
The Making of a Pink and White Quilted Cake
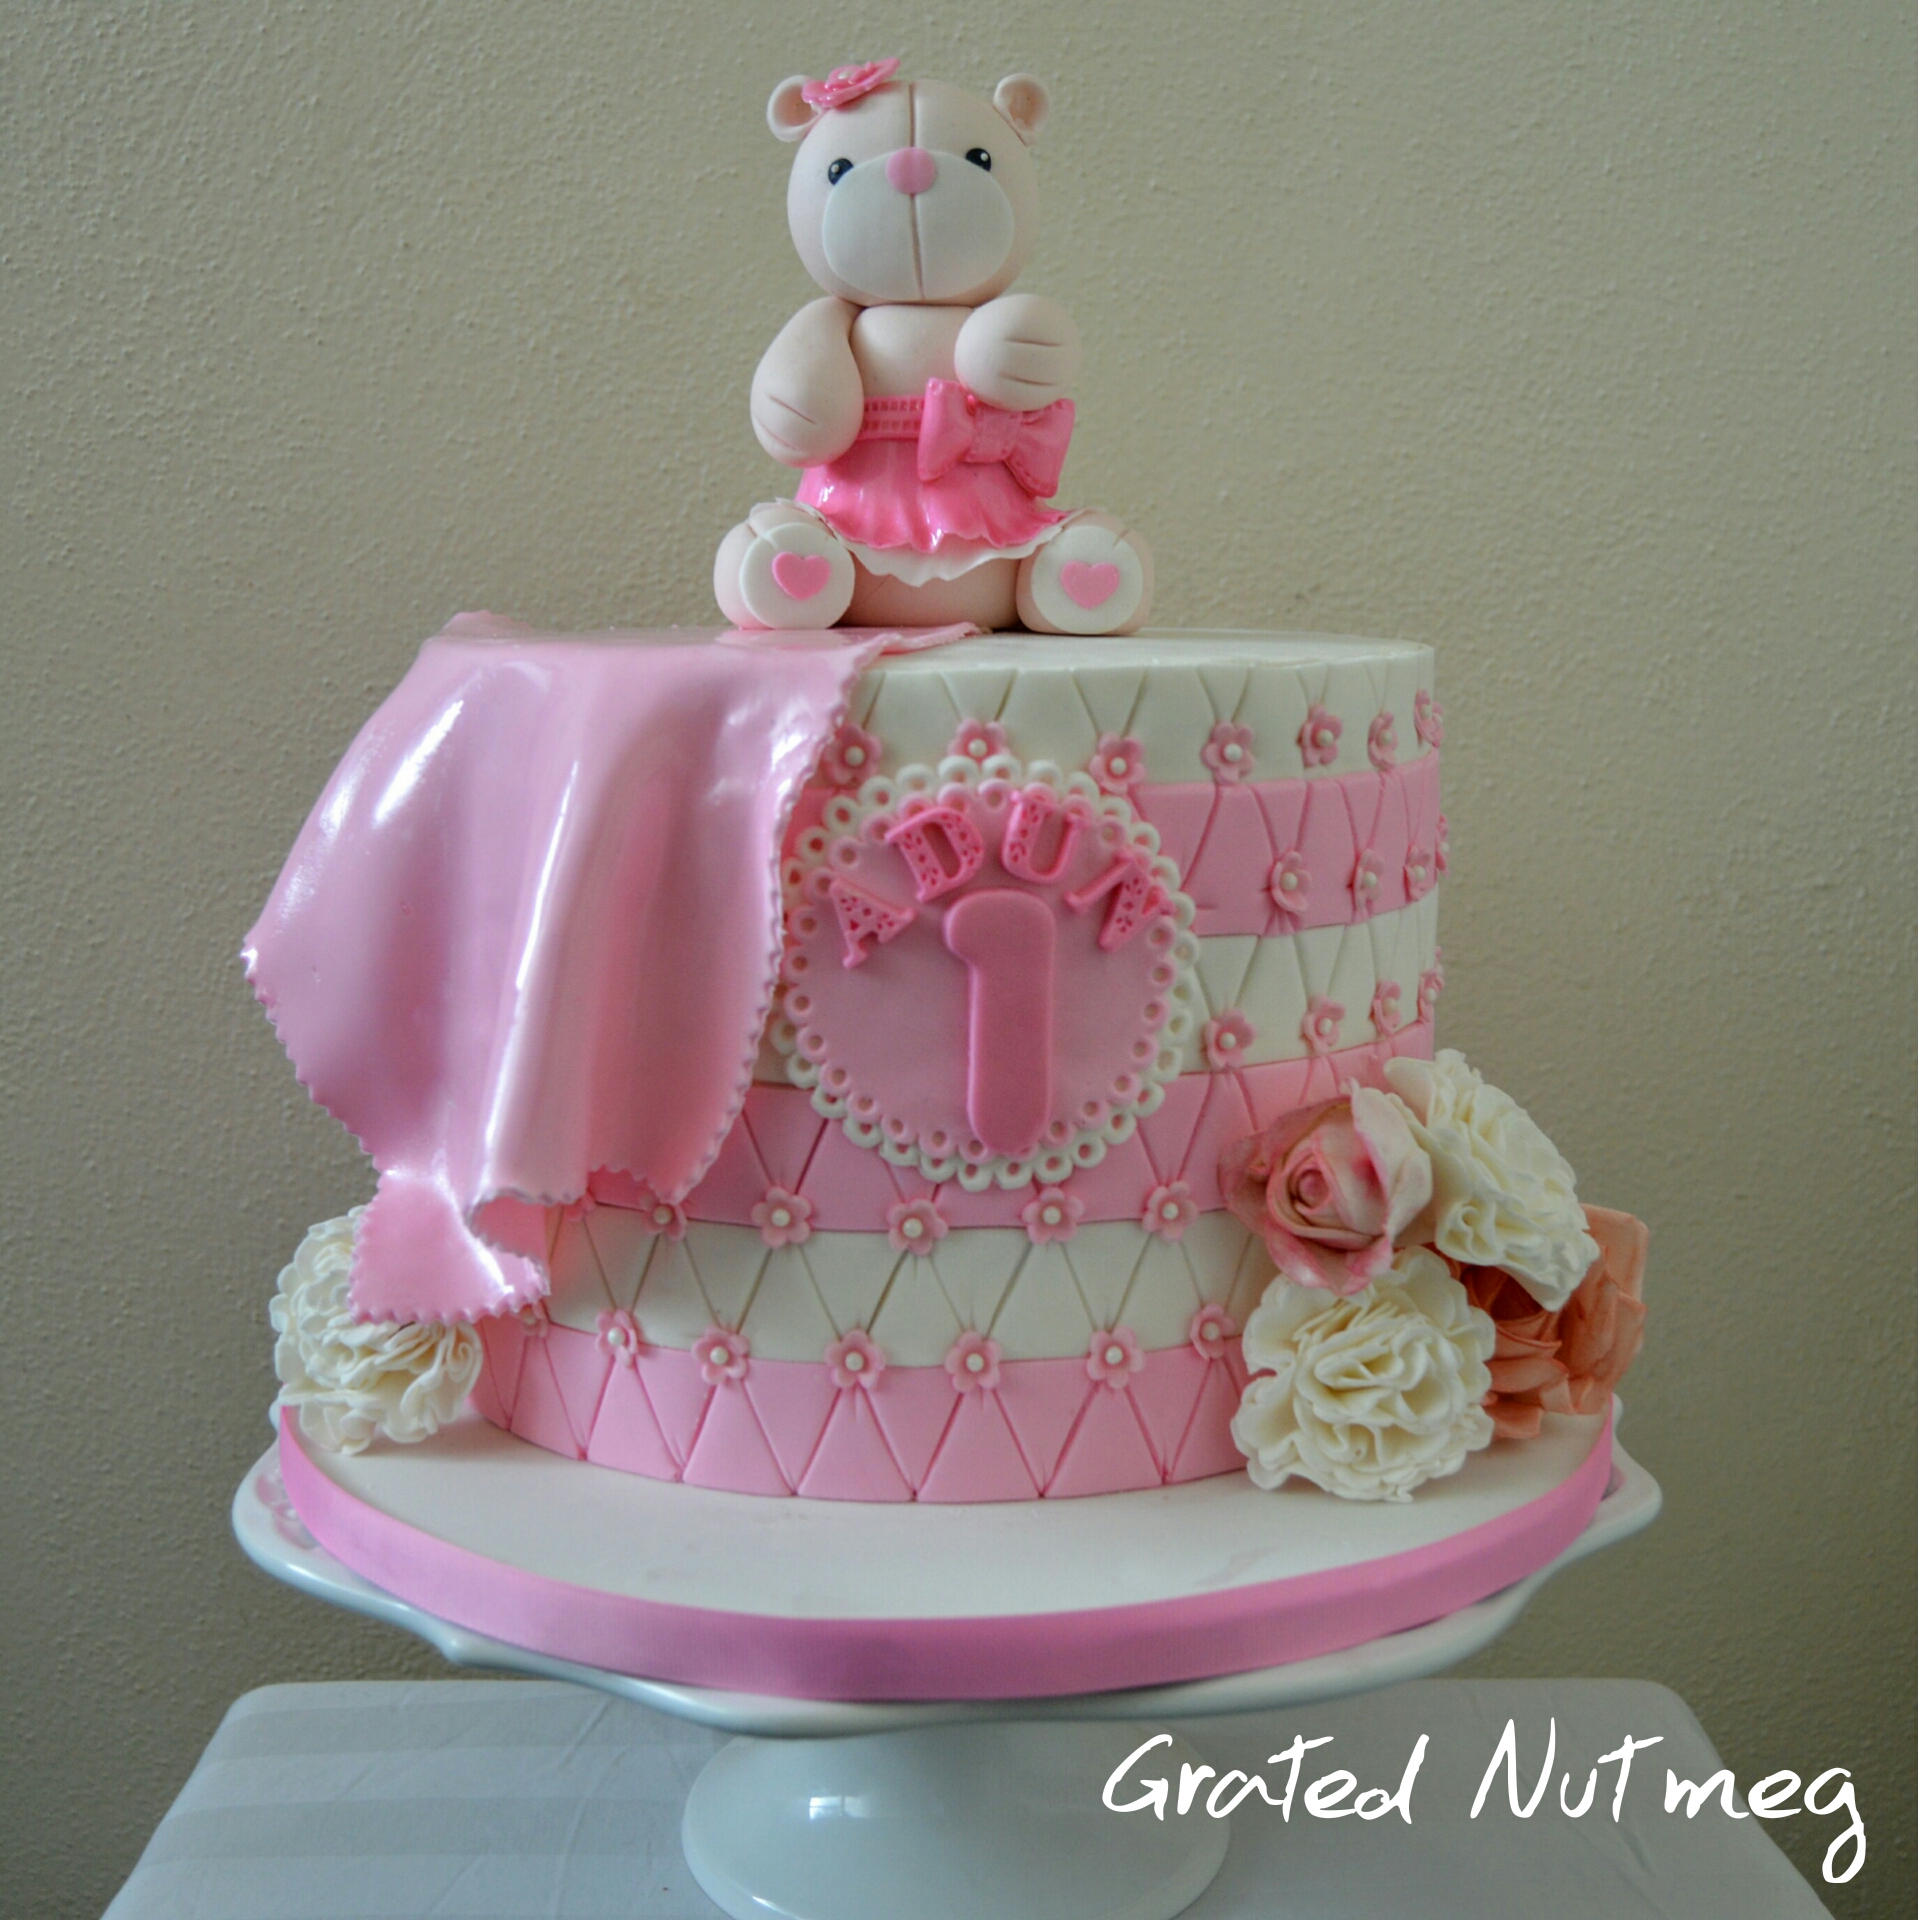
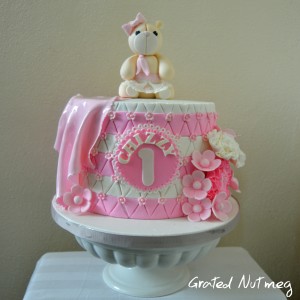
In this tutorial, I will be showing you how I made the pink and white quilted cake above which features a pink and white teddy. As you will see below, it is a very simple cake to make. It can also be made in different variations like the cake below shows. To see other views of this cake and have access to the recipes used, click here.
THE PROCESS:
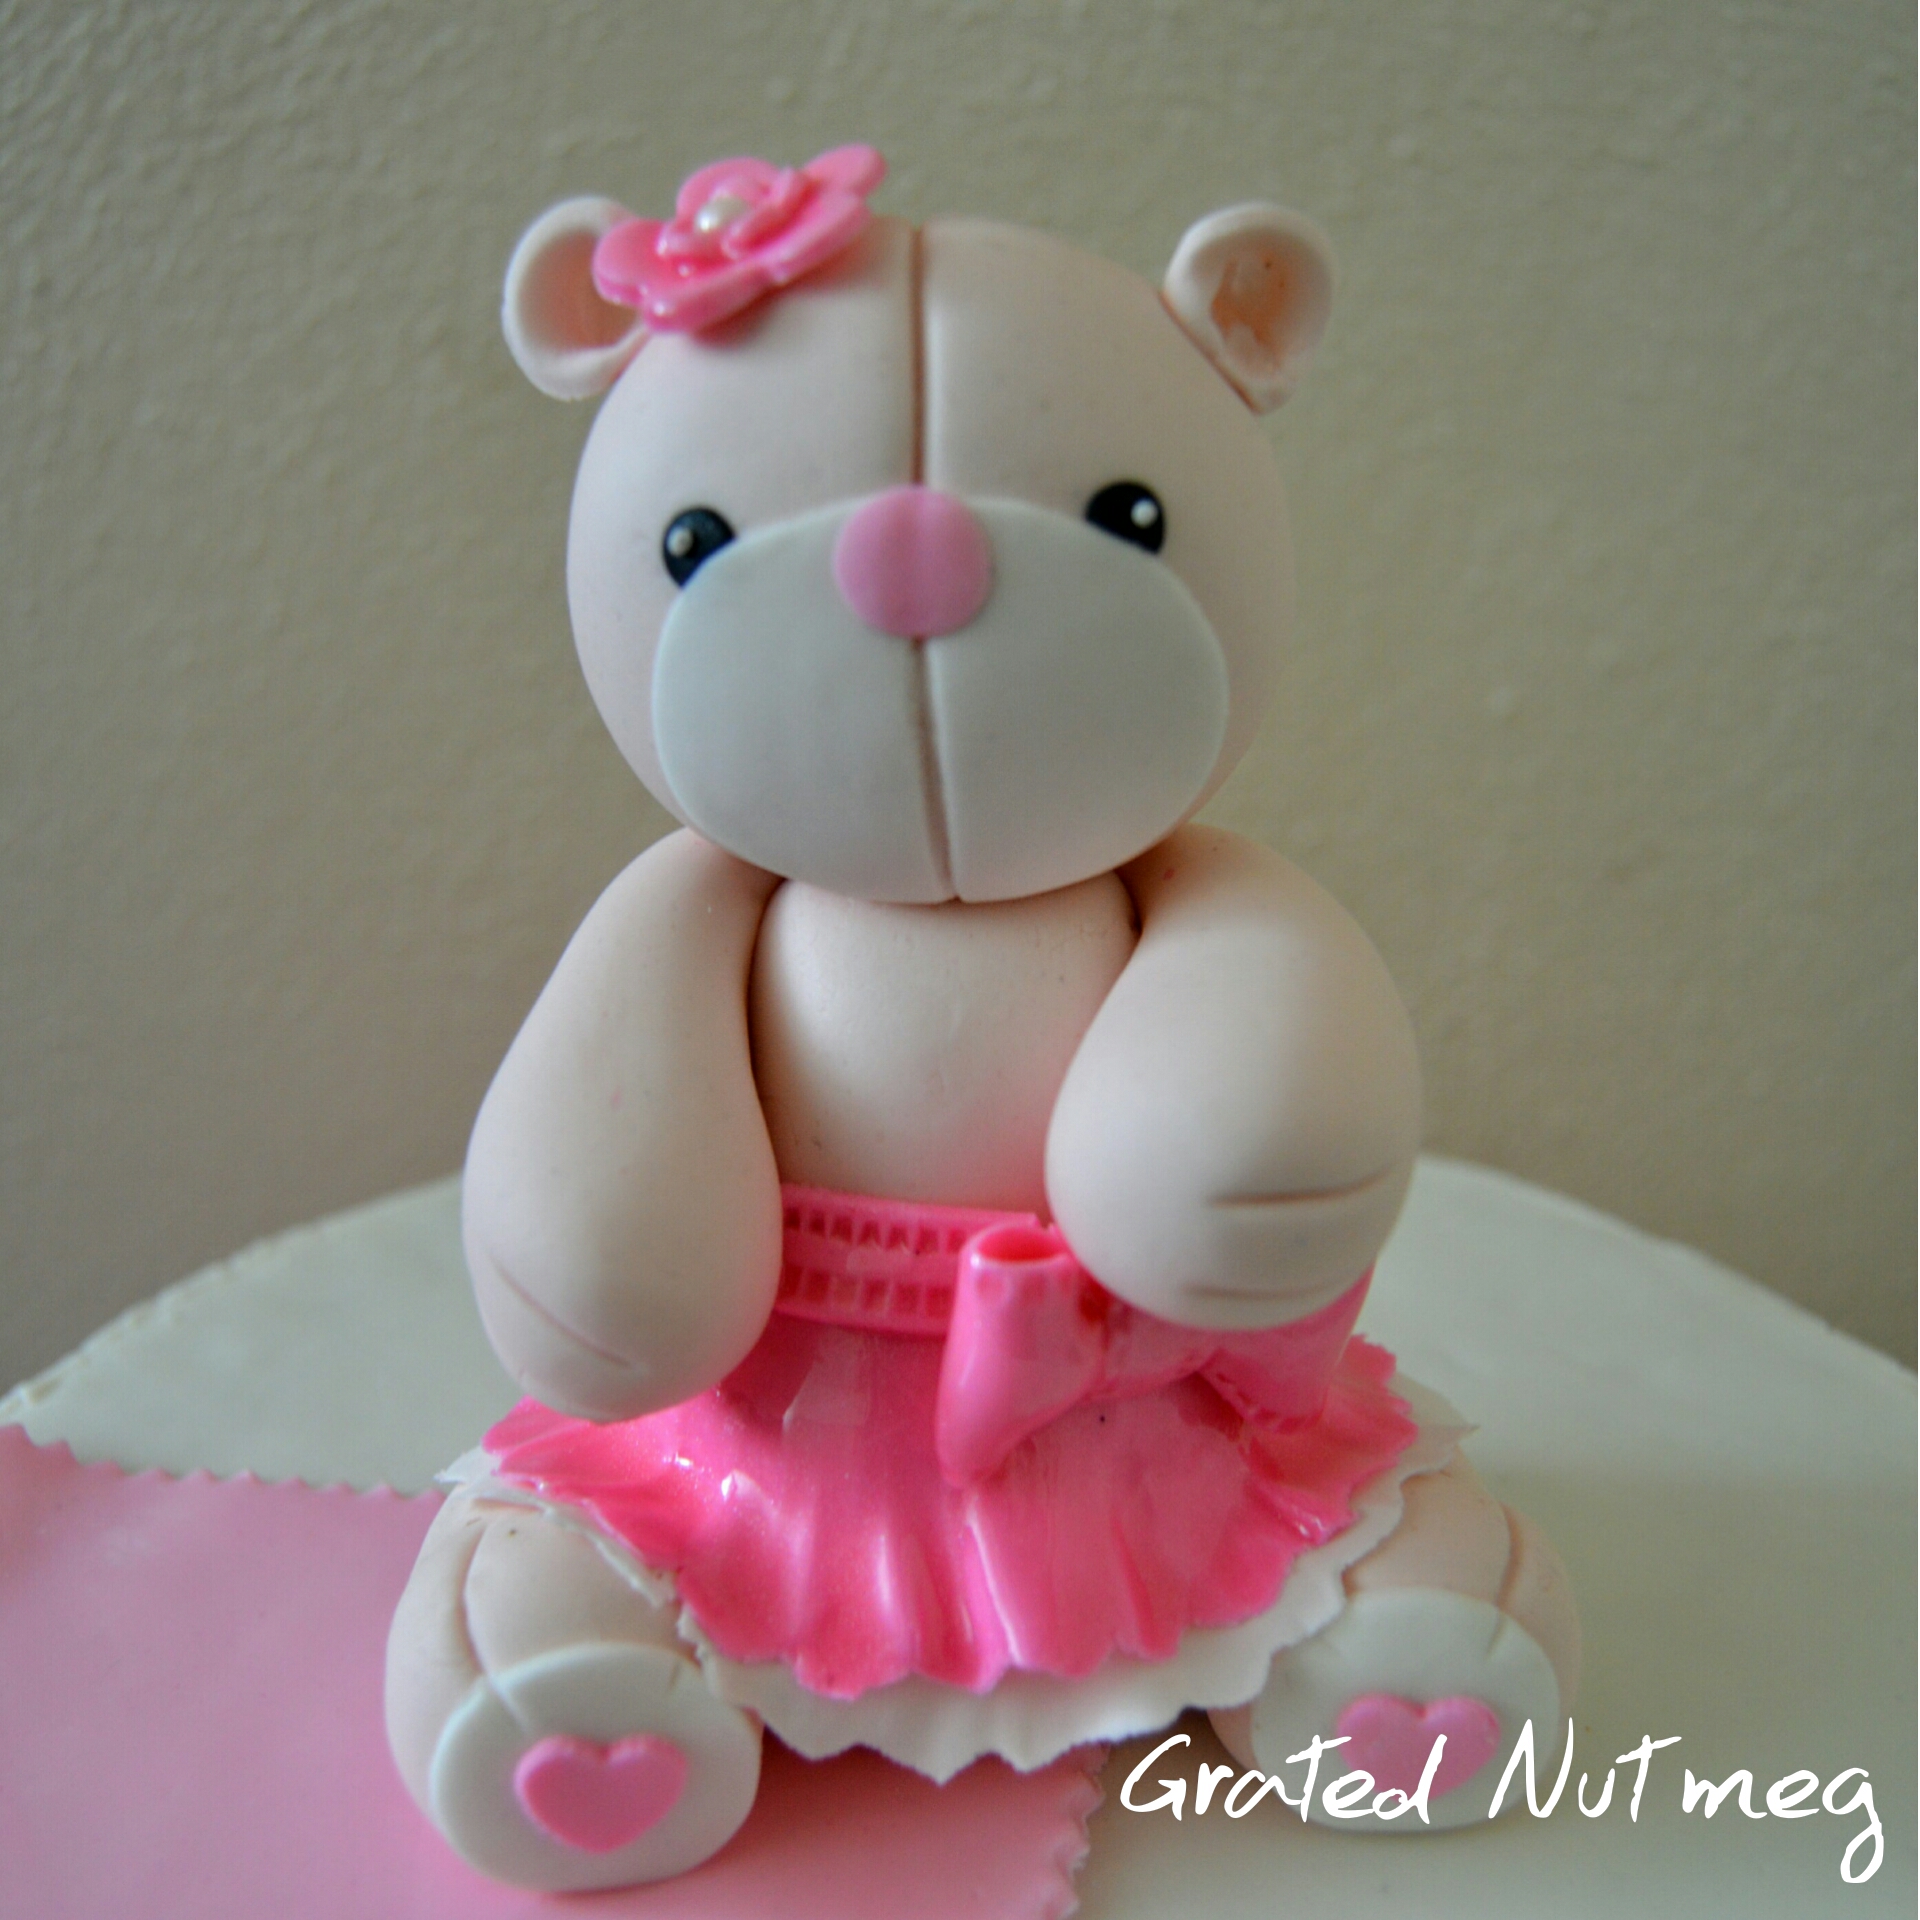
(1) Make the pink and white teddy topper. A pictorial on how to make this topper can be found here.
(2) Next, make the rose and carnation flowers tutorials for which can be found here and here. Feel free to make any flowers of your choice.

(3) Make the small pink flowers which will be embedded into the quilted cake. I used a simple petal cutter to make them and placed a white sugar pearl in the middle of each flower. Leave these to dry.
(4) Frost the baked cake. The cake here is a 9 inch cake which is about 6 inches high. Stick the cake to a covered cake board. Cut out a round piece of fondant and cover the top of the cake with it.
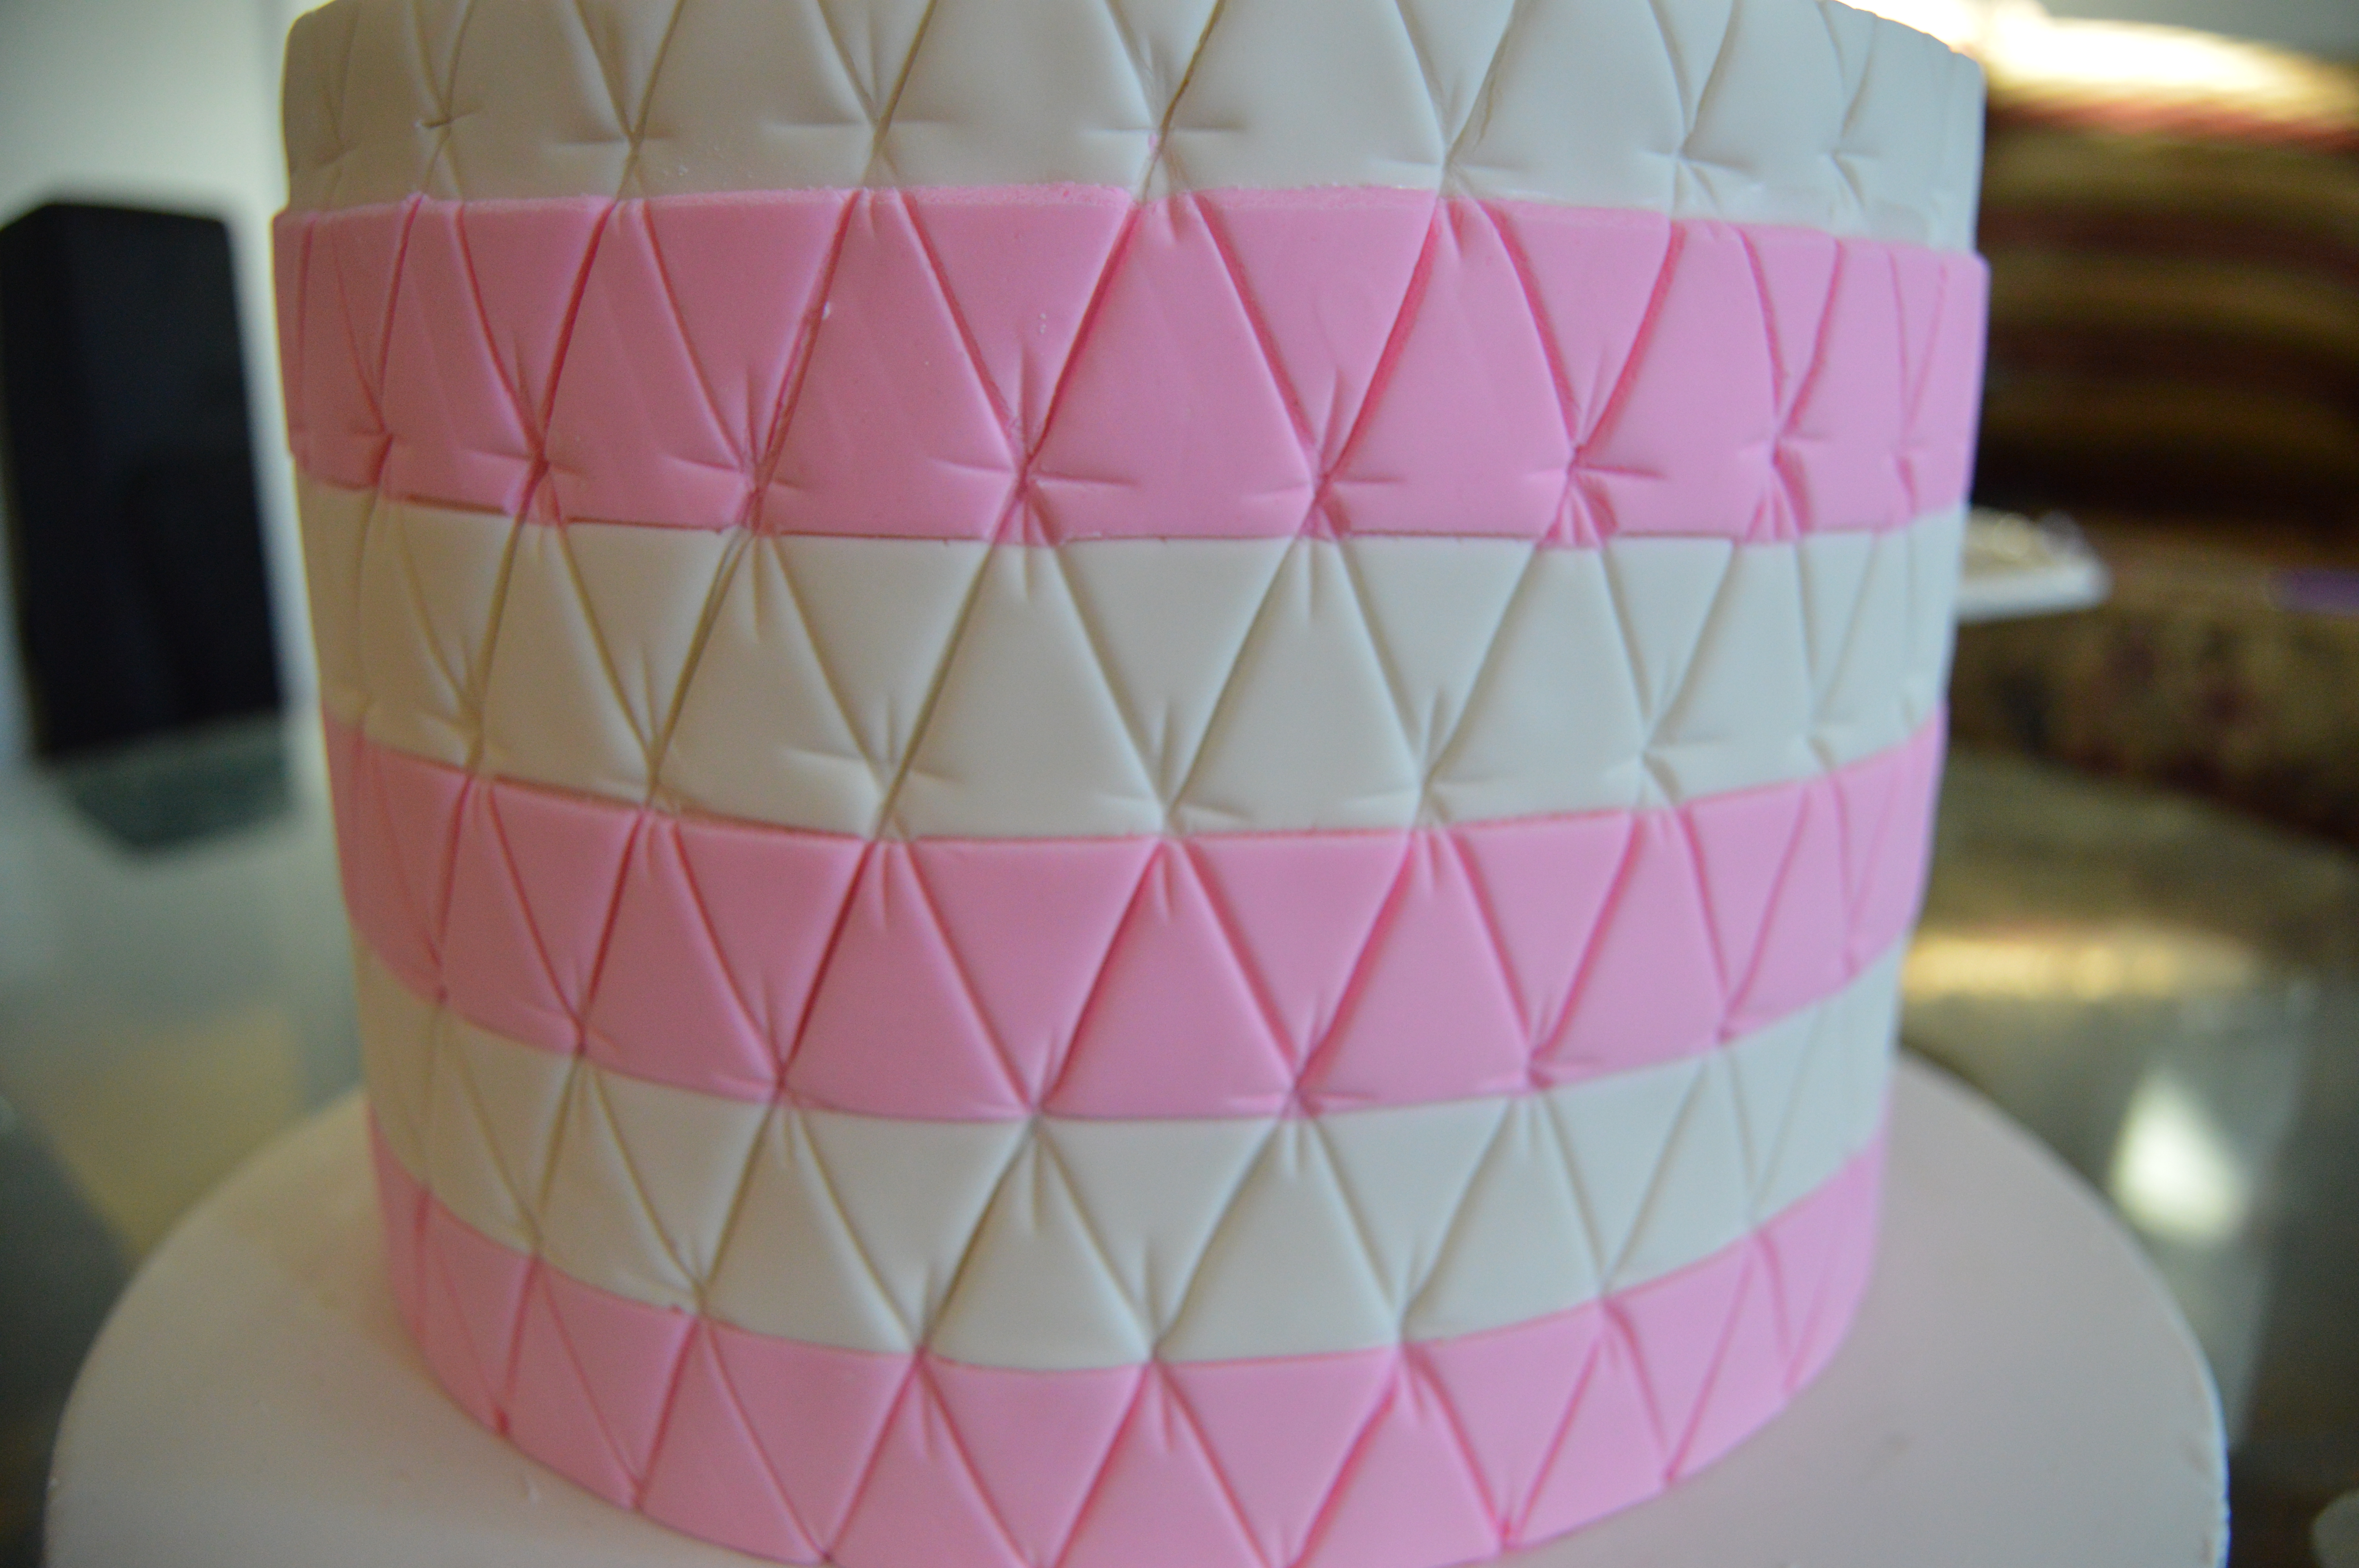
(5) Next, make the quilted pattern which will go around the sides of the cake. I have a tutorial here on how I make my quilted diamond pattern designs. What I did differently here was overlap the rolled out fondant with 1 inch pink and white fondant strips before quilting it.
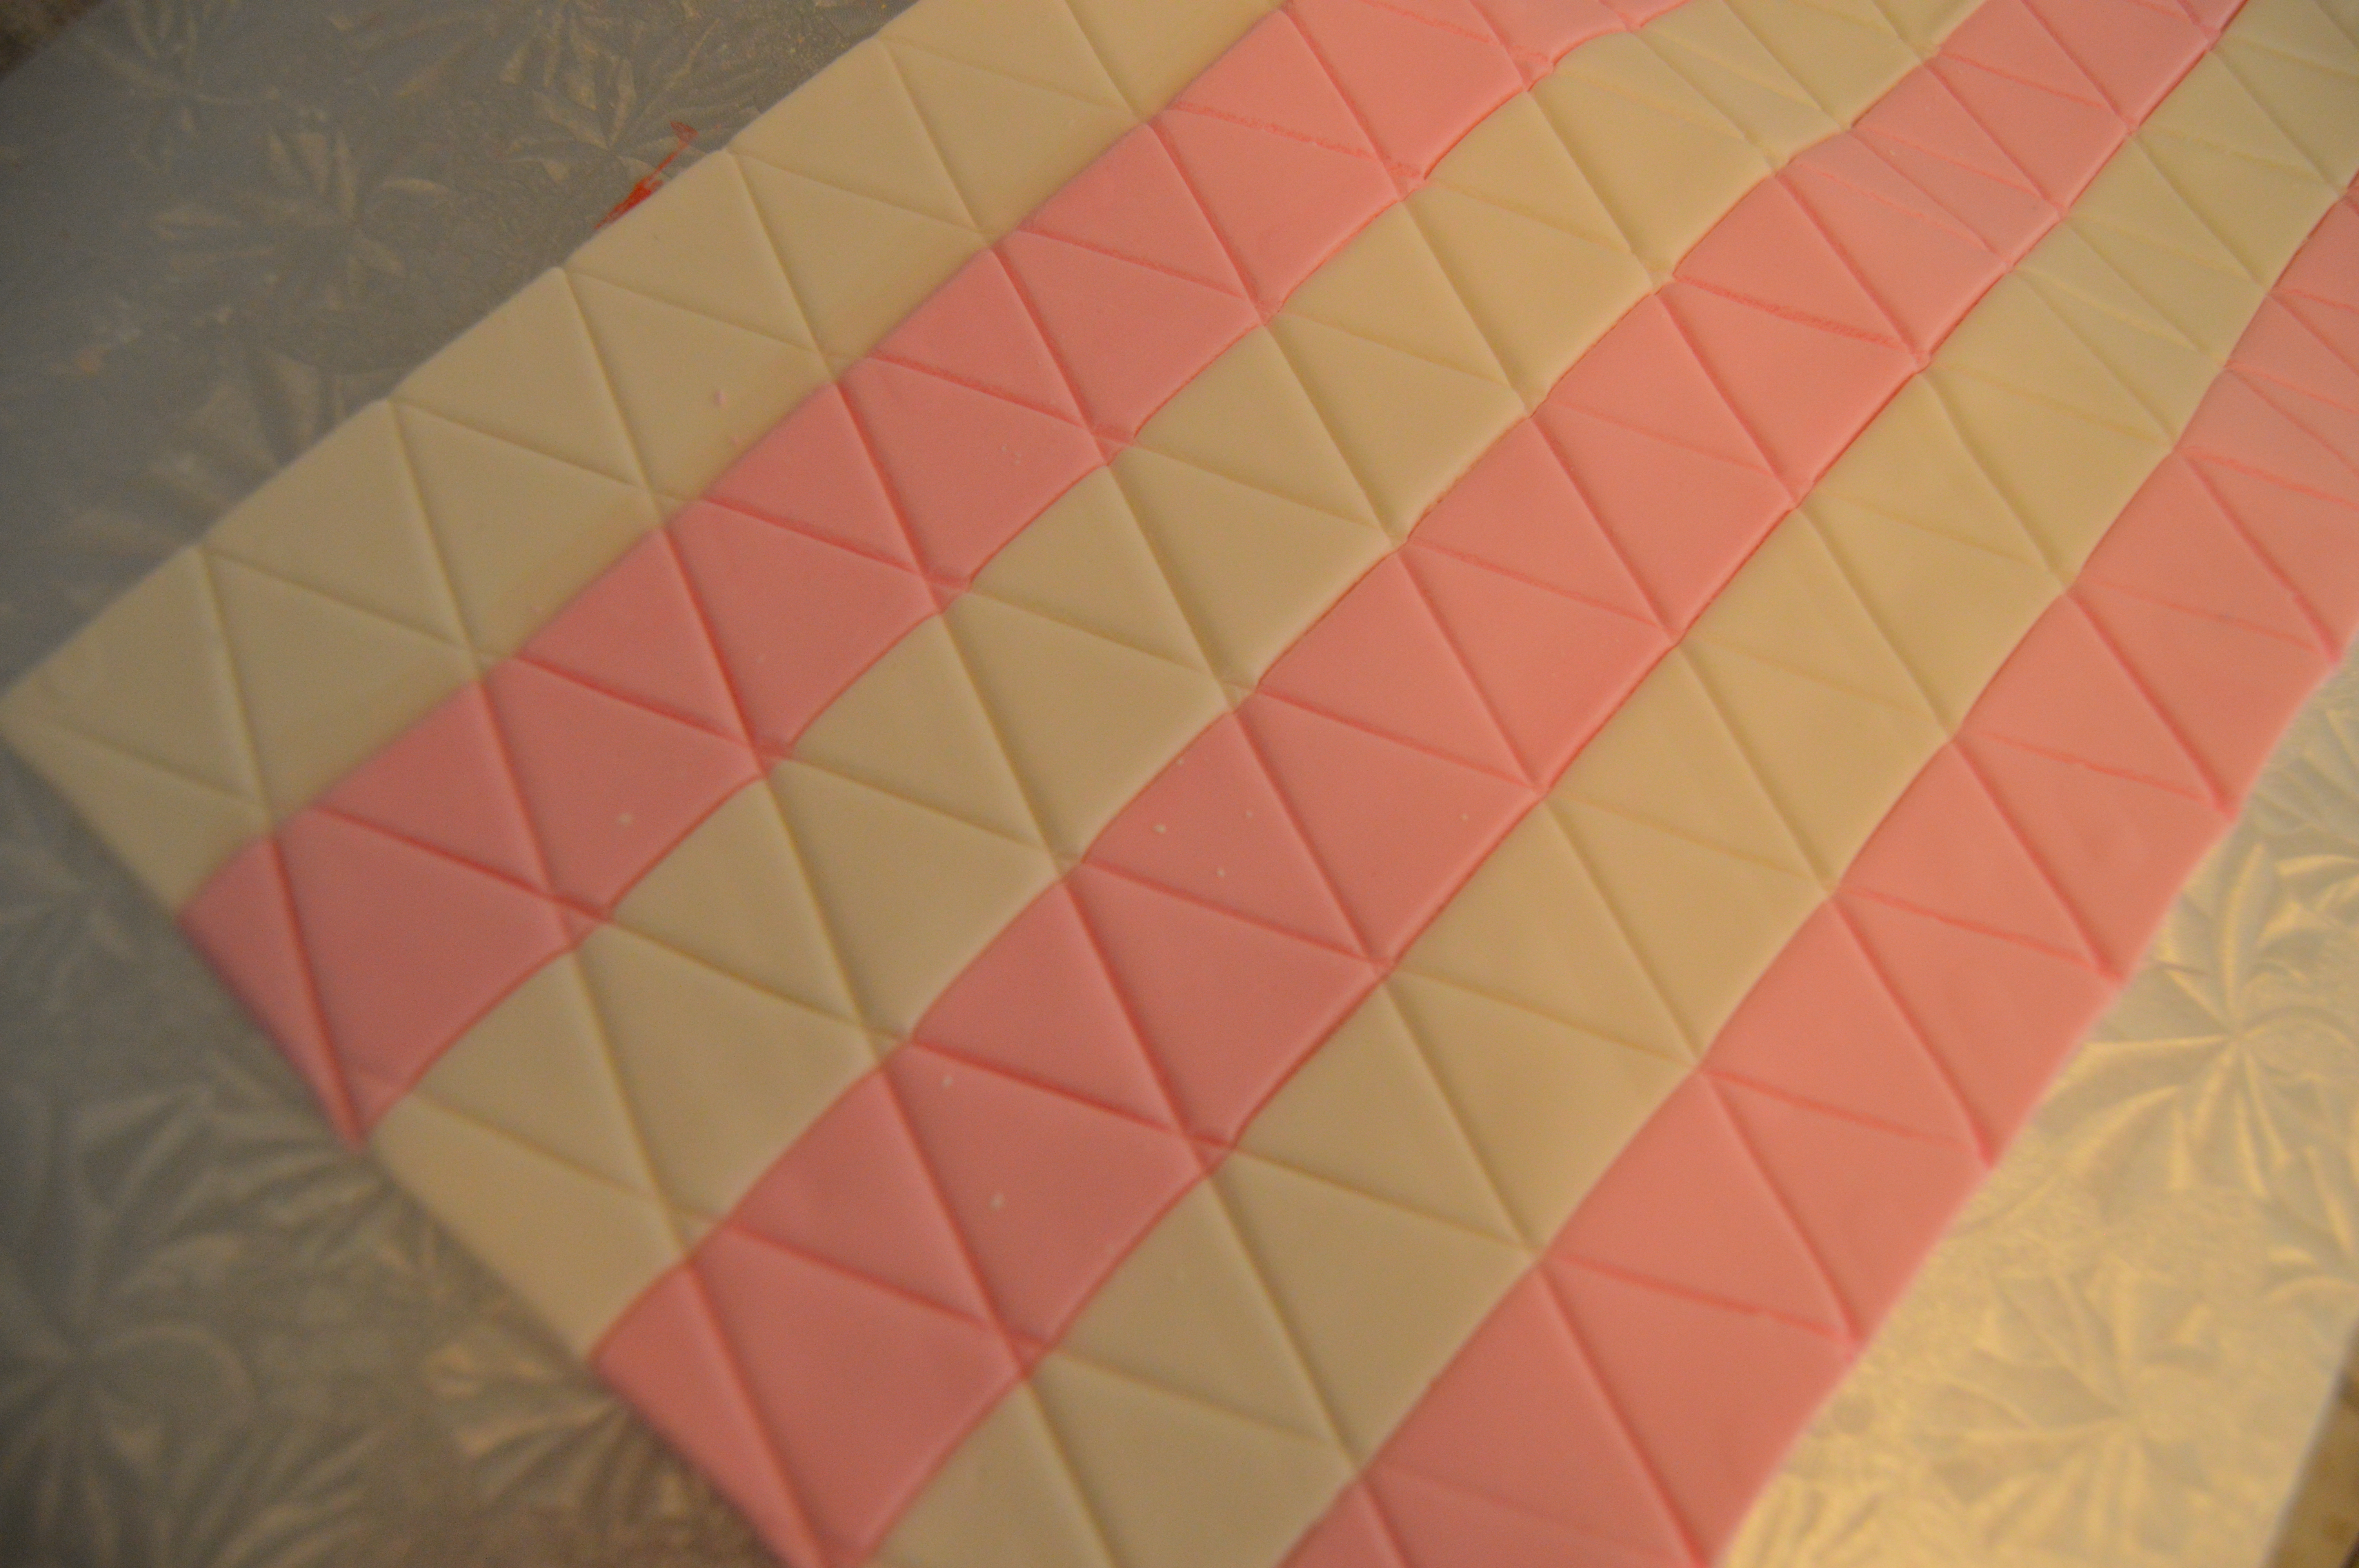
(6) Wrap the quilted fondant around the side of the cake, ensuring the seams end up at the back of the cake. Use a table knife or an embosser to make cross markings at all the intersections.
You could place the small flowers on the side of the cake now. I however did not make enough flowers and so wanted to make sure I didn’t waste them in places which would eventually be covered by a design. They were thus placed on only the exposed portions of the quilt after the design work was completed.
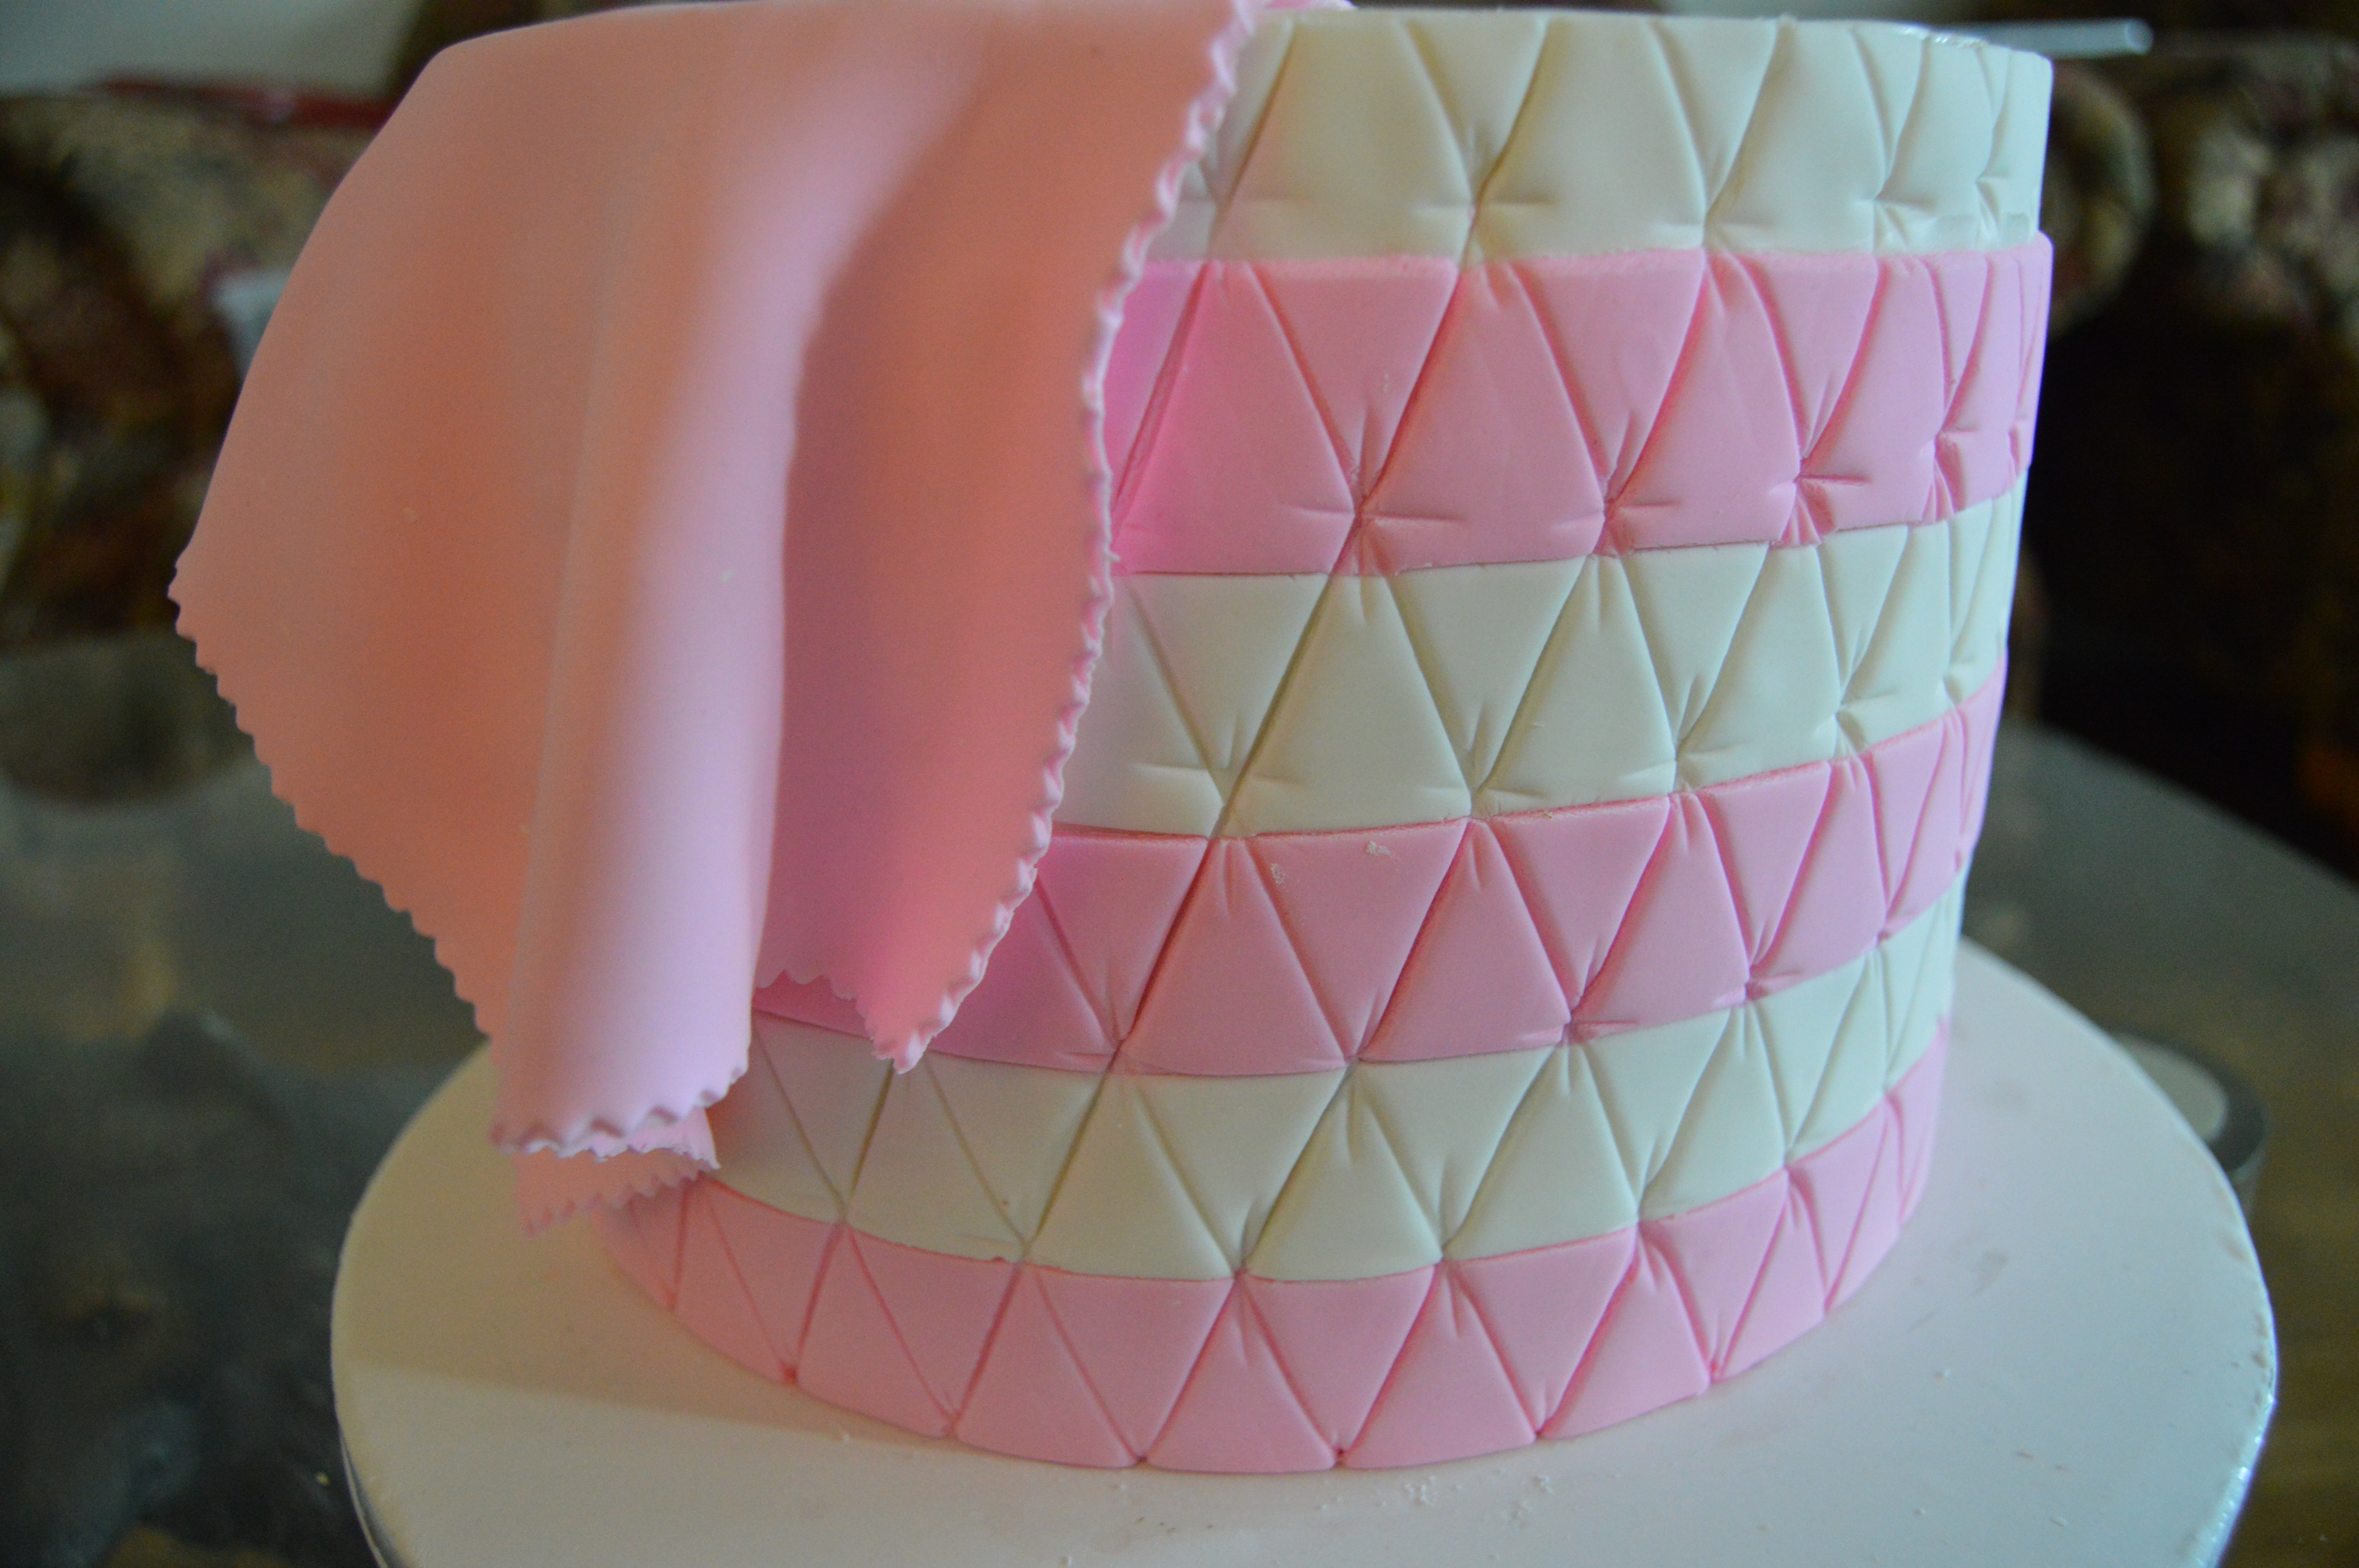
(7) Next, use a fluted wheel cutter to cut pink fondant into a square and drape it on one side of the cake. This would serve as a pink blanket. Brush this with a 50/50 mixture of vodka and corn syrup after it has dried a bit in order to get the glossy effect.
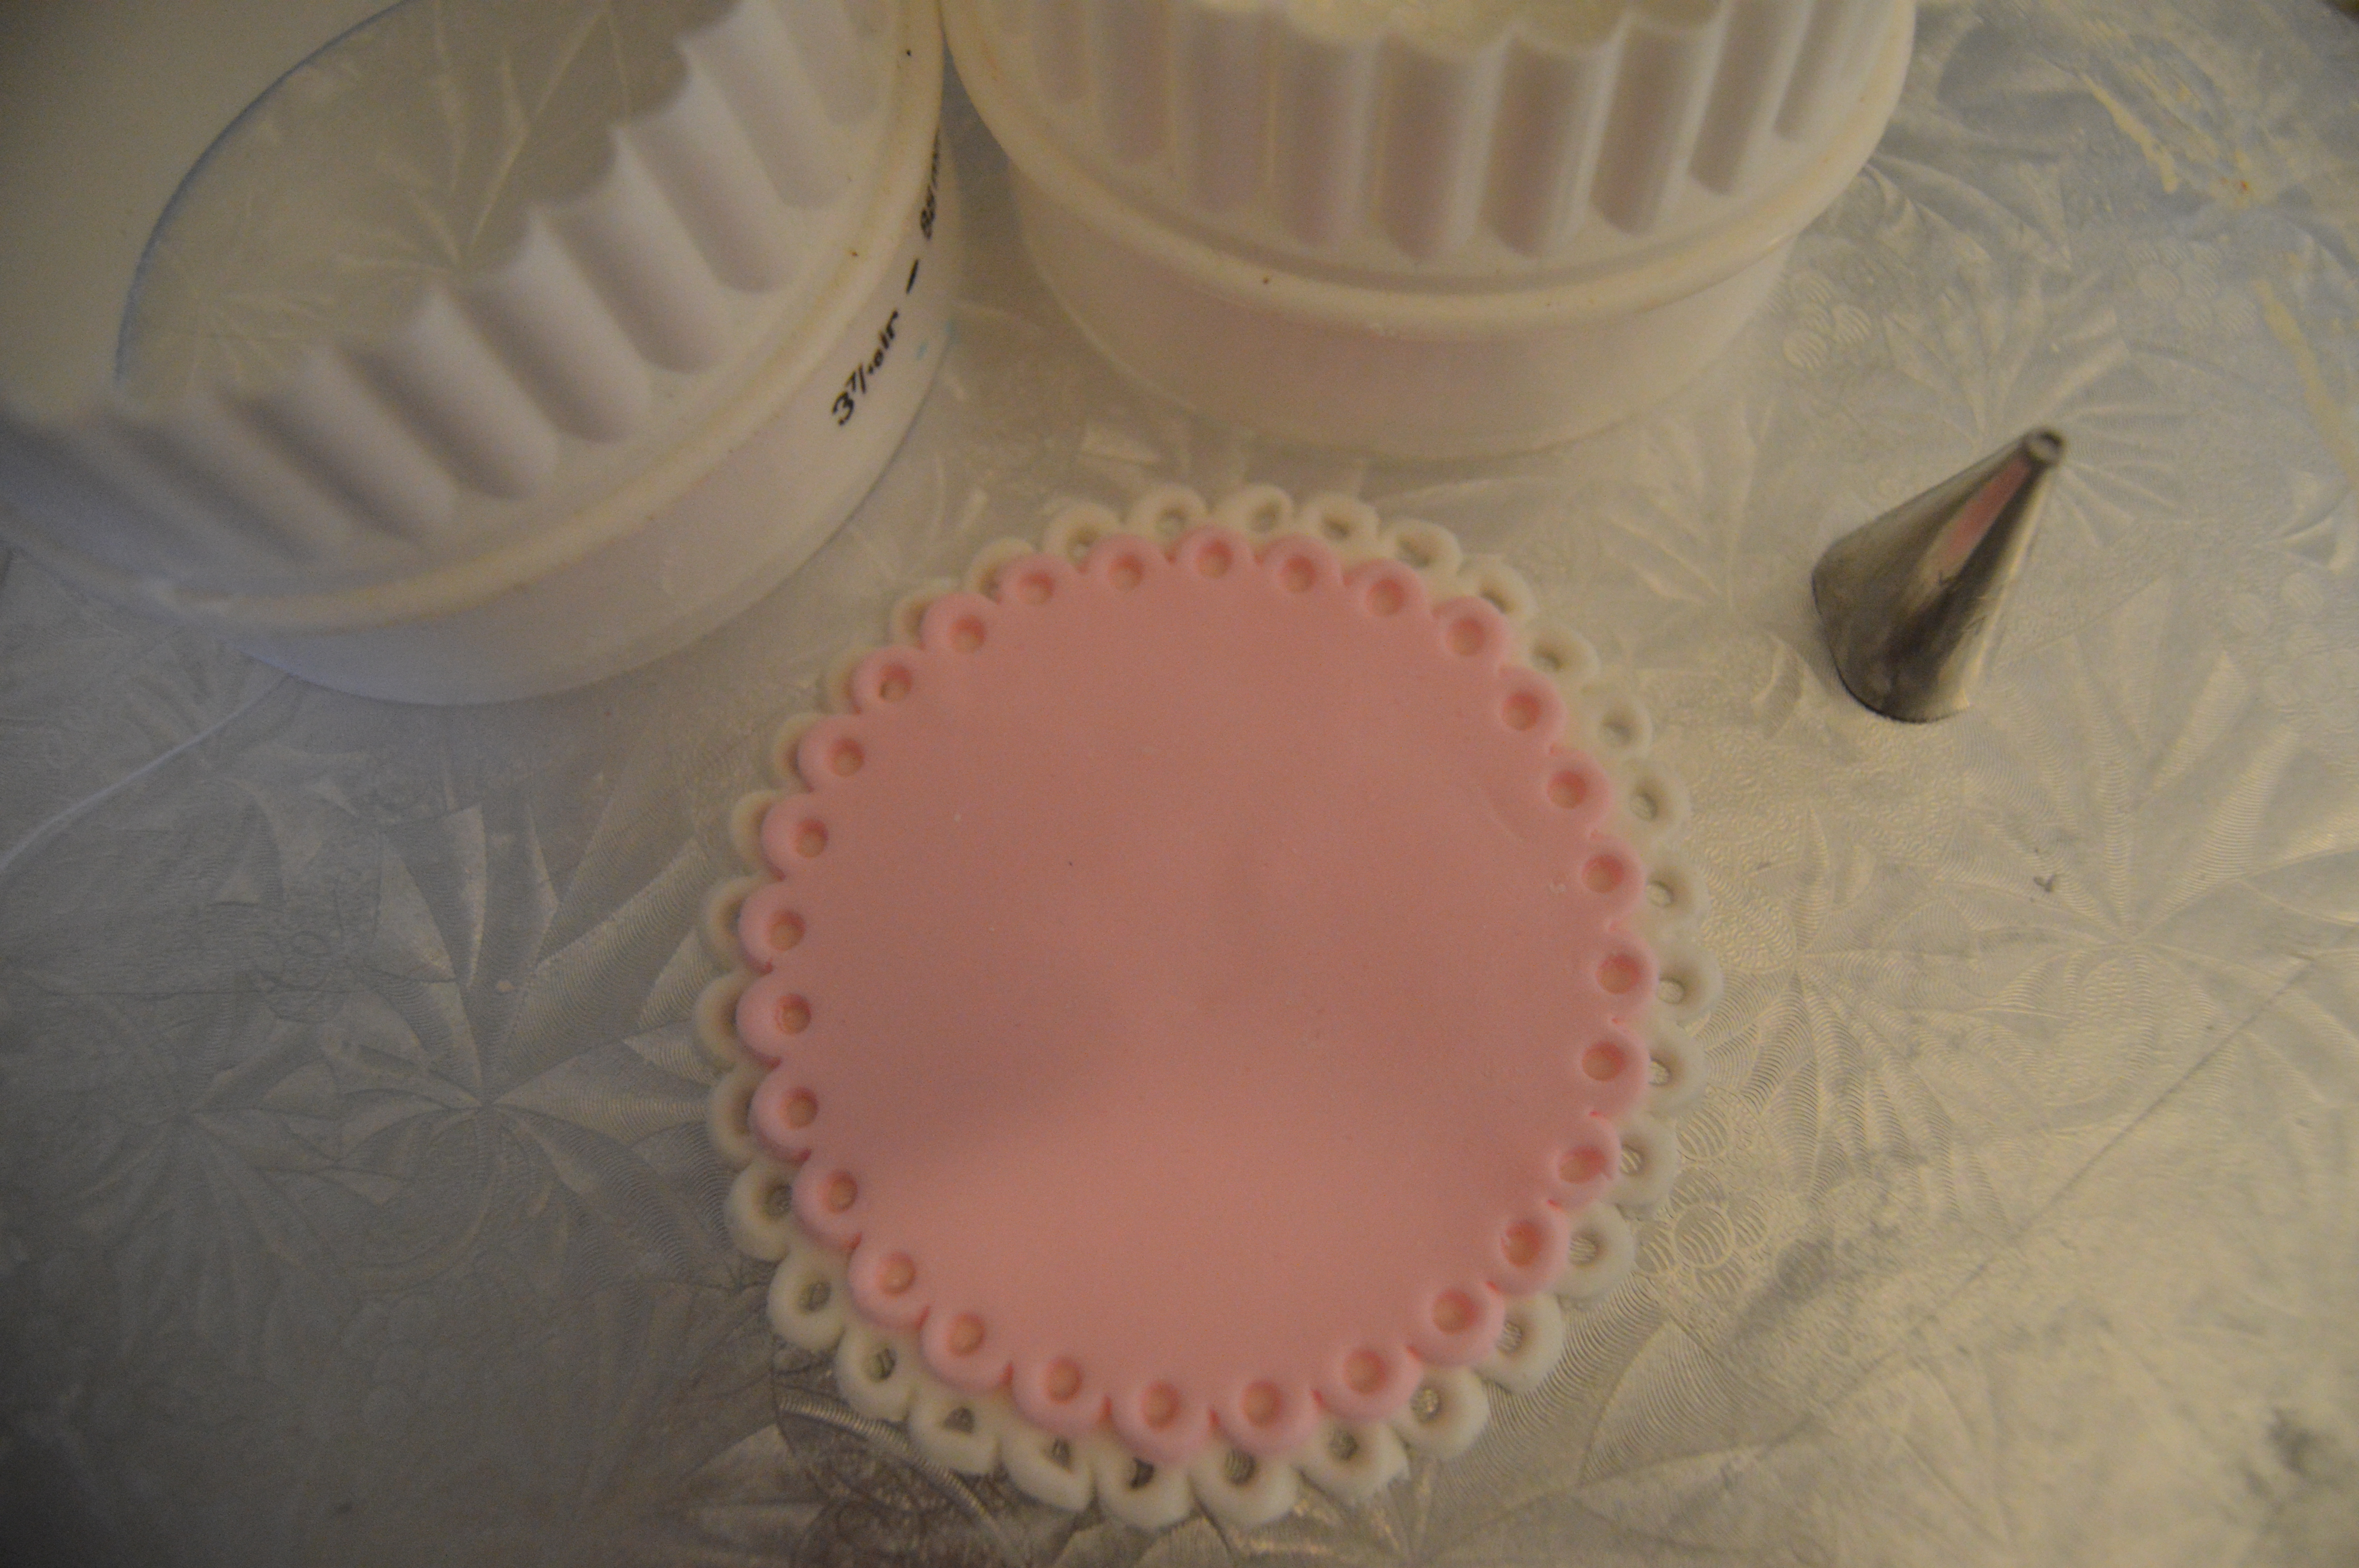
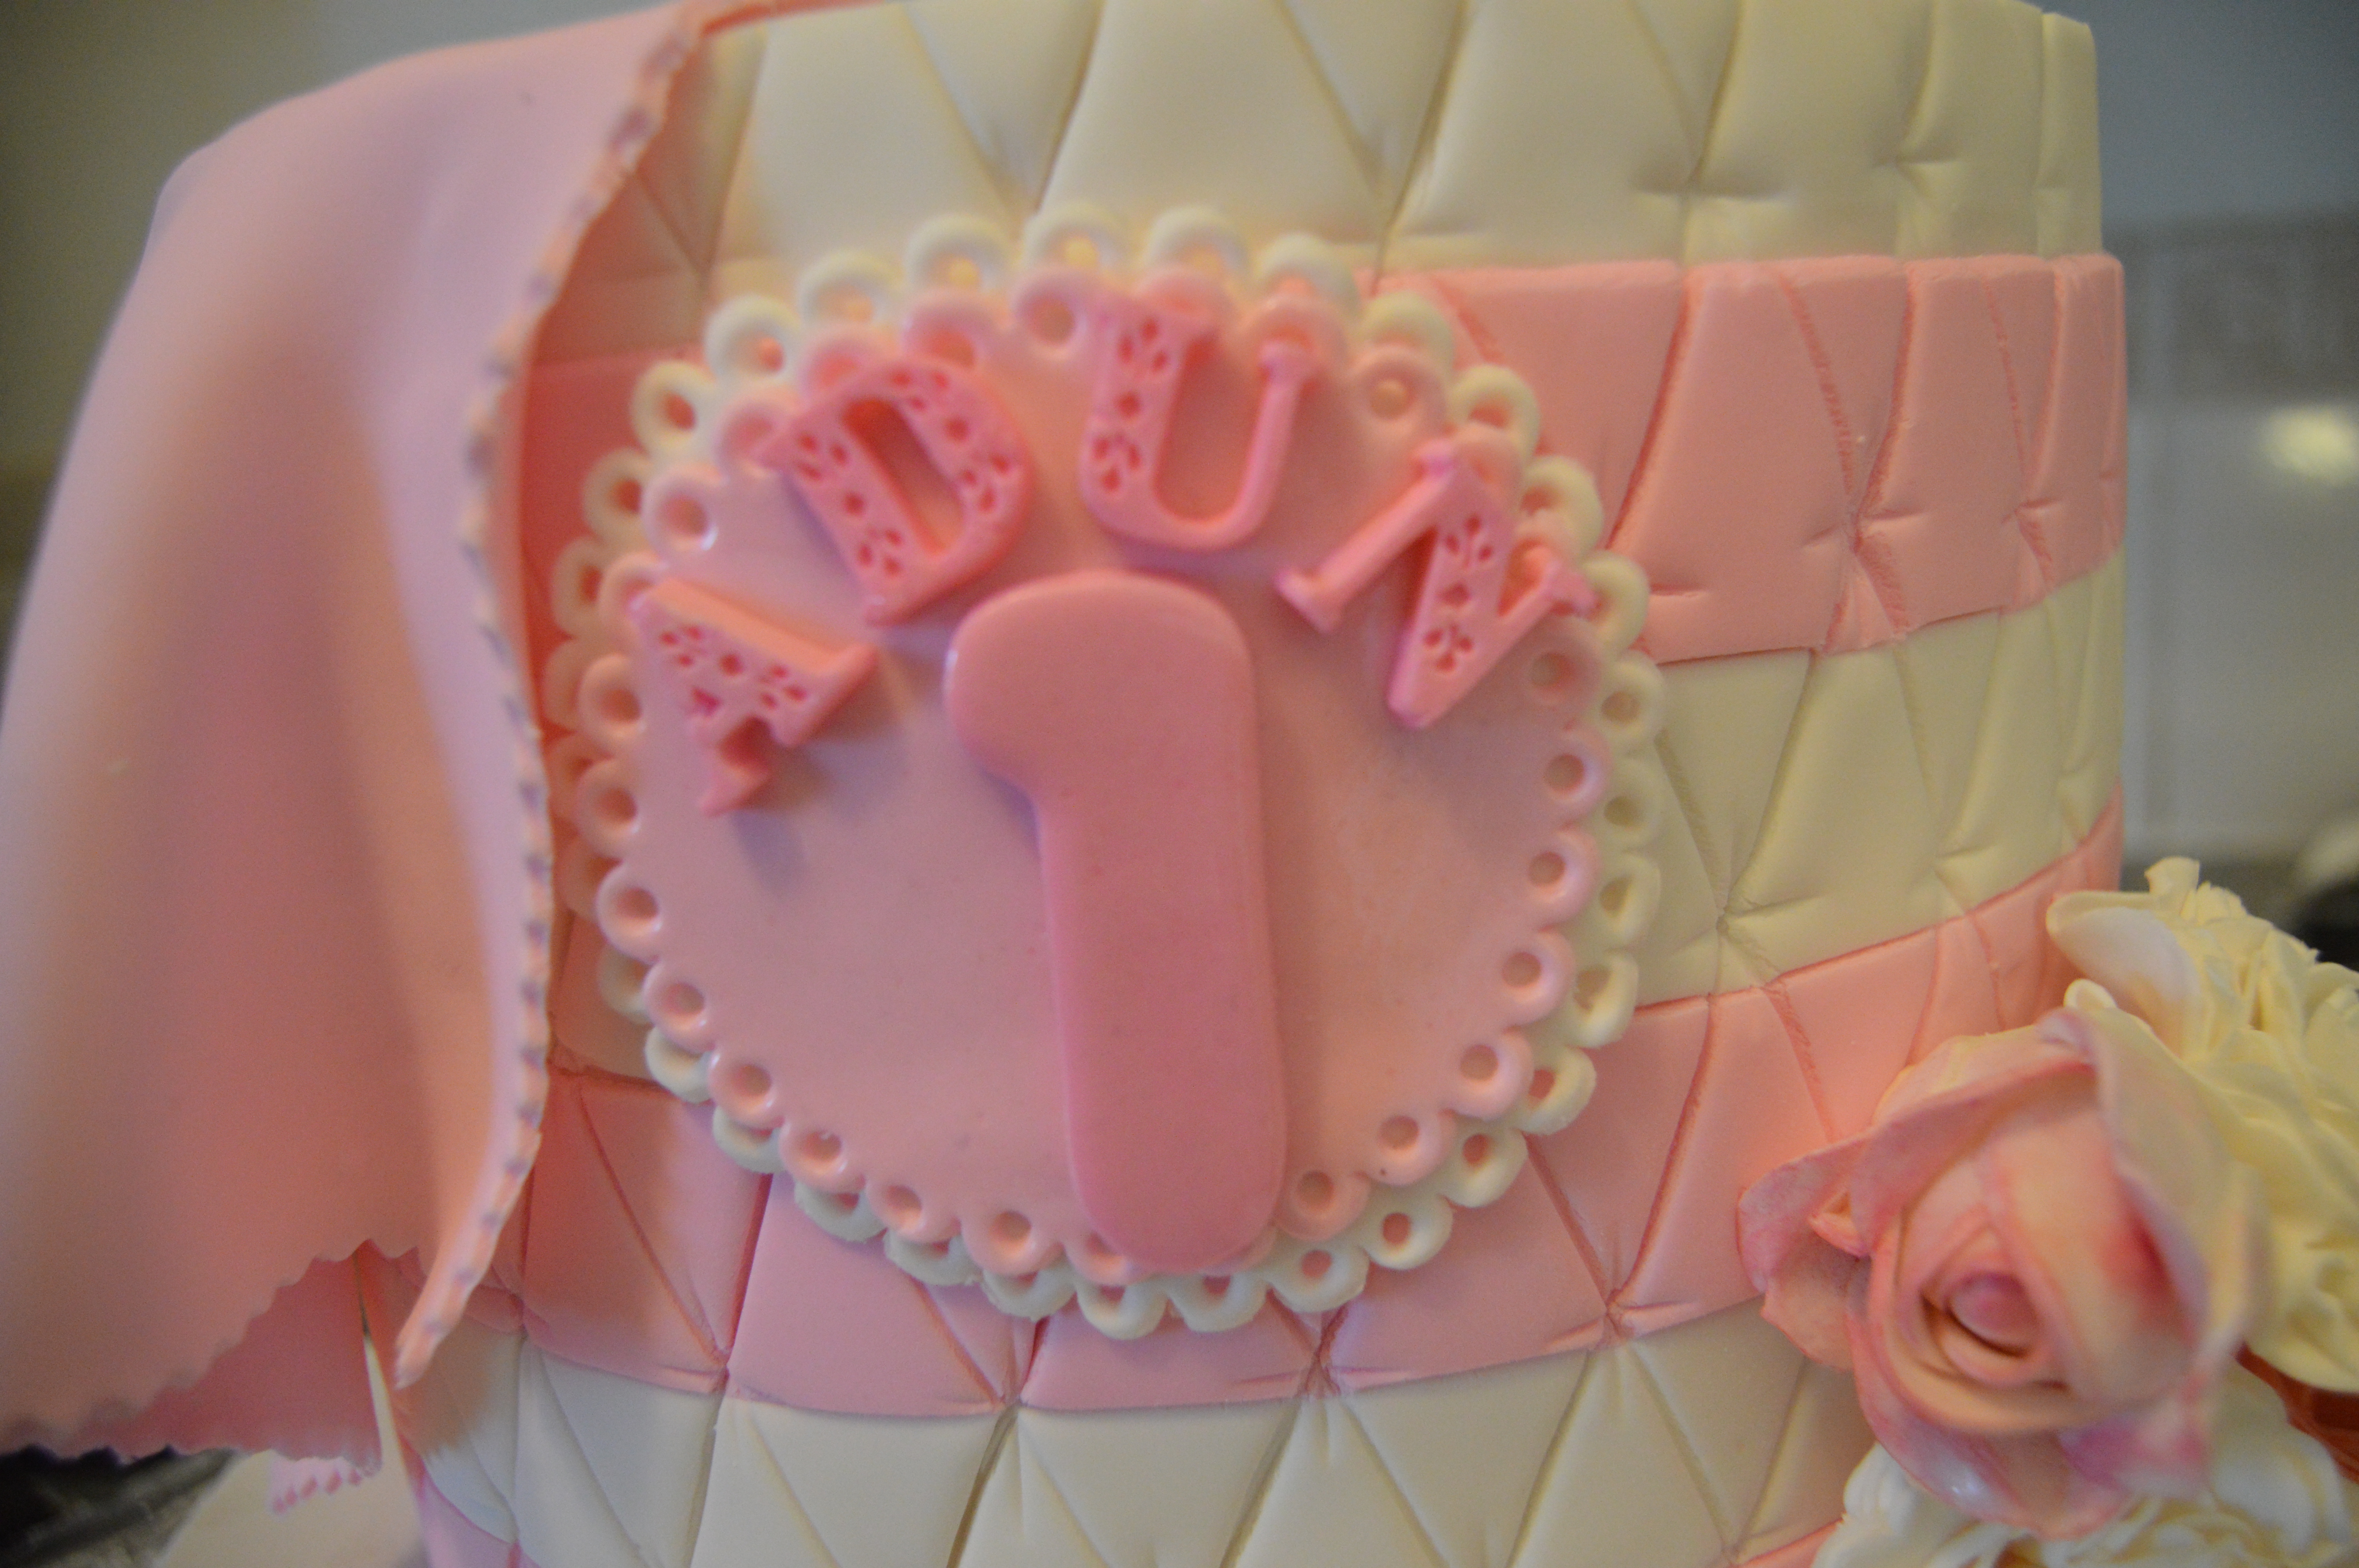
(8) Next, make the name dolly. Fluted round cookie cutters were used to cut out pink and white fondant. A small round icing tip was used to make the holes around the circles. The circles were layered on each other, stuck on the cake and the name and age of the celebrant were placed on the fondant dolly. The name was made using a Martha Steward’s letter craft mold. Also stick the flowers to the side of the cake.
(9) Next, stick the small pink flowers on the sides of the cake.

(10) Finish the look of the cake by placing the teddy on it. I inserted a couple of dowels into the middle of the cake before placing the teddy. This is to ensure that the weight of the teddy does not exert pressure on the cake thereby creating bumps and dents on the cake. That’s all there is to it. Happy caking!
Terry Adido is passionate about showing people how easy it is to recreate restaurant quality meals in the comfort of their kitchens. With a style of cooking he refers to as Afro-European Fusion, his meals are influenced greatly by French and Italian Cuisine with a West African twist. If you love good food, you are in for the ride of your life.
Thanks Terry, U re always there. Nice one
You are welcome Jennifer.
simply put, U ARE GREAT
Awww. Thanks Shola.
Your works are genius. Keep it up. I w
ill love to learn more. Thanks.
Thanks Adedayo.
Hi Terry, lovely design as always.
Thanks Juliet.
God bless you,nice tutorial
Thanks Mama.
can edible spirit be used in place of vodka?
As long as it is tasteless and colorless, yes.