
Beginner’s Guide to Frosting Cakes

Frosting a cake is the act of filling the cake layers with frosting or fillings, stacking the cake layers and finishing with a smooth layer of frosting around the sides of the cake. A lot of home bakers shy away from frosting cakes as they feel the task is quite daunting. The opposite is however the reality. Below, I am going to show you how I frost my cakes and you are going to see how easy it is. I will also be sharing a lot of tips in this post on how to get even and smooth frosting on your cakes. Note that the methods here are those I use personally. I do not by any means exclude any other methods out there. I must let you know that this post is somewhat lengthy as I tried to be as thorough as possible. To see some of my frosted cakes, click here.

My frost of choice here is Vanilla Buttercream which I have colored rose petal pink. You can however use any type of frosting of your choice. On this website, there are recipes for Chocolate Buttercream Frosting, Creamcheese Frosting, Raspberry Buttercream Frosting and fillings like Ganache, Lemon Curd, Pastry Cream, Caramel, et cetera. You can find these and many other frosting and fillings here.


You will also need a leveled and torte cake. I have a tutorial here on how to level and torte a cake. Do go through this tutorial first before going through this one.

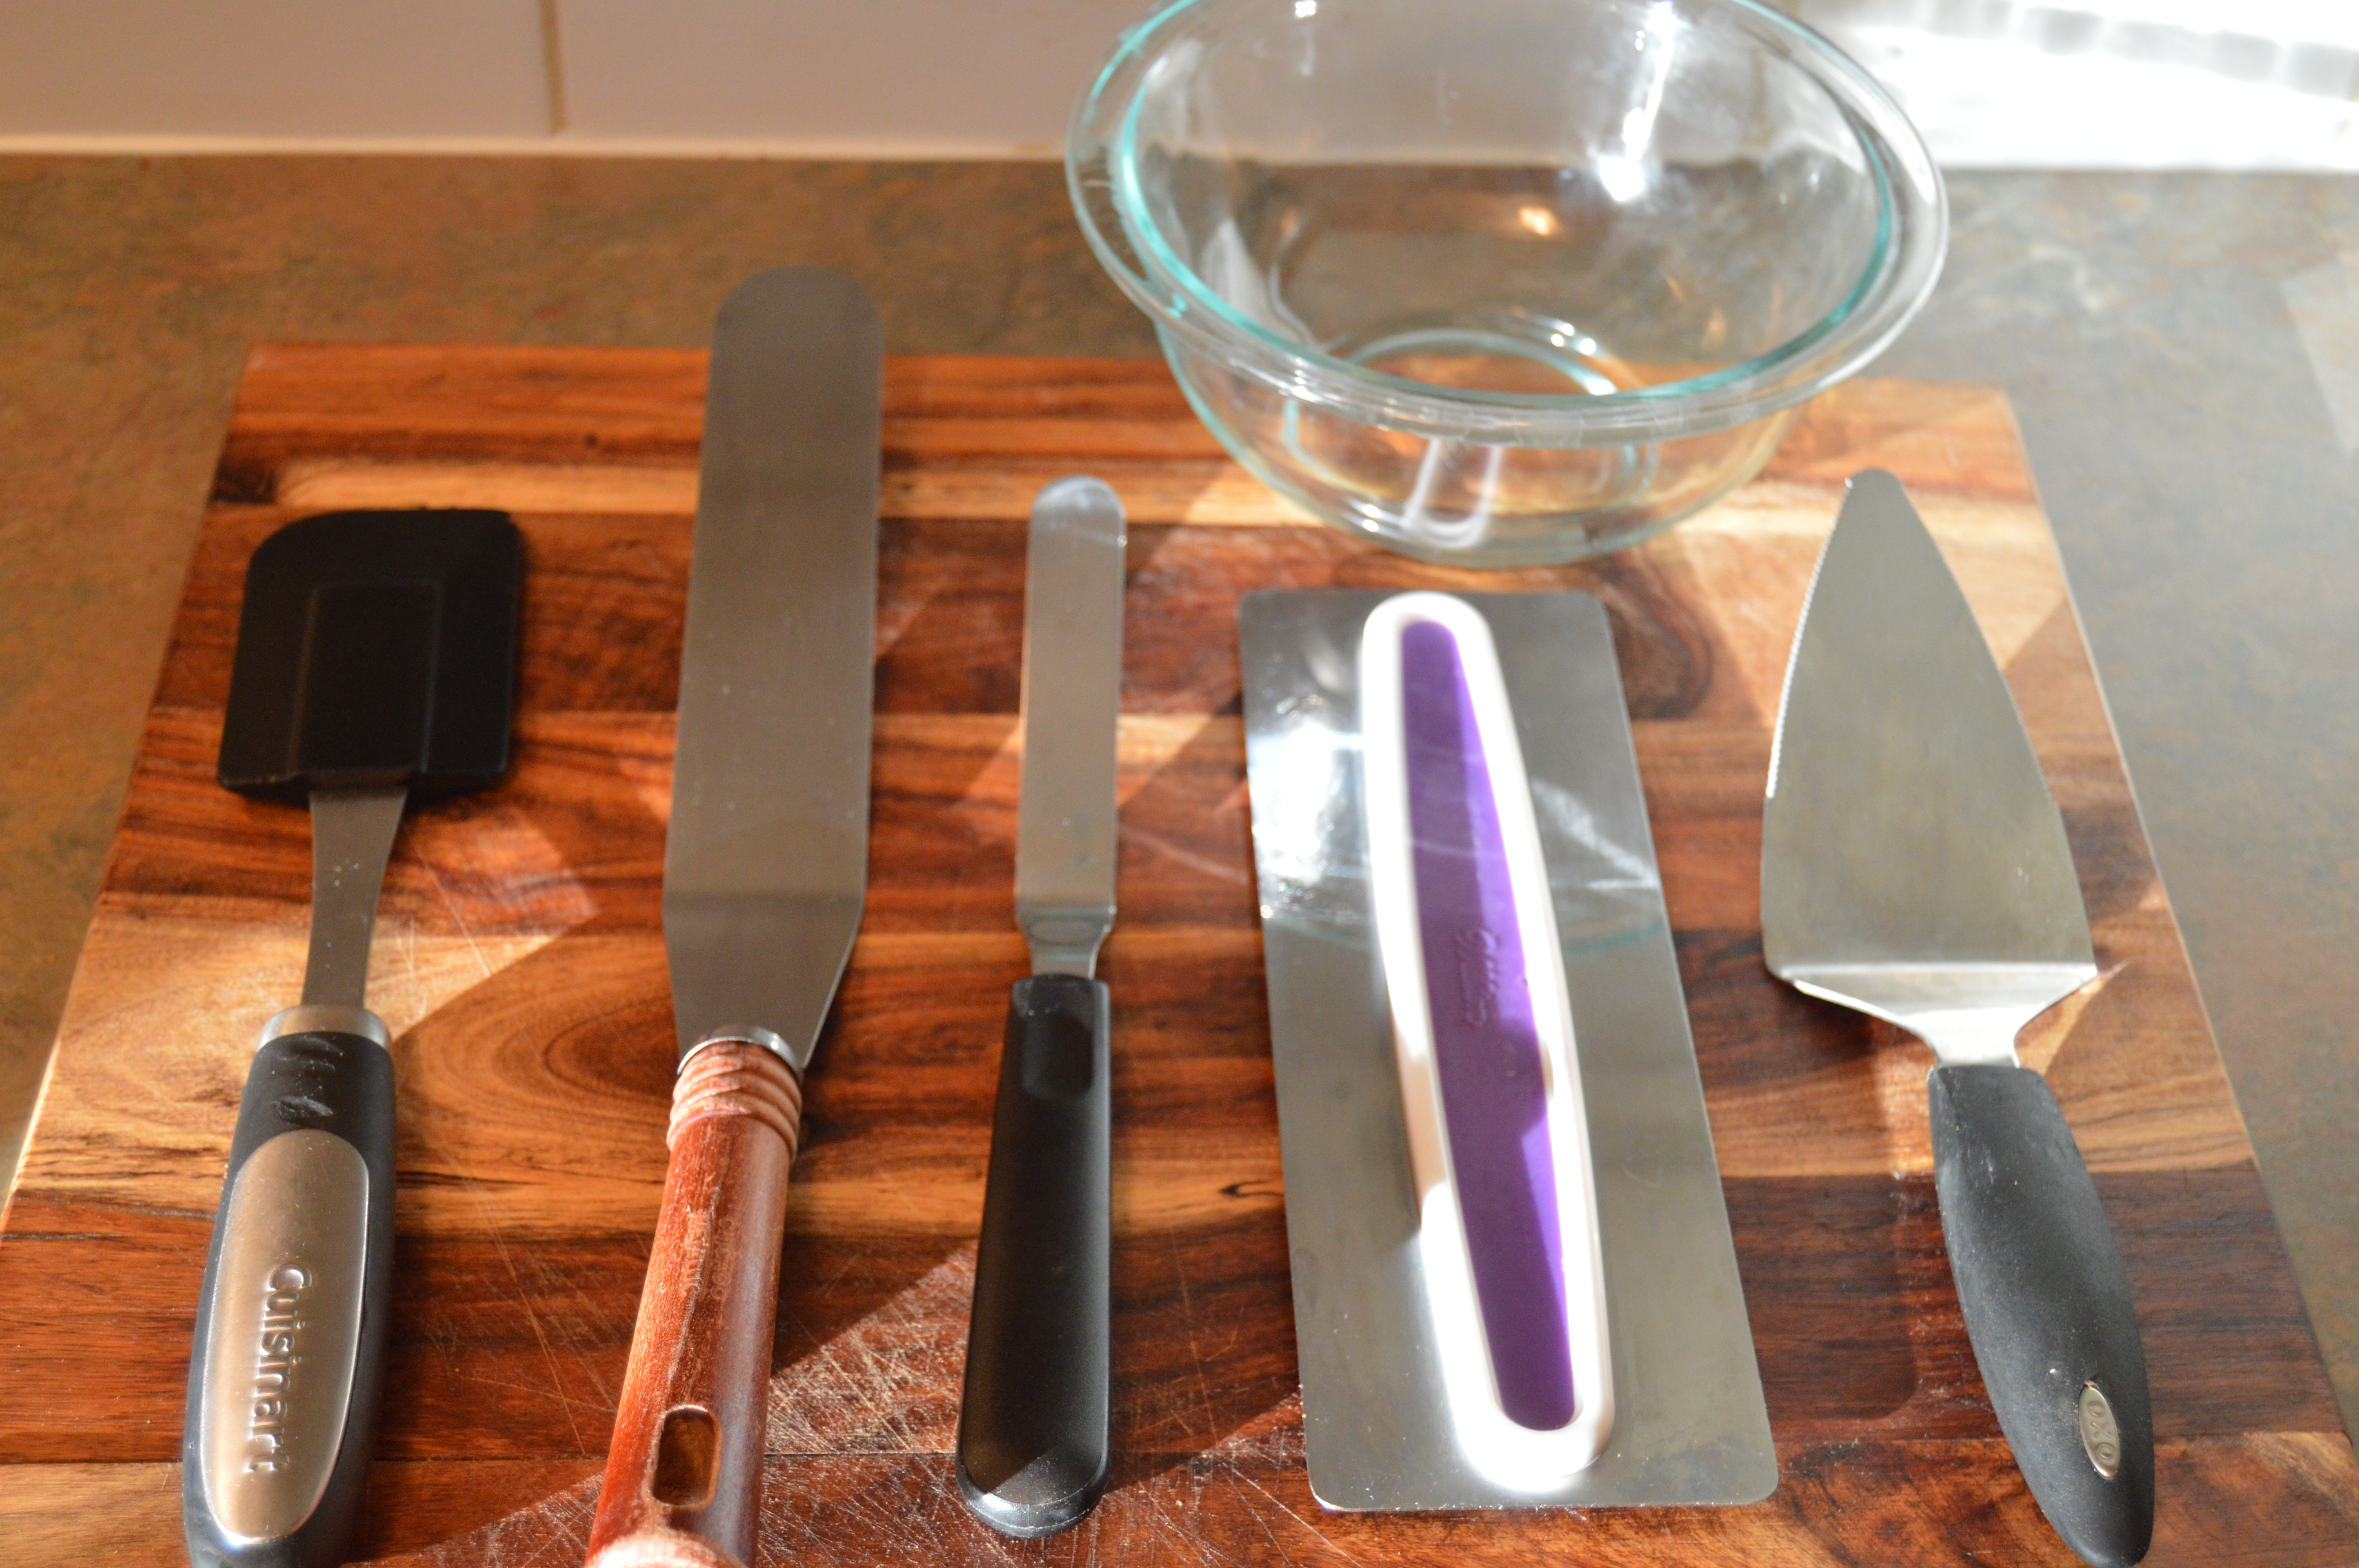
TOOLS:
(1) Rubber Spatula
(2) Palette Knife
(3) Icing Smoother
(4) Cake Server/Shovel
(5) Fondant Smoother (Optional)
(6) A Clean Bowl
(7) Turntable or Lazy Susan
(8) A Cake Card
(9) Paper Towels
SOME OF MY GENERAL RULES
(1) As a habit, I only frost cakes after they have been chilled, leveled and torte. If you try to frost a cake which has not been chilled, it most likely will tear. You will also end up with a lot of cake crumbs. Cold cakes are easier to handle.
(2) As a general rule, apart from when I apply frosting to my cake card in the beginning of the process, my palette knives never go into my mixing bowl which has the frosting. This is because the palette knife comes in contact with the cake and collects crumbs. Dipping it into the bowl of frosting will transfer cake crumbs to the frosting. Only my rubber spatula goes into the mixing bowl.
(3) I always have a small glass bowl when I am frosting cakes. When frosting cakes, you need to keep your palette knife free of frosting as much as possible. I constantly scrape my palette knife against the inside edge of the small bowl each time I want to clean it. The small bowl is also used to house frosting which I will eventually use to frost the sides of the cake and frosting which I will scrape from the sides of the cake using an icing smoother. This frosting will have crumbs which you do not want to reintroduce to your general bowl of frosting.
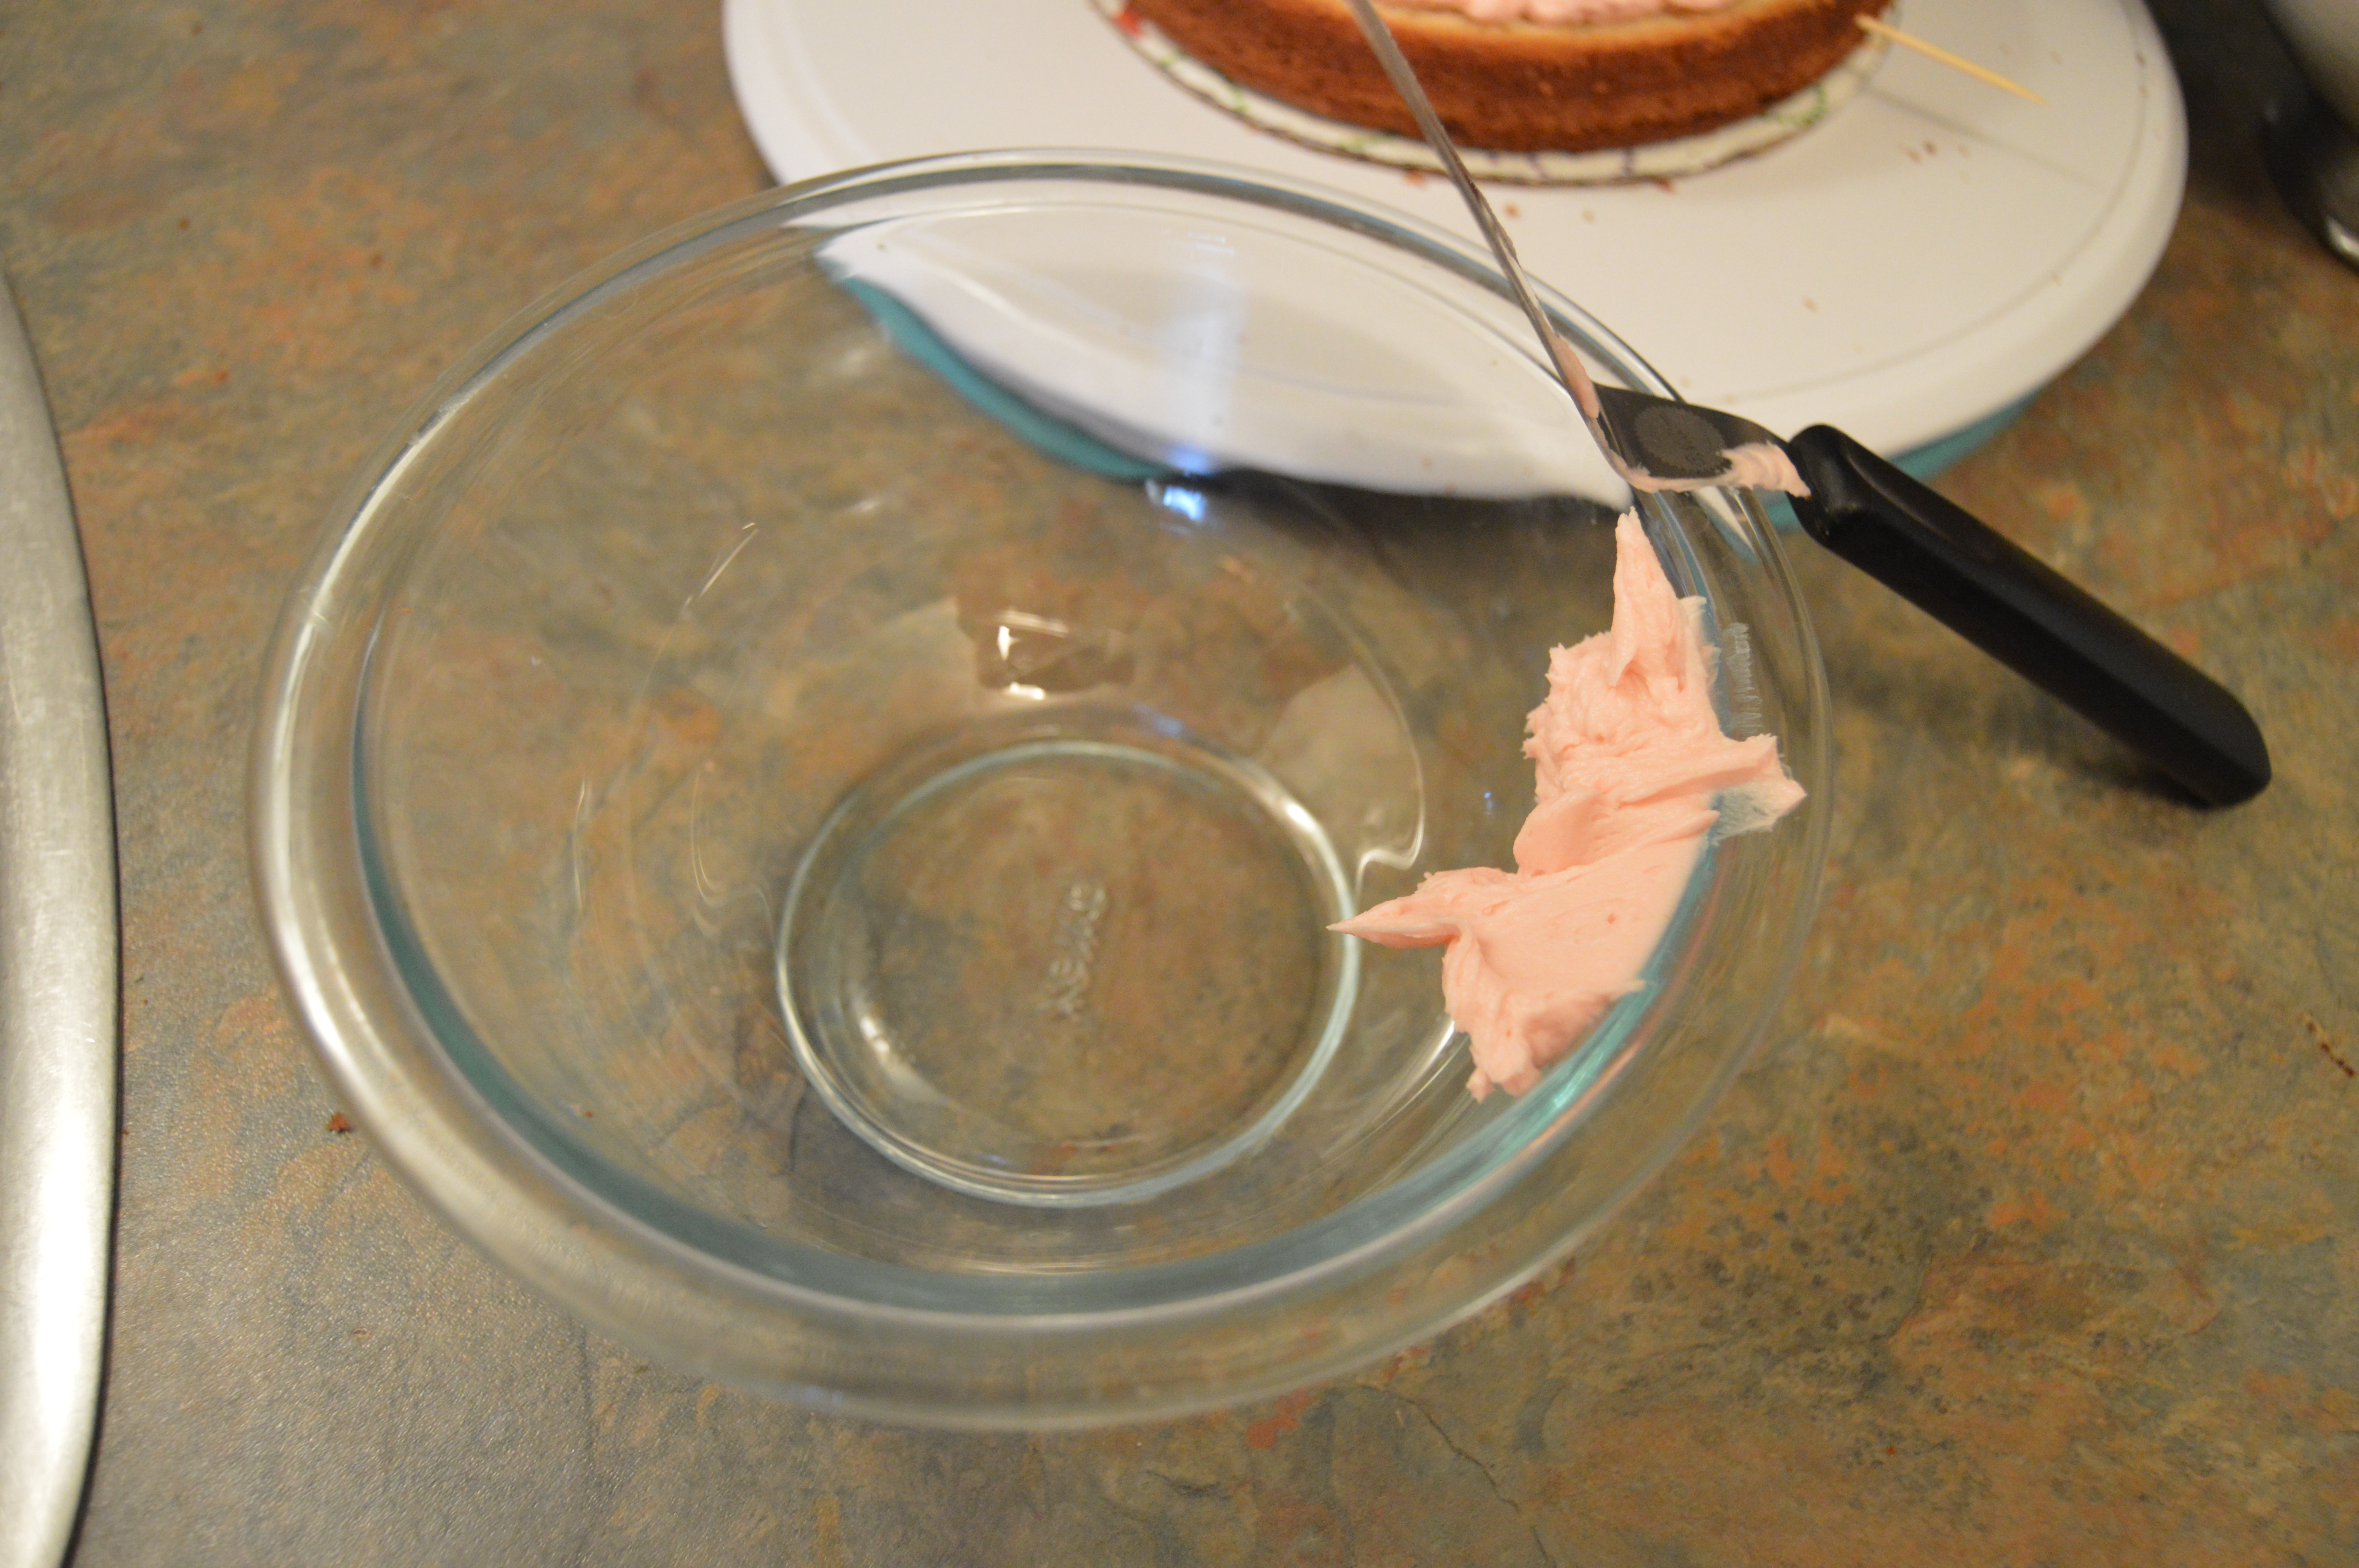
(4) I also always have some paper towels on hand. The paper towels will be used to clean my palette knife and icing smoother. Paper towels can also be used to smooth the frosted cake at the end of the frosting process.
(5) I always have a cake card which is the same size as my cake. This card will provide a guideline when frosting. For more on the uses of cake cards and boards, click here.
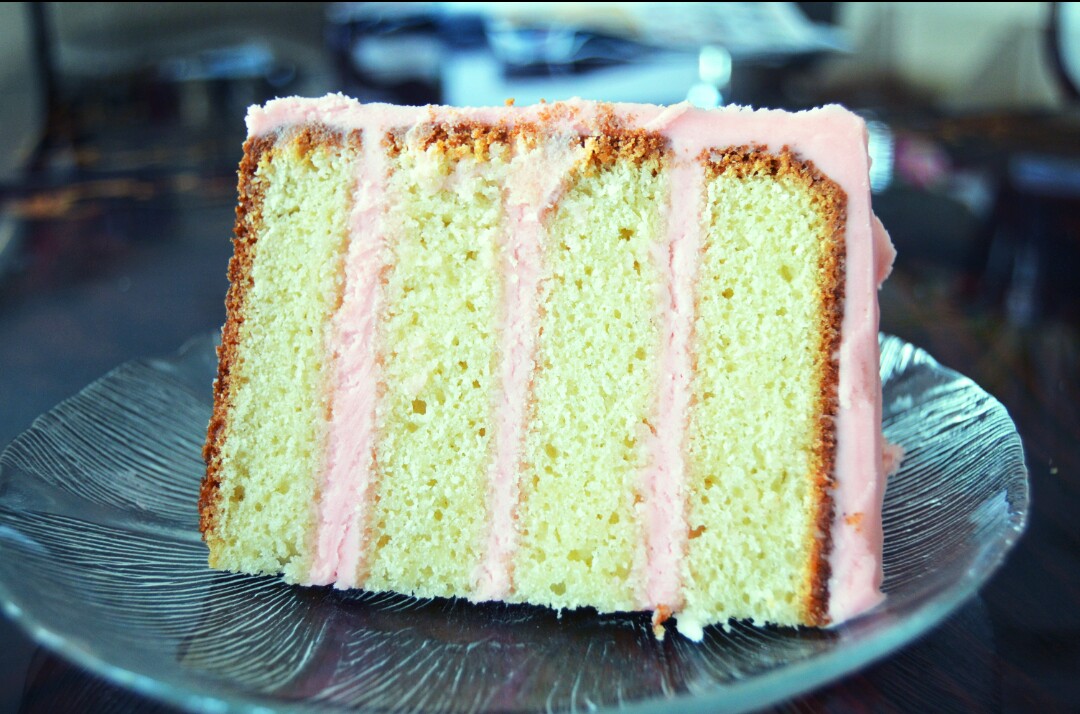
(6) Lastly, when frosting two cakes which have been divided to make 4 layers, you need to know how to place the layers when stacking. The bottom of the two cakes must end up at the base and the top of the frosted cake. If you are frosting a cake which has two layers, the top of the cake should be at the bottom and the bottom should be at the top. The brown sealed bottom of the cake must always be on top and not an exposed leveled or sliced surface. Also, always ensure that you stack slices from the same cake on each other using inserted toothpicks as guide on the direction to place the slices.
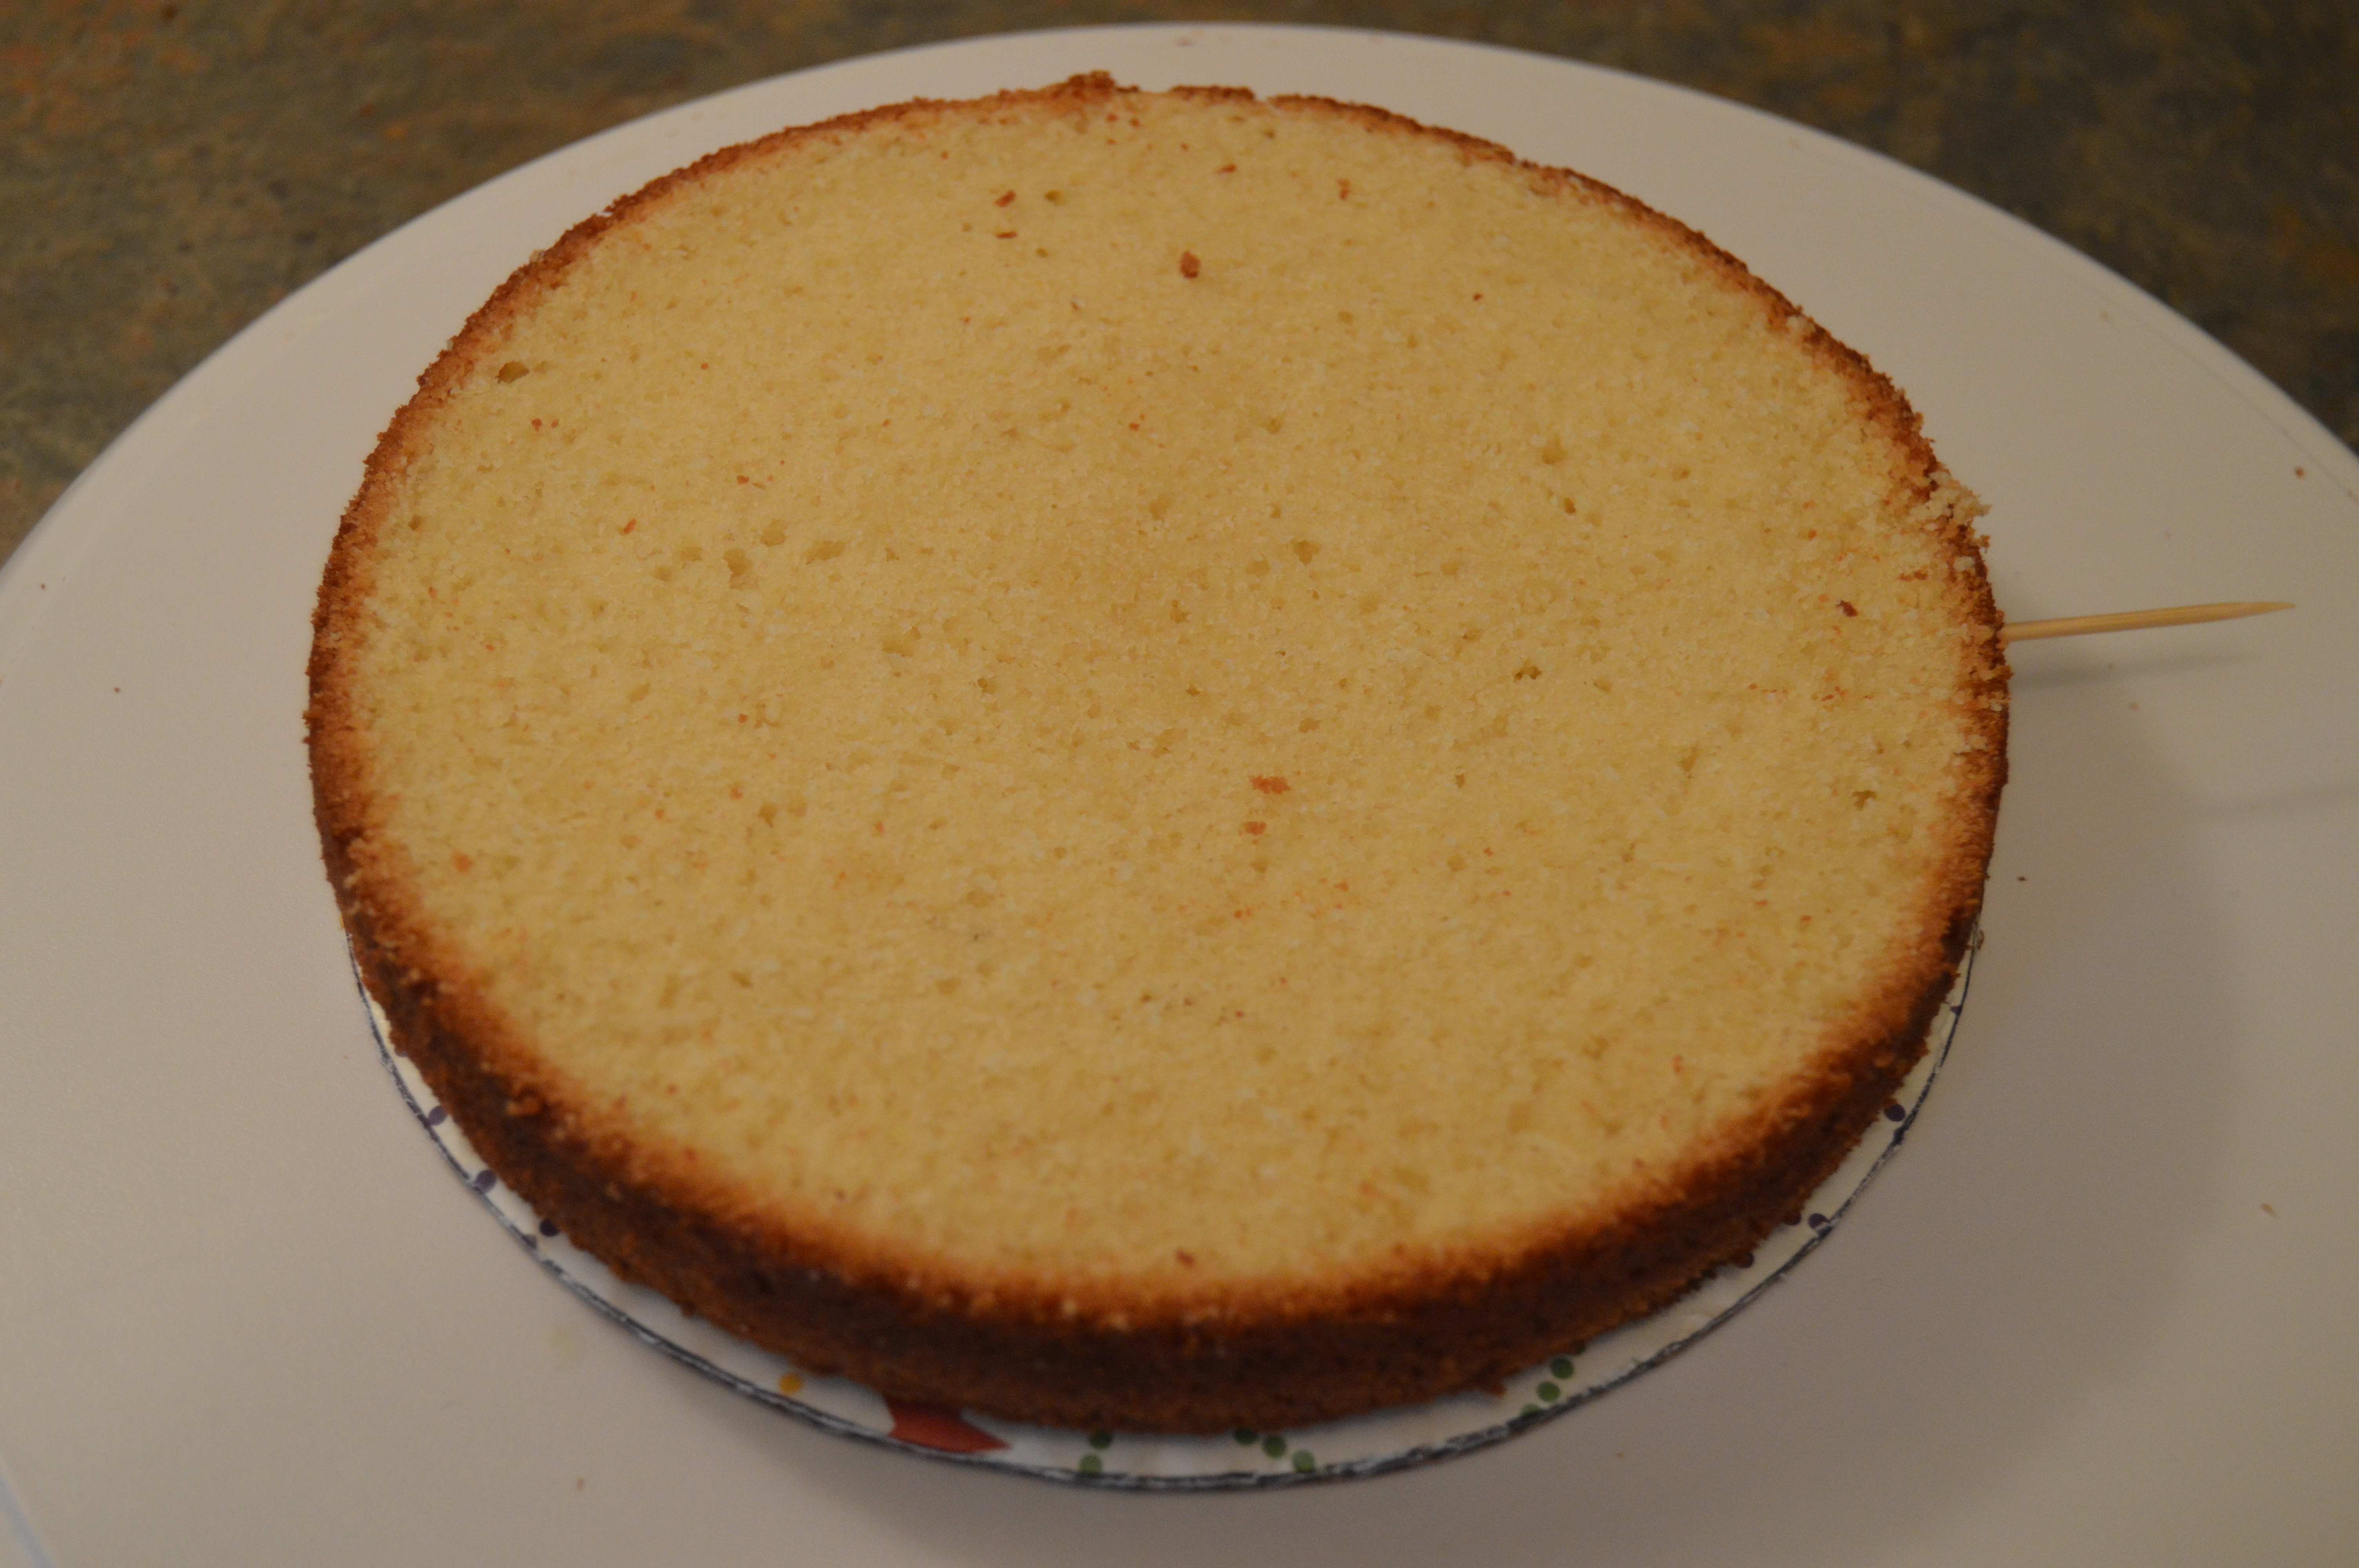
Now, let’s frost a cake. I am working with a 7 inch round pound cake which has been divided into 4 layers. You can find the recipe for this cake here.
PROCEDURE:
(A) FILLING AND STACKING
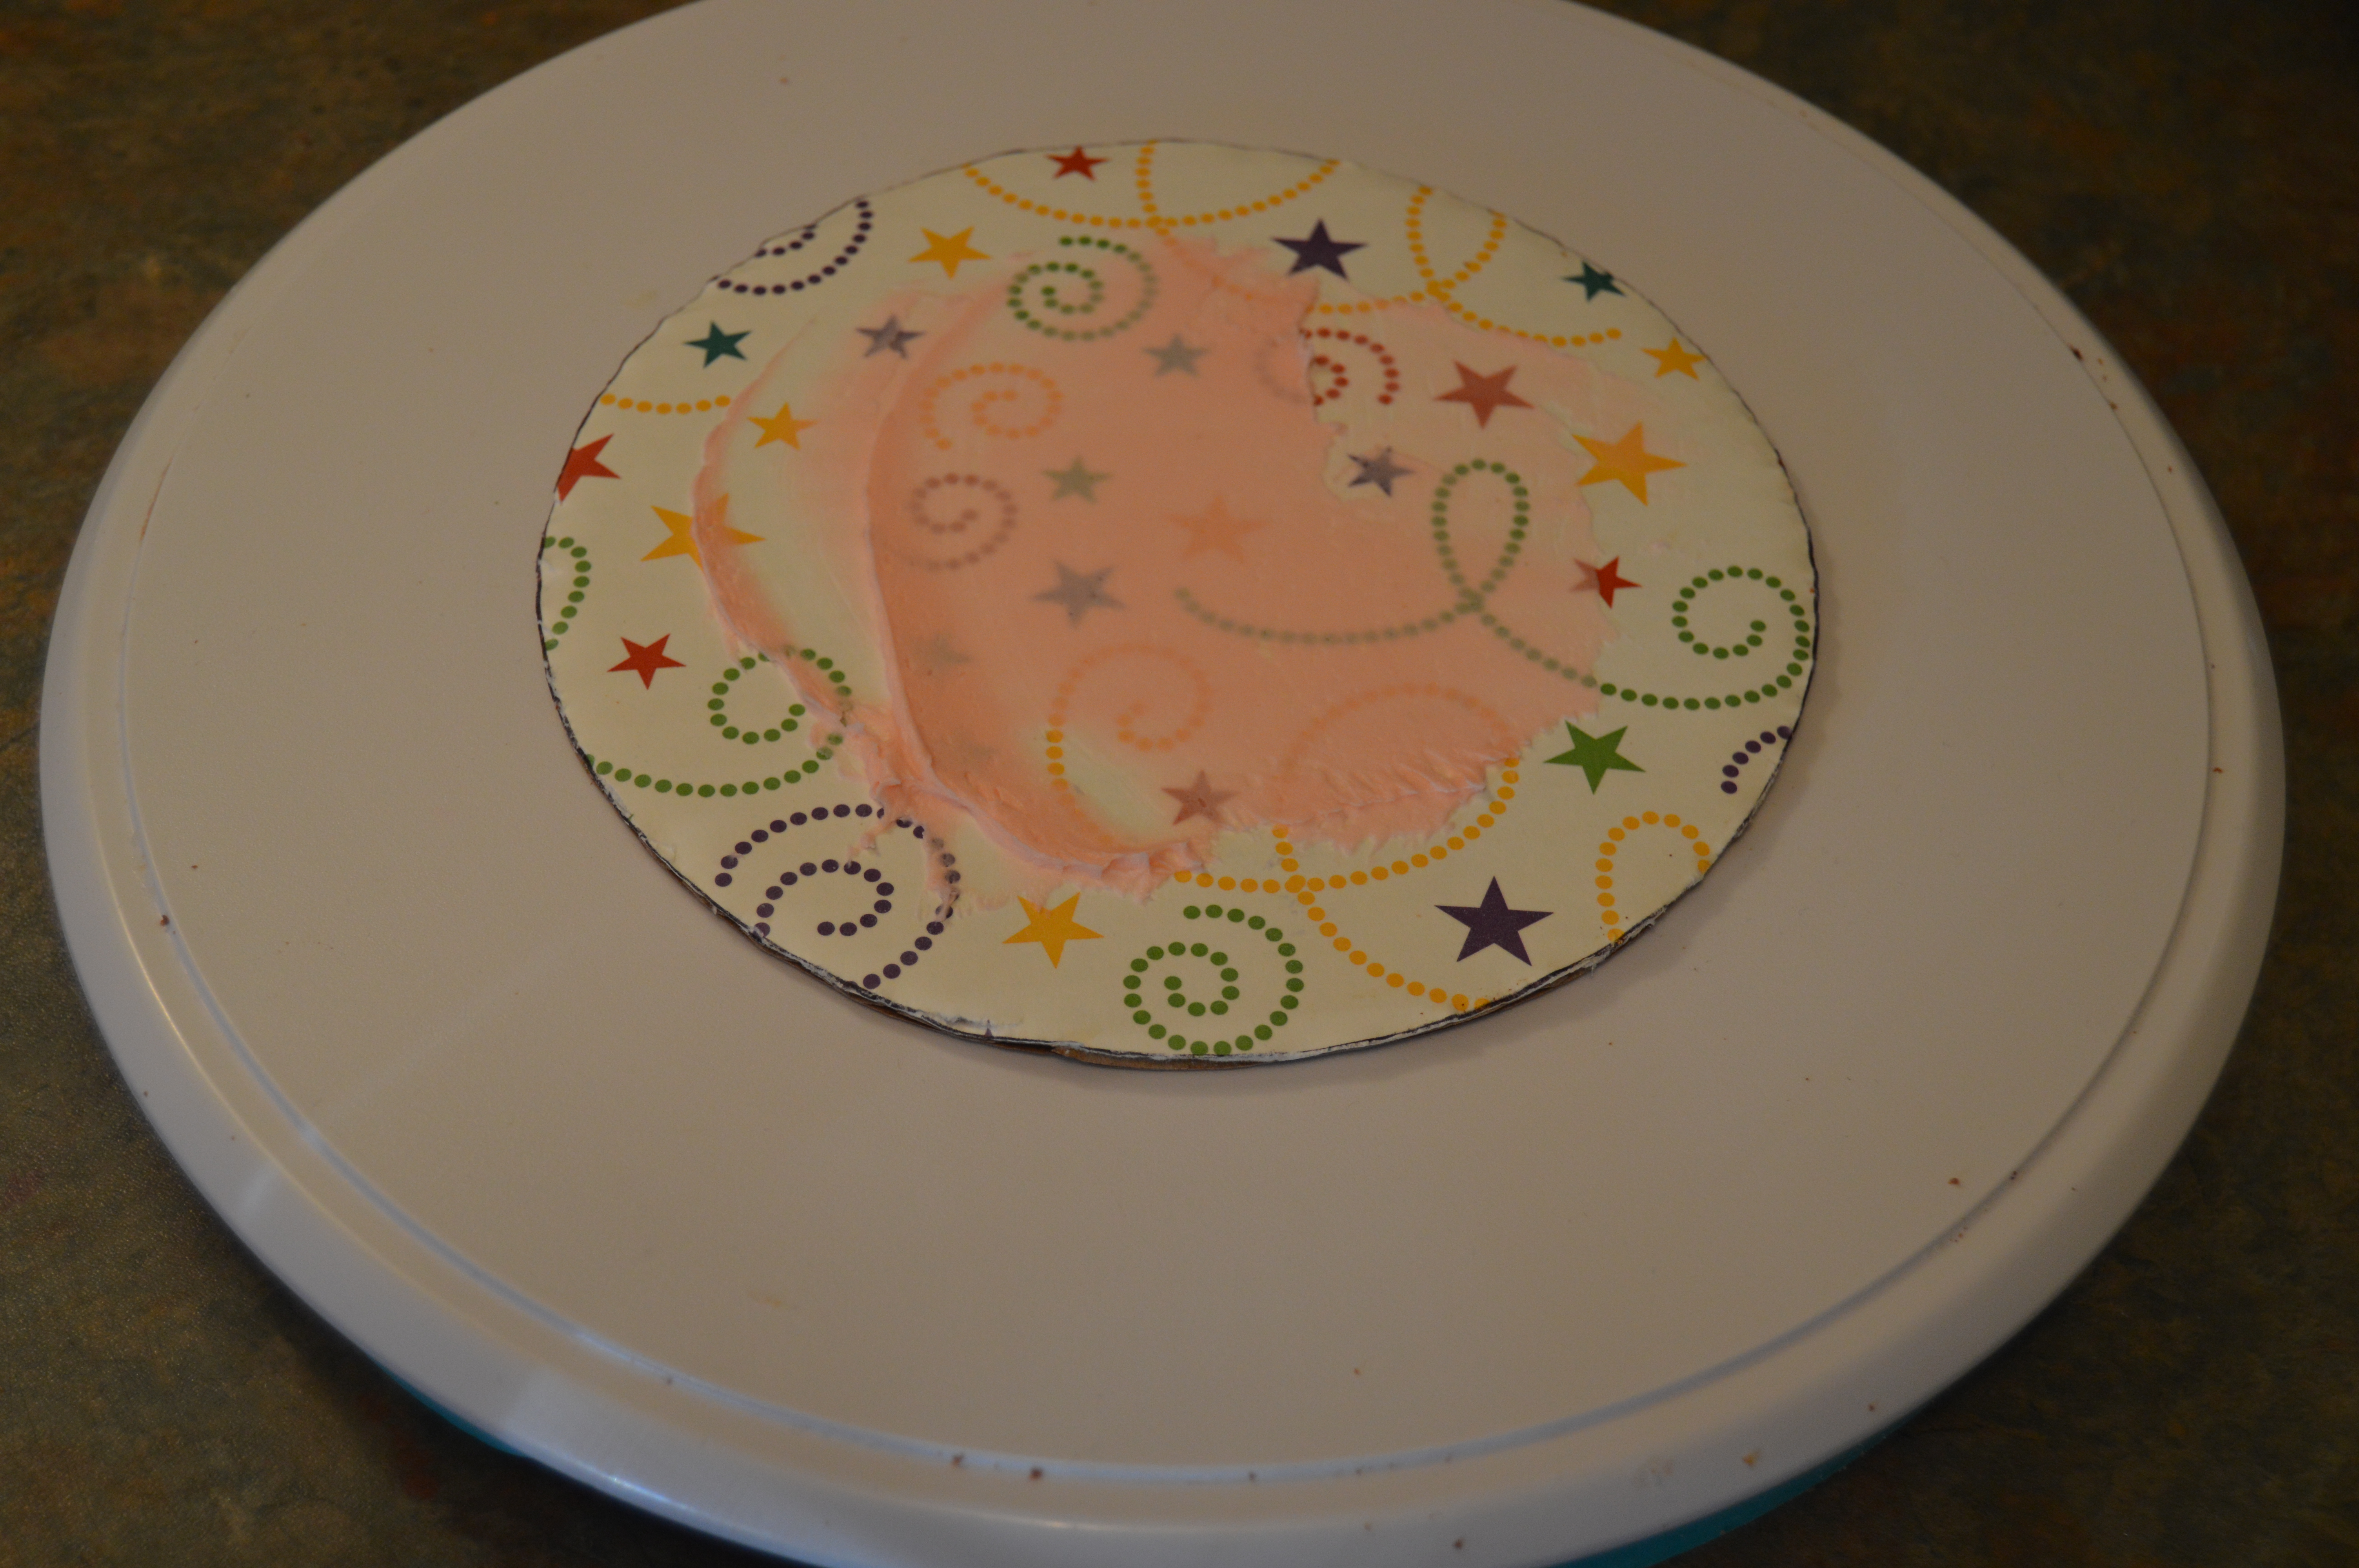
(1) Place a cake card on your turntable. If you want to keep your turntable clean of frosting, you can place a second larger cake card on the turntable before placing the smaller one. Using your palette knife, scoop a little bit of frosting and place on the cake card. This frosting will be used to hold the bottom tier of the cake in place. Place one of your cake layers on the cake card following the directions in General Rule 6 above and press it down a bit so it sticks to the frosting.
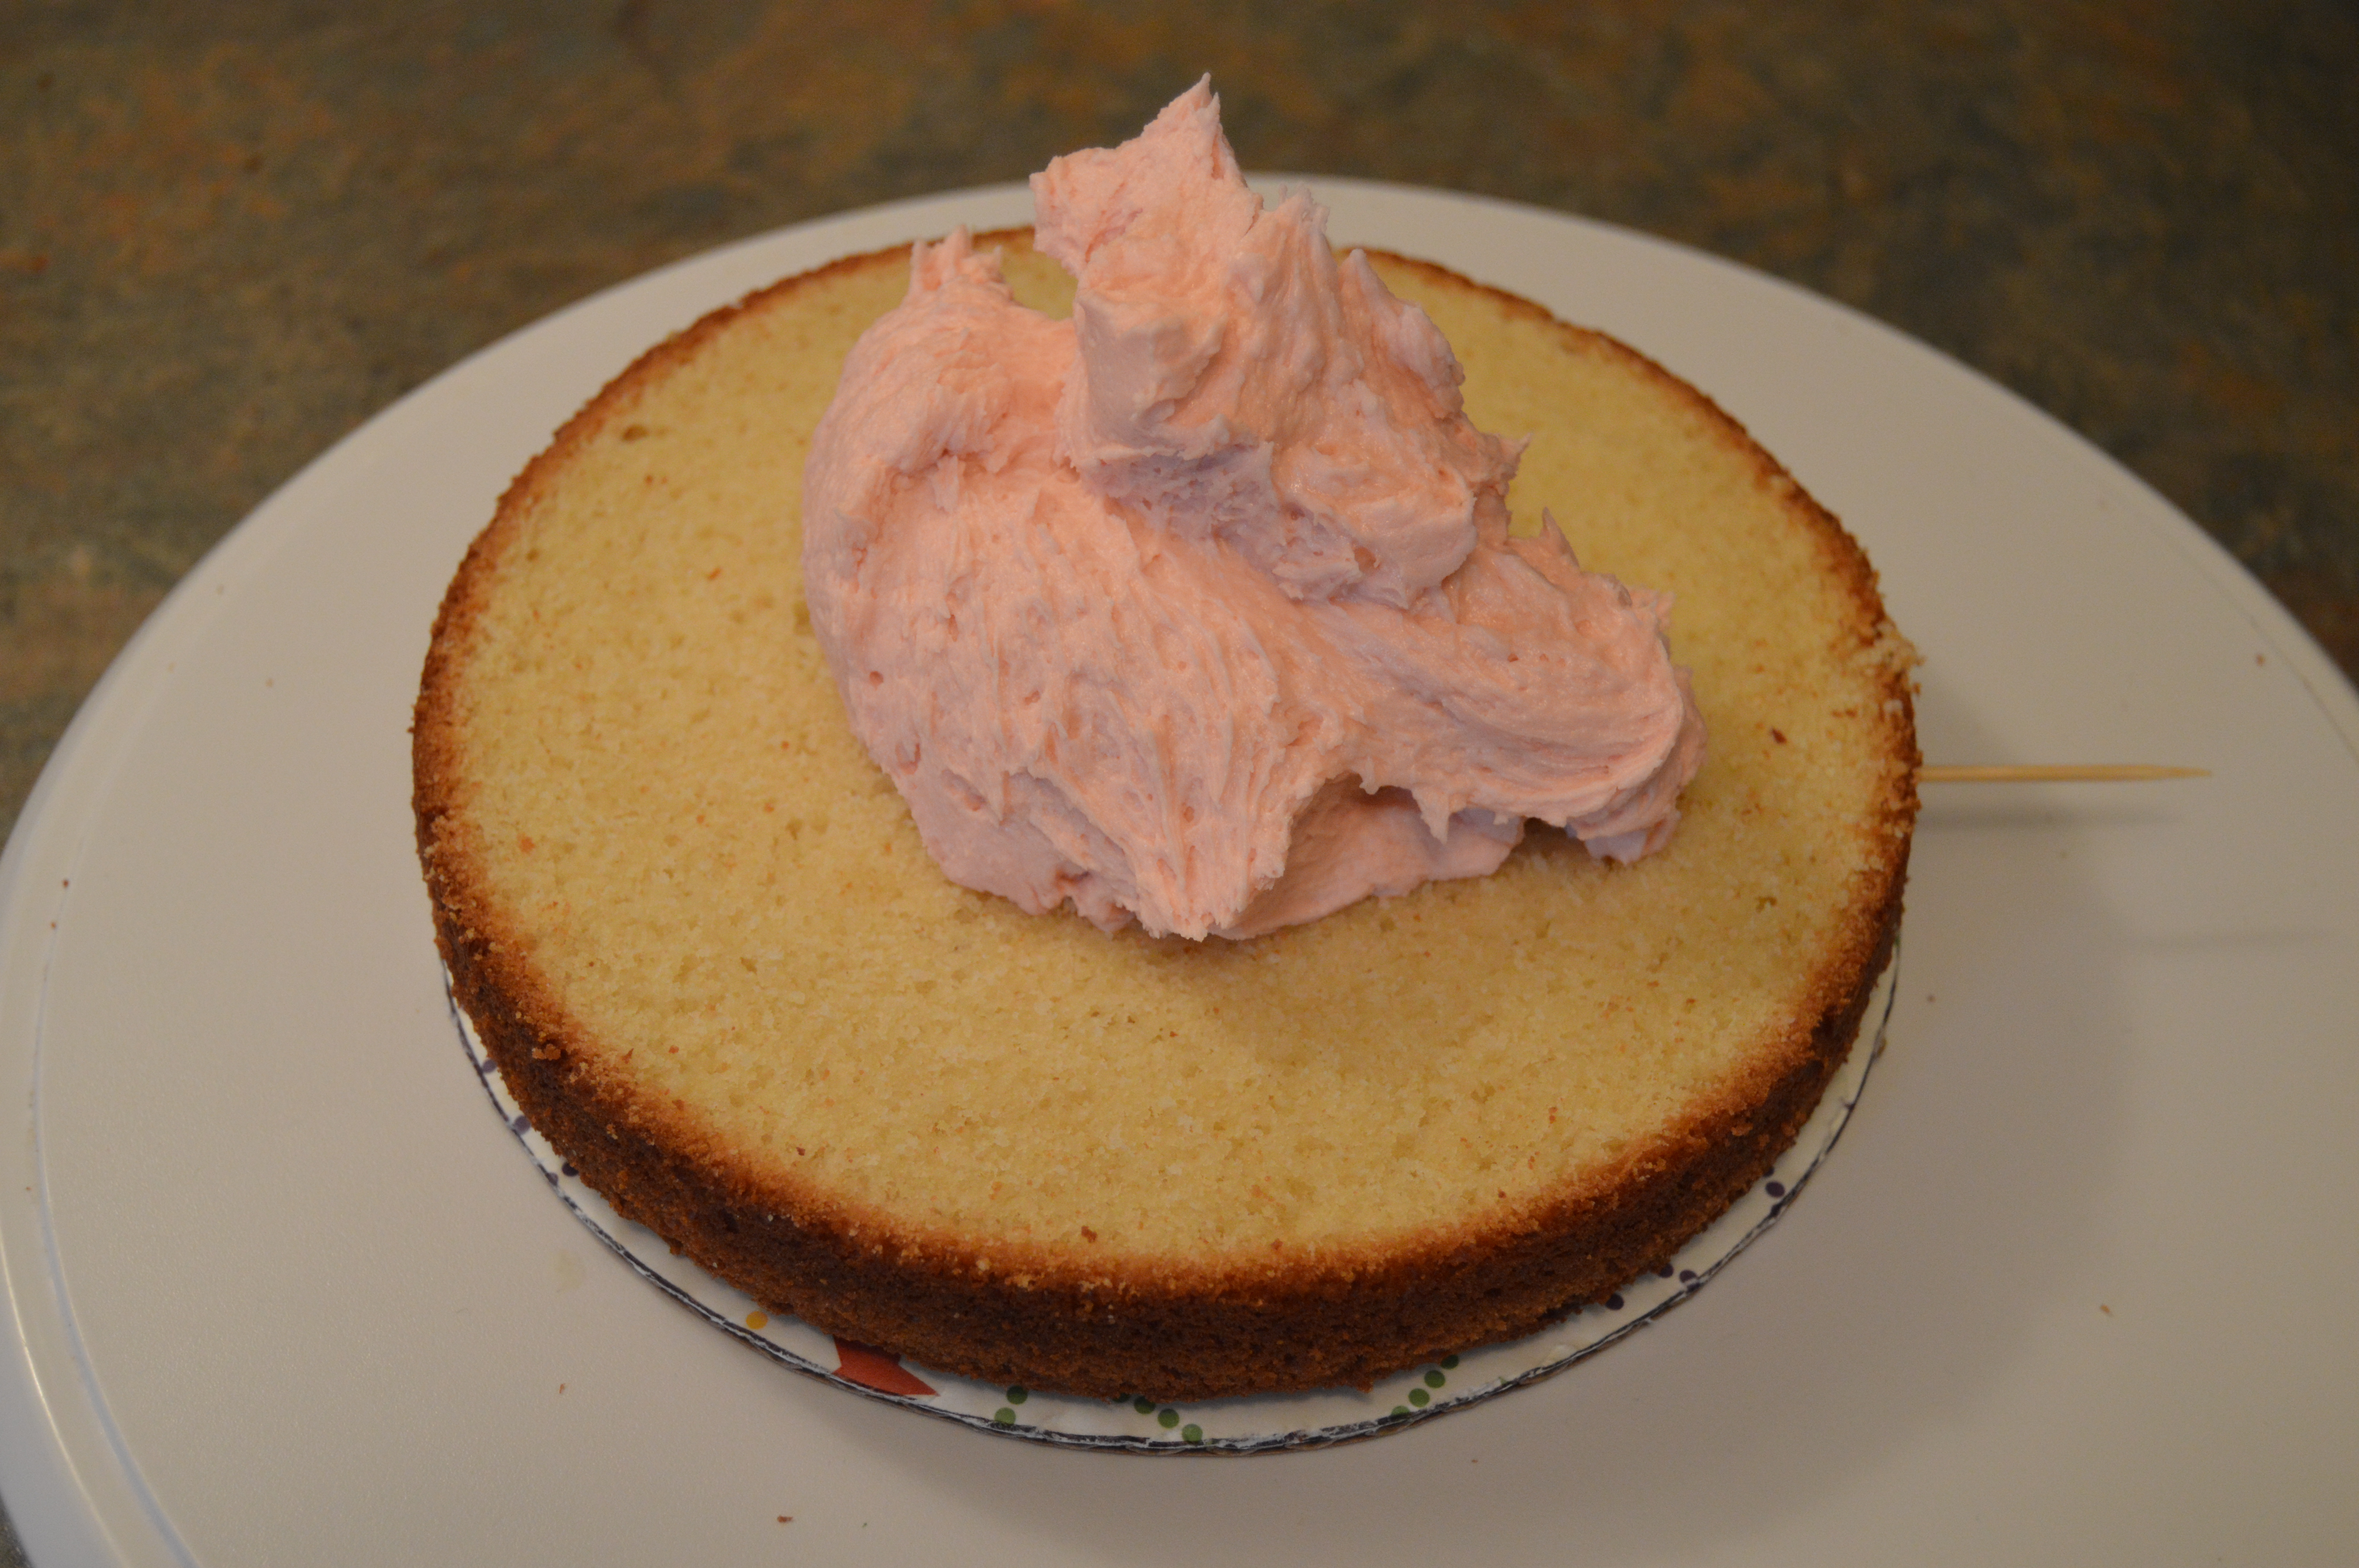
(2) Now begins the process of filling. Using a rubber spatula, scoop a dollop of frosting and place it on top of the cake slice. The spatula must not come in contact with the cake surface or it might pick up some cake crumbs and transfer them to the mixing bowl. The amount of frosting you use will depend on how much frosting you like in your cakes. Note however that the more frosting you have between your cake layers, the more difficult it would be to frost the cake. This is because the layers will often slide on the frosting as opposed to remaining grounded.
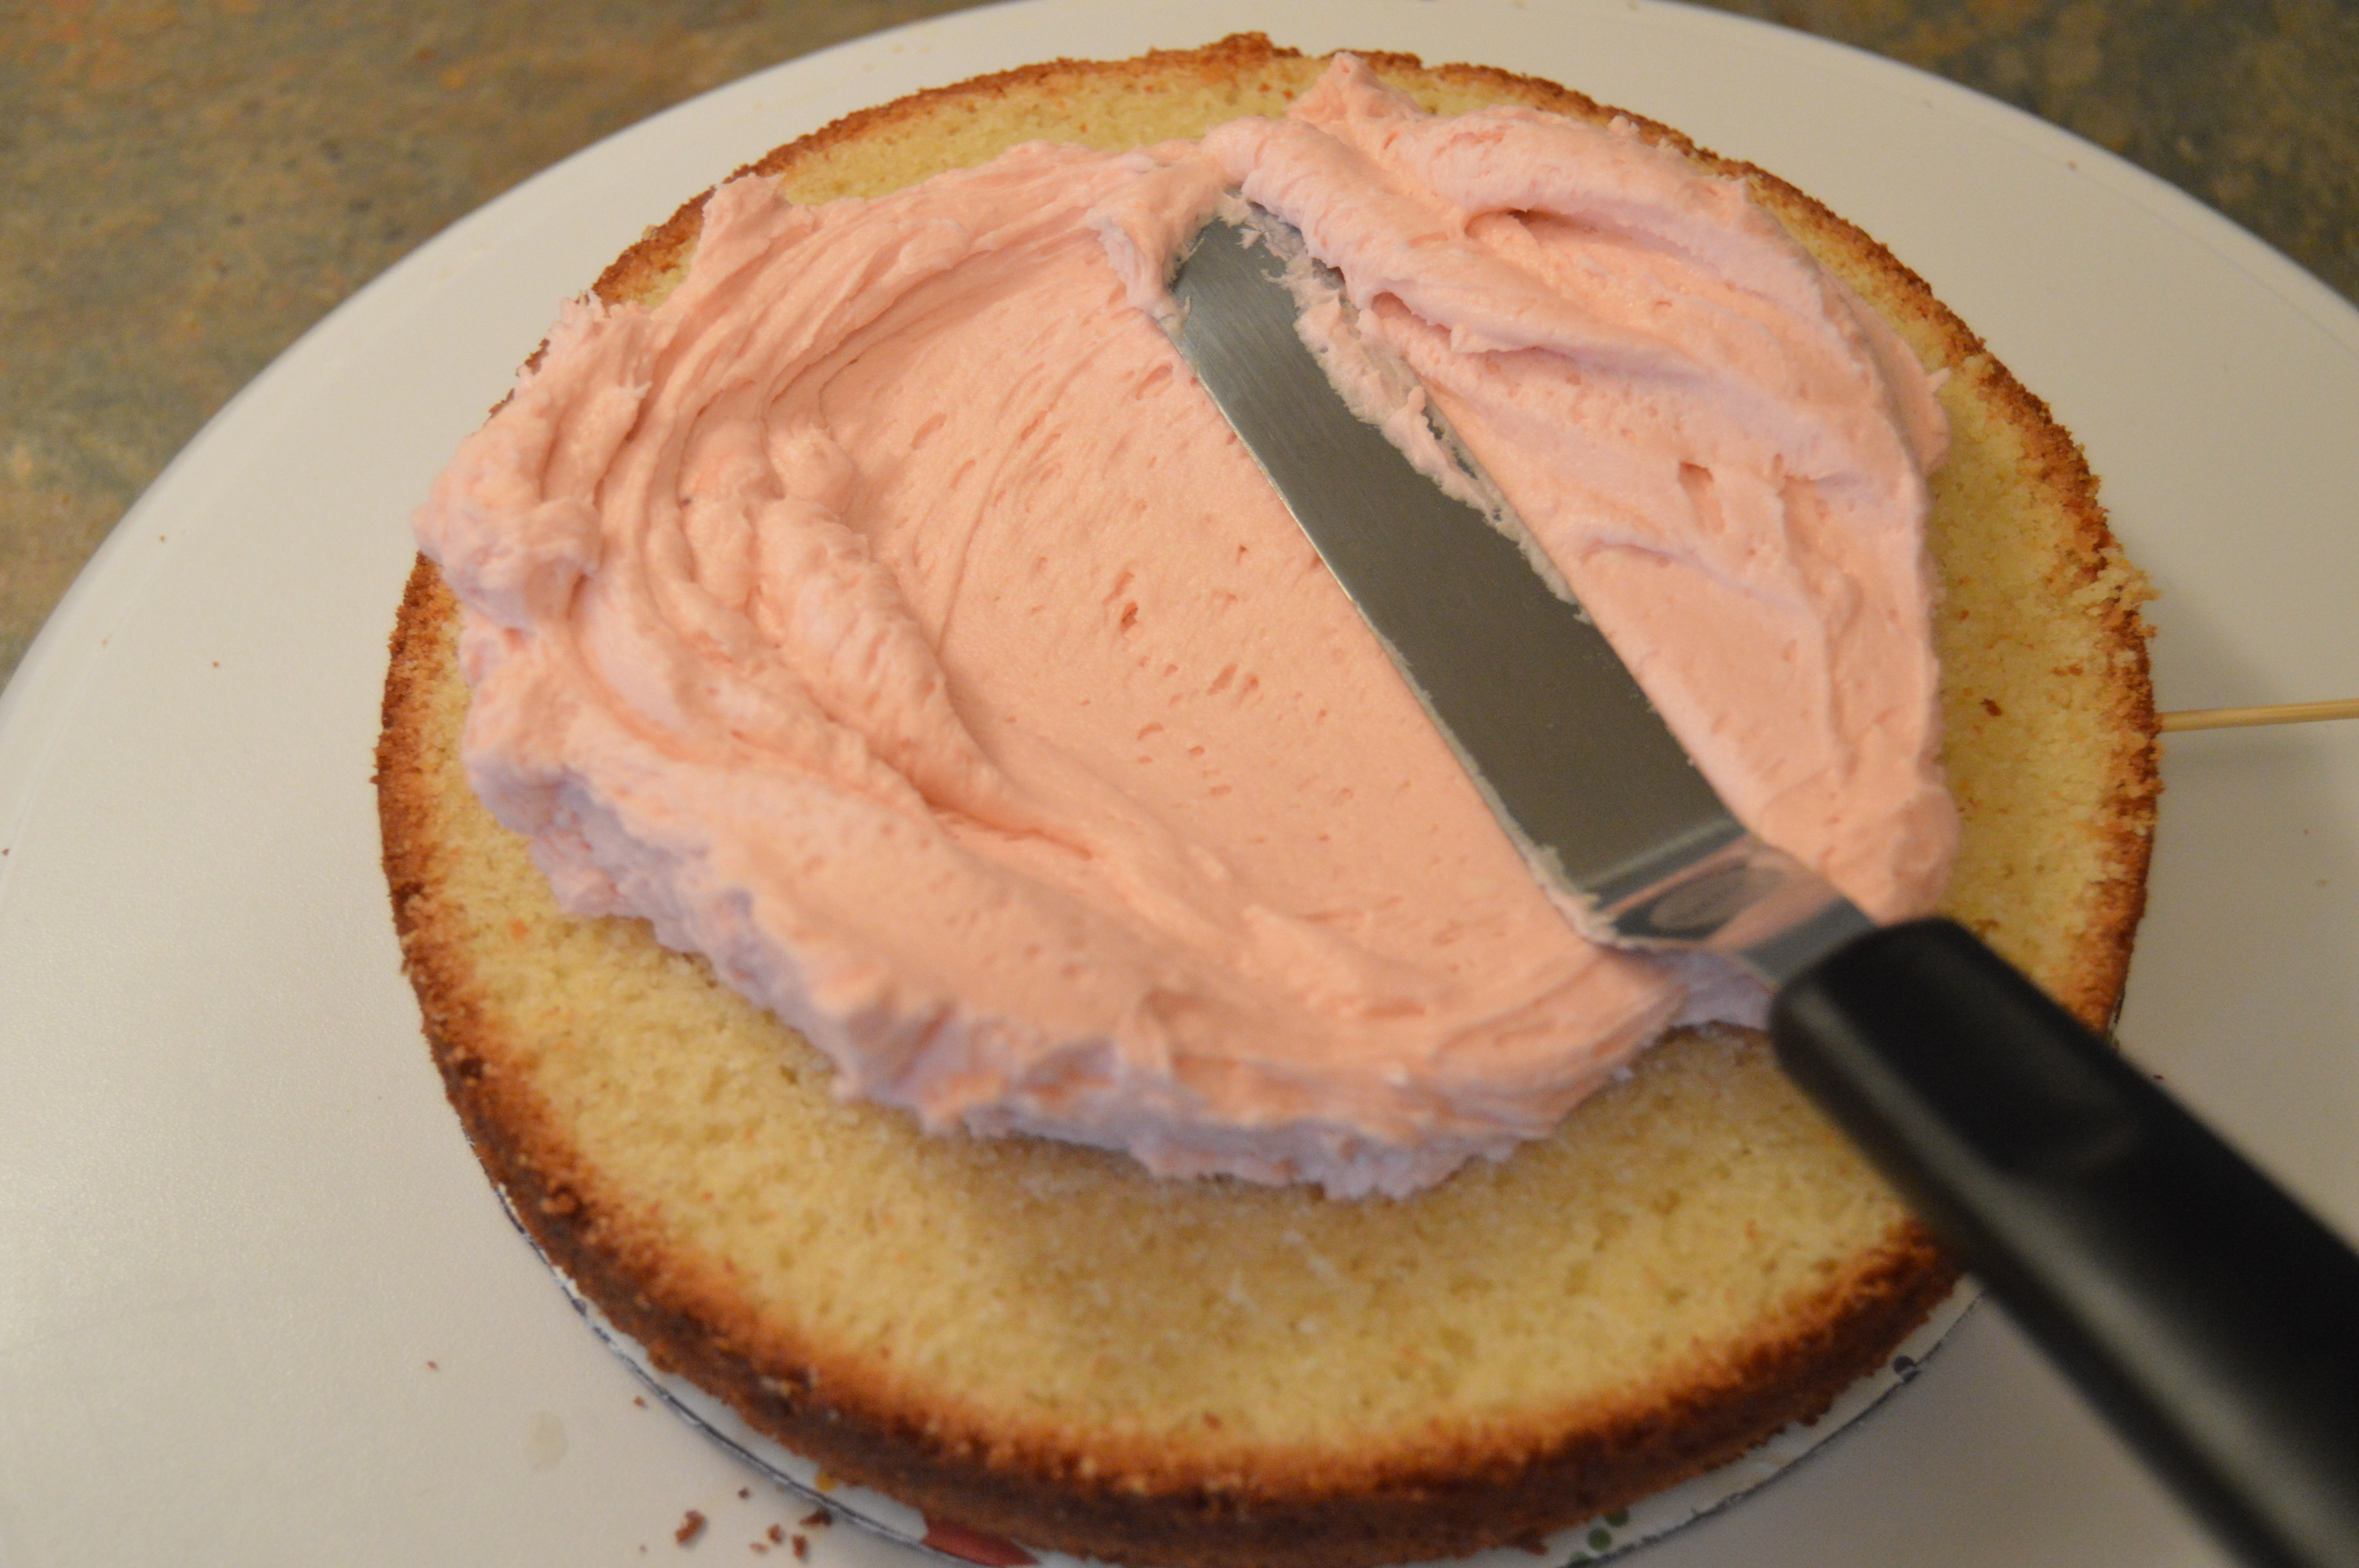
(3) Using a palette knife, smooth out the frosting while turning the turntable. Do not frost cakes as though you are applying butter on bread; the cake will tear. You frost cakes using a wave pattern, moving your wrist from side to side (The Princess Diana Wave). Do not be worried about frosting going over the sides of the cake. At intervals, you might need to scrape your palette knife against the edge of your glass bowl to brush off excess frosting. If you feel you have applied too much frosting, simply scoop some with you palette knife and transfer it to your glass bowl. You can use this transferred frosting for your next layer before dipping into your mixing bowl for more frosting.
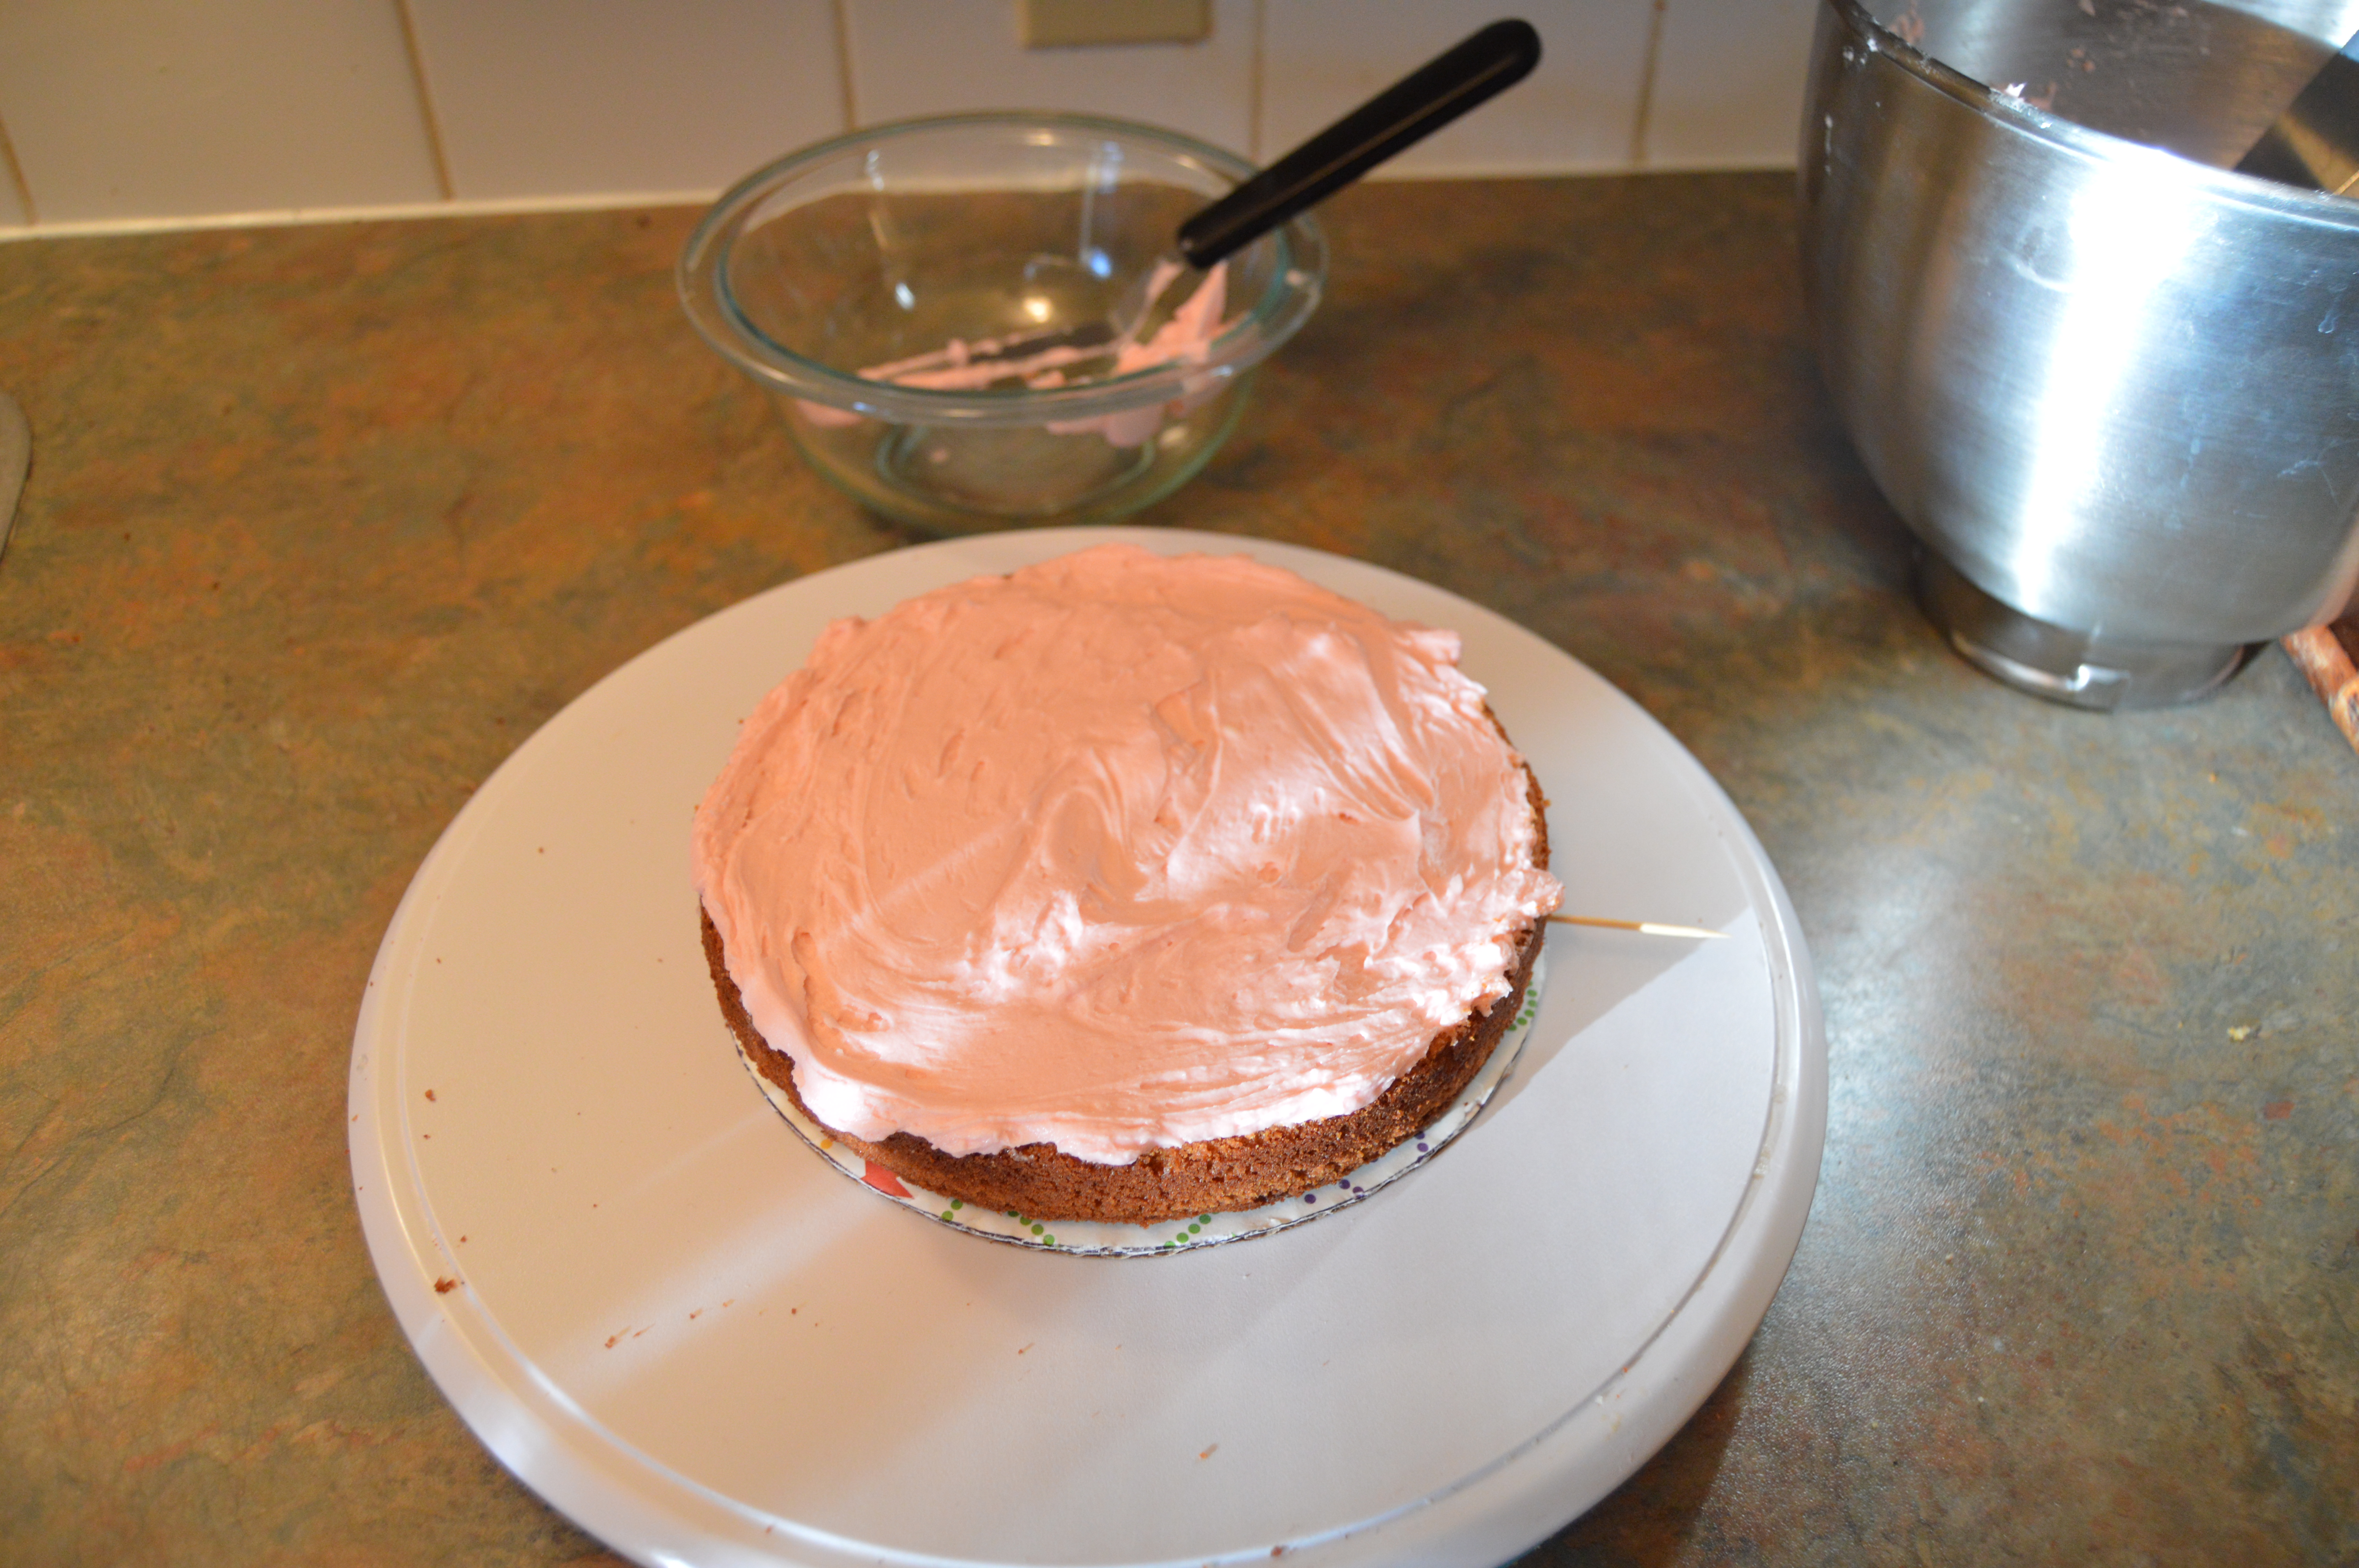
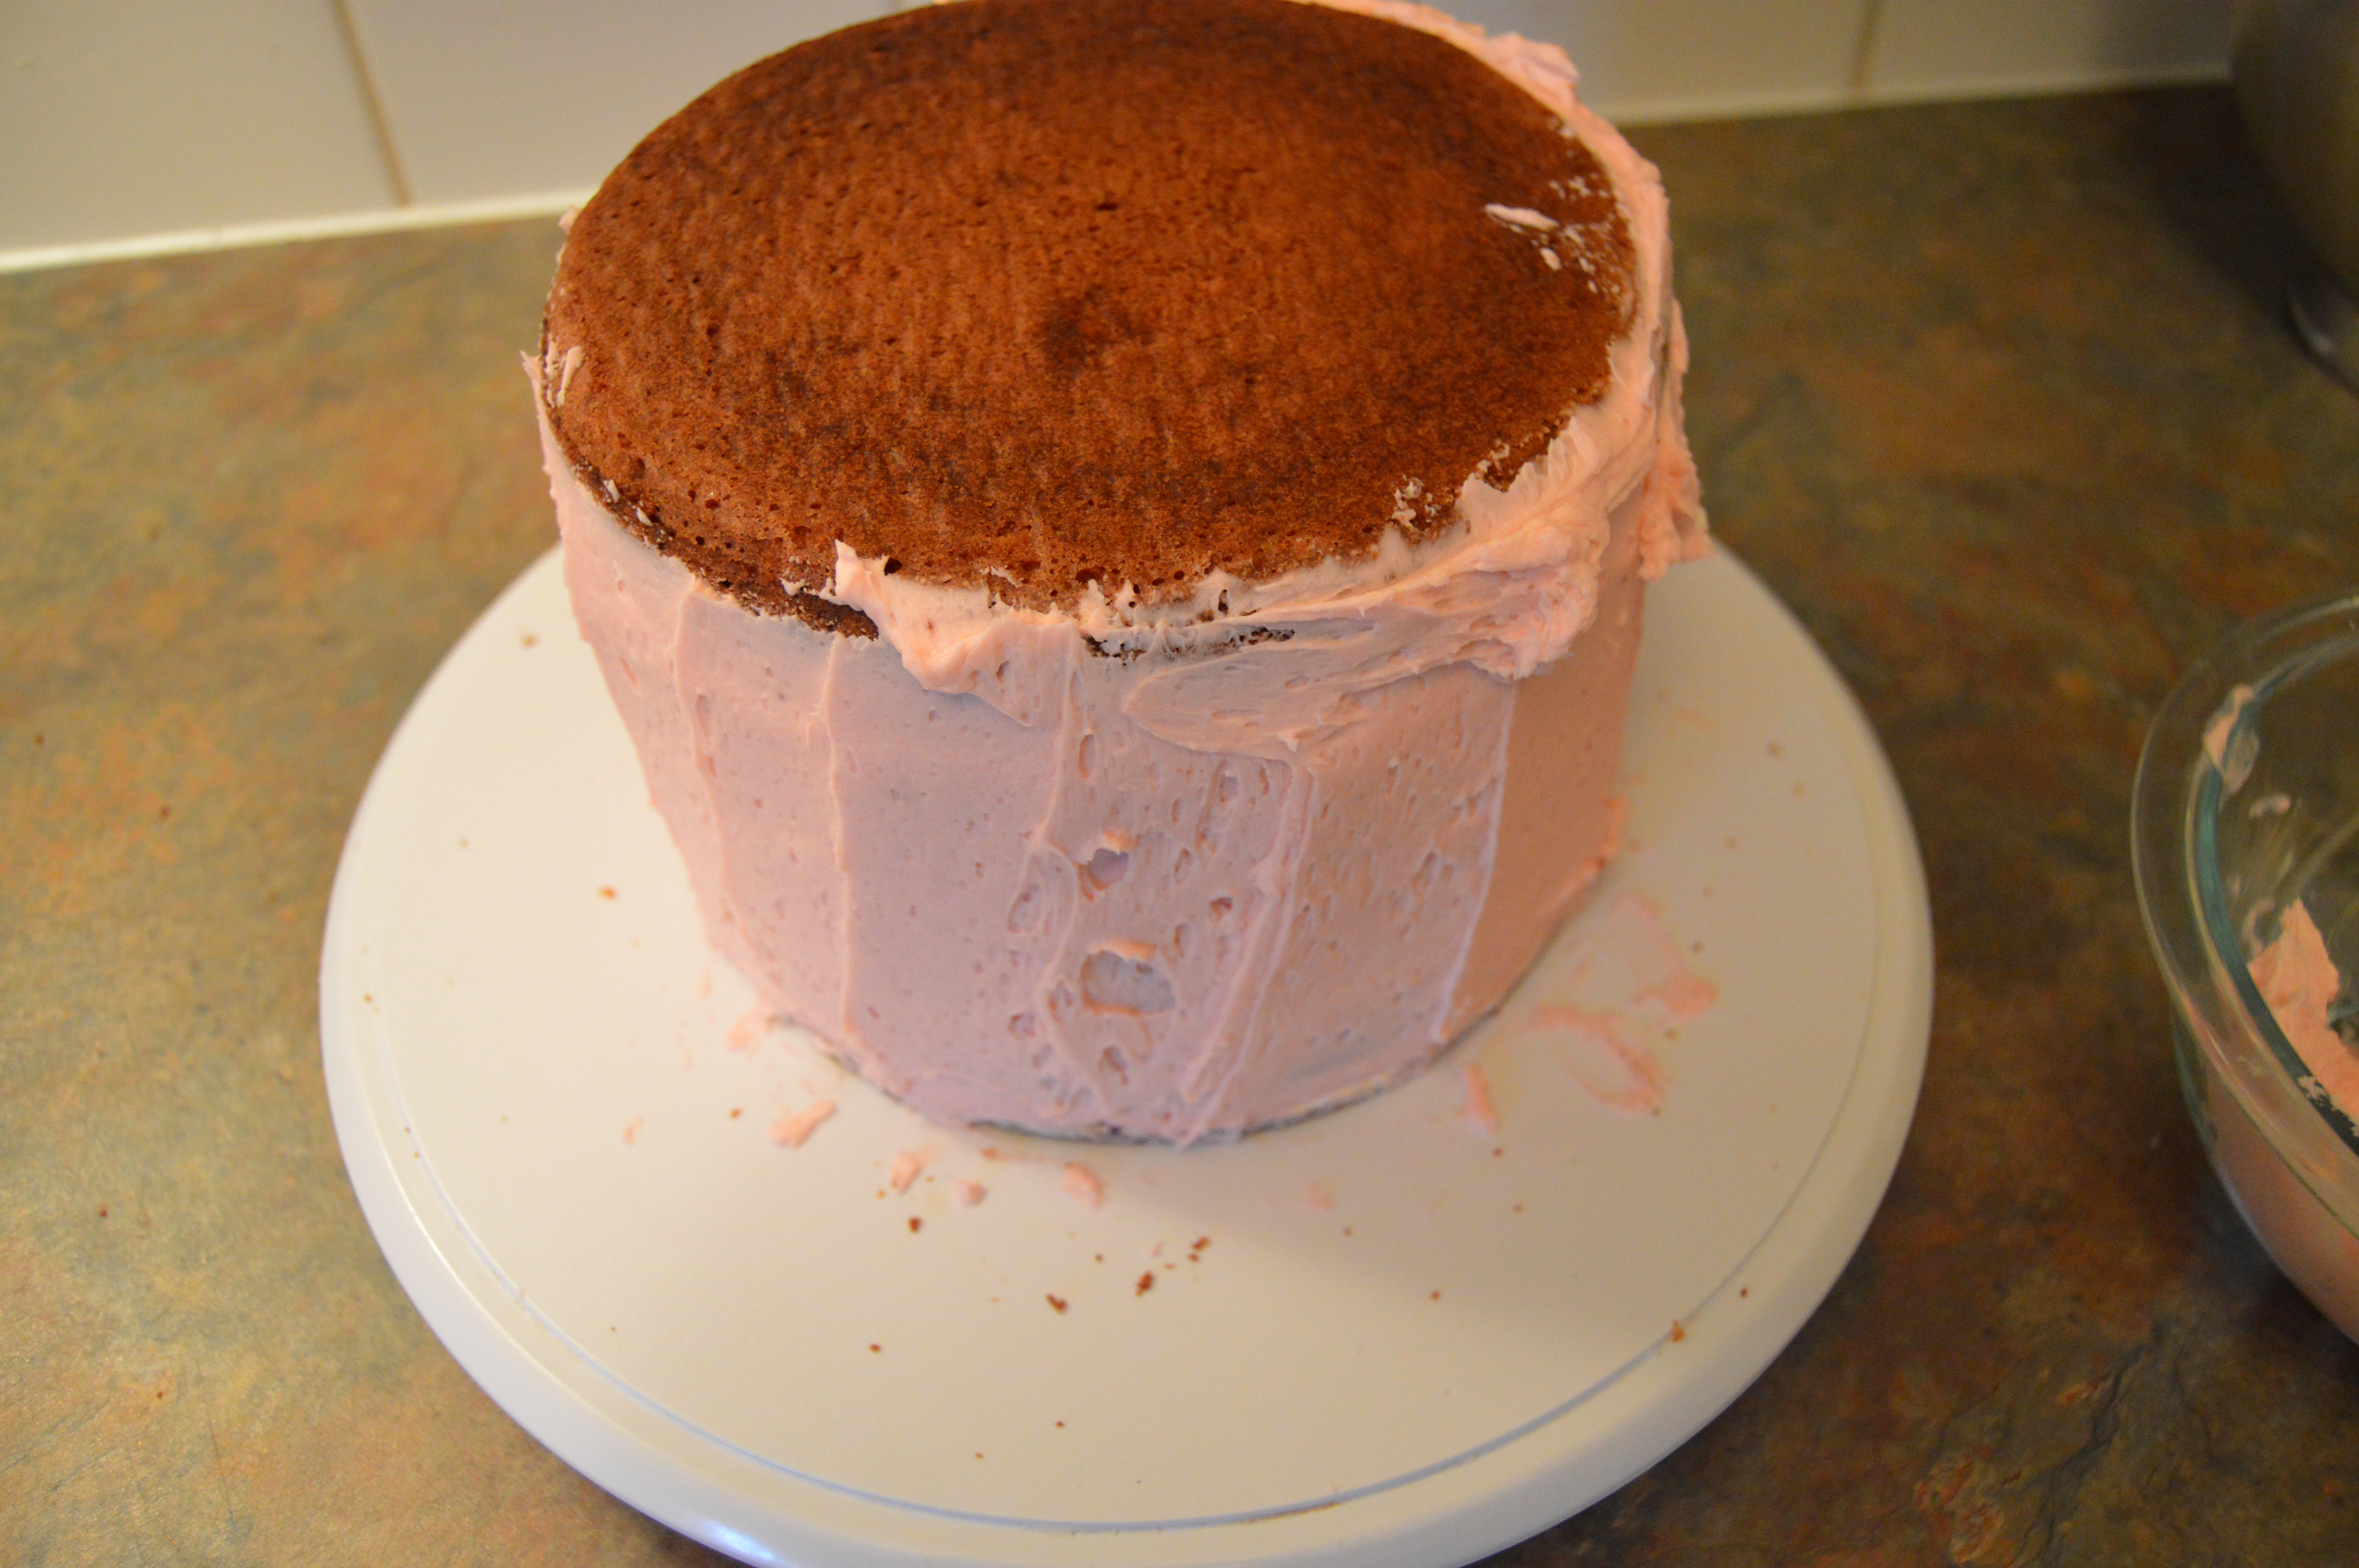
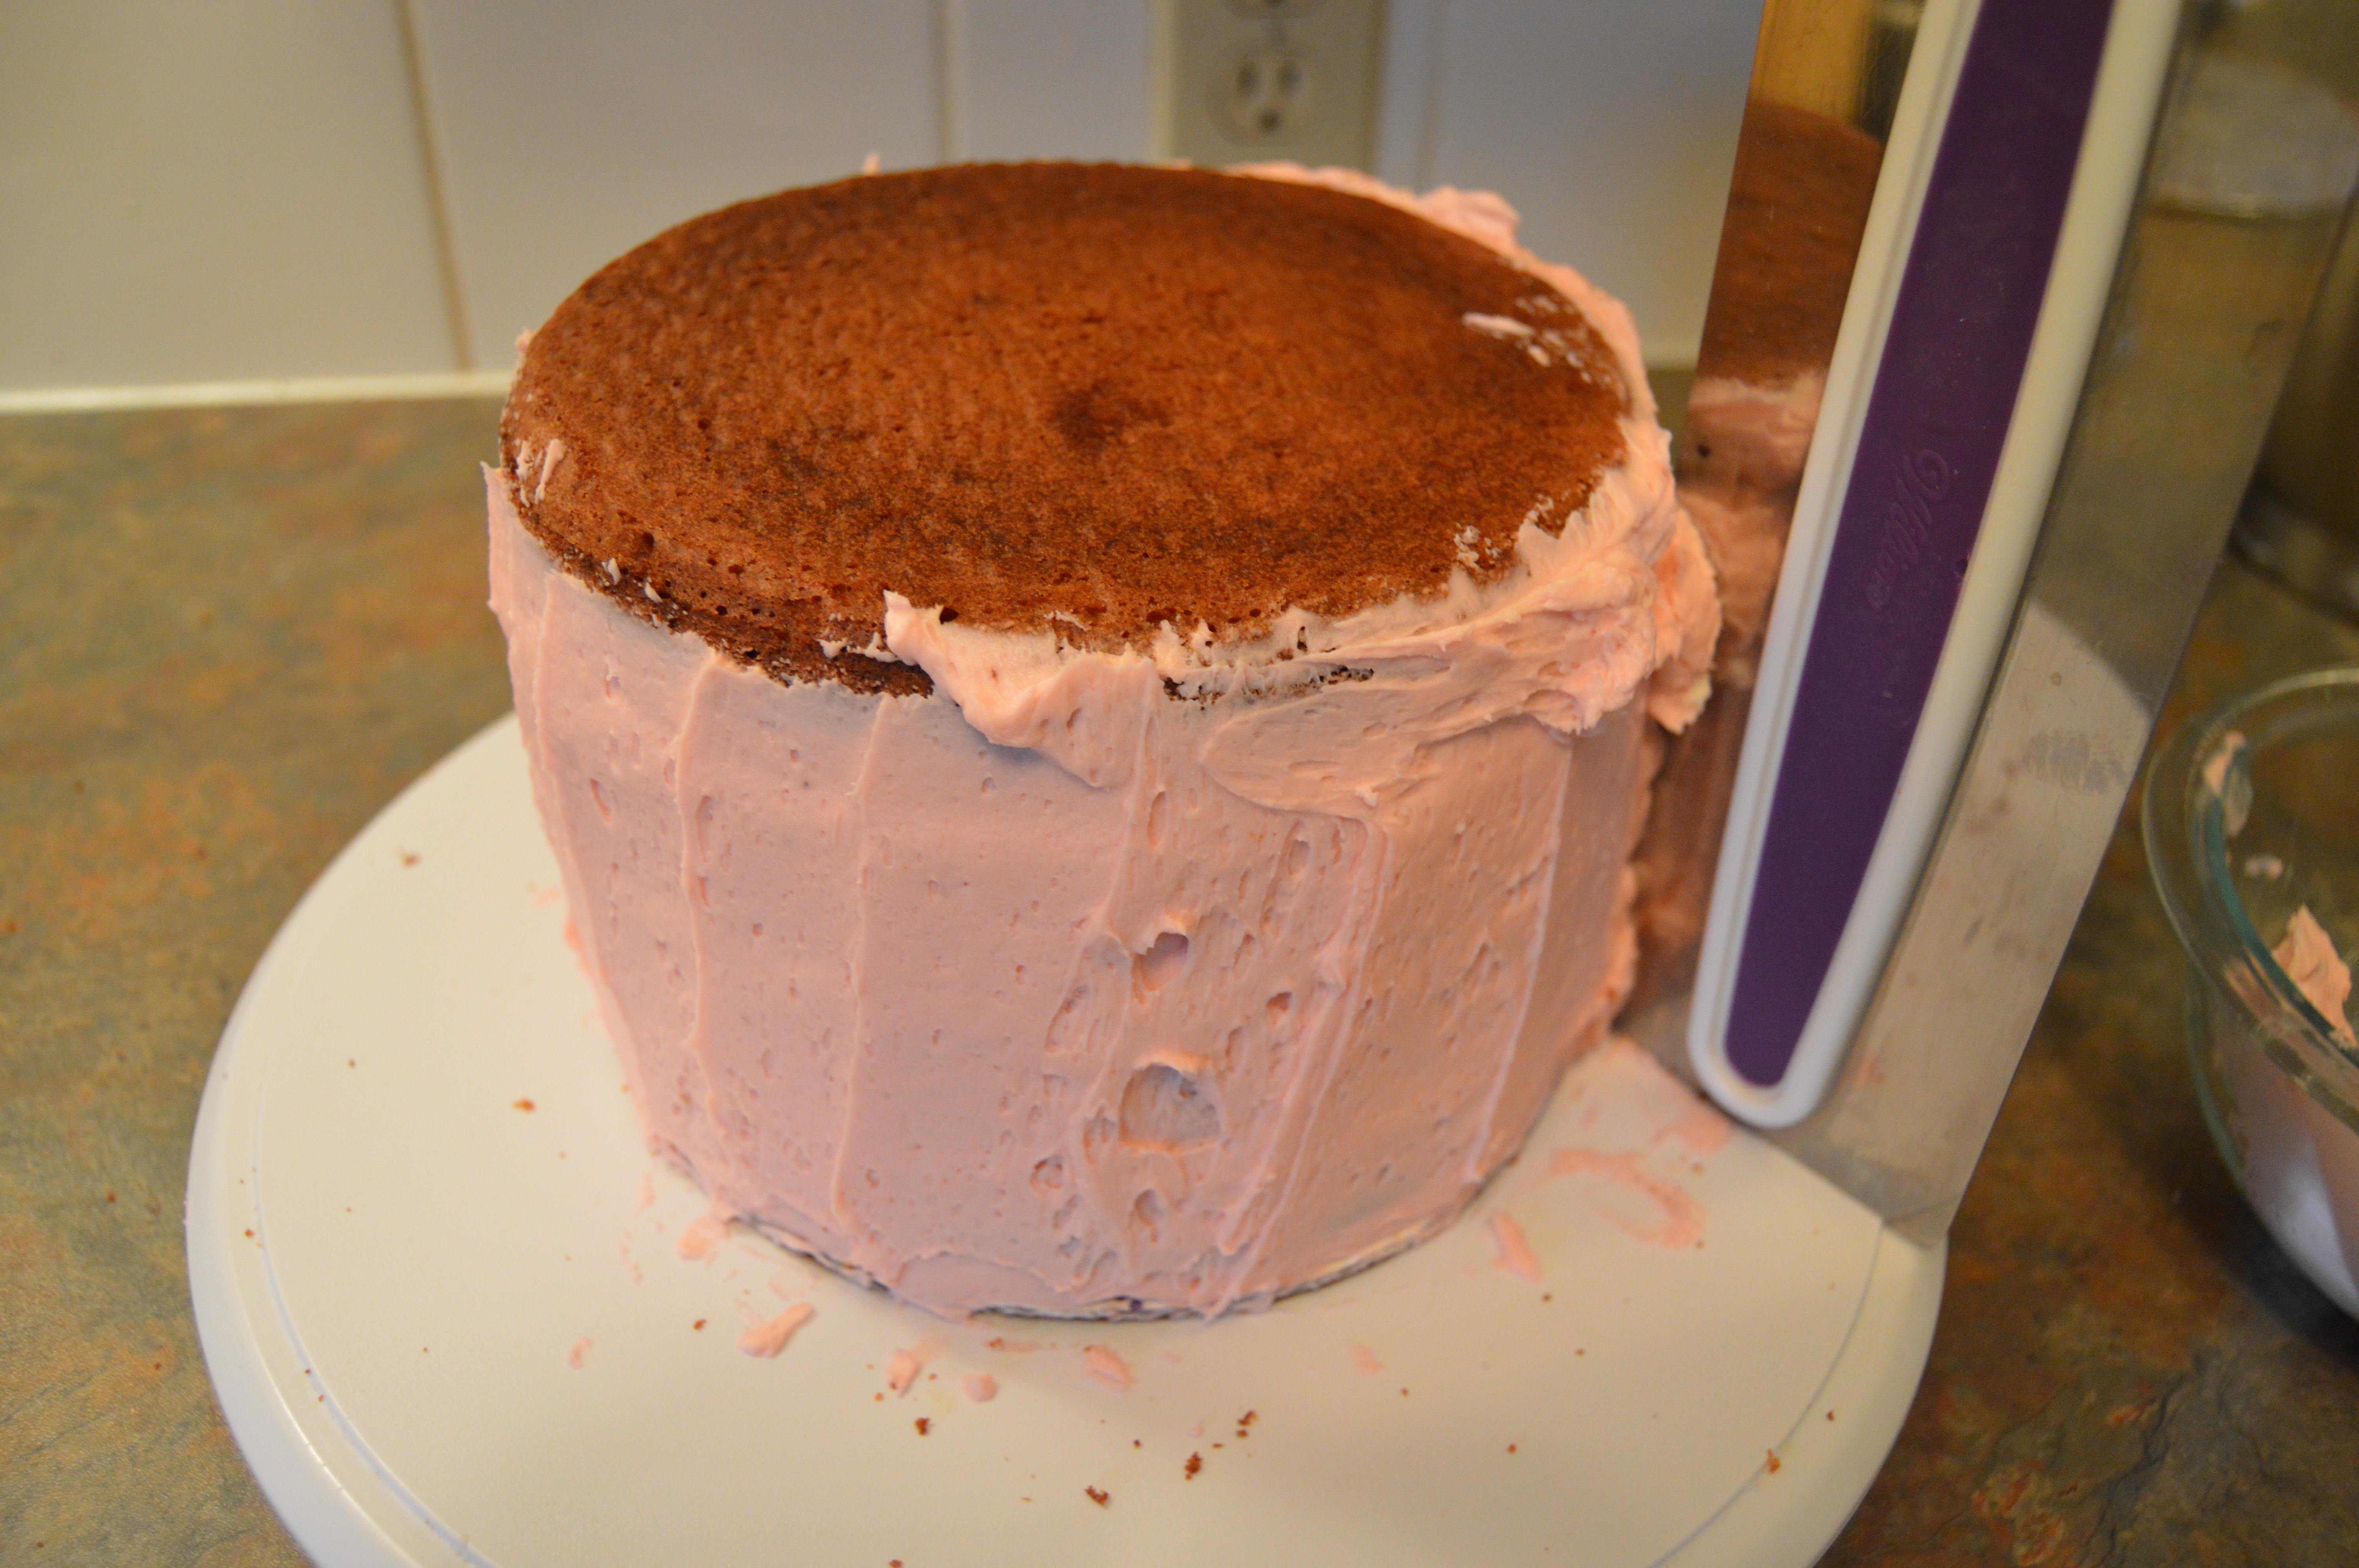
(4) Place your next cake layer on the frosted layer, pressing it down a bit. Frost this layer as you did with the first. Do the same with the third layer also. If you are using toothpicks, make sure the toothpicks are properly aligned above each other. Place the forth layer on the cake without frosting it. Some people frost the top of their cakes before frosting the sides. I do the top last as I place my left fingers on it while frosting the sides of the cake with my right hand as this gives me better control of the cake.

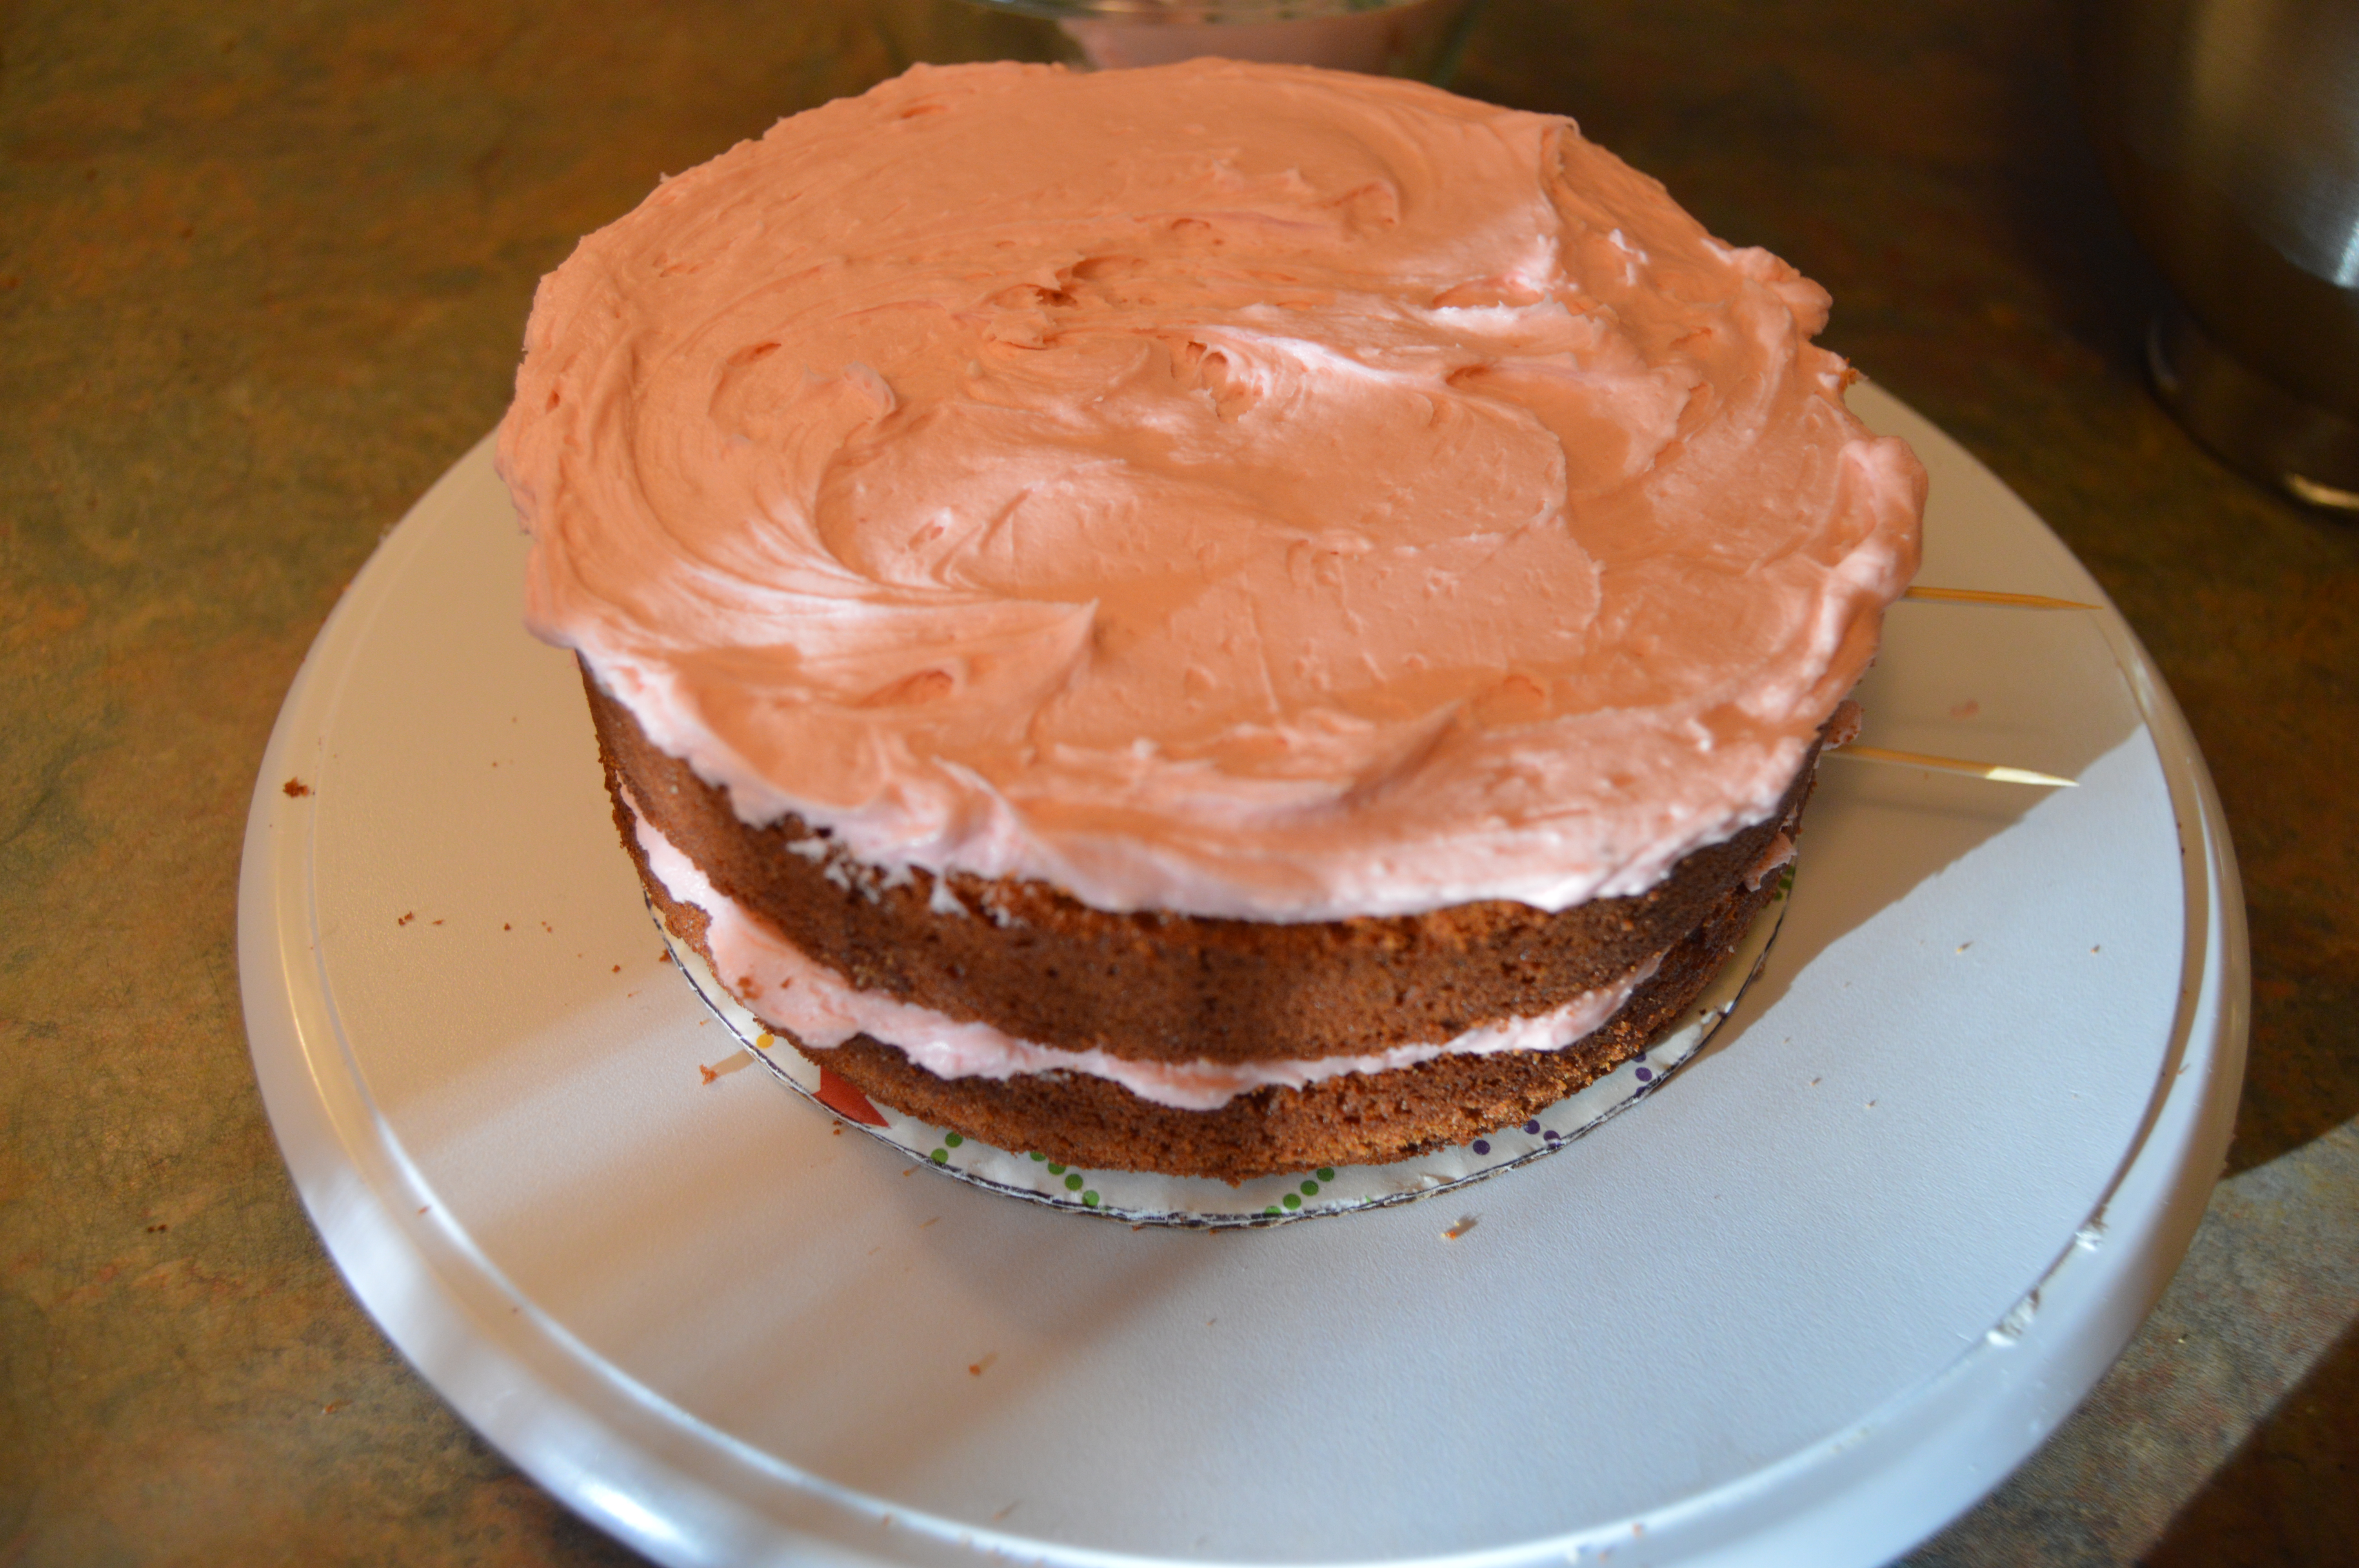

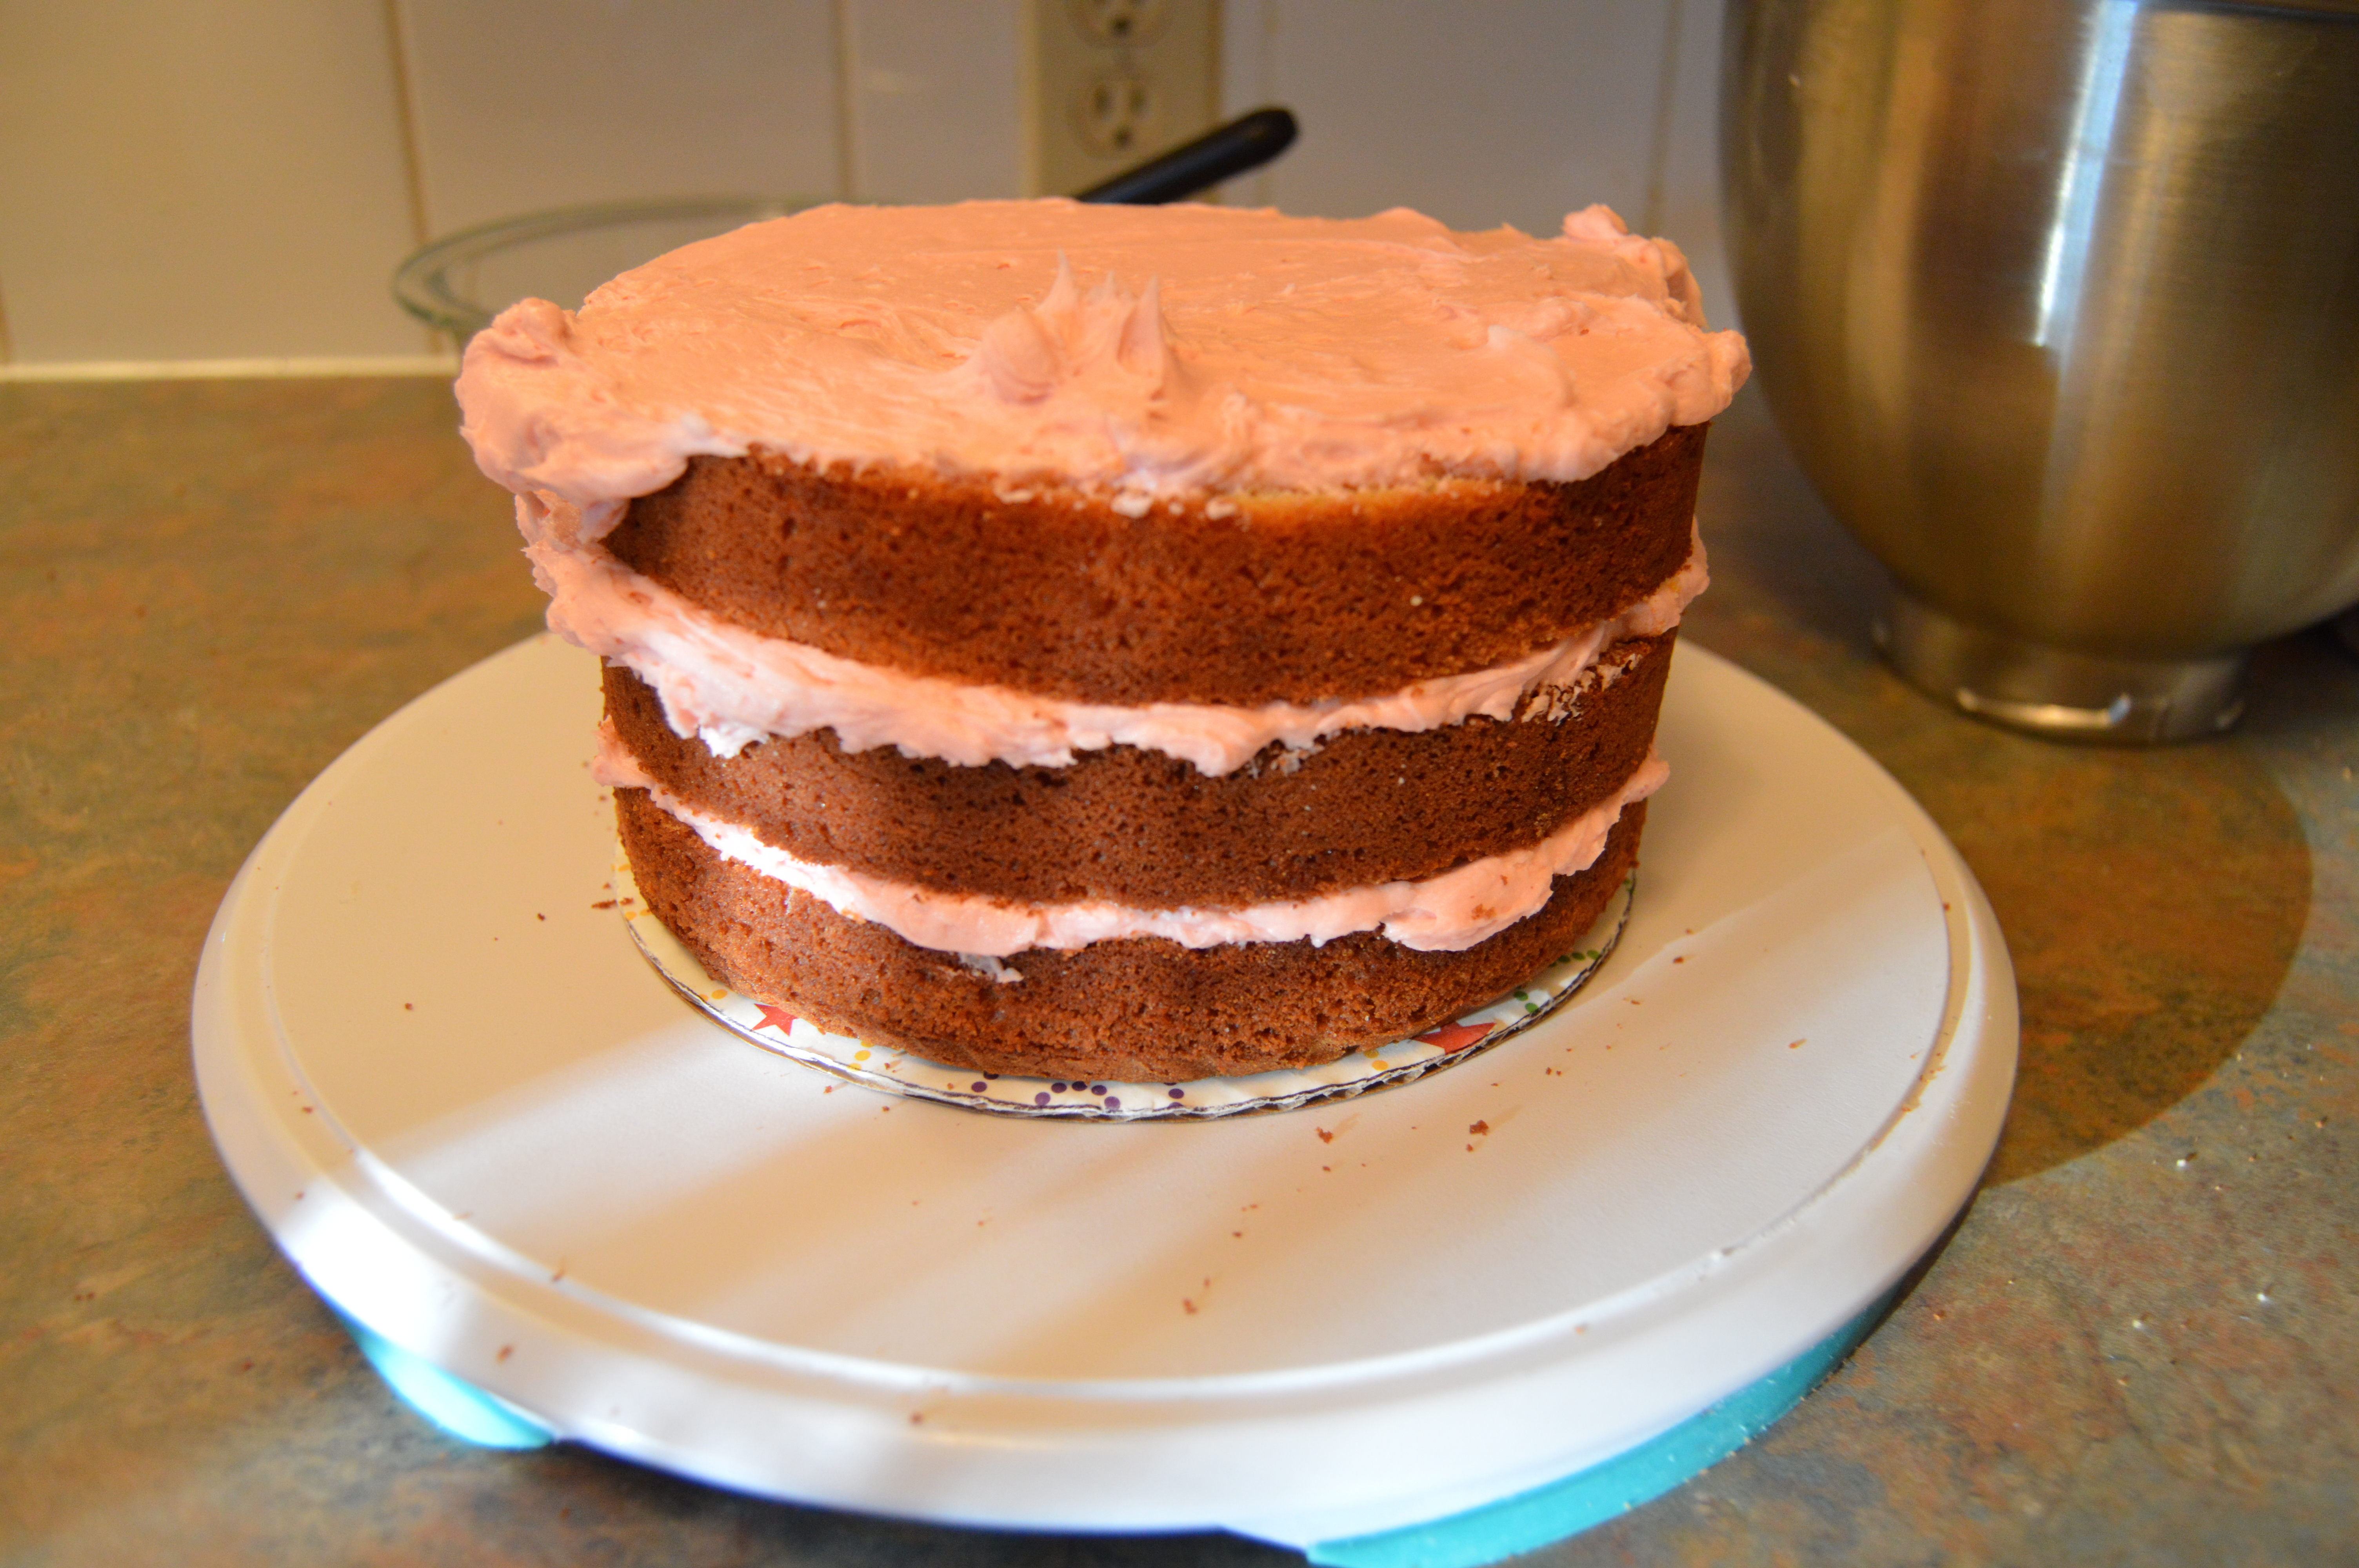
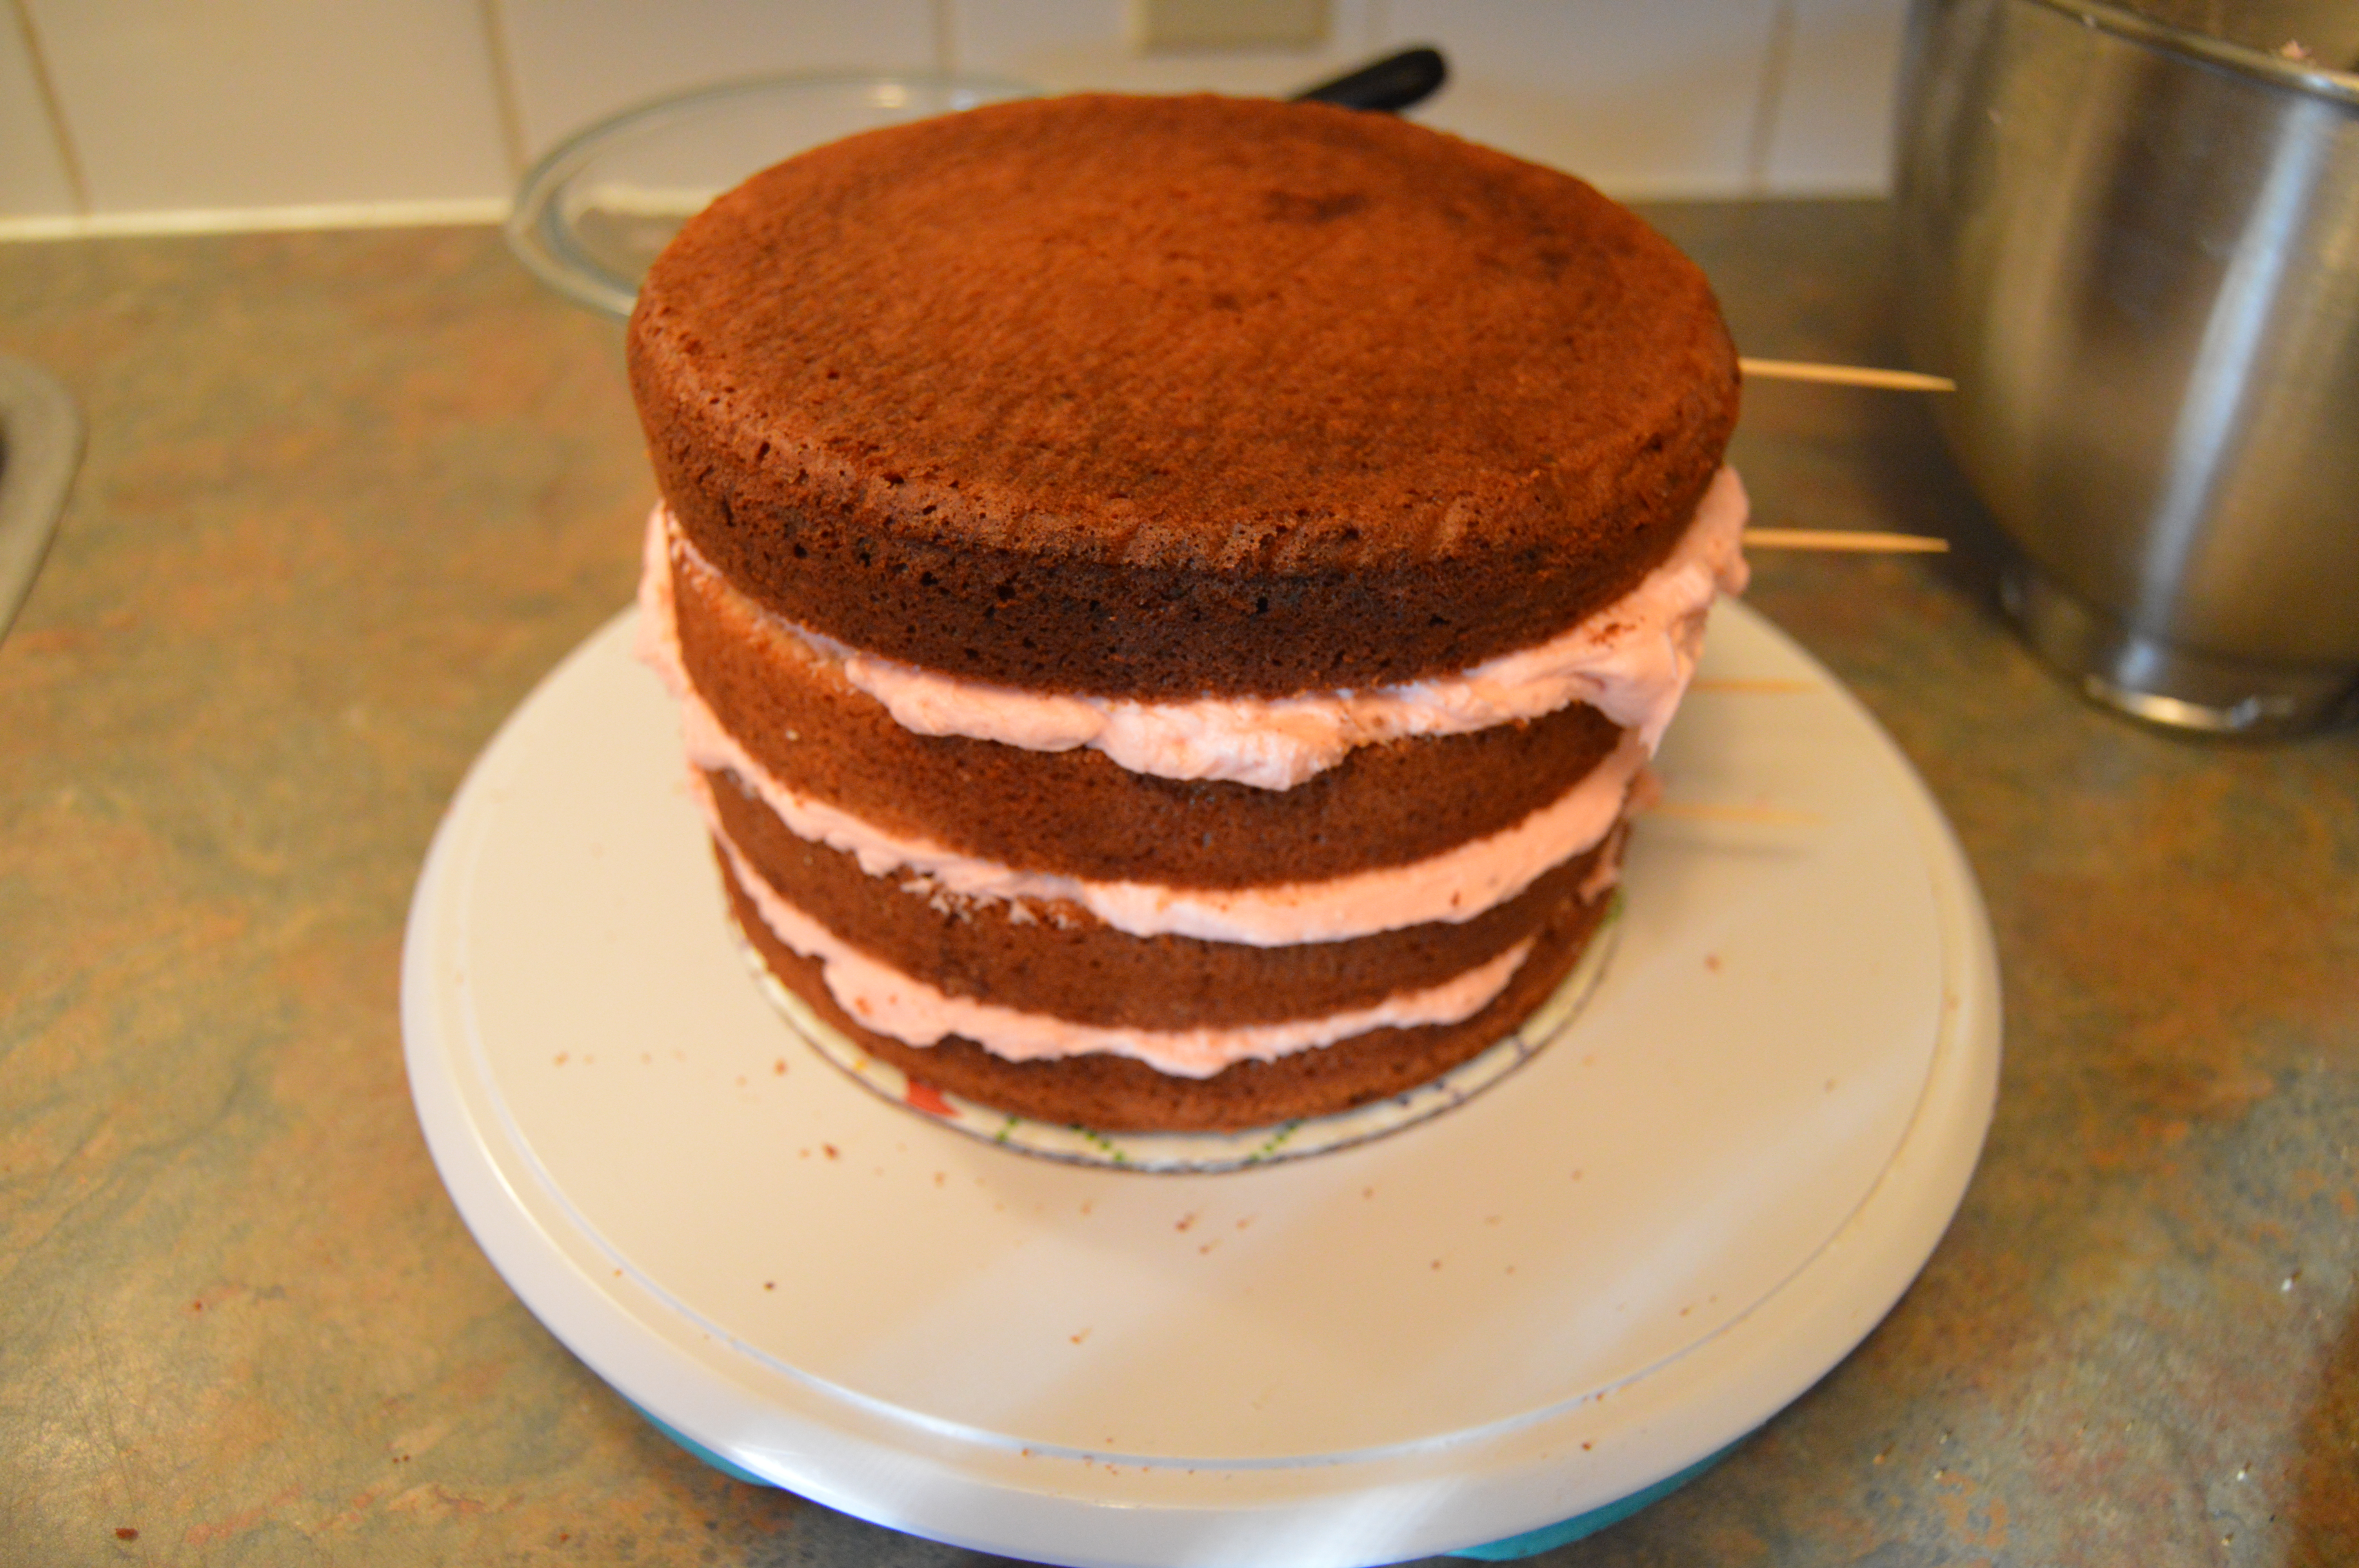
(5) After you have stacked all the cake layers, lean one edge of your icing smoother against the cake to make sure the cake has been stacked properly. Shift the tiers a bit if you notice some are indented and not properly aligned or if the cake is bent to a side. If you used toothpicks, its time to take them off. They have done their job.
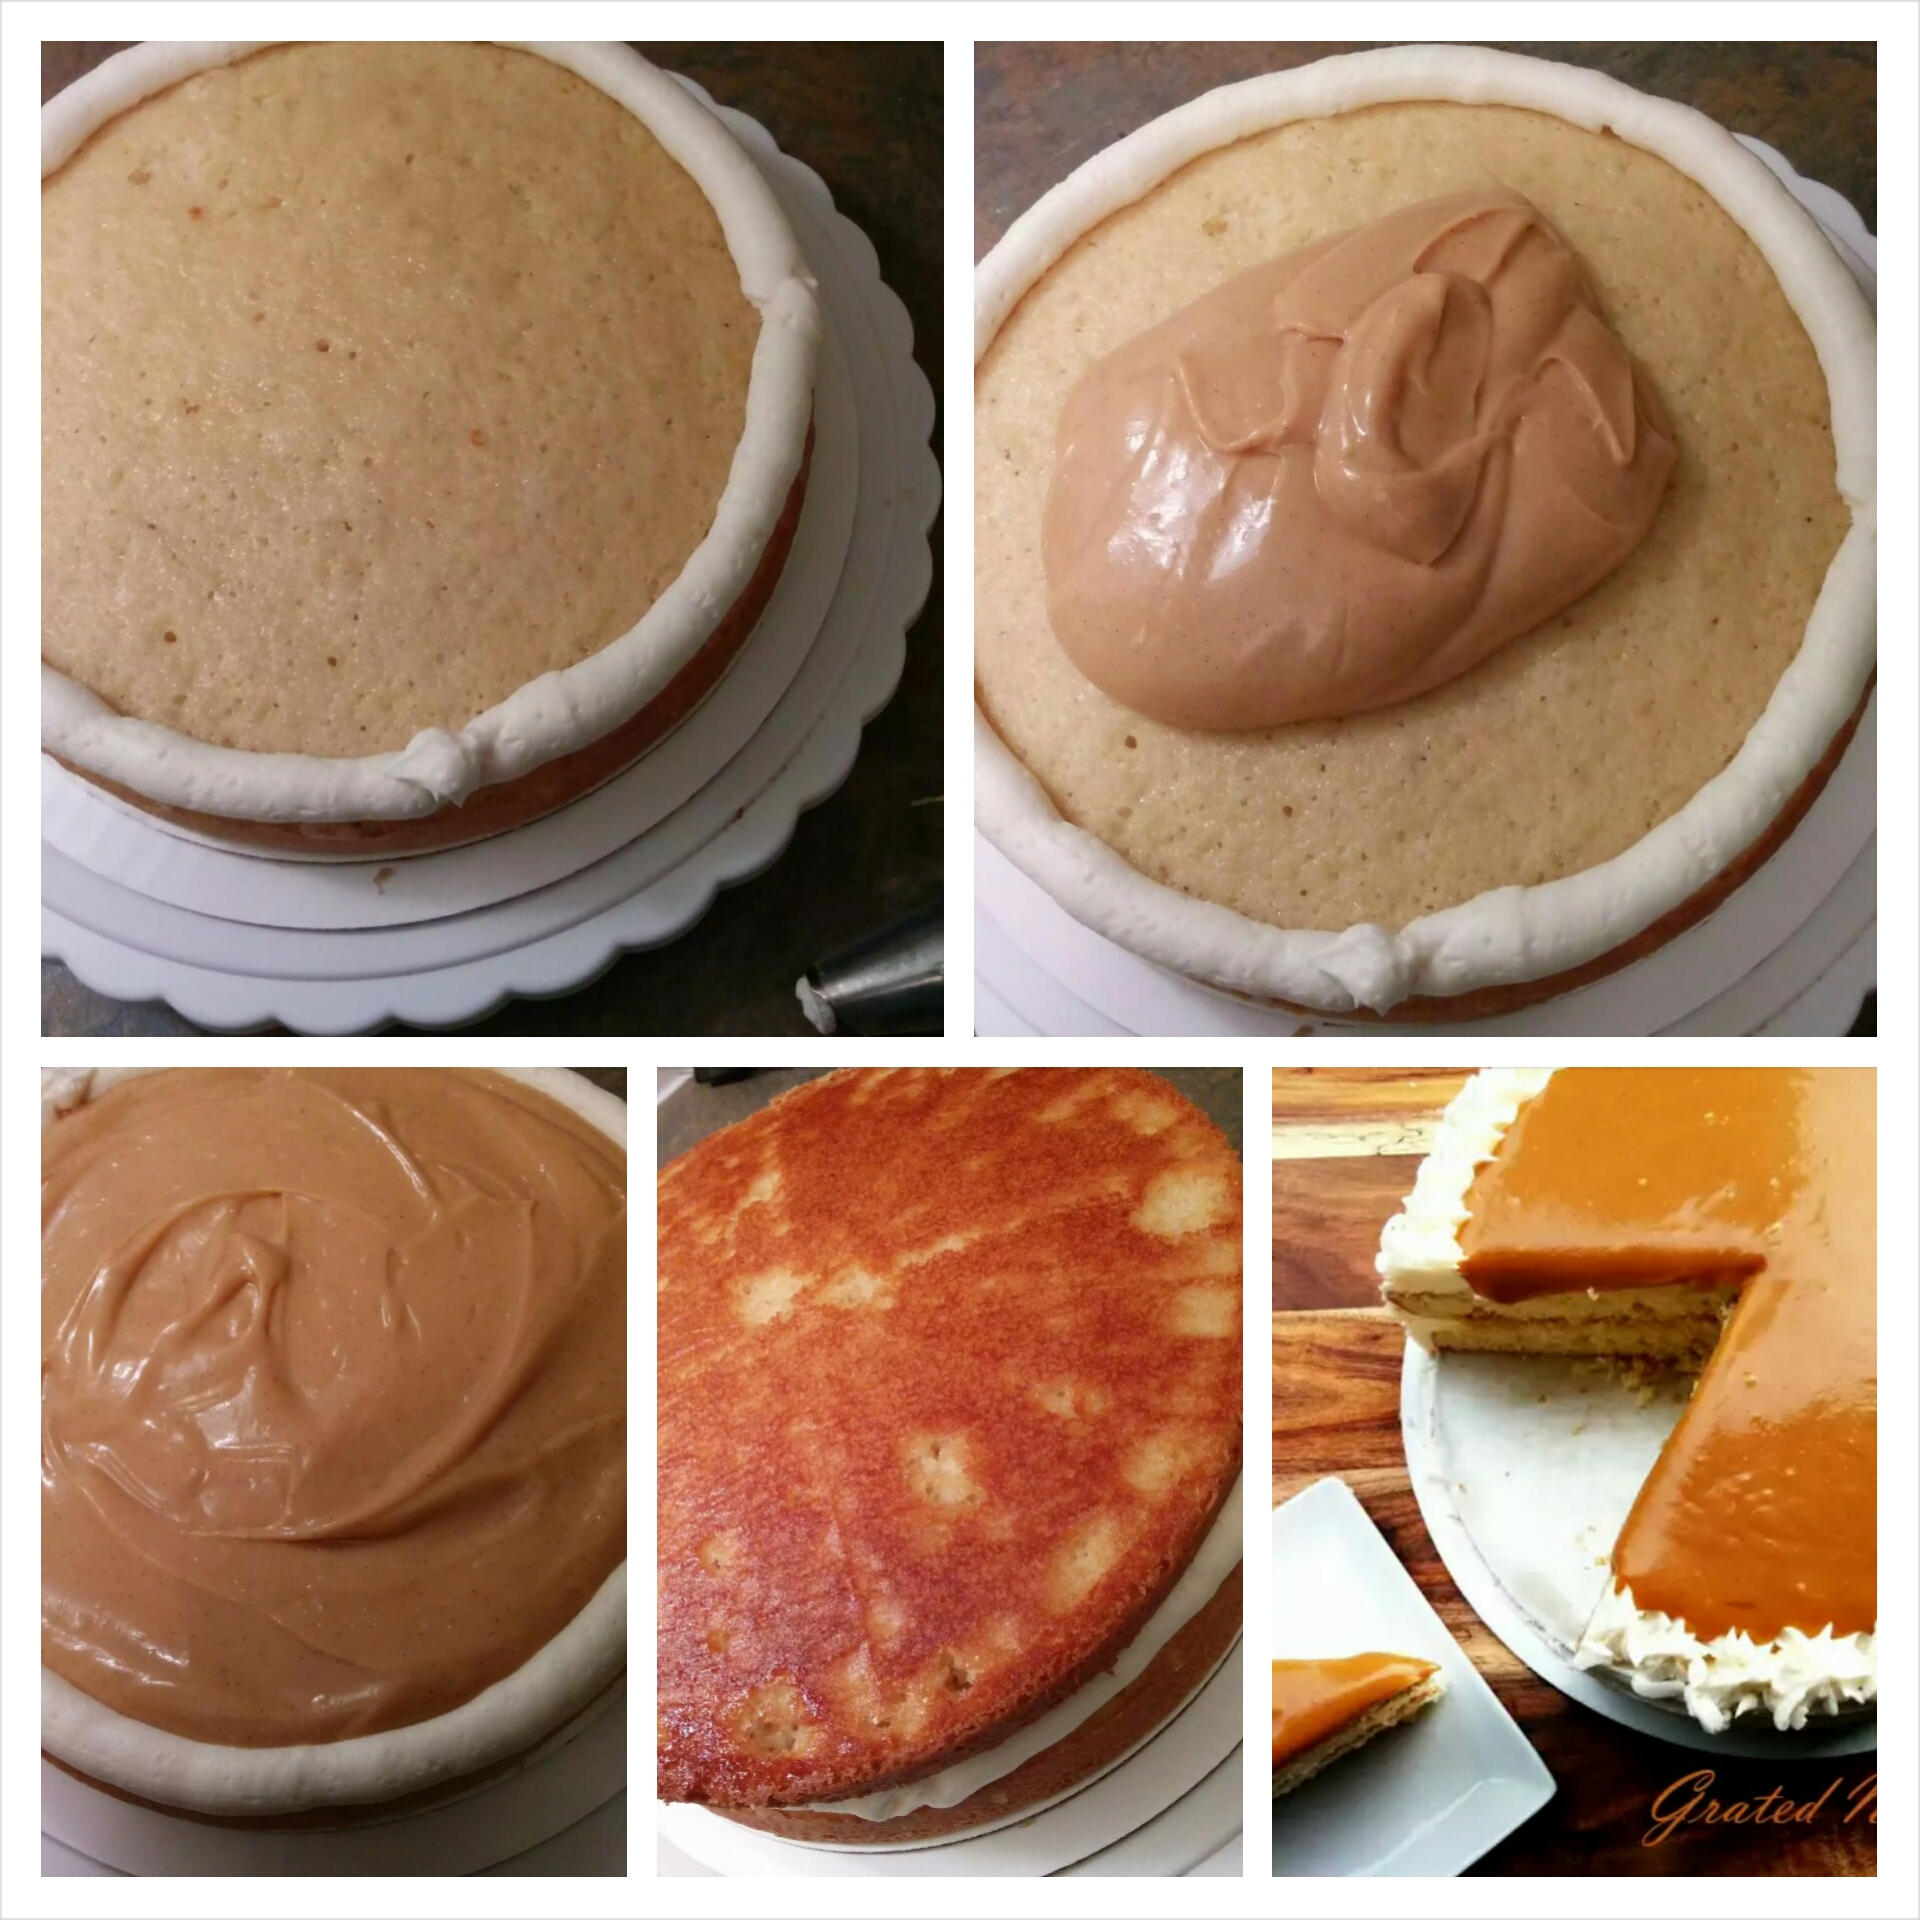
(6) If you are using a filling for the tiers as opposed to just frosting, the process will be different. First, fill a pipping bag fitted with a large round tip with frosting and make a boarder around the cake layer. Next fill the inside of the cake layer with the filling and spread it within the boarder. The boarder will help contain the filling and prevent it from mixing with and staining the outside cake frosting. You can read more on how to do this here.
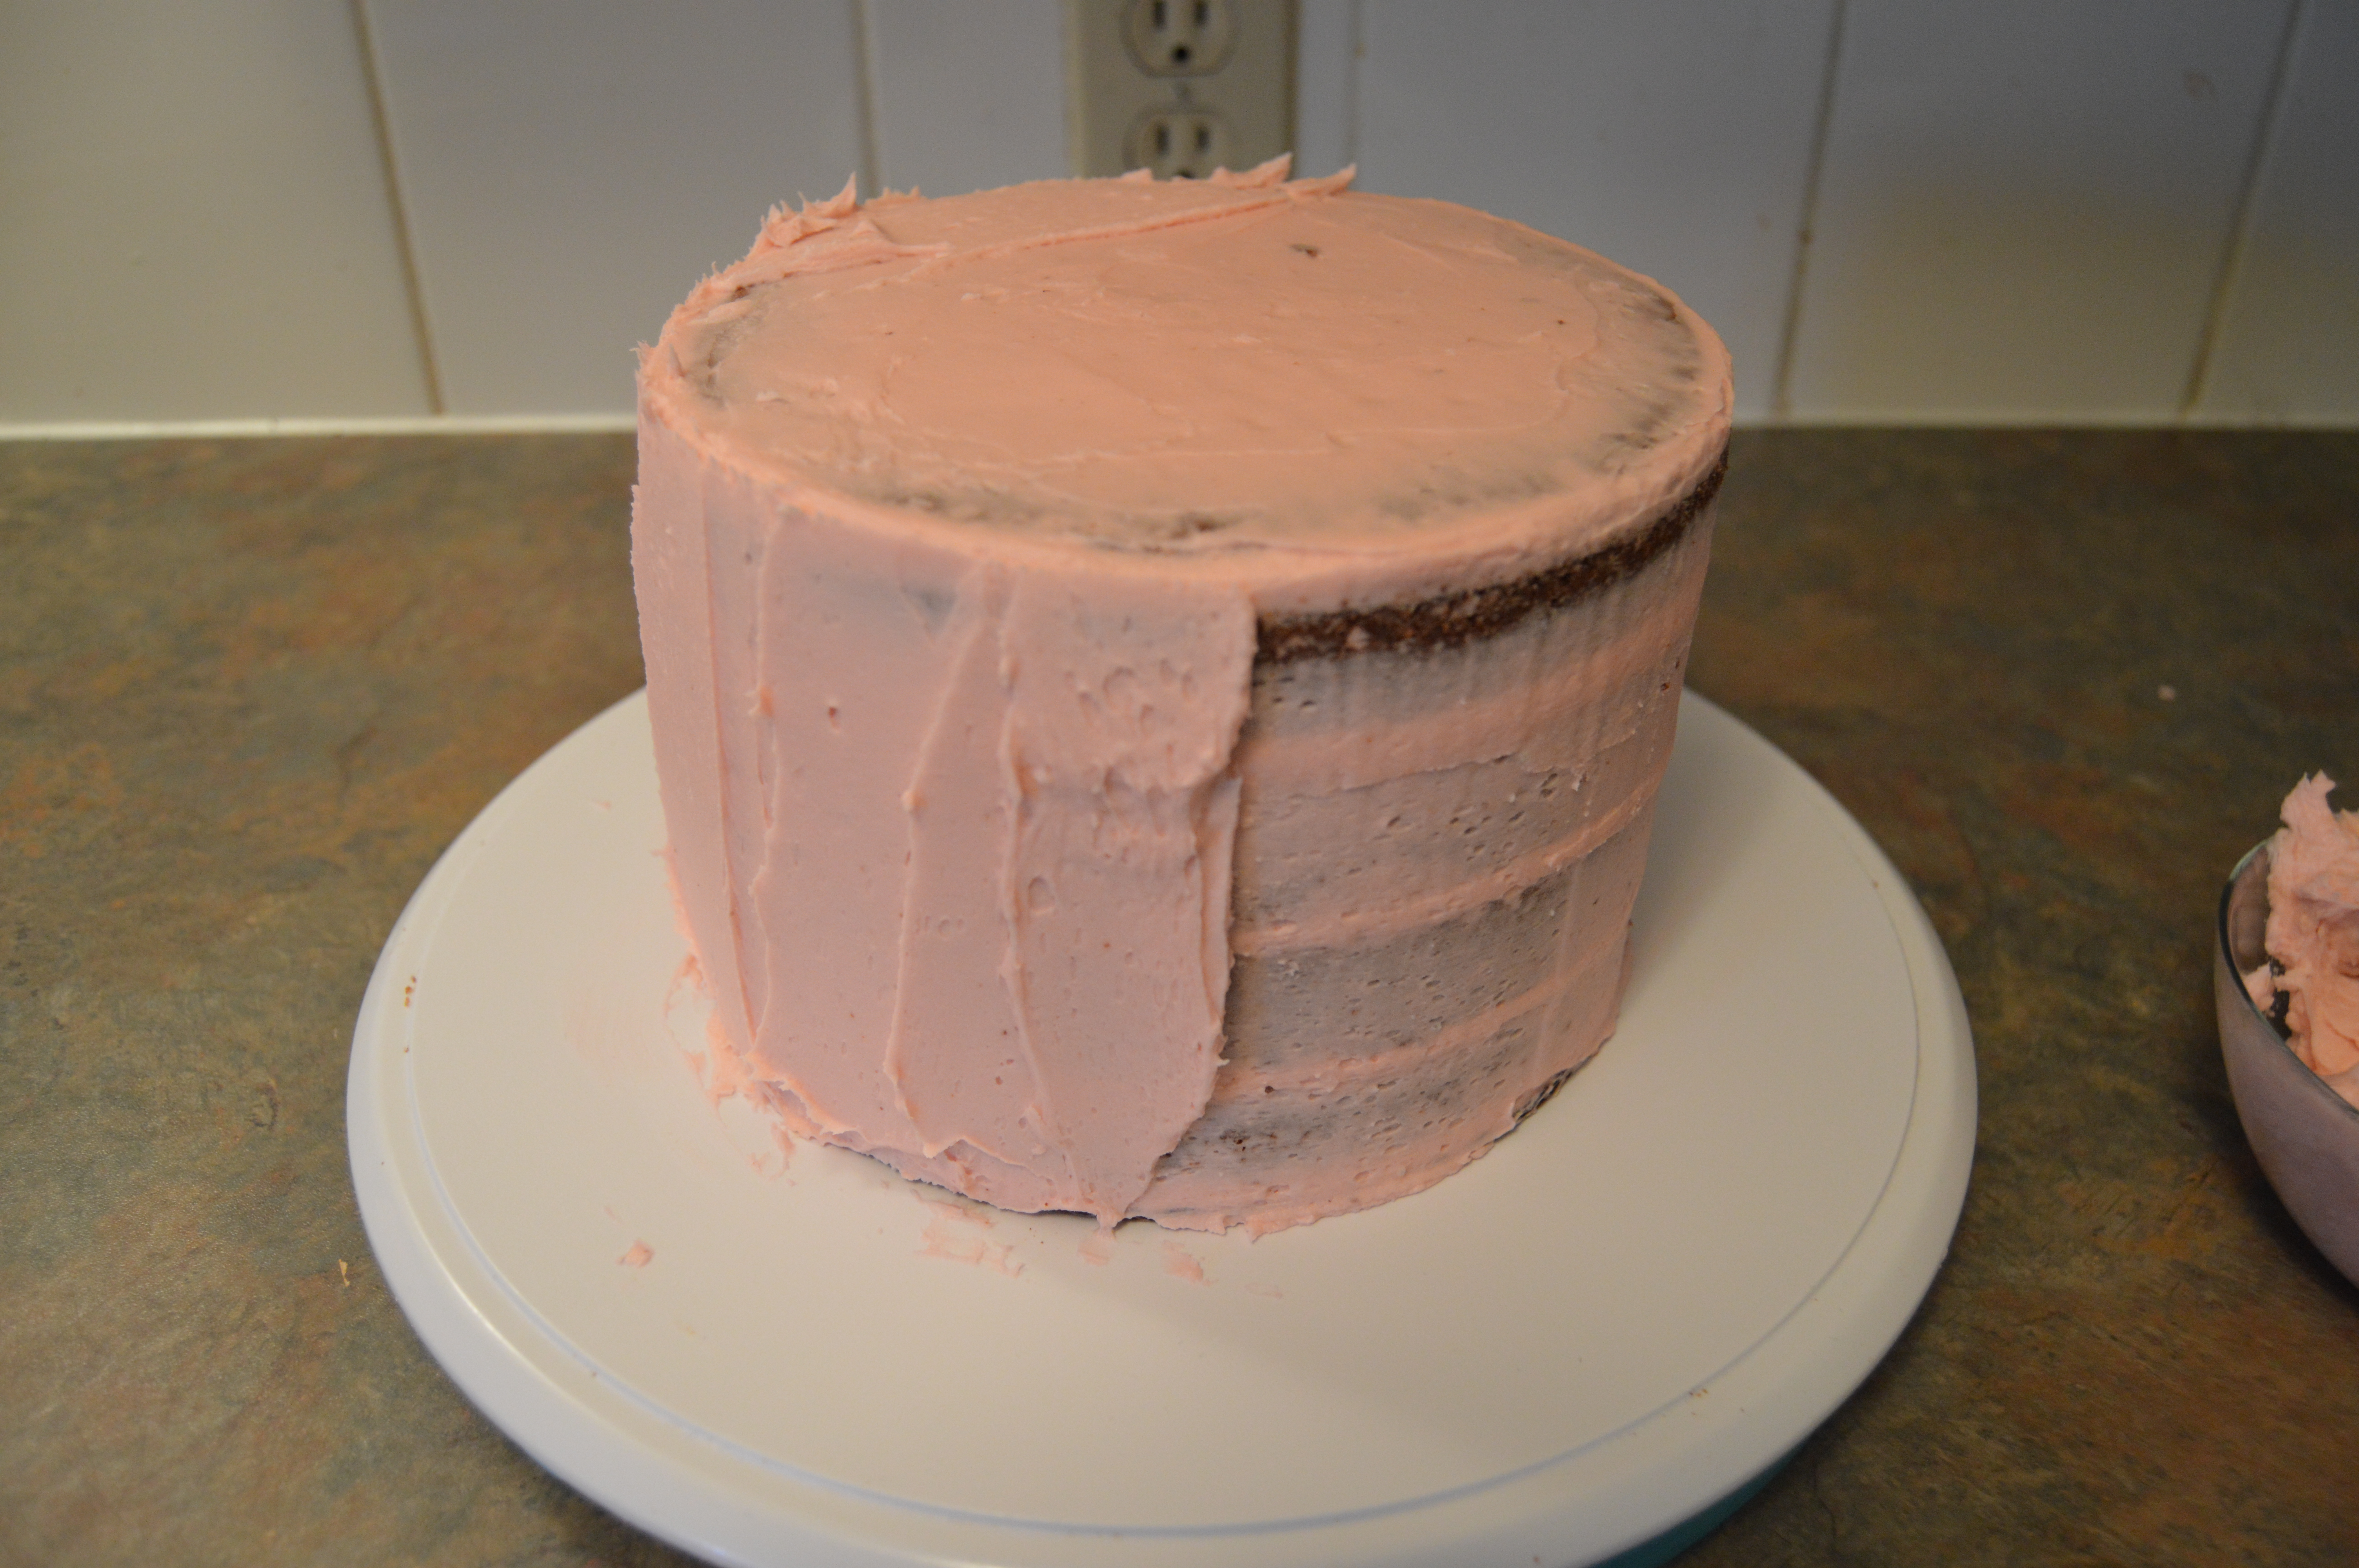
(B) CRUMB COAT
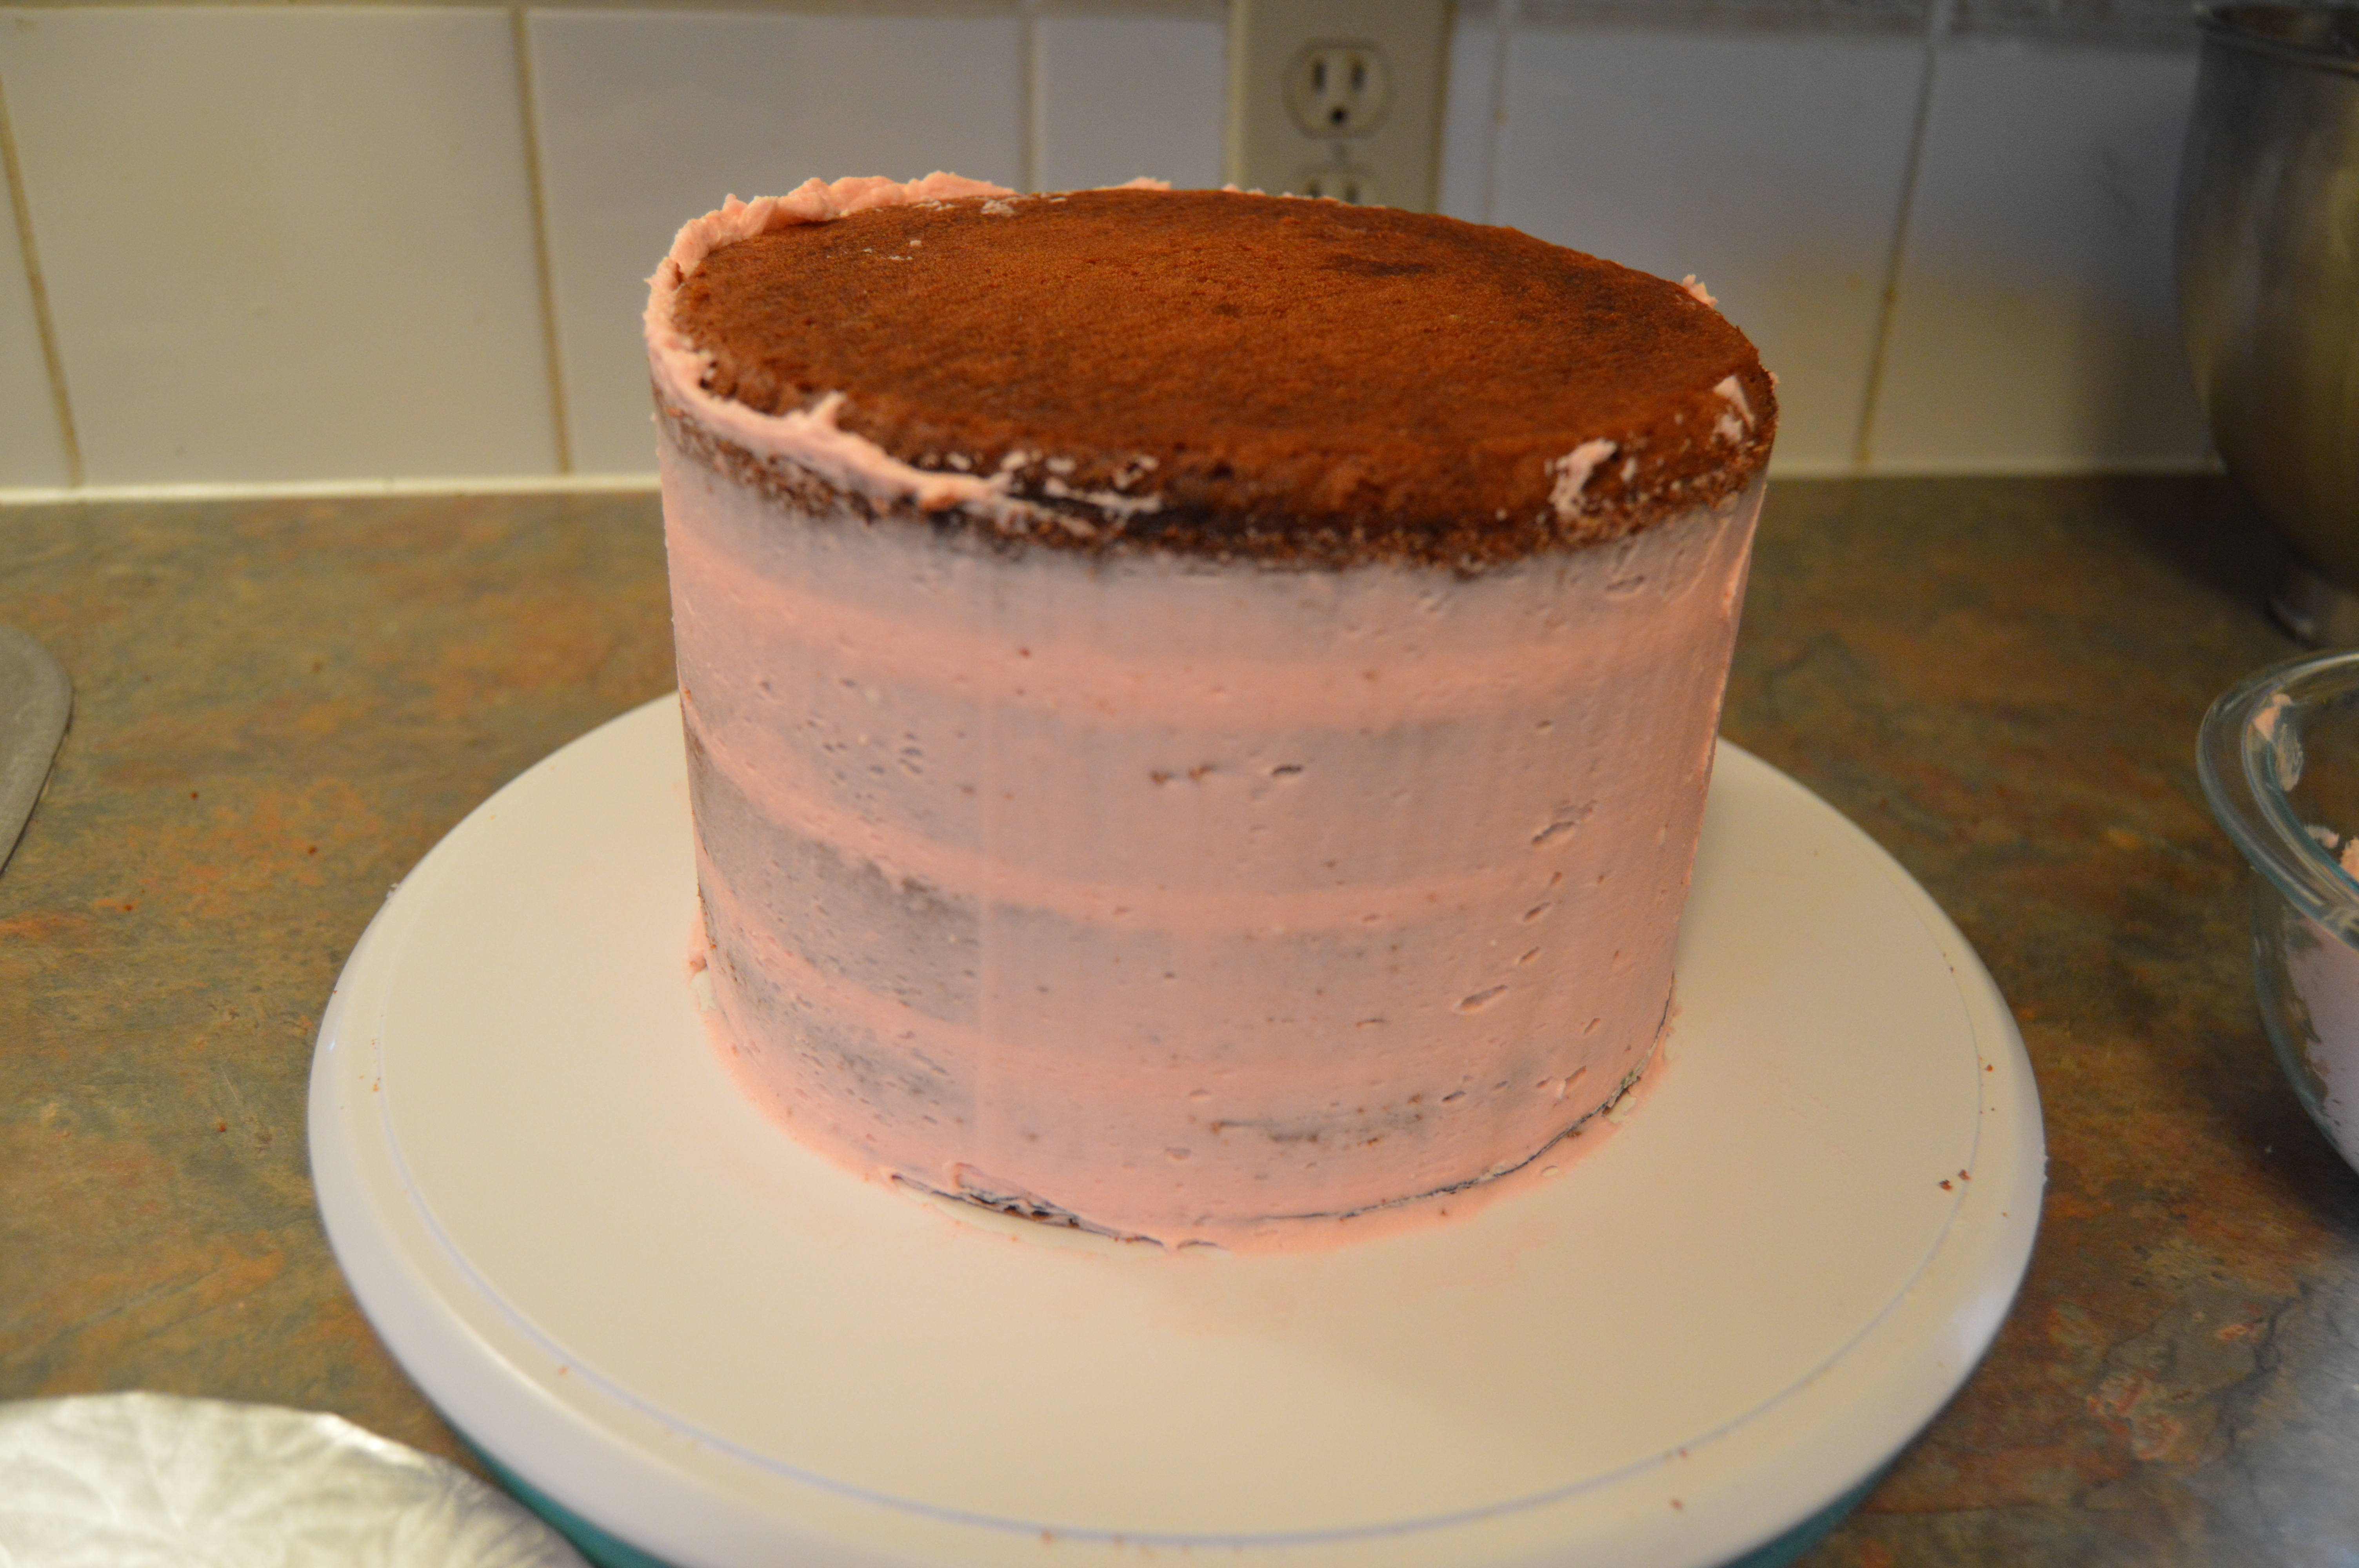
(1) Now its time to frost the sides of the cake. This first layer of frosting is called the crumb coat. This is because it seals in the cake crumbs so the other layers of frosting will be clean. Using your spatula, scoop some frosting into the small glass bowl. This frosting will be used to frost the sides and the top of the cake. You will be applying frosting to the sides of the cake using a palette knife and remember my General Rule 2: the palette knife must never go into the mixing bowl containing the bulk of your frosting.
(2) While rotating the turntable as needed, apply frosting to the sides of the cake using a palette knife. Do not be stingy when applying the frosting. Focus on the bottom and top part of the cake as these are the usual trouble areas. Do not get fancy here; just spread the frosting on the sides of the cake.
(3) Using your icing smoother, scrape off the excess frosting from the side of the cake. Make sure the base of the smoother is touching the edge of the cake card all the time and the smoother is resting entirely on the turntable (It should be at 90 degrees with the cake and turntable). Turn your turntable when scraping the side of the cake. Technically, the icing smoother should not move. The cake and the turntable should do all the moving. Try to do it in one complete turn. You might need to repeat the process more than once to make the sides smooth. Scrape the collected frosting into the glass bowl and clean the icing scarper with a paper towel between each scrape.
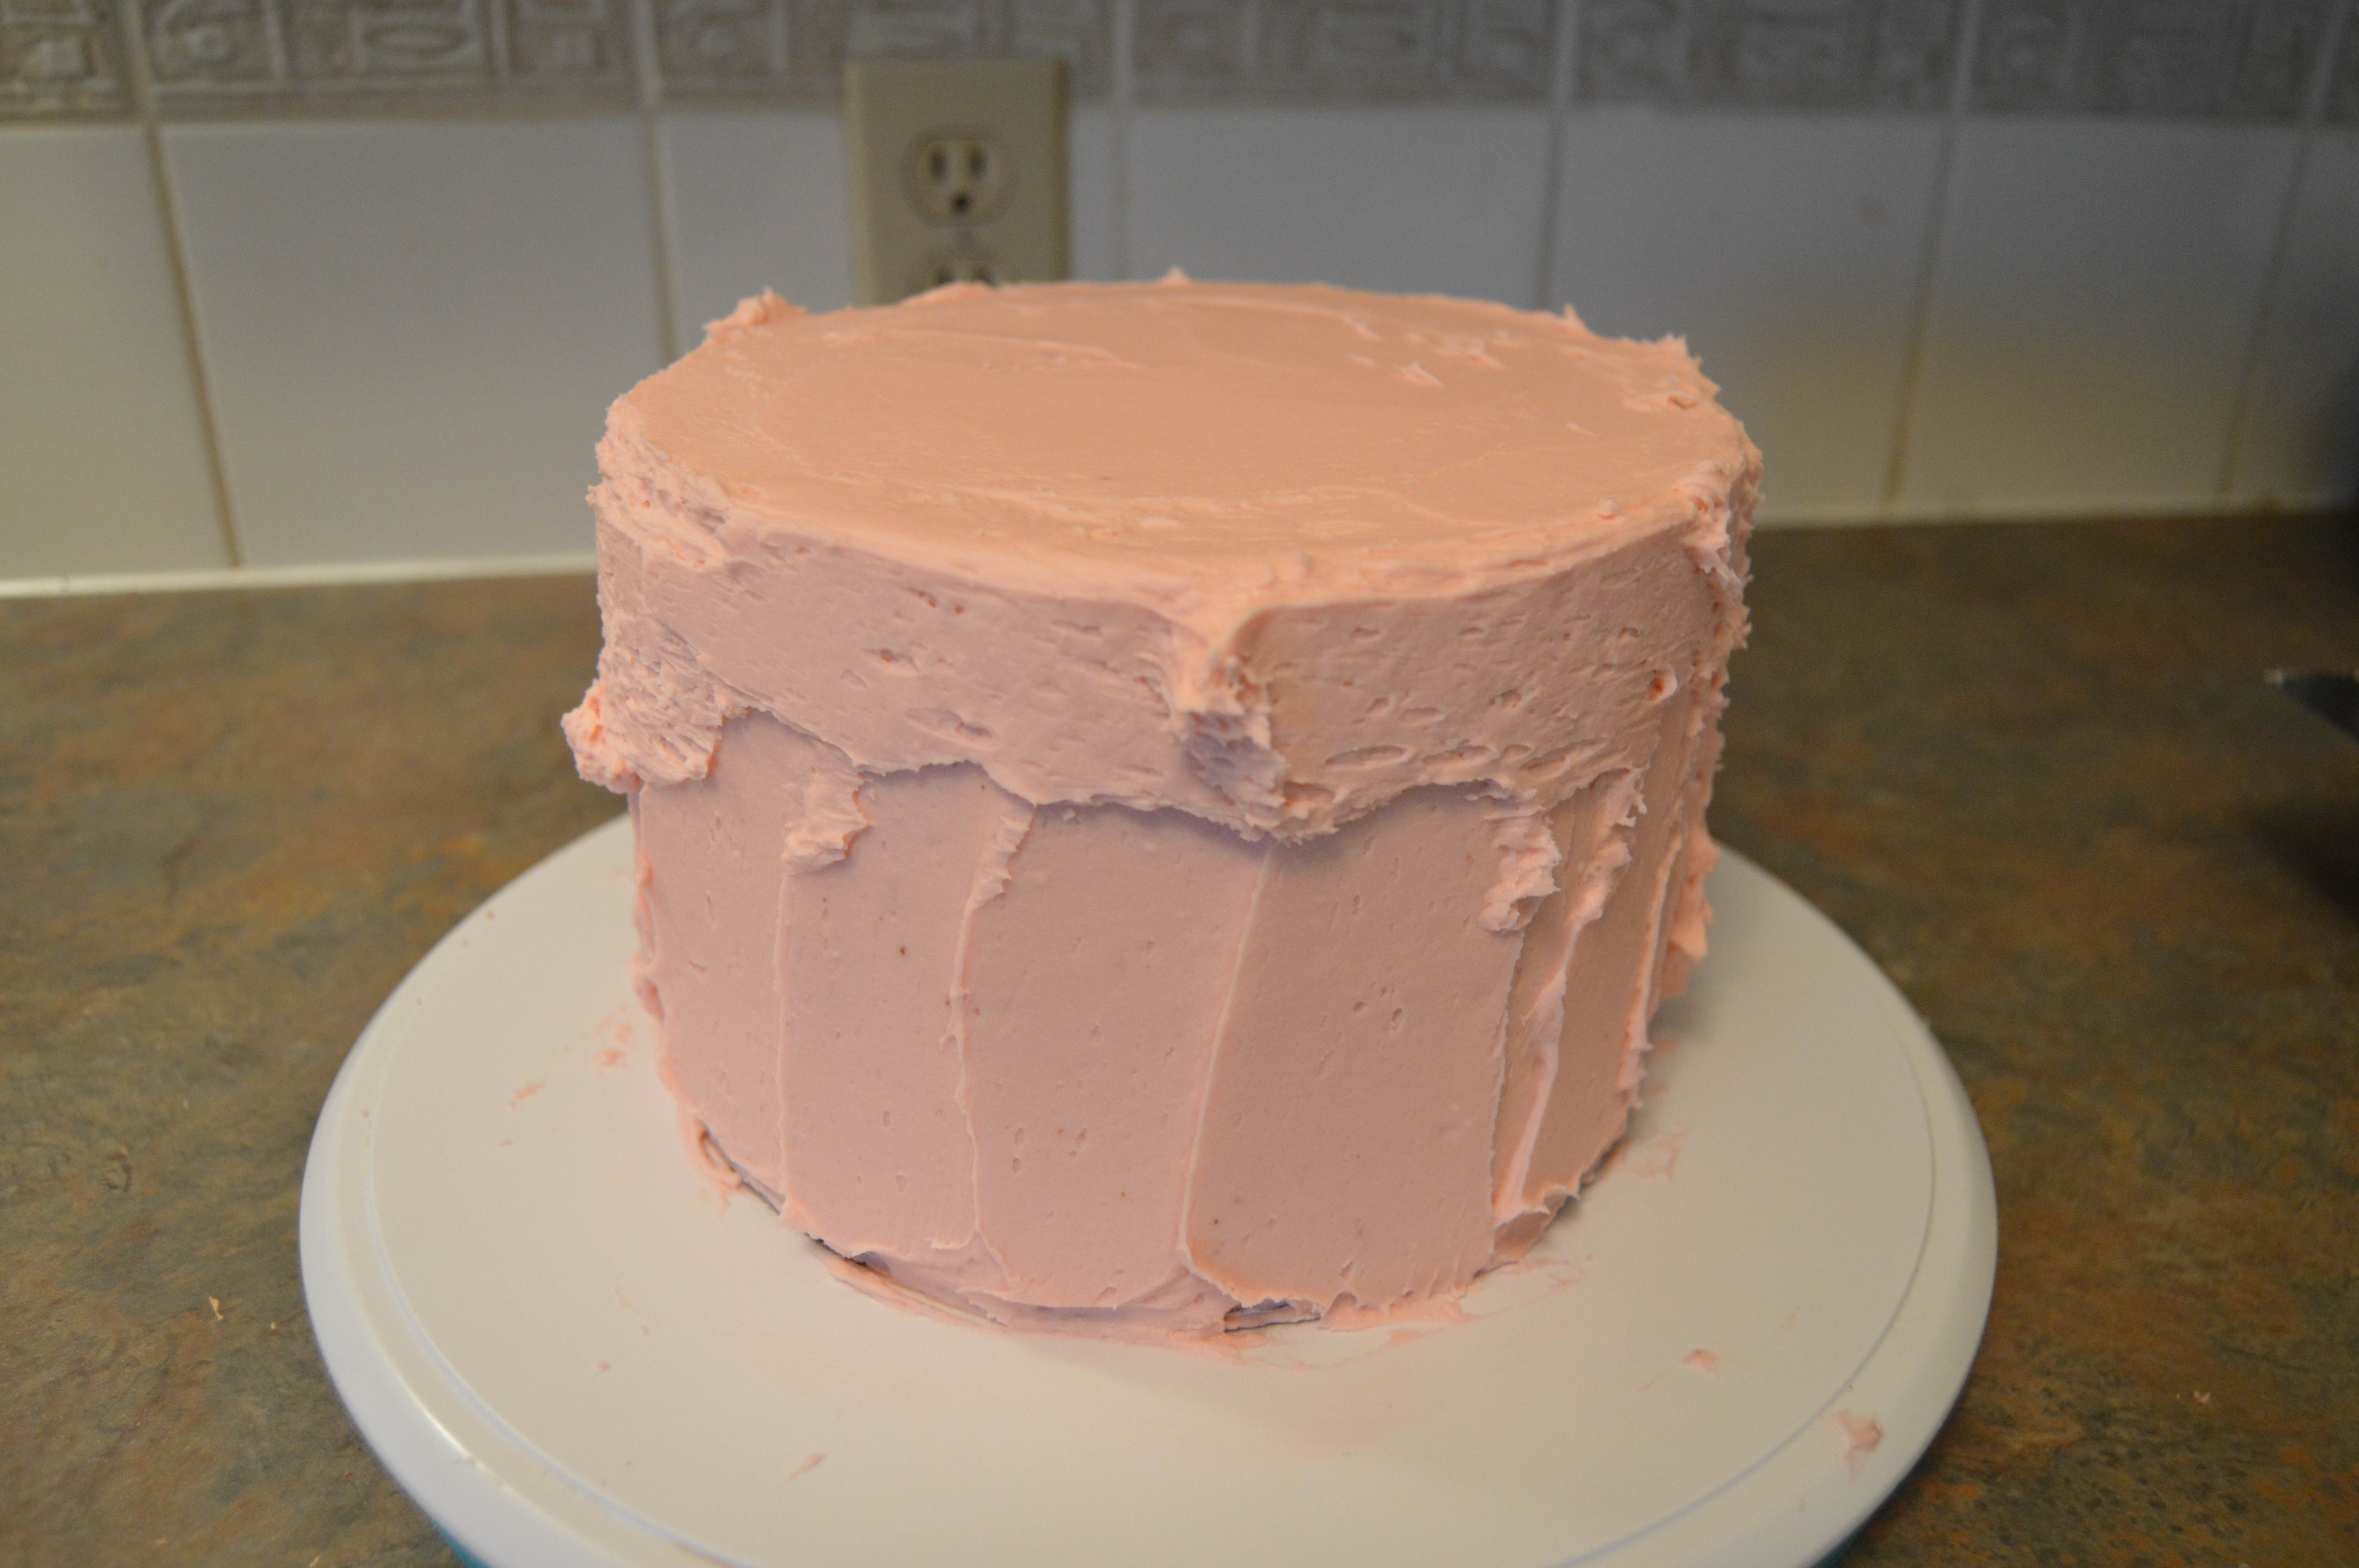
(4) Next, apply a generous amount of frosting on top of the cake using the excess frosting you scraped off the side of the cake. Add more clean frosting if you need to. Using your palette knife, spread the frosting over the edge of the cake. Most bakers will attest to the fact that the top sides of the cake is the most problematic. There always seems not to be enough frosting there. Making sure your frosting on top goes over the edge of the cake is a good way of ensuring that you have enough frosting on the top sides of your cake.
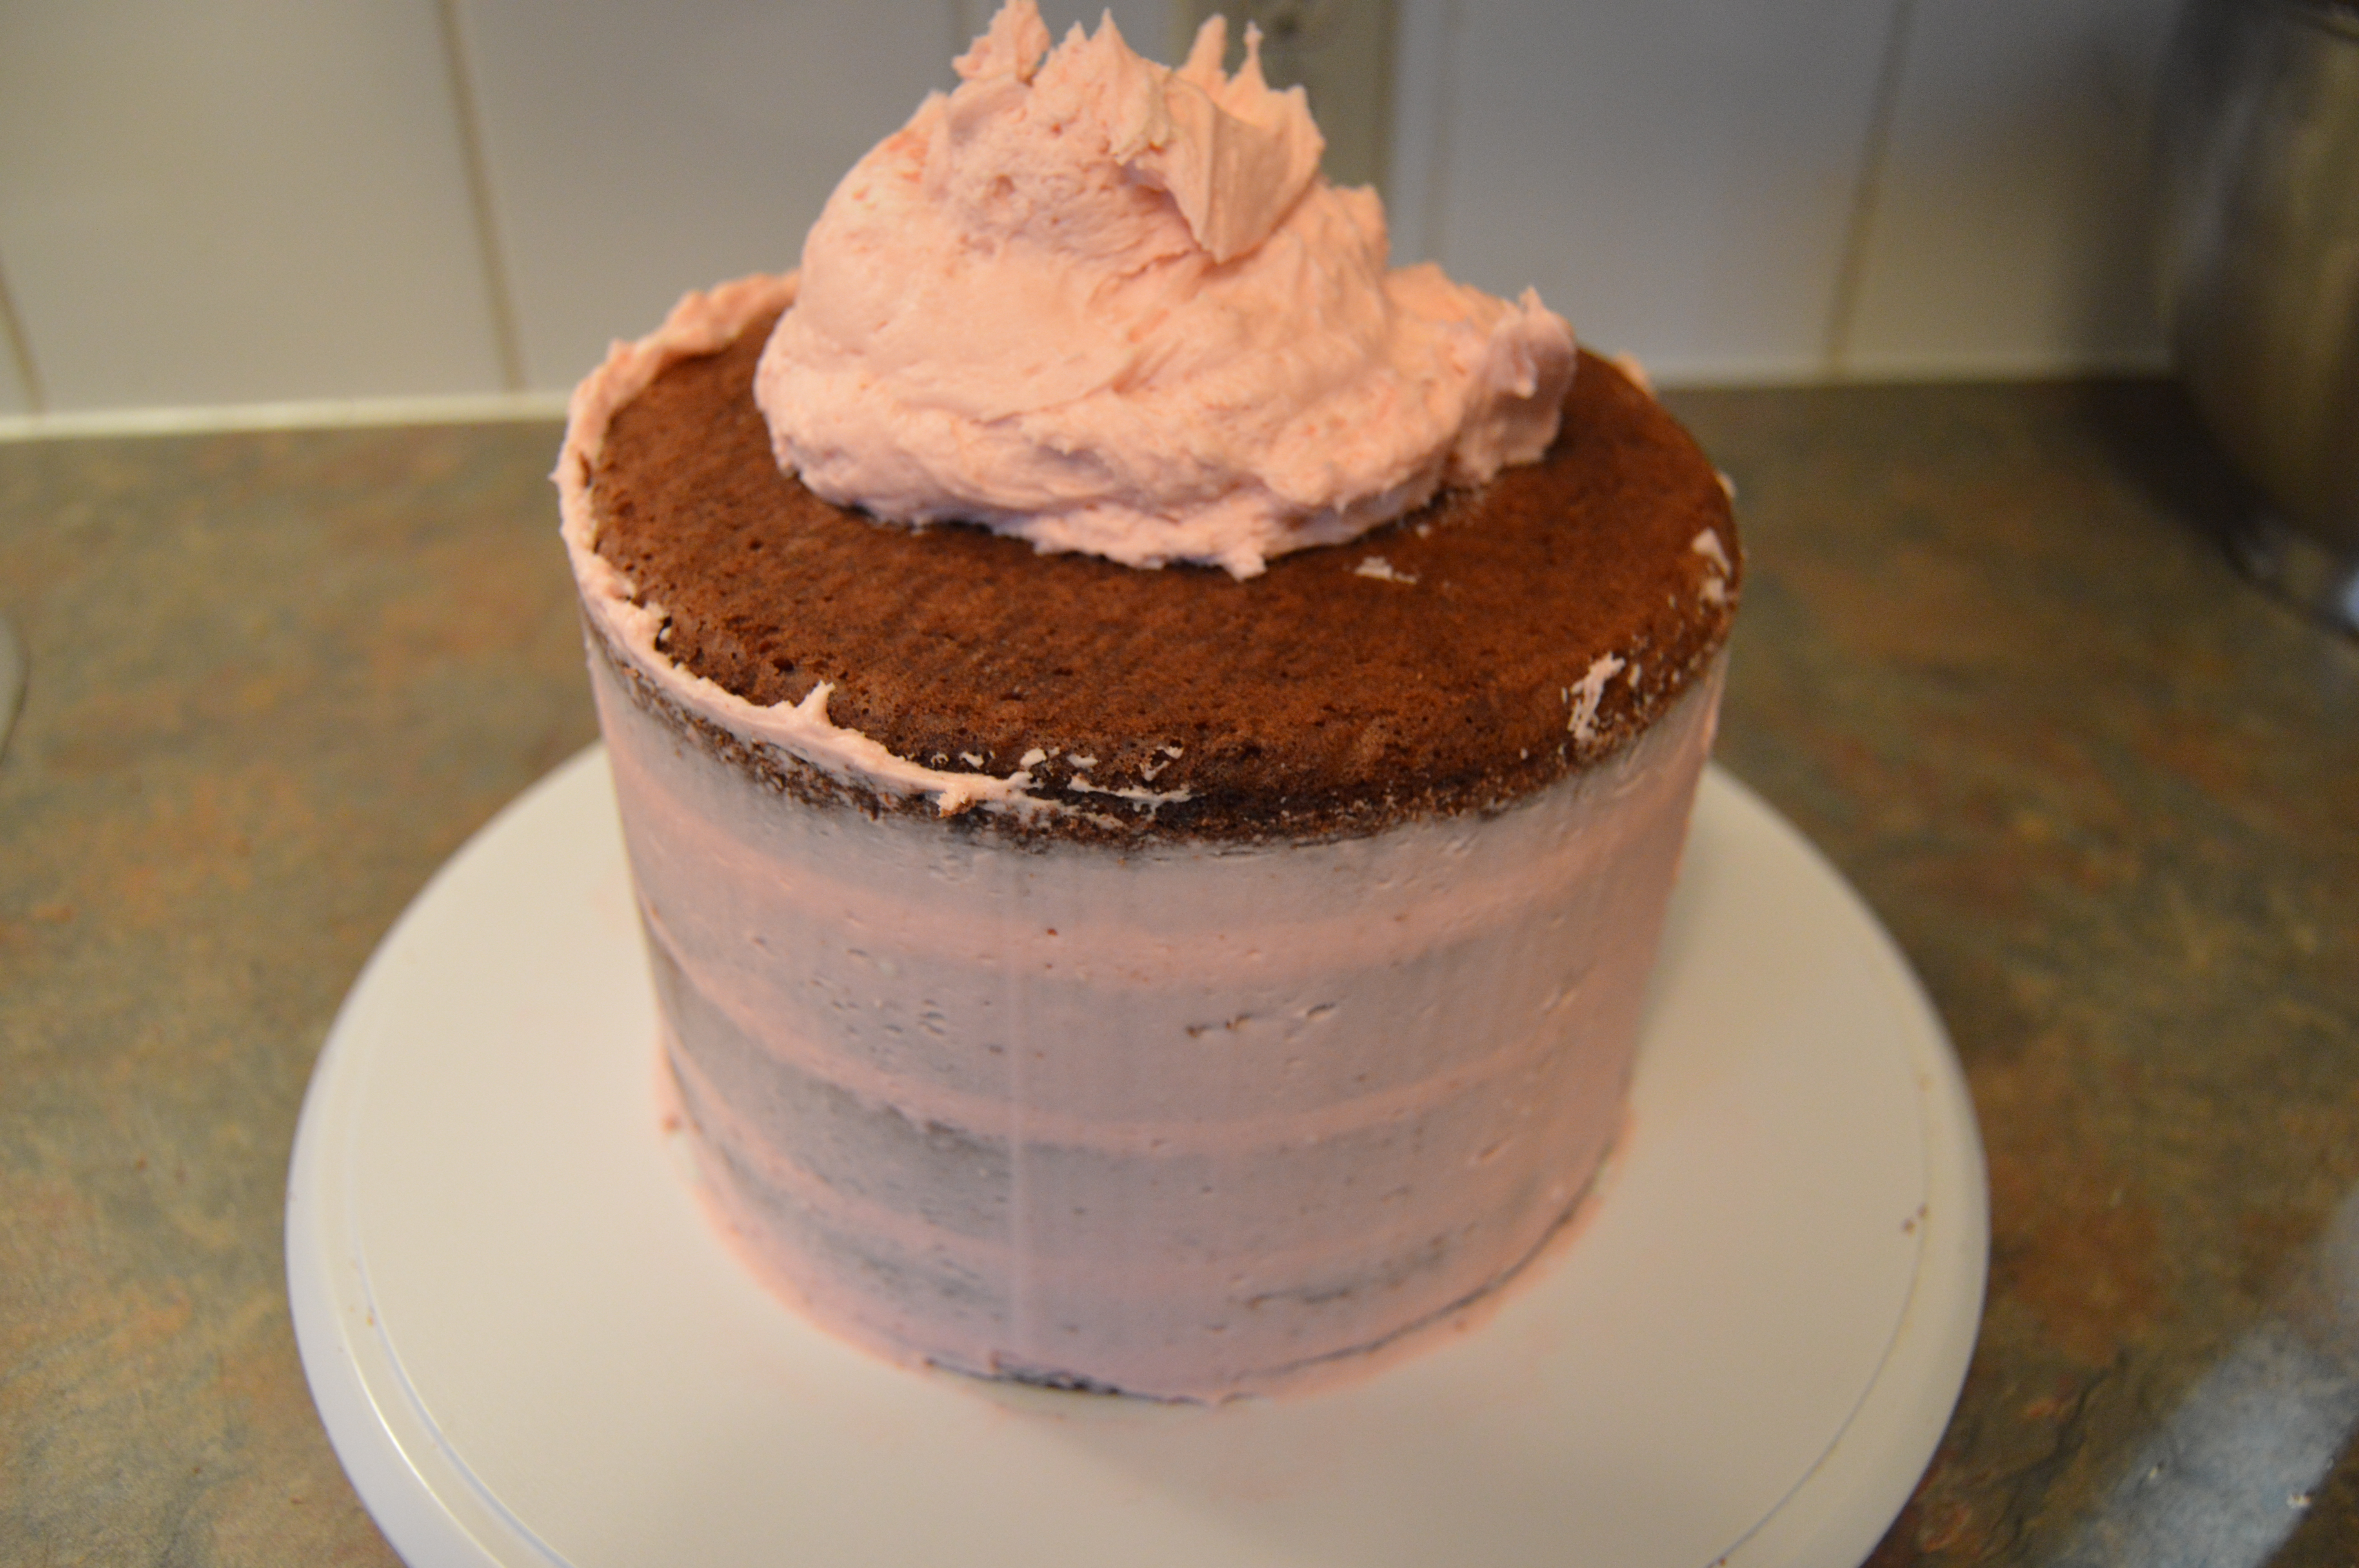
(5) Run the icing smoother around the side of the cake again to remove the excess frosting.
(6) You will notice that some frosting will tower over the top of the cake. This is exactly what you want to happen. This is what is going to give you sharp edges. Using a wiped palette knife, scrape the towering frosting towards the center of the cake. Work from the edge of the cake and make clean sweeps to the center.
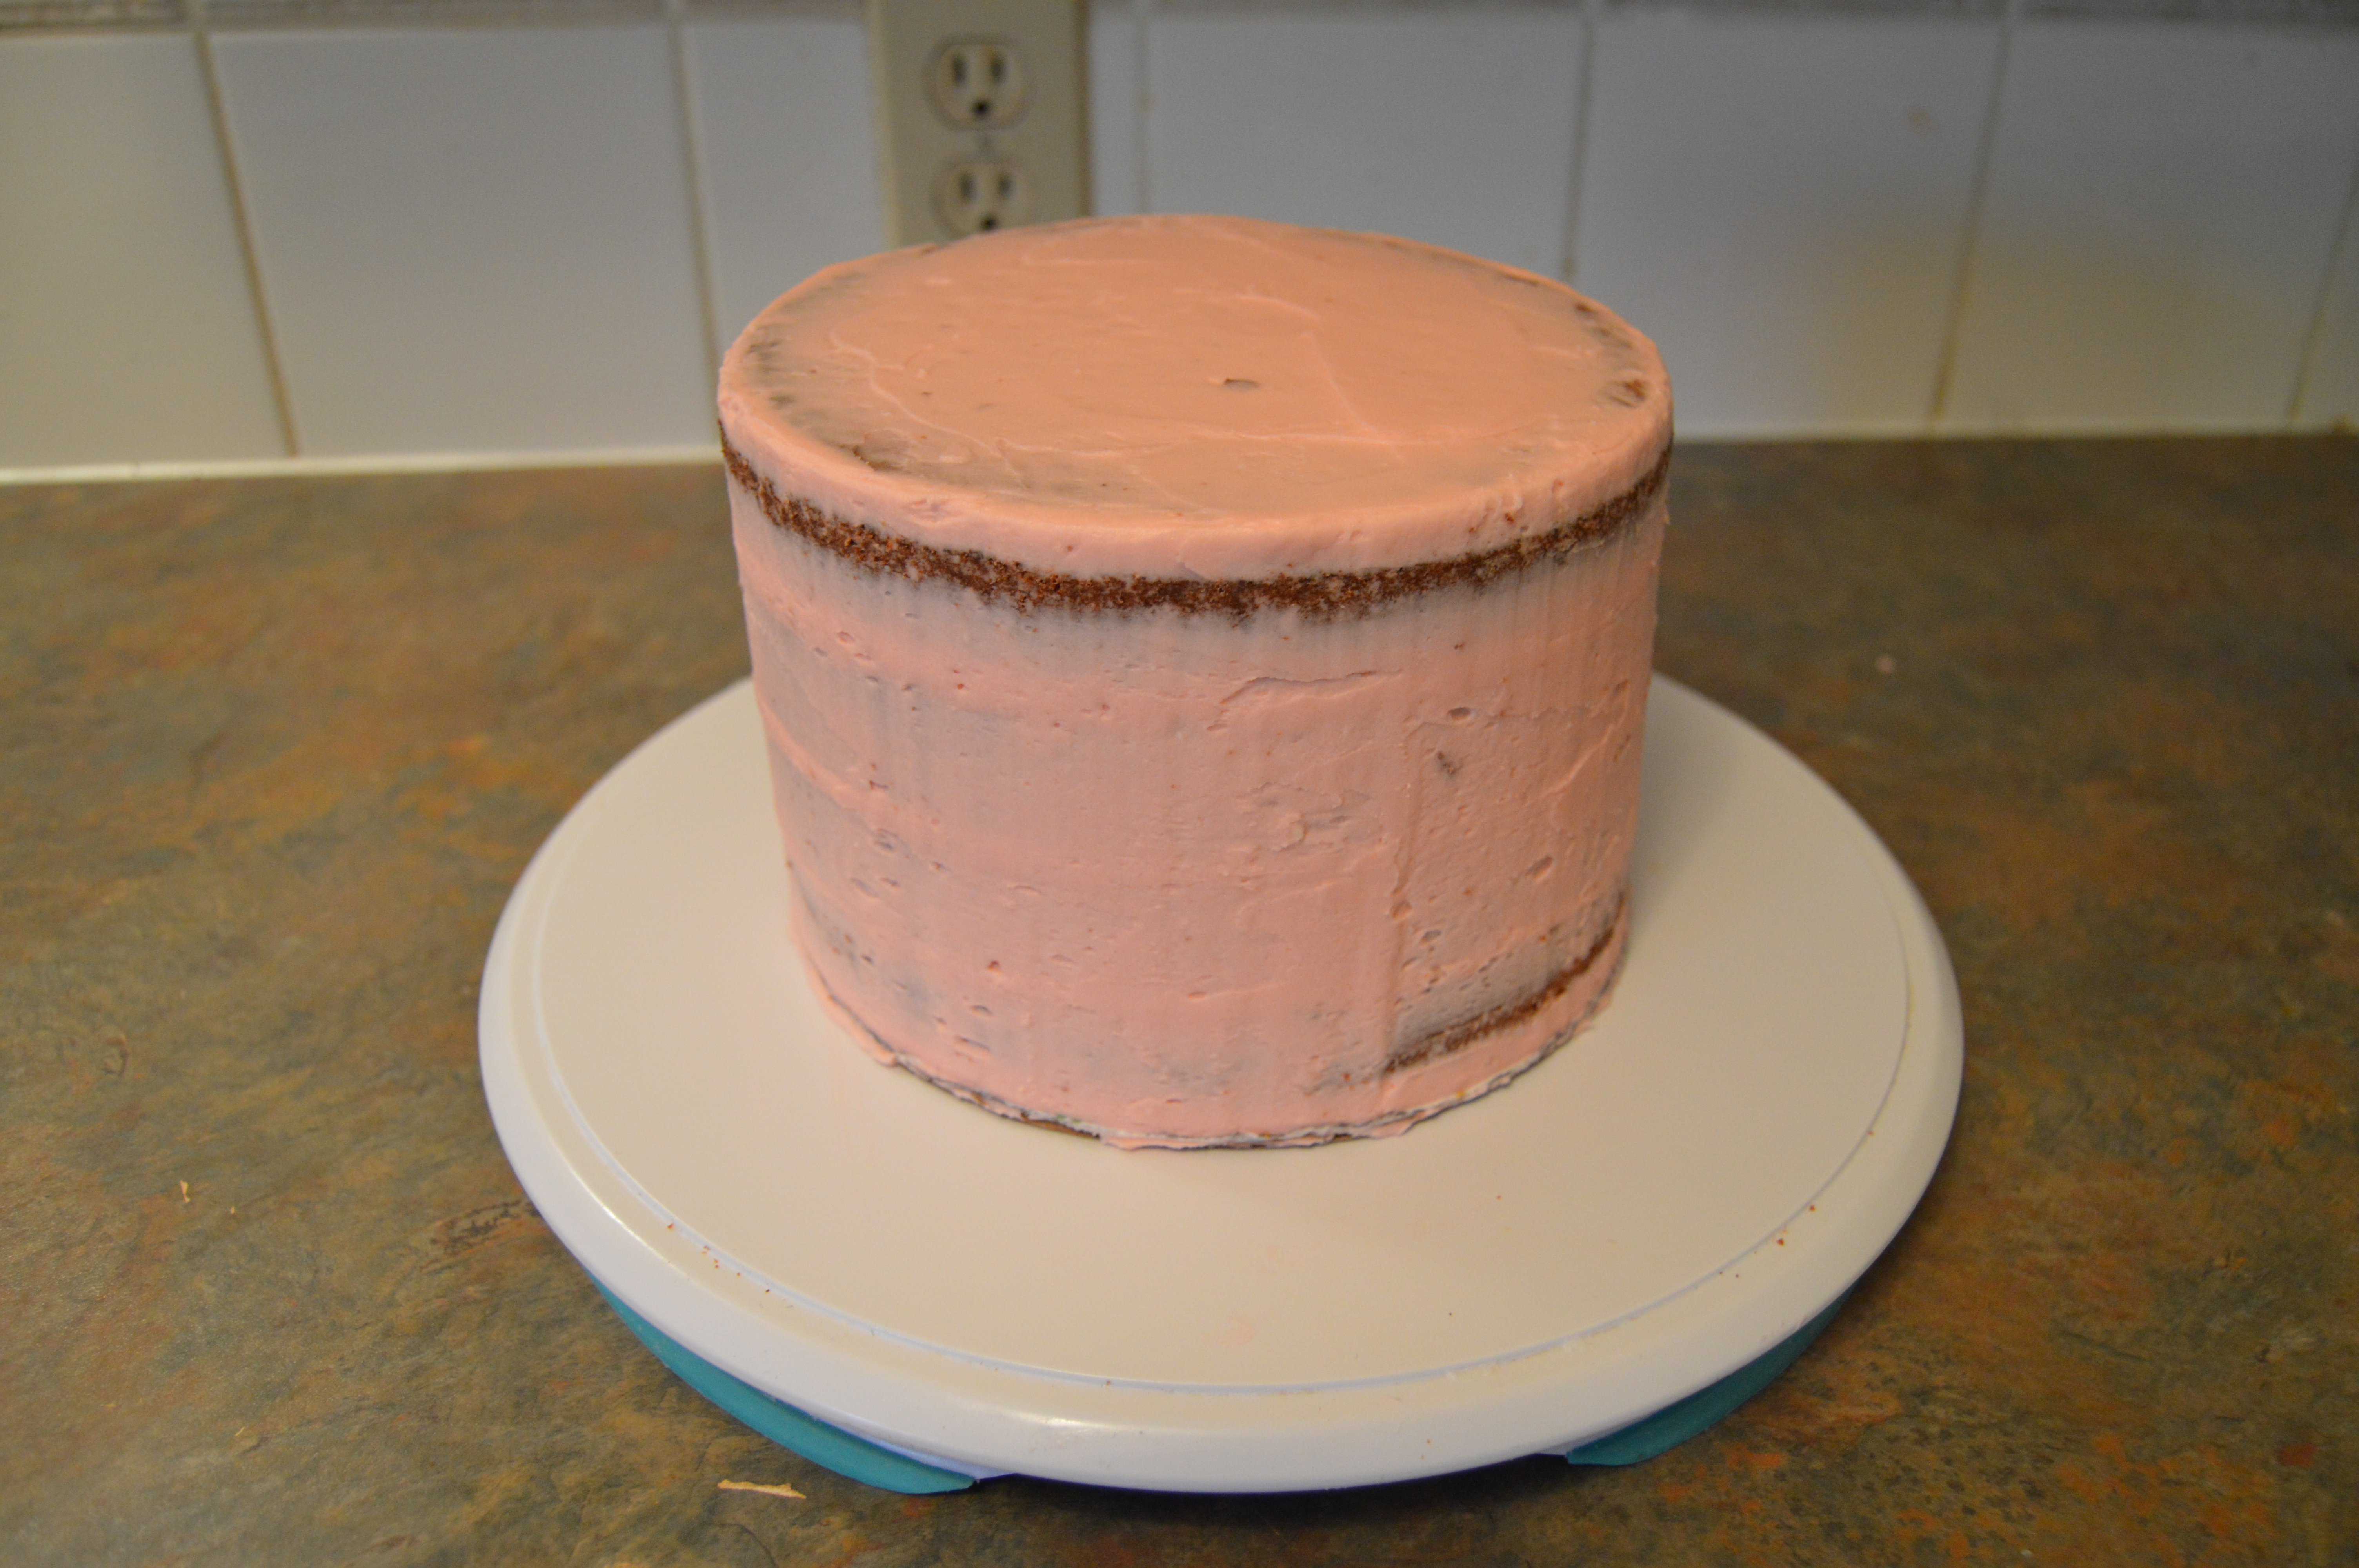
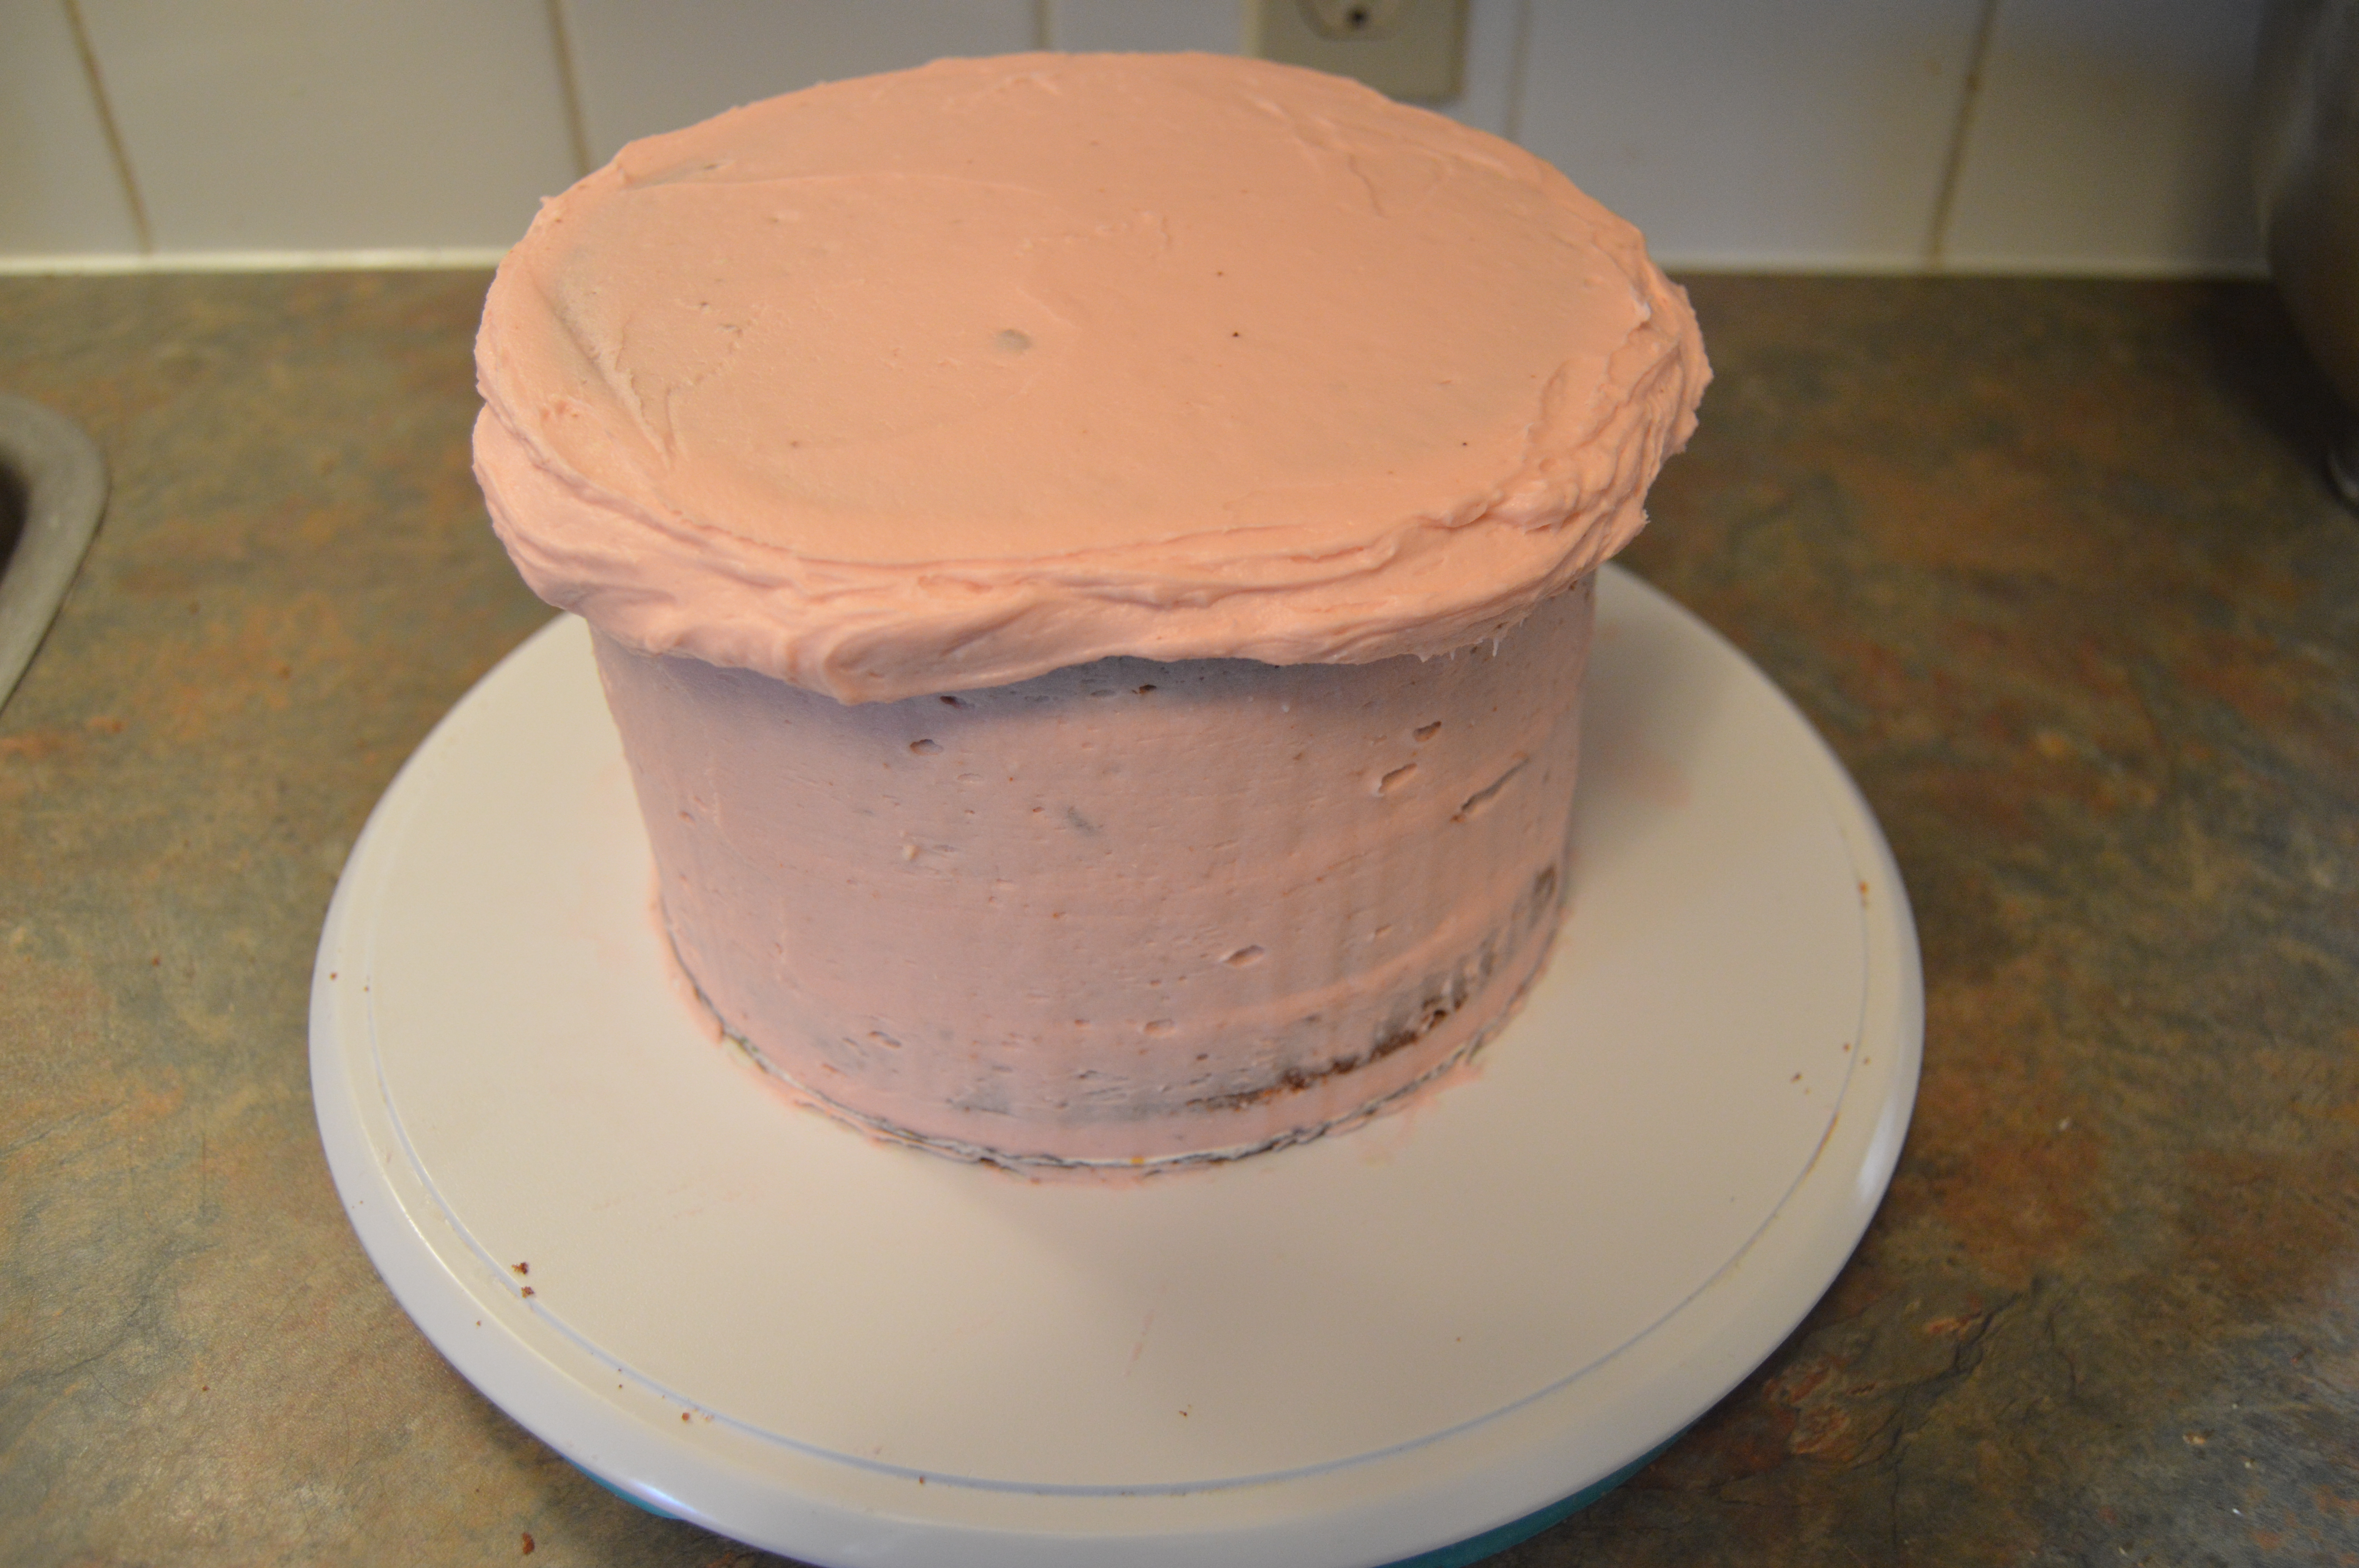
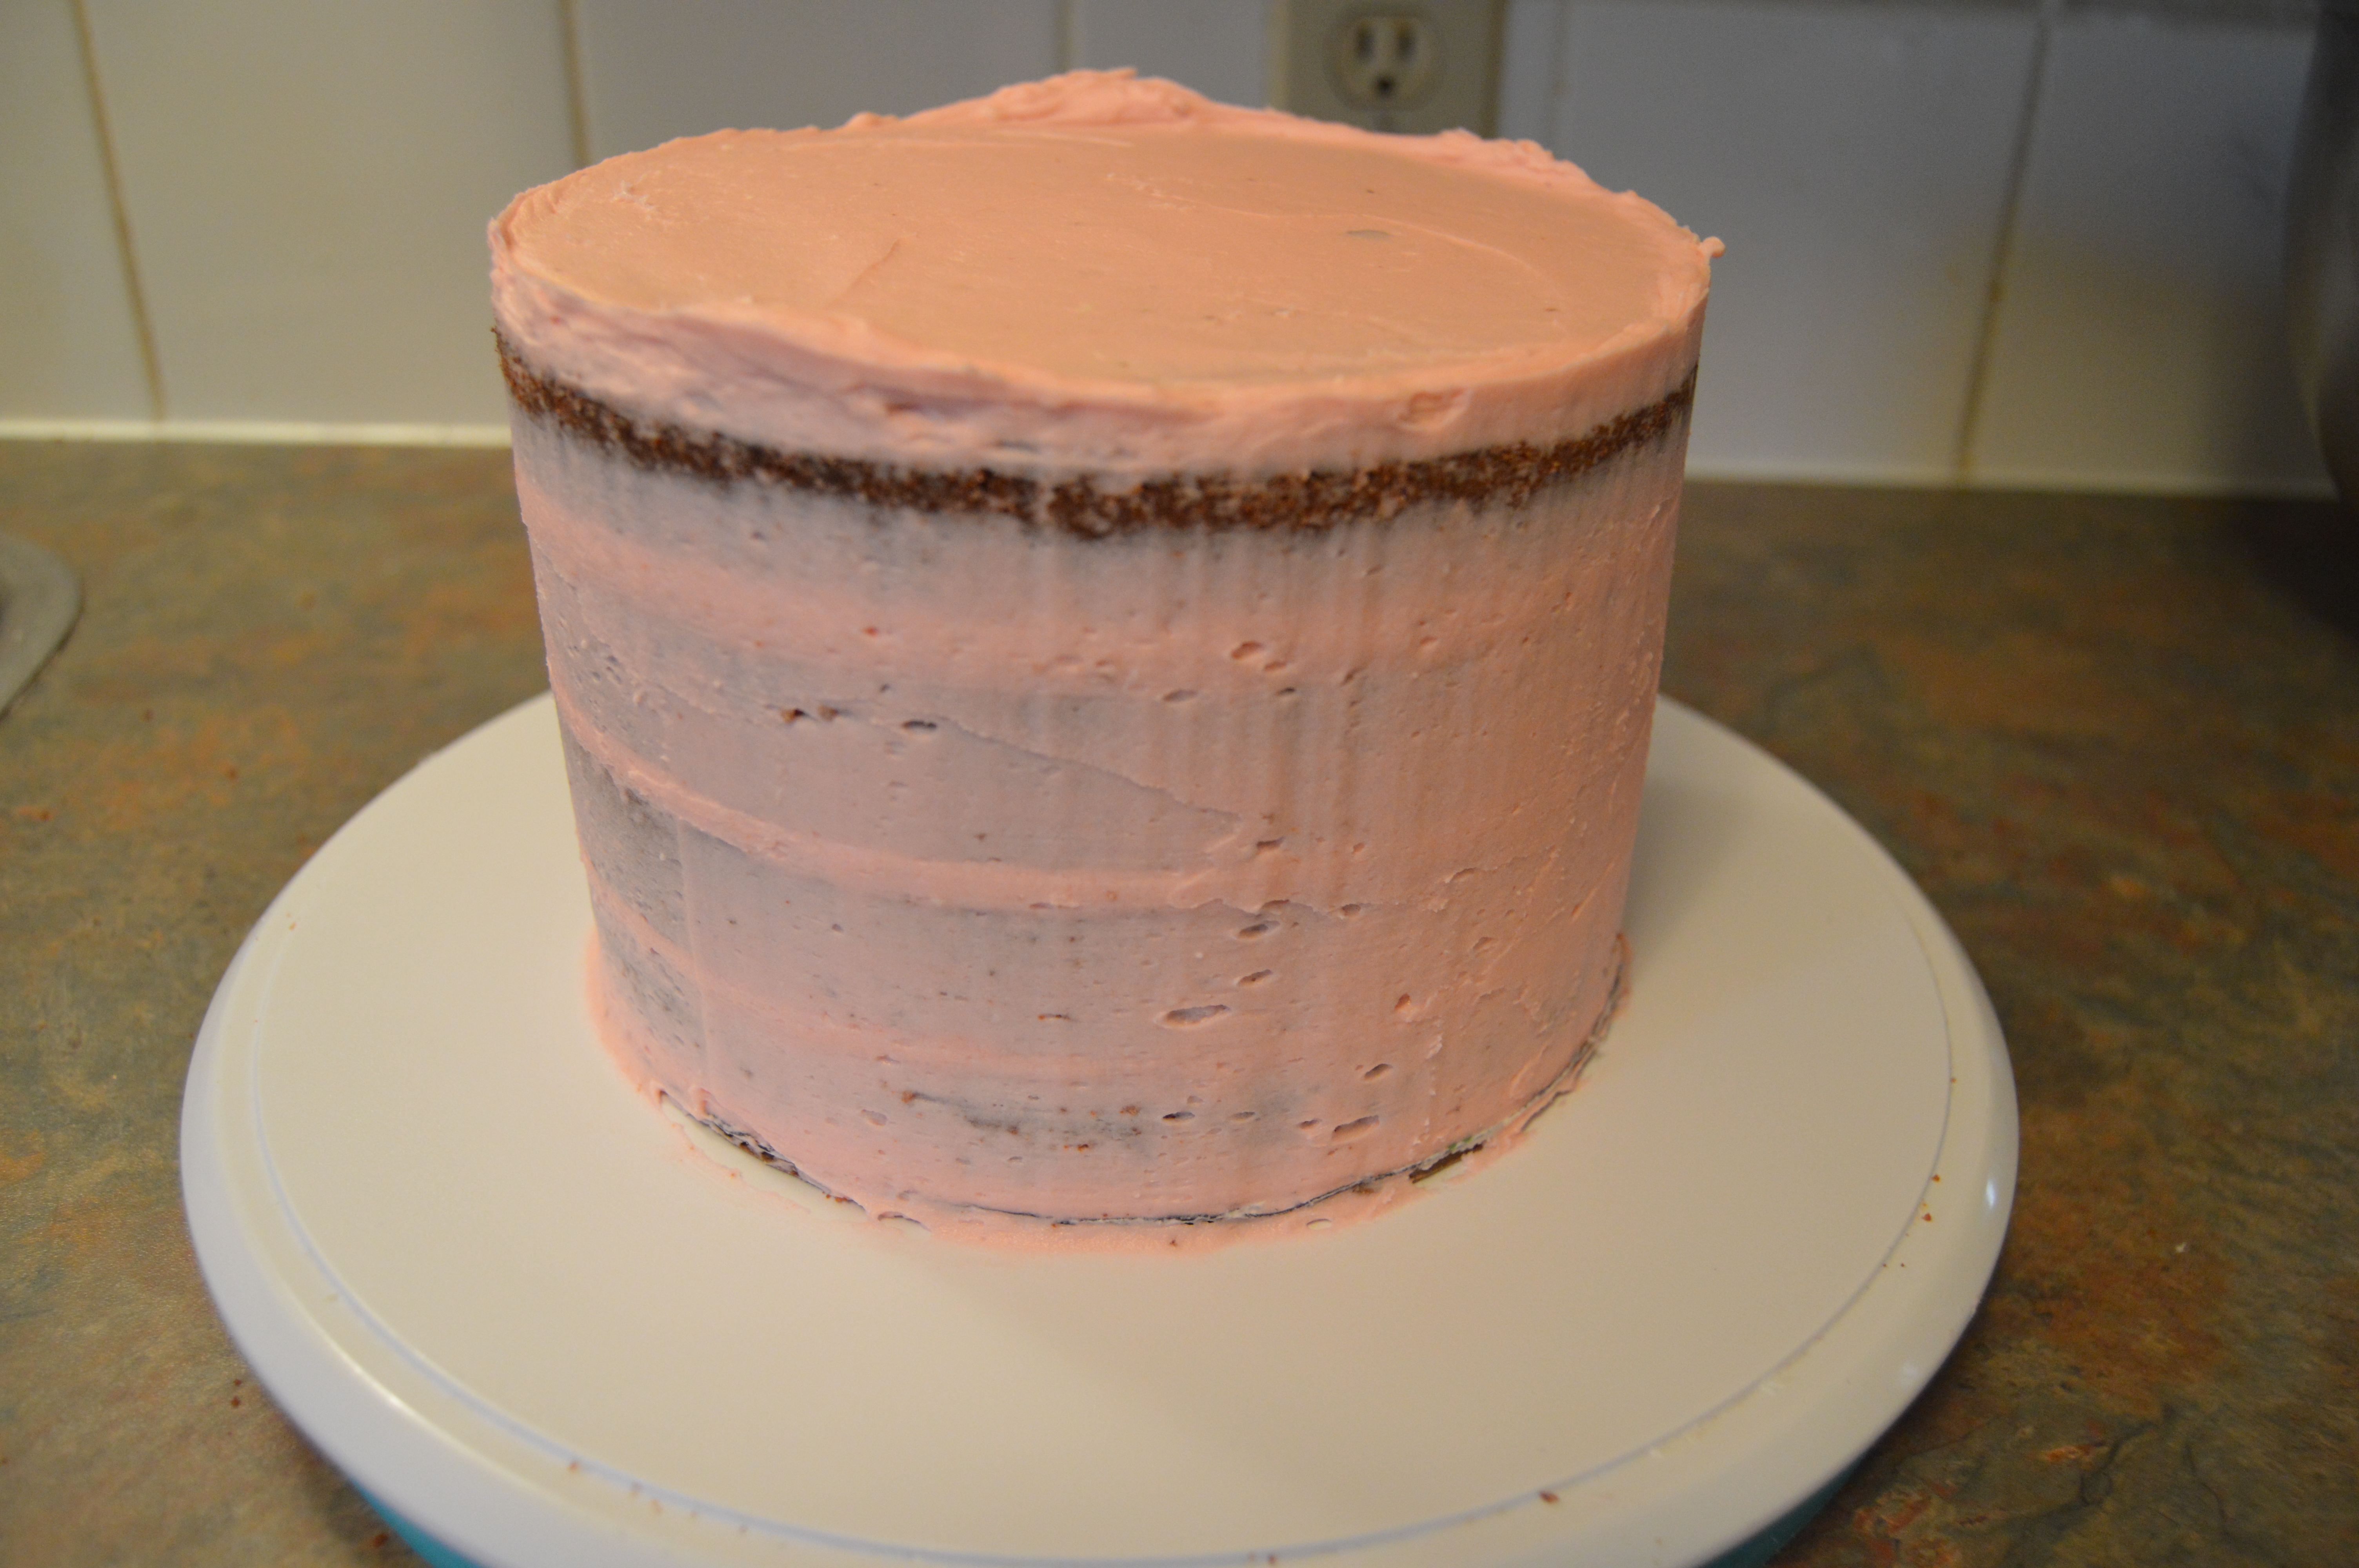
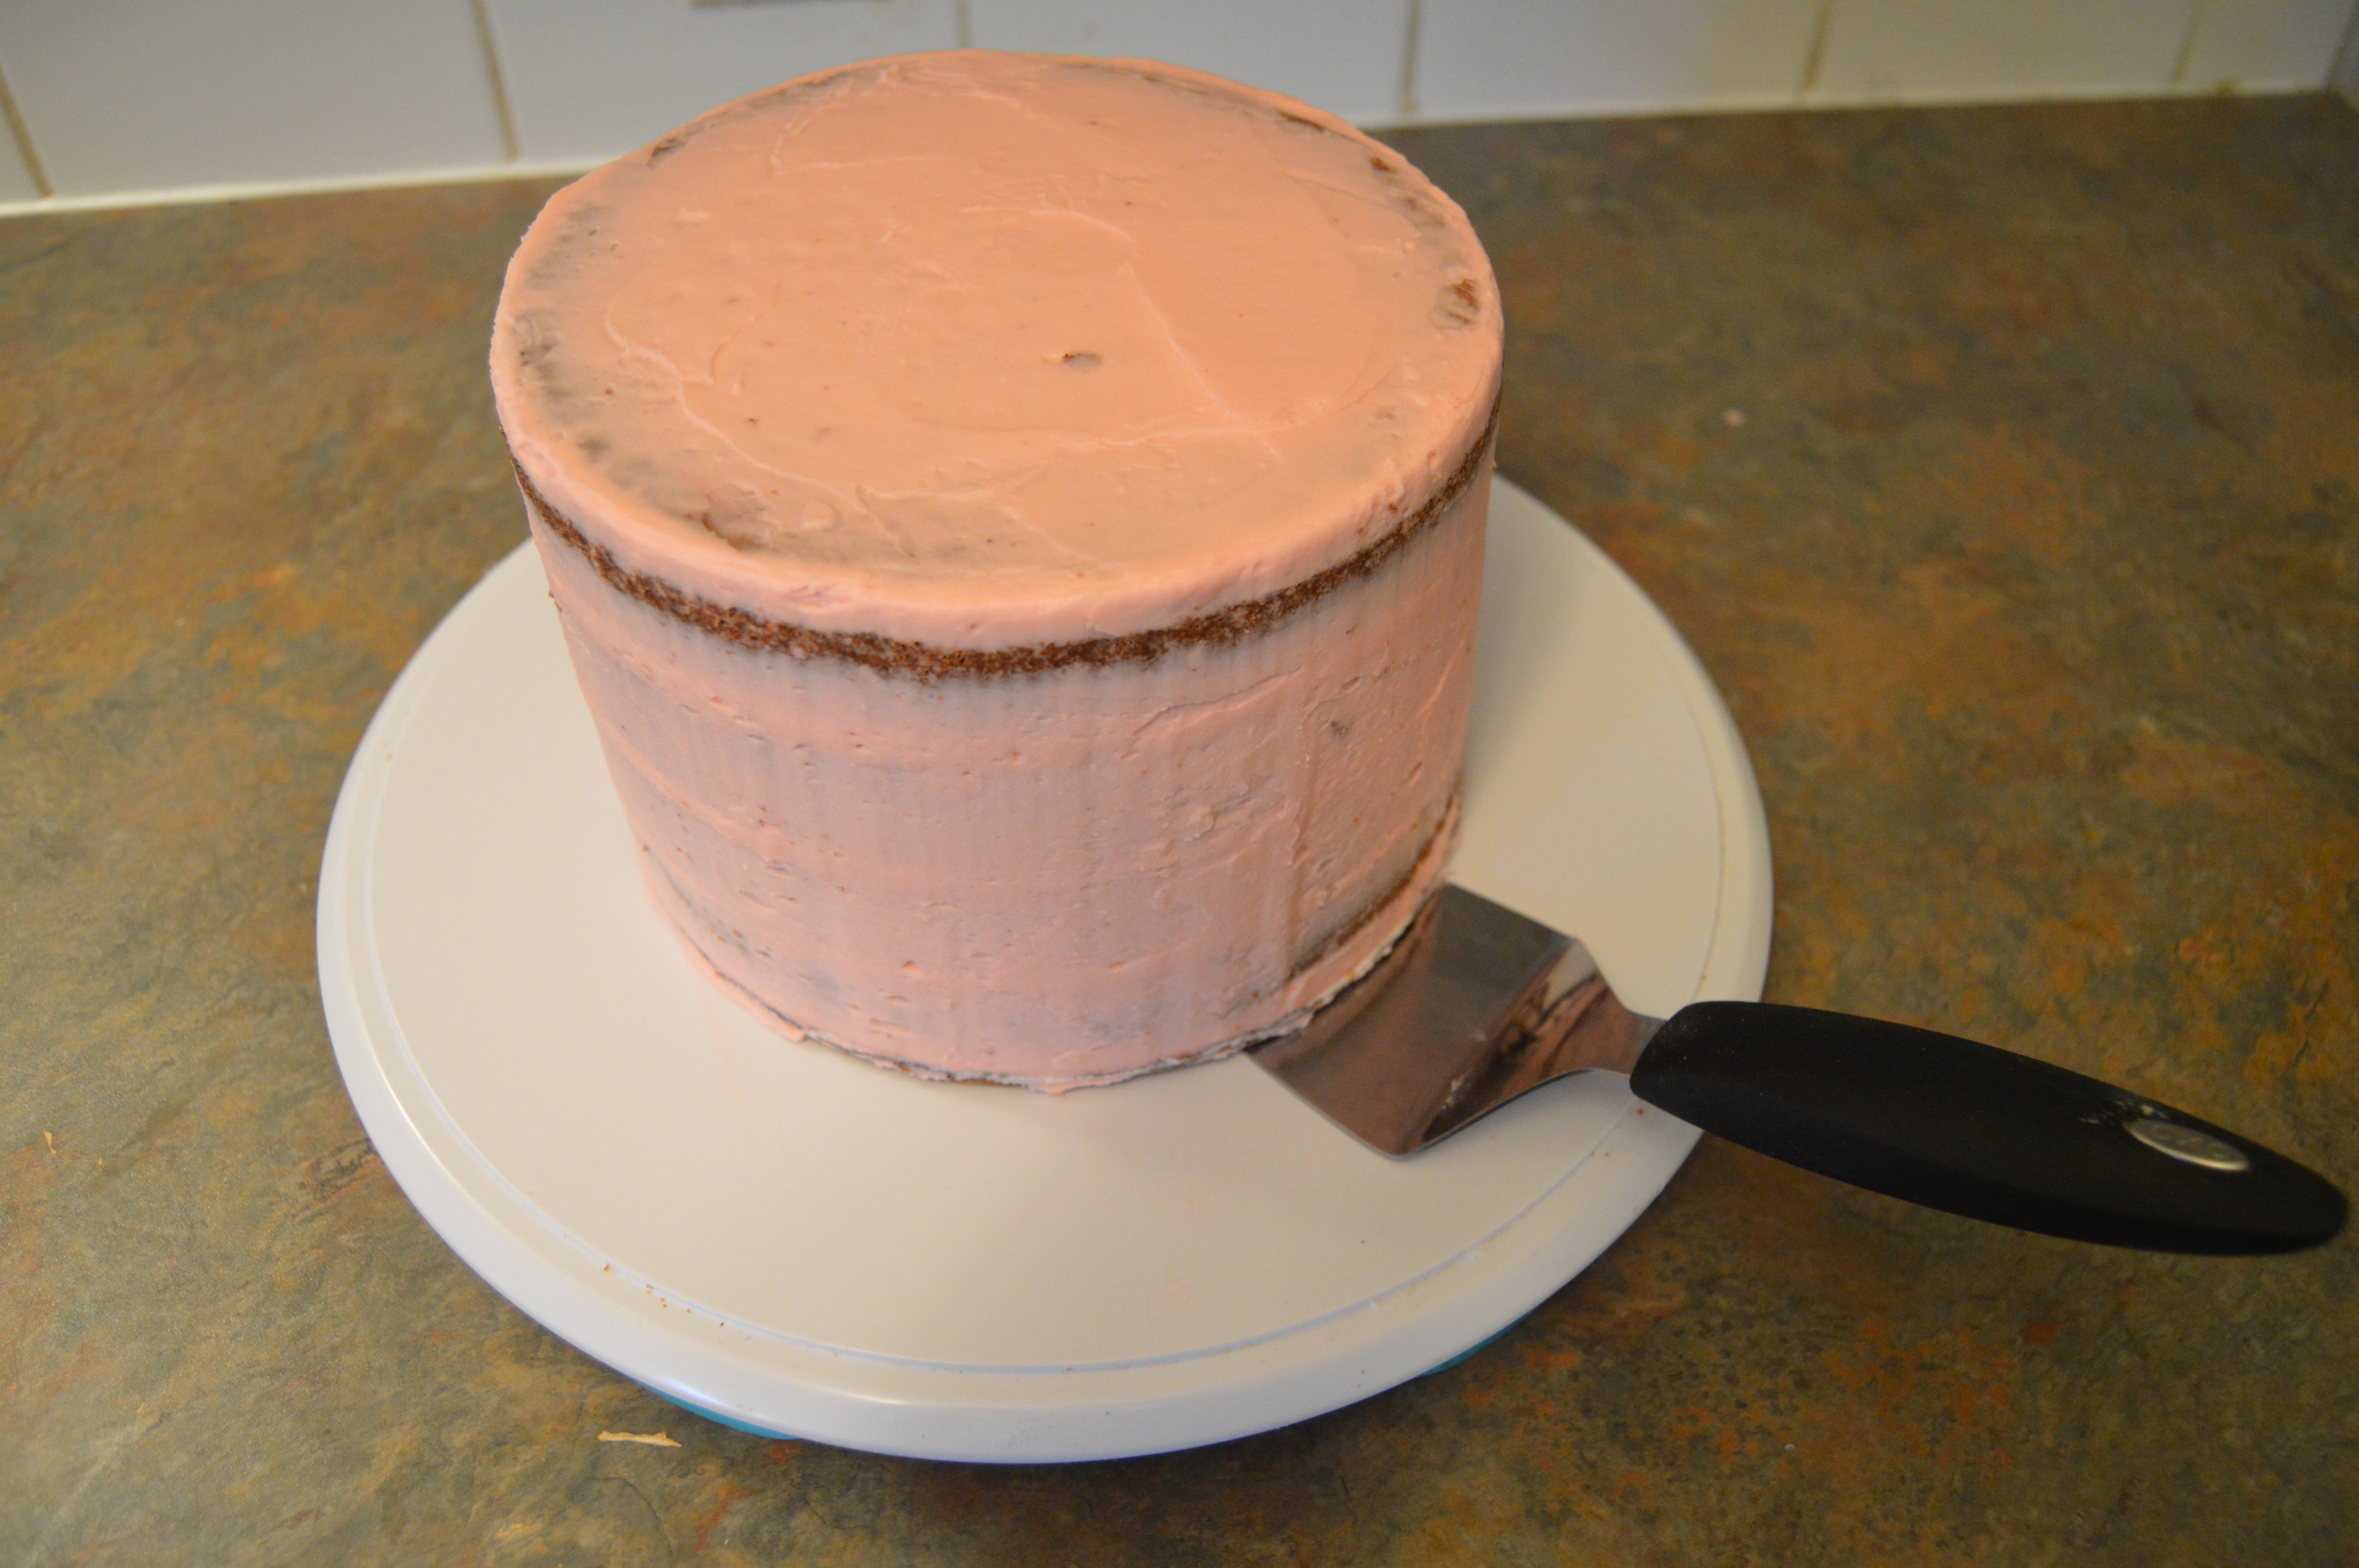
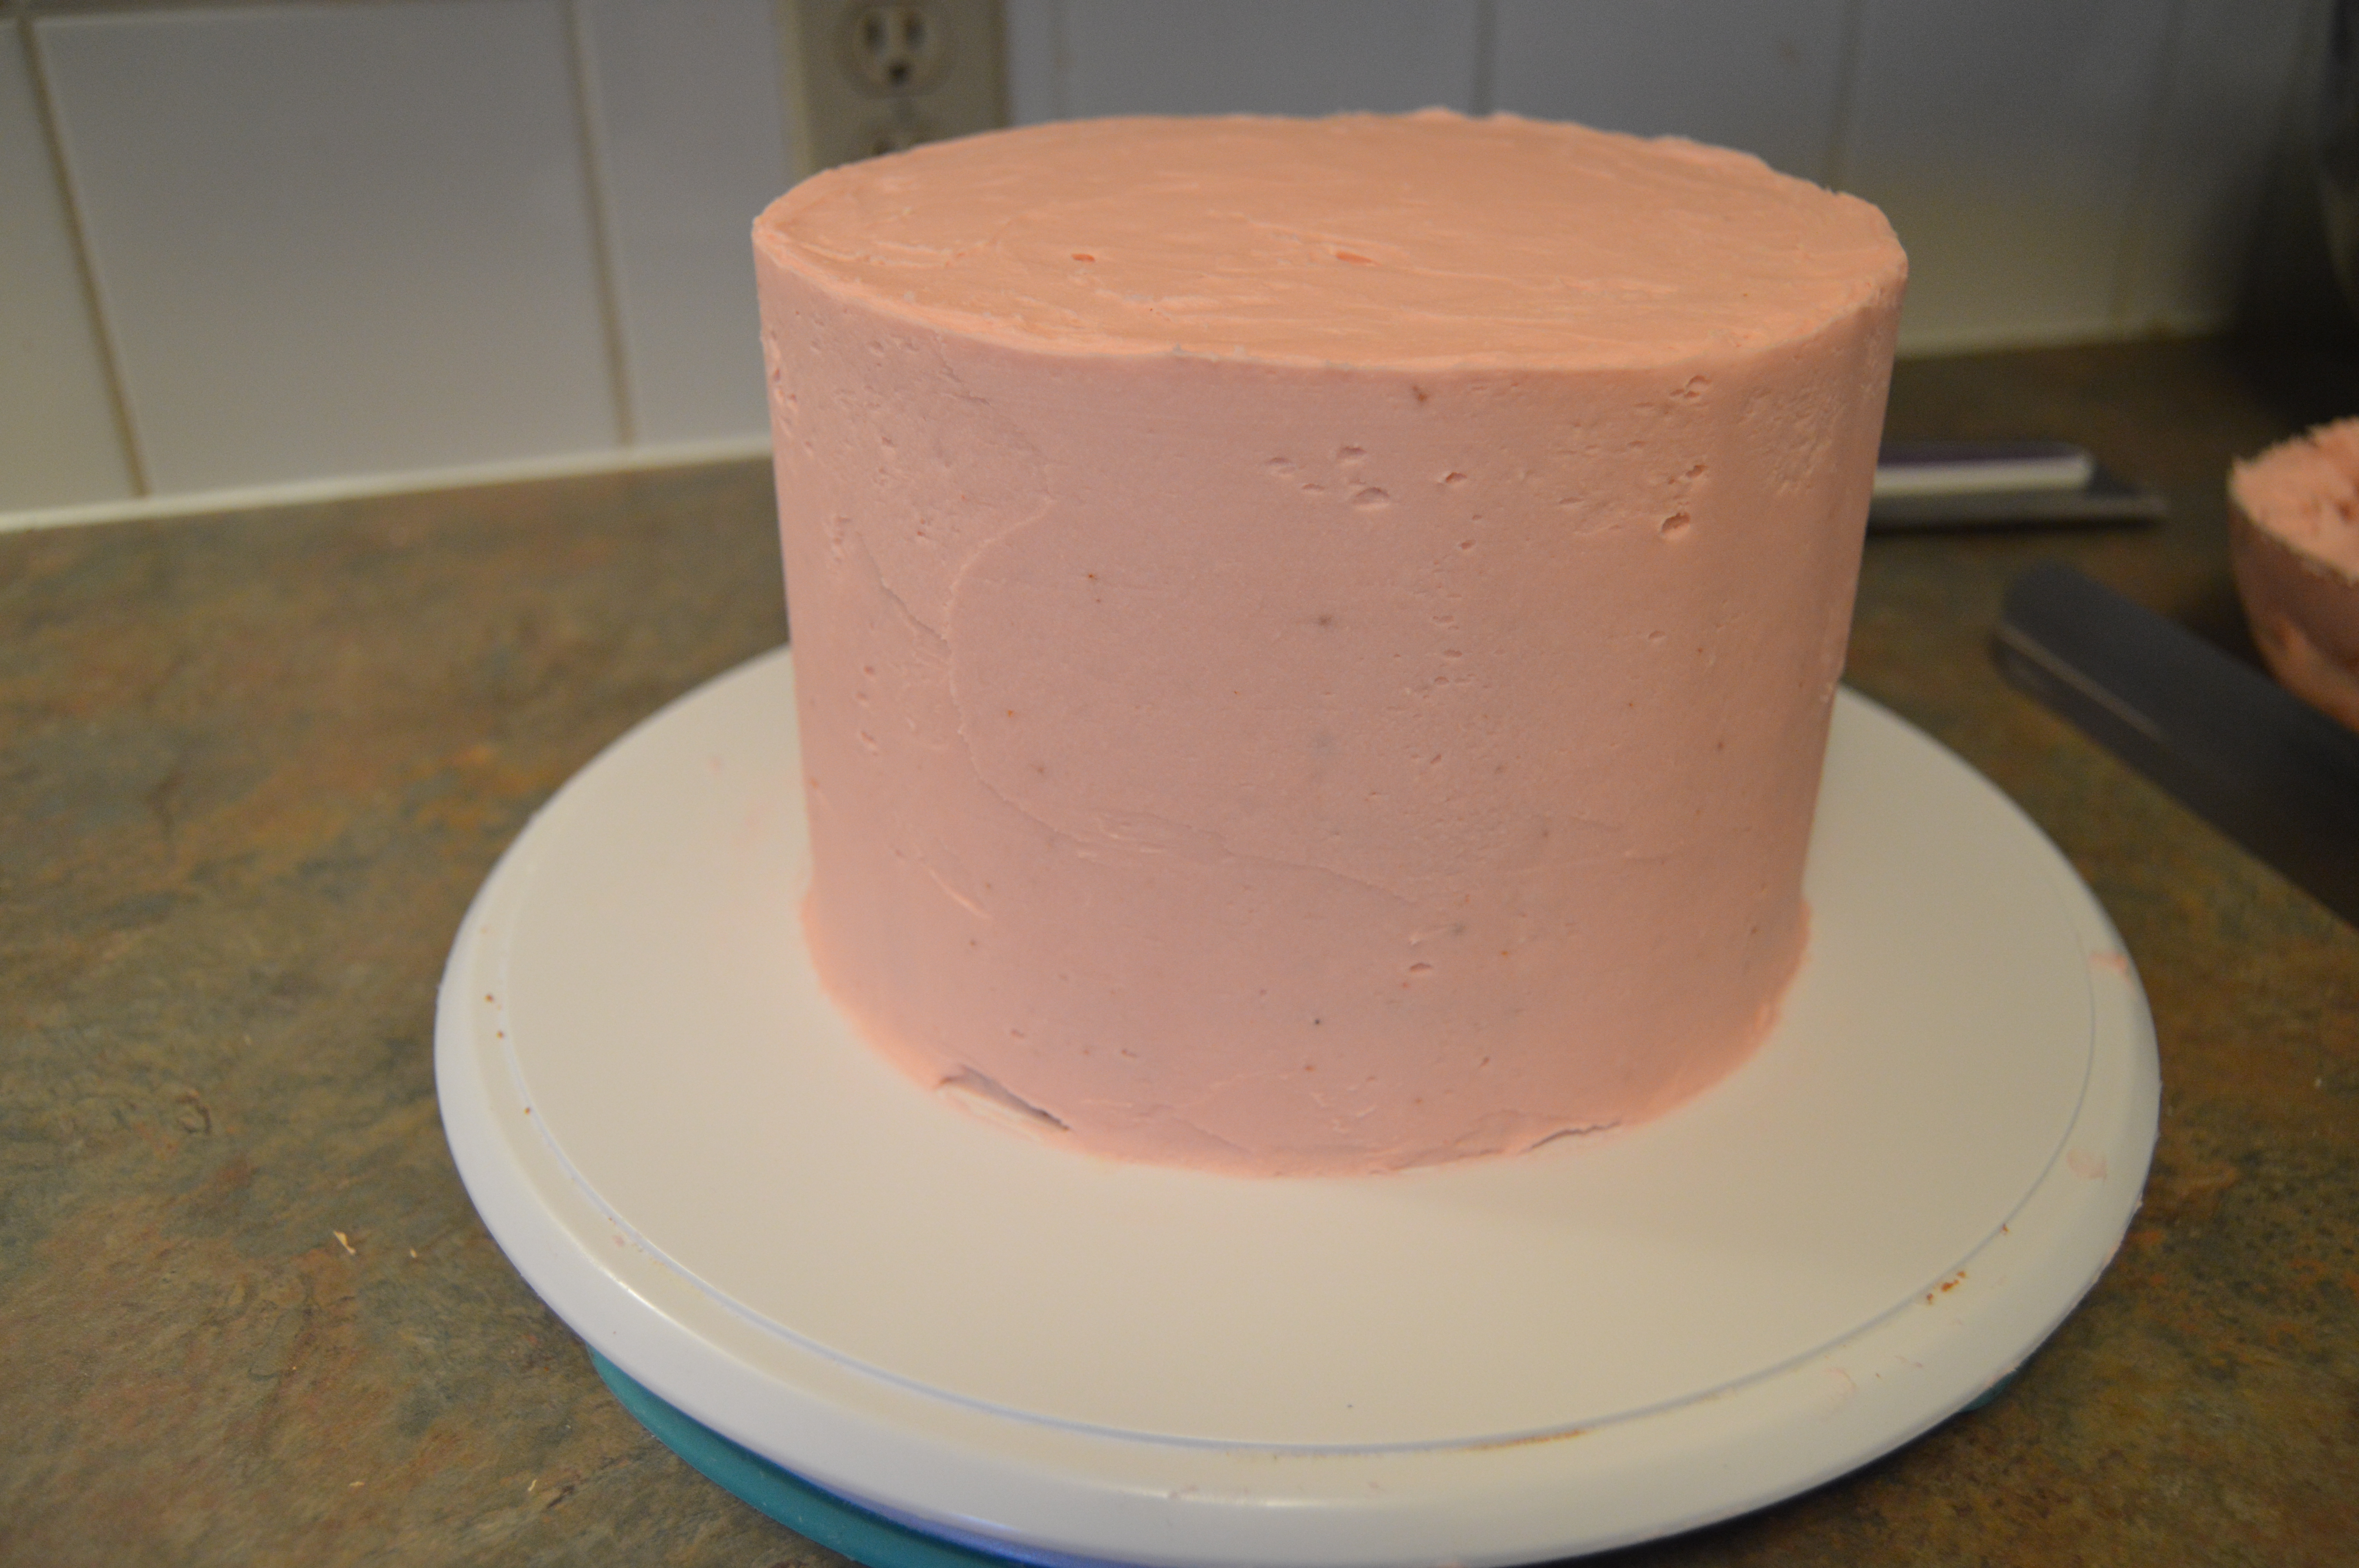
(7) Your crumb coat is complete. Use a cake server to lift the cake from the turntable and place it in the fridge for about an hour for the frosting to set and solidify. Some people place their cakes in the freezer to hasten the process. That’s also fine. You need the crumb coat to be strong and have a dry feel before applying the next layer of frosting. This way, you will be able to build layers of frosting on each other.
LAYERING
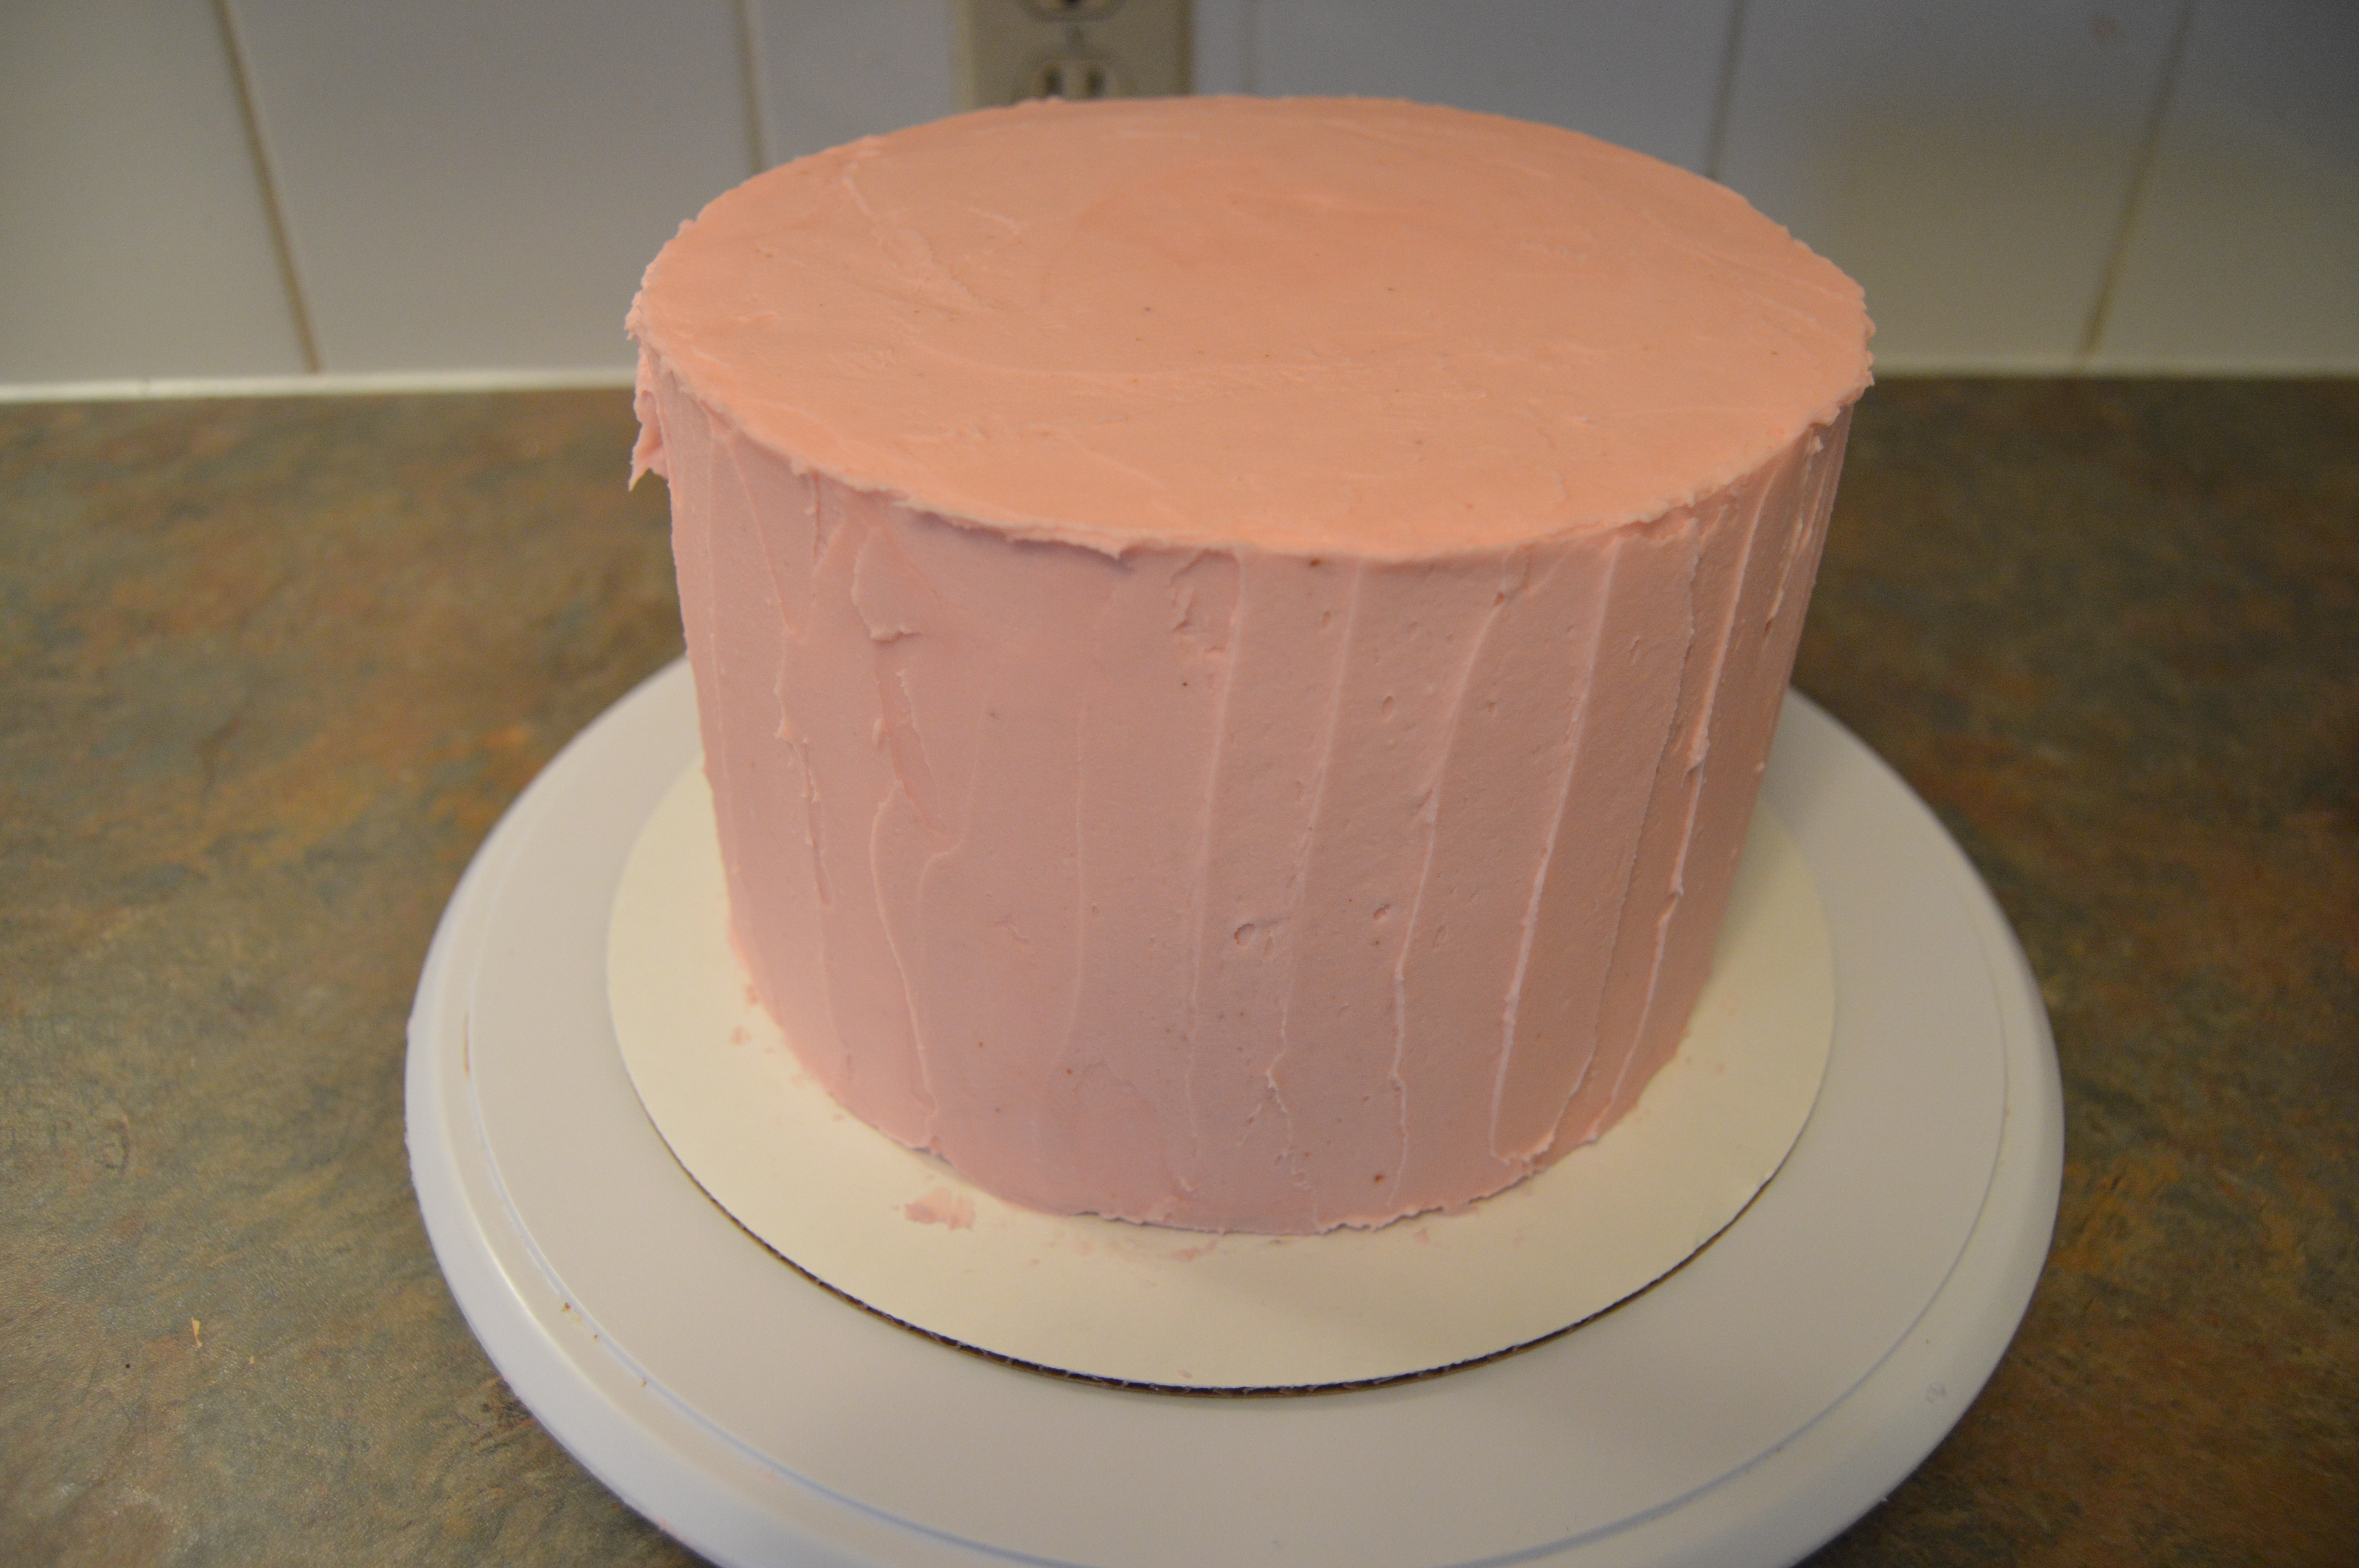
(1) After an hour, place your cake on the turntable and apply another layer of frosting on the cake, concentrating on the top and bottom side of the cake. Like you did while crumb coating, use the icing smoother to scrape off excess frosting. This time around though, do not press the smoother firmly against the cake as you want to create another layer of frosting. After smoothing the side of the cake, go round the cake and apply some more frosting at spots where you notice dents and holes. Run the smoother around the cake again and scrape the top of the cake inwards like you did before. This is the second coat of frosting. This layer should have very few cake crumbs. If you are going to cover the cake with fondant, place the cake in the fridge for another hour before covering it with fondant. Do not cover a cake with soft frosting with fondant. Your fondant surface will be not be smooth. You need strong frosting for shape and structure. If however you are going to finish the cake with frosting, you have one more layer of frosting to go after chilling the cake.
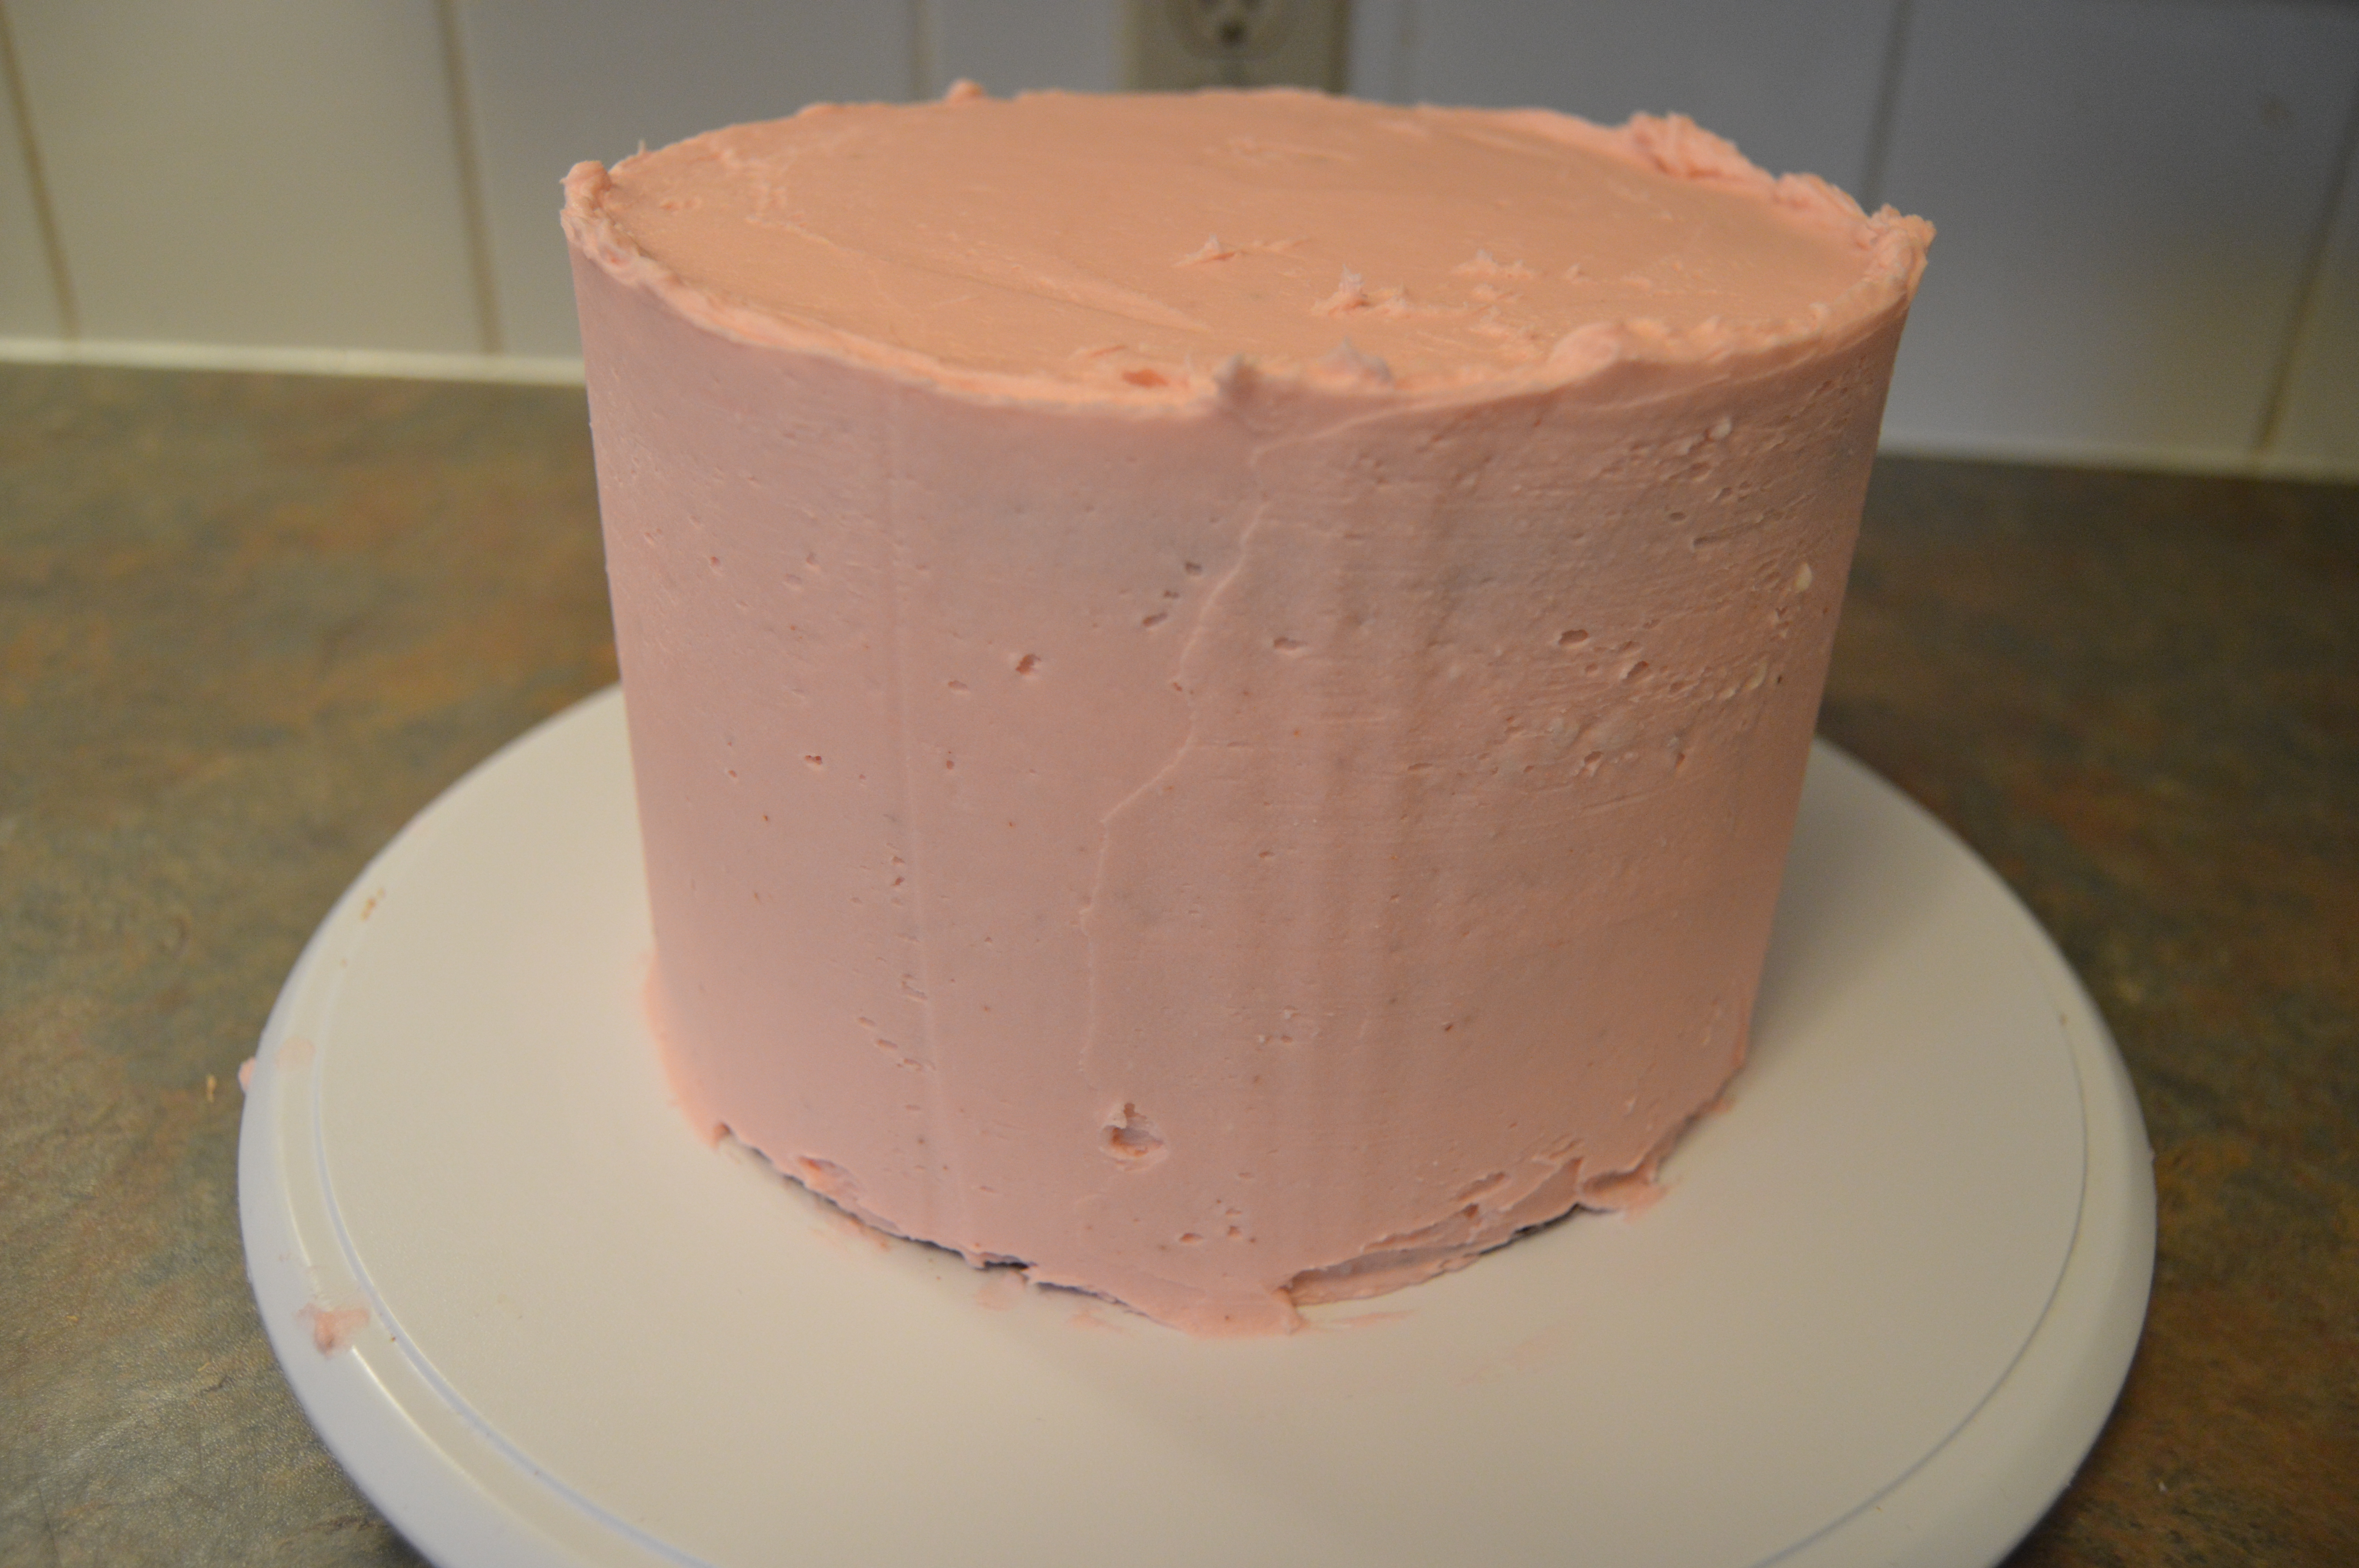
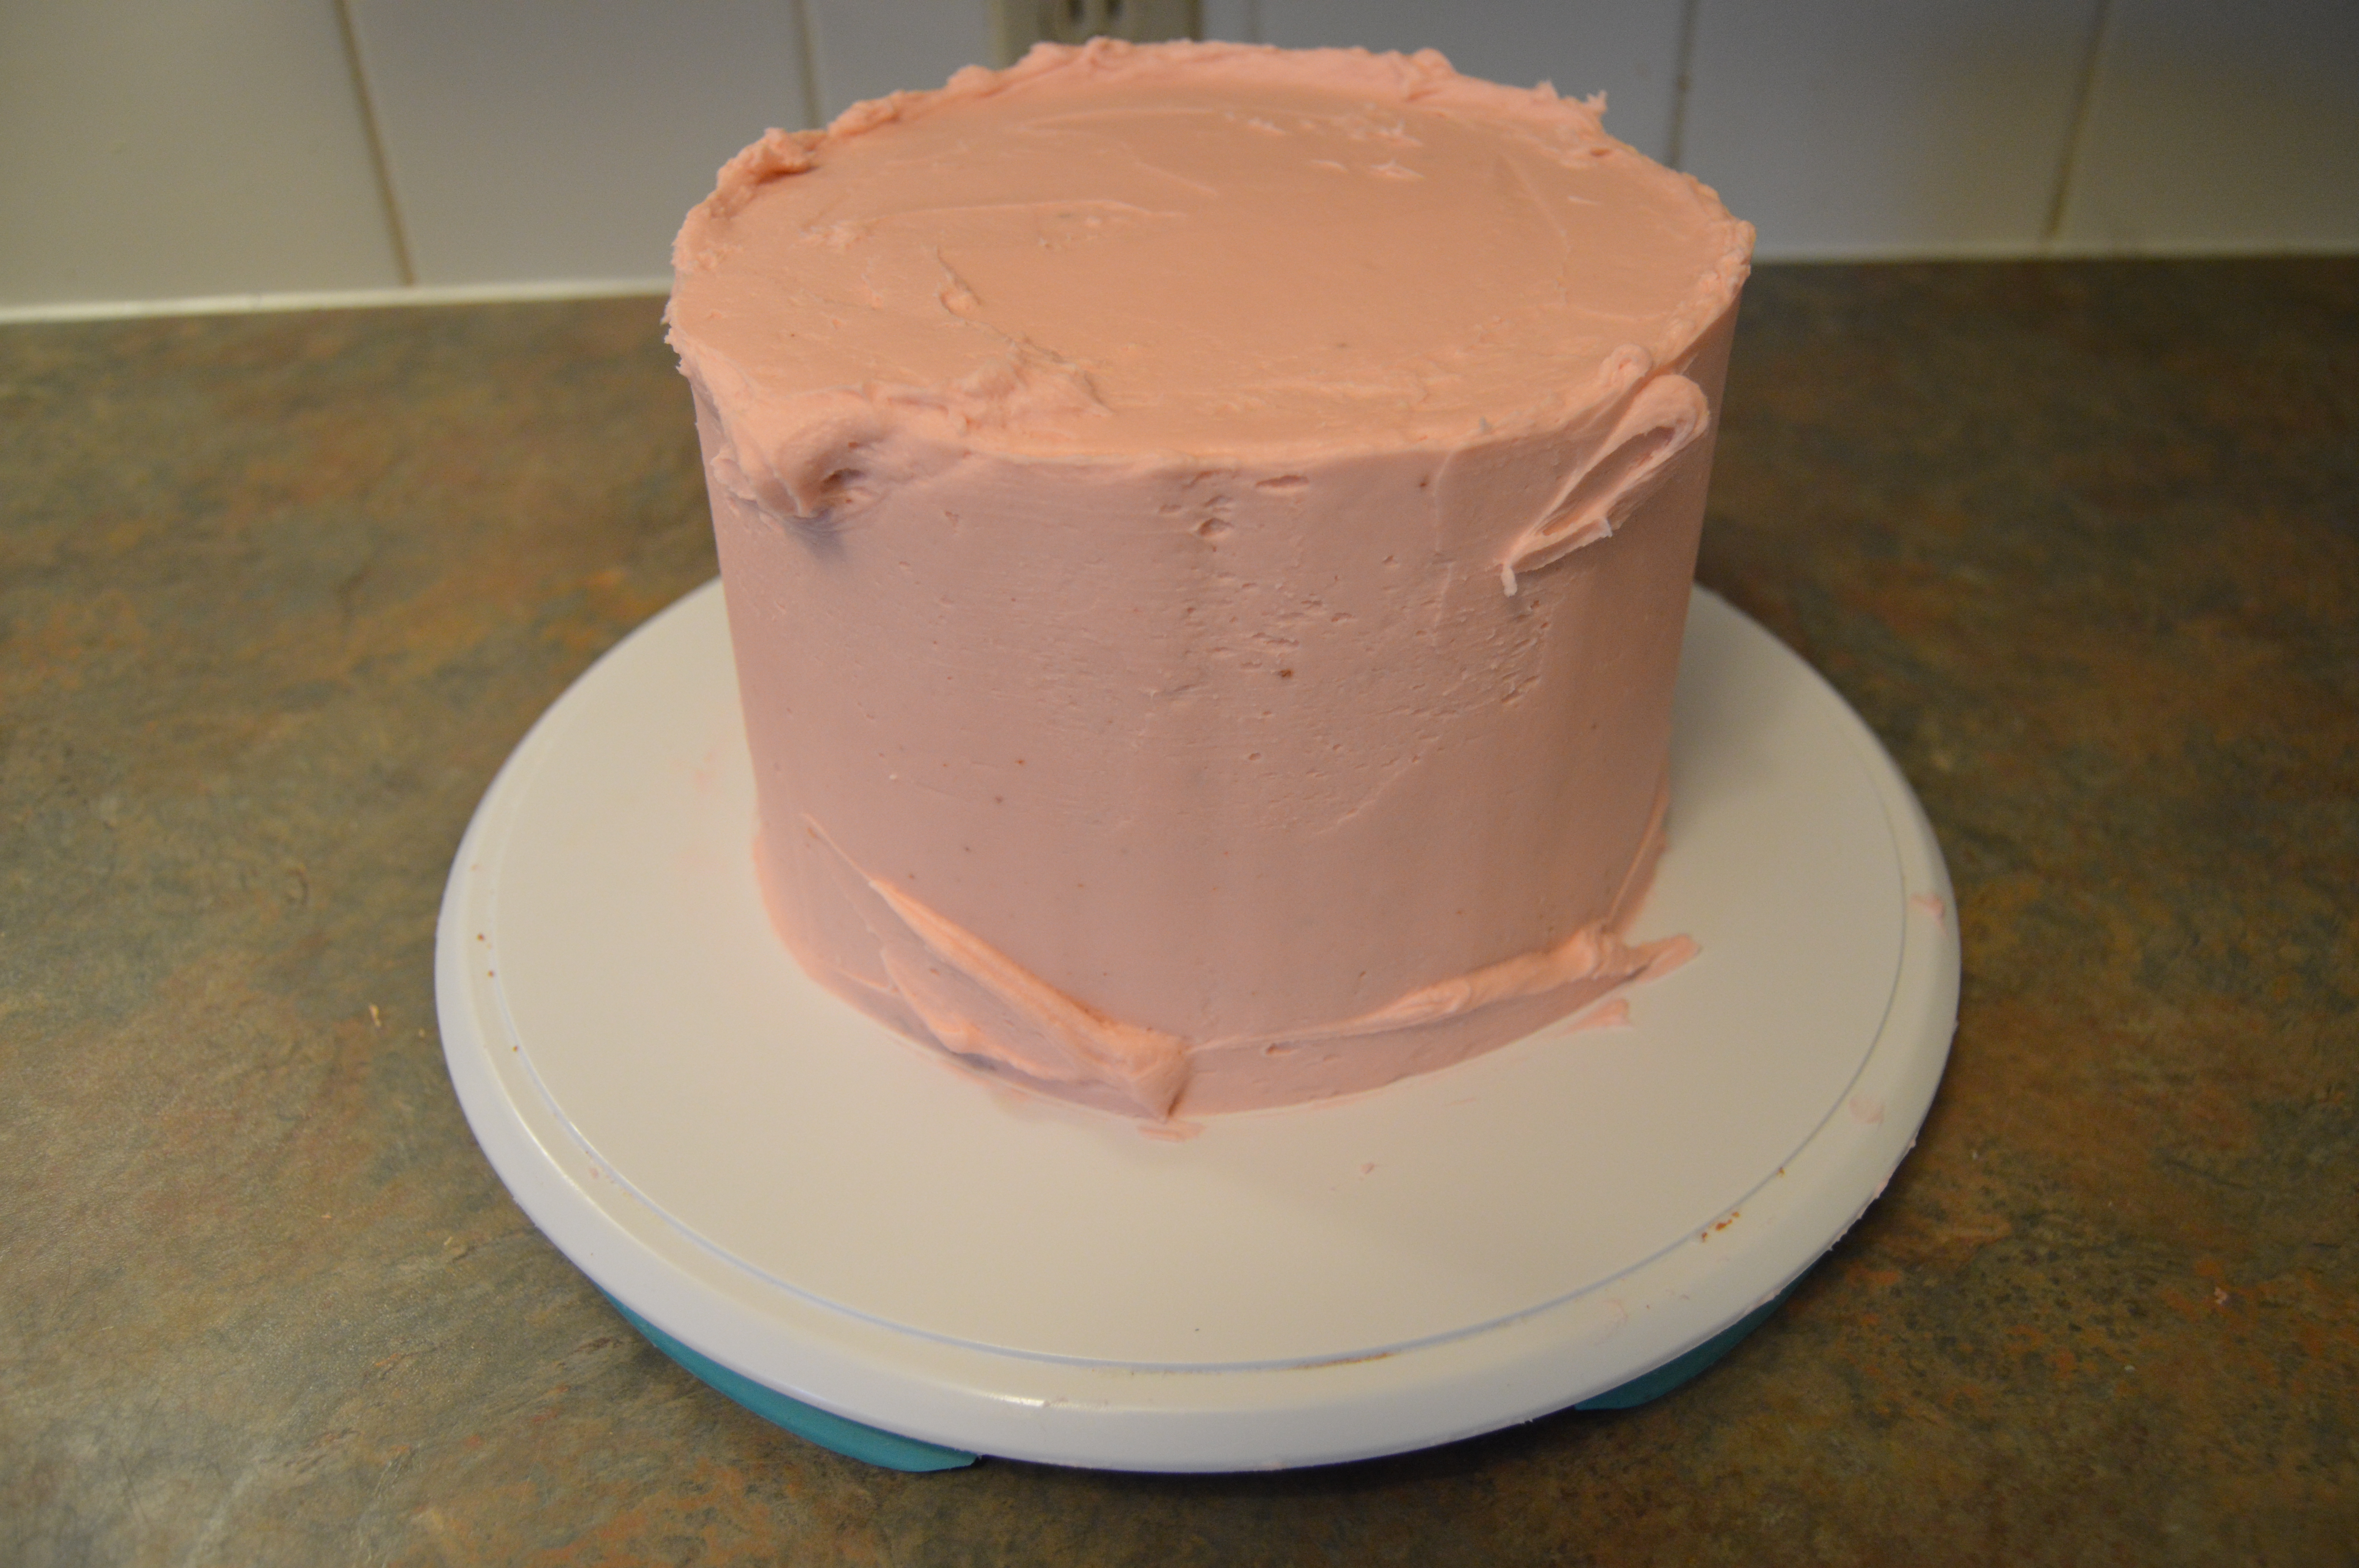
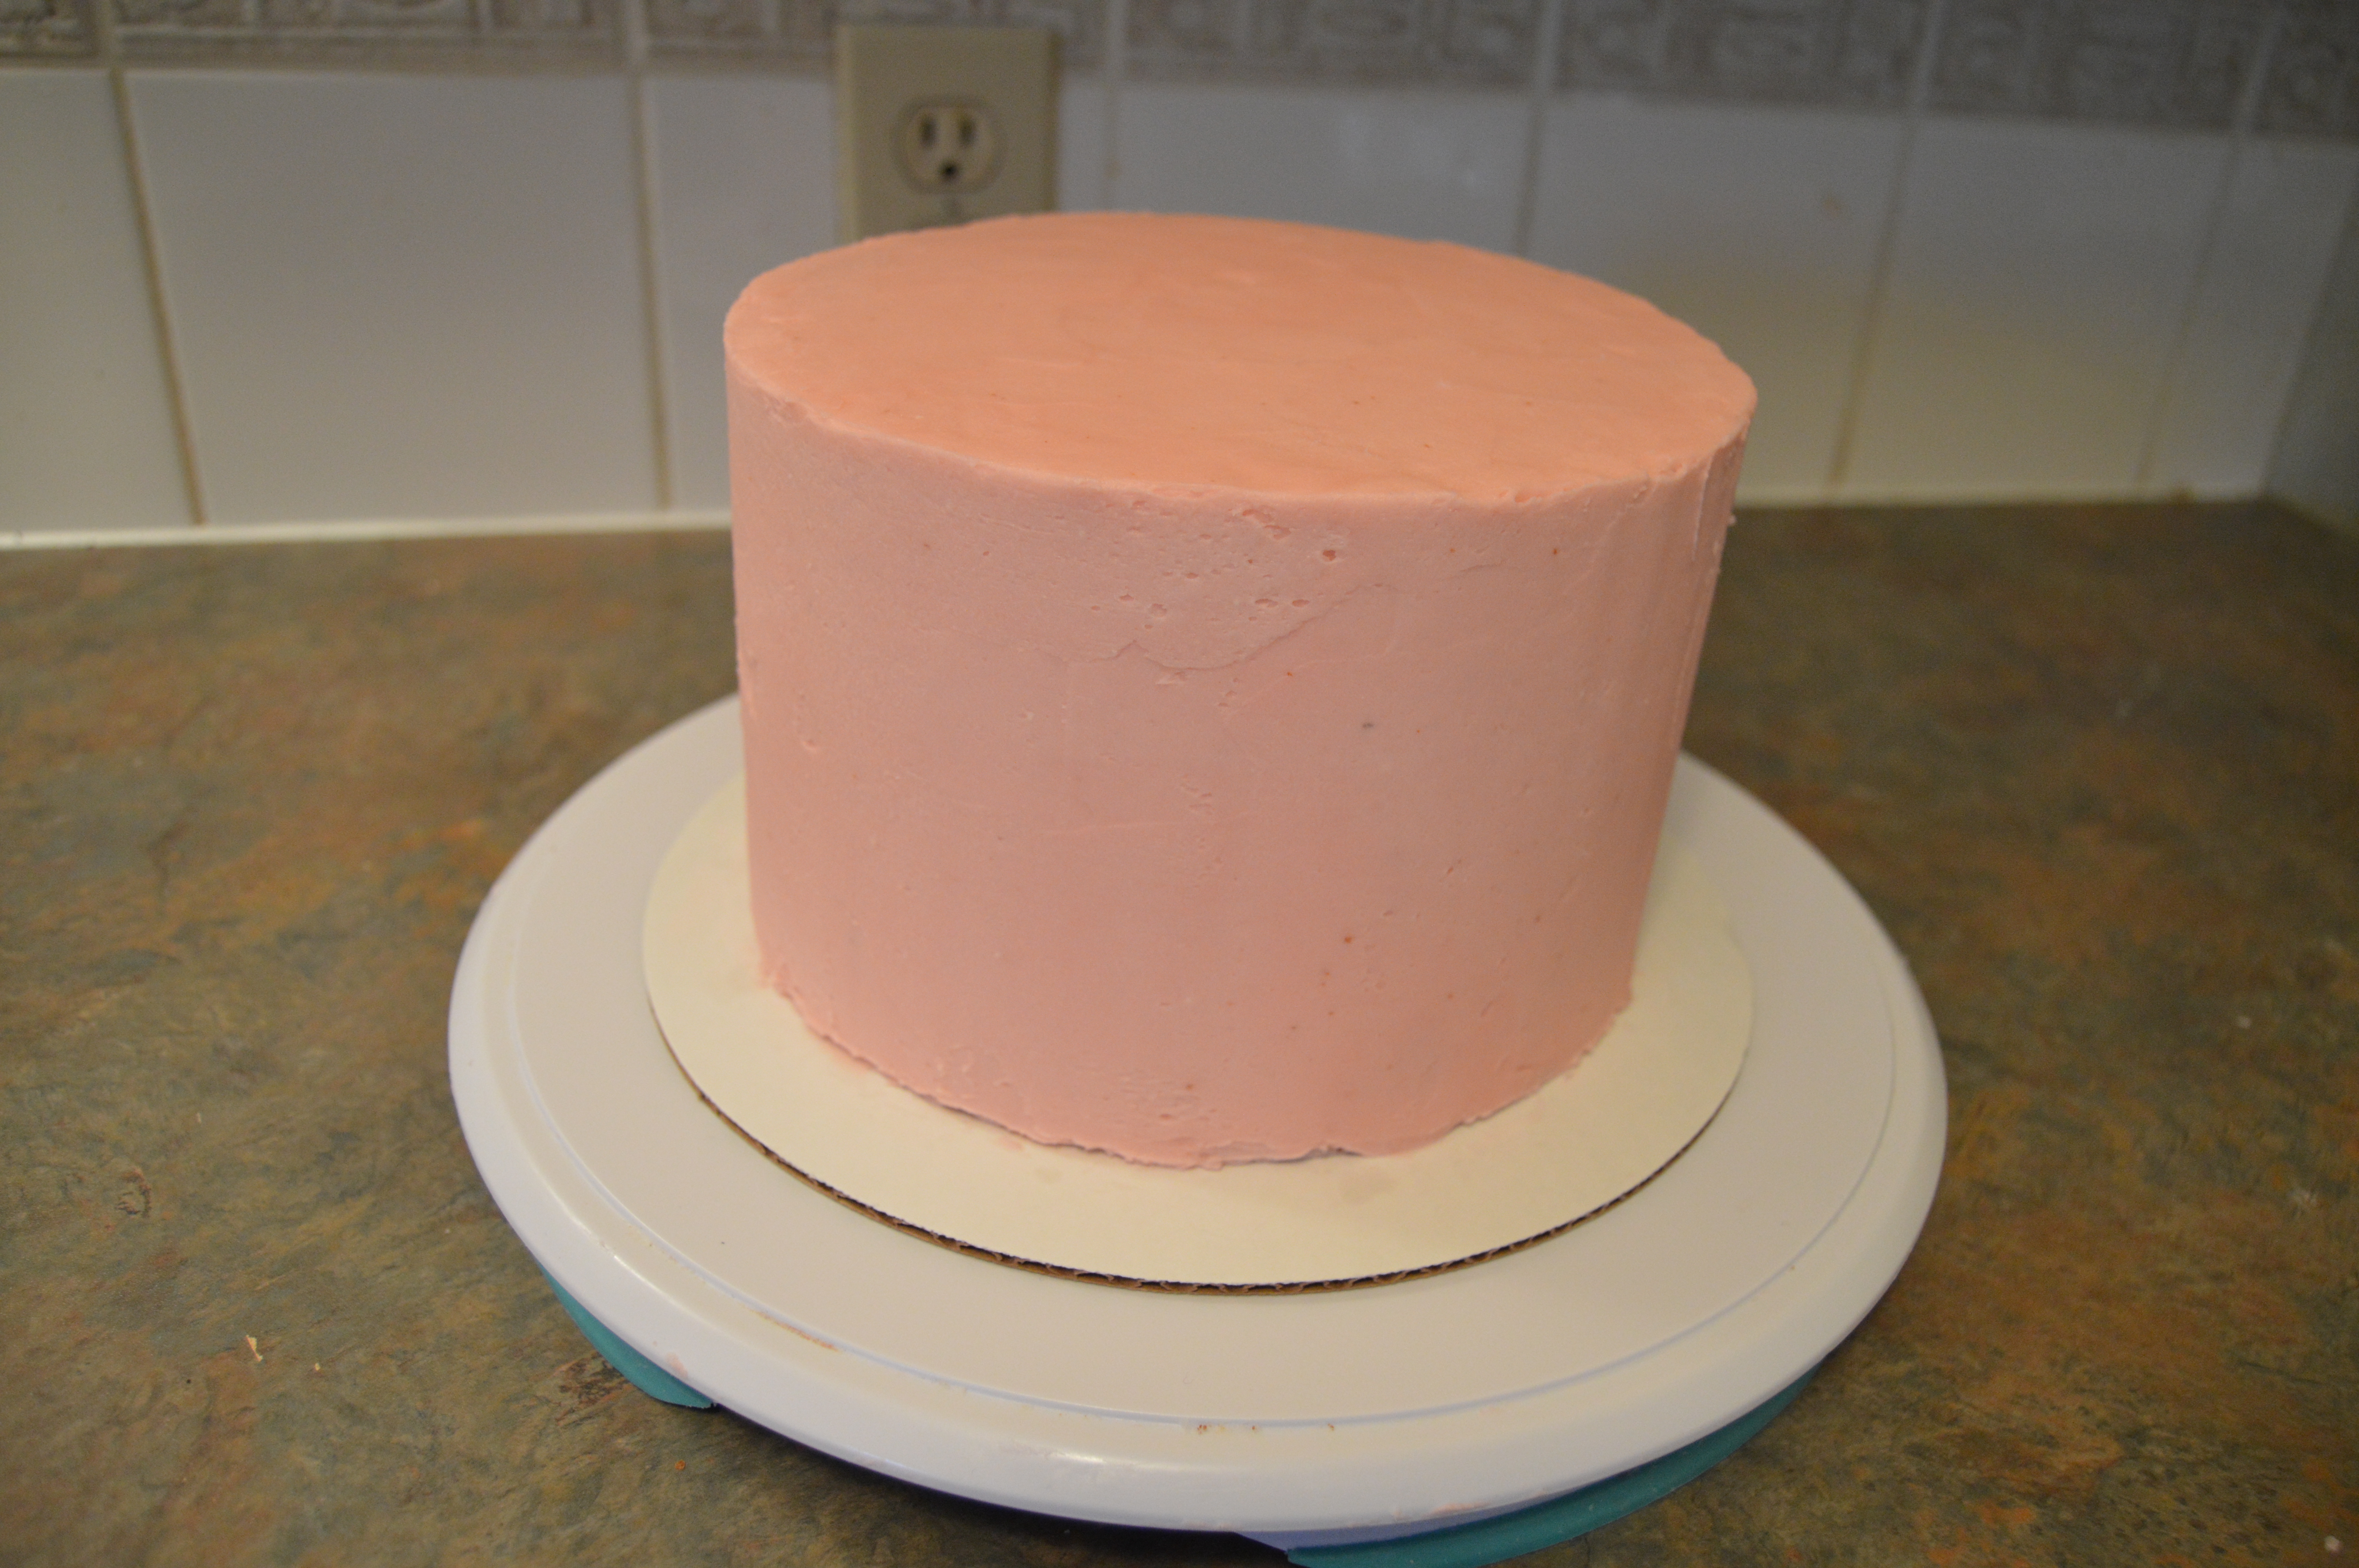
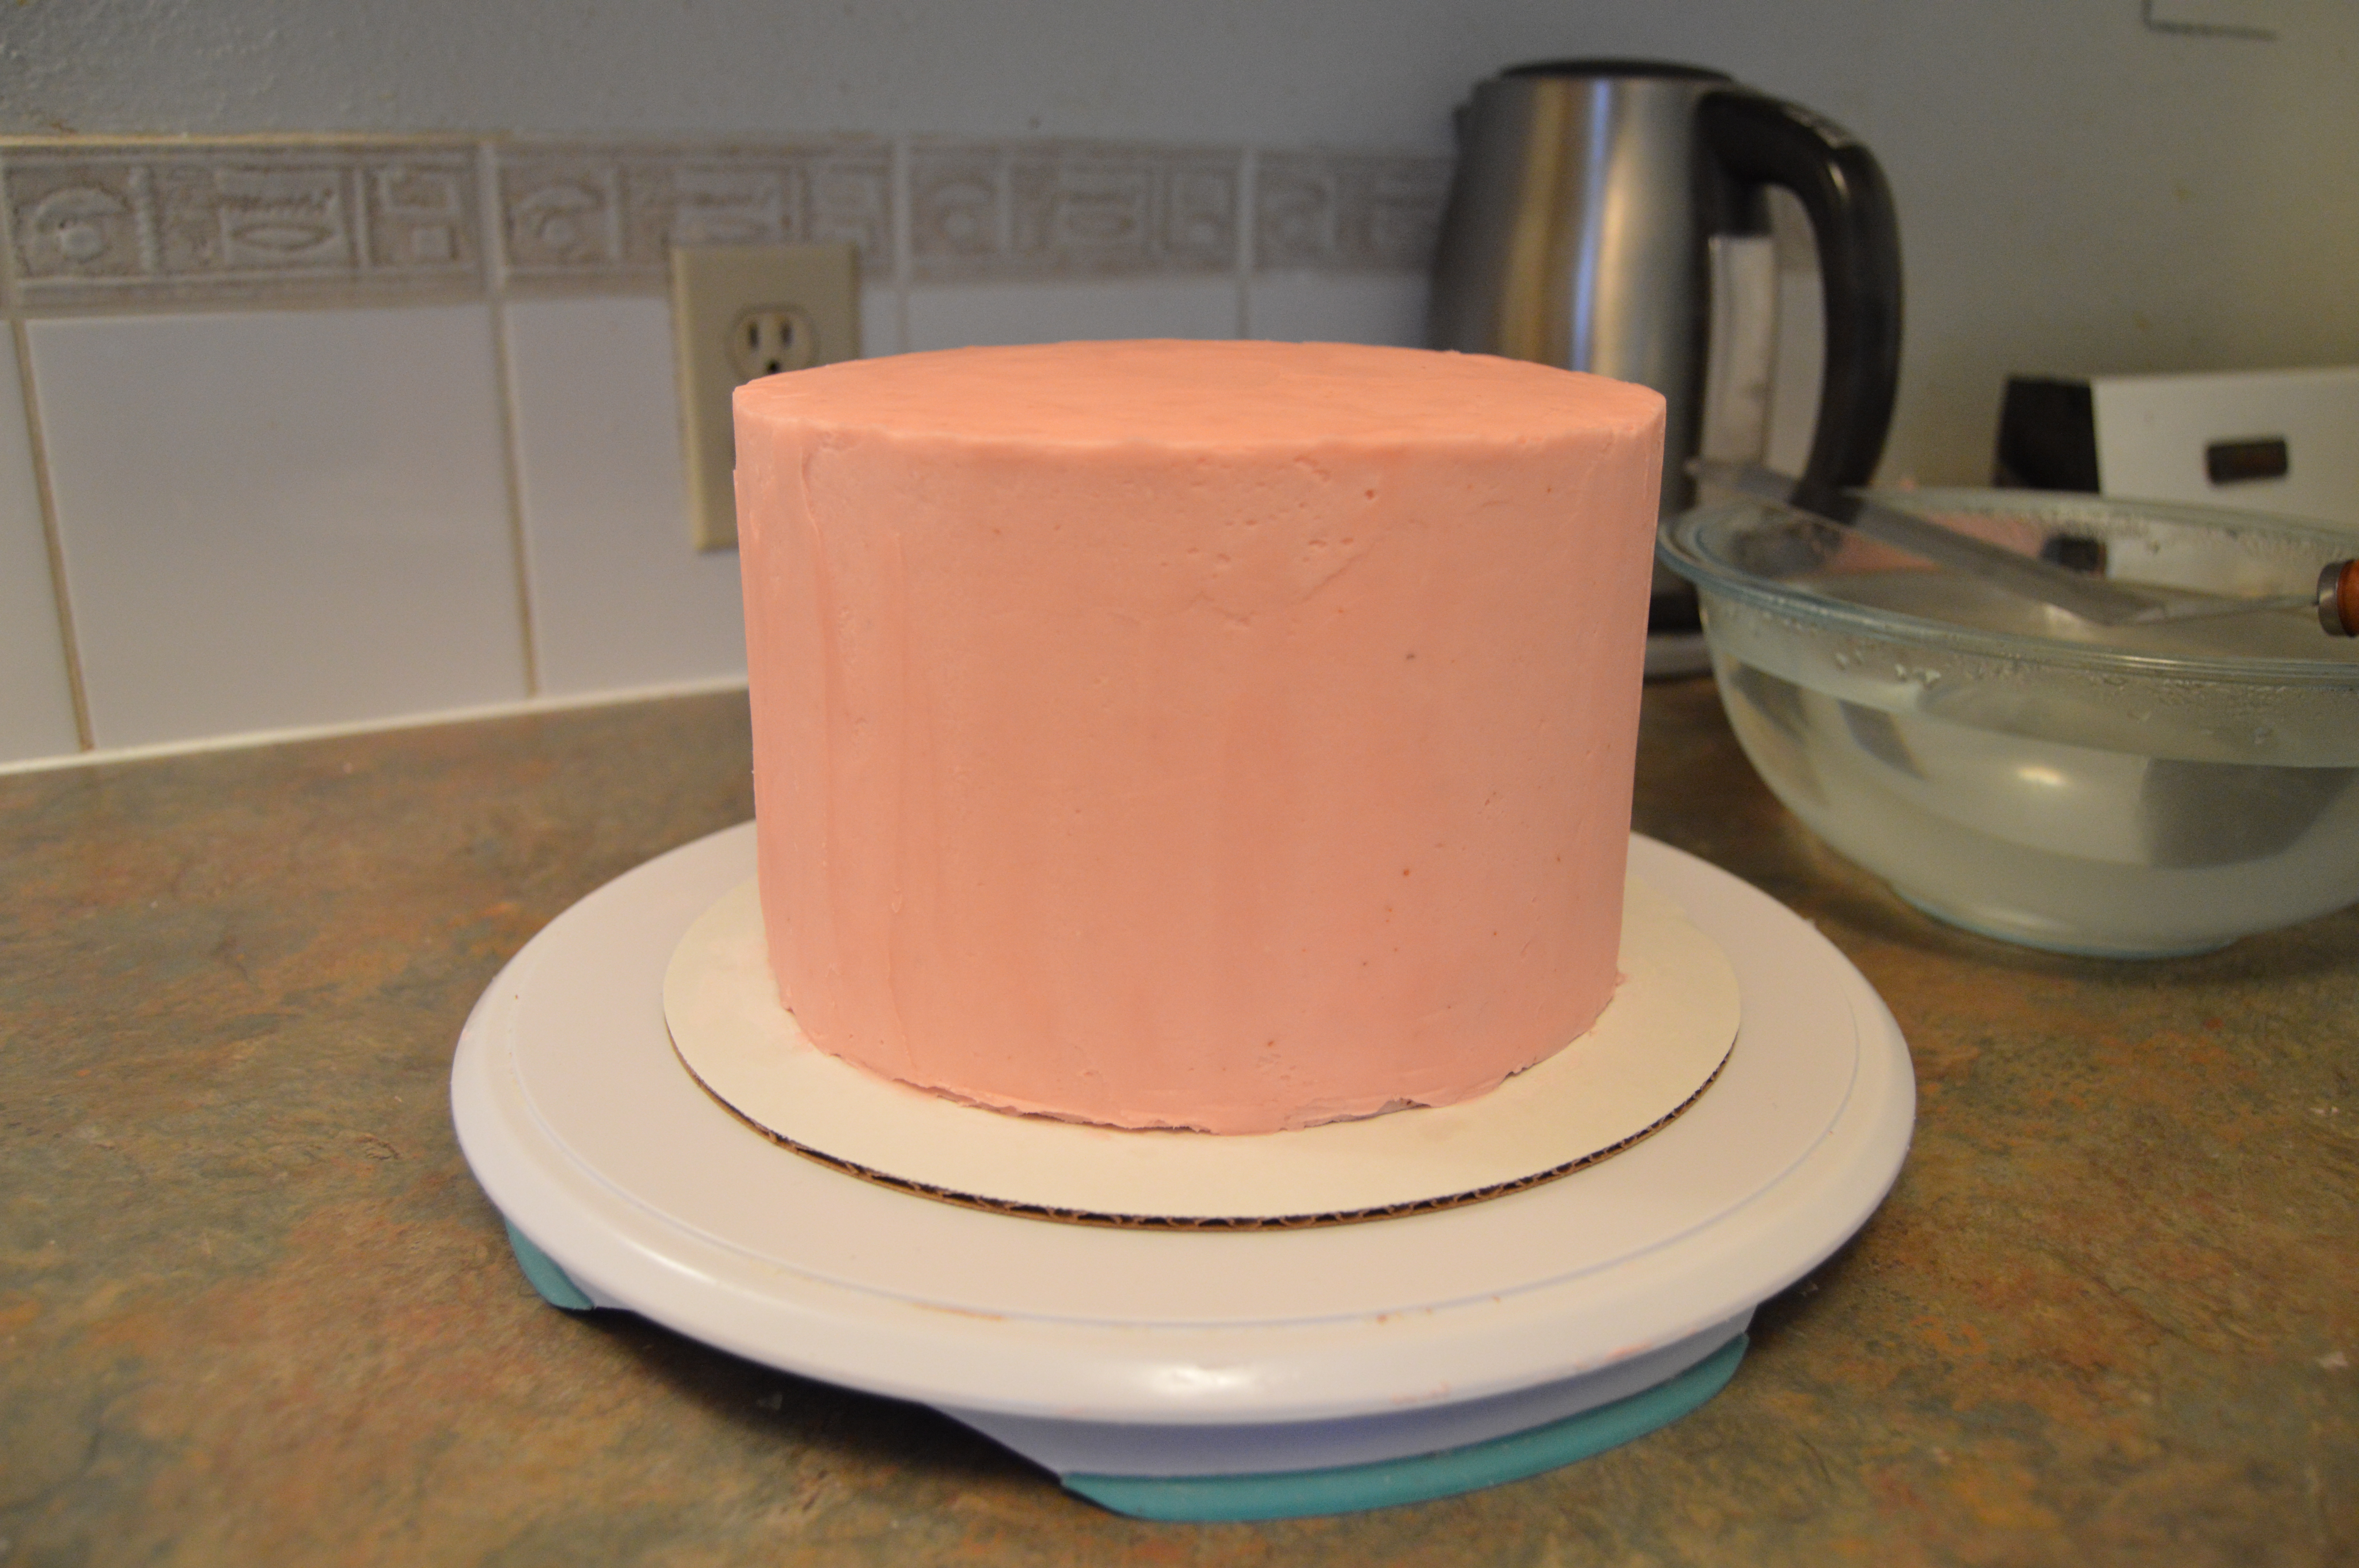
(2) After another hour of chilling, place the cake on the turntable and apply another layer of frosting. You want to be more particular this time around by targeting areas which are indented and need more frosting. Repeat the process of scraping again. This time around, you should end up with a smoother cake. Allow the cake to chill one final time before laminating the frosting.

LAMINATION
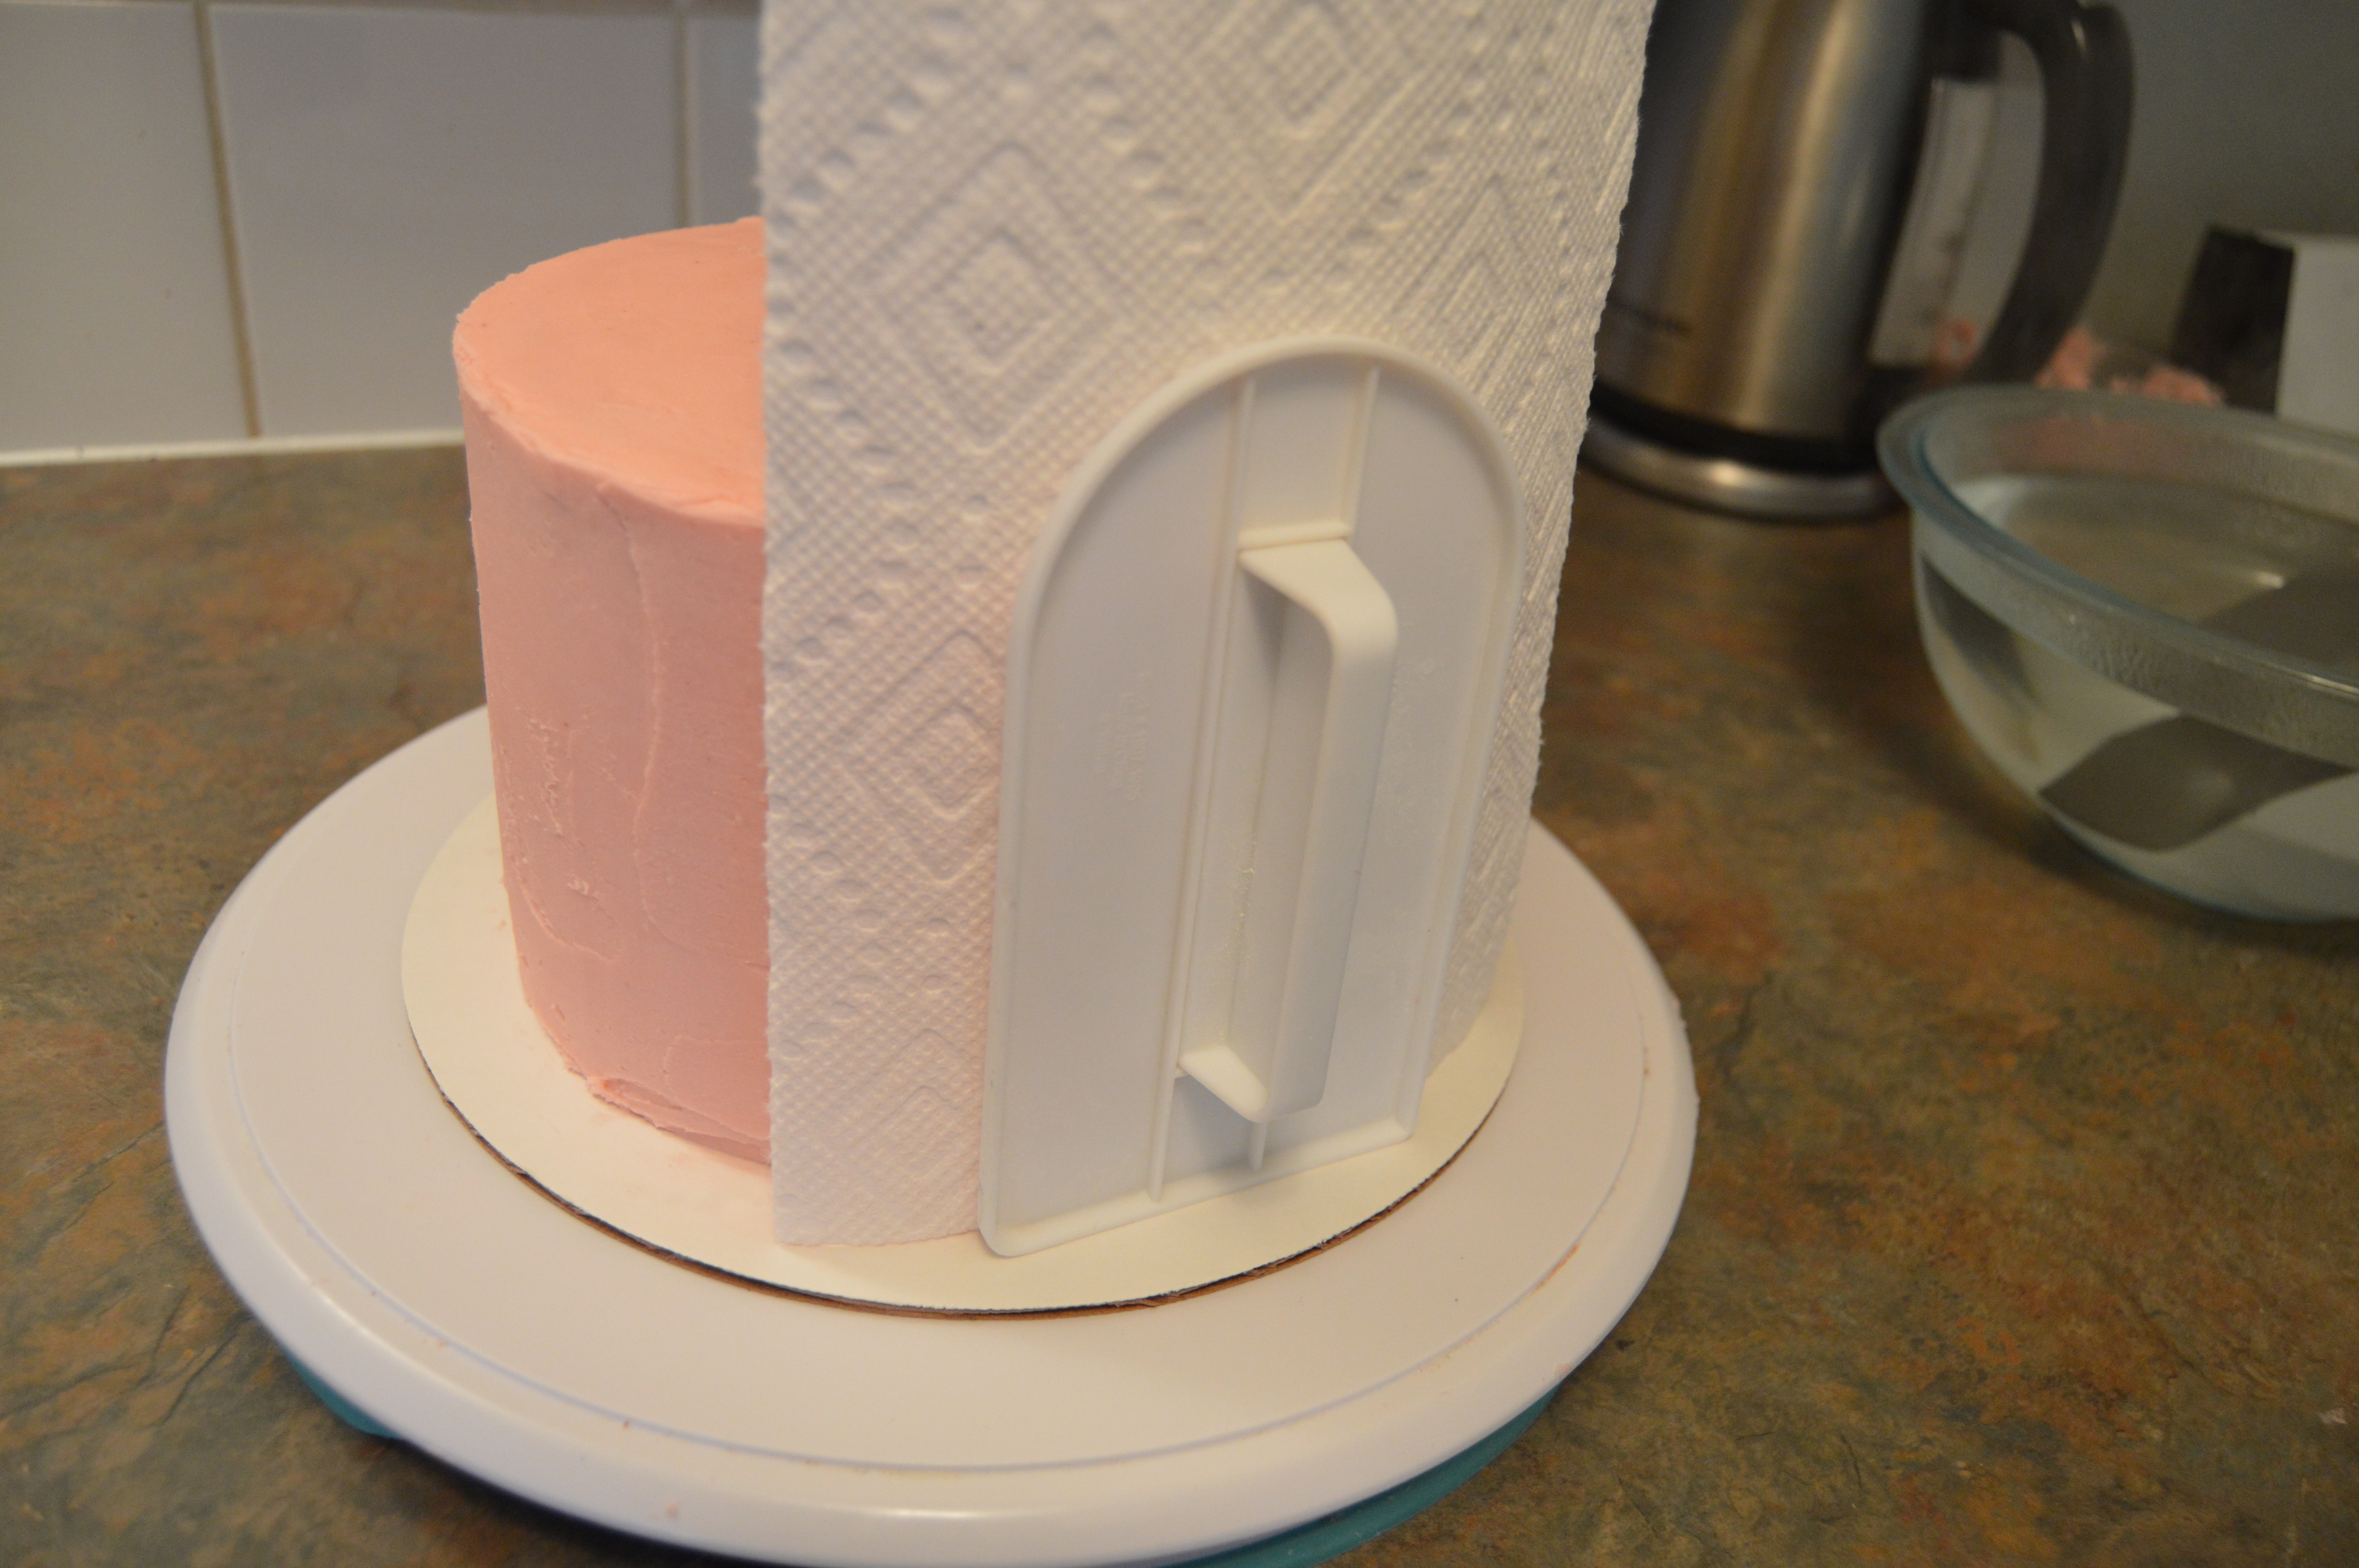
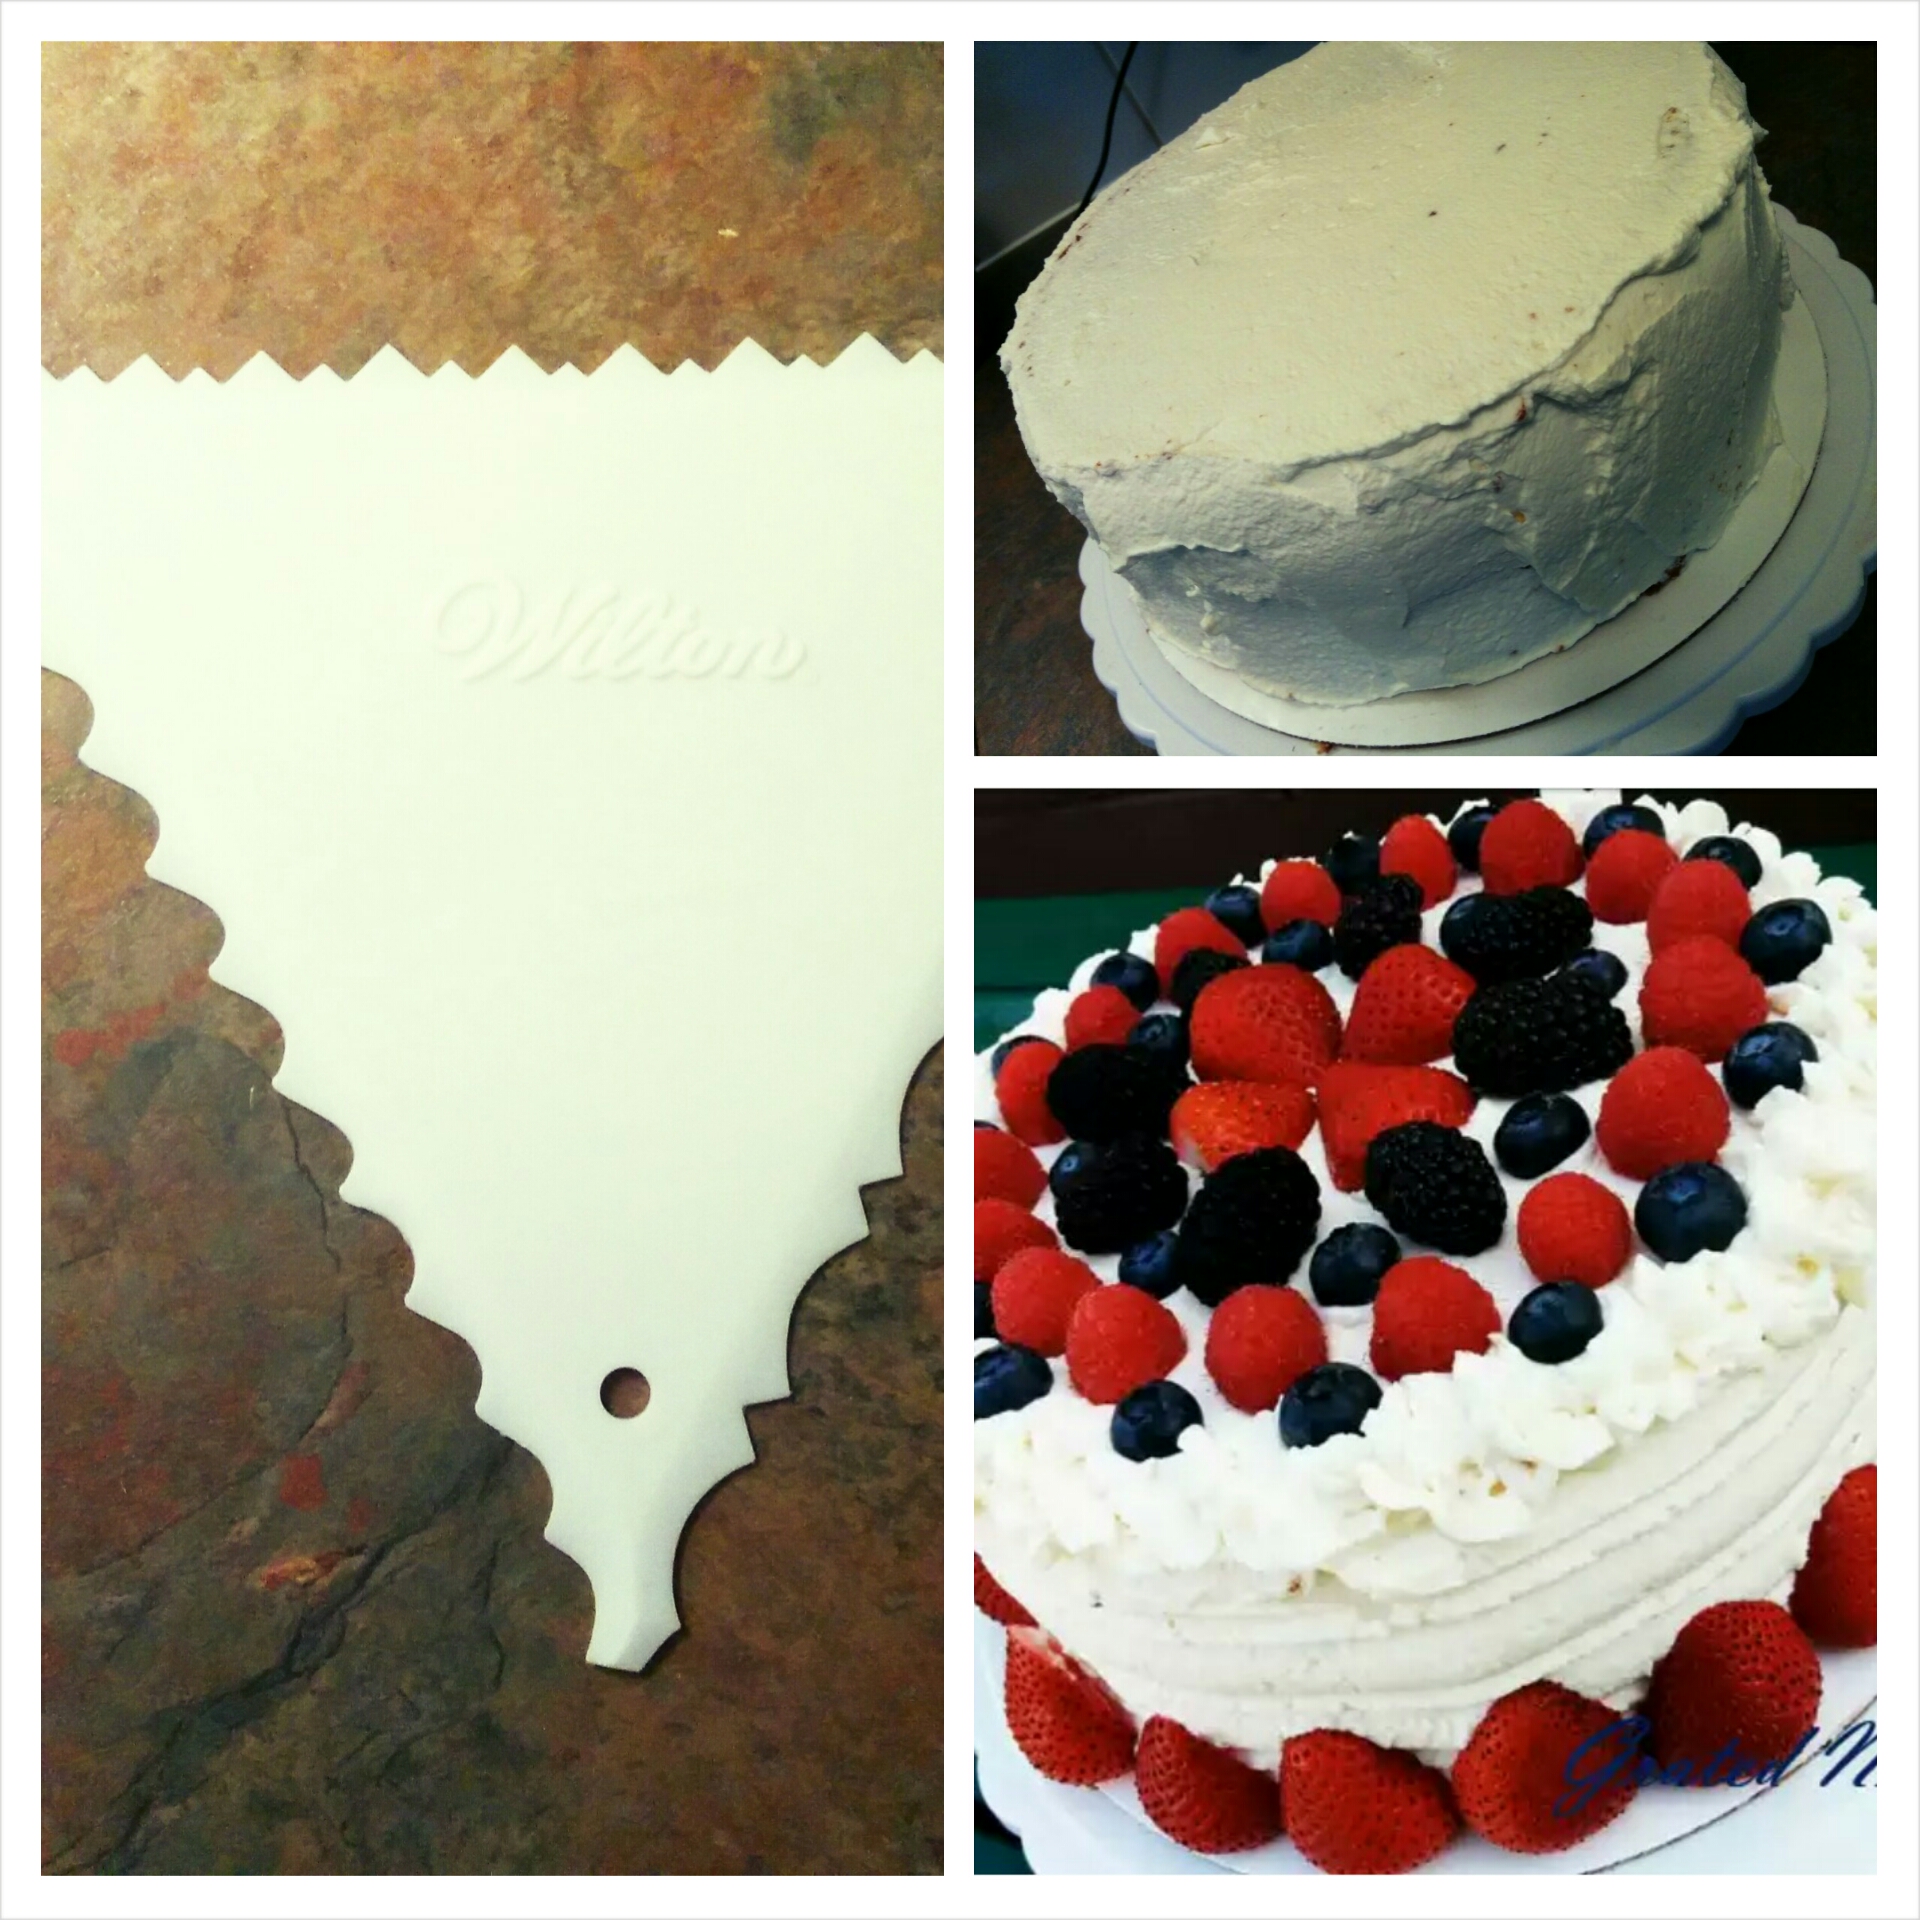
(1) Lamination refers to the process of smoothing out the frosting and sealing it. There are two ways of doing this. The first way is by placing a paper towel on the cake and robbing it against the cake with a fondant smoother. You do this all over the cake until it becomes as smooth as you want it to be. Note that the paper towel must be smooth without patterns on it. The picture below is only for illustration purposes.
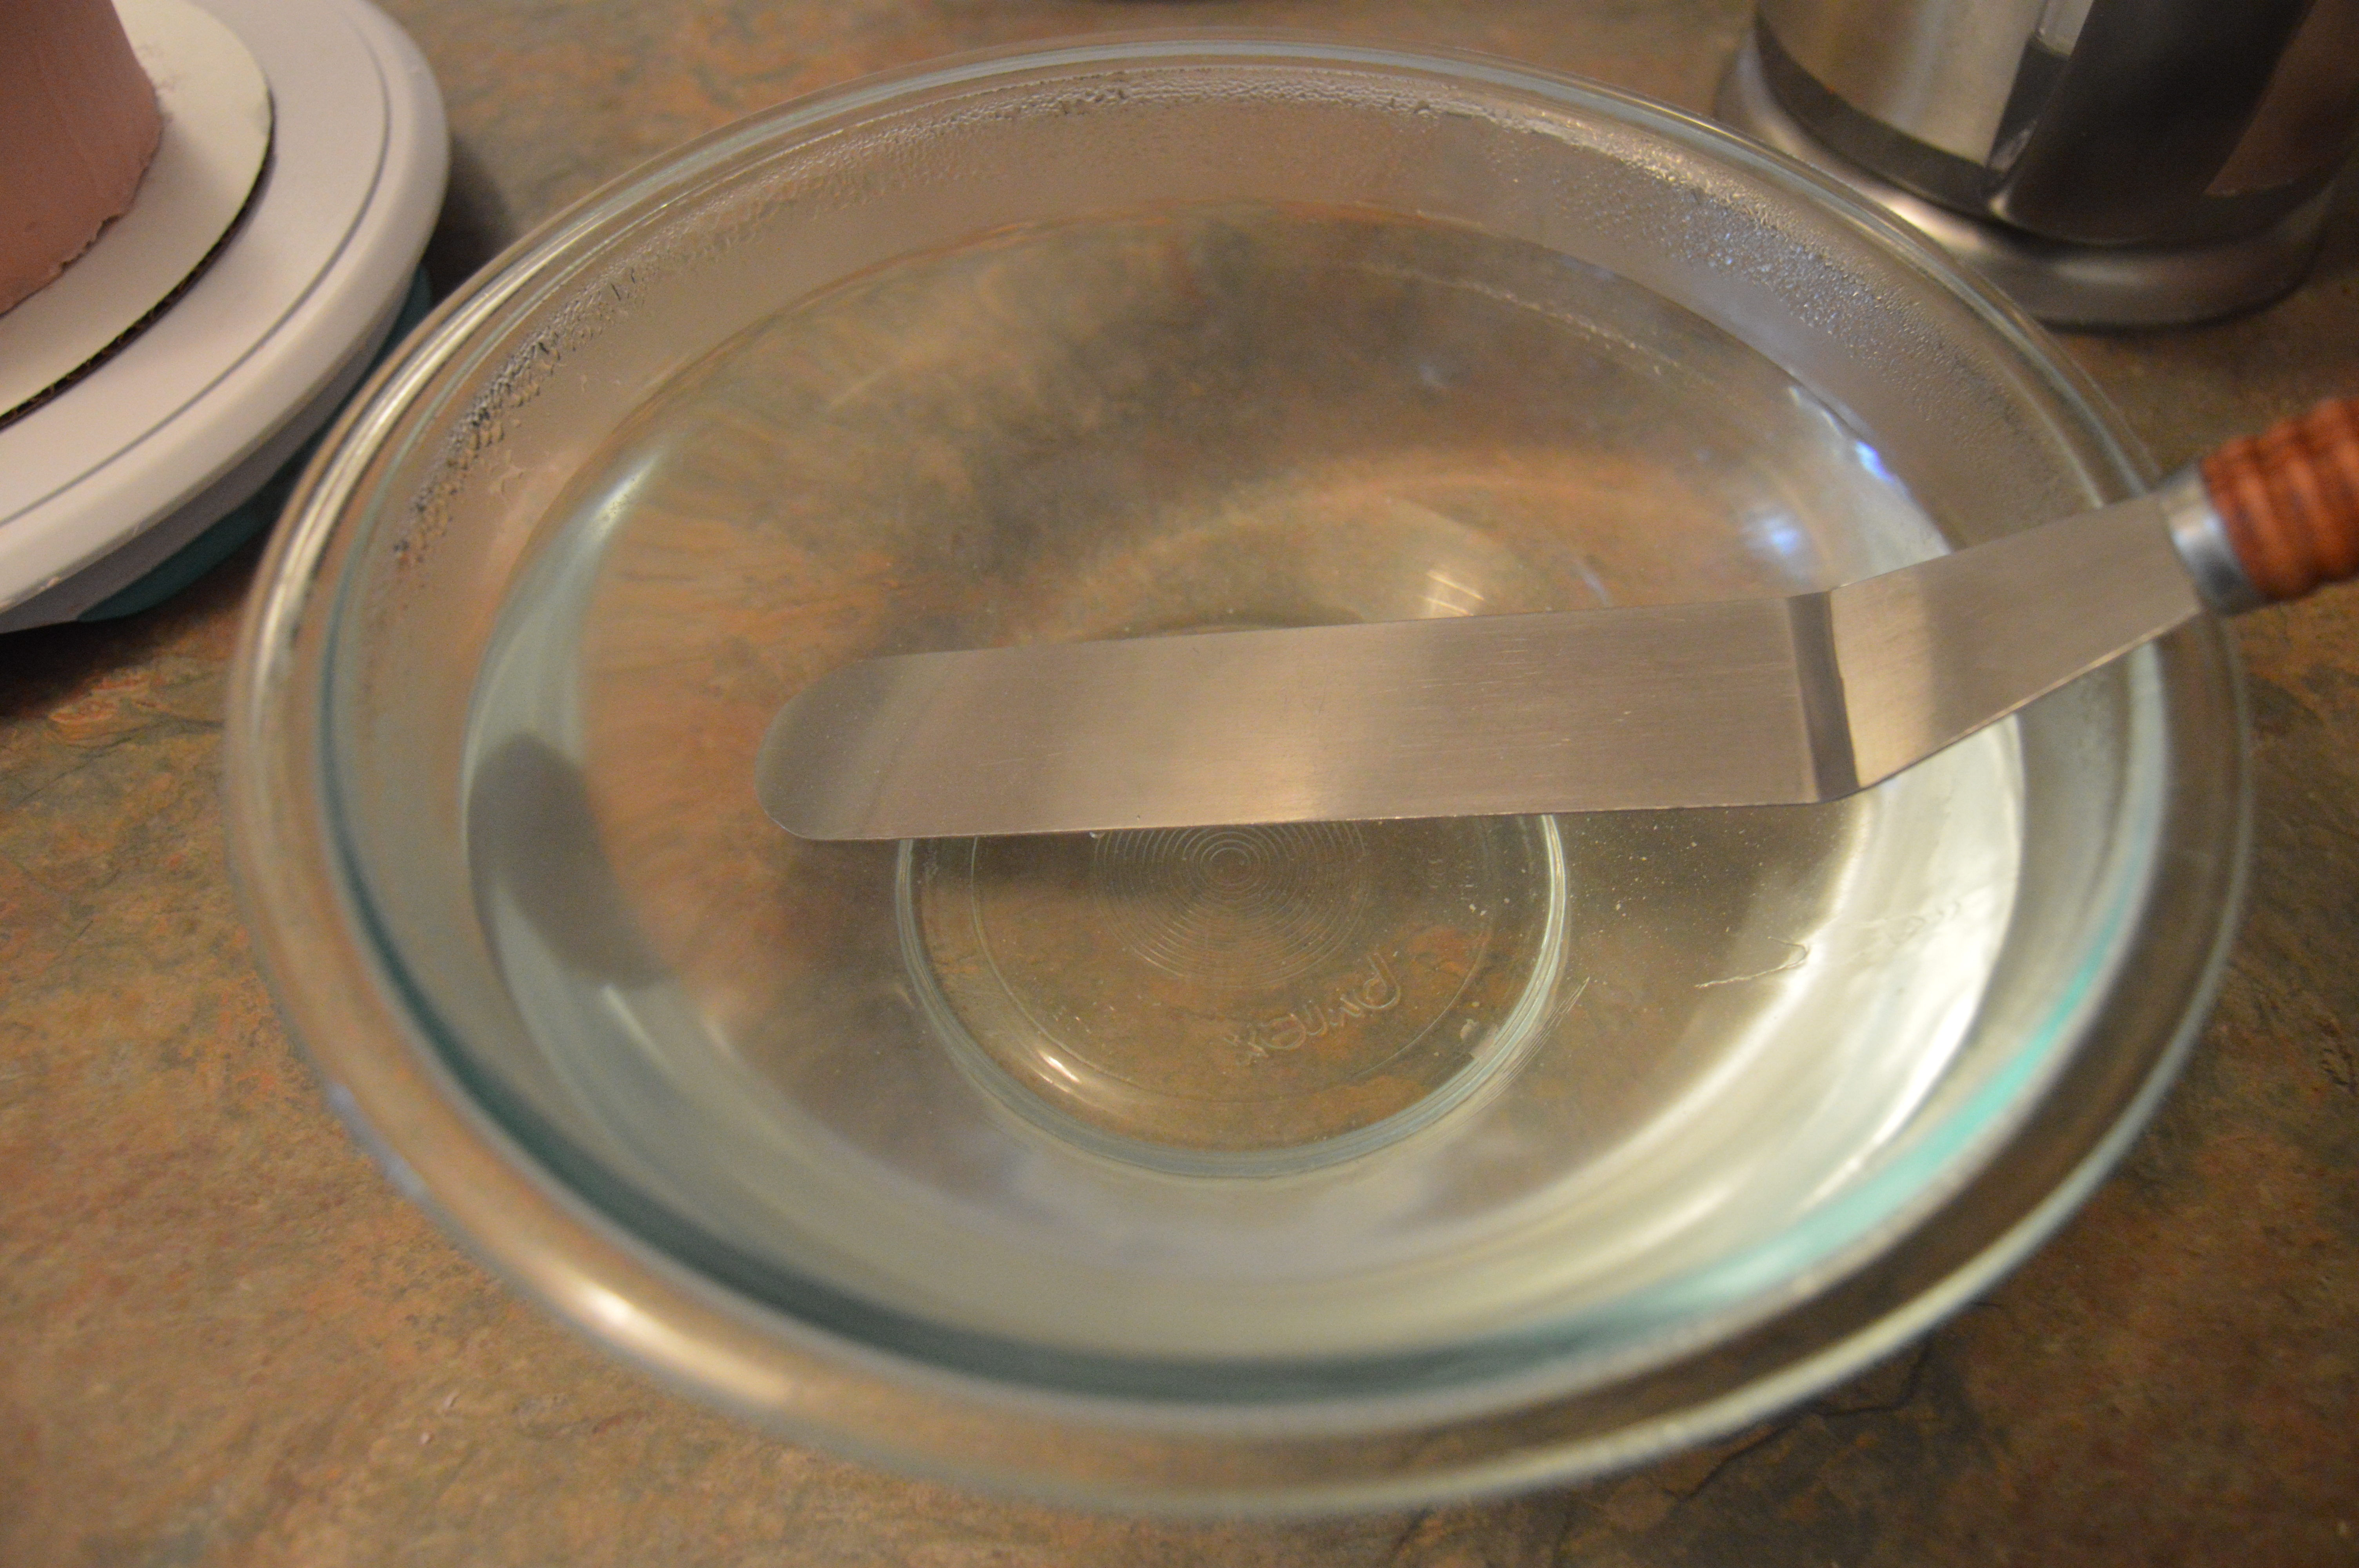
(2) The second method is with hot water. To do this, boil and place your palette knife in the hot water to heat up. This knife will be rubbed on the frosting. You will need some paper towel to dry the knife before using it on the frosting. What you want is the heat from the hot water and not the water itself. So, dip the knife in hot water, dry, laminate cake, dip in hot water again, dry, laminate, and continue the process until you are satisfied. What will happen is that the heat from the knife will melt the outer layer of the frosting slightly which in turn will fill up any small holes on the frosting and create a smooth compact exterior frosting layer. You have to work fast so the frosting does not melt while you are laminating it.
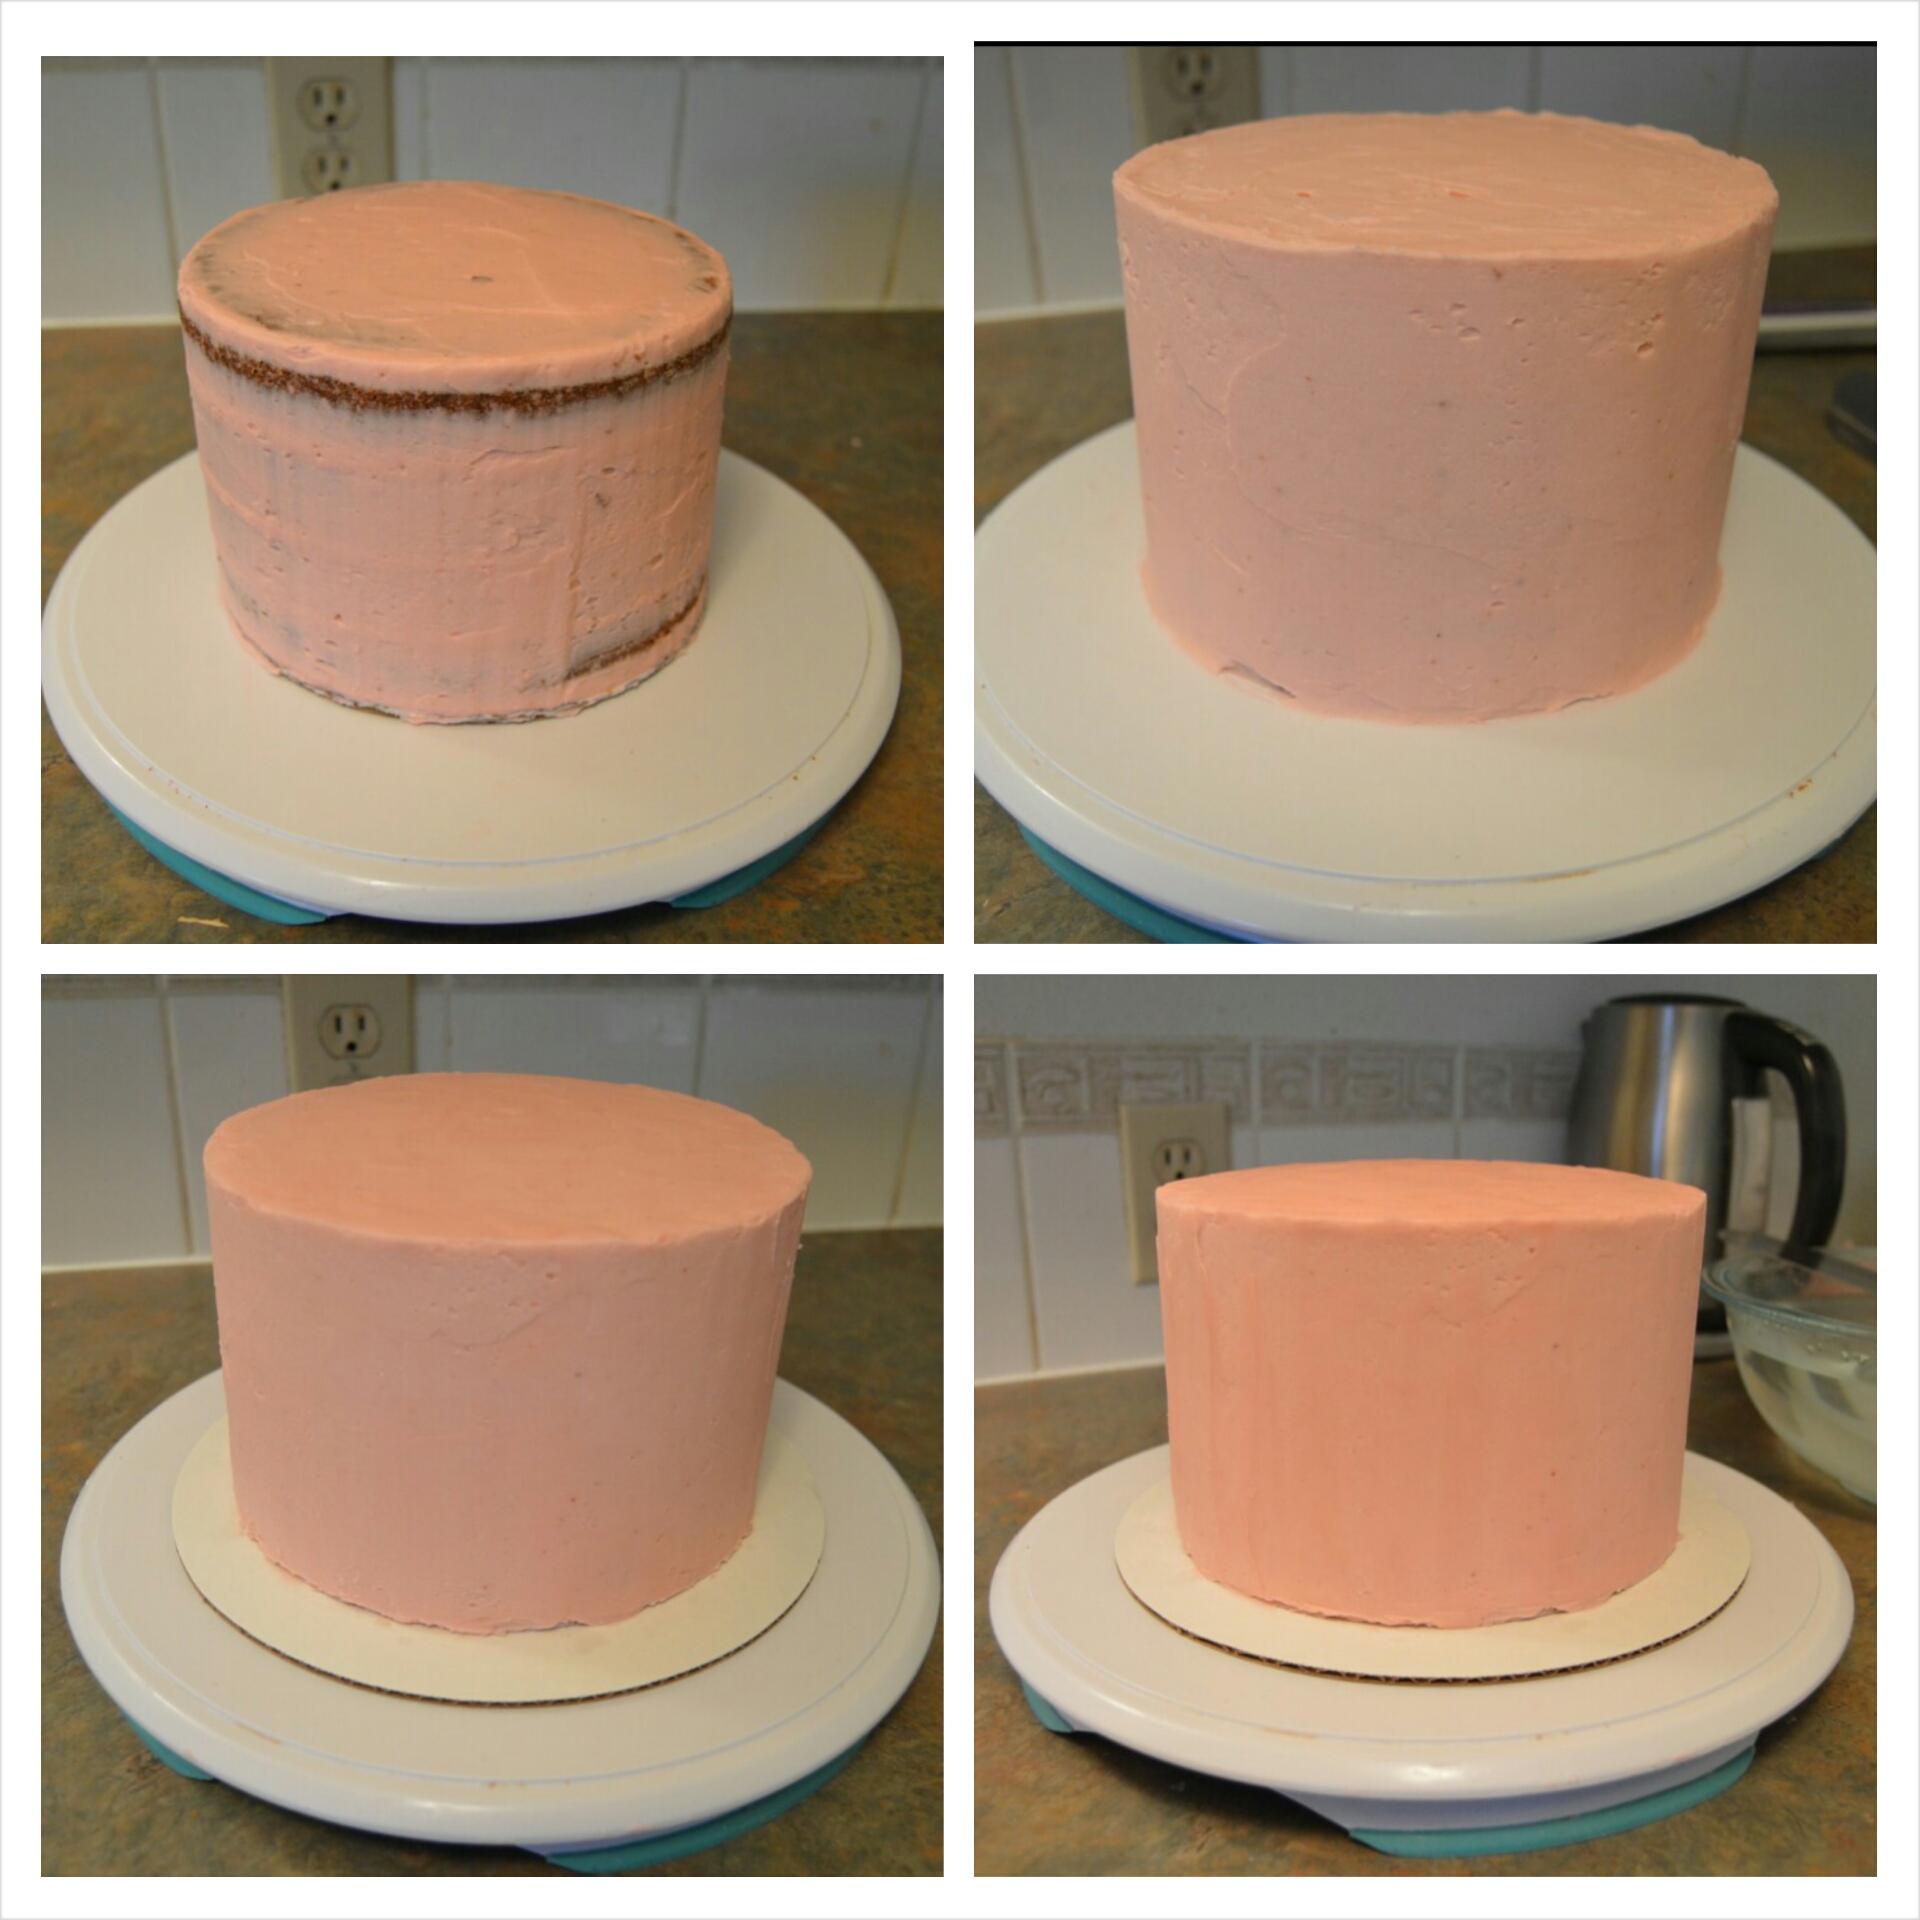
The Picture below shows 4 different pictures of the cake through the various stages: crumb coat, 2nd layer, 3rd layer and post-lamination. Spot the difference?
If you do not want to stress yourself going through the various layers of frosting, an easy way out is to run an icing comb around the cake after applying the second layer of frosting. Make sure that you are very generous with the frosting if you intend to make use of a comb as the comb goes deep.
DECORATING
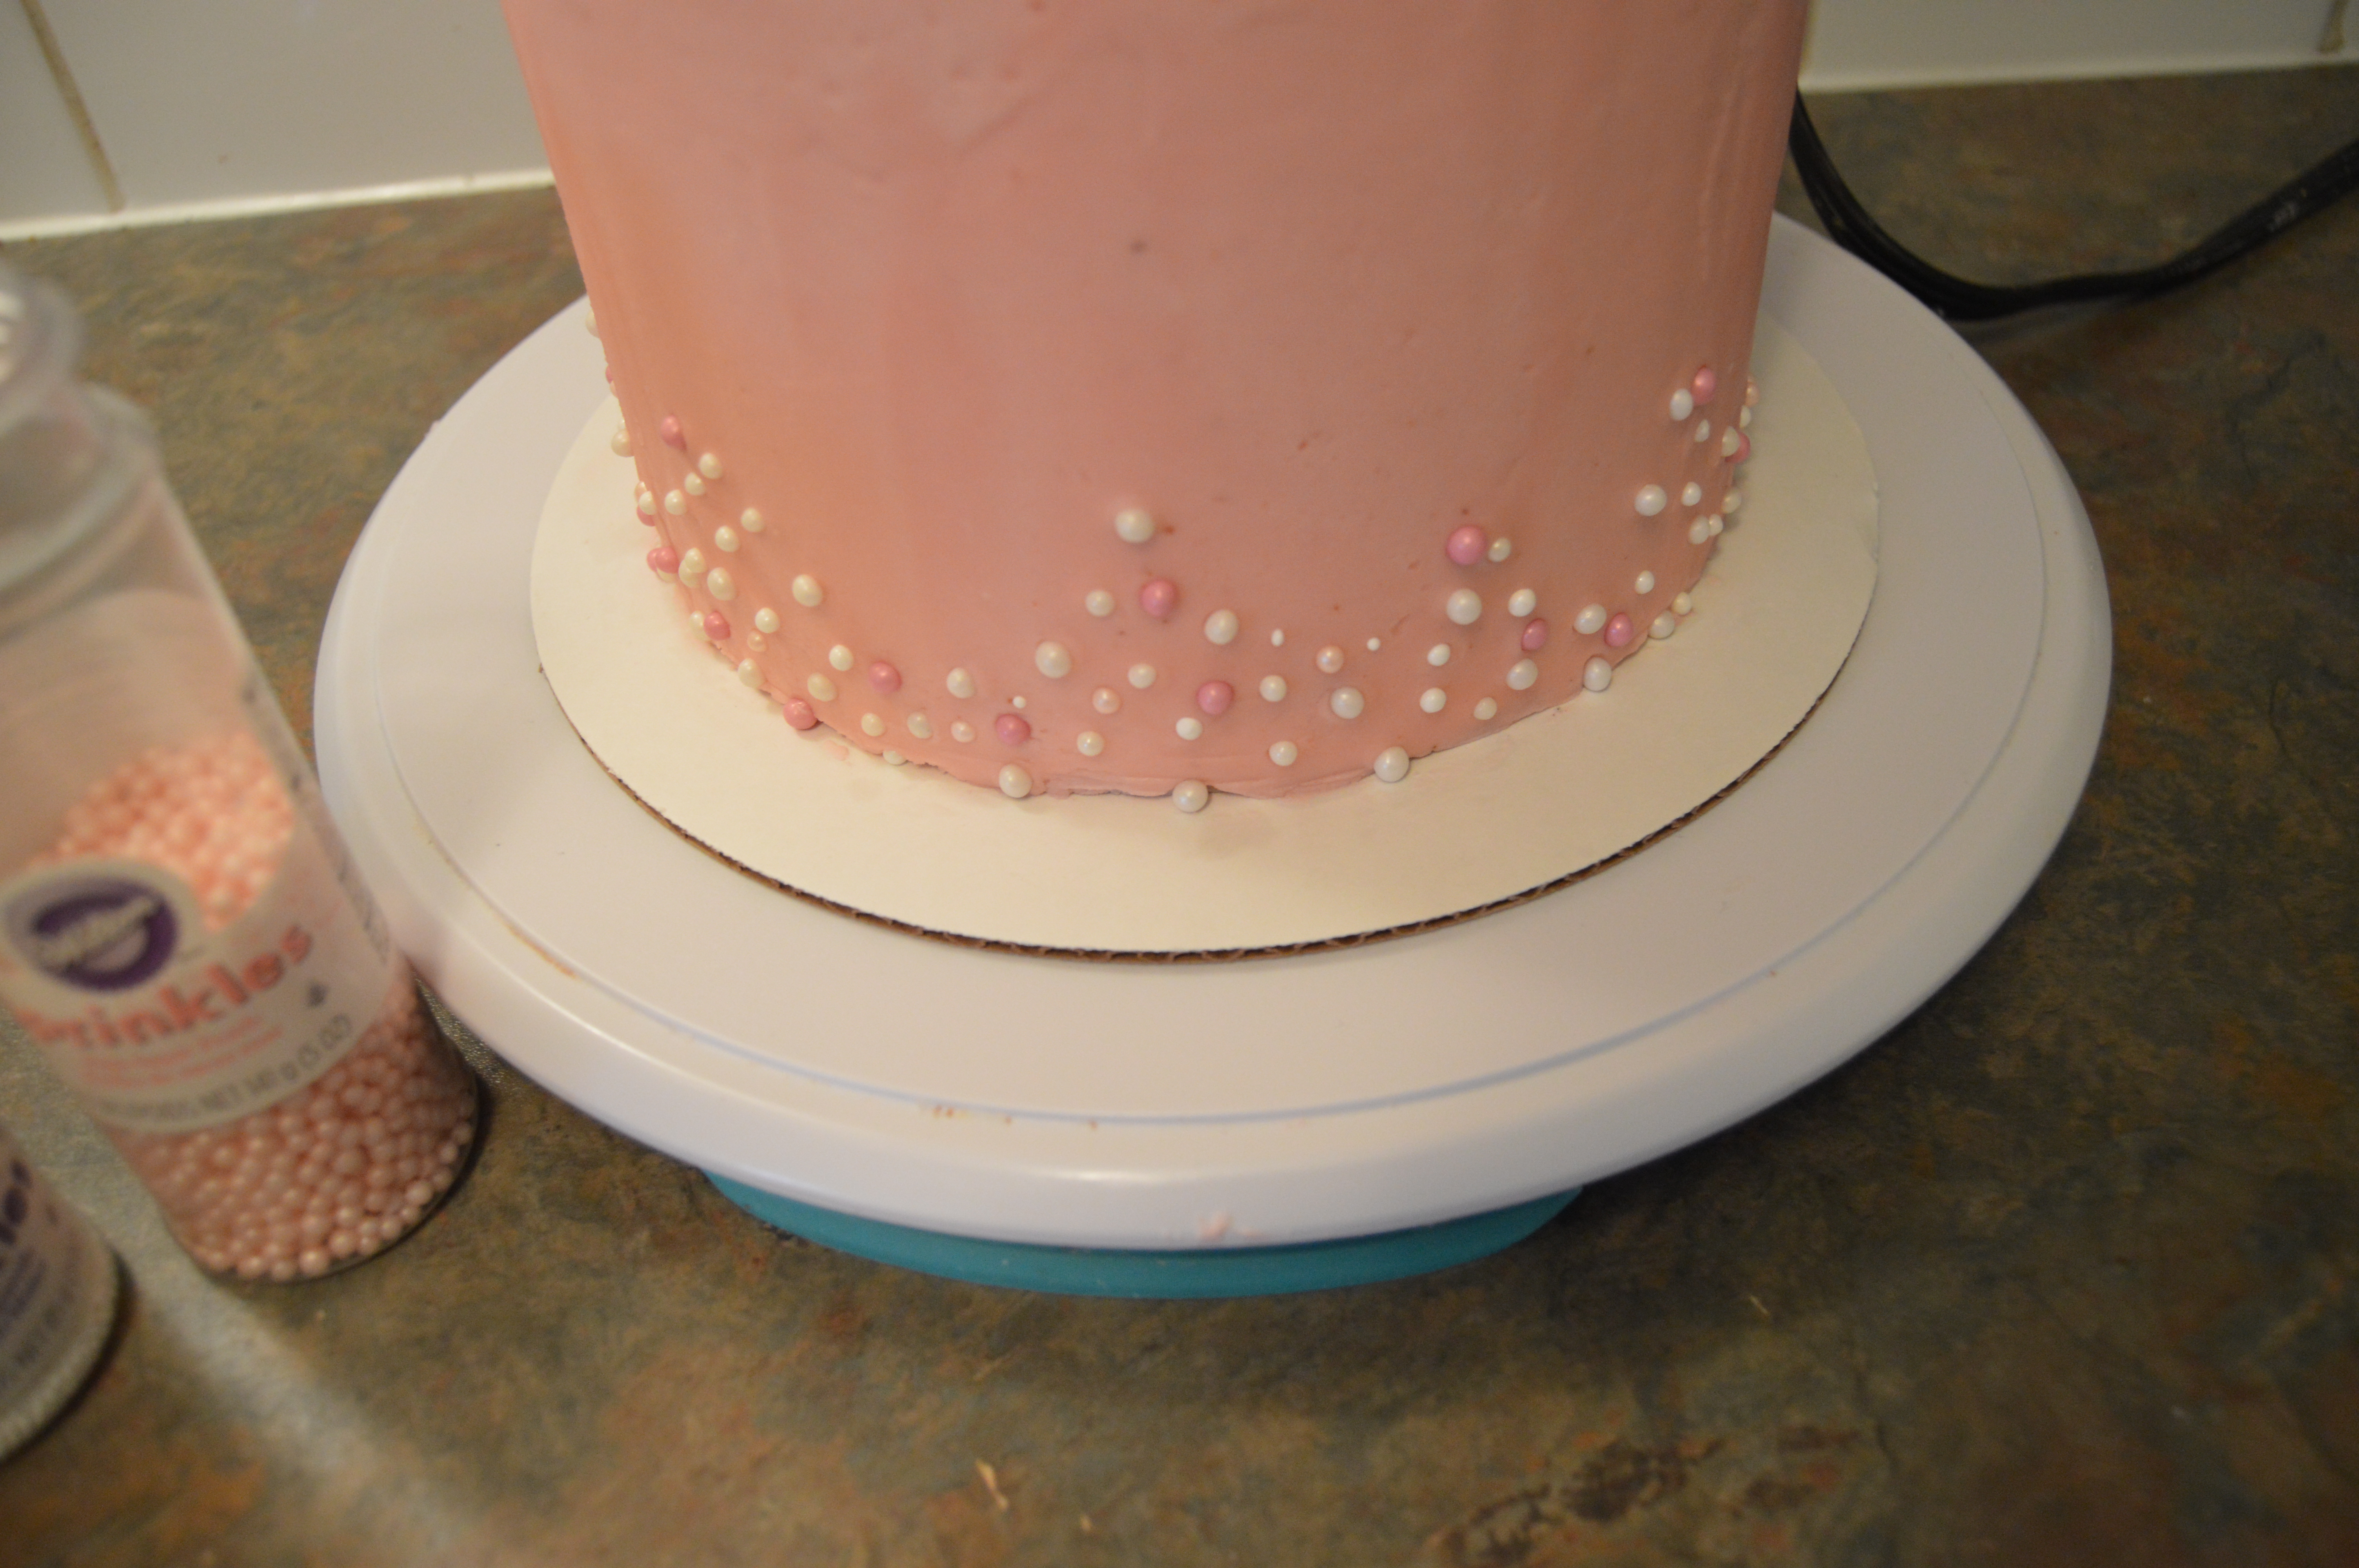
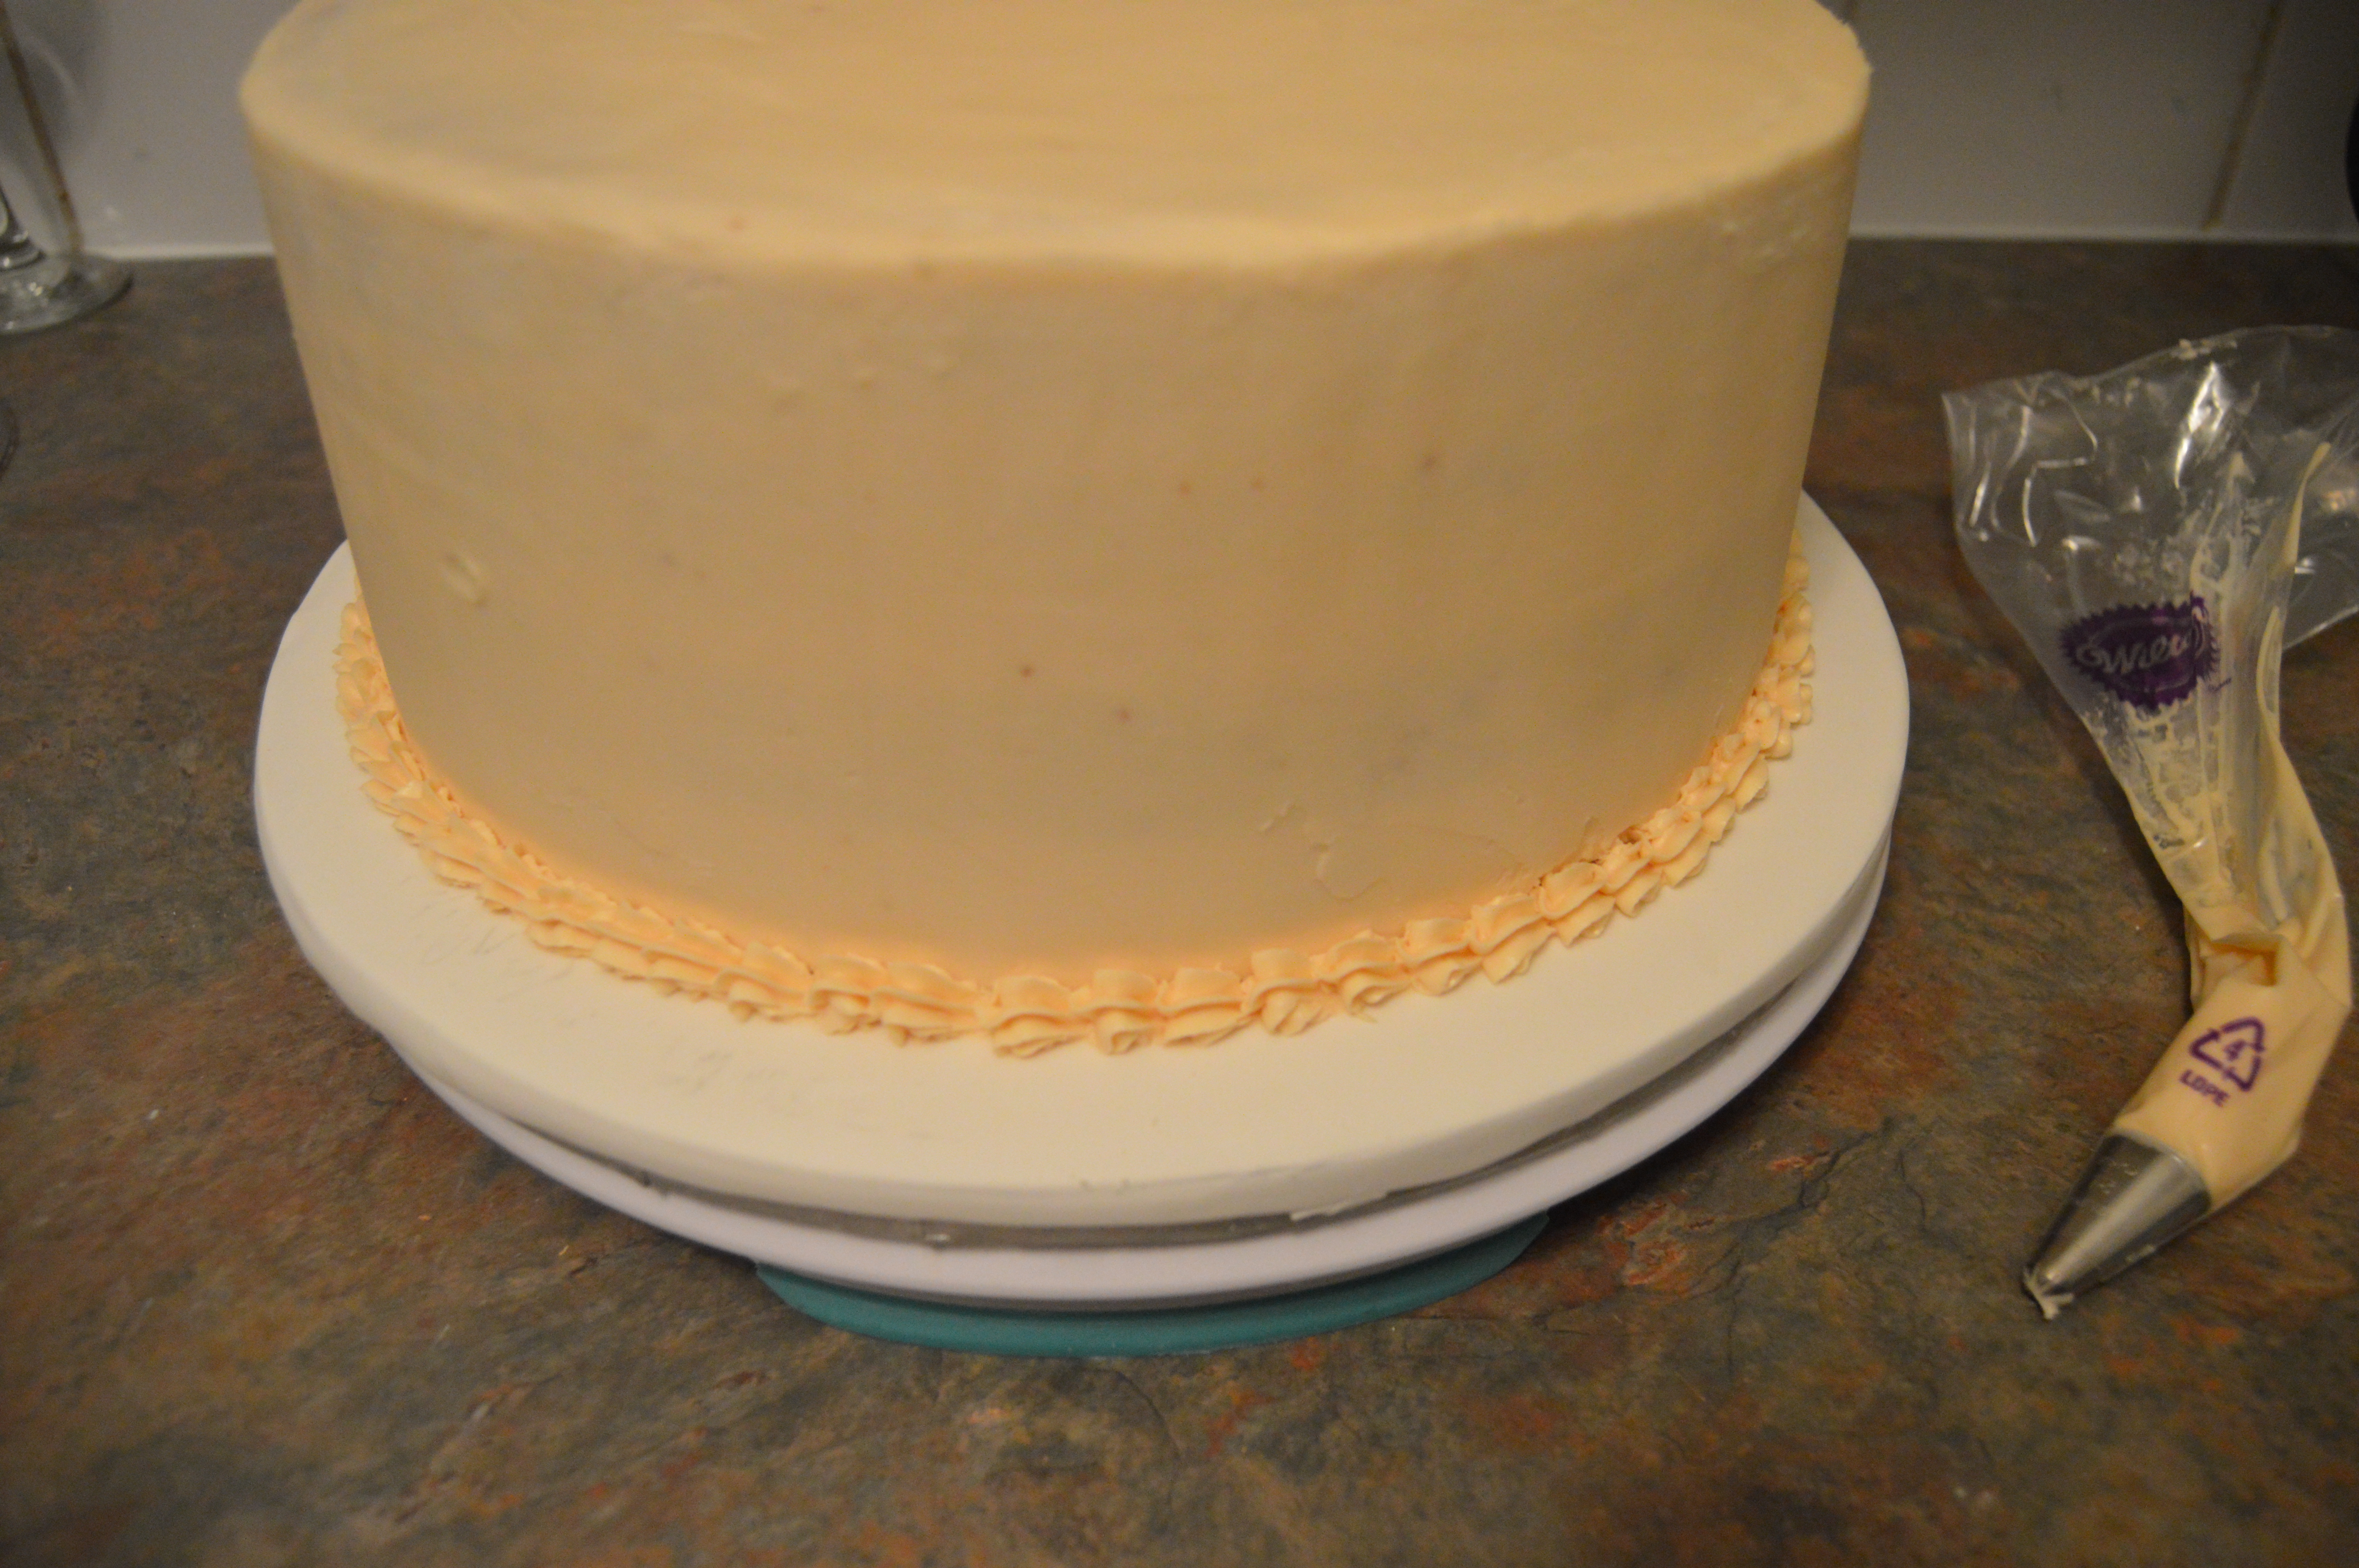
(1) Your options are limitless. Most frosted cakes have borders which are almost always created with star pipping tips. Borders serve both functional and aesthetic purposes. They help hide the rough spots at the base and top of the cake while beautifying the cake.
(2) With this cake, I decided to use pearl sugar to decorate the base.
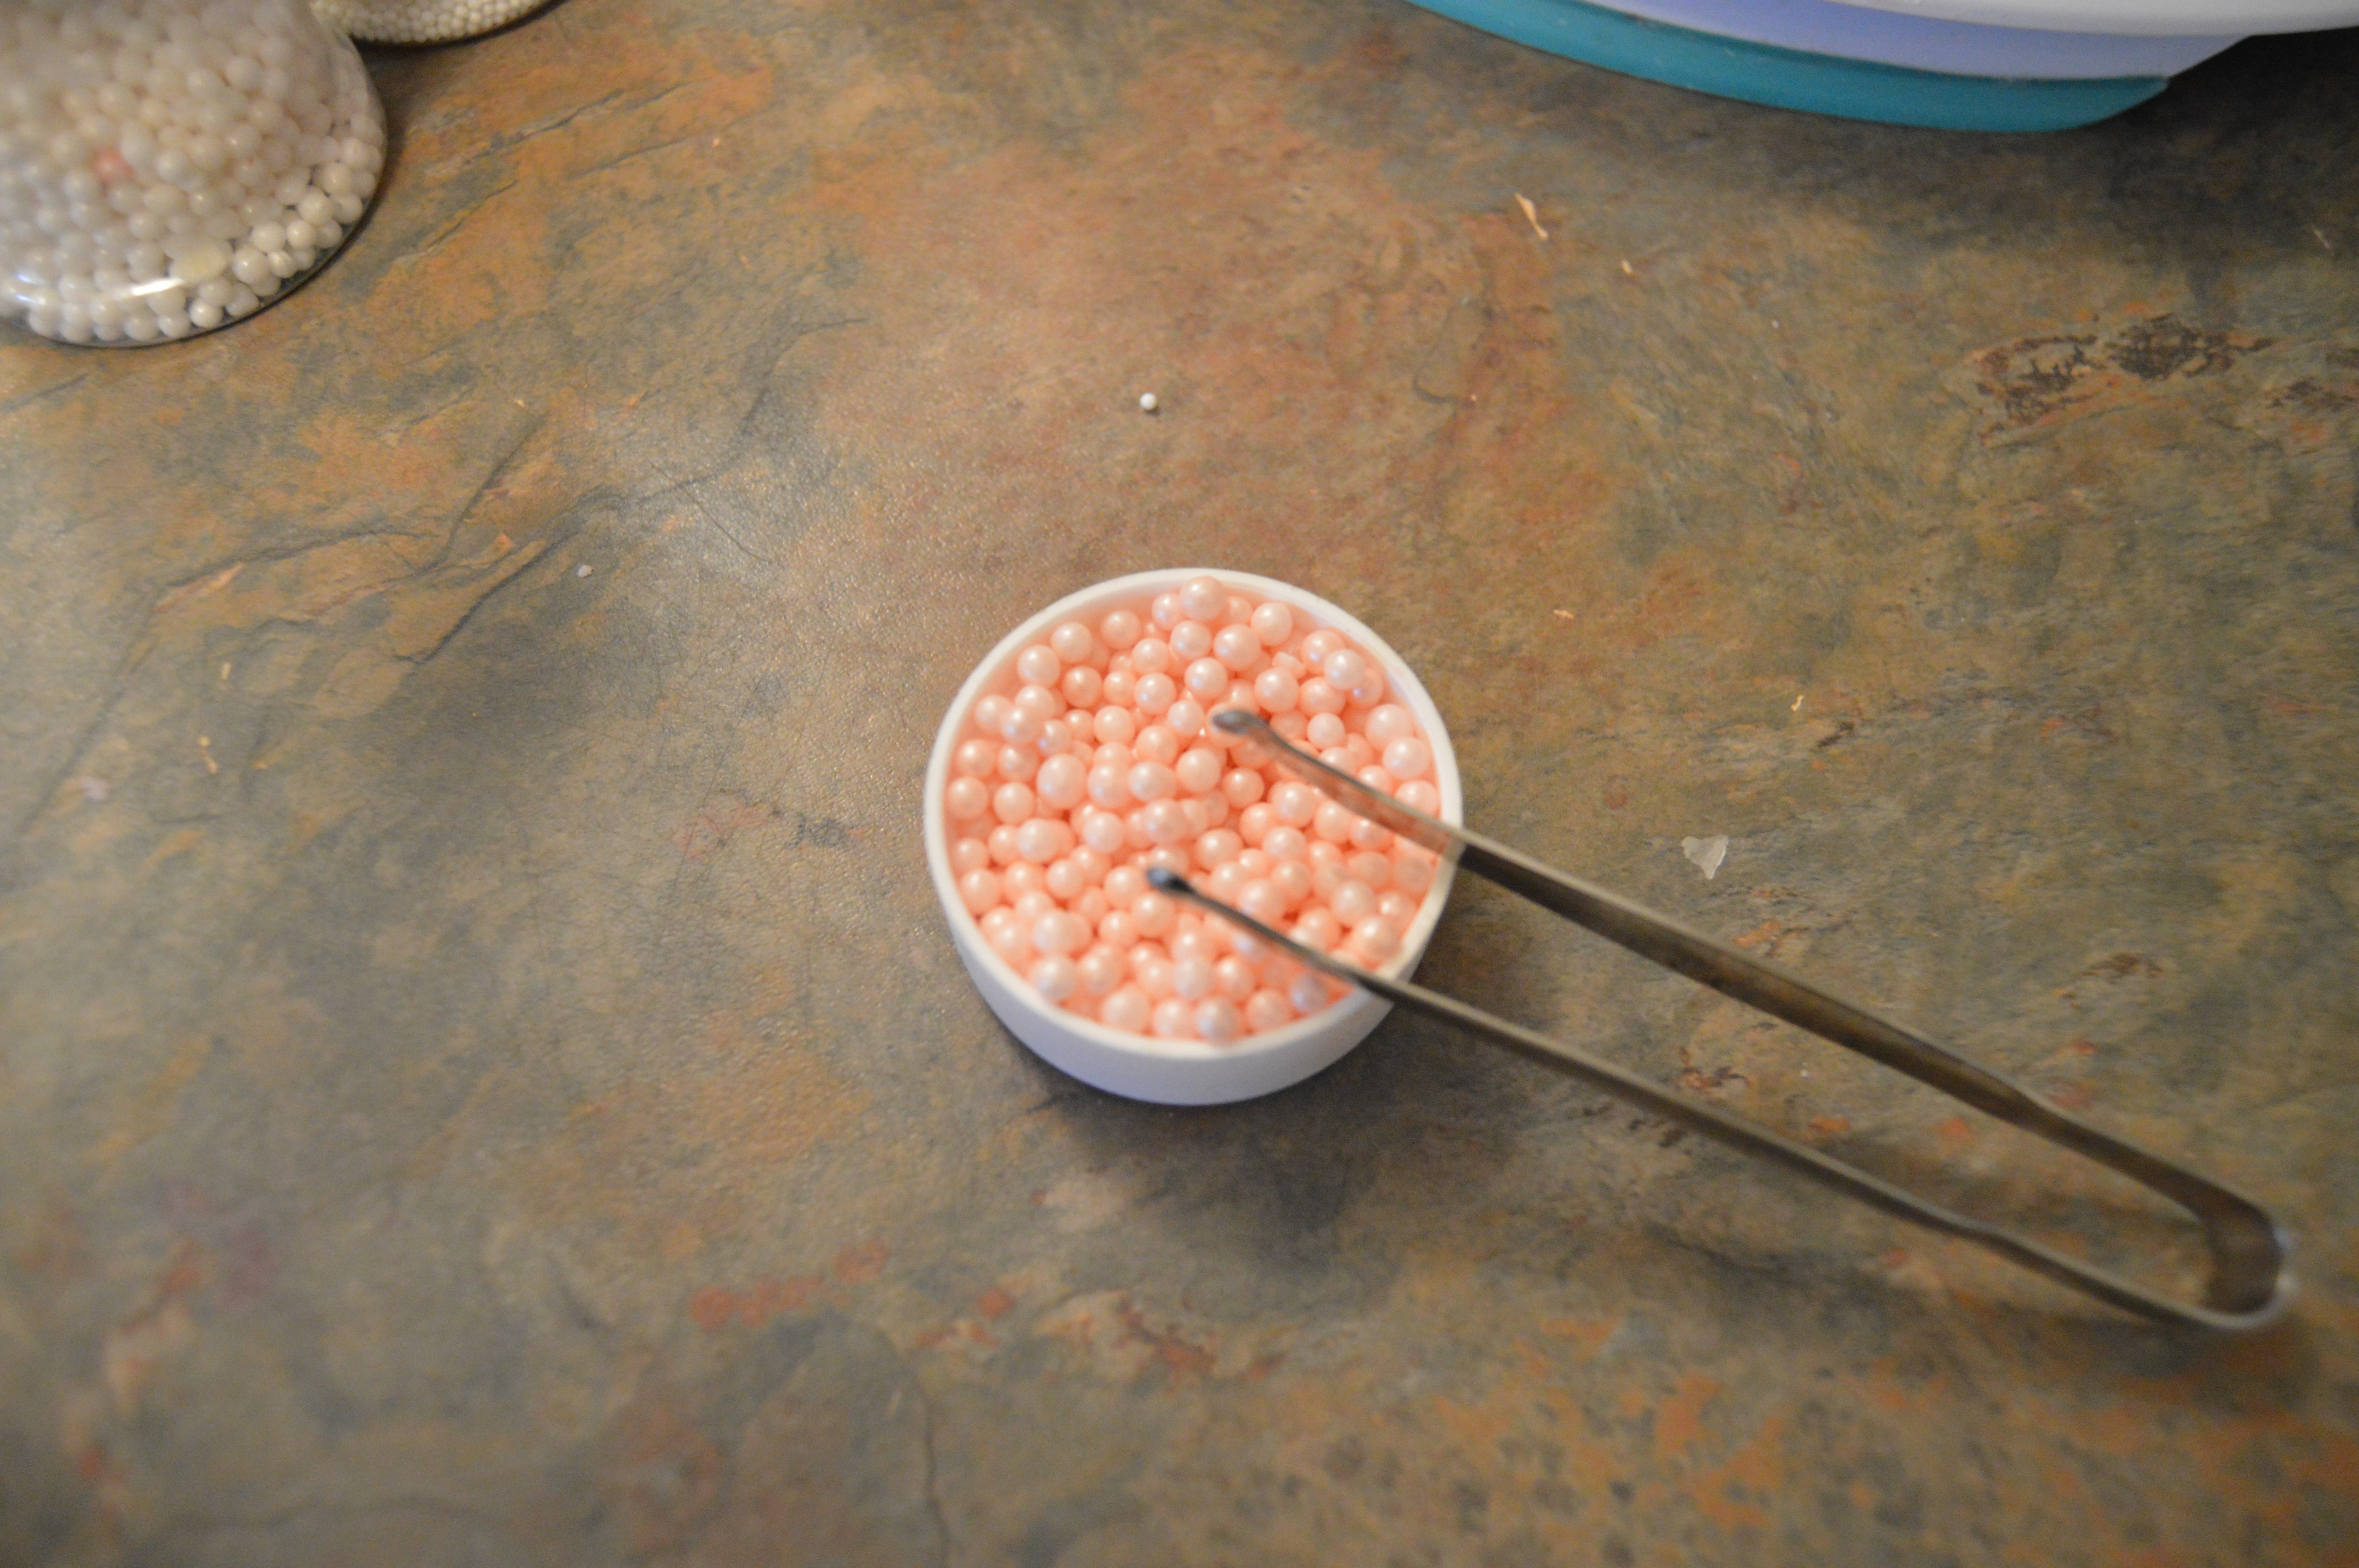
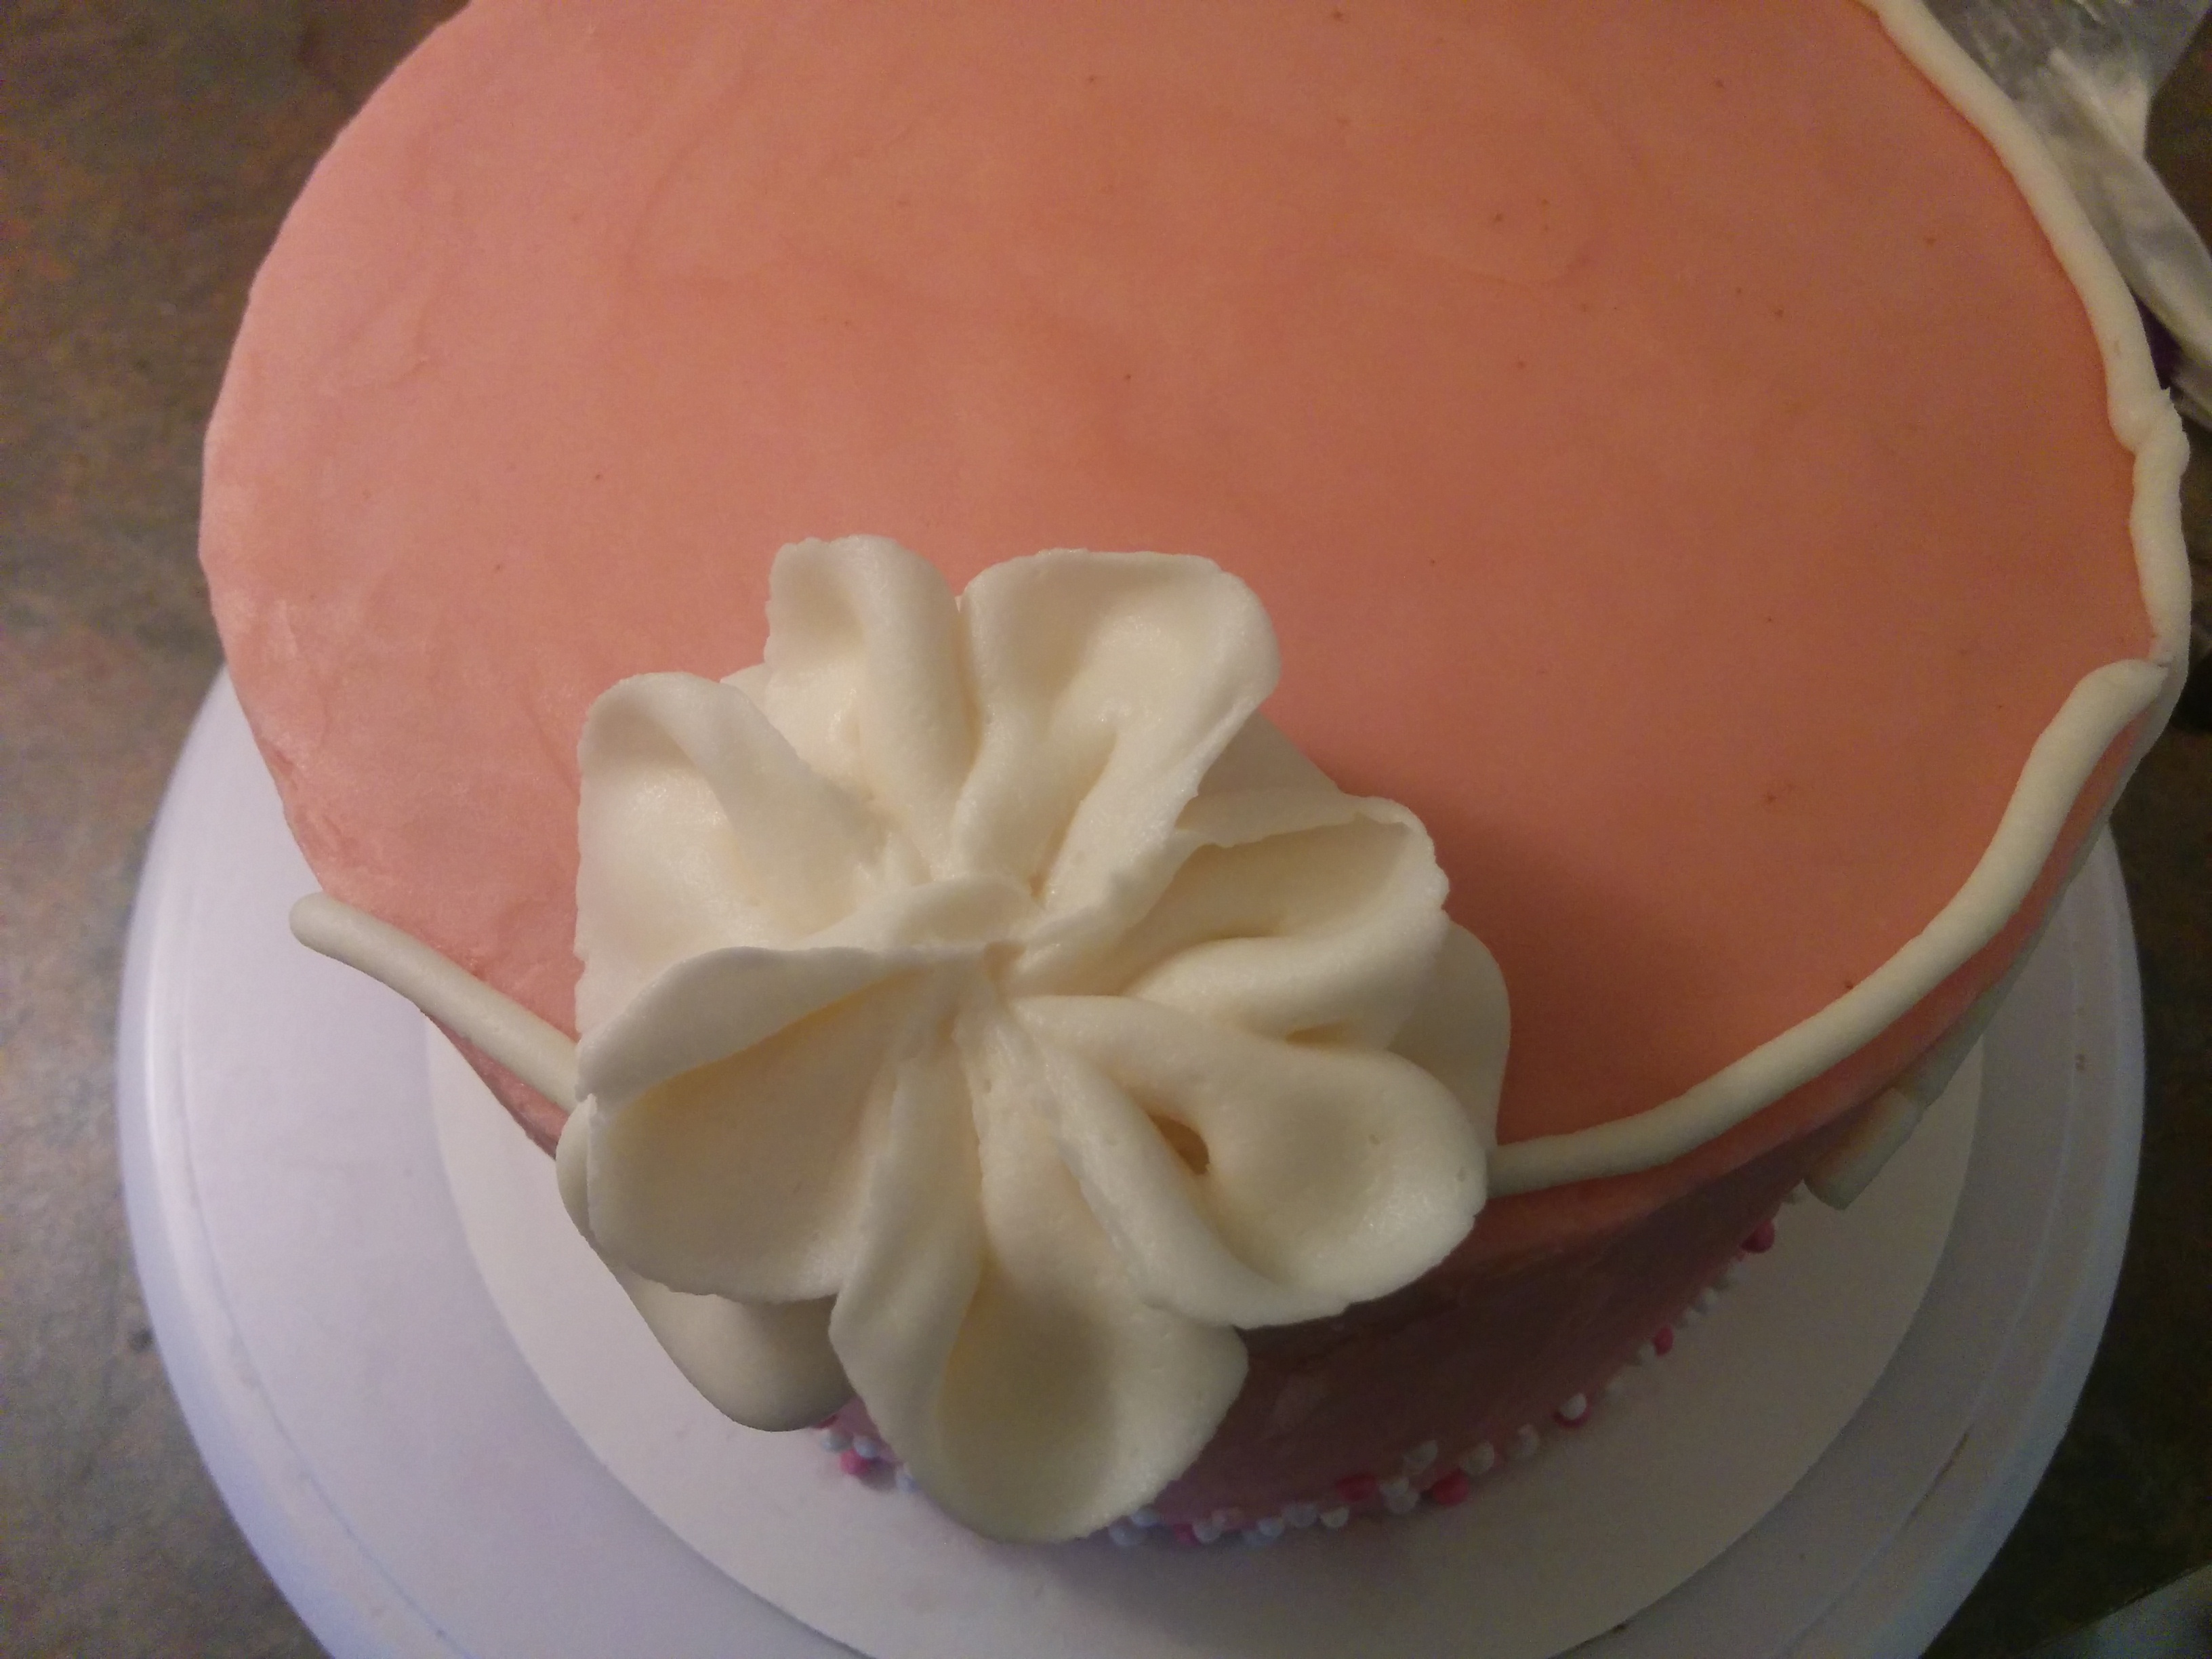
(3) The ruffles were made with a rose petal pipping tip and a large red pearl sugar was placed in the middle of each ruffle. When pipping ruffles or flowers on cakes, you might need to add more icing sugar to your frosting to make it thicker. This is so the ruffle keeps its shape and not melt or collapse. To make the ruffles, the round end of the tip should always be inwards and in contact with the cake while the pointed end should be outwards and elevated. Make large loops starting and ending in the middle of the ruffle. Make as many loops as you desire to make the ruffles as full as you would like.
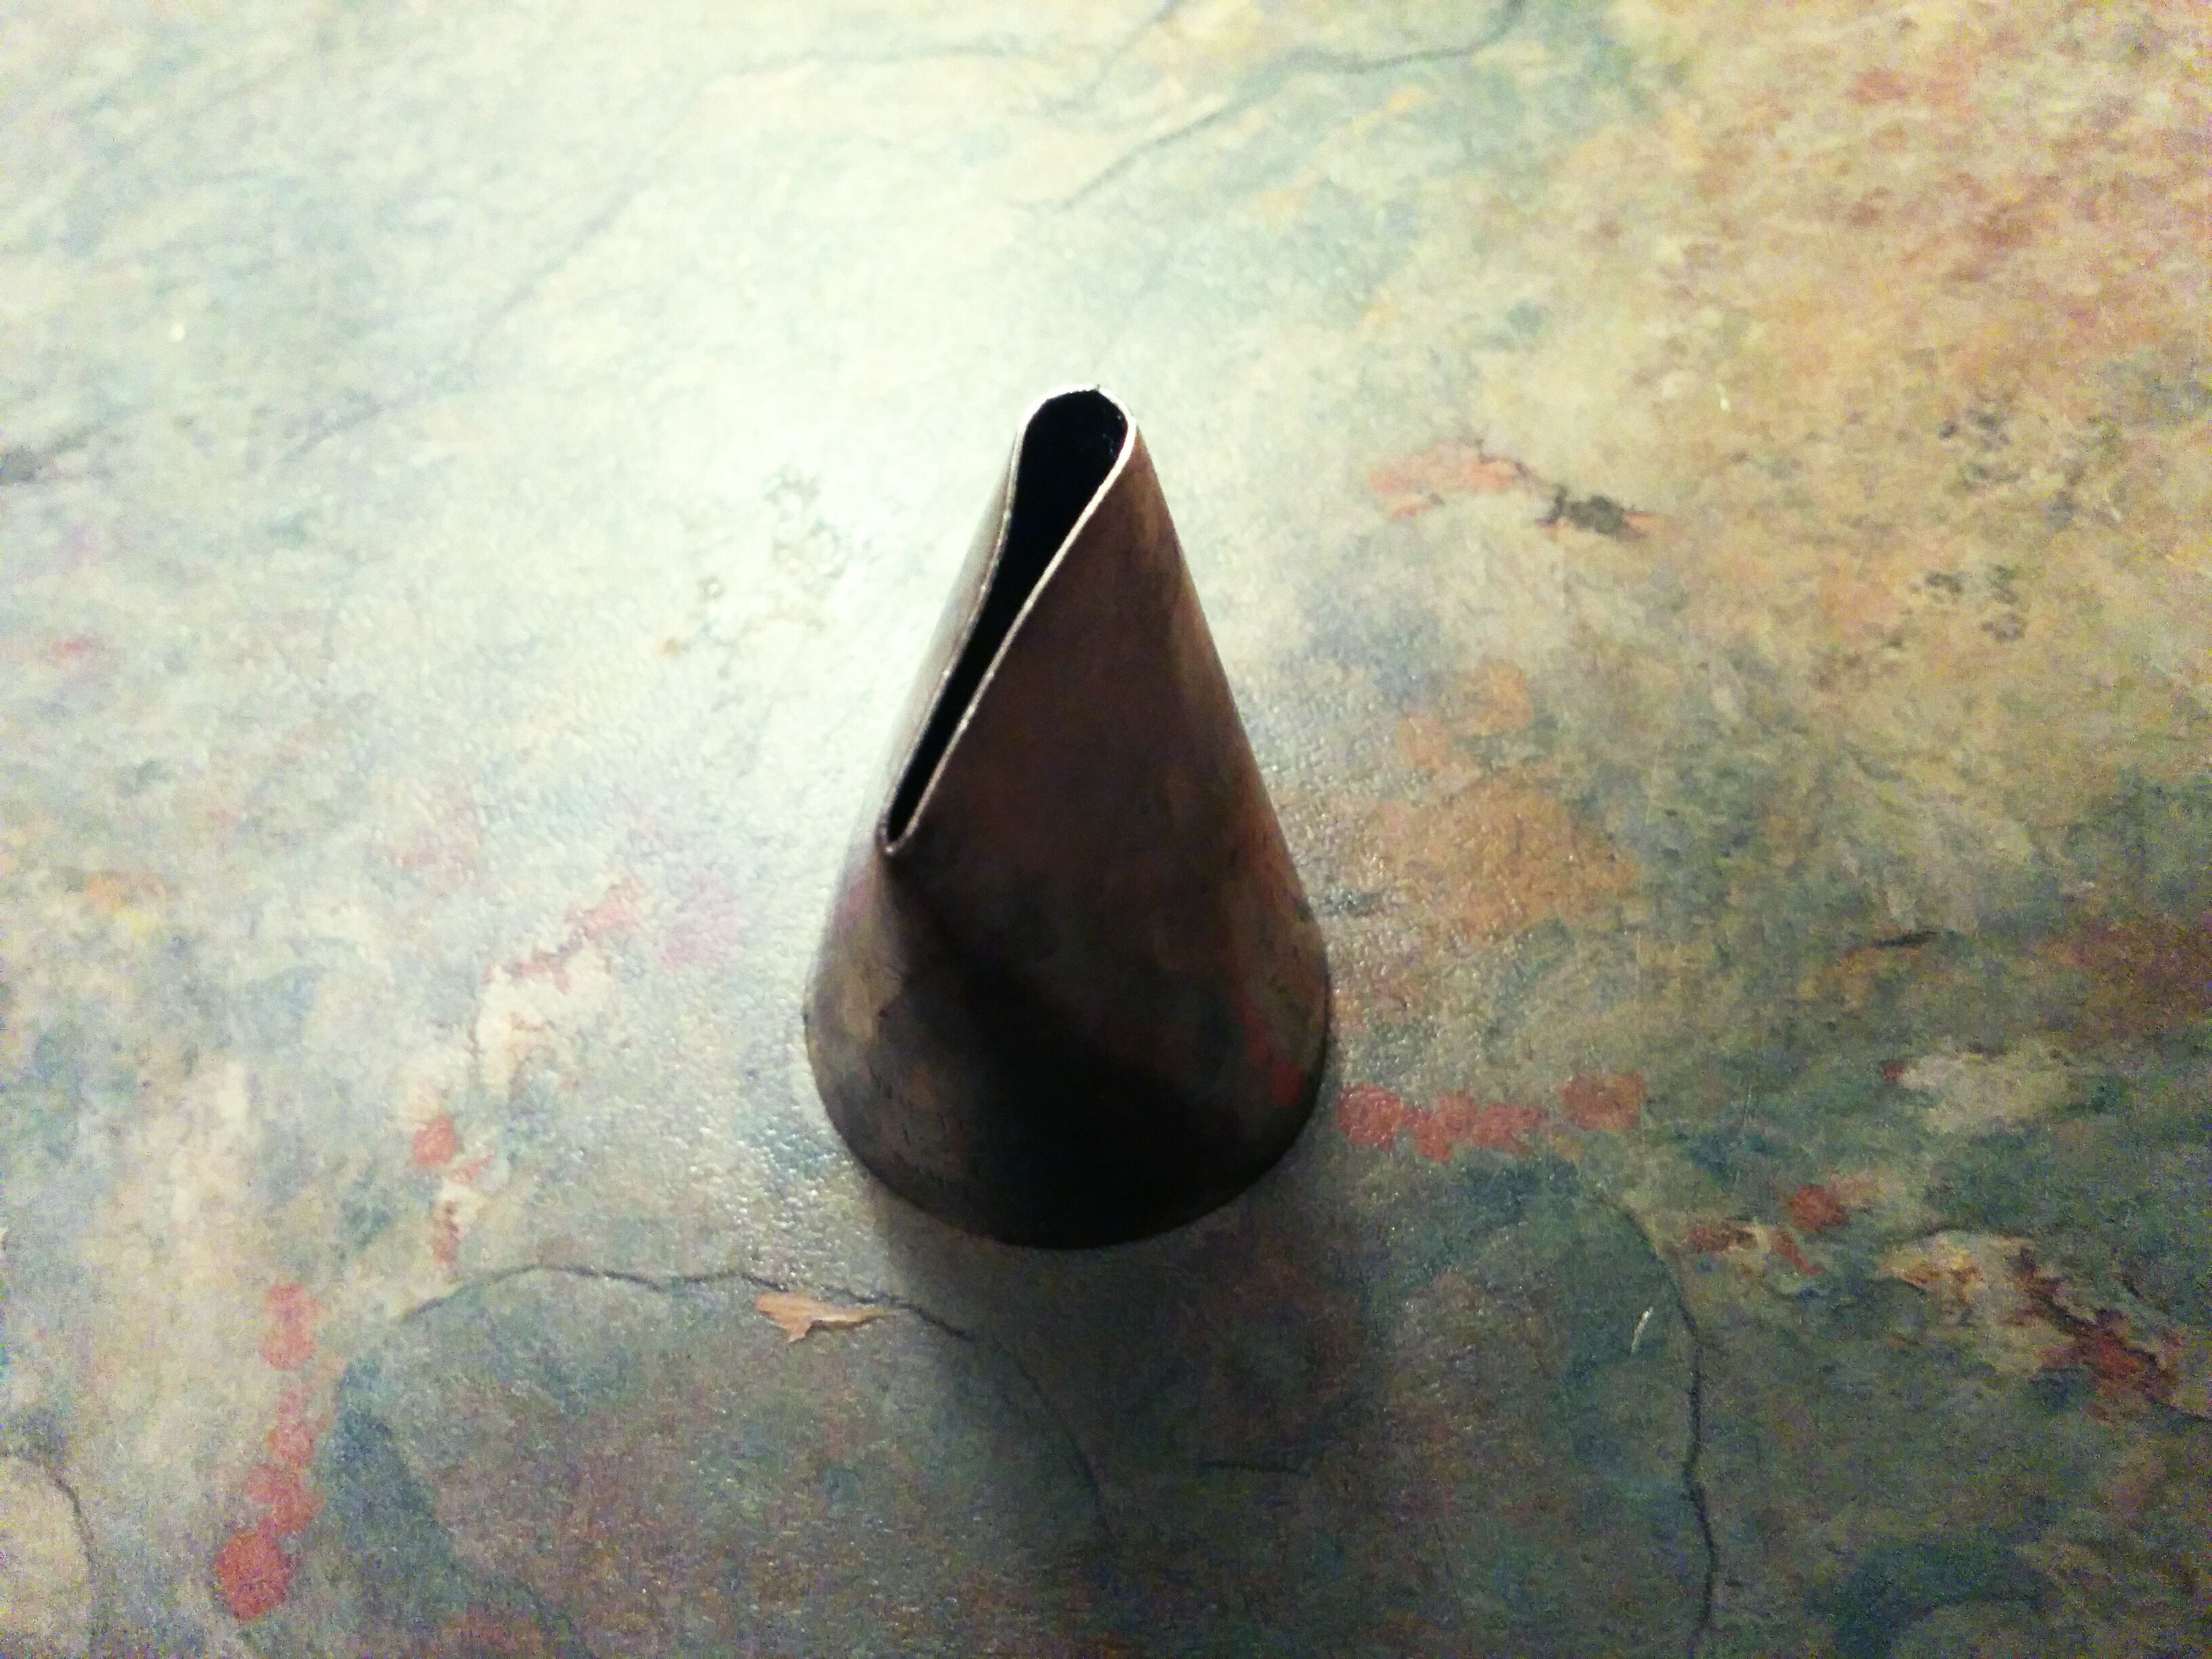
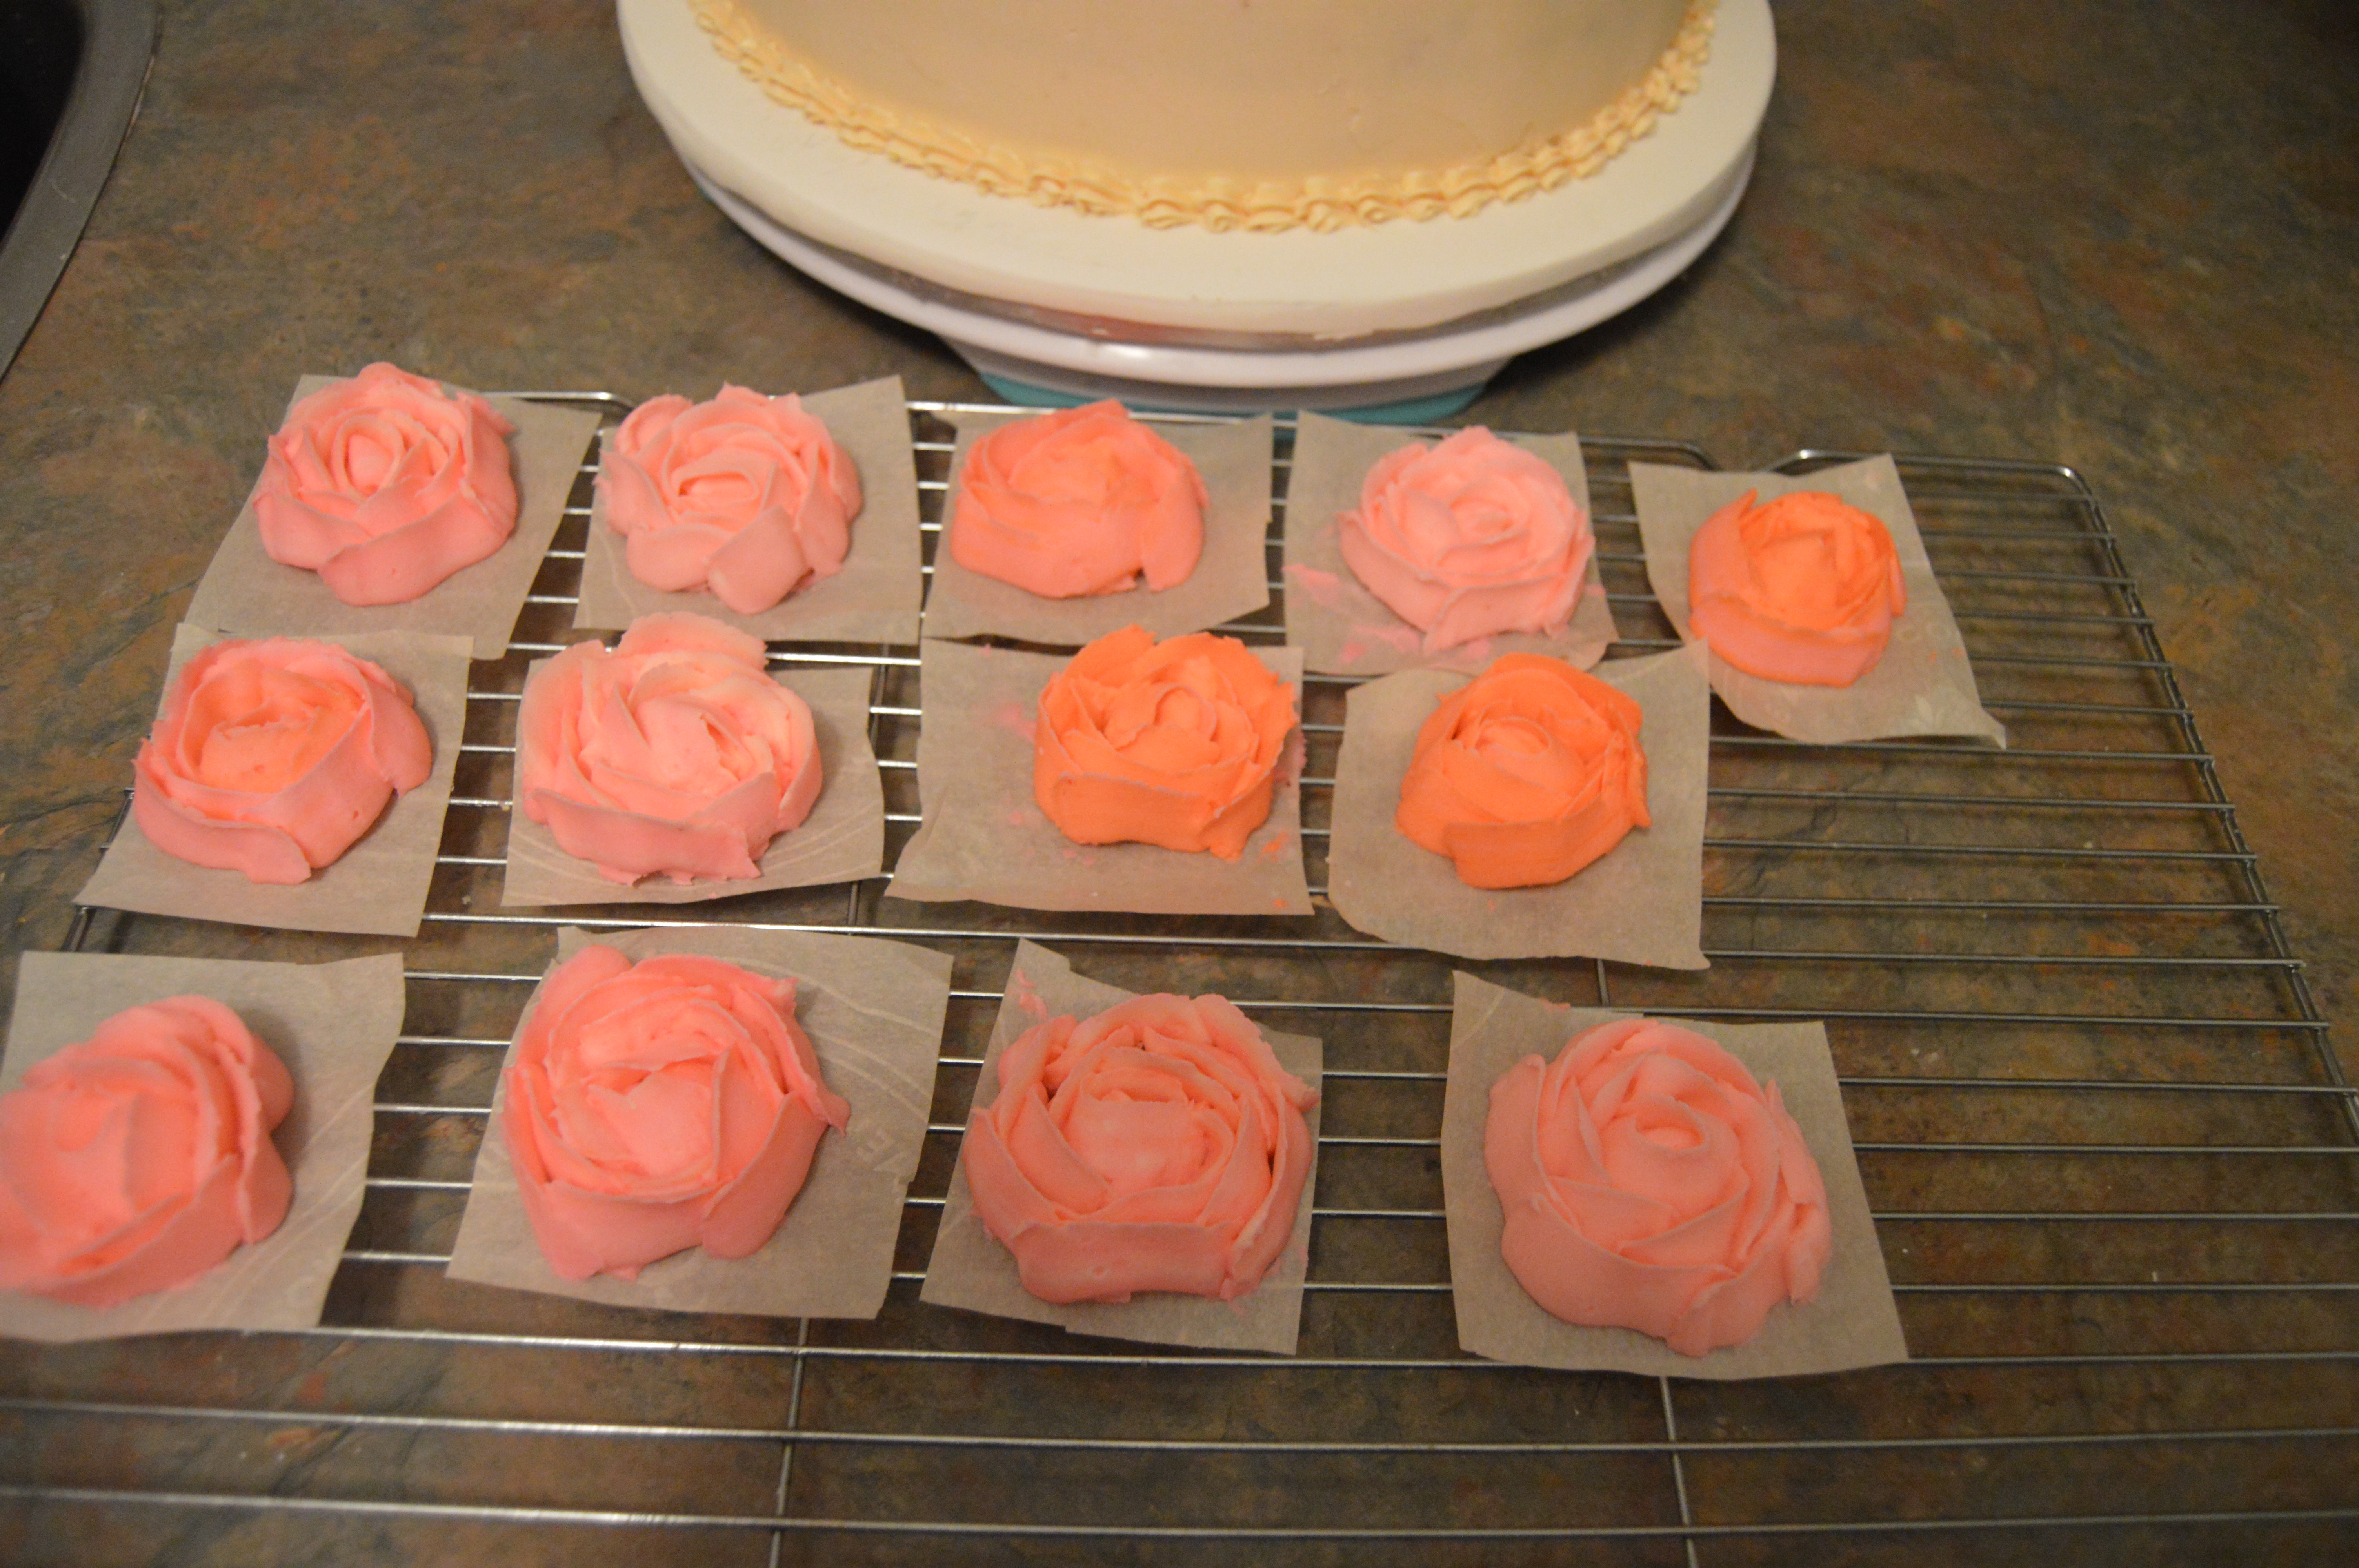
(4) The rose petal tip, as the name implies can be used to pipe roses. In order to learn now to pipe roses and other types of flowers, it is best to watch instruction videos on these. You can find a lot of these videos on YouTube. When pipping flowers, it might me best to pipe them on parchment paper, transfer them to the fridge to harden and then place them on your frosted cake.
(5) You also have a choice of stenciling your buttercream cakes. I have a tutorial on how to do this here.
QUESTIONS/IMPUTES/COMMENTS
I want this post to be as comprehensive as possible so a lot of people can benefit from it. I also want this post to be a depository of knowledge for bakers. Thus, your comments, critique and questions are welcomed. And if you found this post useful, do drop a comment too. Together, we can create an online “Bible” for frosting cakes.
Regards, Terry Adido
Terry Adido is passionate about showing people how easy it is to recreate restaurant quality meals in the comfort of their kitchens. With a style of cooking he refers to as Afro-European Fusion, his meals are influenced greatly by French and Italian Cuisine with a West African twist. If you love good food, you are in for the ride of your life.
I love all u do post for people to learn from you may God bless you
Thanks for your feedback. I’m grateful.
Now I understand some questions that have going on in my mind.
Thanks.
I pray that God will give you more knowledge and understanding.
Thanks
Terry u are a darling, a God sent. I ‘ve been wondering how these things are done. Now I ‘ve better understanding, God bless u plenty
You are welcome Ngozi. Thanks
This is timely, thanks Terry for those wonderful tutorial. Very specific and simplified. Cheers.
You are welcome Roseline.
Your labour in this industry WILL not be fotgotten.Thank you Terry.
Thanks Kemi.
Thanks Terry this was really helpful and detailed. God bless you
Thanks. Glad it was helpful.
Thanks for your teaching
The Lord is your strength, you are bless
You are welcome
I’m very greatful for this tutorial. My confusion is that when I put my cake in fridge, it sweat and I don’t know what to do, bcos it spoils d whole show.
Yeah, some people do complain of sweating cakes. I personally do not have that issue. Maybe its because I live in a cold climate.
As comprehensive as ever, Terry, thank you..
You are welcome Yetti.
wow Terry am so impressed. came across your website literally yesterday when i was looking for a tutorial on fondant shirt. i have to say you have done so well breaking this down thanks. i have a few questions. i did a practice cake recently and i used buttercream to fill and frost and the next day i noticed some sides were puffy what did i do wrong. also i have seen some other tutorials were the sides of the cakes are shaved, is this really necessary. Apologies for the epistle i have a wedding cake order in afew weeks and its my 1st wedding cake and 1st 4 tiered cake so my heart is beating quite fast. i have other questions but really dont want to bore you.
Hi Dee, when cakes puff at the sides, it’s usually trapped air trying to escape or too much frosting bulging out at the sides as the cake settles. To avoid this,(1) Try not to fill the cake with a lot of frosting (2) Press the cake layers down as you frost them to eliminate air bubbles and expel excess frosting to the sides of the cake which can be removed while scraping (3) Do not frost and cover your cake on the same day. Cakes need time to settle (4) Make sure your layers are well leveled. Don’t be stingy and cut off only part of the cake dome. Your layers should be flat. (5) Make a hole in the middle of the cake after crumb coating to provide an alternative route for the air to escape. All the best.
thanks for the quick response. well am based in naija and as you might know the electricity situation is not so good here so leaving it over night might be risky. dont want the cake taking on the freezer smell. thanks again
Yeah, living somewhere with no constant power supply makes baking a bit more tricky.
M beginning 2 love baking more.even wia ℓ̊ paid huge amount ø̶̷͡ƒ̶̷̊͡ money F̶̲̥̅̊o̶̲̥̅̊я̣̣̥ training does not analys it 2 ∂ȋ̝̊̅§ level.God bless u
You are welcome Remi.
Thanks so much terry for improving my skills.i’ve acquired more knowledge for cake frosting now.Thanks for been a blessing. God bless u more.
Thanks Wumi.
Thank God i stumbled upon ur page.ur tutorials are very detailed,comprehensive as they are easy to understand.we cant thank u enough God bless ur efforts
You are welcome Ify. Thanks.
Wow..am glad u did this tutorial. Frosting has always been a nightmare to me,but am itching to try again because of ur detailed tutorial. Am wondering if the Nigerian version of BC (Margarine & icing sugar) can be successfully smoothed using the paper towel method.
Also,won’t condensation from chilling the cake in the fridge ruin the frosting at room temp in Nigerian weather?
Thanks for your speedy response.
It would be more challenging working with margarine “buttercream”. Chilling will not affect it.
Your work is amazing. Thanks for the tutorial.
Thanks. My pleasure.
Terry, you are the Best
Thanks Chinyere.
Can i add milk 2 d buttercream frost if am using margarine in place of butter
Yes you can Amaka.
Thank you so much , Terry. I have always battled with my buttercream frosting but after reading through this detailed tutorial, I feel like I could take up the challenge, this time winning. I hope to send you a picture of my “Trophy” when I’m done.
You are welcome Tope. I look forward to your picture.
Terry I have a big problem using buttercream comb, it comes out rough looking, I don’t know if d consistency for frosting is suppose to be thin or medium, please help
I’d say medium. Be sure to pile on a lot of frosting on the cake so the comb has enough to create the pattern.
Thank you sooo much, I appreciate.
You are welcome Rukky.
God bless you for this tutorials, may God continue to increase you
Thanks Yewande.
Really helpful. Thanks a lot
You are welcome Ada.
I want to know if am making 2 tier cake what i need to do to the topper cake .shall i need to put any board or not
Yes Board underneath the top tier and dowels in the bottom tier.
I have asked myself what people like you gain from helping others, especially coming from an environment where we believe nothing goes for nothing. I have realised however,that what you gain is putting smiles on the faces of people. I stumbled on your name and my baking has never remain the same.God bless you!
Thanks Kemi. The love for the art and the need to show people how to execute basic designs are what motivate me.
Hi,Mr. Terry.. I really Appreciate ur Tutorials.. Pls what can I use in place of Meringue powder,to help harden my buttercream.. (cream of Tartar)?
Thanks. Cream of tartar will not work for this purpose. You can just leave out the meringue powder as I am not aware of a substitute.
Great
job! Well done, more grace to yor work.
Thanks.
Thank you so much for this great information!! You are amazing and your cakes are beautiful 🙂
Thanks Sara.
Is there a reason behind cutting a cake before frosting them. I used to think one could frost a whole cake without cutting. Please I will like to know the reason. Thank you for the good work.
Hi. Frosting a whole cake will result in a “dry cake. No one wants to eat big chunks of dry cake. Frosting adds moisture, taste, flavor and creaminess to your cakes.
Thank you for your kind and prompt response.
Thanks so much Terry, may the good Lord increase you more and more.
Thanks.
Can i use baking paper/ parchment paper to do the lamination process. Reason behind my question is that I think baking paper is more food friendly compared to paper towel/ tissue paper. Thanks
I only showed that picture for illustration purposes. I myself use the hot knife technique as that works better for me. I am not sure if parchment paper will work.
Thank you so much terry. My question is when the frosting of a cake u want to cover with fondant is strong like u stated,will the fondant icing stay on a dry and strong frosted cake? Pls enlighten me more. I’m baking at the moment and I want to cover my cake tomorrow sir. God bless yoy
Yes. That’s why you brush the cake with a bit of water before draping with fondant.
This is an awesome tutorial. Thanks again for this labour of love.
Covering a cake with fondant after layering with buttercream has always worried me.
I notice some bakers in naija just cover the cake with fondant after the crumb coat stage or they use jam as the crumb coat then cover.
Now my question is this. After layering with butter cream like in the tutorial above, and covering the cake with fondant, do you put back in the fridge the keep the buttercream firm or do you leave it out.
Also what is likely to happen if it is left out. Thanks in advance.
I always return to the fridge. You should read this post about preventing bubbles in cakes for the answer to your second question.
Thank you for this very detailed tutorial, Terry. I appreciate it. May God increase your knowledge and understanding.Nigerian bakers out there, please where can I buy an icing smoother in Lagos, and also a candy thermometer? I’d appreciate useful information please.
Hi. Thanks. I have no idea.
Thanks Terry,its truely comprehensive
You are welcome Elizabeth.
Thanks so much Sir, i have always wondered how people use stencil on butter cream,thank you for this tutorial is going to add extra beauty to my work, God bless you richly Sir.
You are welcome Happiness.
Wow! This came at the right time. Having my first four tiers wedding cake next week. I’ve being surfing the internet all most every second of the day. Thank God I found this. I pray my cake comes out real good but not having good gelatin fondant recipe pricks my heart. I will send you the finished cake next week. Thanks and God bless you
Hi. All the best with your cake. I am looking forward to the picture.
You are a genius, the step by step method makes it all easy to learn. May God continue to increase u.
Thanks Joy.
Thanks so much for this comprehensive tutorial, I am a new baker just starting up your recipes have been very helpful & am learning alot from you. God bless your kind heart.
You are welcome Joy.
This post was really helpful, just what I was looking for. Thank you so much and God bless.
You are welcome Victory.
Pls can I make use of this method when using royal icing for frosting? Tnks in Advance.
Hi. No you should not. Royal icing has its own techniques.
Thank you very much Terry Adido on your very detailed tutorial on butter icing, this is the best thing that happened to my buttercream, I tried it and it was awesome, for the first time, I was able to ice without cake crumbs getting all over the Cake. Your tips are absolutely top notch.good material!
I am glad I could help Uju.
Wow. I wish I’d read this before baking my kids’ birthday cake last weekend :). I followed your buttercream recipe which turned out perfect but I could not for the life of me achieve a smooth cake. Now I know why, I’ll definitely do that next time.
P.S: I used both the Nigerian cake and buttercream frosting from here, and it tasted delish as usual. Thanks for your willingness to share your knowledge.
You are welcome Chidimma.
Thank Terry for this may God bless you. My question is when baking a 4 teir cake of different sizes how do I do all bottom since u said bottom at d top and bottom of d cake, do I have to remove d bottom of the rest and frost together? Again this butter cream above, did u transfer to a bigger board or card cos d one u used at d beginning can’t be seen. Thanks for ur prompt response
I apologize but i do not understand your question.