
The Making of a Nikon Camera Cake
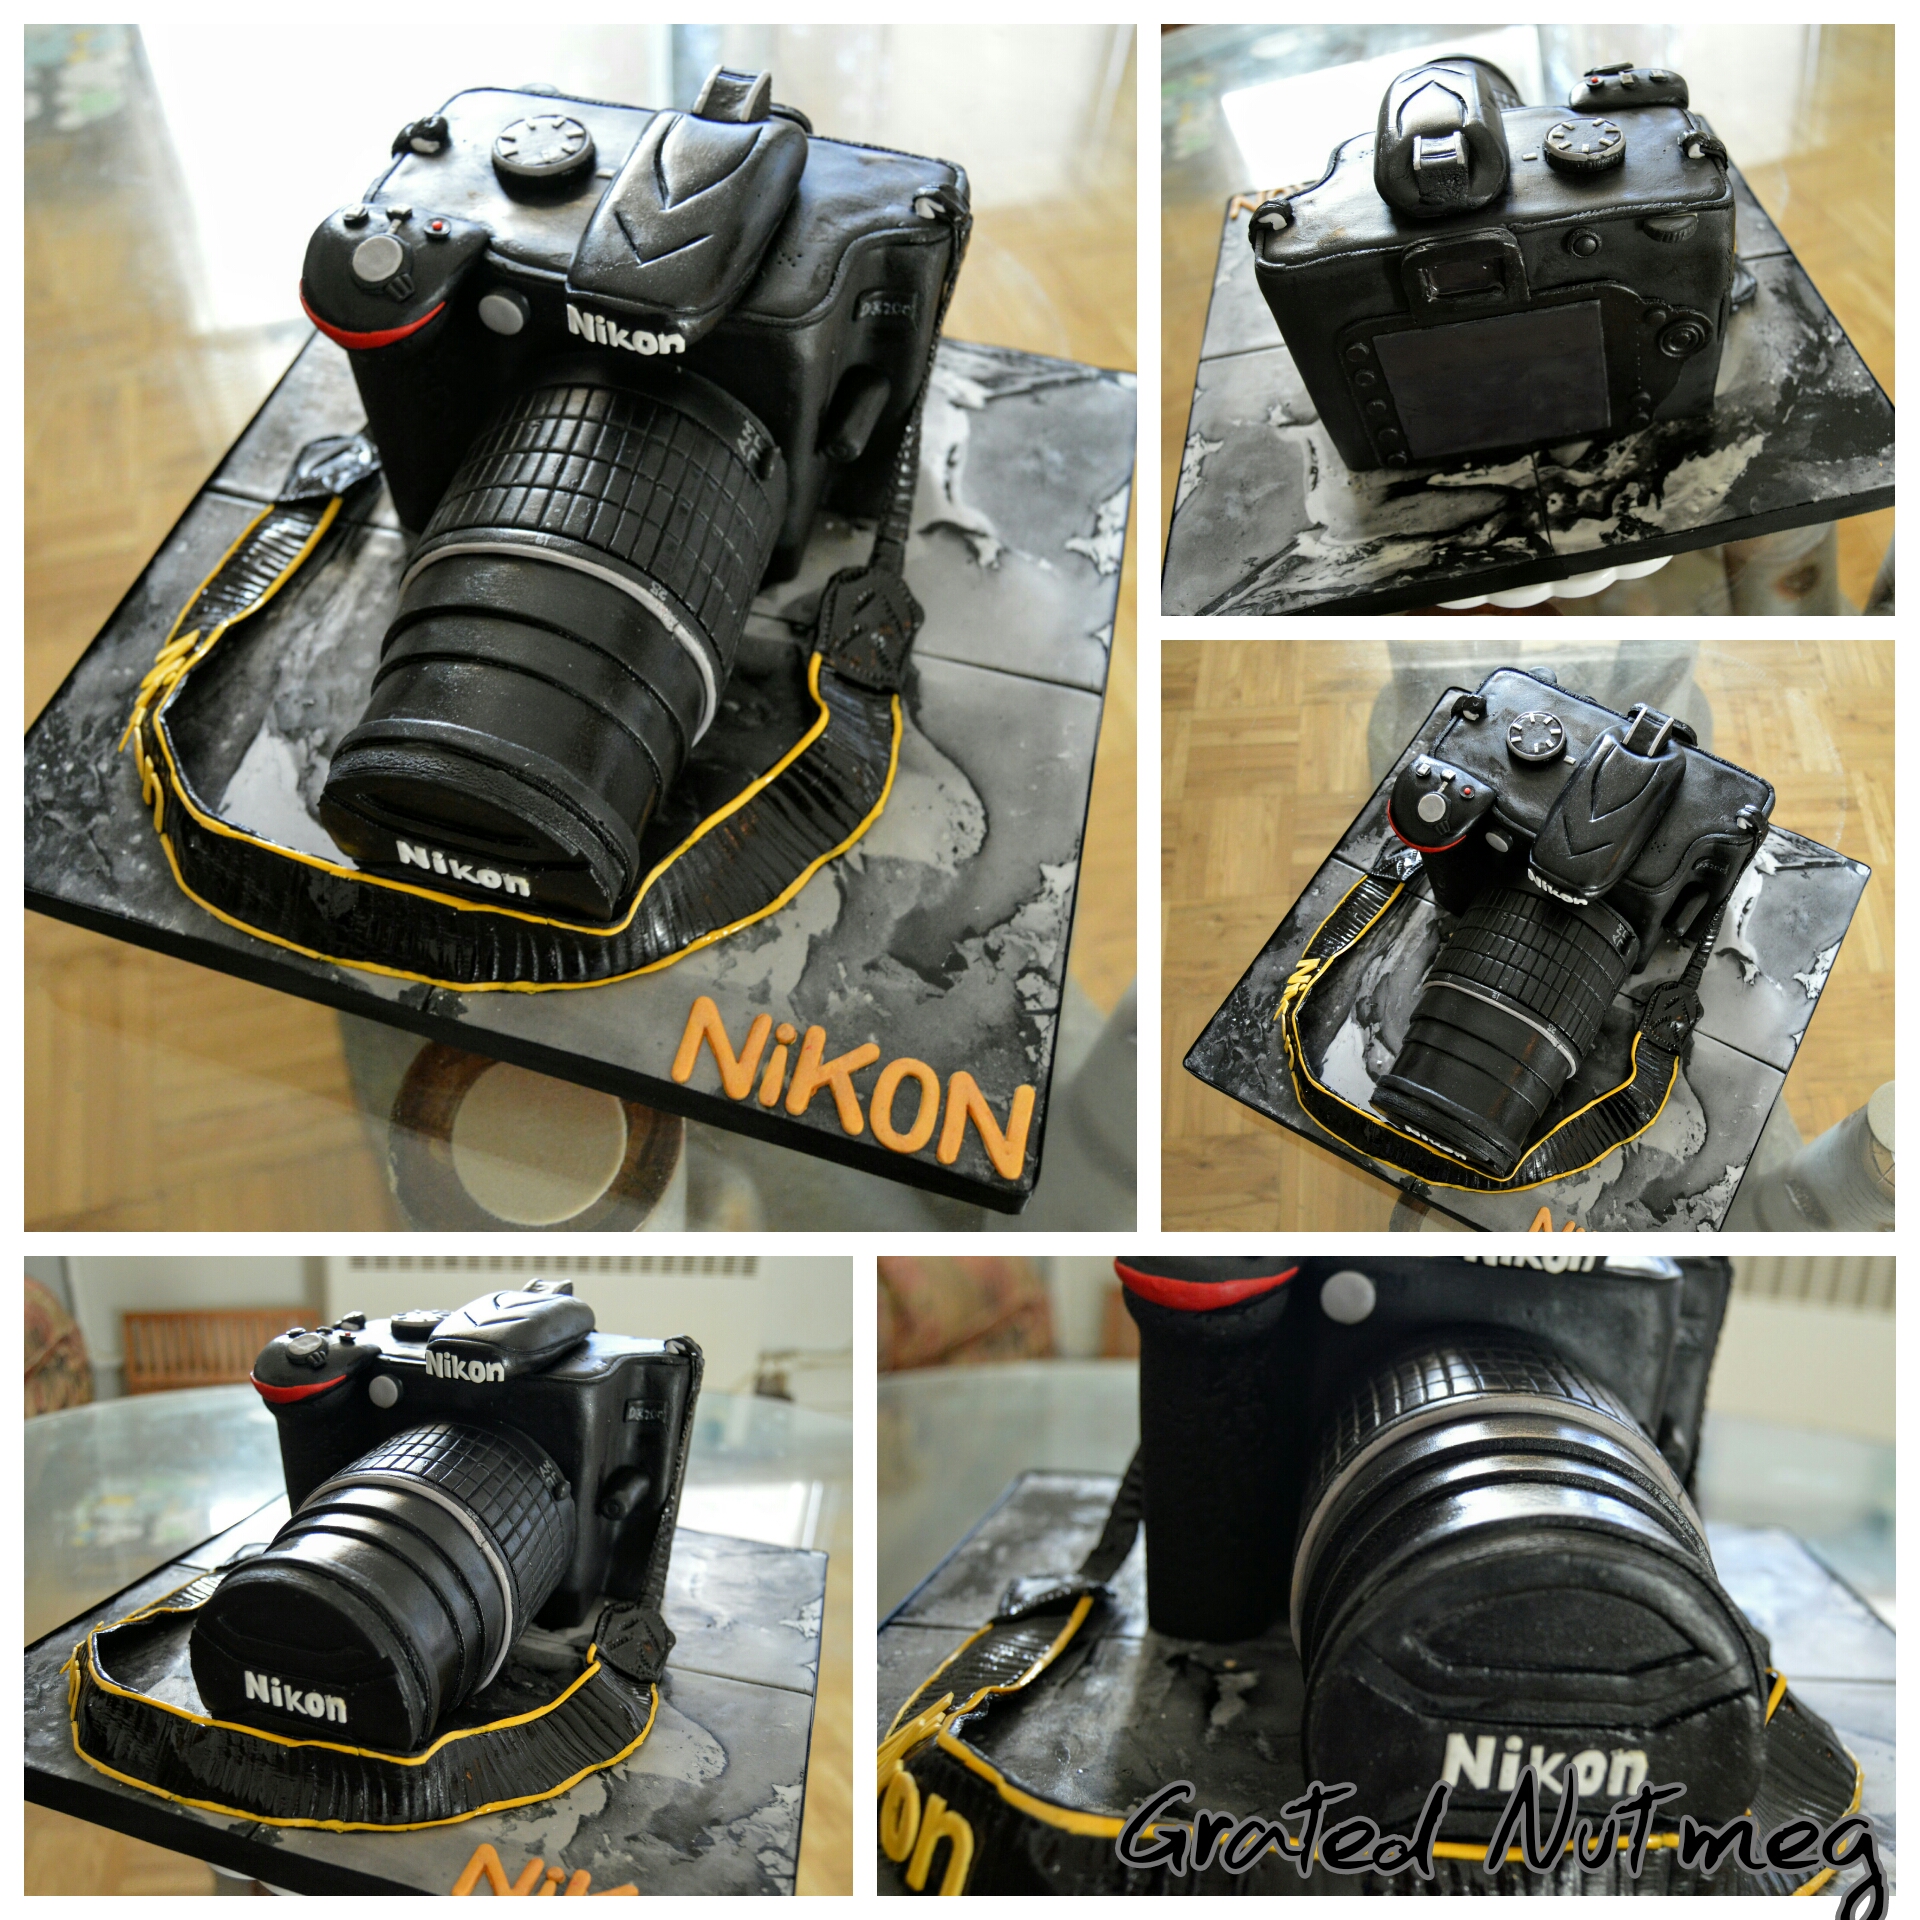
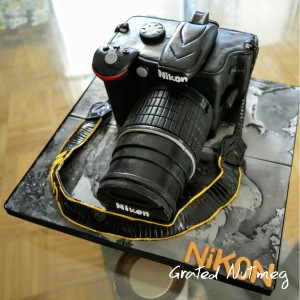
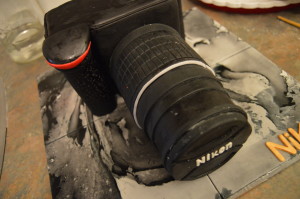
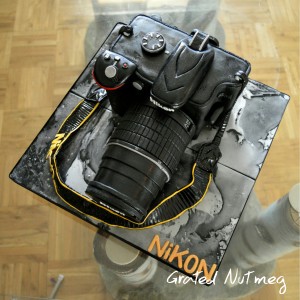
This post is more of an insight into how I went about making the camera cake above. This is one cake design I had absolutely no clue about, but piece by piece I was able to bring it all together. It is by no means the best looking camera cake out there due partly to my stubbornness on refusing to use inedible materials or printed edible papers. I take pride in the fact that every design element of this cake was hand crafted and made using fondant. The process of how I went about this would be explained below. To see more views of this cake and have access to the recipes used, click here.
THE PROCESS:
As a general note, I own a Nikon camera and made reference to it throughout the cake making process. I set out to replicate the several details of my camera on this cake. It always helps to have the real thing (or a picture of it) and make reference to it when making an unconventional cake.
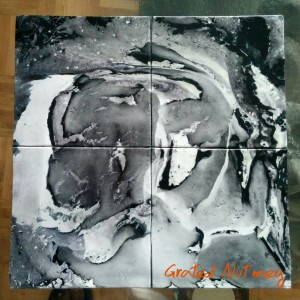
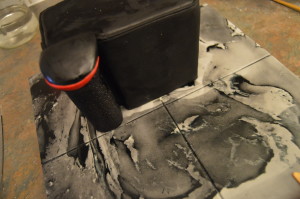
(1) The first thing I did was make the cake board. The design on this board was arrived at unintentionally. I had leftover black, white and grey fondant and set out to combine all three together in a bid to make black fondant. During the kneading process, I discovered the unique pattern that had formed and decided to roll out the fondant. I fell in love with the rolled out fondant and decided to cover a cake board with it. The board below was the result.
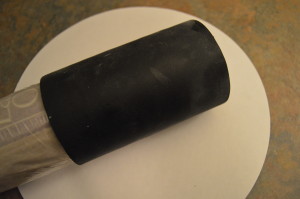
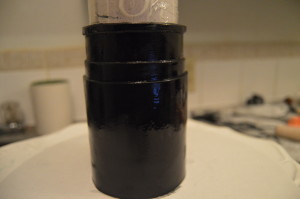
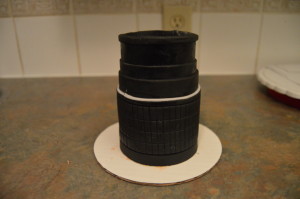
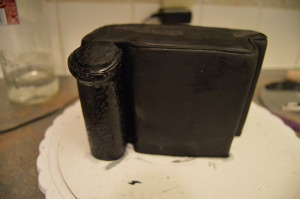
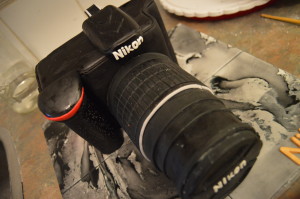
(2) Next, I focused on making the lens of the camera. I had two options. The first was to bake the cake, frost it, carve it to form a lens and cover the lens with fondant. The second option was to make a fondant shell and fill it up with cake and frosting. I went with option two as this option was best guaranteed to give me a perfect cylindrical shape. I used this same technique for my pop cup cakes (post here). To make the shell for the lens, I first wrapped a cylindrical container with parchment paper and then cling film. Next, I rolled out black fondant and wrapped this around the cylindrical container and left it this way to dry. After the fondant had dried, I wrapped it with other layers of fondant to create the various layers of a camera lens. The cylindrical container was removed when the structure was dry enough to stand on its own.
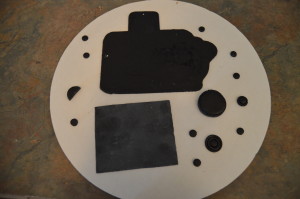
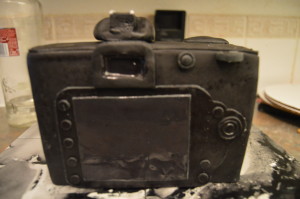
(3) Next, I made other elements of the camera. These include the back panel, lens cover, knobs, buttons and other structural parts of the camera. These were left to dry. The gloss on the back screen was made with a 50/50 vodka and corn syrup mixture.
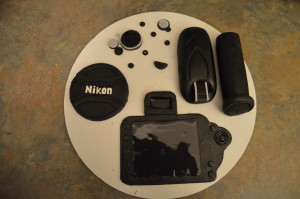
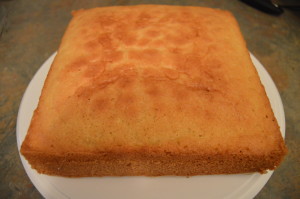
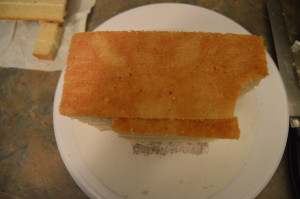
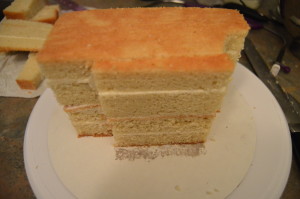
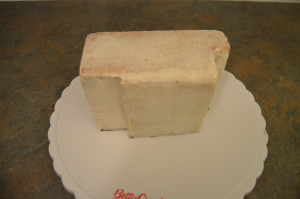
(4) With the above parts made, I moved on to baking the sponges. Two 8 inch square sponges were baked, one for the body of the camera and the other for the lens. The sponge for the body was leveled, divided into two, stacked and cut to create a cube measuring 4 x 7 x 4 inches. This cube was later carved and frosted to create the shape of a camera. This was chilled to set the frosting.
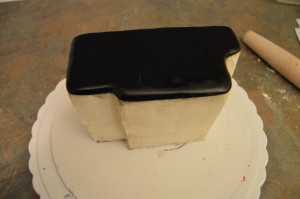
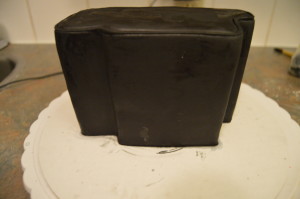
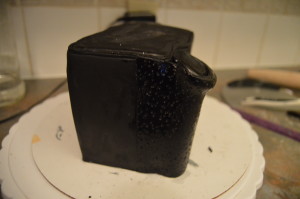
(5) Now comes the design stage of the camera. This was done mainly by my method of soft fondant paneling (more about this method here). First, I covered the top of the camera with black fondant and then wrapped the sides with another layer of black fondant.
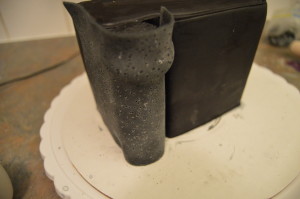
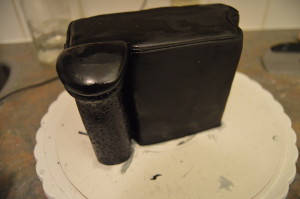
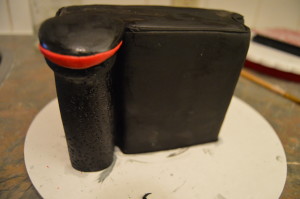
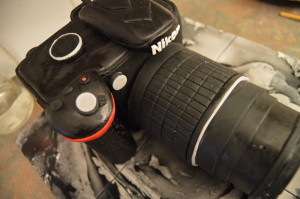
(6) Next, To create the exact shape of a camera, I had made a couple of fondant parts ahead of time and left to dry. One of these parts is a cylindrical part which goes to the left side of the camera. This was glued to the camera and wrapped with textured black fondant. The texture on the fondant was made by poking holes in fondant with a needle. A knob was later placed on this cylinder and finished with red fondant details. At the end of this stage, I transferred this portion of the camera to the cake board.

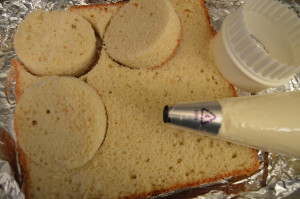
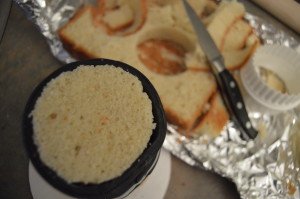
(7) Next, I moved to the lens and the second square cake sponge. Using a round cookie cutter, I cut the sponge into circles the same diameter as the lens shell. I also filled a pipping bag with frosting. The lens was then filled with alternating layers of sponges and frosting until I got to the top of the lens. The fondant lens cover was placed on the lens and the whole lens was stuck to the cake on the cake board.
PS: The “Nikon” writing on the lens cover and top of the camera was made with fondant. White fondant was rolled out and left to air dry and a sharp blade was used to cut out the letters for the words (Takes lots of patience).
(8) Next, I attached the remaining dry fondant pieces to the camera and brushed the camera with a bit of shortening for gloss.
(9) Final details were later added to the camera. These include:
(a) The grey details were painted with silver luster dust mixed with vodka for shine;
(b) Certain details were painted on the camera using the silver luster dust and vodka mixture. These include numbers painted on the lens;
(c) The camera strap was made out of black fondant with yellow fondant trimmings and attached to the cake.
That’s all there is to it. I hope this inspires your future camera cake creations. Happy caking!
Terry Adido is passionate about showing people how easy it is to recreate restaurant quality meals in the comfort of their kitchens. With a style of cooking he refers to as Afro-European Fusion, his meals are influenced greatly by French and Italian Cuisine with a West African twist. If you love good food, you are in for the ride of your life.
Thank you Terrific Terry.
You are welcome Toks.
u are too much may God continue to give u more knowledge
Thanks Atinuke.
Skillful.. You are….
Thanks Fadekemi.
i am speechless
Thanks Aminat.
Thanks Terry this is really great
Thanks Oge.
how long did this take you to make?!
Its hard to tell. I work in stages.