
The Making of a Tote Bag Cake

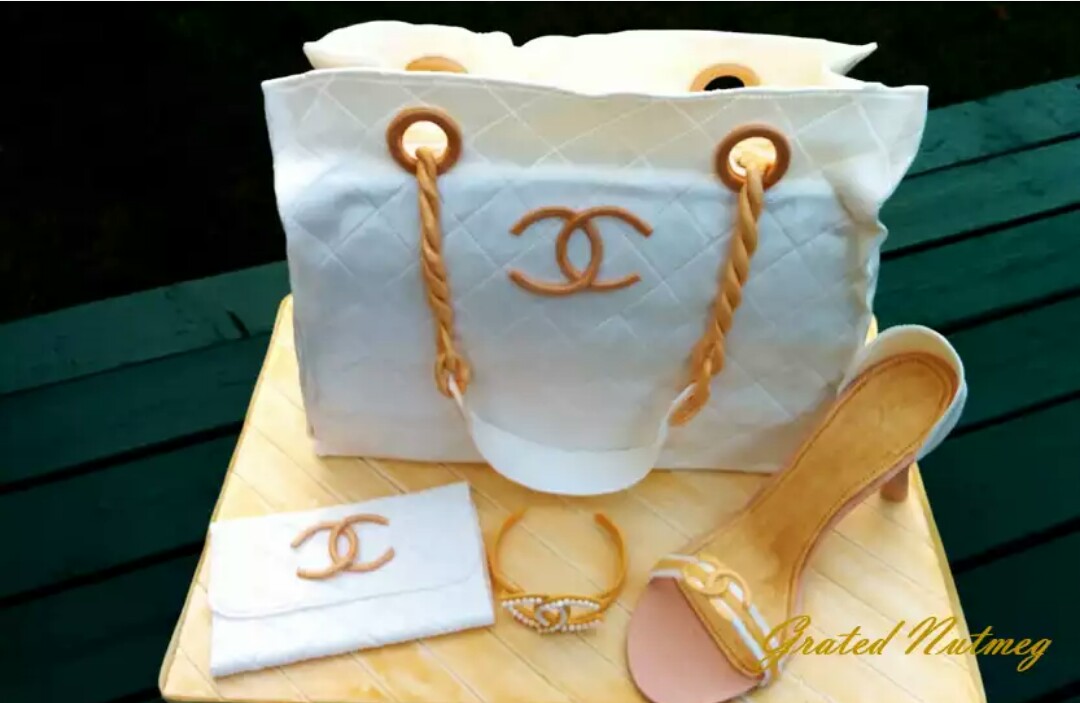
This is a tutorial on how I made this tote bag cake. It is a white bag with blue stripes and ivory and gold details. This cake is great for a birthday or a summer time picnic. Contrary to how it looks, this cake really is quite easy to make. The skills you learn here can be used to create other bag cakes like the Chanel Bag below. To see other views of this cake, click here.
THE PROCESS
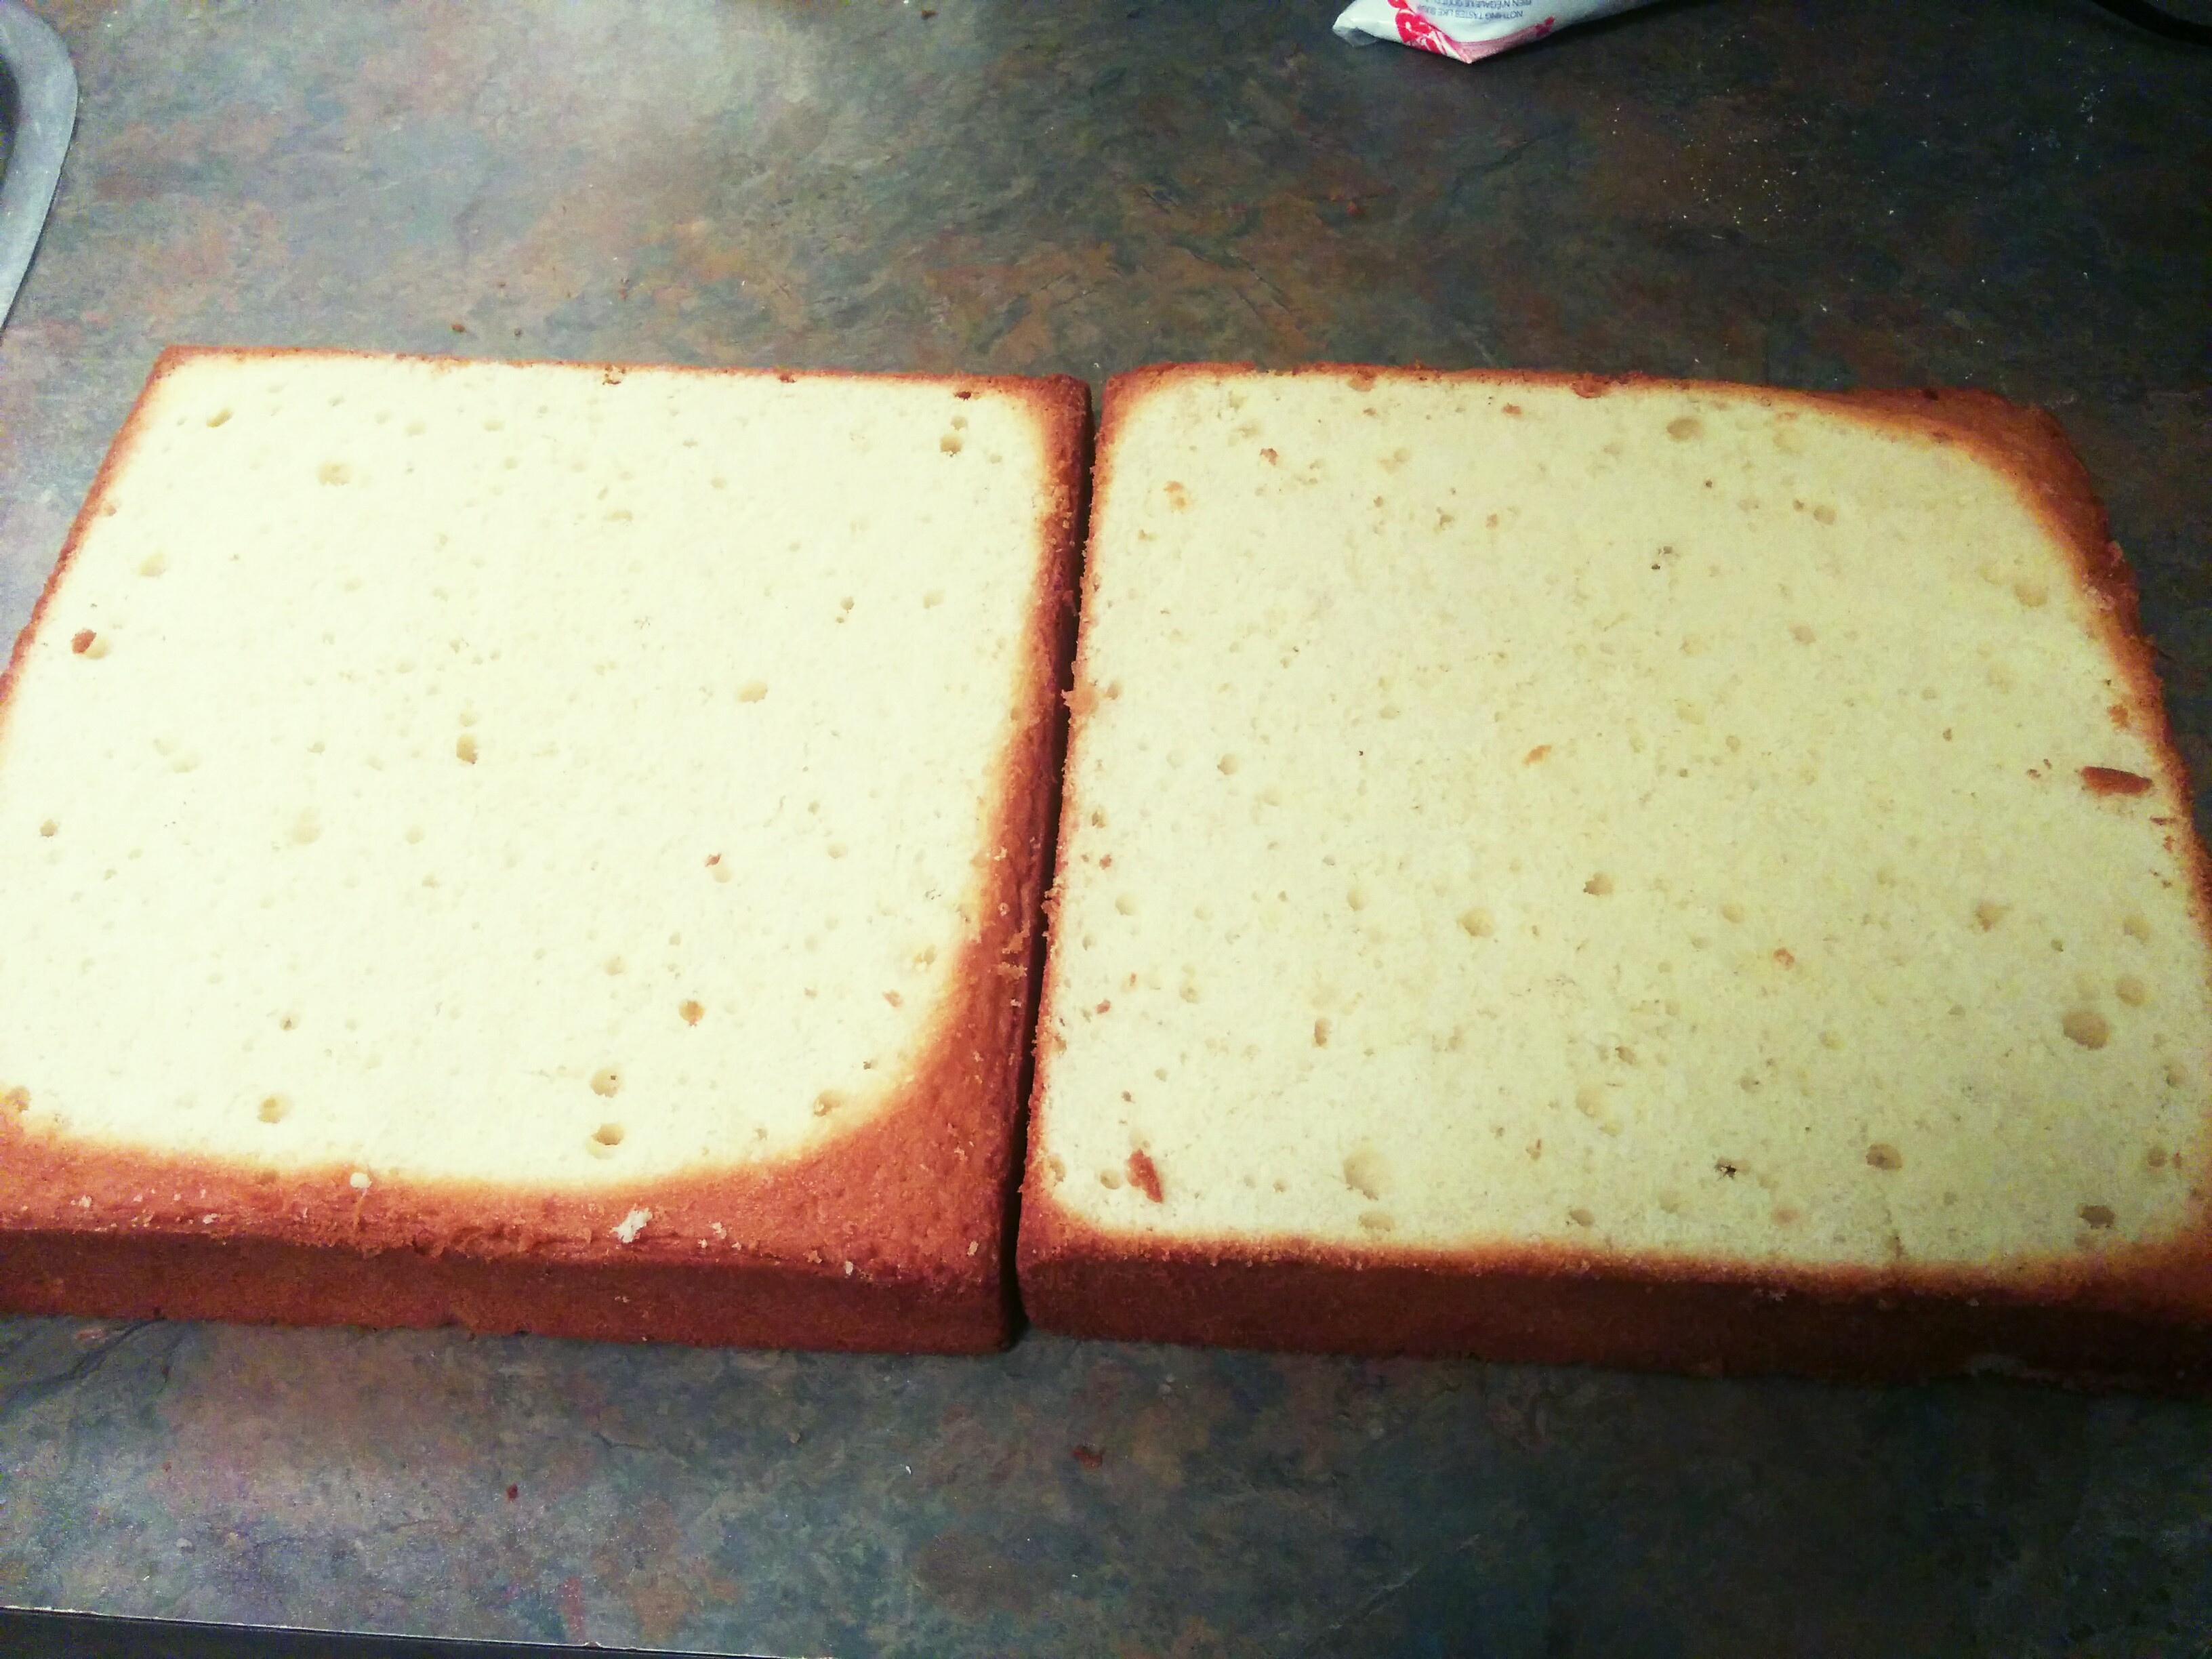
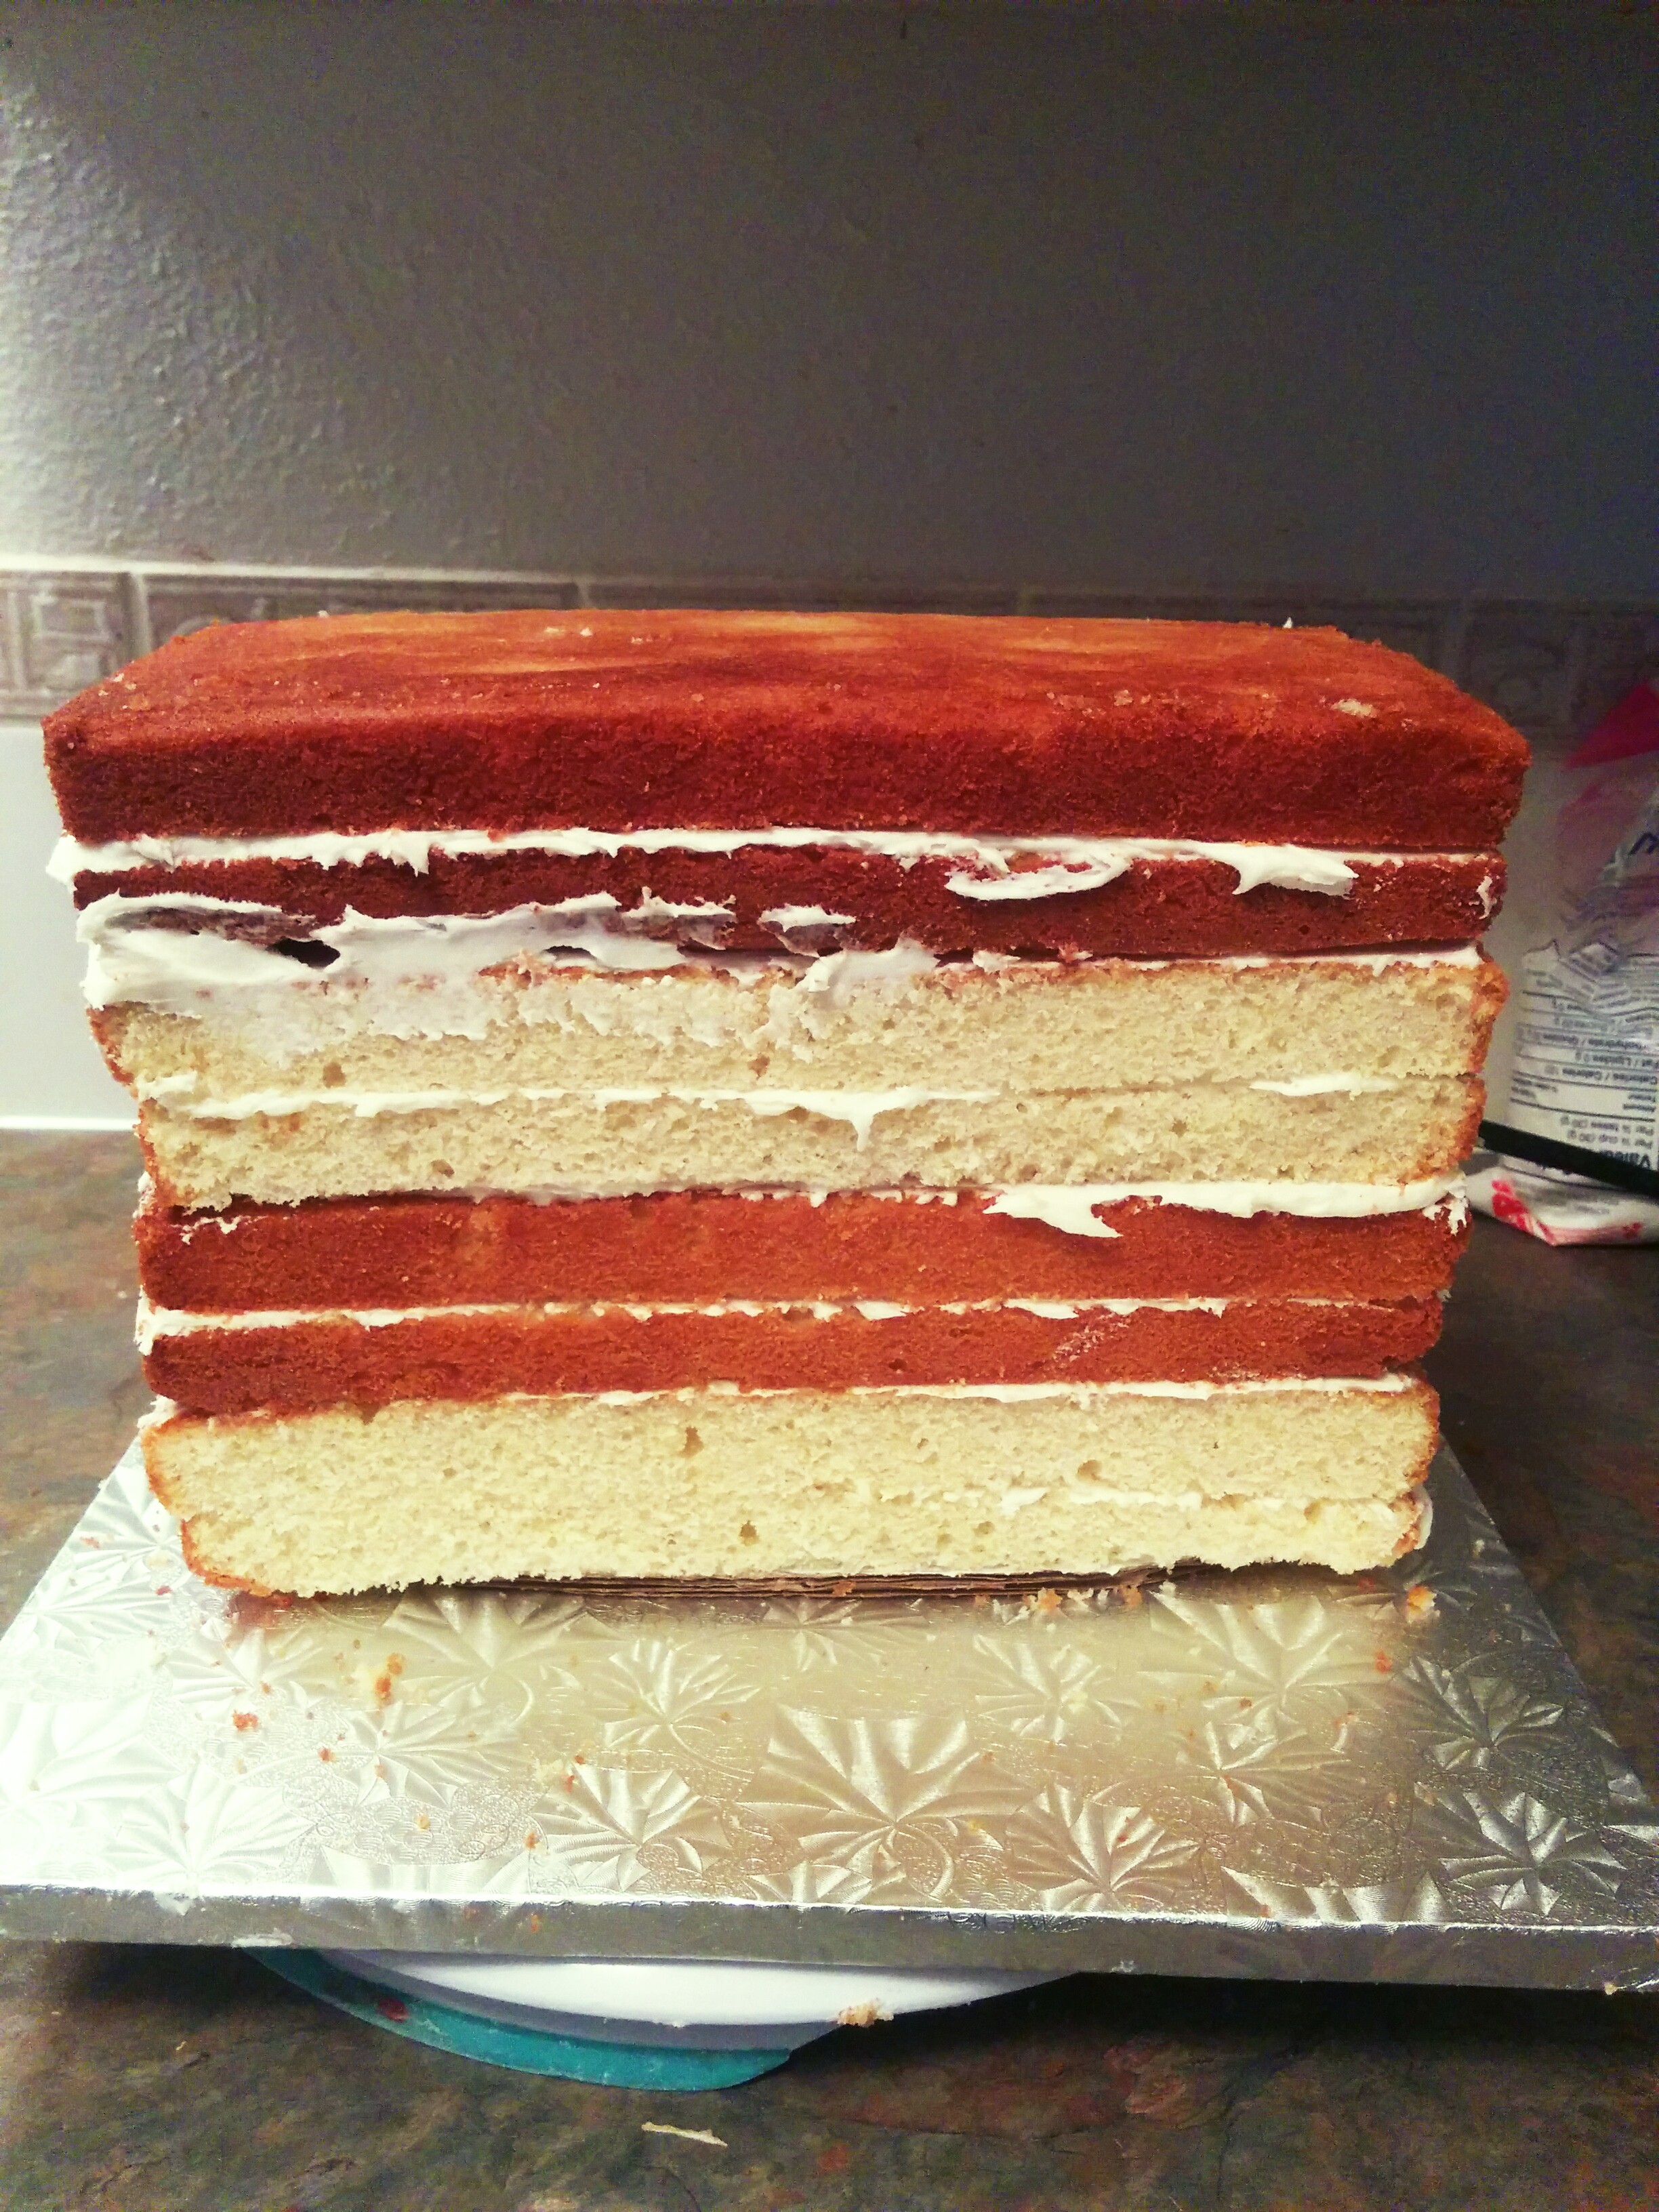
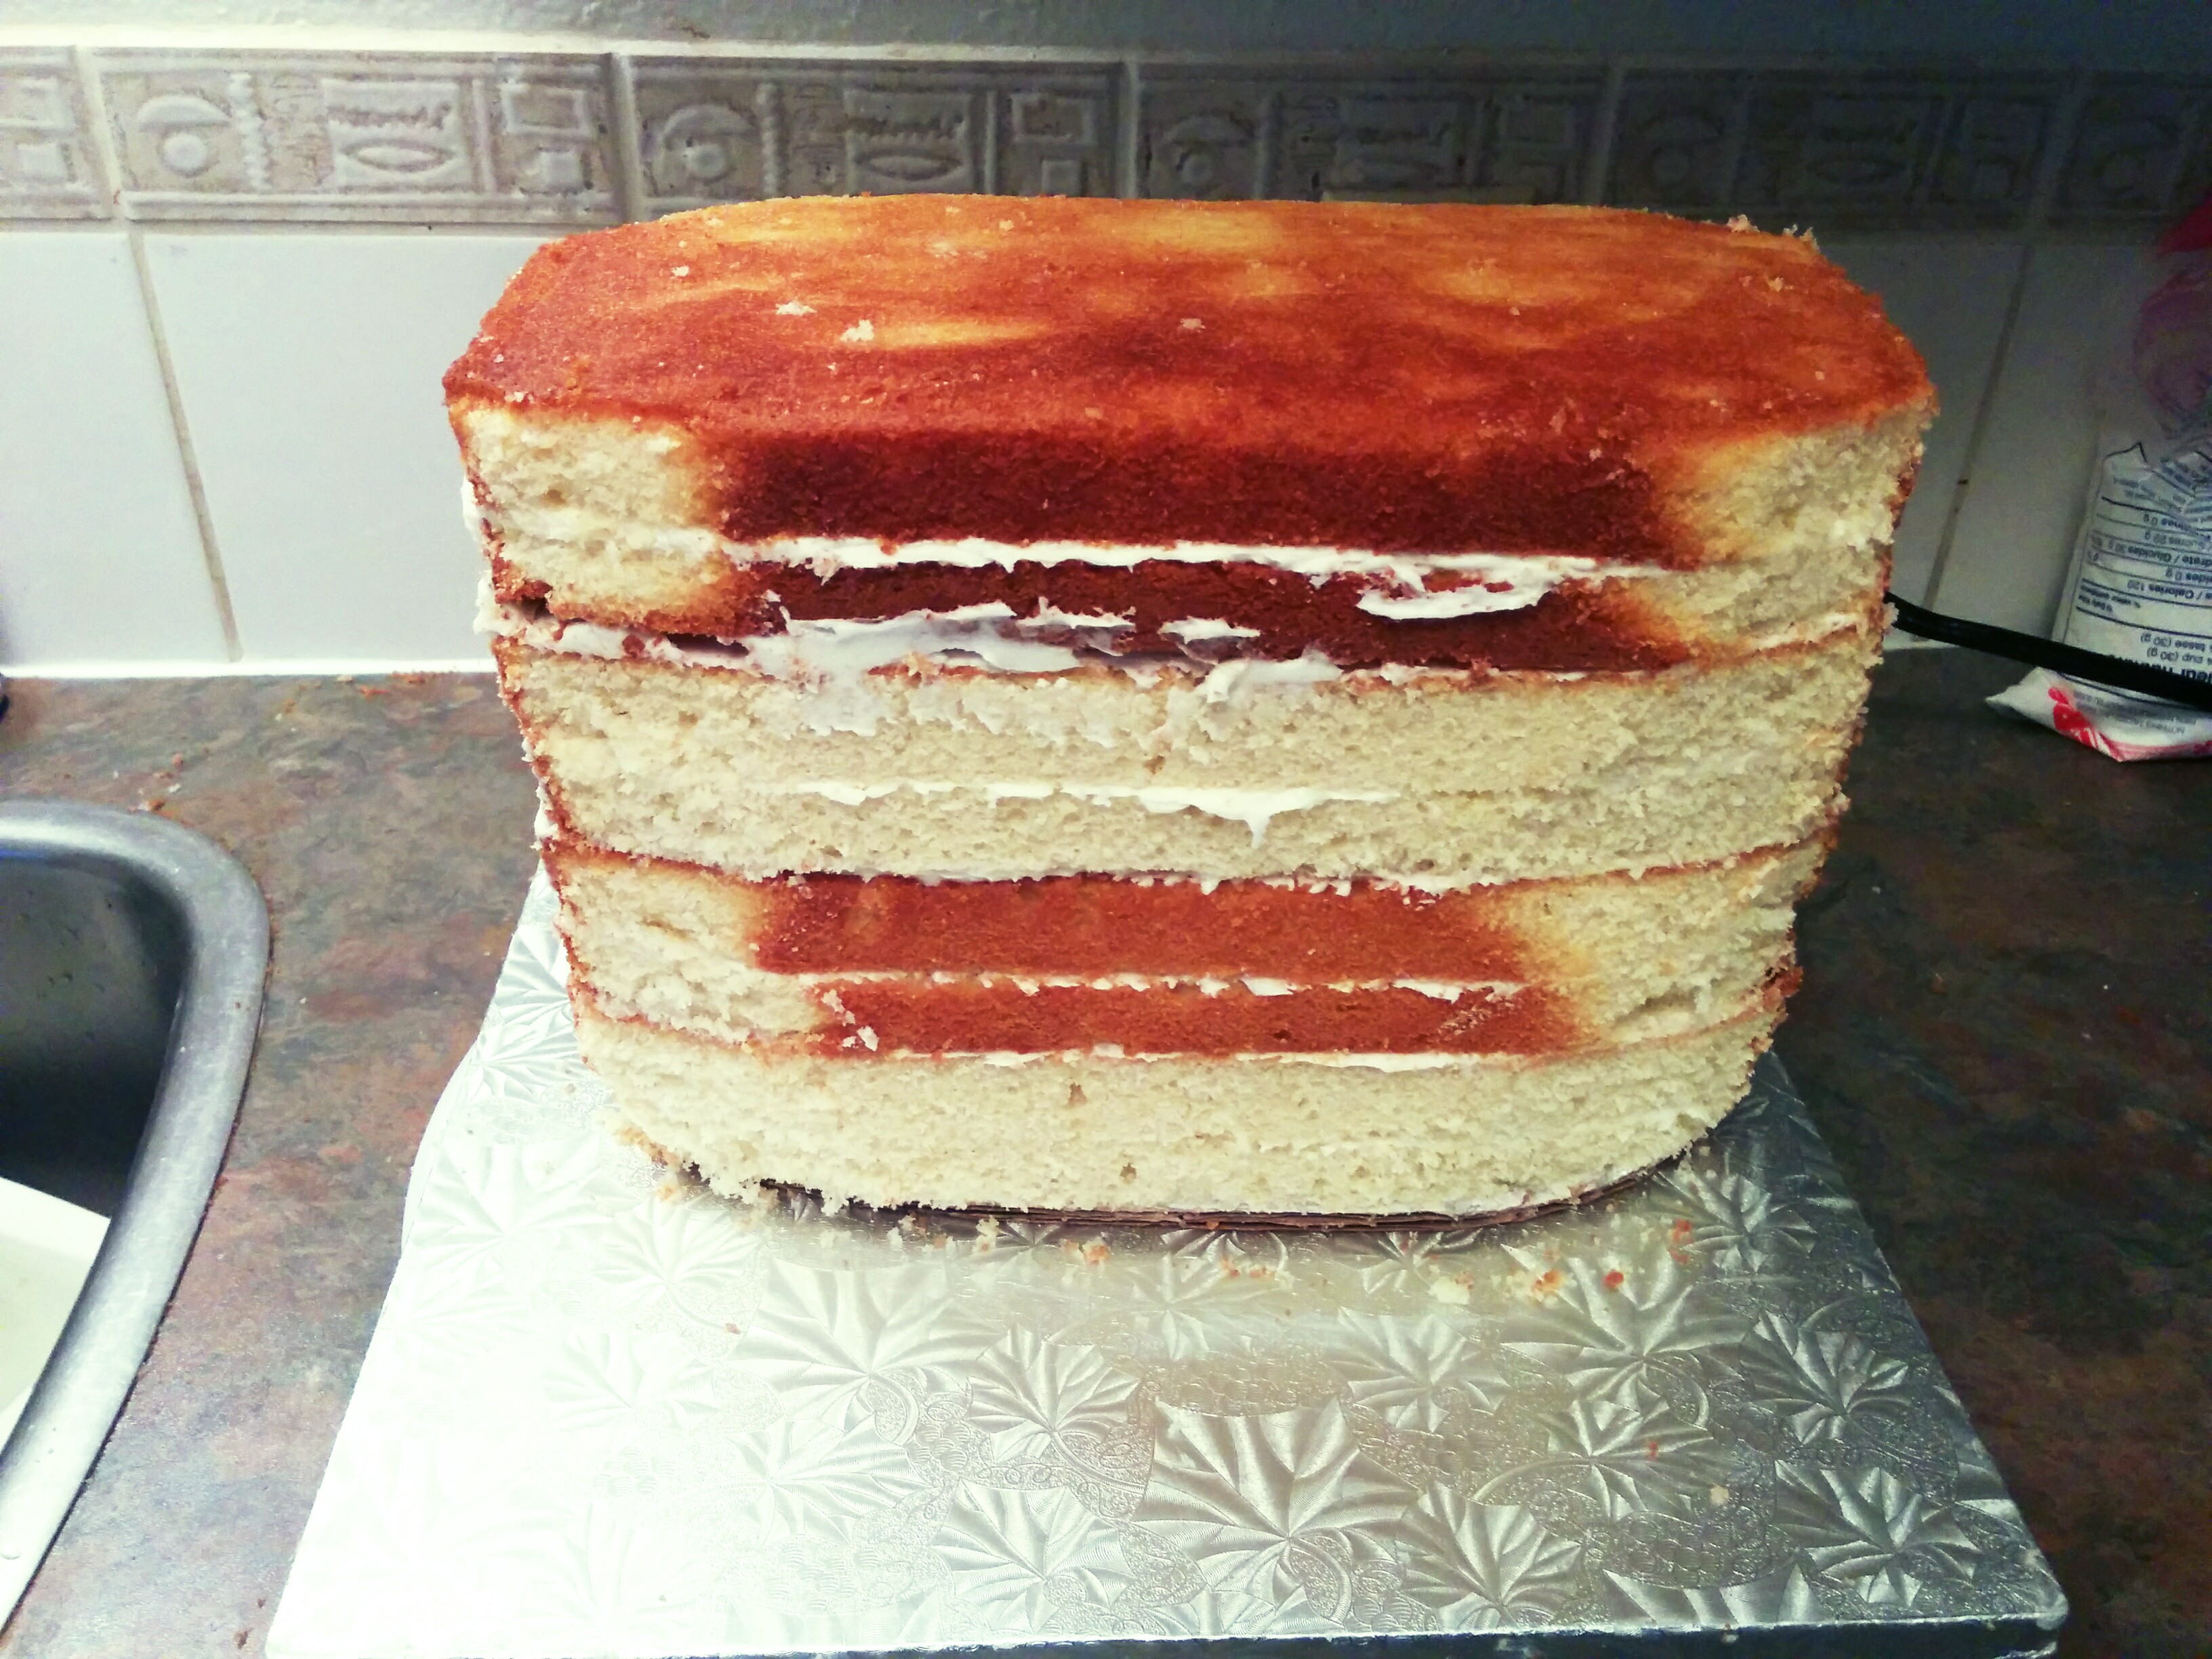
(1) Bake your sponges in two 10 x 10 inch cake pans. The sponges here are my Nigerian Cake. Level the cakes and divide each sponge into two equal parts. The base dimension of the bag will thus be 10 x 5 inches. The height of the bag will depend on the height of your sponges.
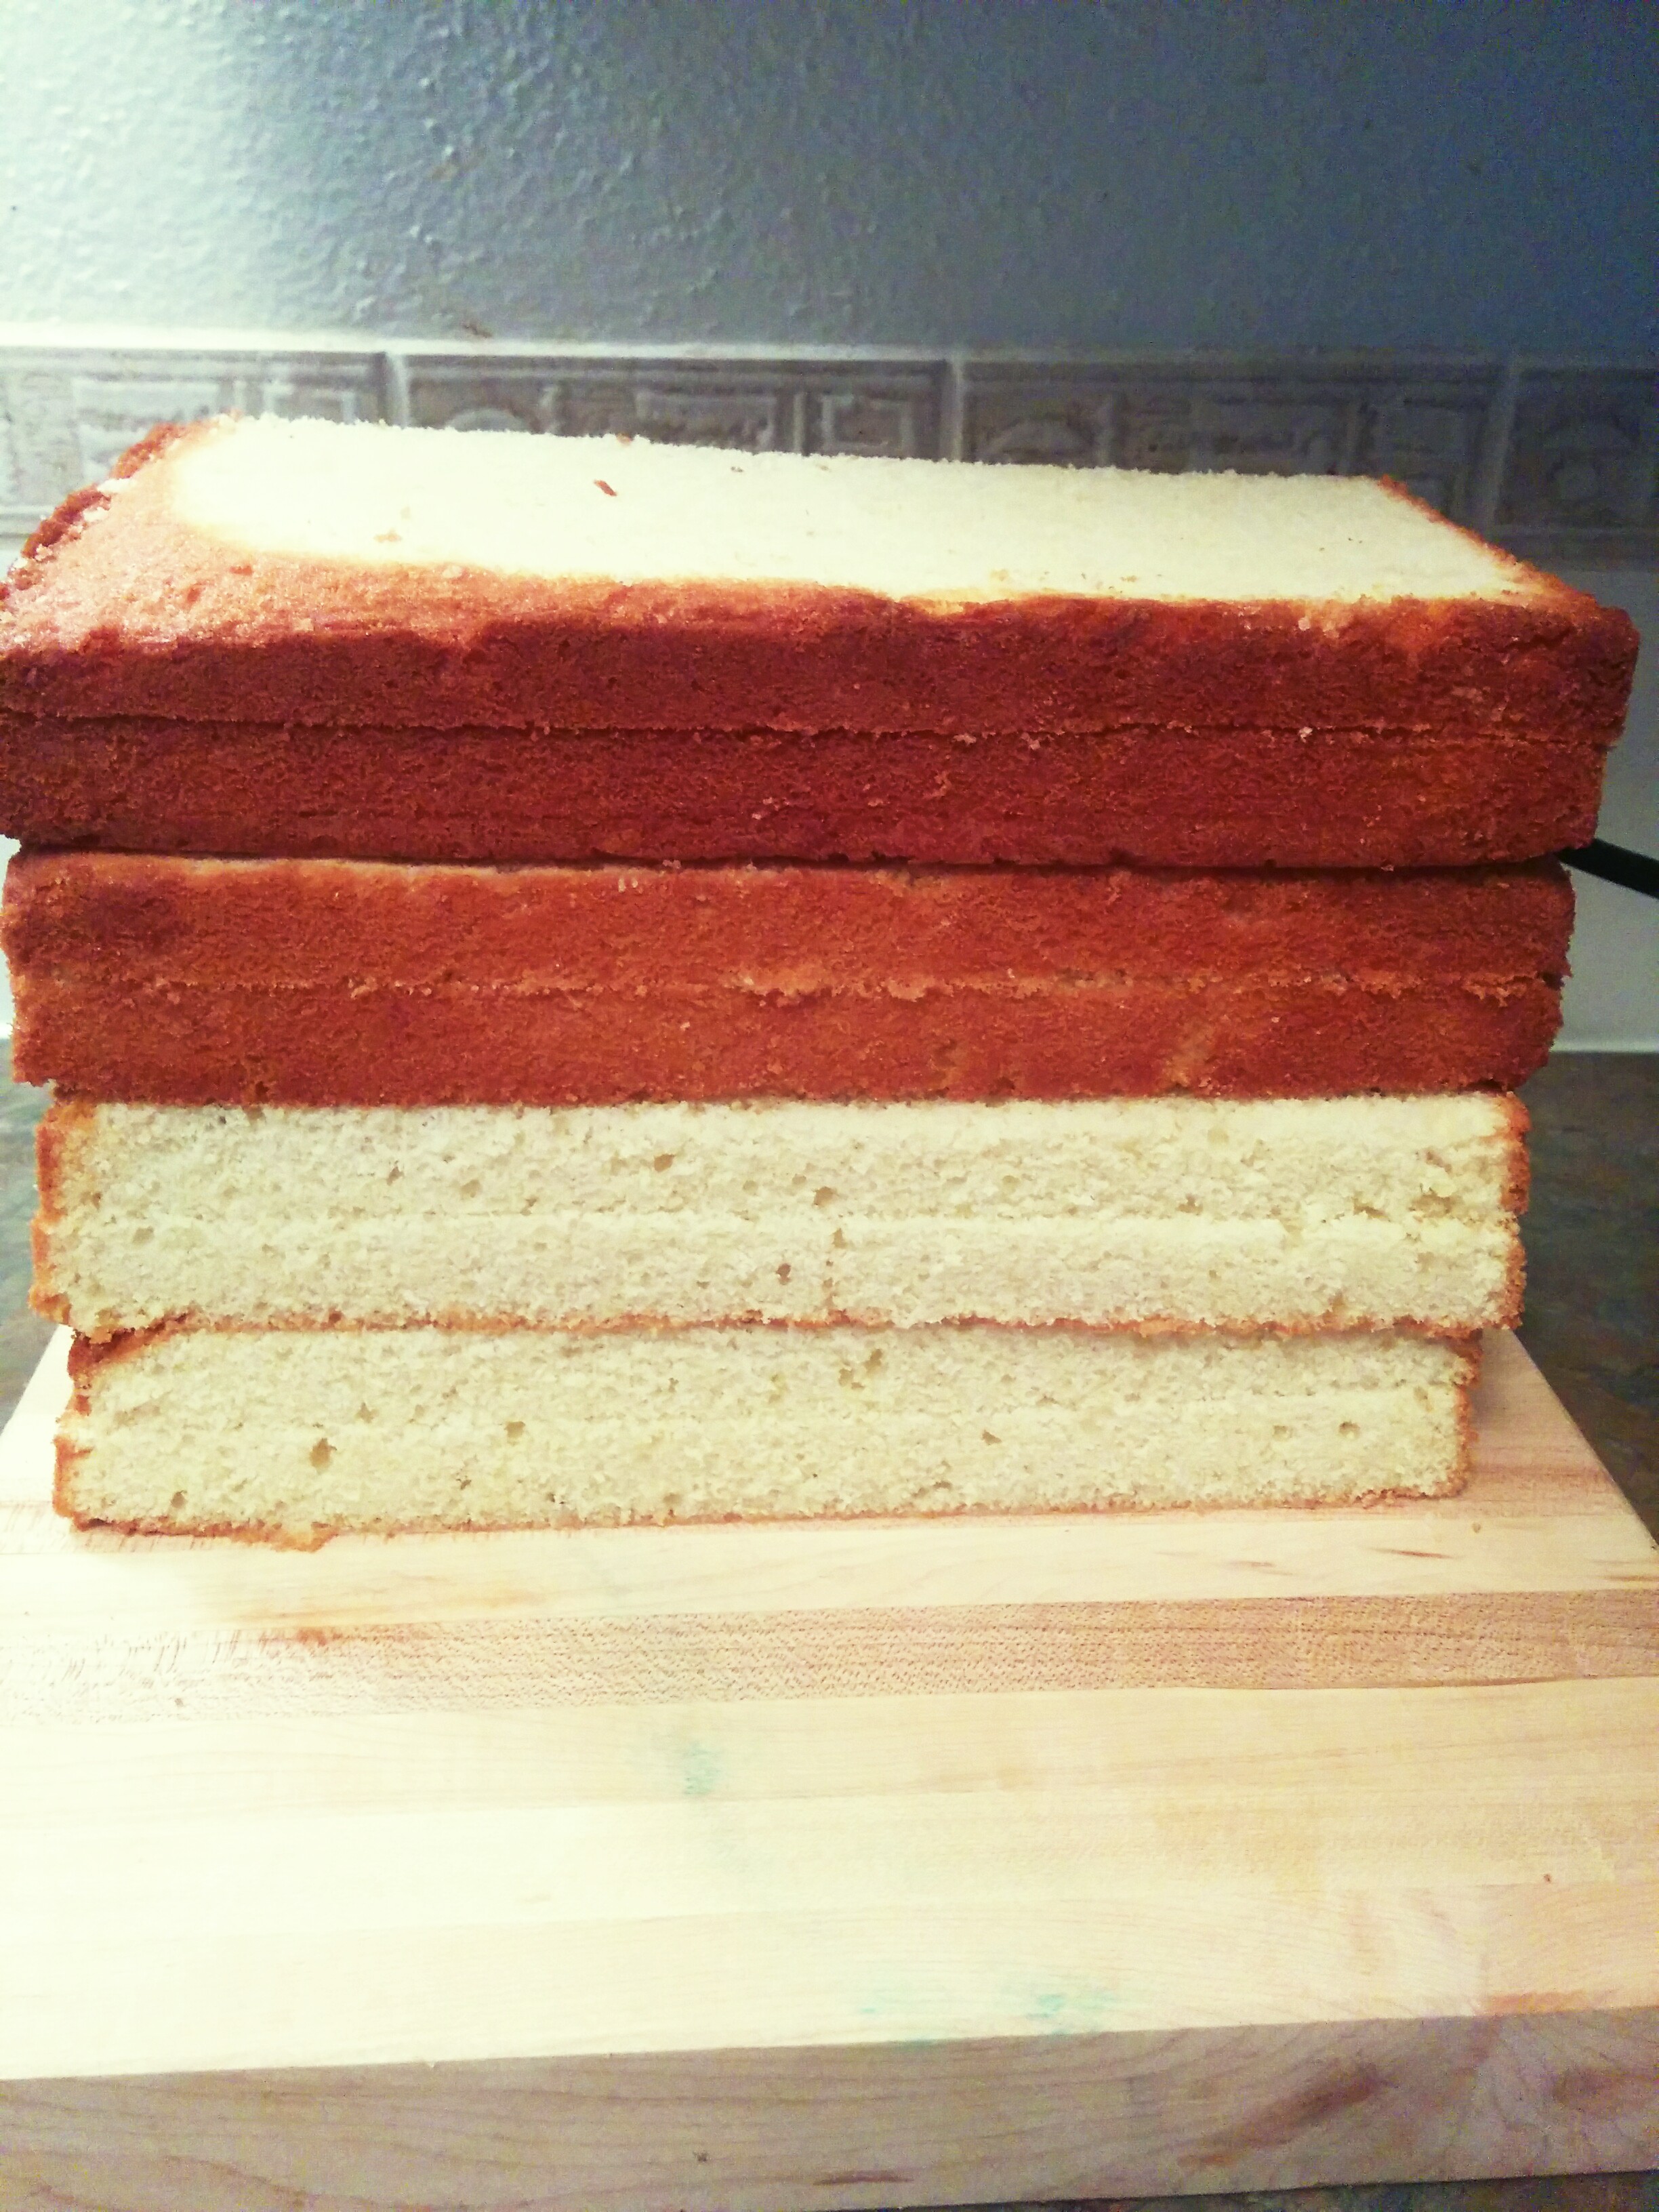
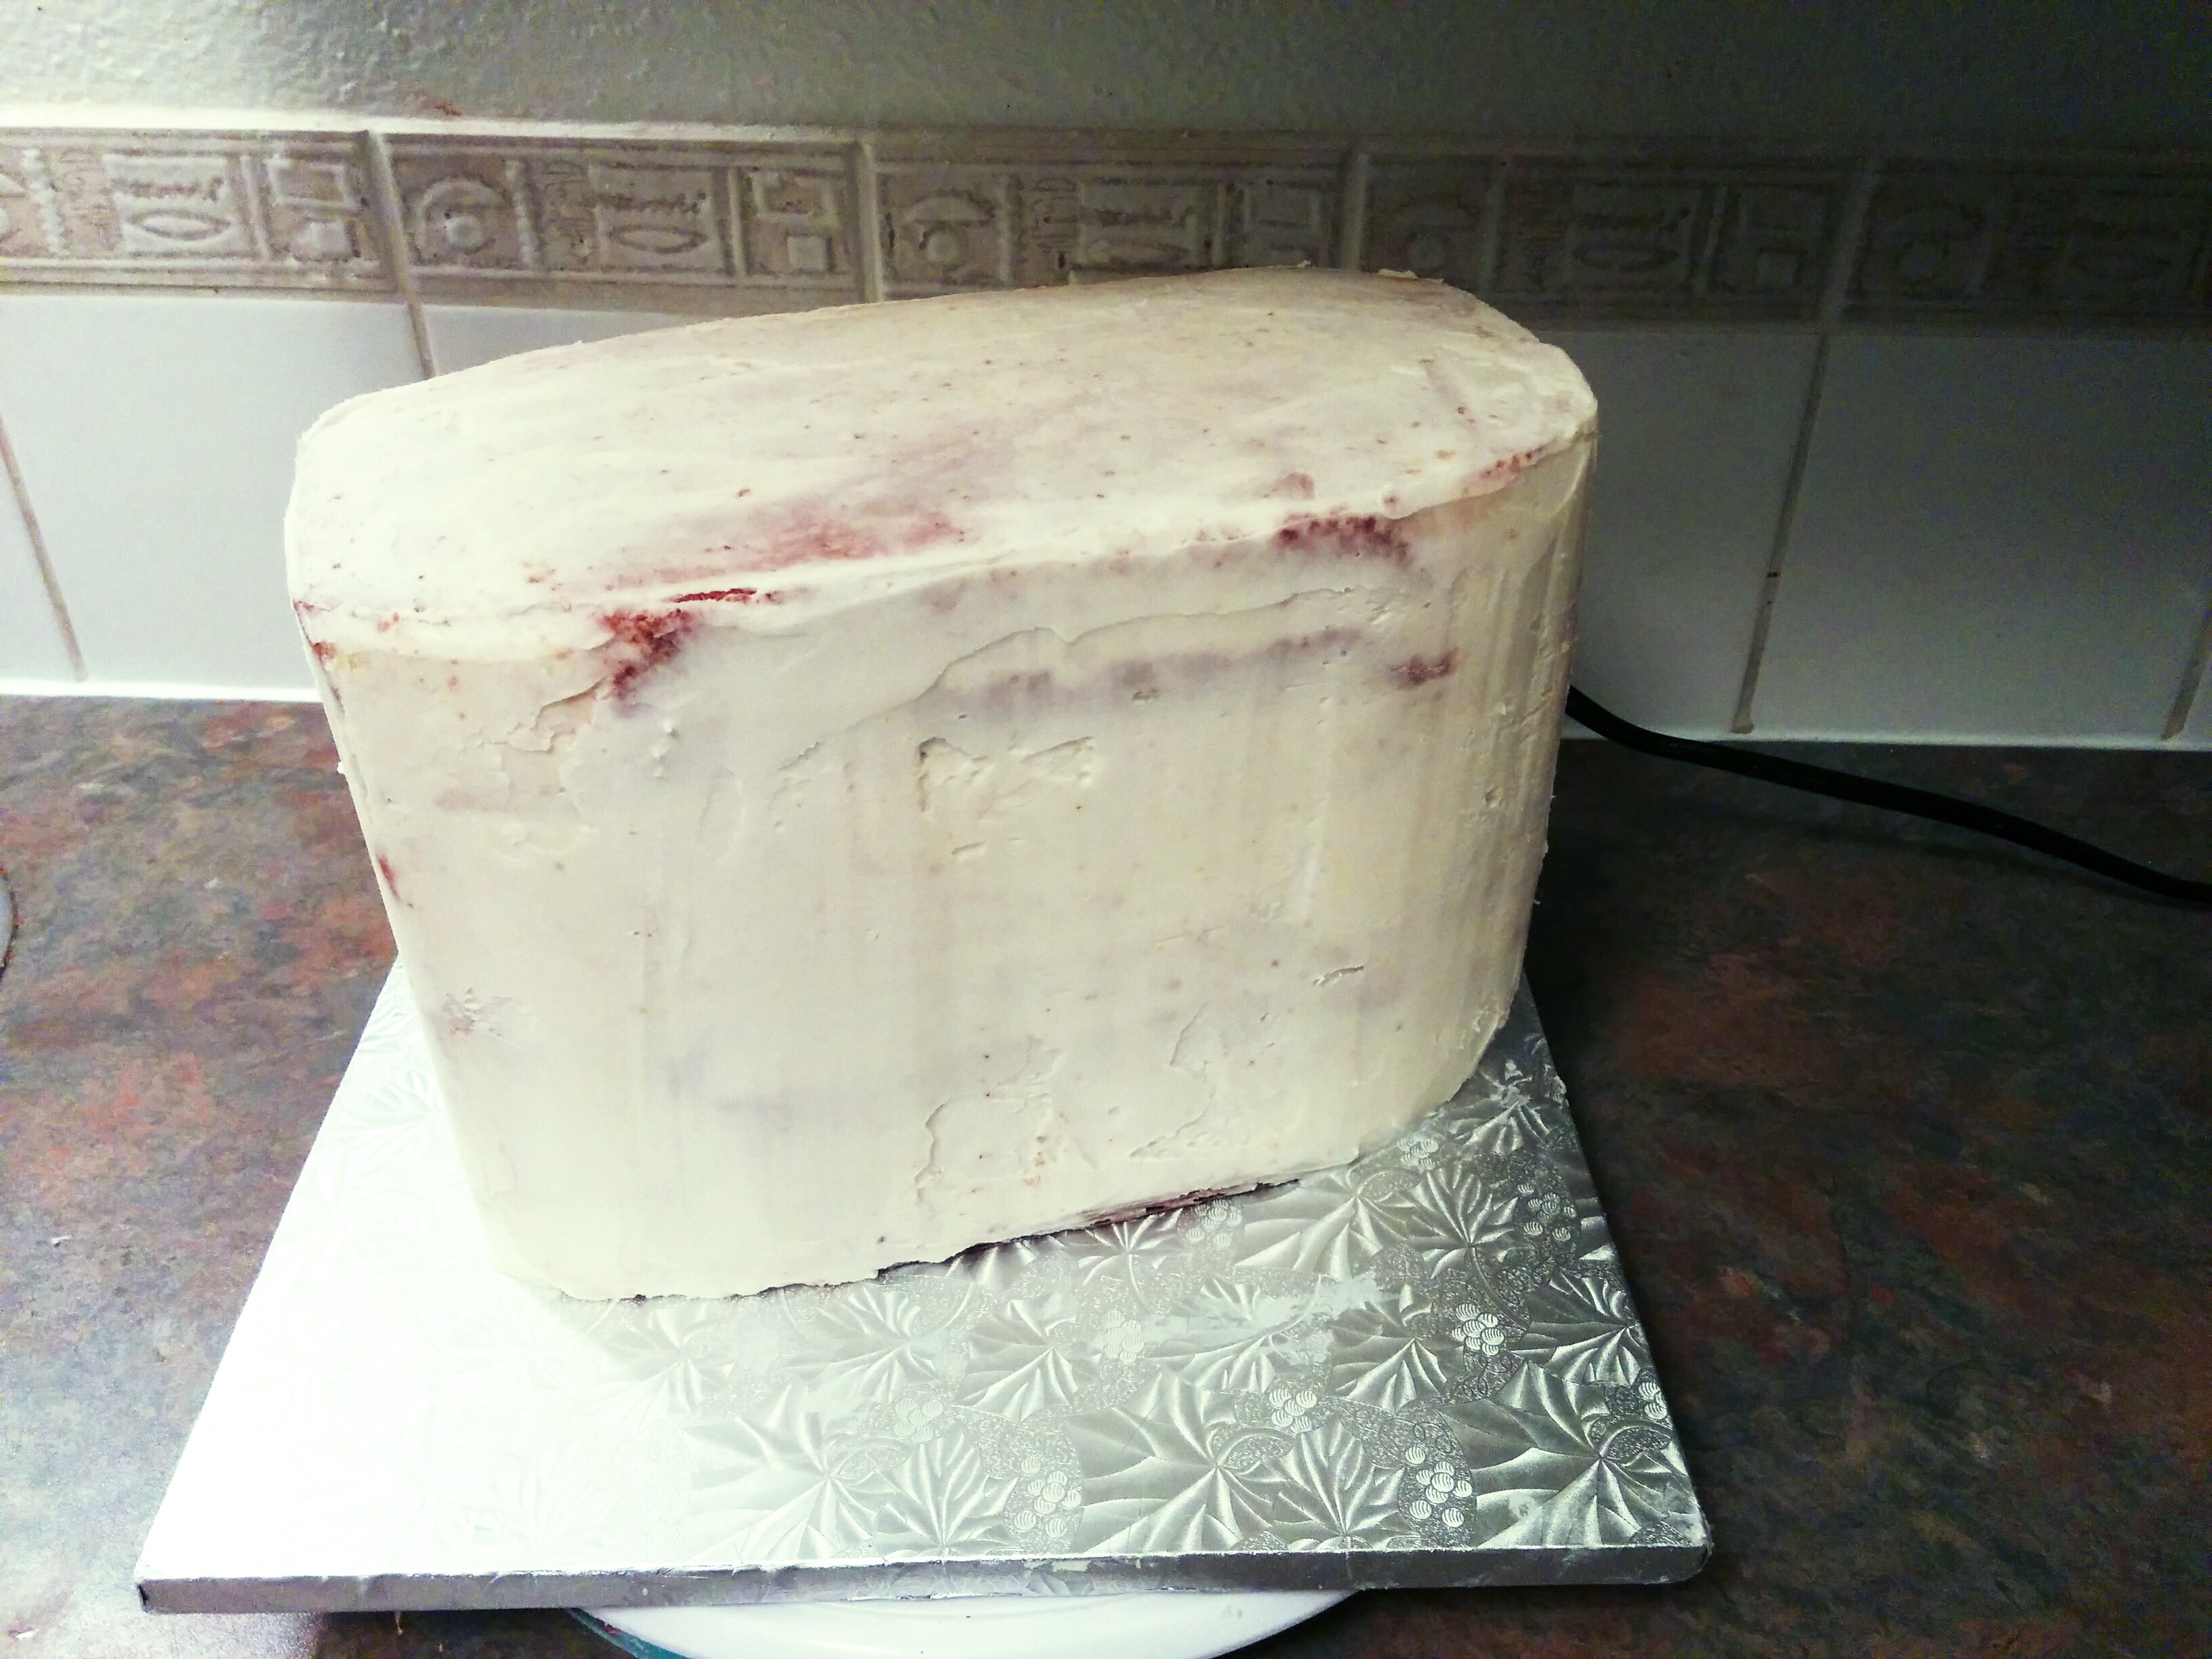
(2) Stack and frost the sponges on eachother. Next, use a serrated knife to carve the sides of the cake to form the shape of the bag. Finally frost the outside of the cake and refrigerate to set the frosting.
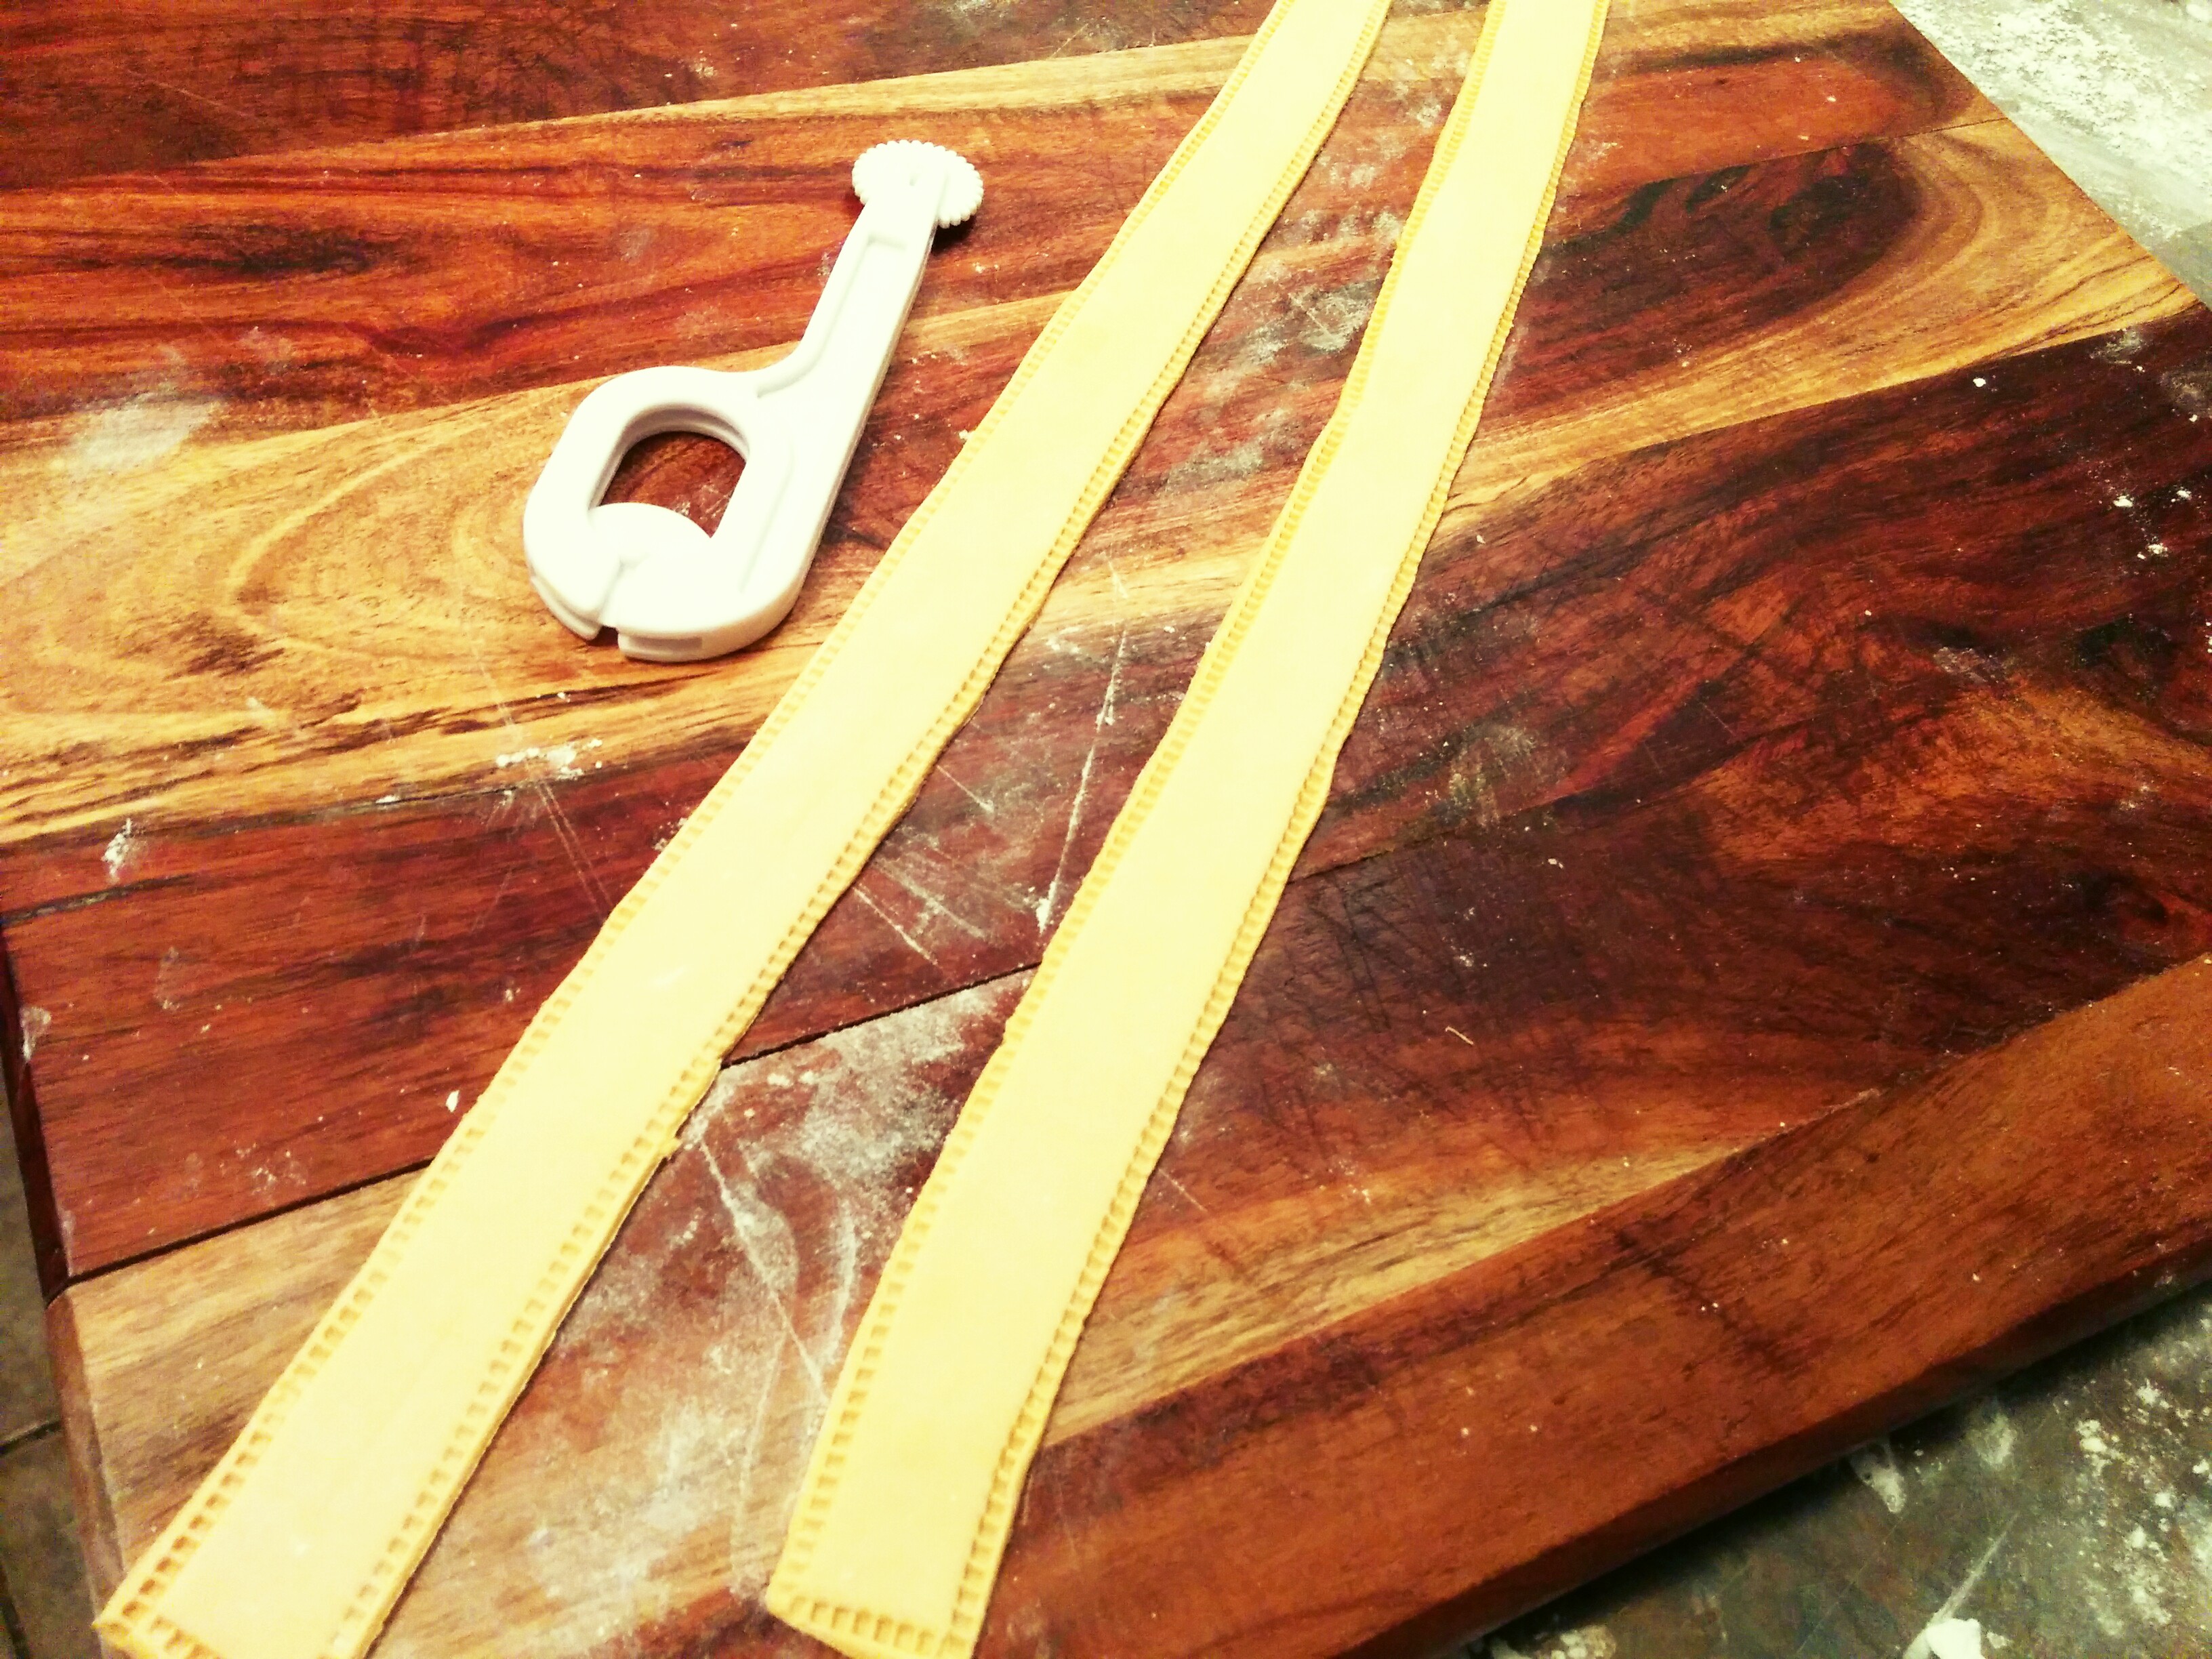
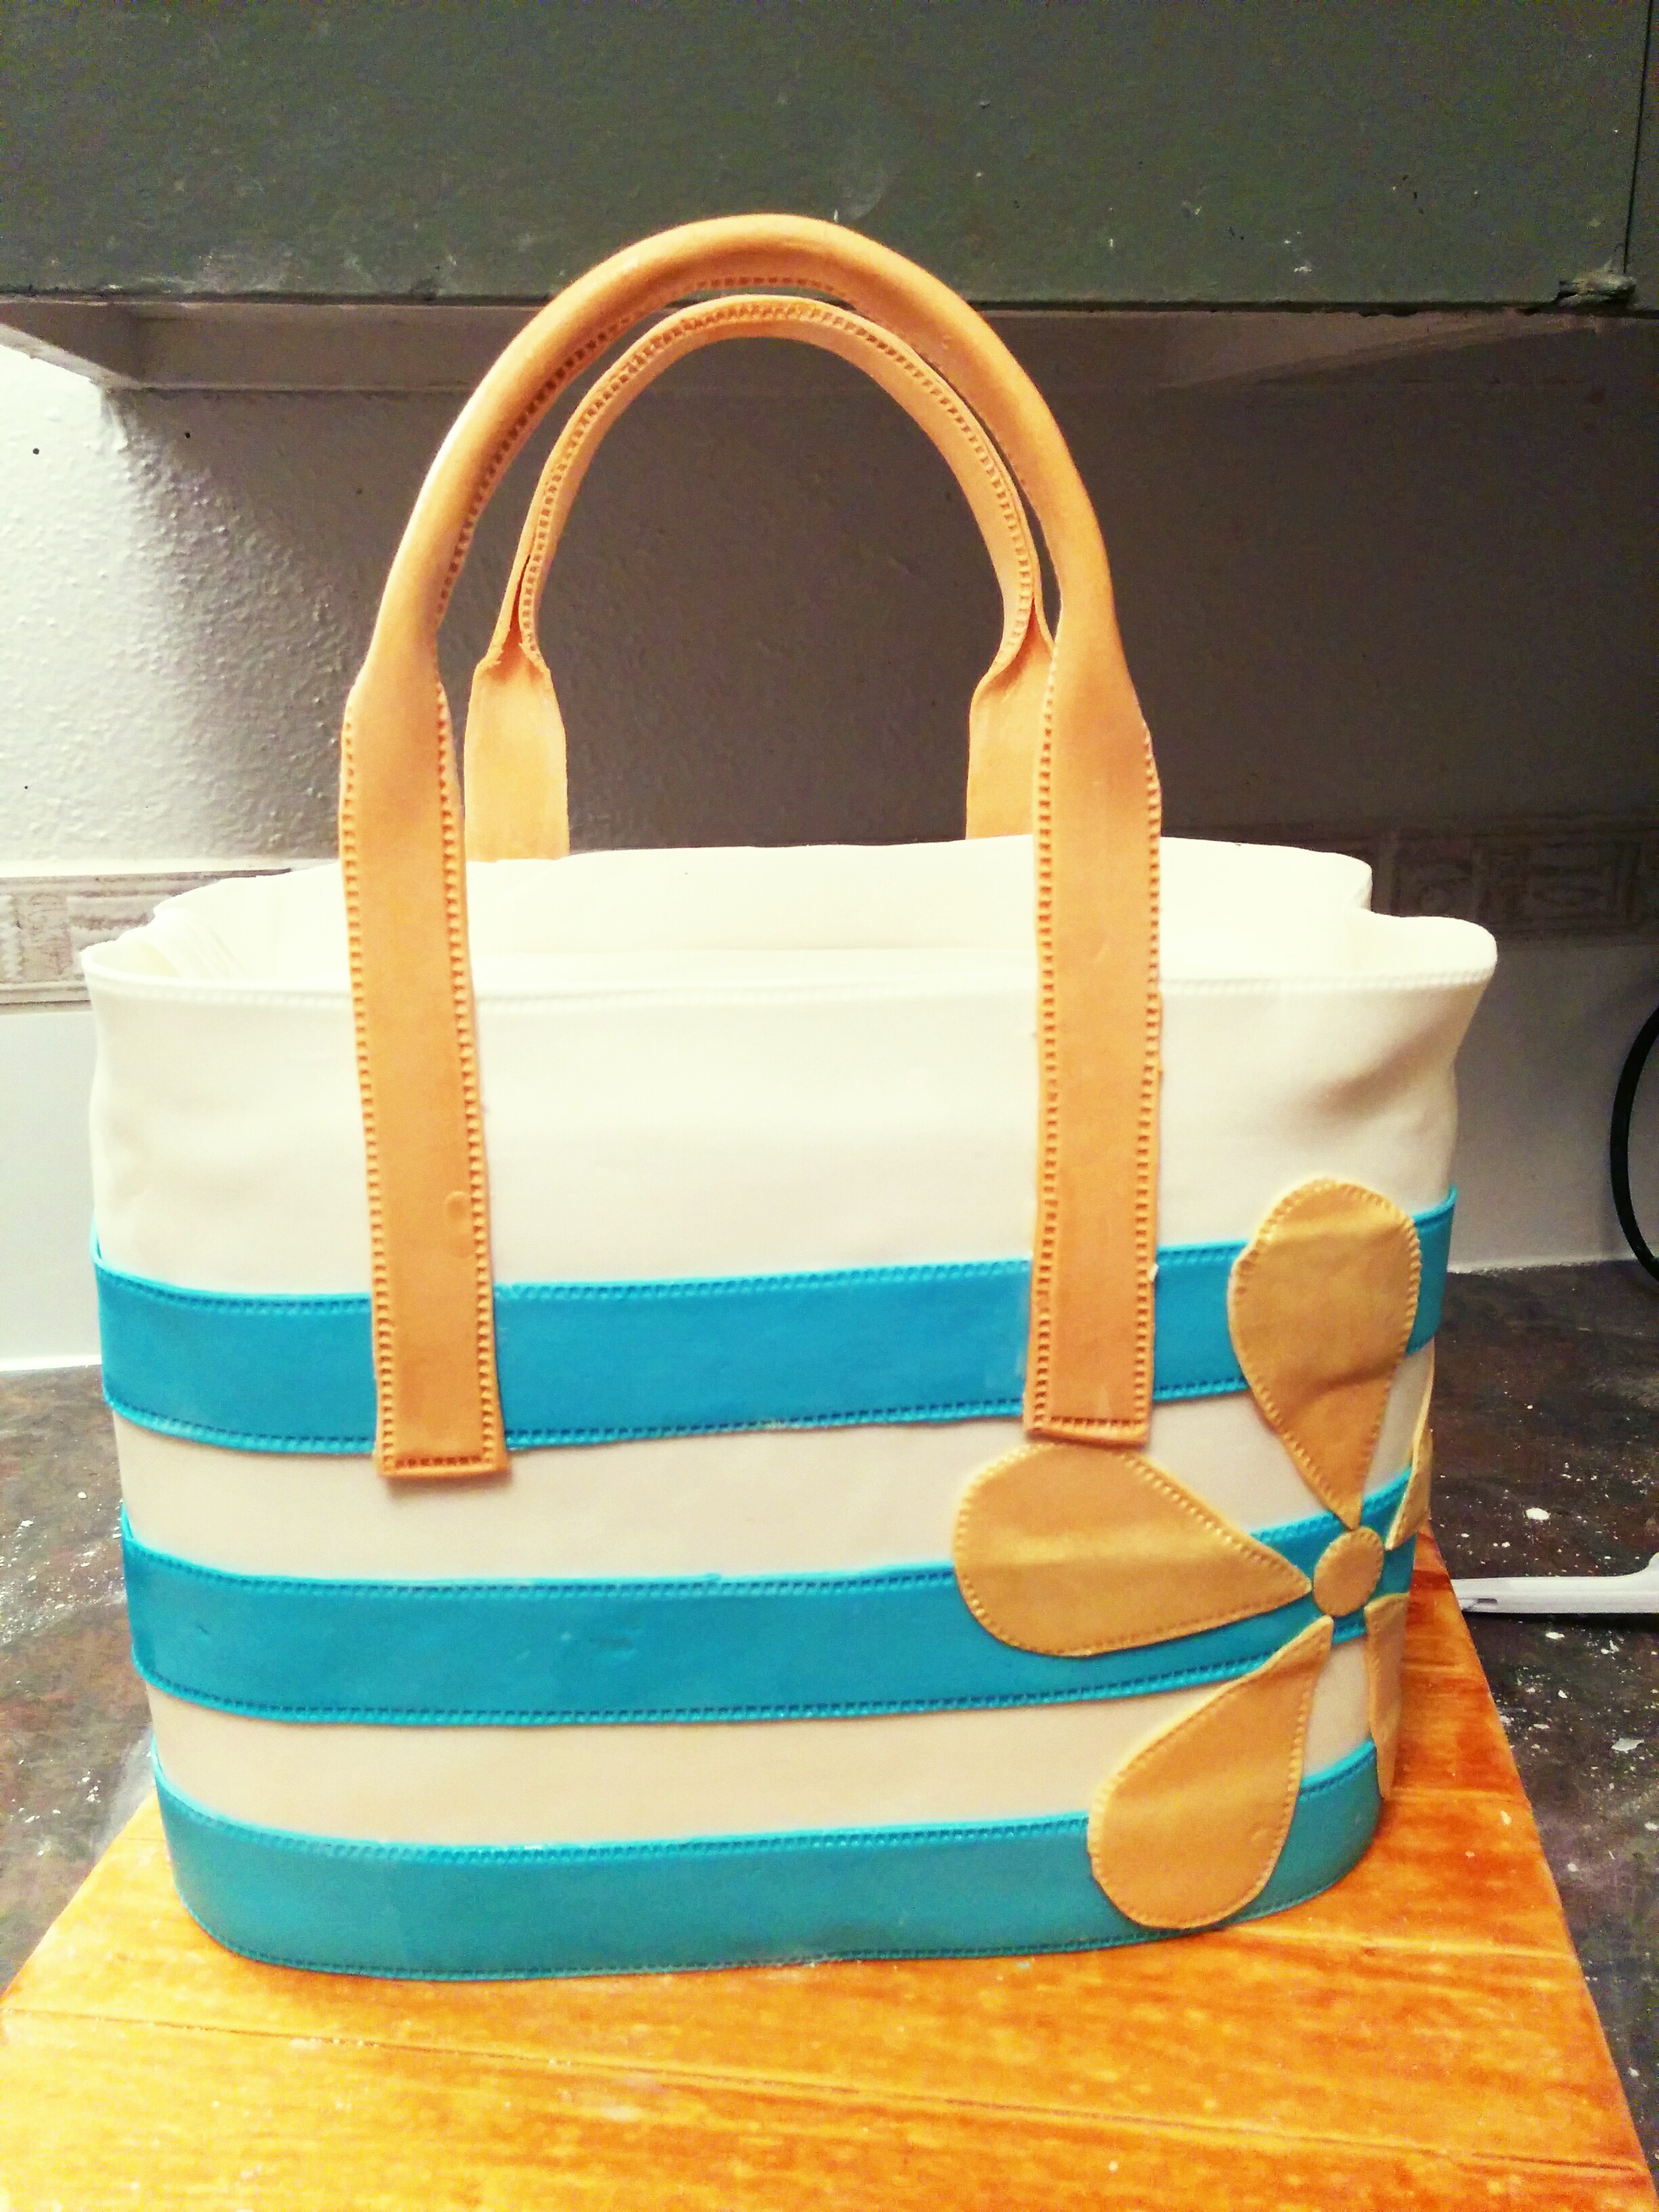
(3) The first step in designing the cake is making the bag straps. To do this, cut out 2 ivory strips of fondant measuring 40 x 1 inch each. Use a stitching wheel to stitch the sides. Apply some water to the middle of each strap and fold them in the middle leaving the edges flat. Finally curve the straps and allow them to dry. Make the straps a few days (up to a week) before you plan to make the cake so they dry properly. You can also make your charm and charm ring now and allow them to dry along with the straps.
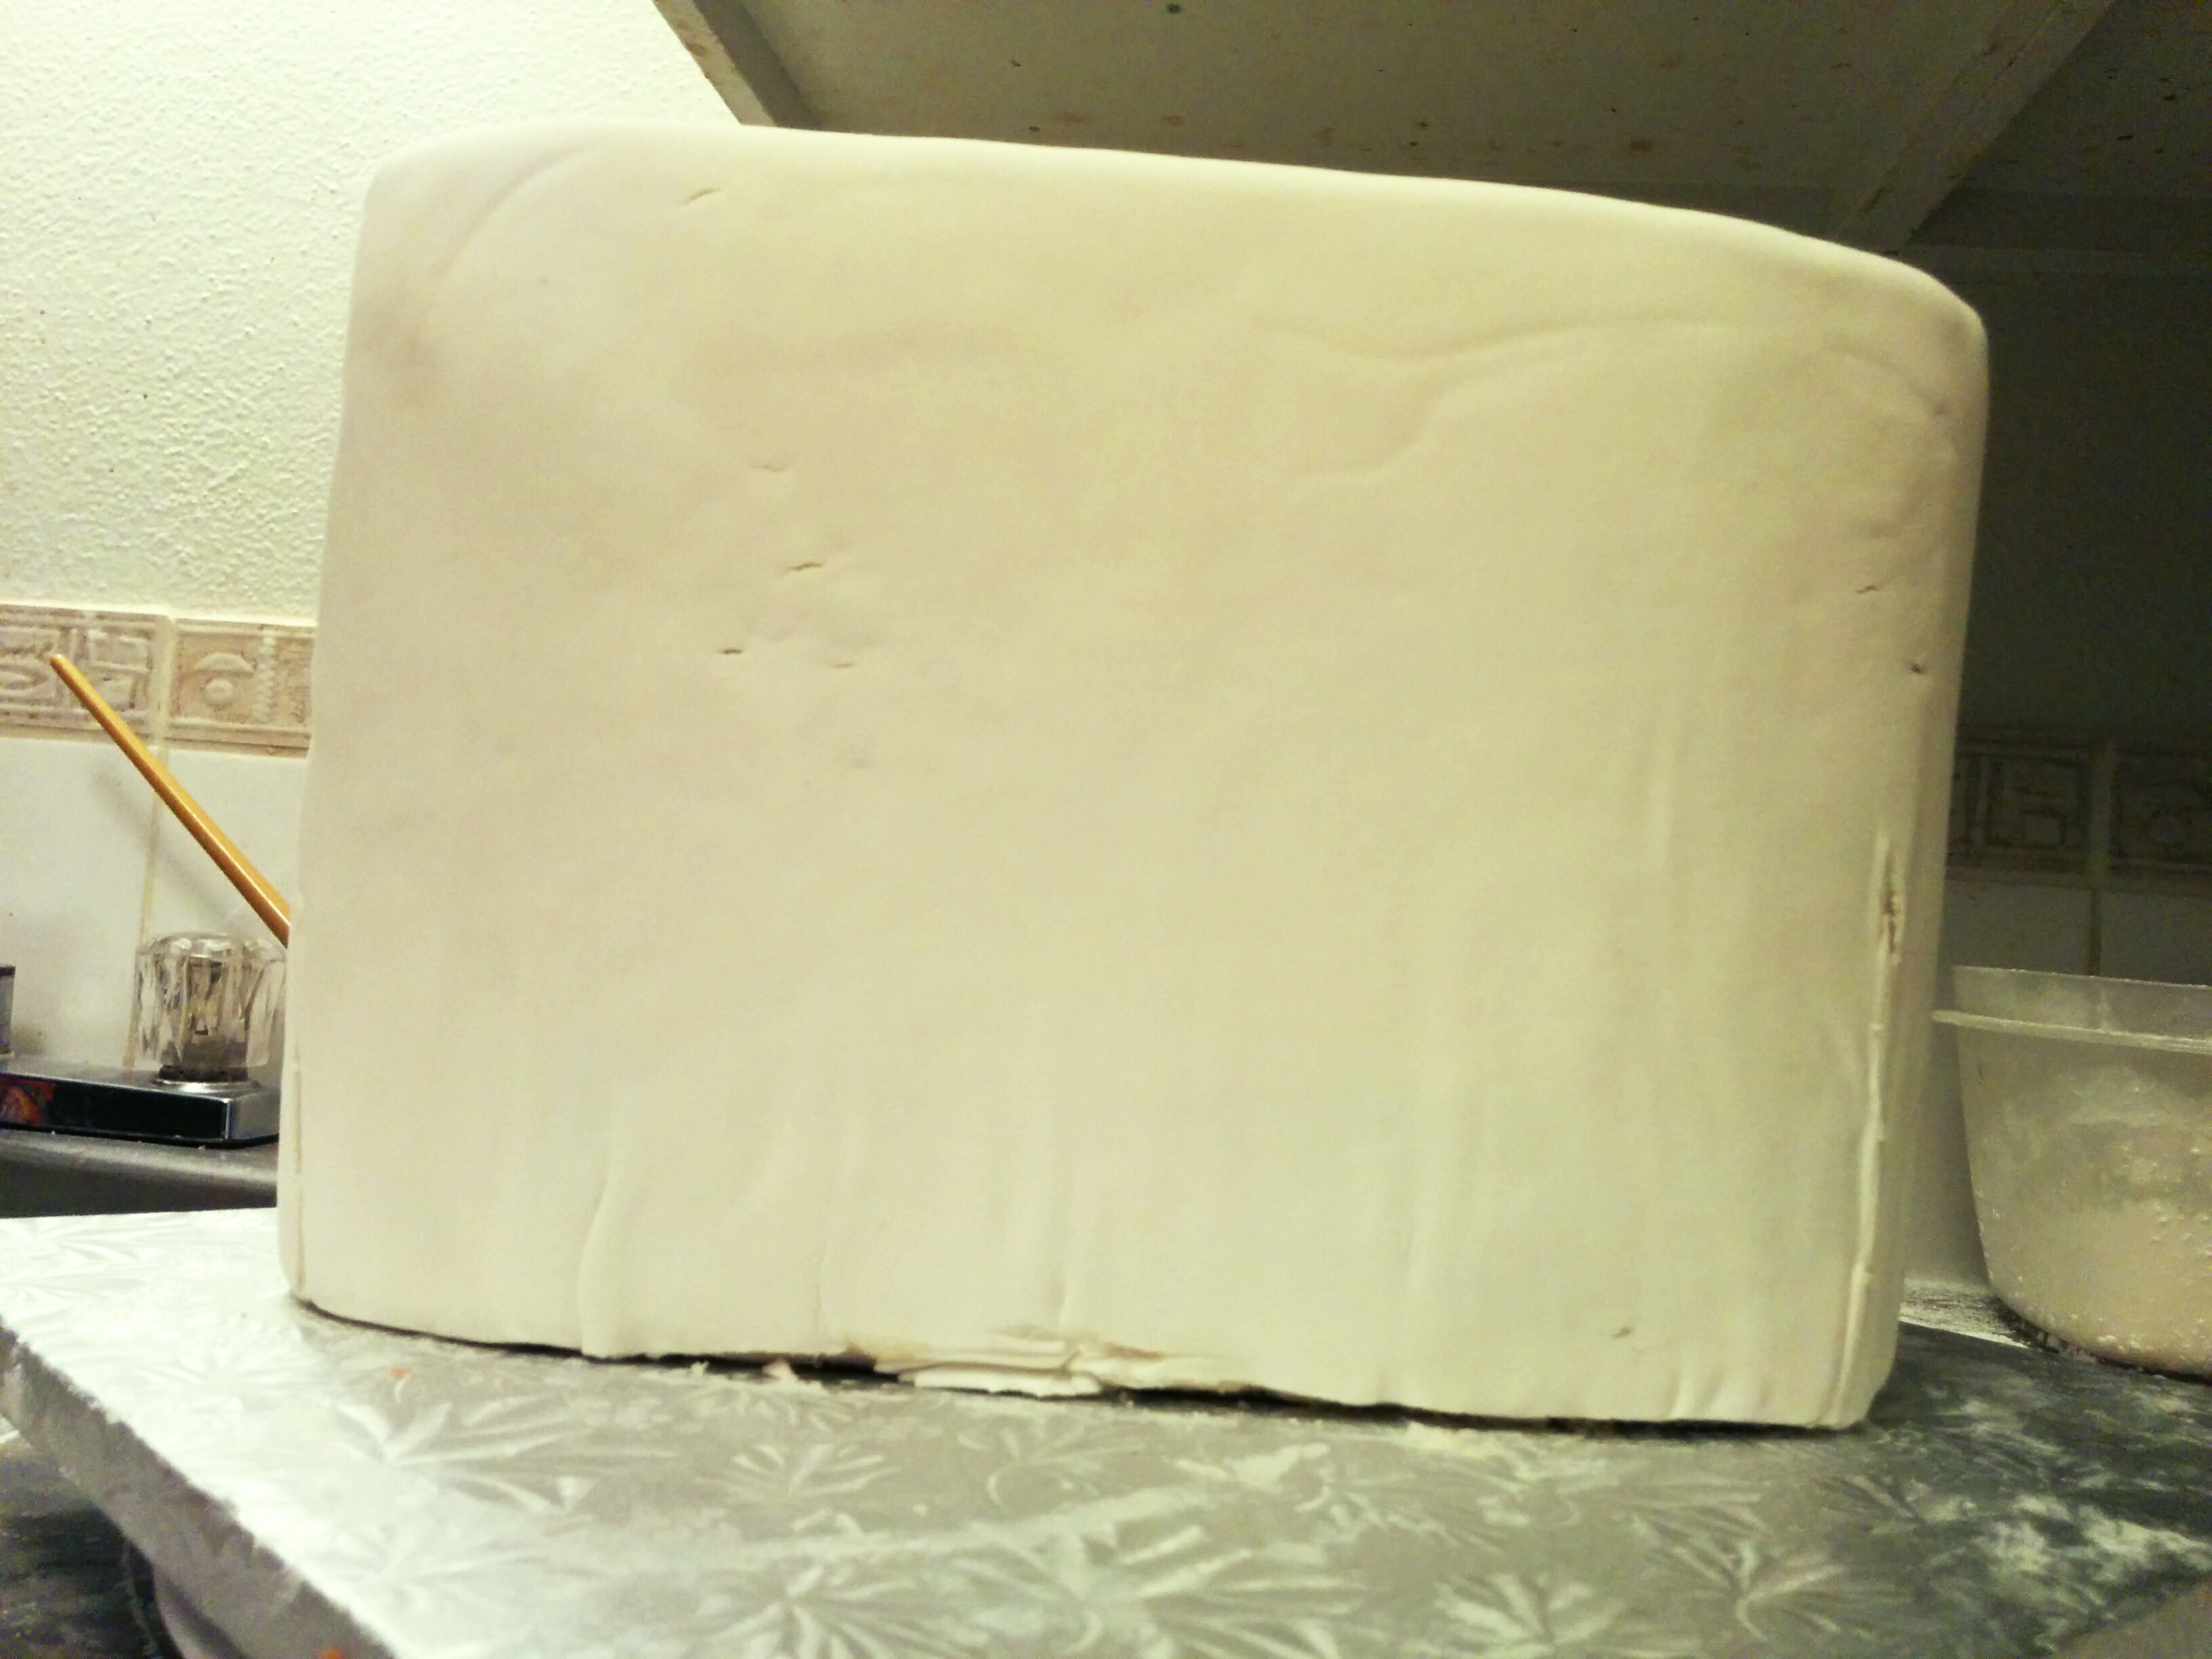
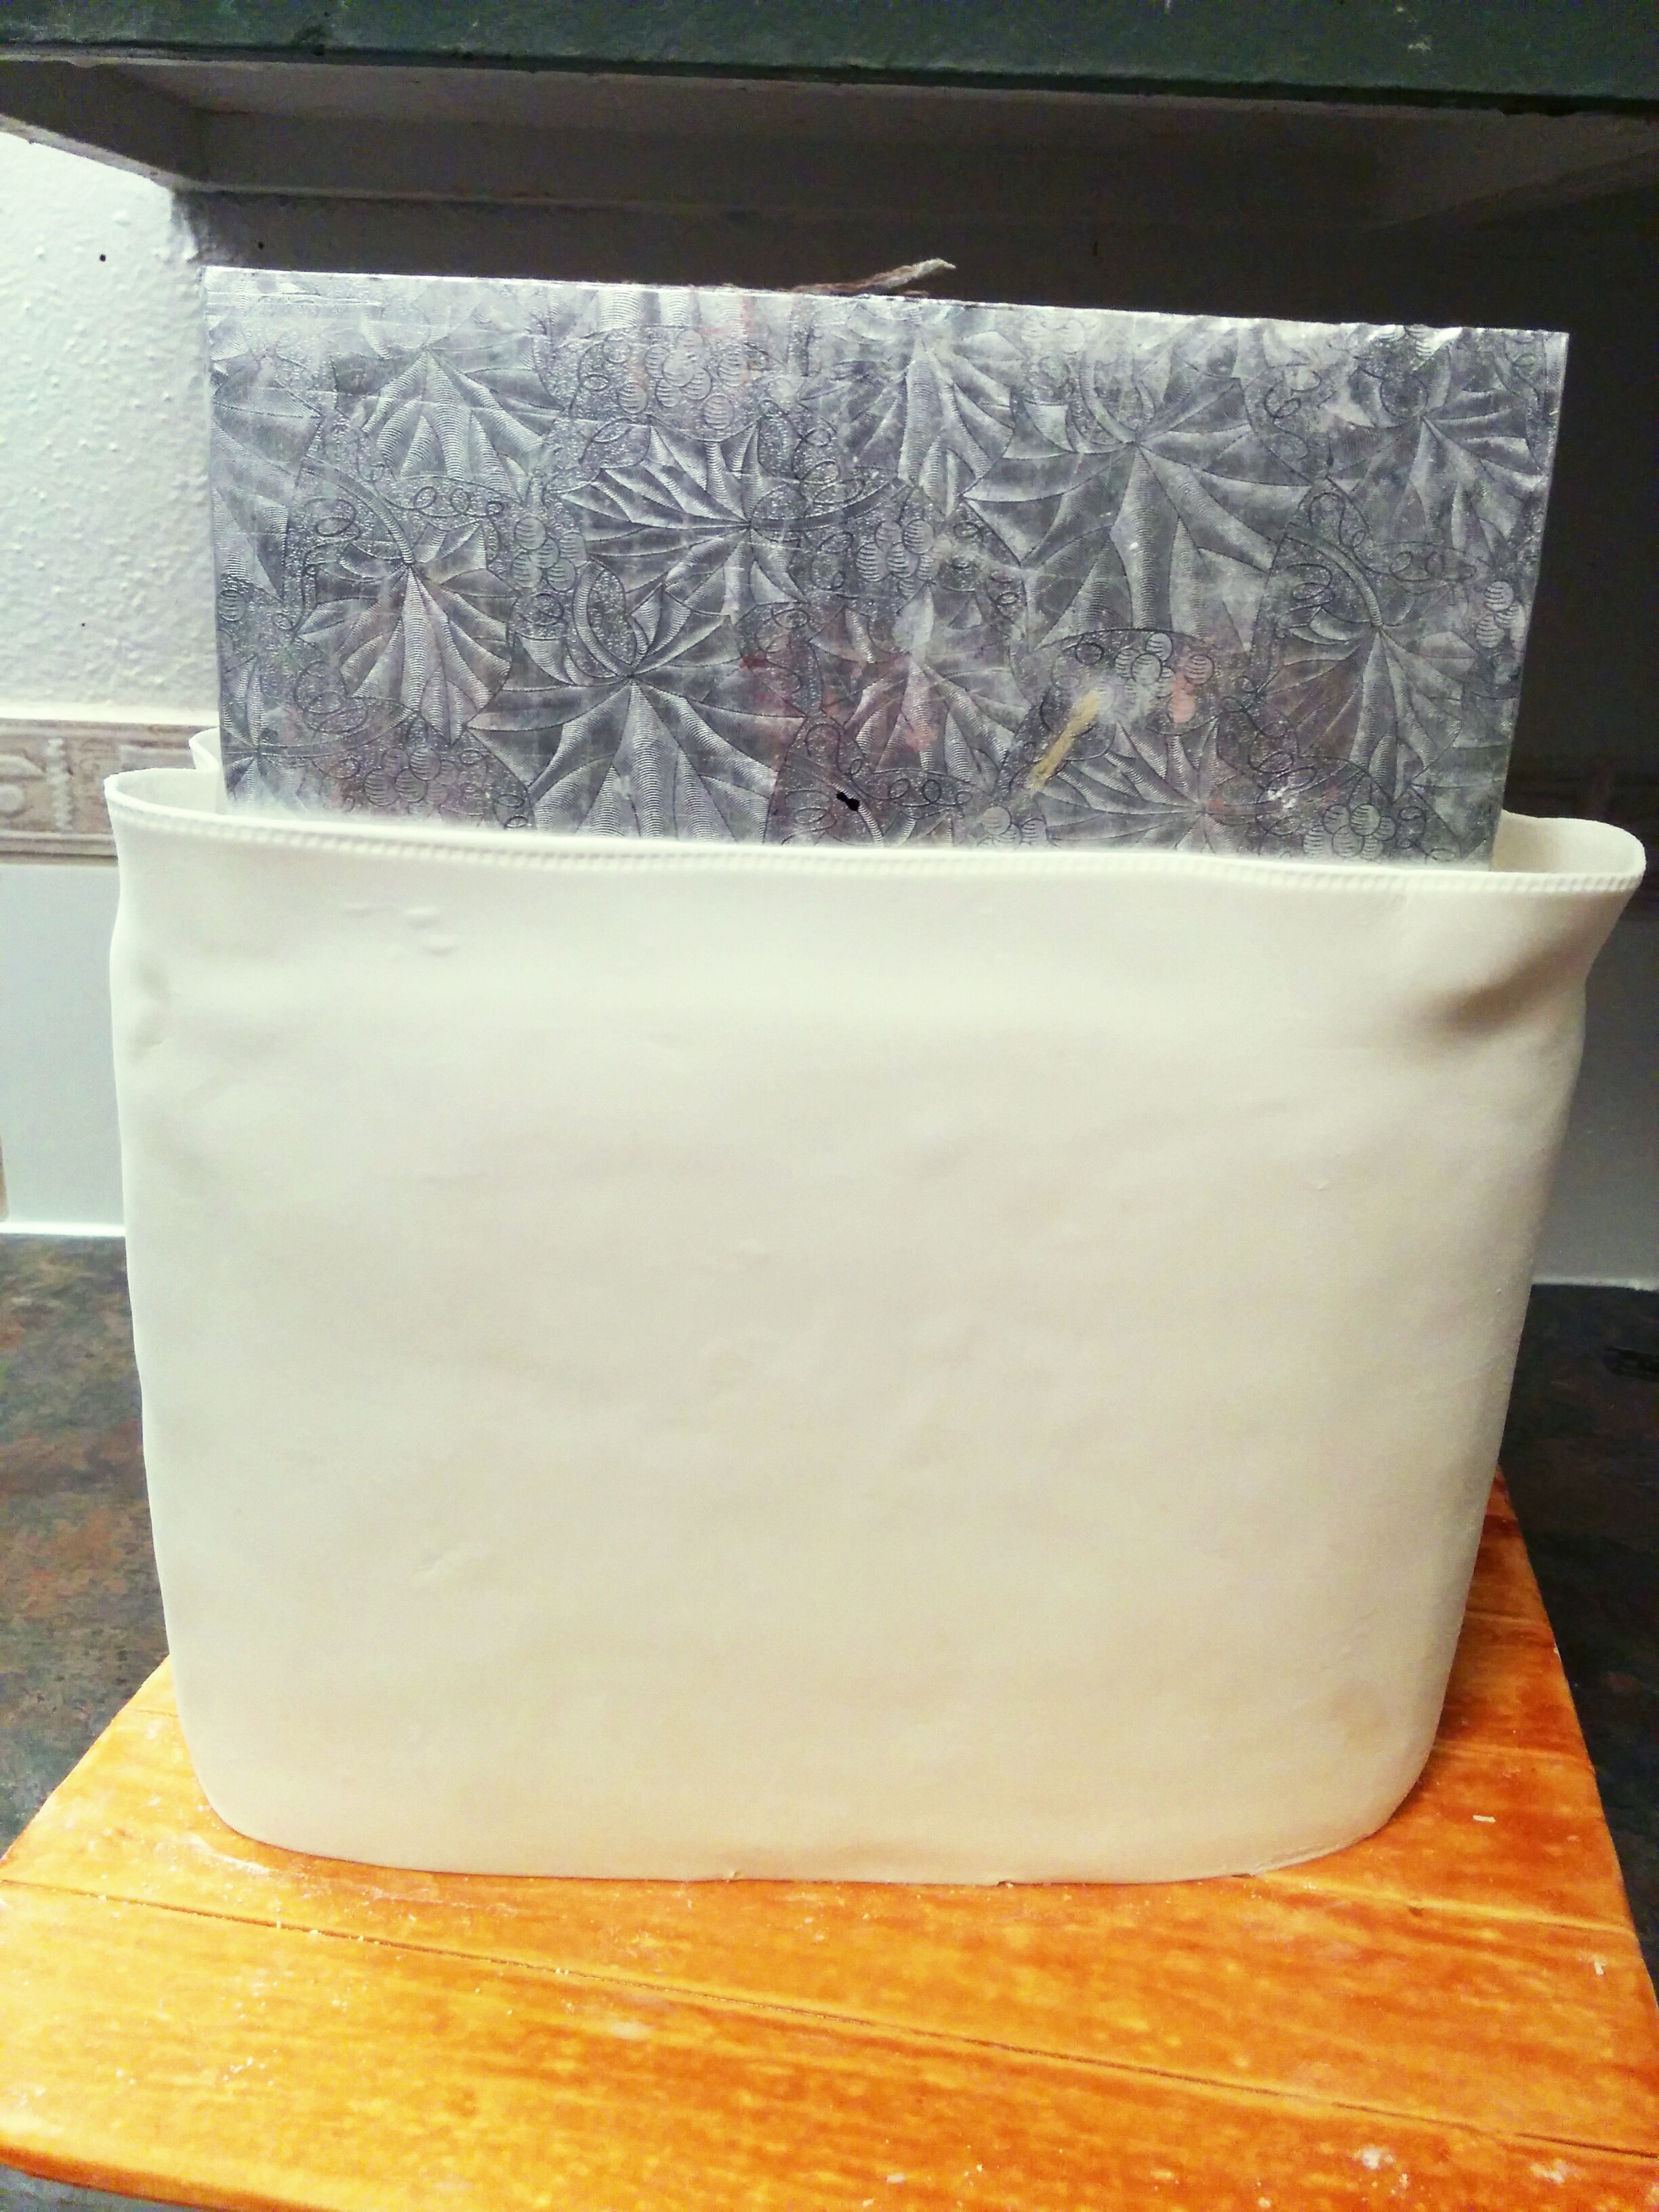
(4) To design the cake, drap it with white fondant. Do not be fussy about tears in the fondant as this layer of fondant will be covered with another wrap of fondant. This layer seals in the buttercream and covers the top of the bag. Place the draped cake on your prepared cake board.
(5) Next, roll out some more white fondant into a rectangle large enough to wrap the cake. The height of this piece of fondant will depend on the height of your cake. Measure the height of your cake and add another inch to get the height of your rolled out fondant. Stitch the top end of the rolled out fondant, apply some water to the sides of the cake and wrap the fondant around the cake ensuring that the seams are on one of the sides of the cake.
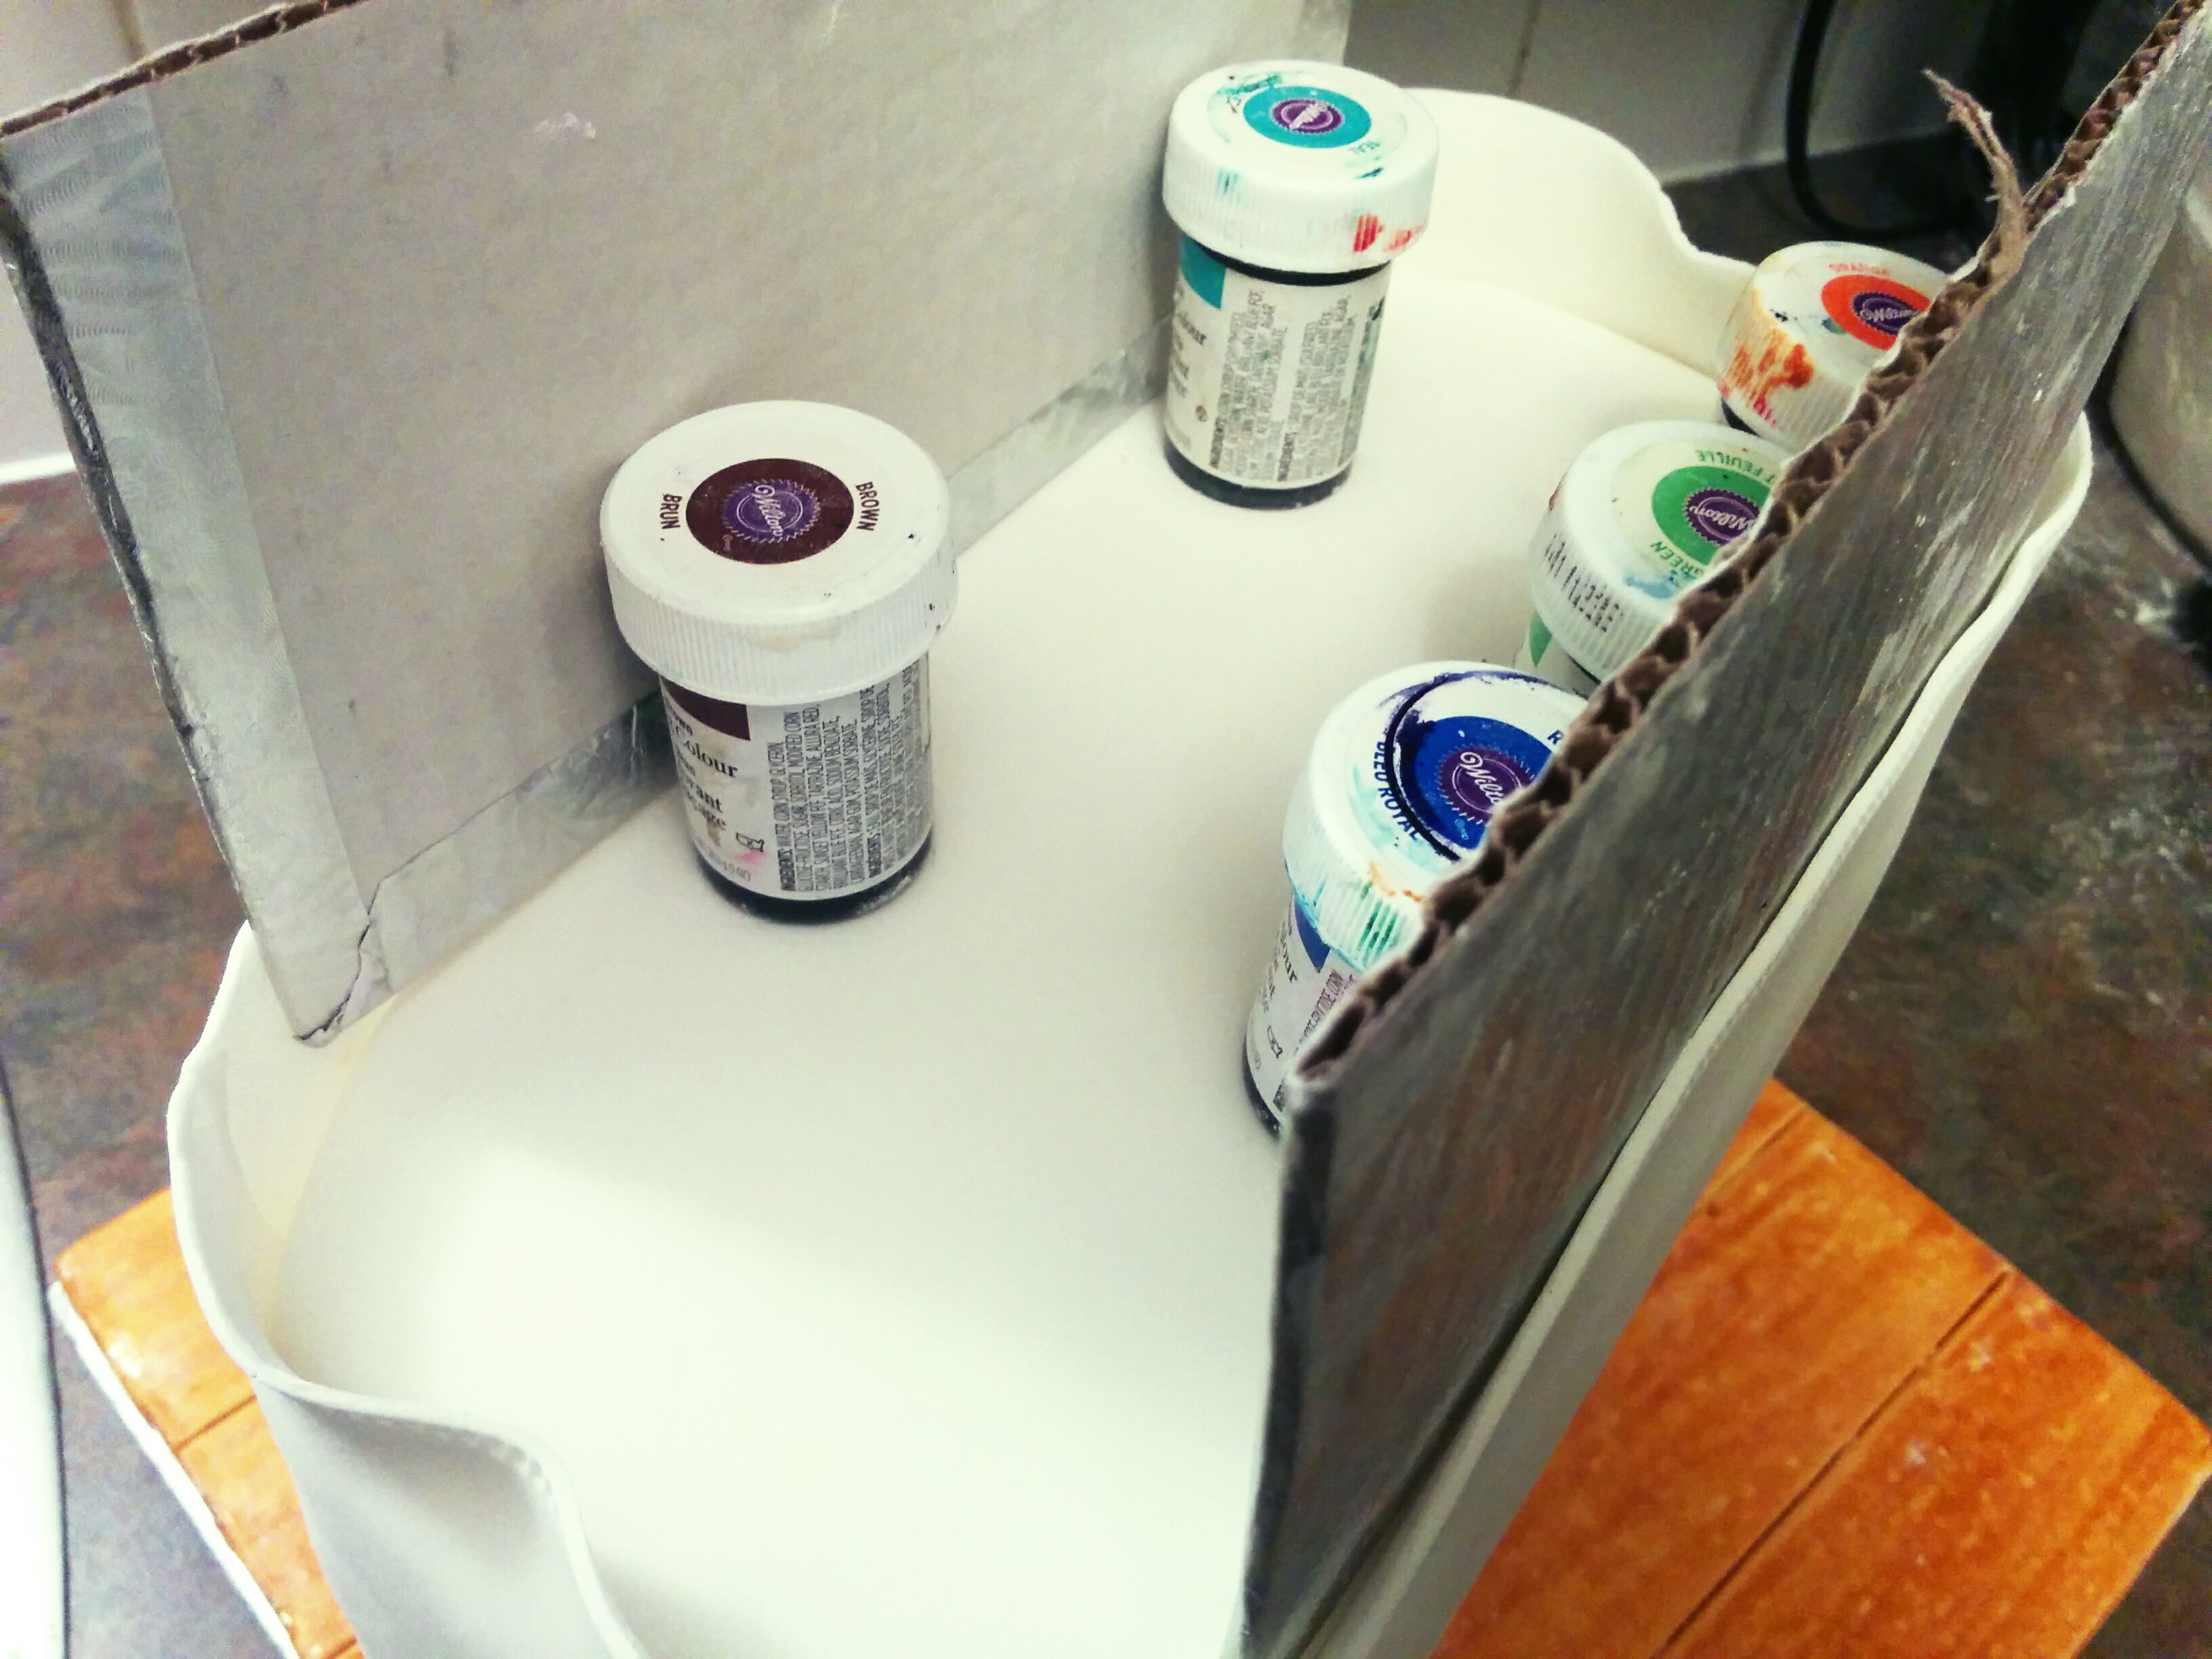
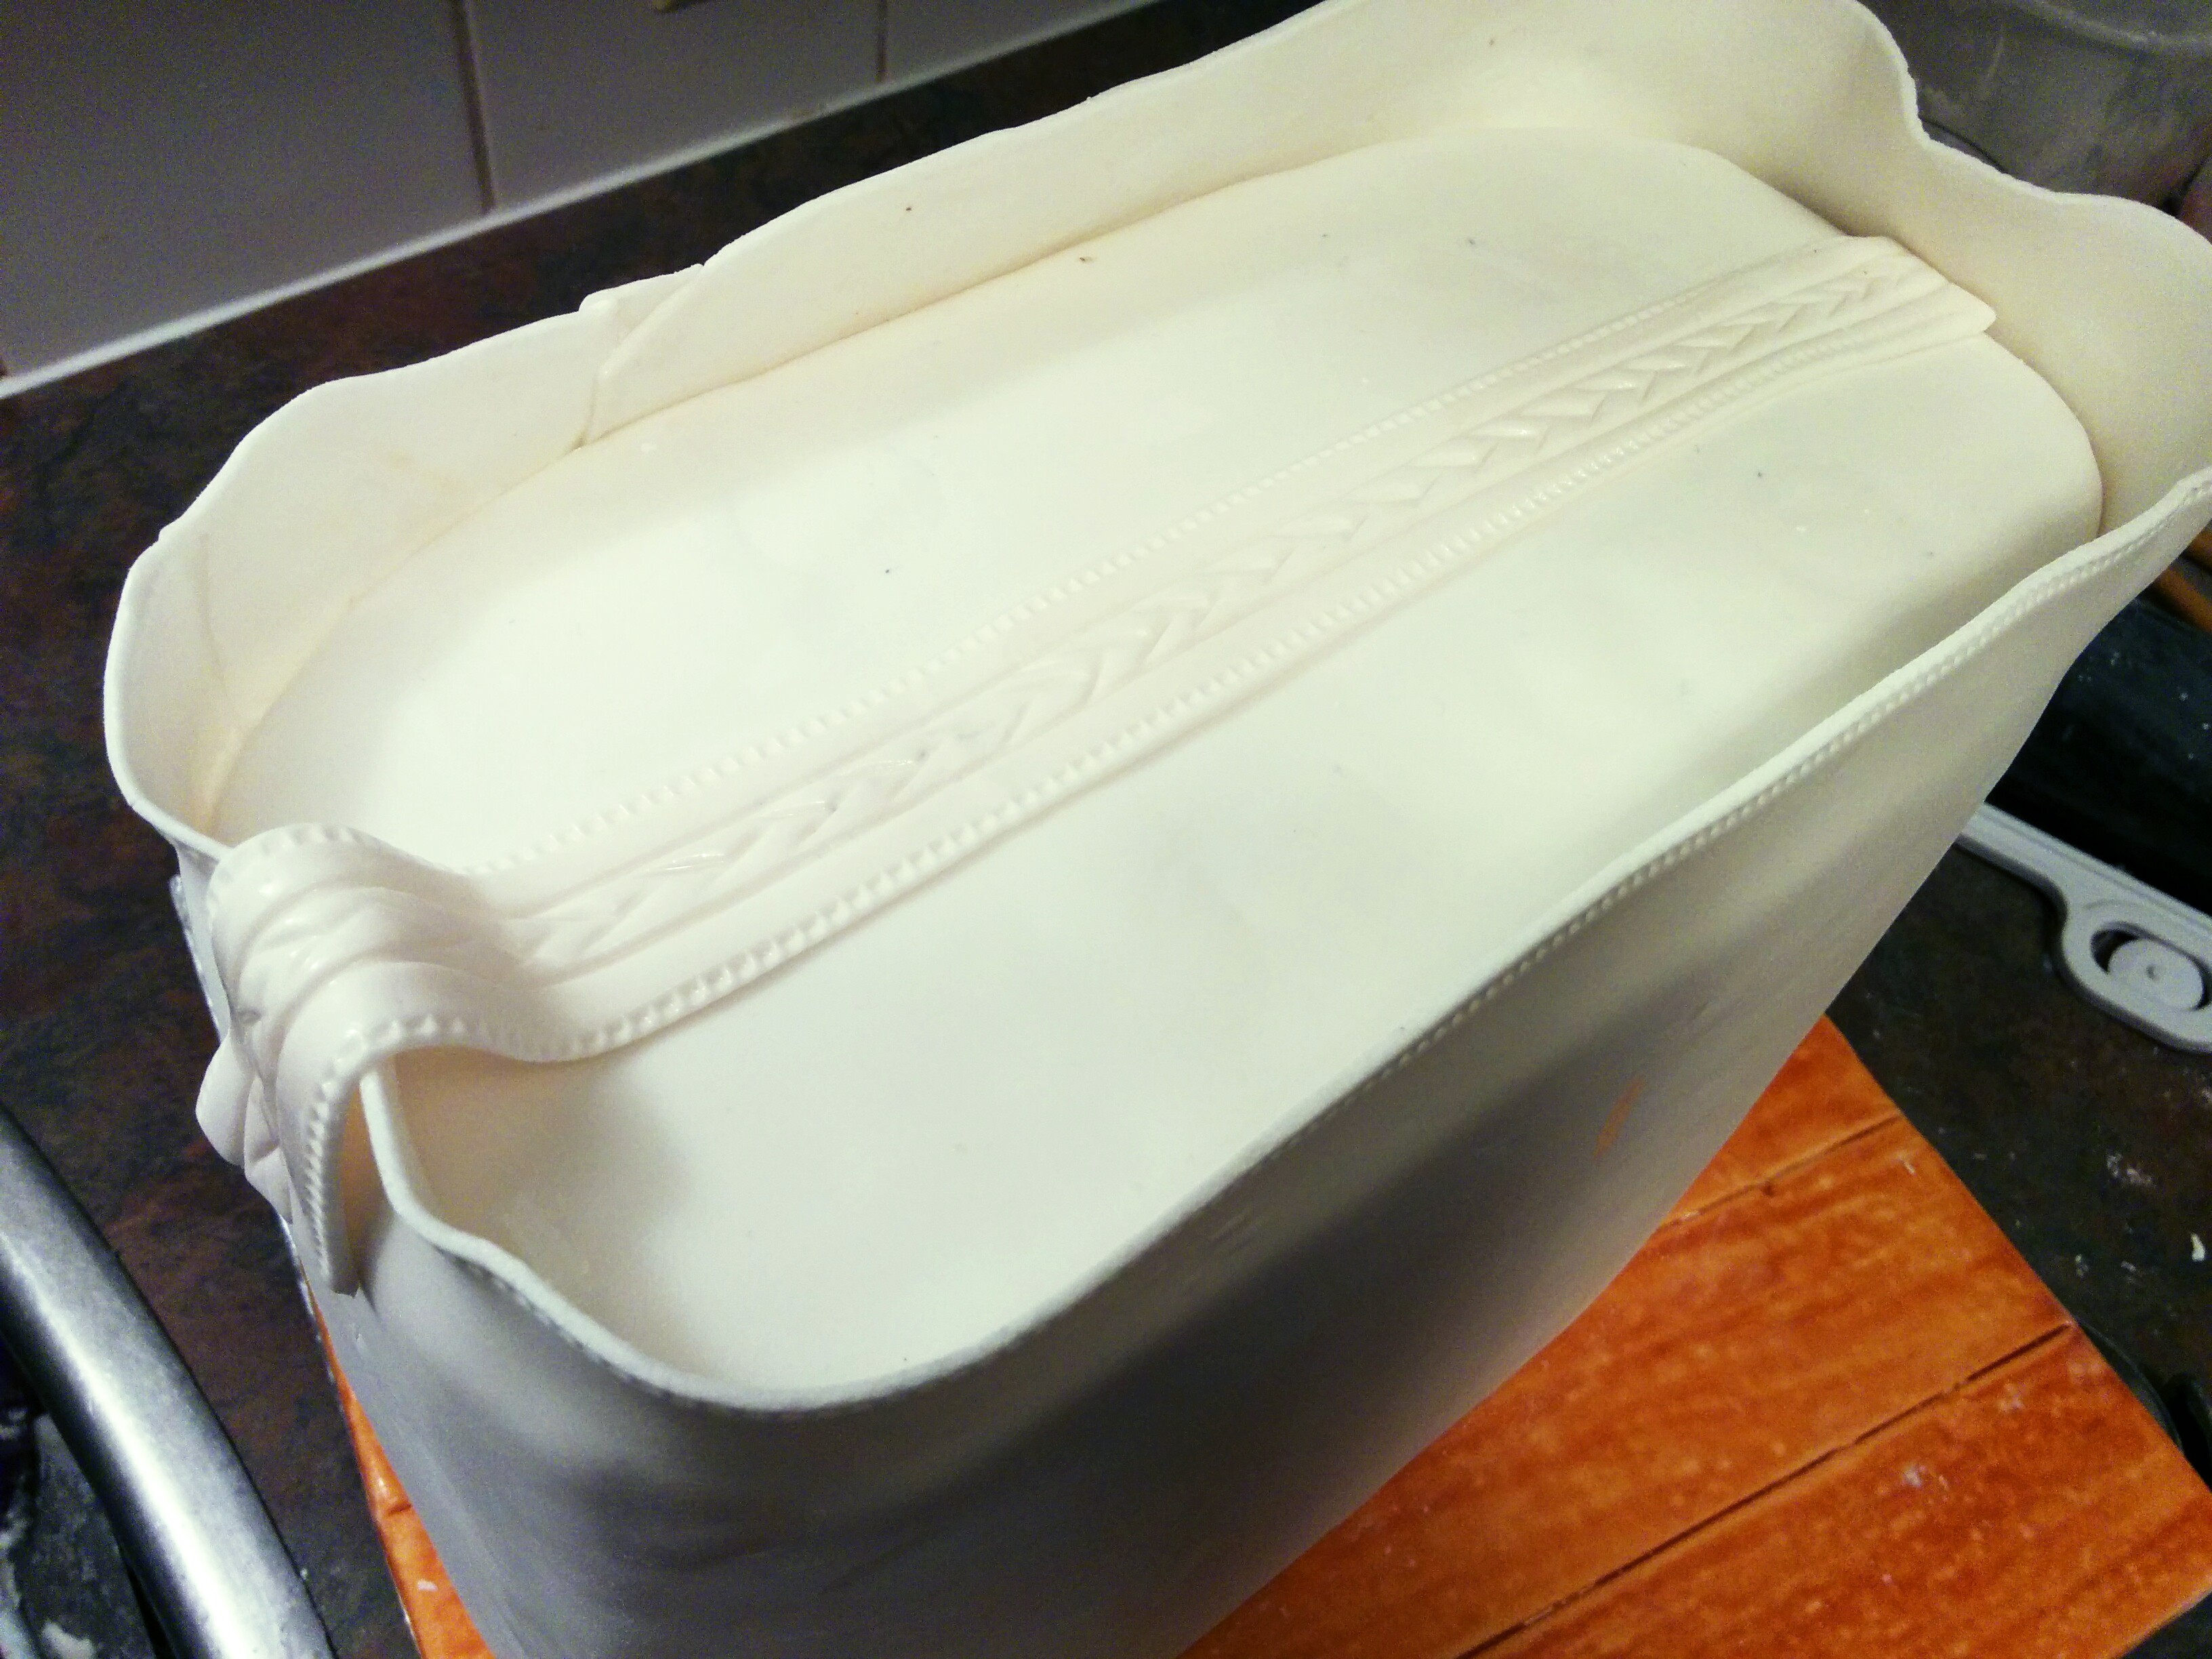
(6) To keep the top of the wrapped fondant from folding, drapping or caving in, divide an 8 inch cake board into two and place each half on each side of the cake. Use some color paste bottles (because they are light and won’t make dents in the cake) to support the cake boards from inside. Allow the fondant to dry for about an hour or until they stand on their own without the cake boards.
(7) After the fondant has dried, remove the cake boards and place the zipper which is a thin strip of fondant with interlocking diagonal lines drawn on it.
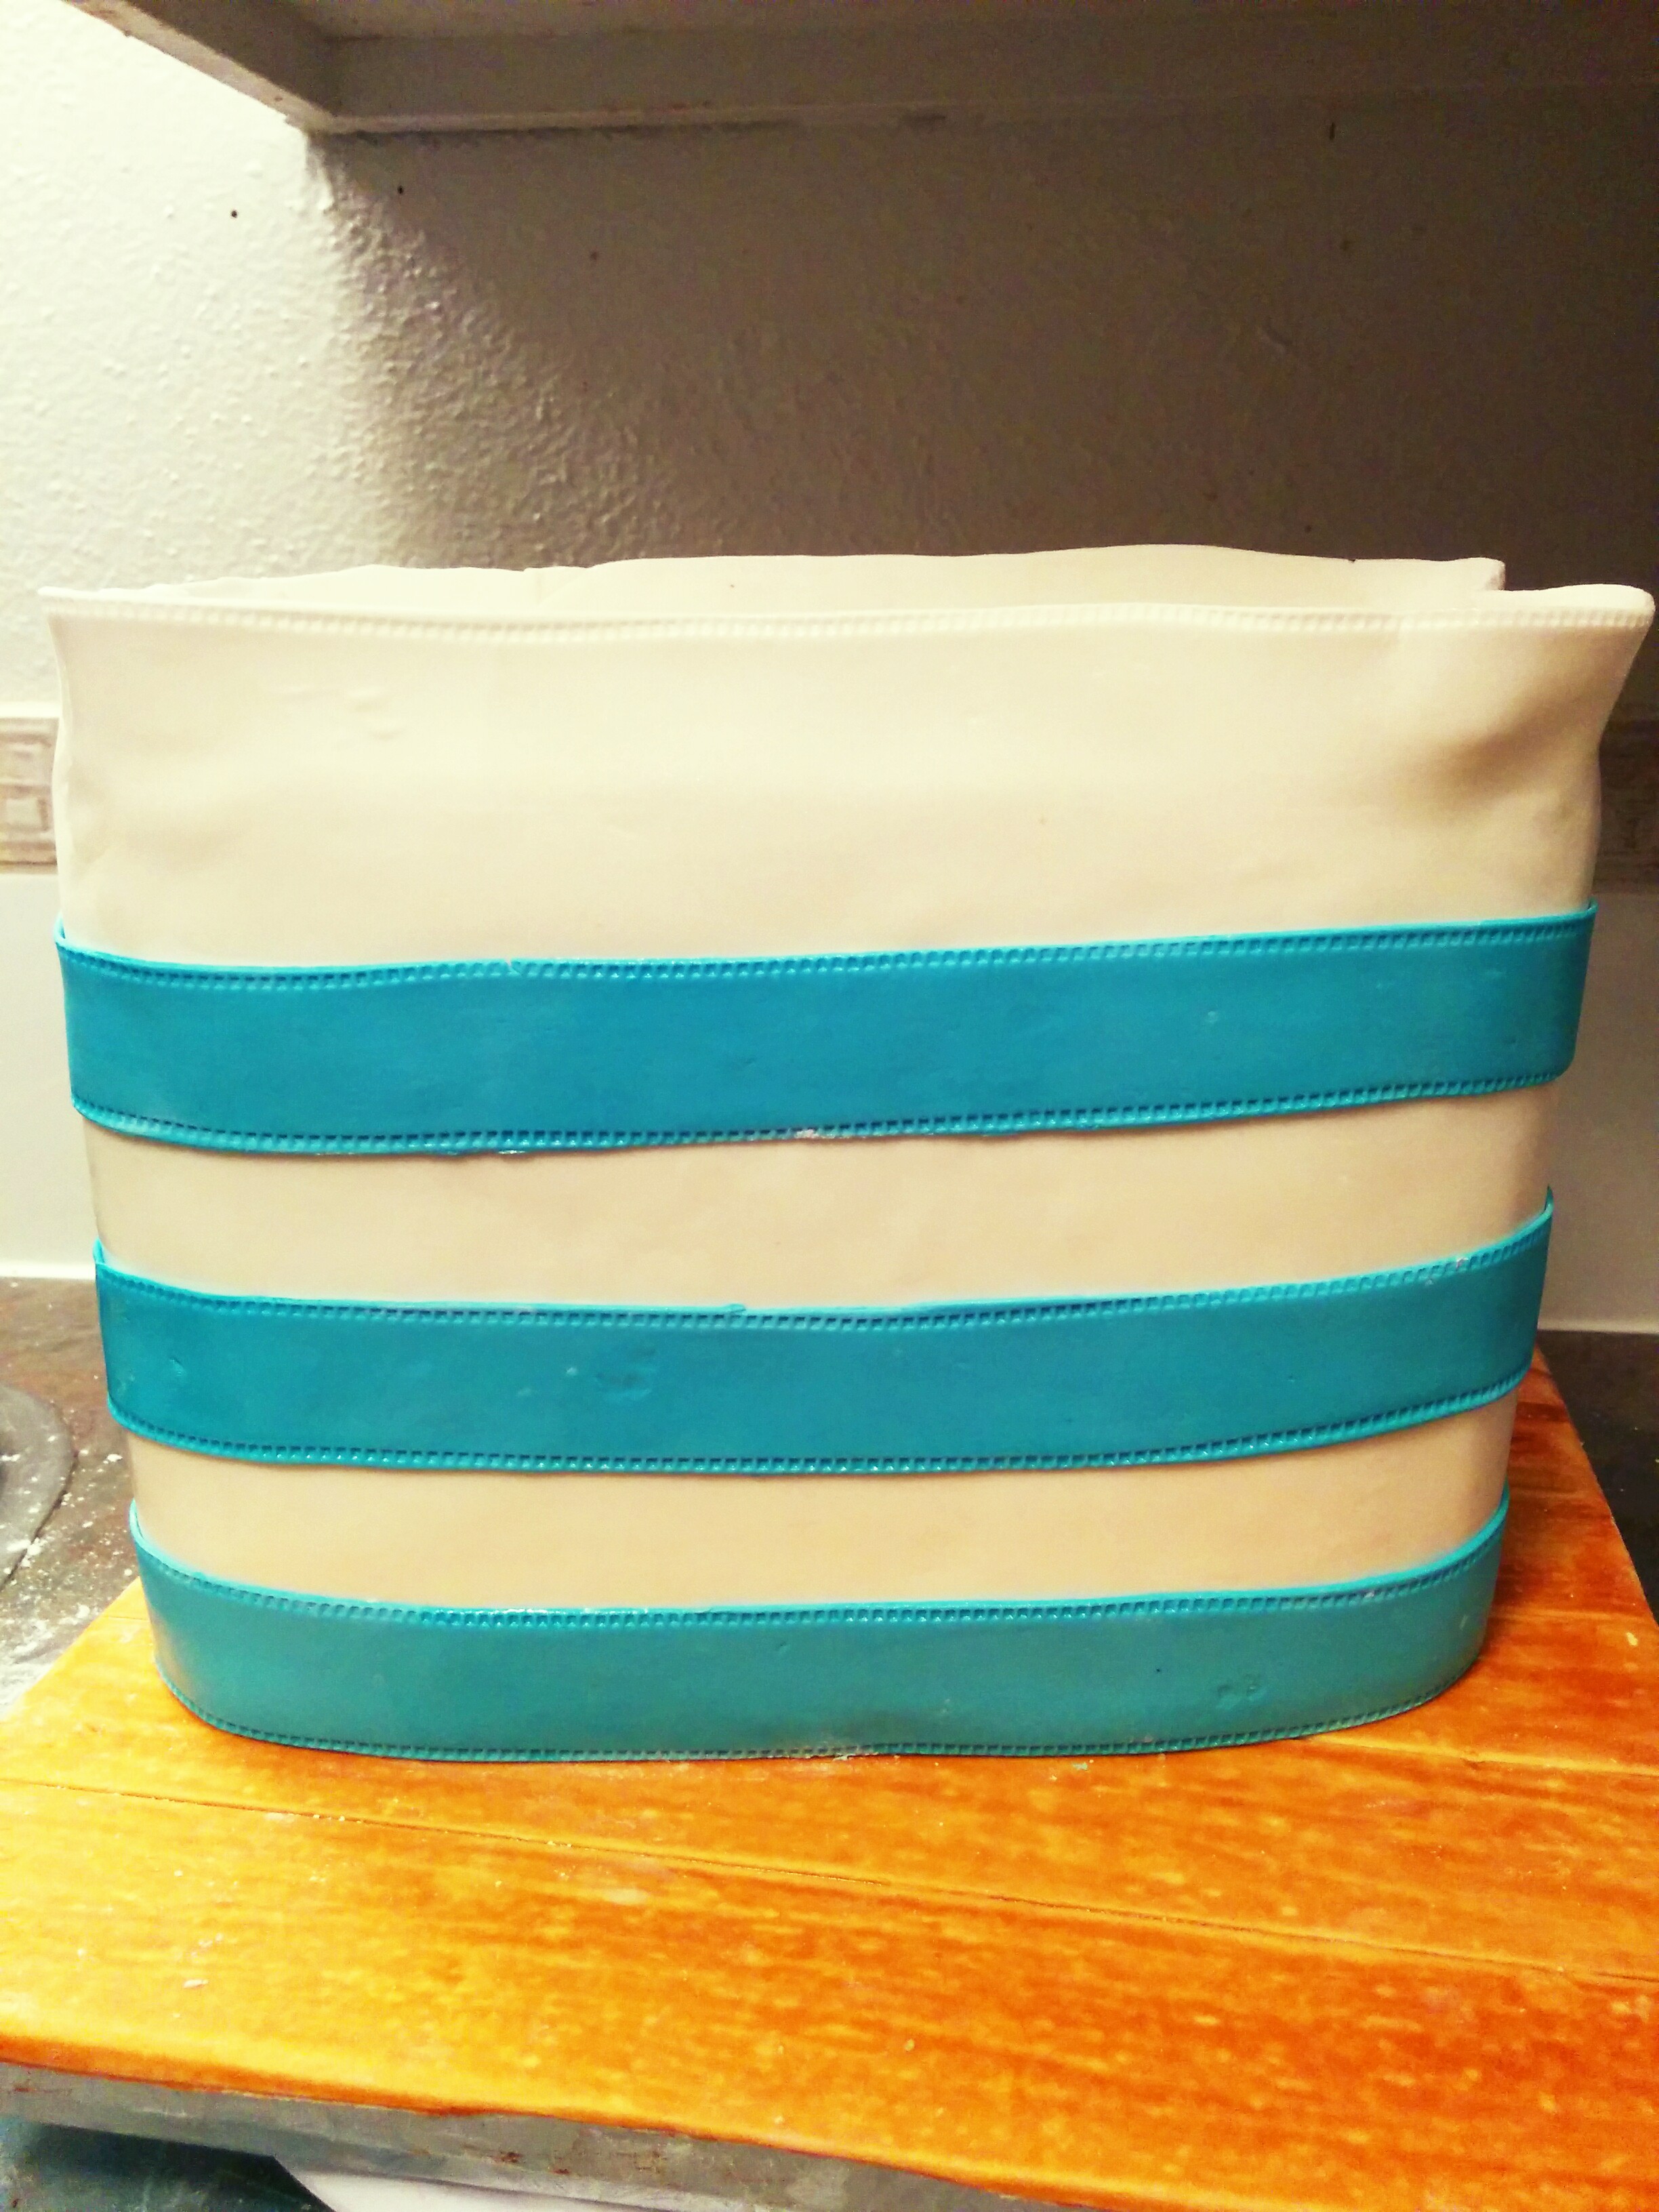
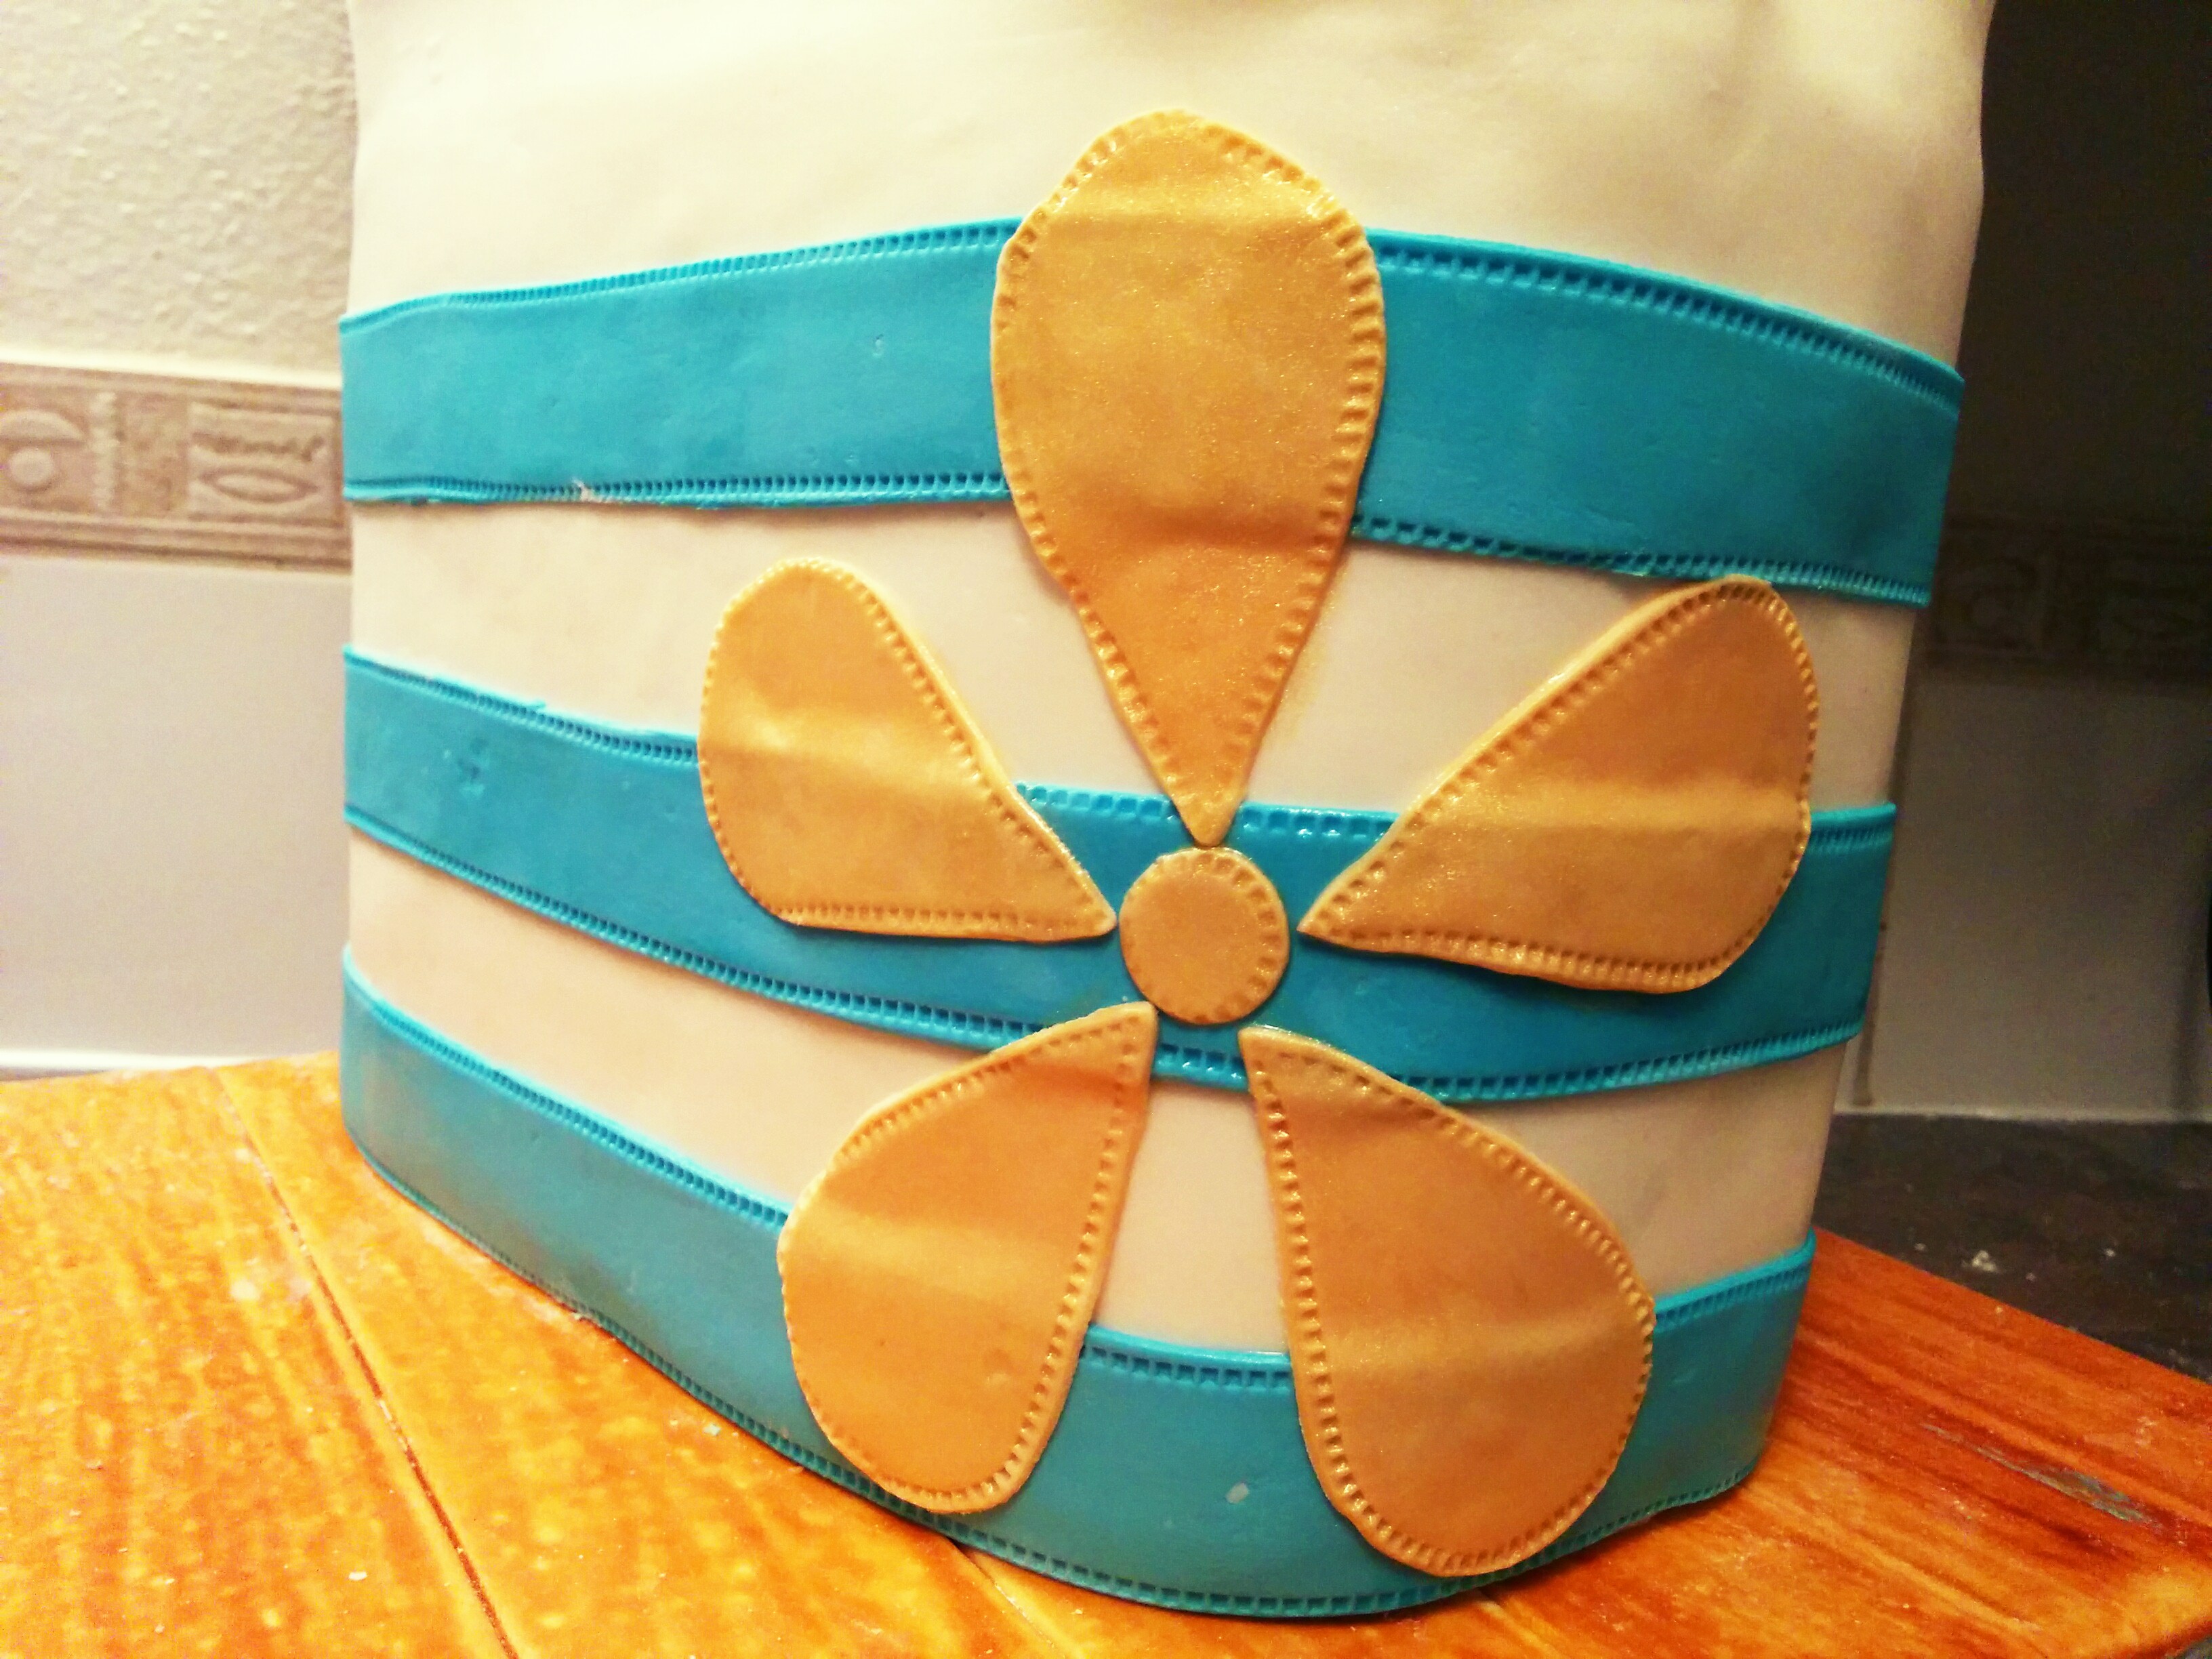
(8) To make the horizontal patterns on the bag, cut out 1 inch long blue straps of fondant, stitch them and stick to the sides of the cake, leaving about an inch of space between each strap.
(9) To make the floral designs on the side of the bag, use a petal cutter to cut out ivory coloured fondant and stick to the cake. Mix some gold pearl dust with vodka and paint the flower gold.
(10) Next, stick the dried bag straps and charm to the bag using some melted (white) chocolate.
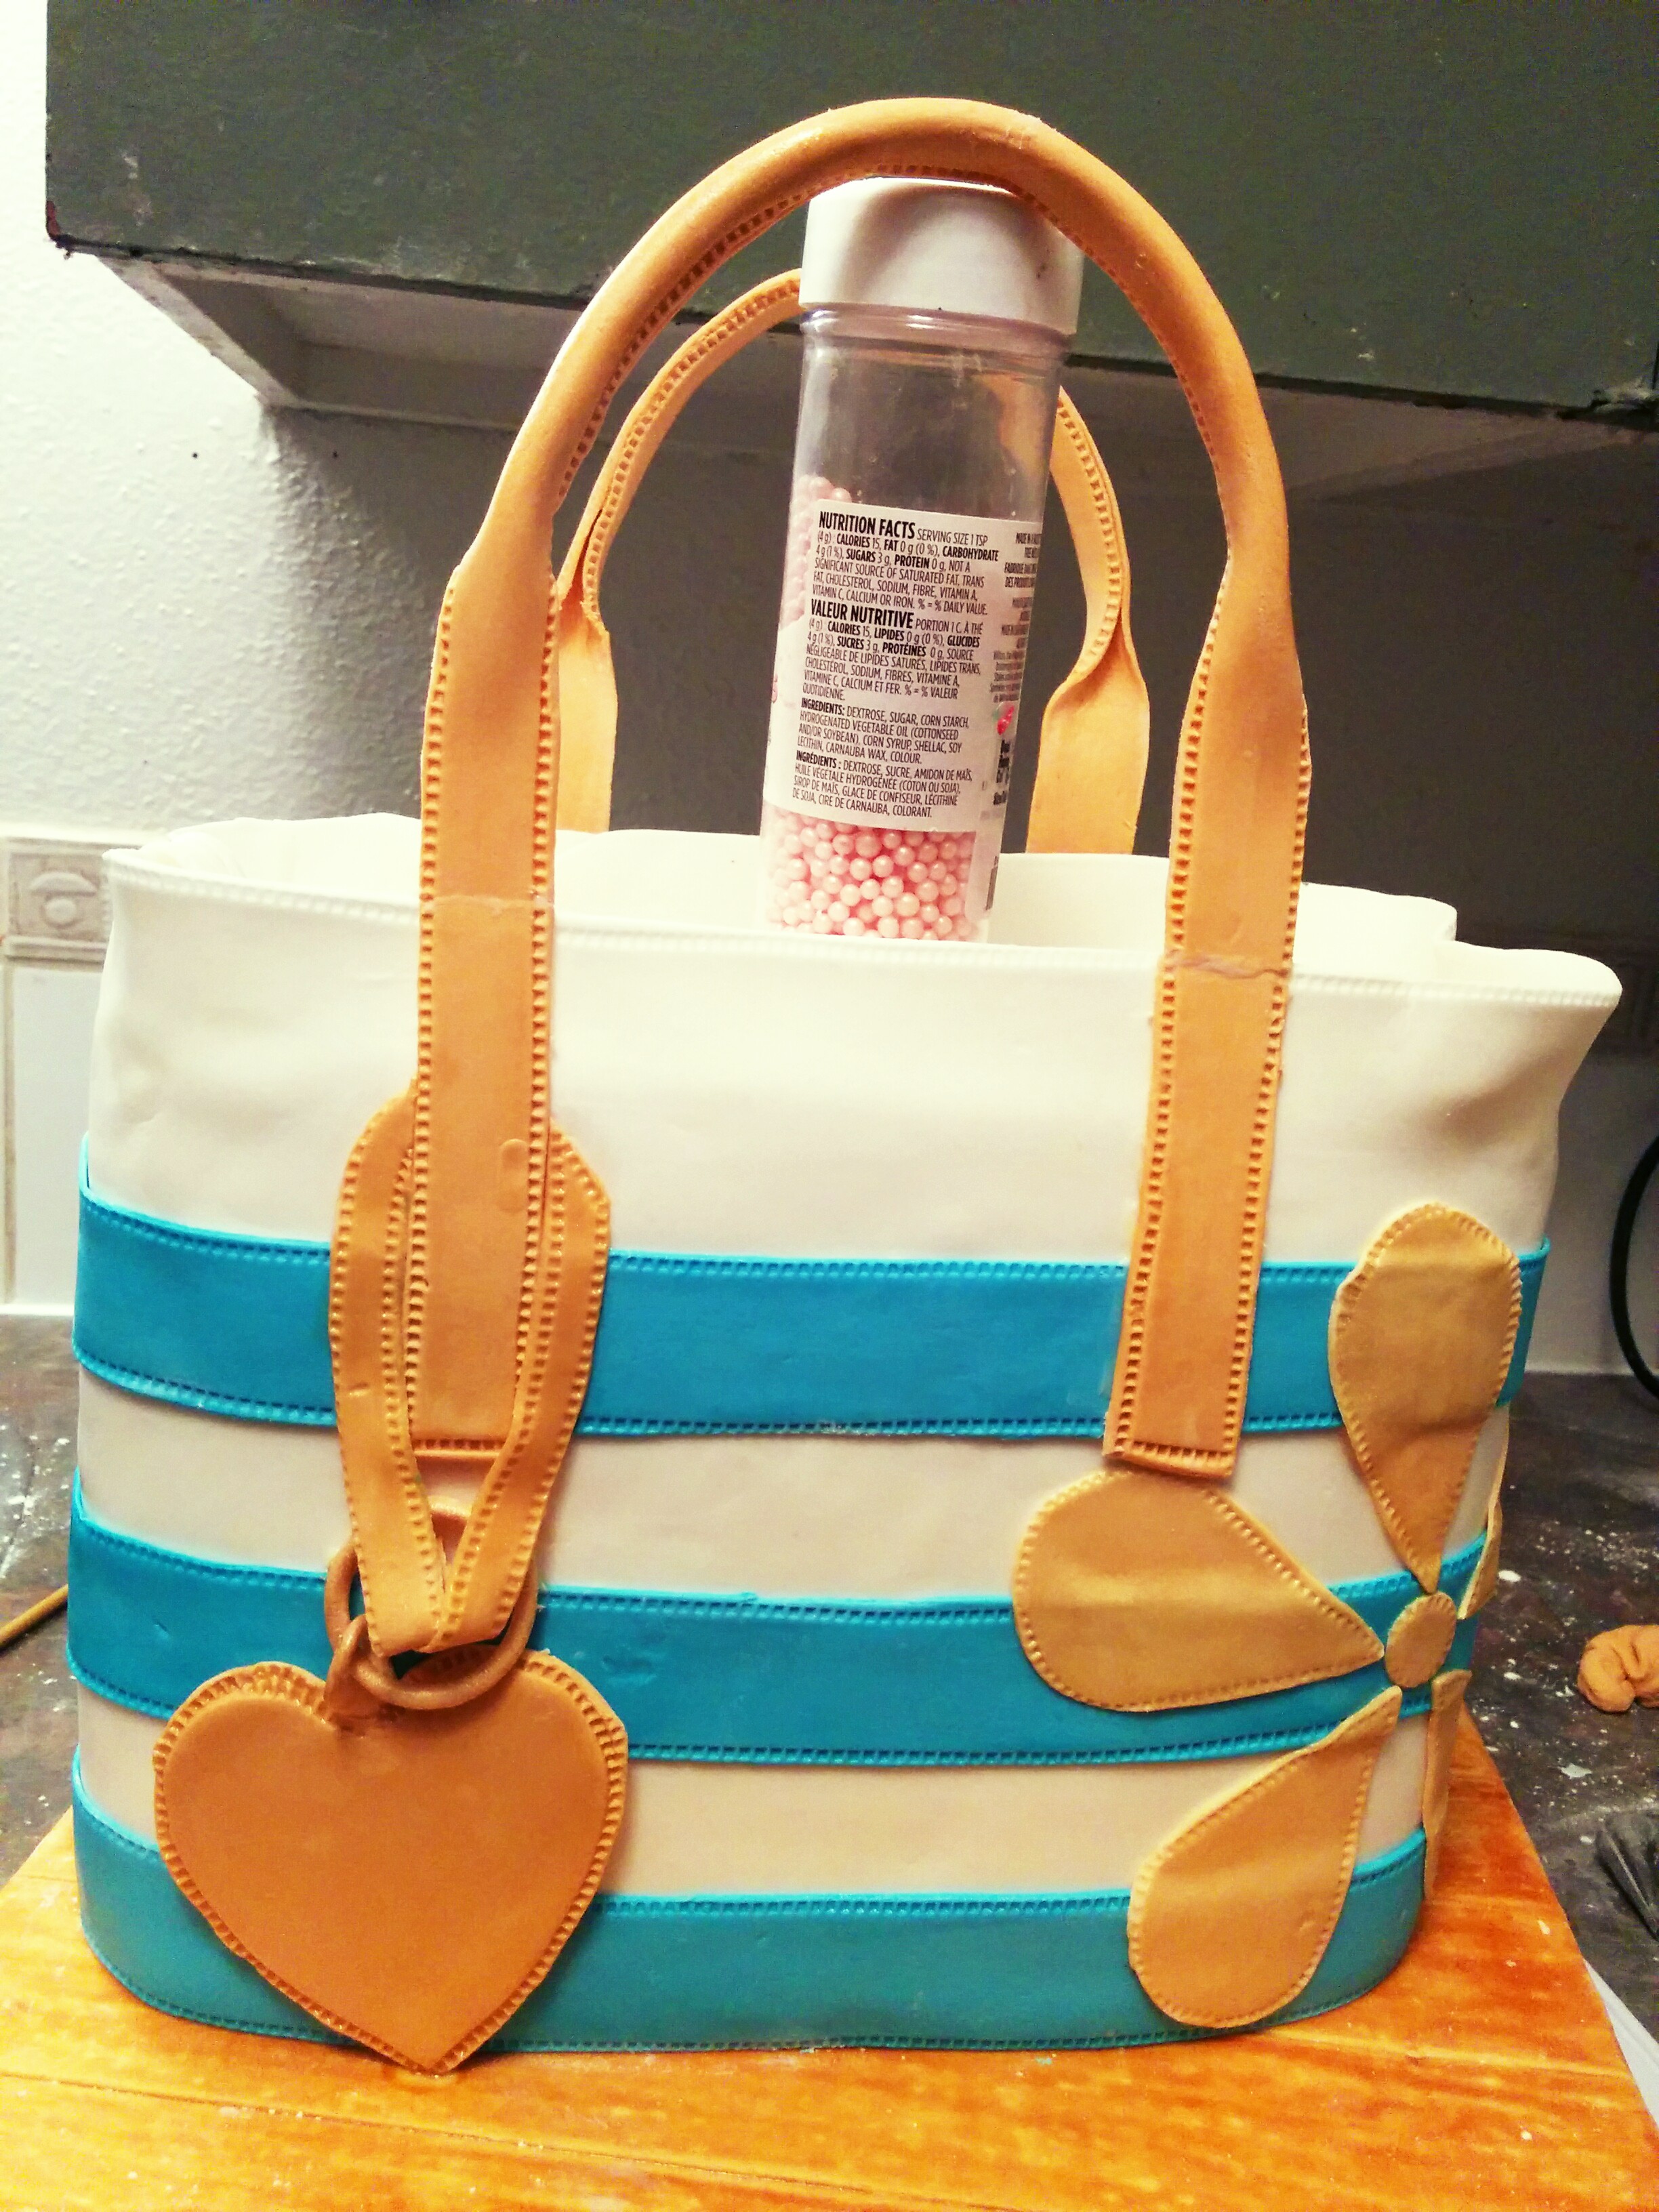
NOTE: The front straps broke because they had not dried properly before I used them. To remedy the situation, I used some white chocolate to stick the broken parts together and supported the srap with a container until it dried. The learning points here are: (1) Ensure your straps are very dry before using them. (2) White chocolate is great when mending broken fondant.
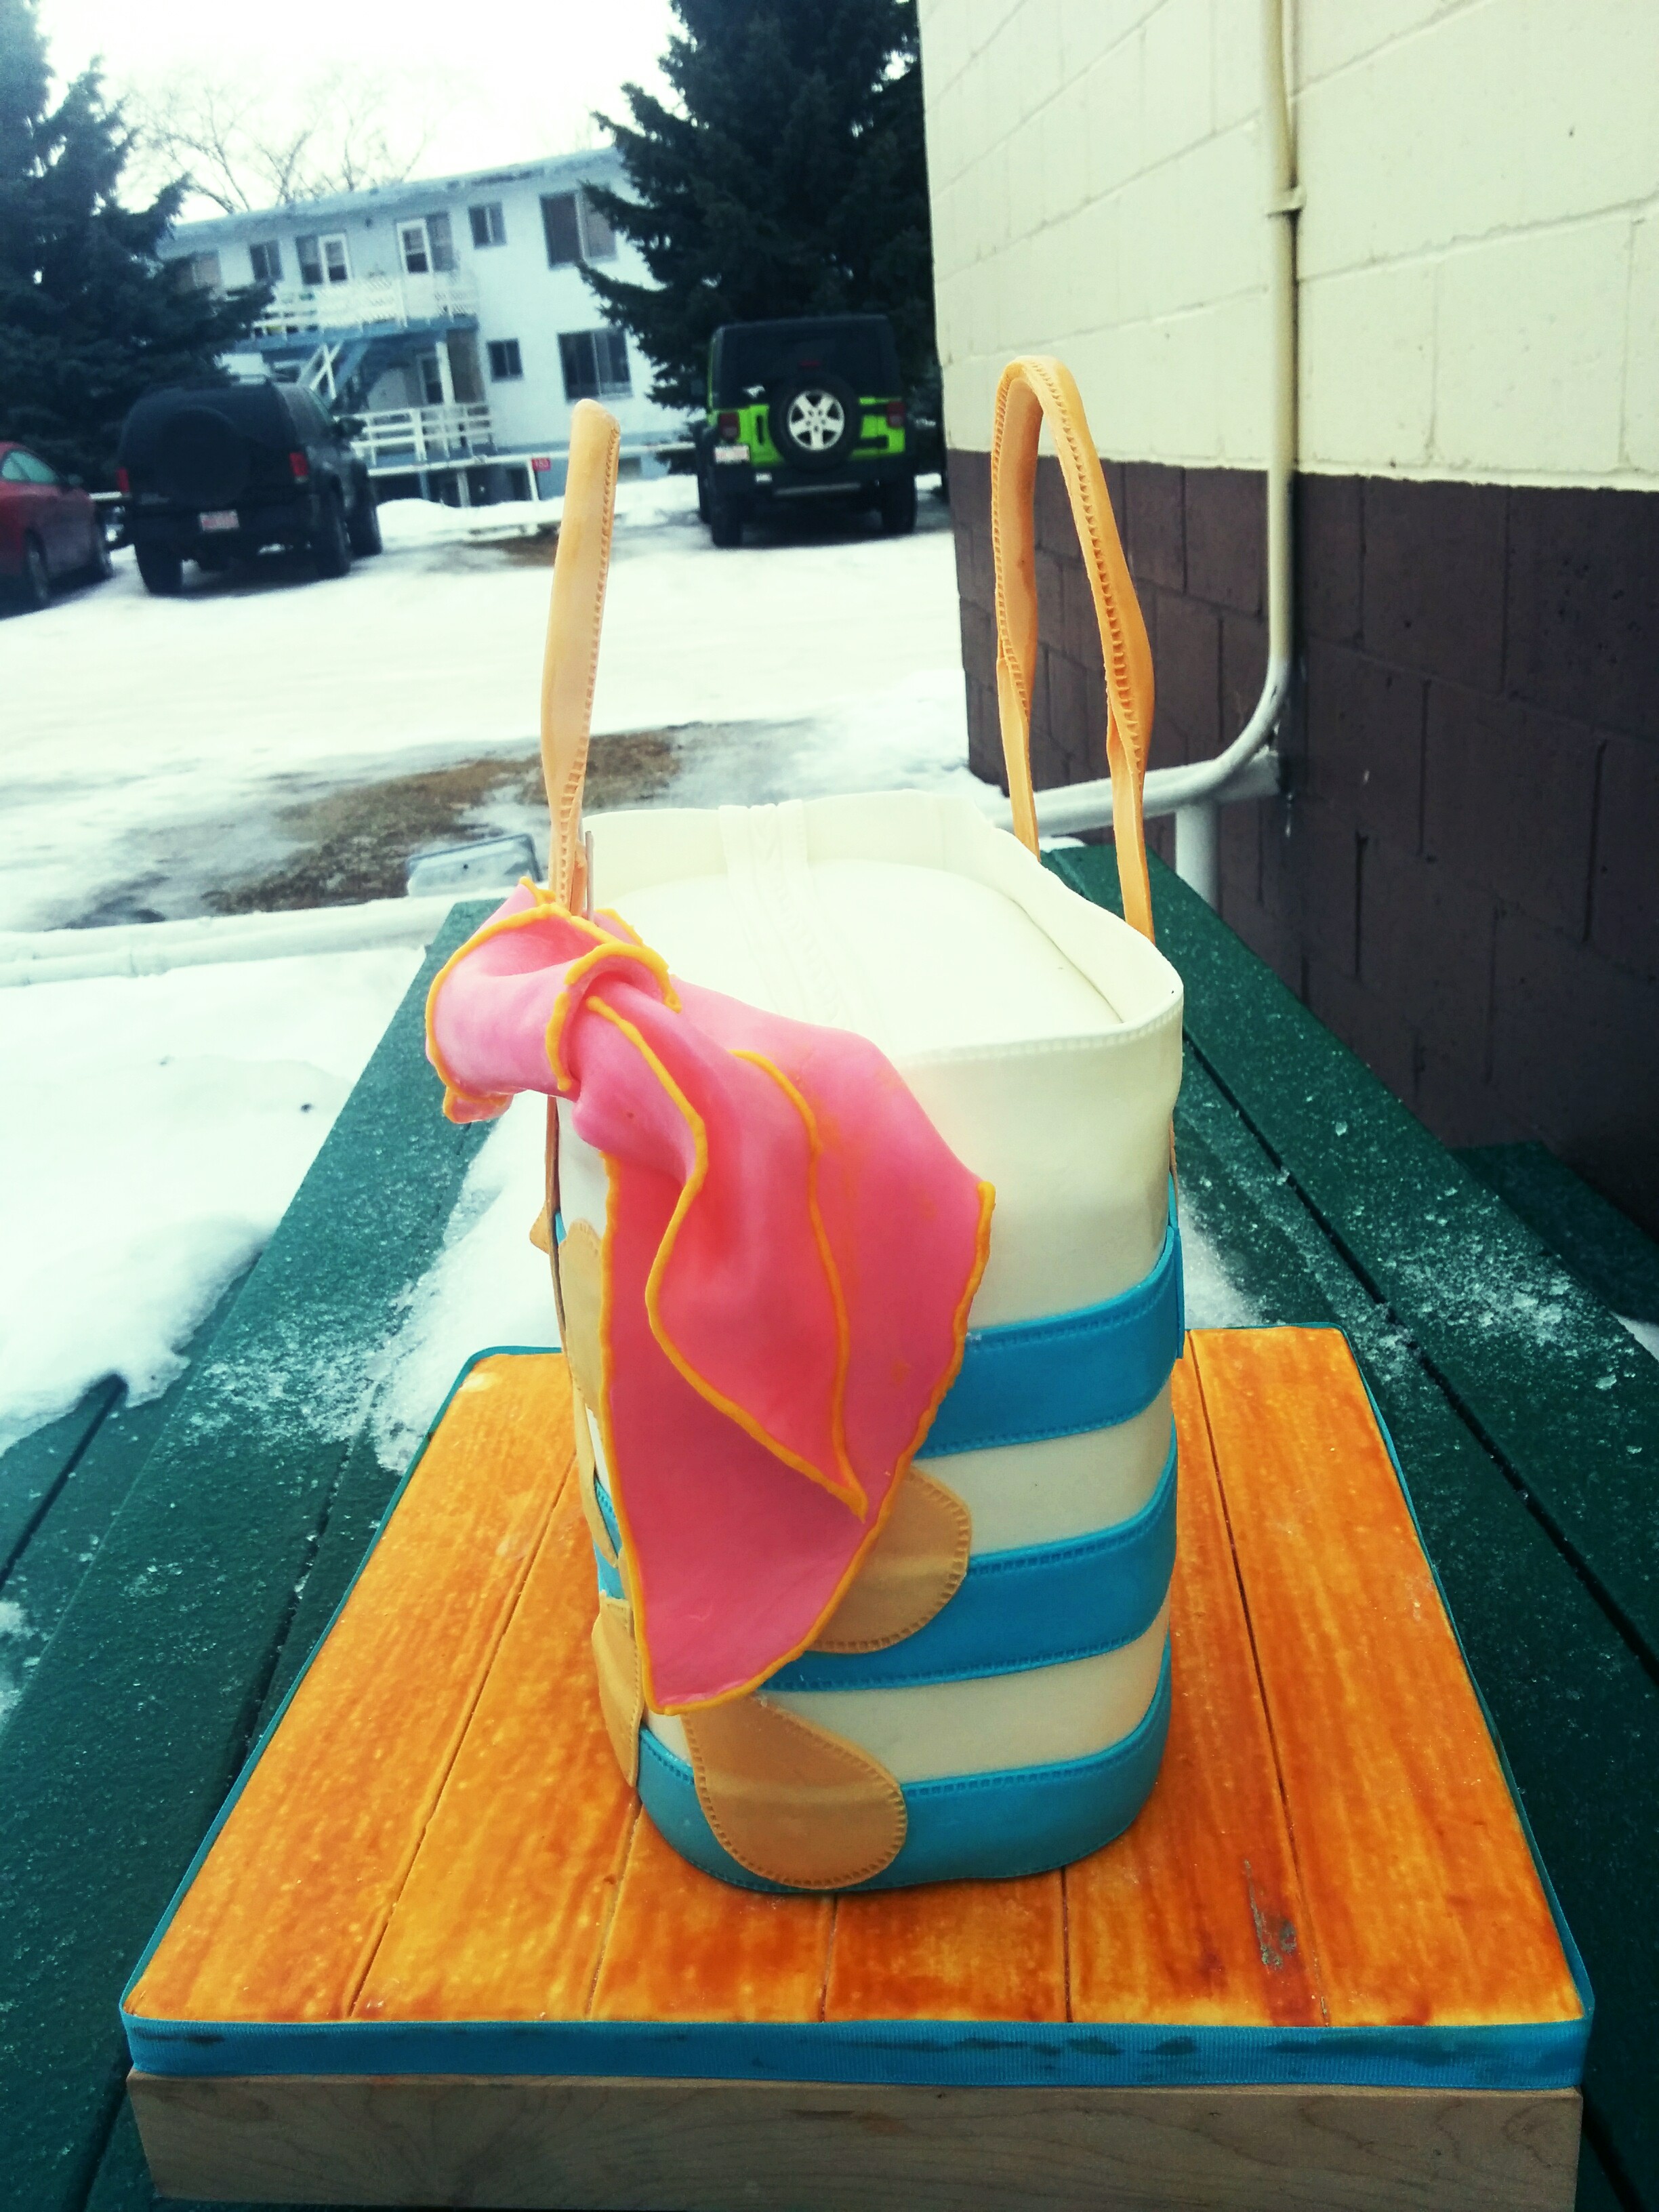
(11) Finally cut out a piece of pink fondant to create a scarf and tie it around one of the bag straps. Paint the edges of the scarf with the leftover gold pearl dust.
(12) Allow the fondant to dry before brushing the bag with some vodka to remove excess icing sugar and make the bag glossy. Brush the bag by colors starting with the white part of it so you do not stain the bag. Use as little vodka as possible so it does not drip and cause the colors to bleed into eachother.
Terry Adido is passionate about showing people how easy it is to recreate restaurant quality meals in the comfort of their kitchens. With a style of cooking he refers to as Afro-European Fusion, his meals are influenced greatly by French and Italian Cuisine with a West African twist. If you love good food, you are in for the ride of your life.
“bake ur sponges”, does it mean dat we av to use a sponge cake for d bag?
Hi. I used the term sponges loosely. Any type of cake will do.
Wow this is indeed a great tutorails thanks man I will try this ur design. Well done
Thanks. All the best.
Uncle Terry u re d best tutor i hv n GOD will surely bless u.
Thanks Sharon.
Wow! Thank you very much for this tutorial. God bless u
You are welcome.
You are one of a kind sir. Thanks for the tutorial
You are welcome.
I have been working out my brain on how to design this bag..
This your tutorial is really right on time.
Thanks Terry dear.
You are most welcome. All the best.
Tanks so much 4 dis. Cnt wait to try dis..
You are welcome.
didnt get d idea of charm and charm ring
You are one of a kind, thank you sooooo much.
You are welcome Rukky.
Hi Terry
I love your cake and the tutorial is easy to follow. I wanted to know if you think the Chanel cake can be done over since the straps are hanging downward.
Hi Yulanda. I’m not sure what you mean by “done over.” If you mean it the straps can be made at the same time as the cake, yes.
Hi Terry
Thanks for the tutorial, I will be making my first handbag cake next year Feb, I would like to know is there another alternative rather than using Vodka?
For me, no there isn’t. Some pple use water, lemon extract and some form of clear alcohol (can’t rmbr the name).
Gud job terry! Pls can I use square baking pan to bake the cake?
If you want to Grace. The bag will take whatever shape the cake is.
Thank you my boss.