
The Making of a Lego Cake (2)

This is a tutorial on how I made this Lego Cake. This is my second Lego Cake tutorial. The first tutorial can be found here and is for the Lego Cake featured below. I did a few things differently while making this second Lego cake and the aim of this tutorial is a show the differences in approach. To see all my Lego cakes, click here.

THE PROCESS:
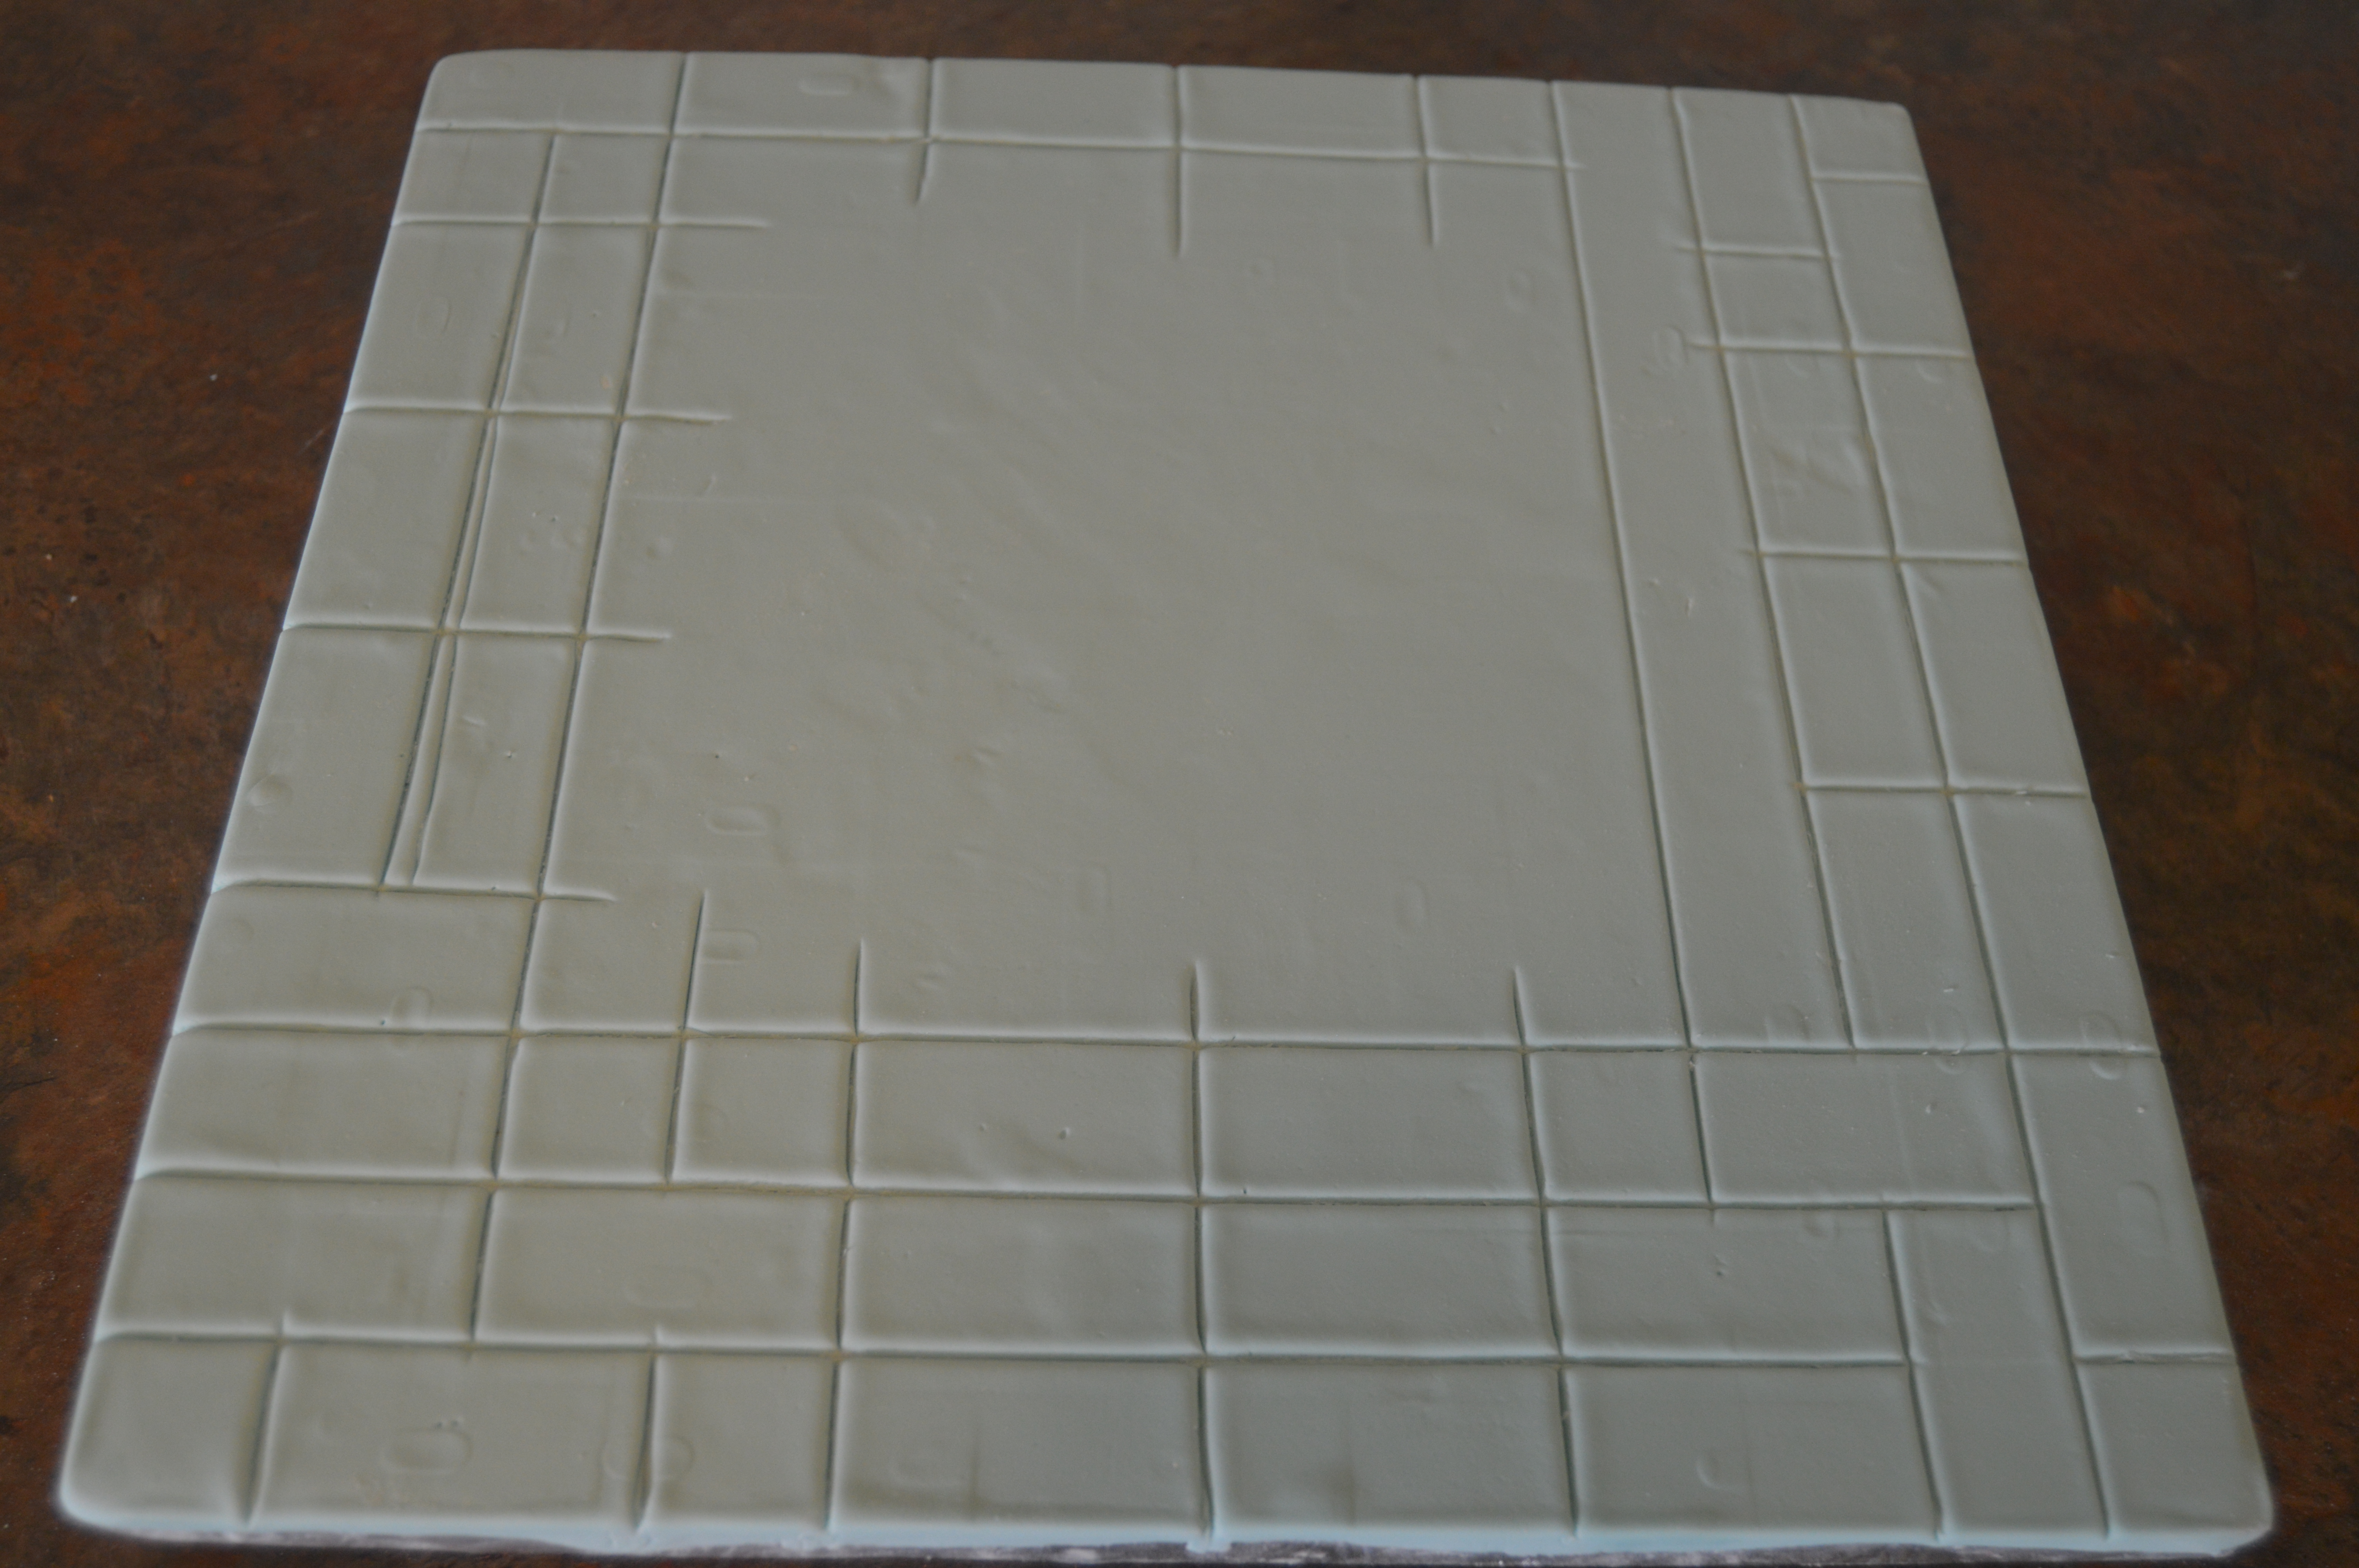
(1) First, drape a square cake drum with light blue fondant. Using a ruler and an embosser/fondant wheel, mark out 1 inch by 2 inches rectangles on the fondant. These are to represent Legos. The rectangles should face different directions. Also include a few squares measuring 1 inch. The rectangles and squares should only be done around the edges of the covered cake drum to save time.
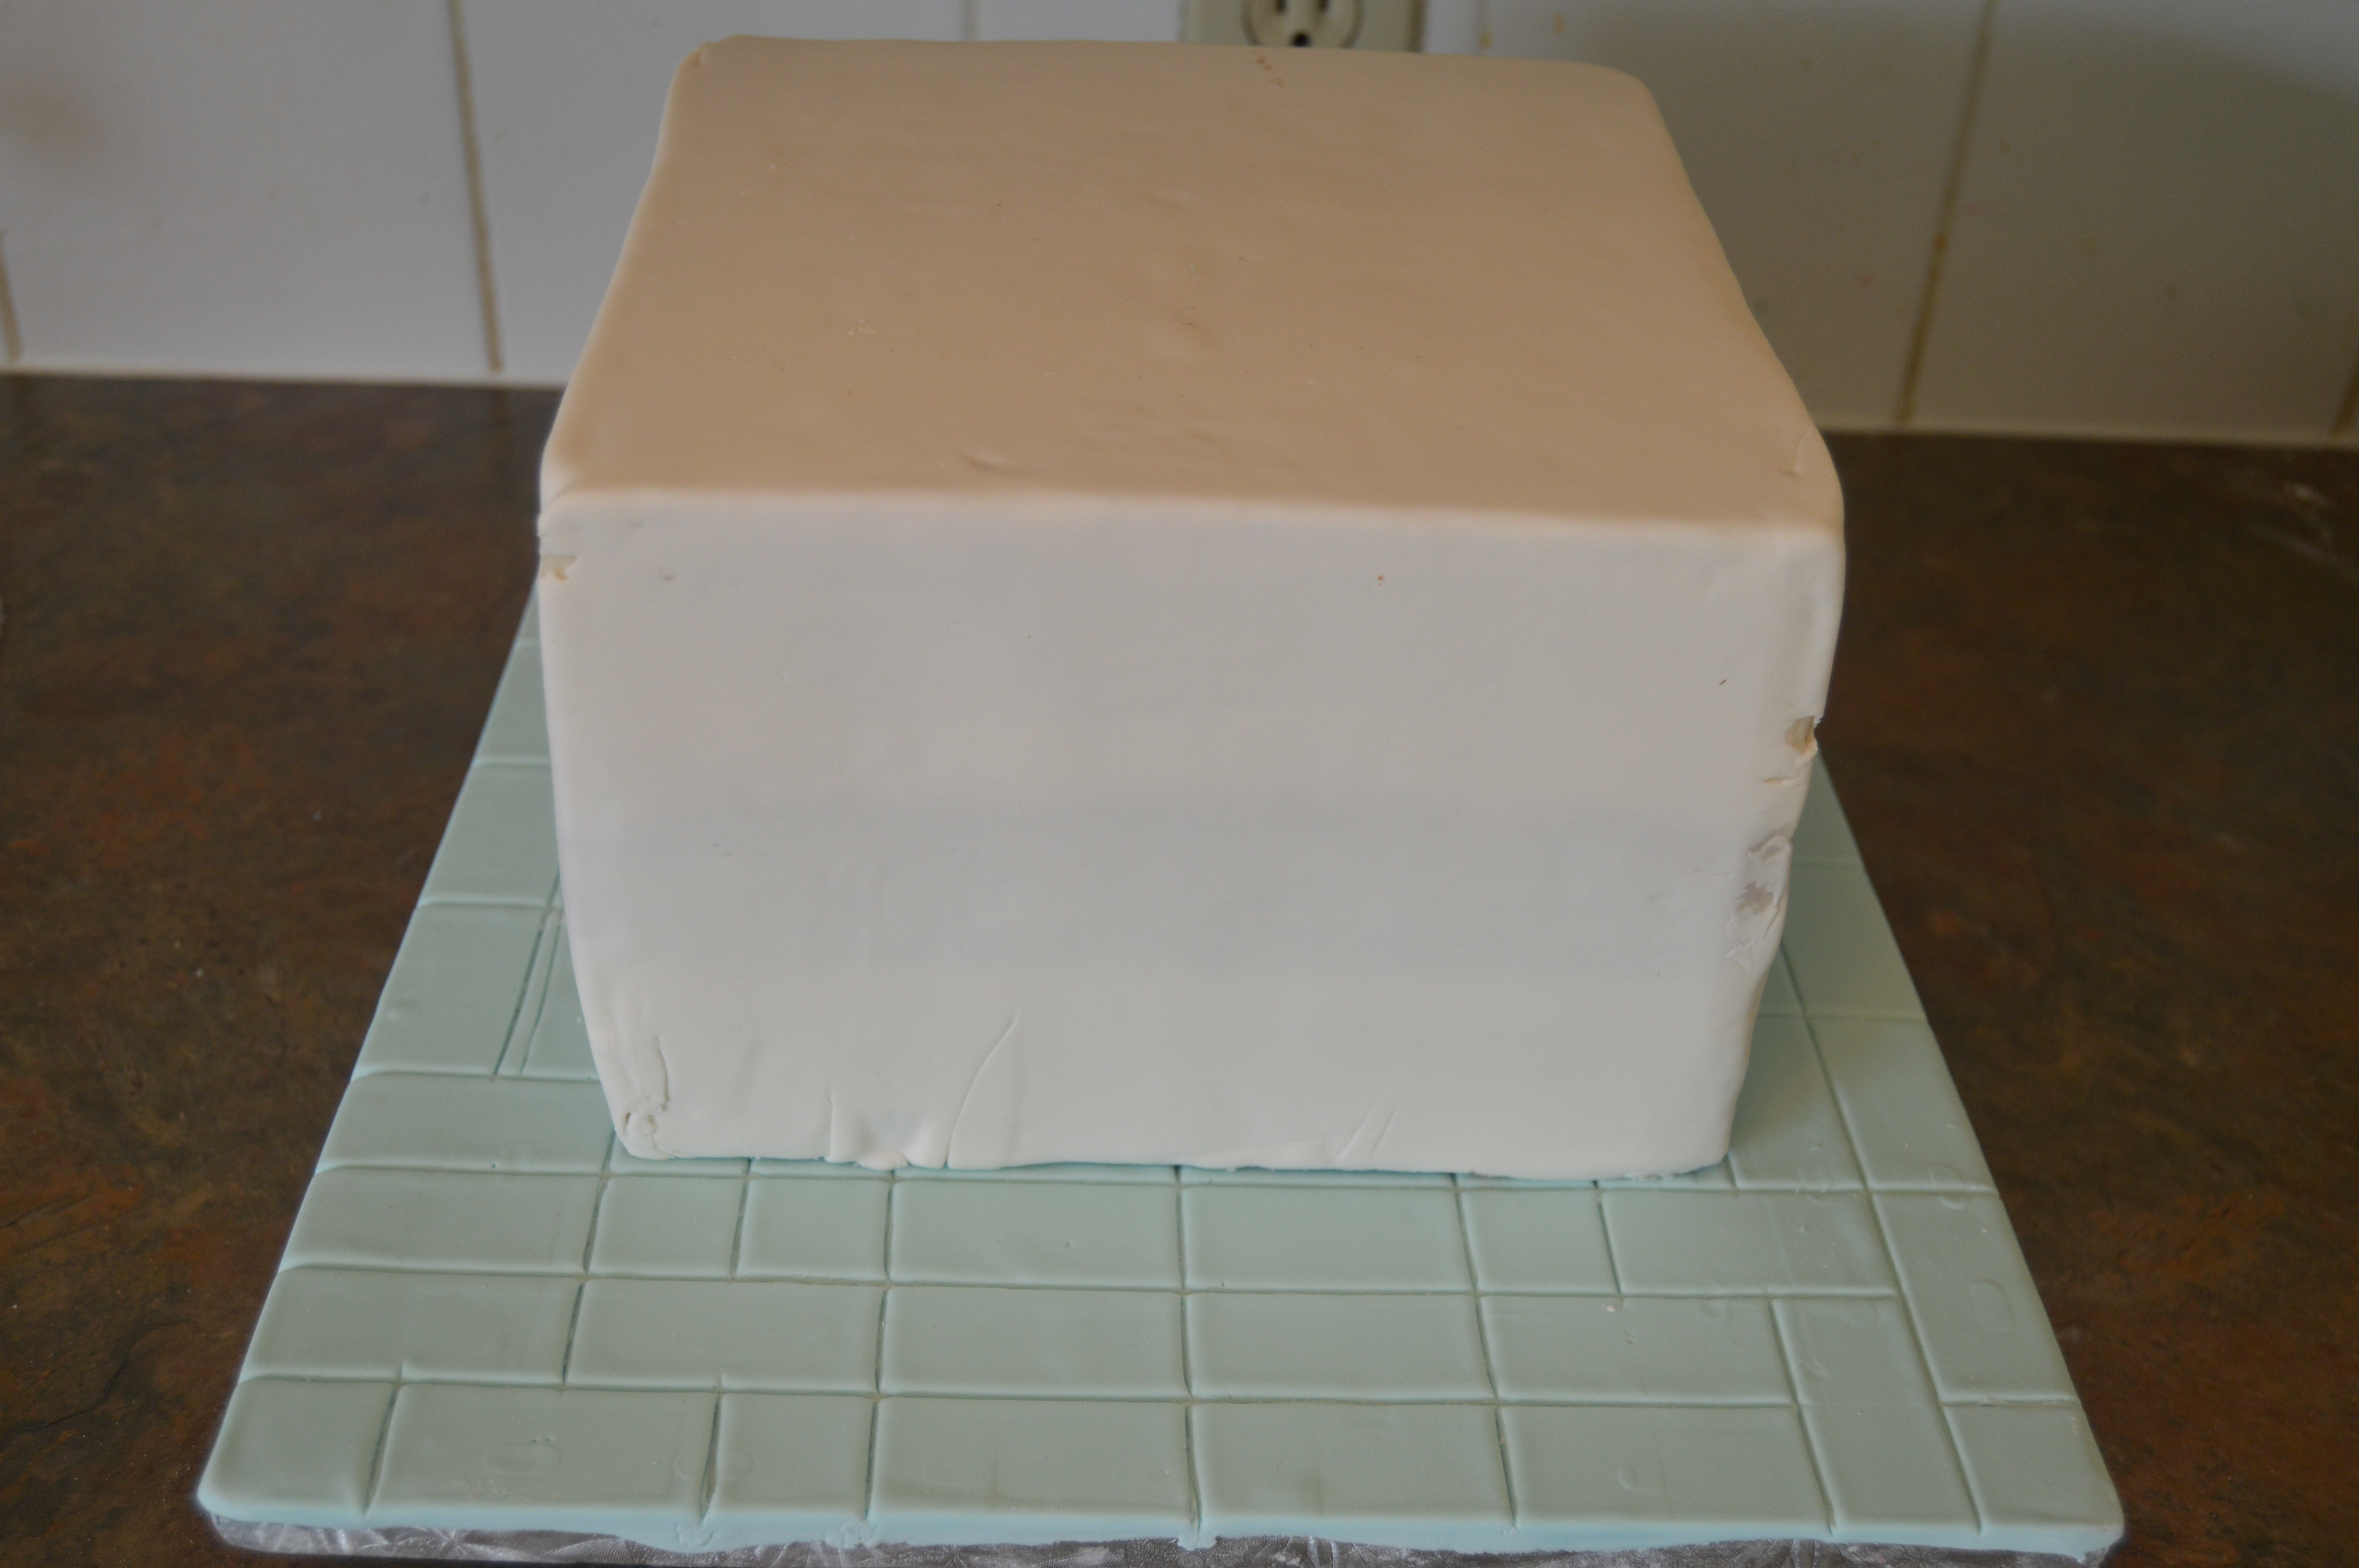
(2) Drape your frosted cake with white fondant and stick it to the cake drum. Be sure to stick the cake so it aligns with the pattern on the cake board.
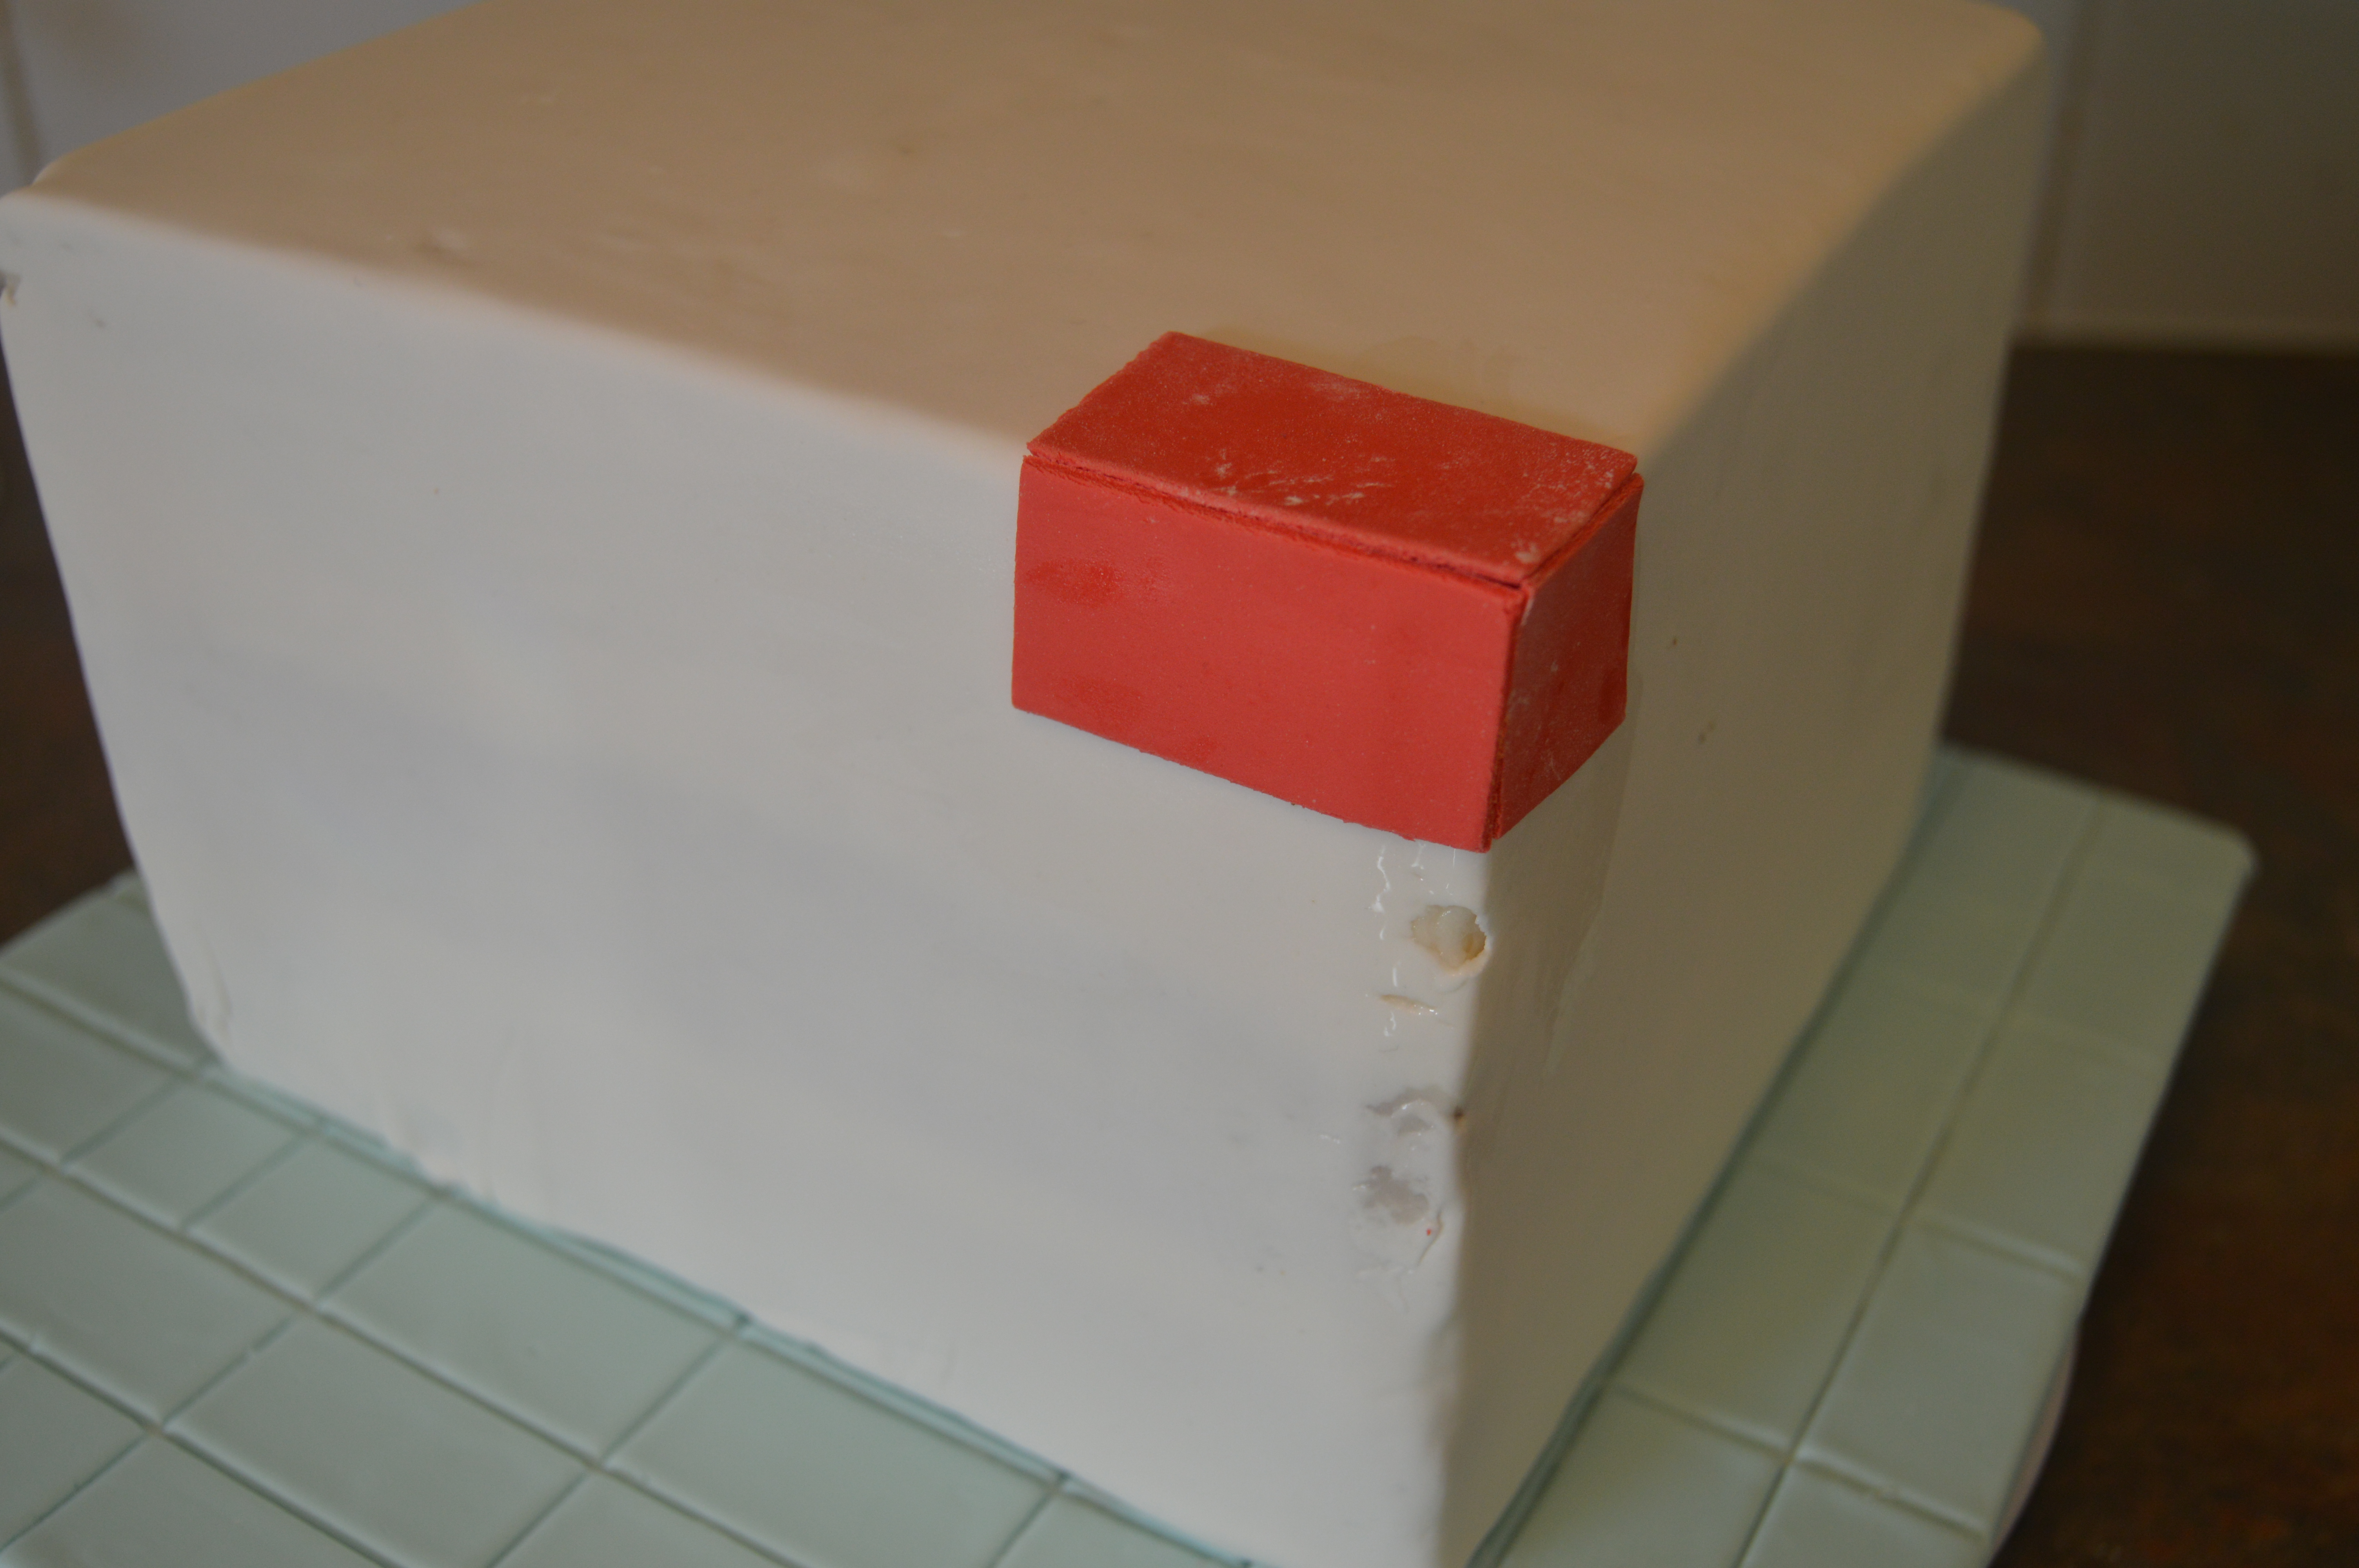
(3) Color fondant to achieve various colors. I used blue, red, yellow, green, purple and orange here (primary and secondary colors). Roll out the colored fondant and divide them into rectangles measuring 1 inch by 2 inches. Again, have a few squares too. For sharper lines, roll out the fondant and allow it to dry for about 15 minutes before cutting out the rectangles. Allow the rectangles to dry for a further 15 minutes before transferring them to the cake.

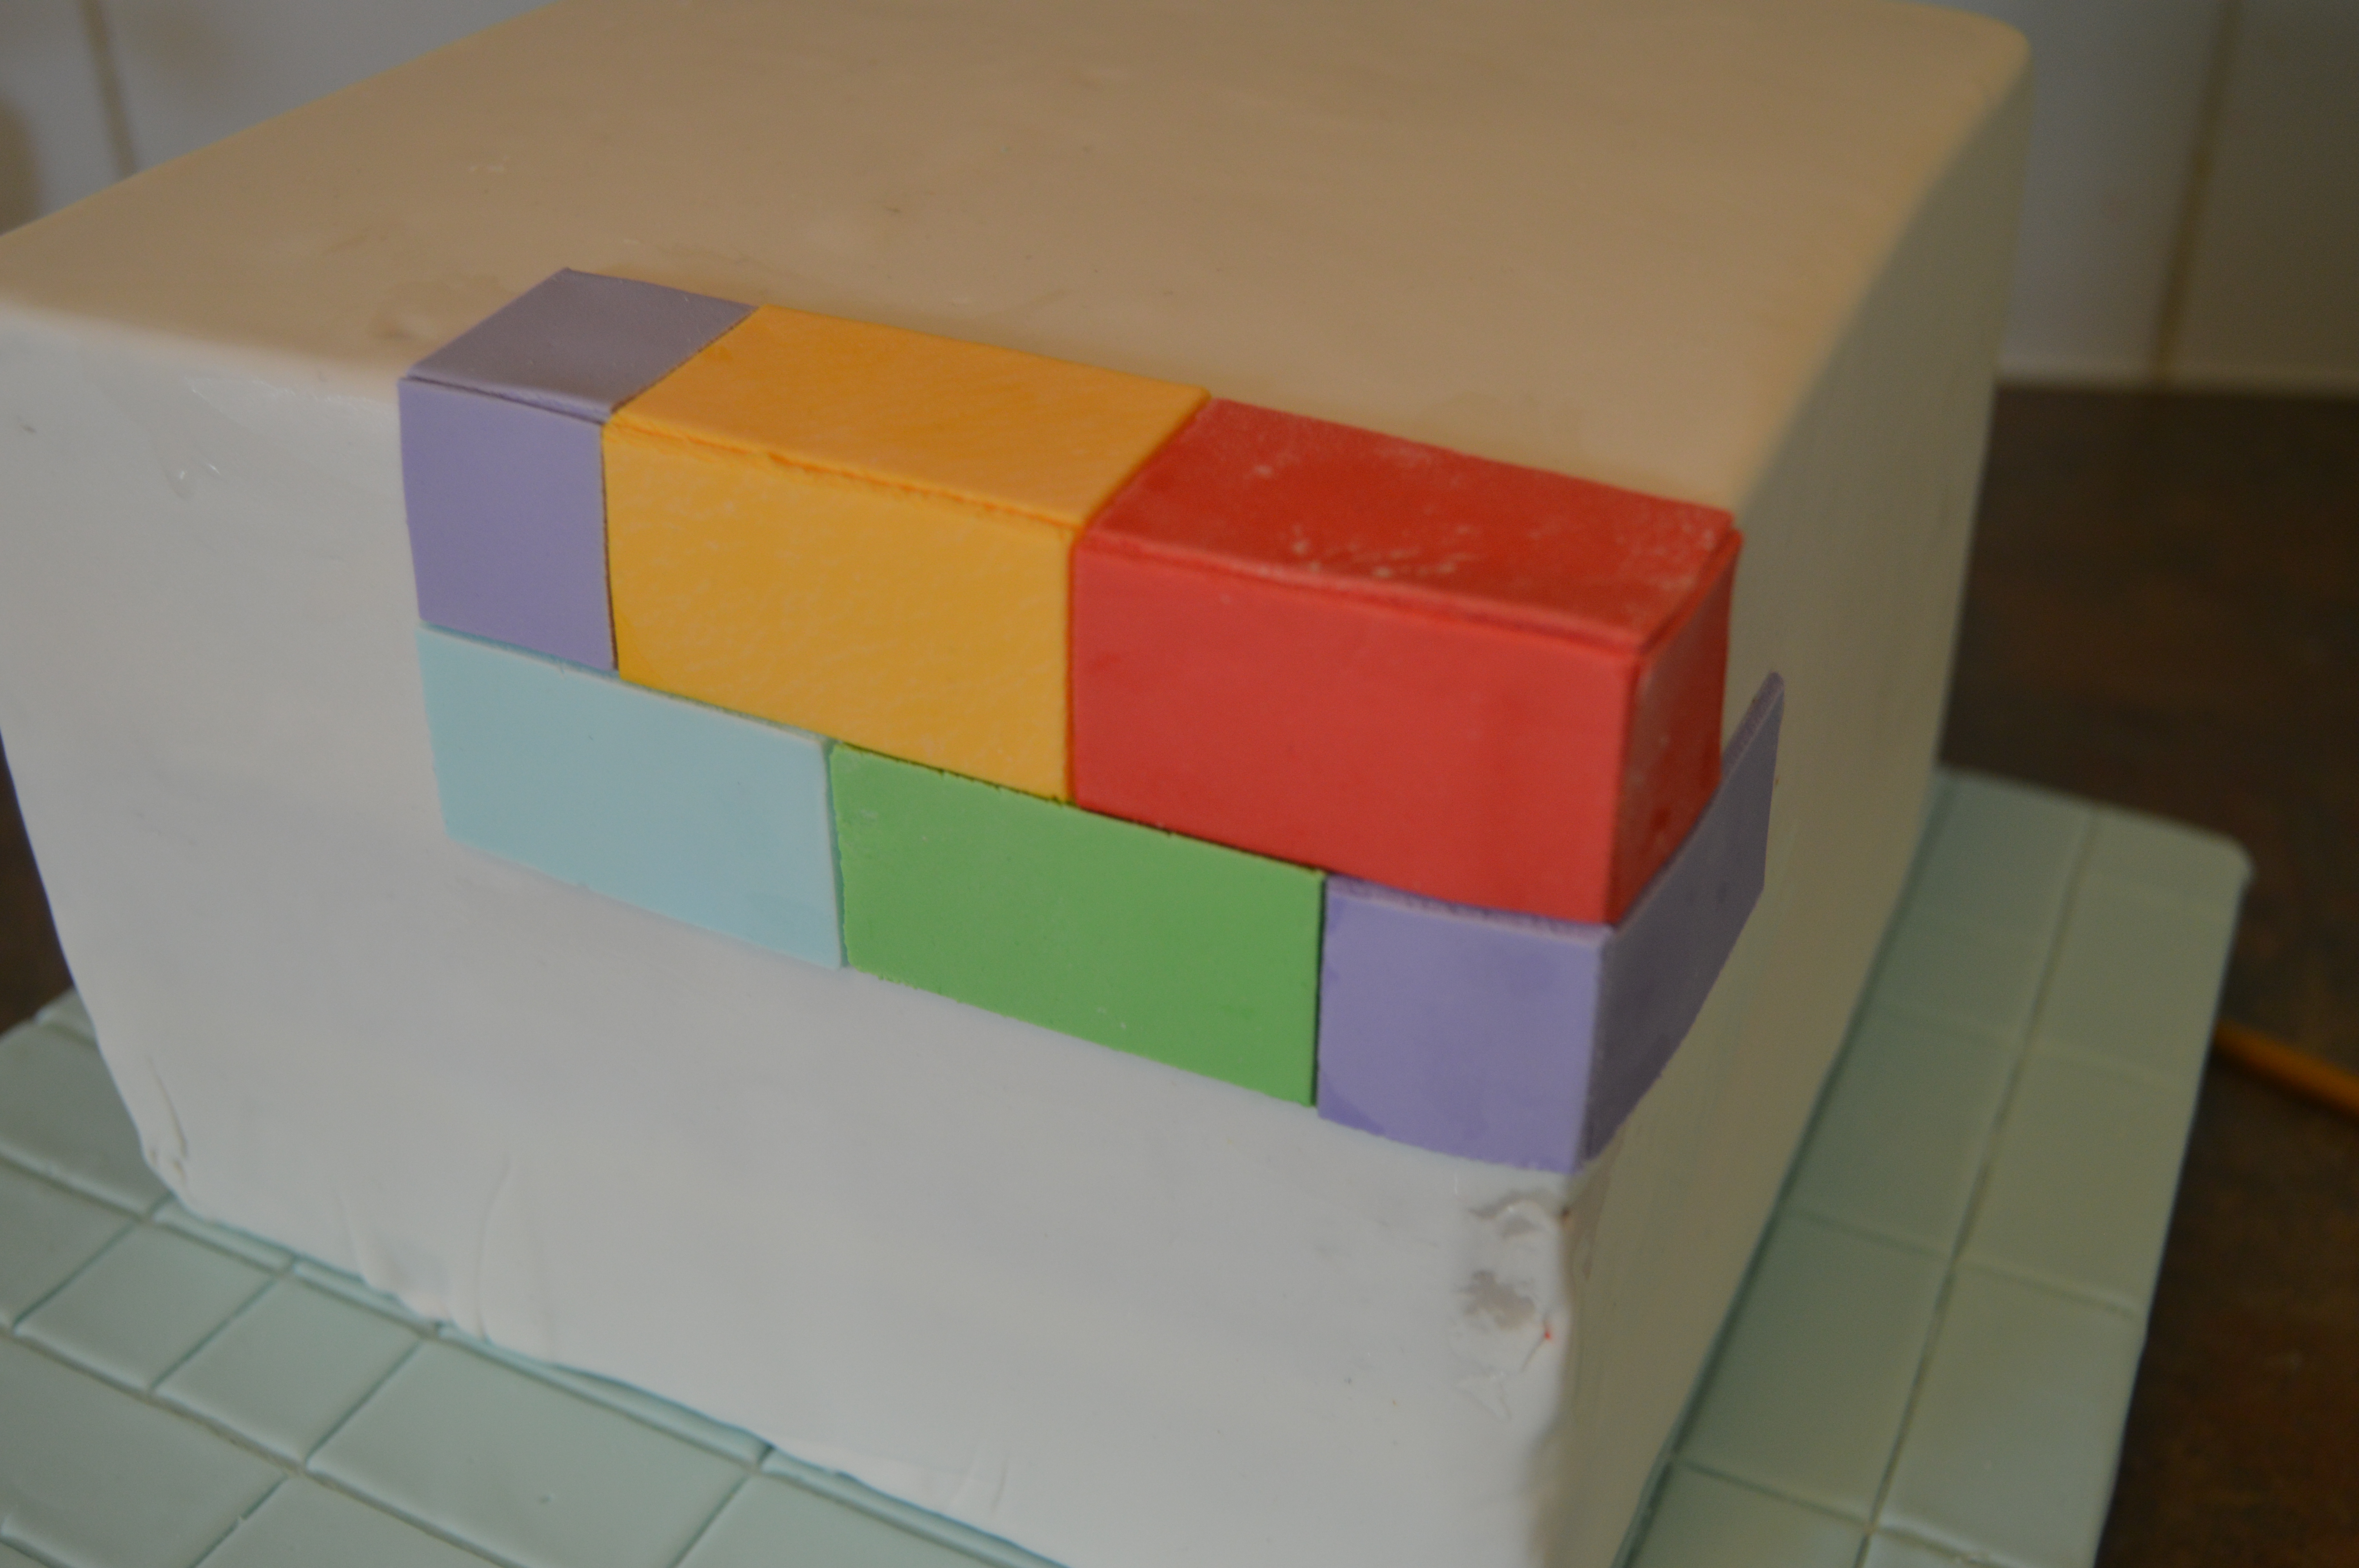
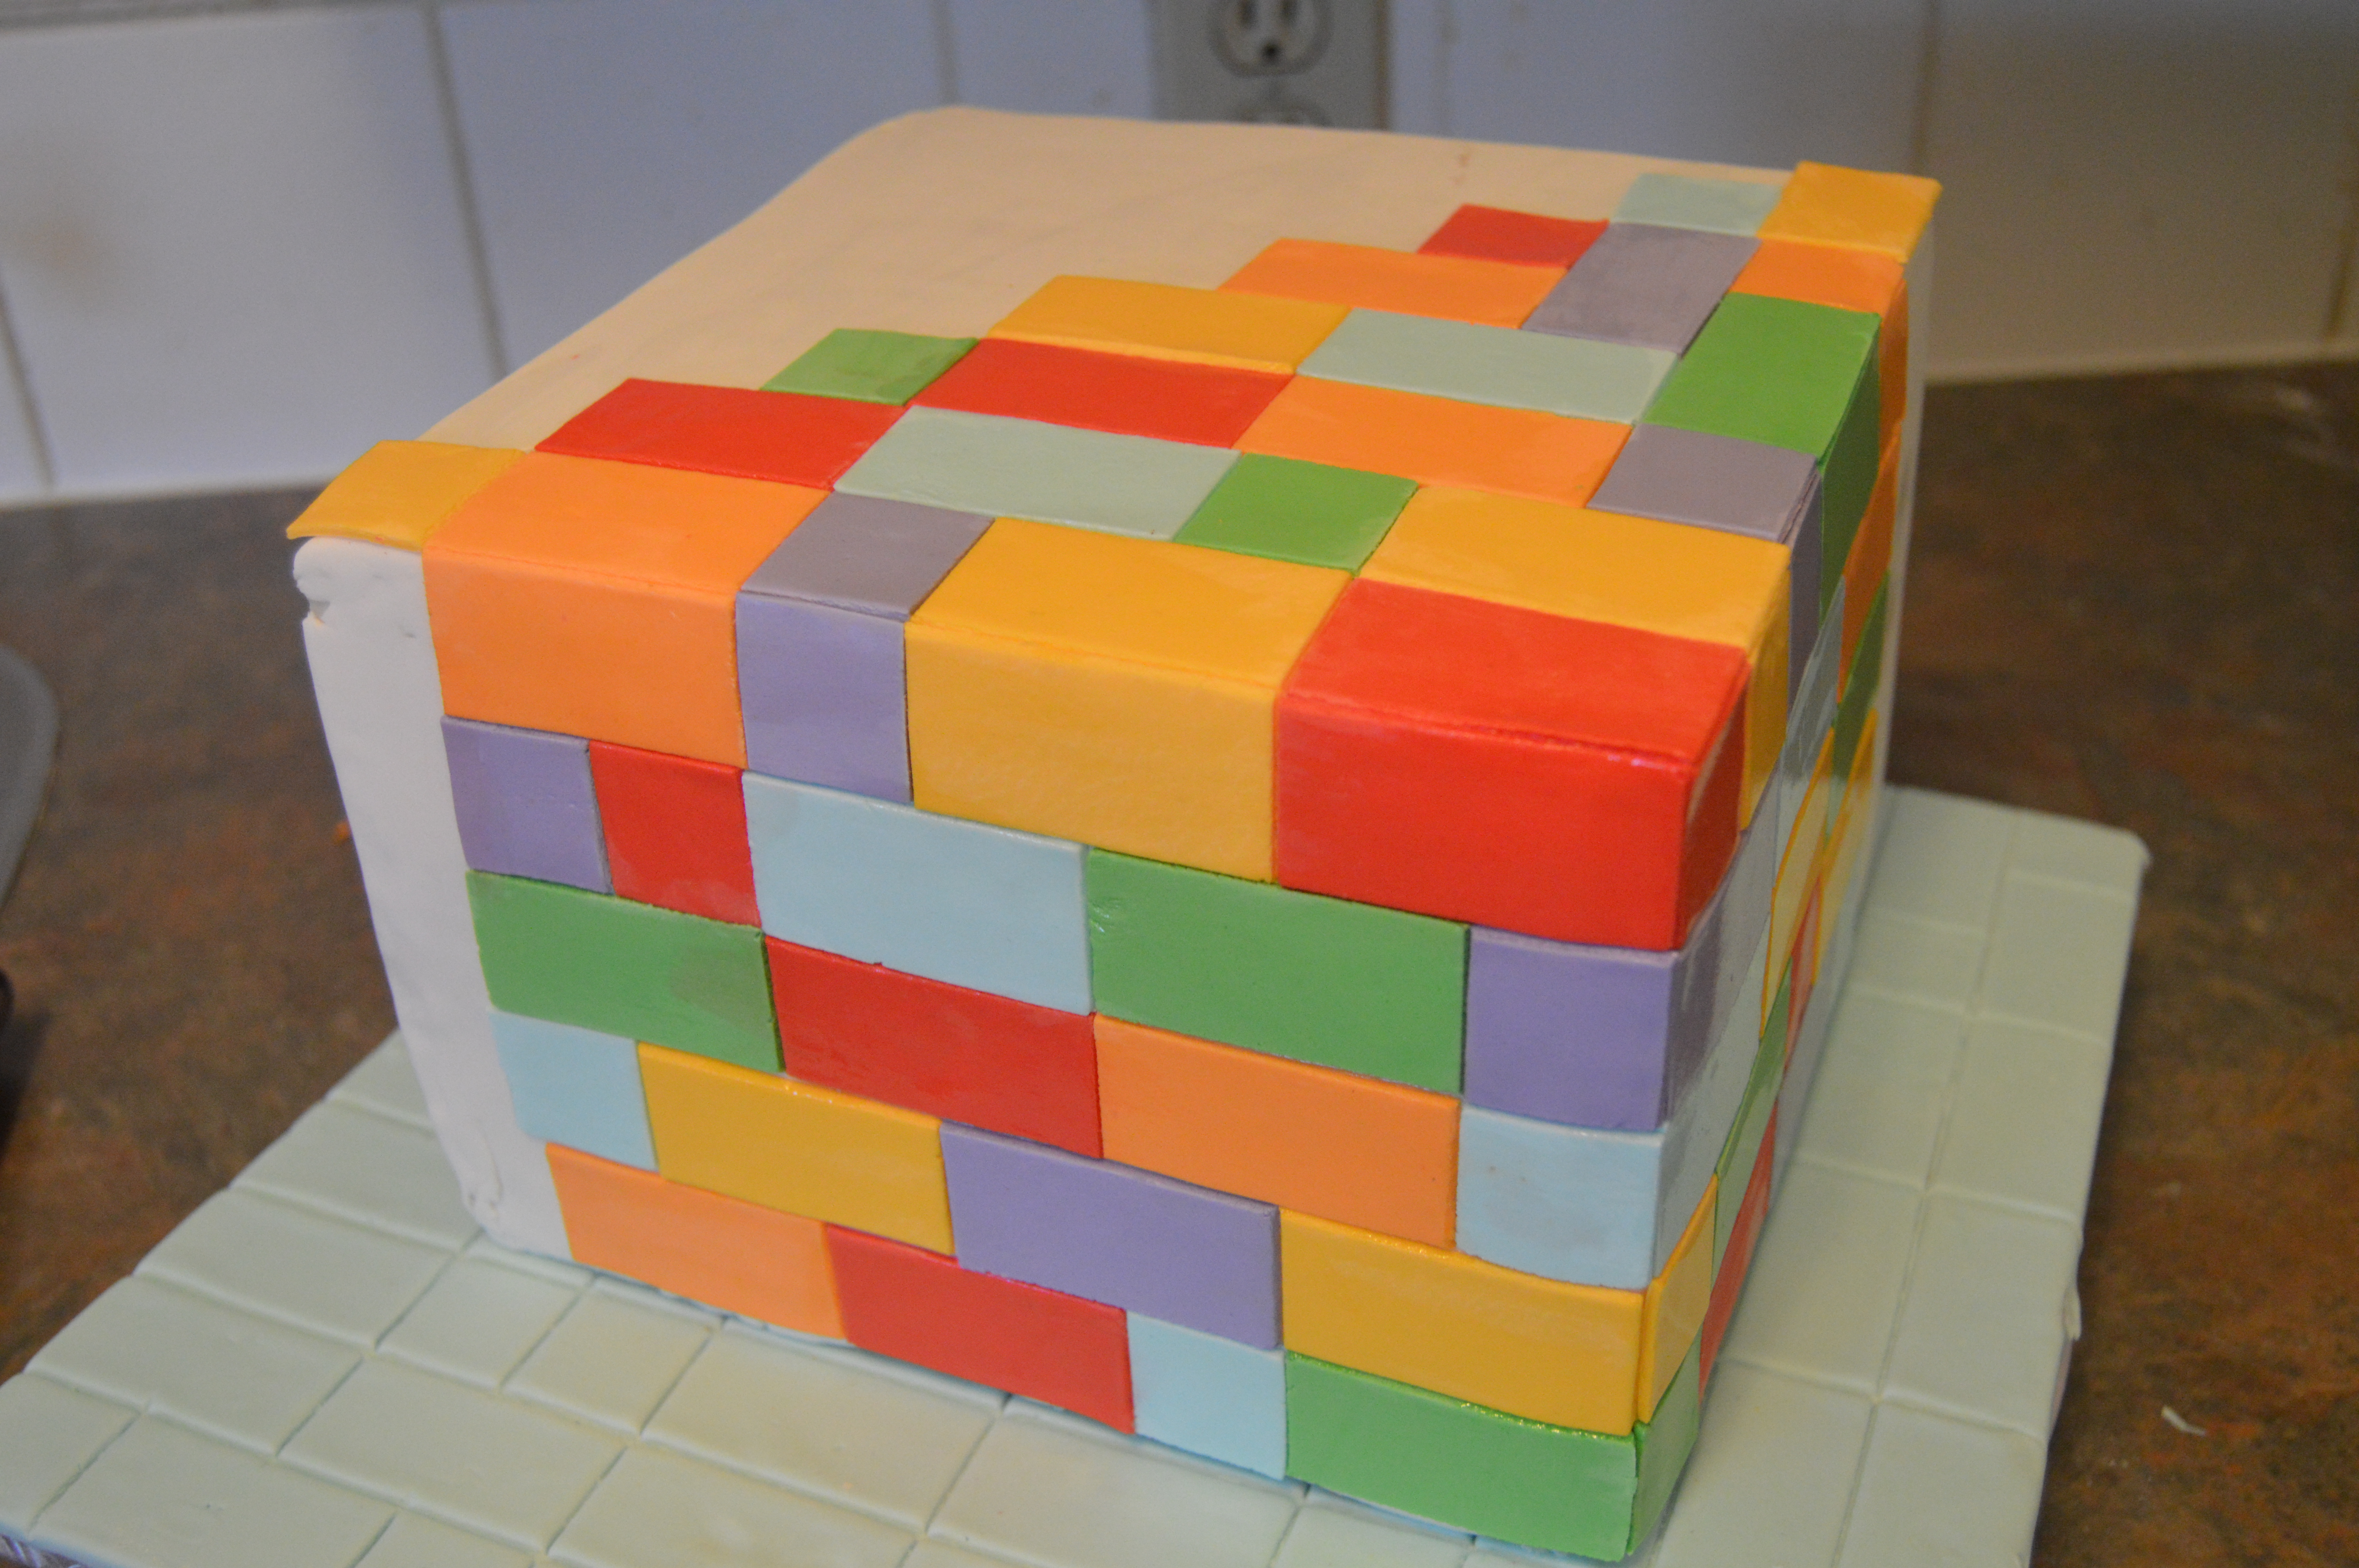
(4) Next, brush the cake with vodka or a little bit of water and start sticking the rectangles to the sides and top of the cake. The rectangles should only be stuck to 2 sides of the cake (the front and right side) and on a 90 degree angle on the top. Try to stick the rectangles as randomly as possible on the cake, separating the colors. Be sure to replicate the same color of rectangles at the various edges and angles of the cake.
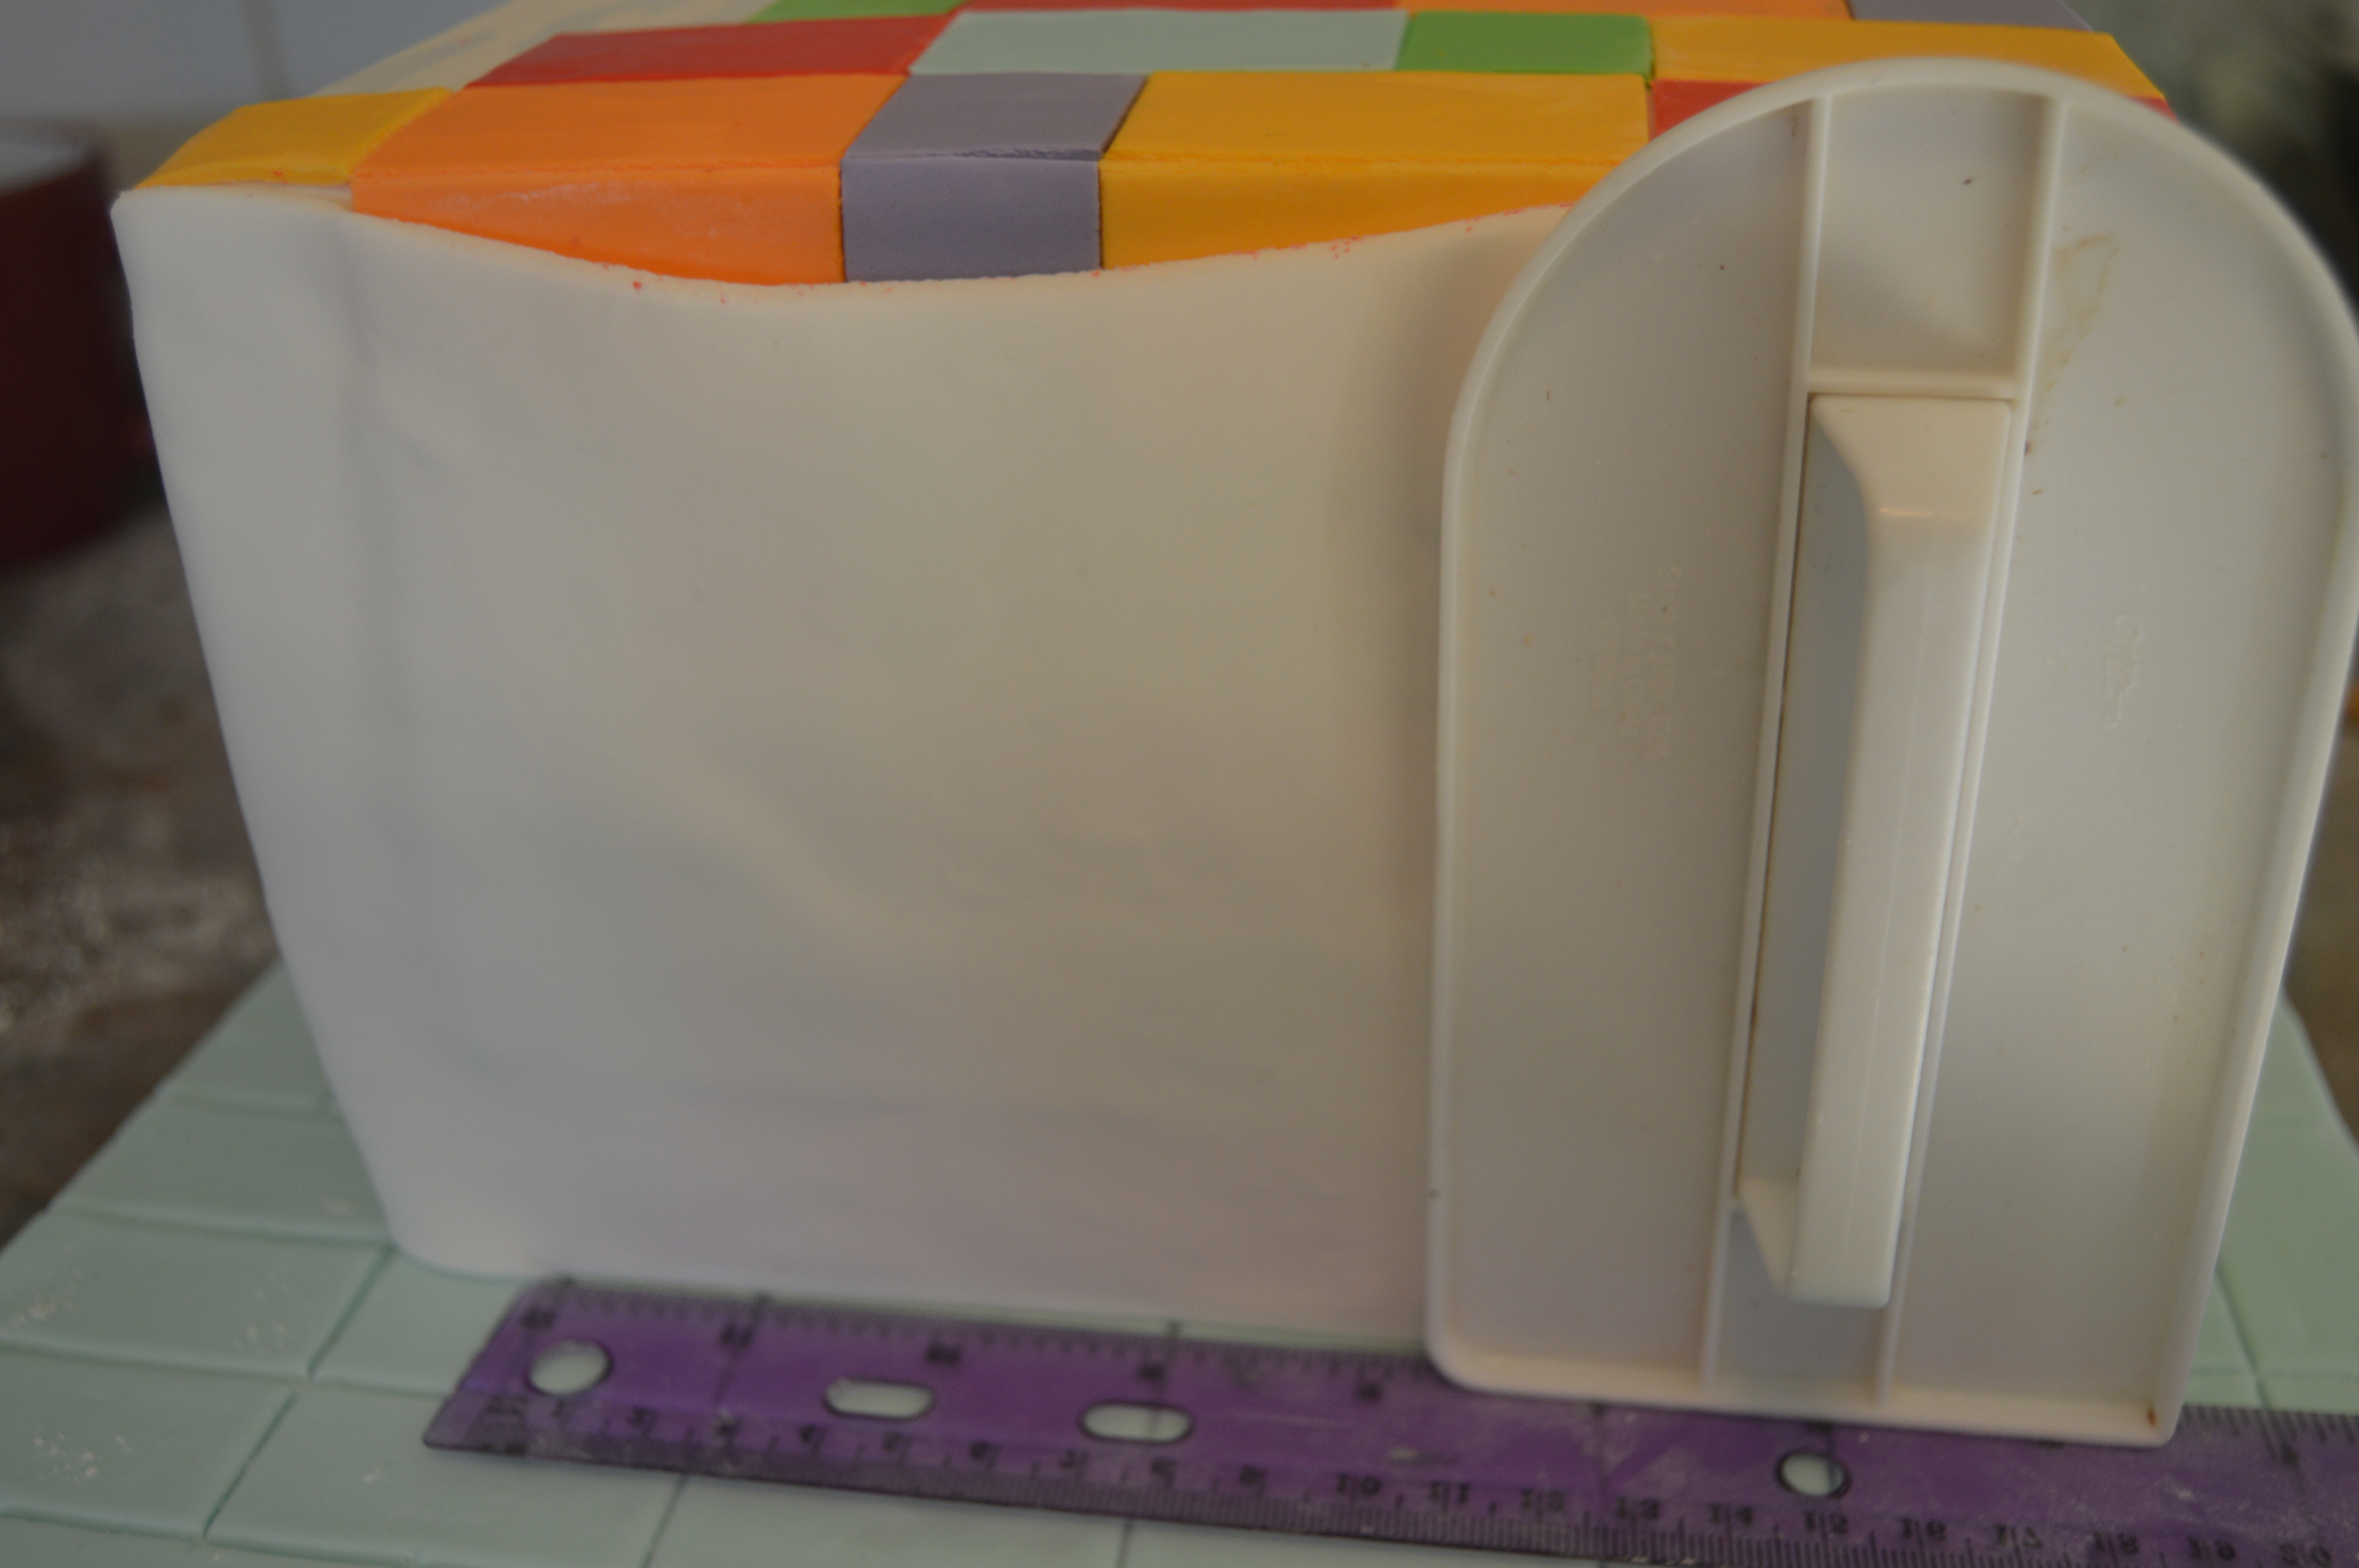
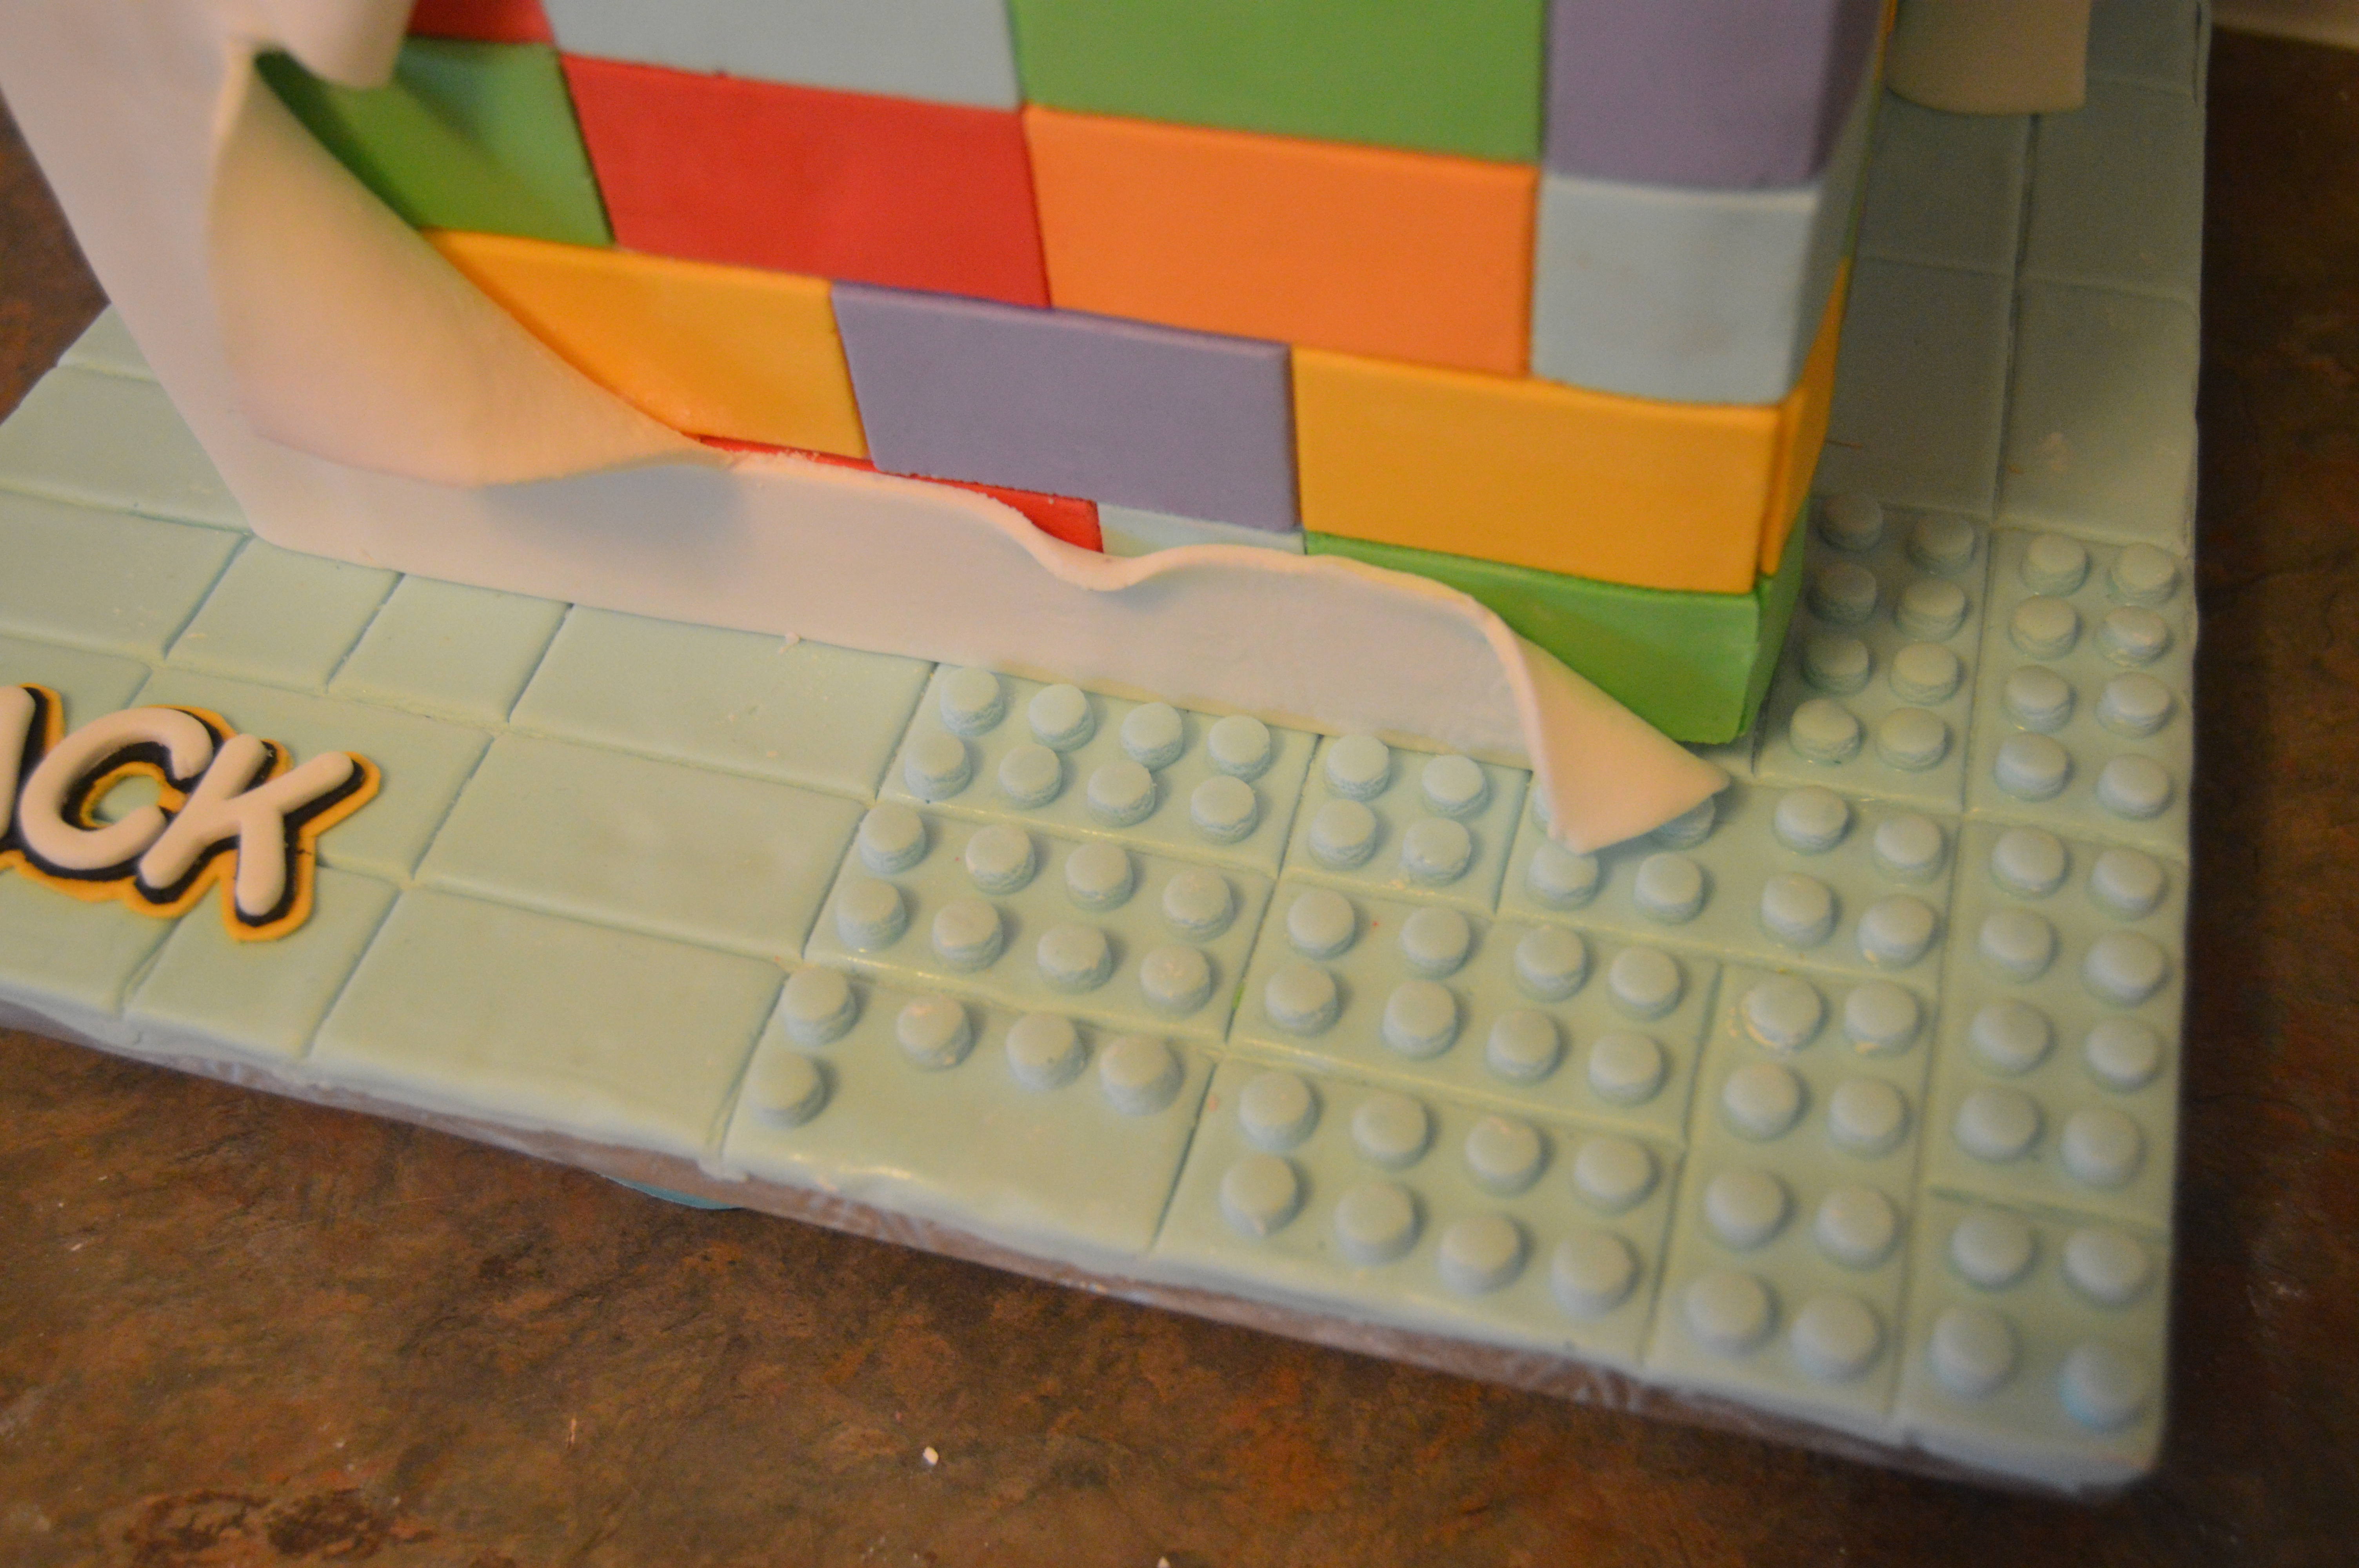
(5) Next, roll out white fondant the same height as the cake and wrap the back and sides of the cake with it taking care not to cover the Lego designs. Using a sharp blade, cut the ends of the fondant to create folds, curves and bends. Use your discretion here and create folds of your choice.
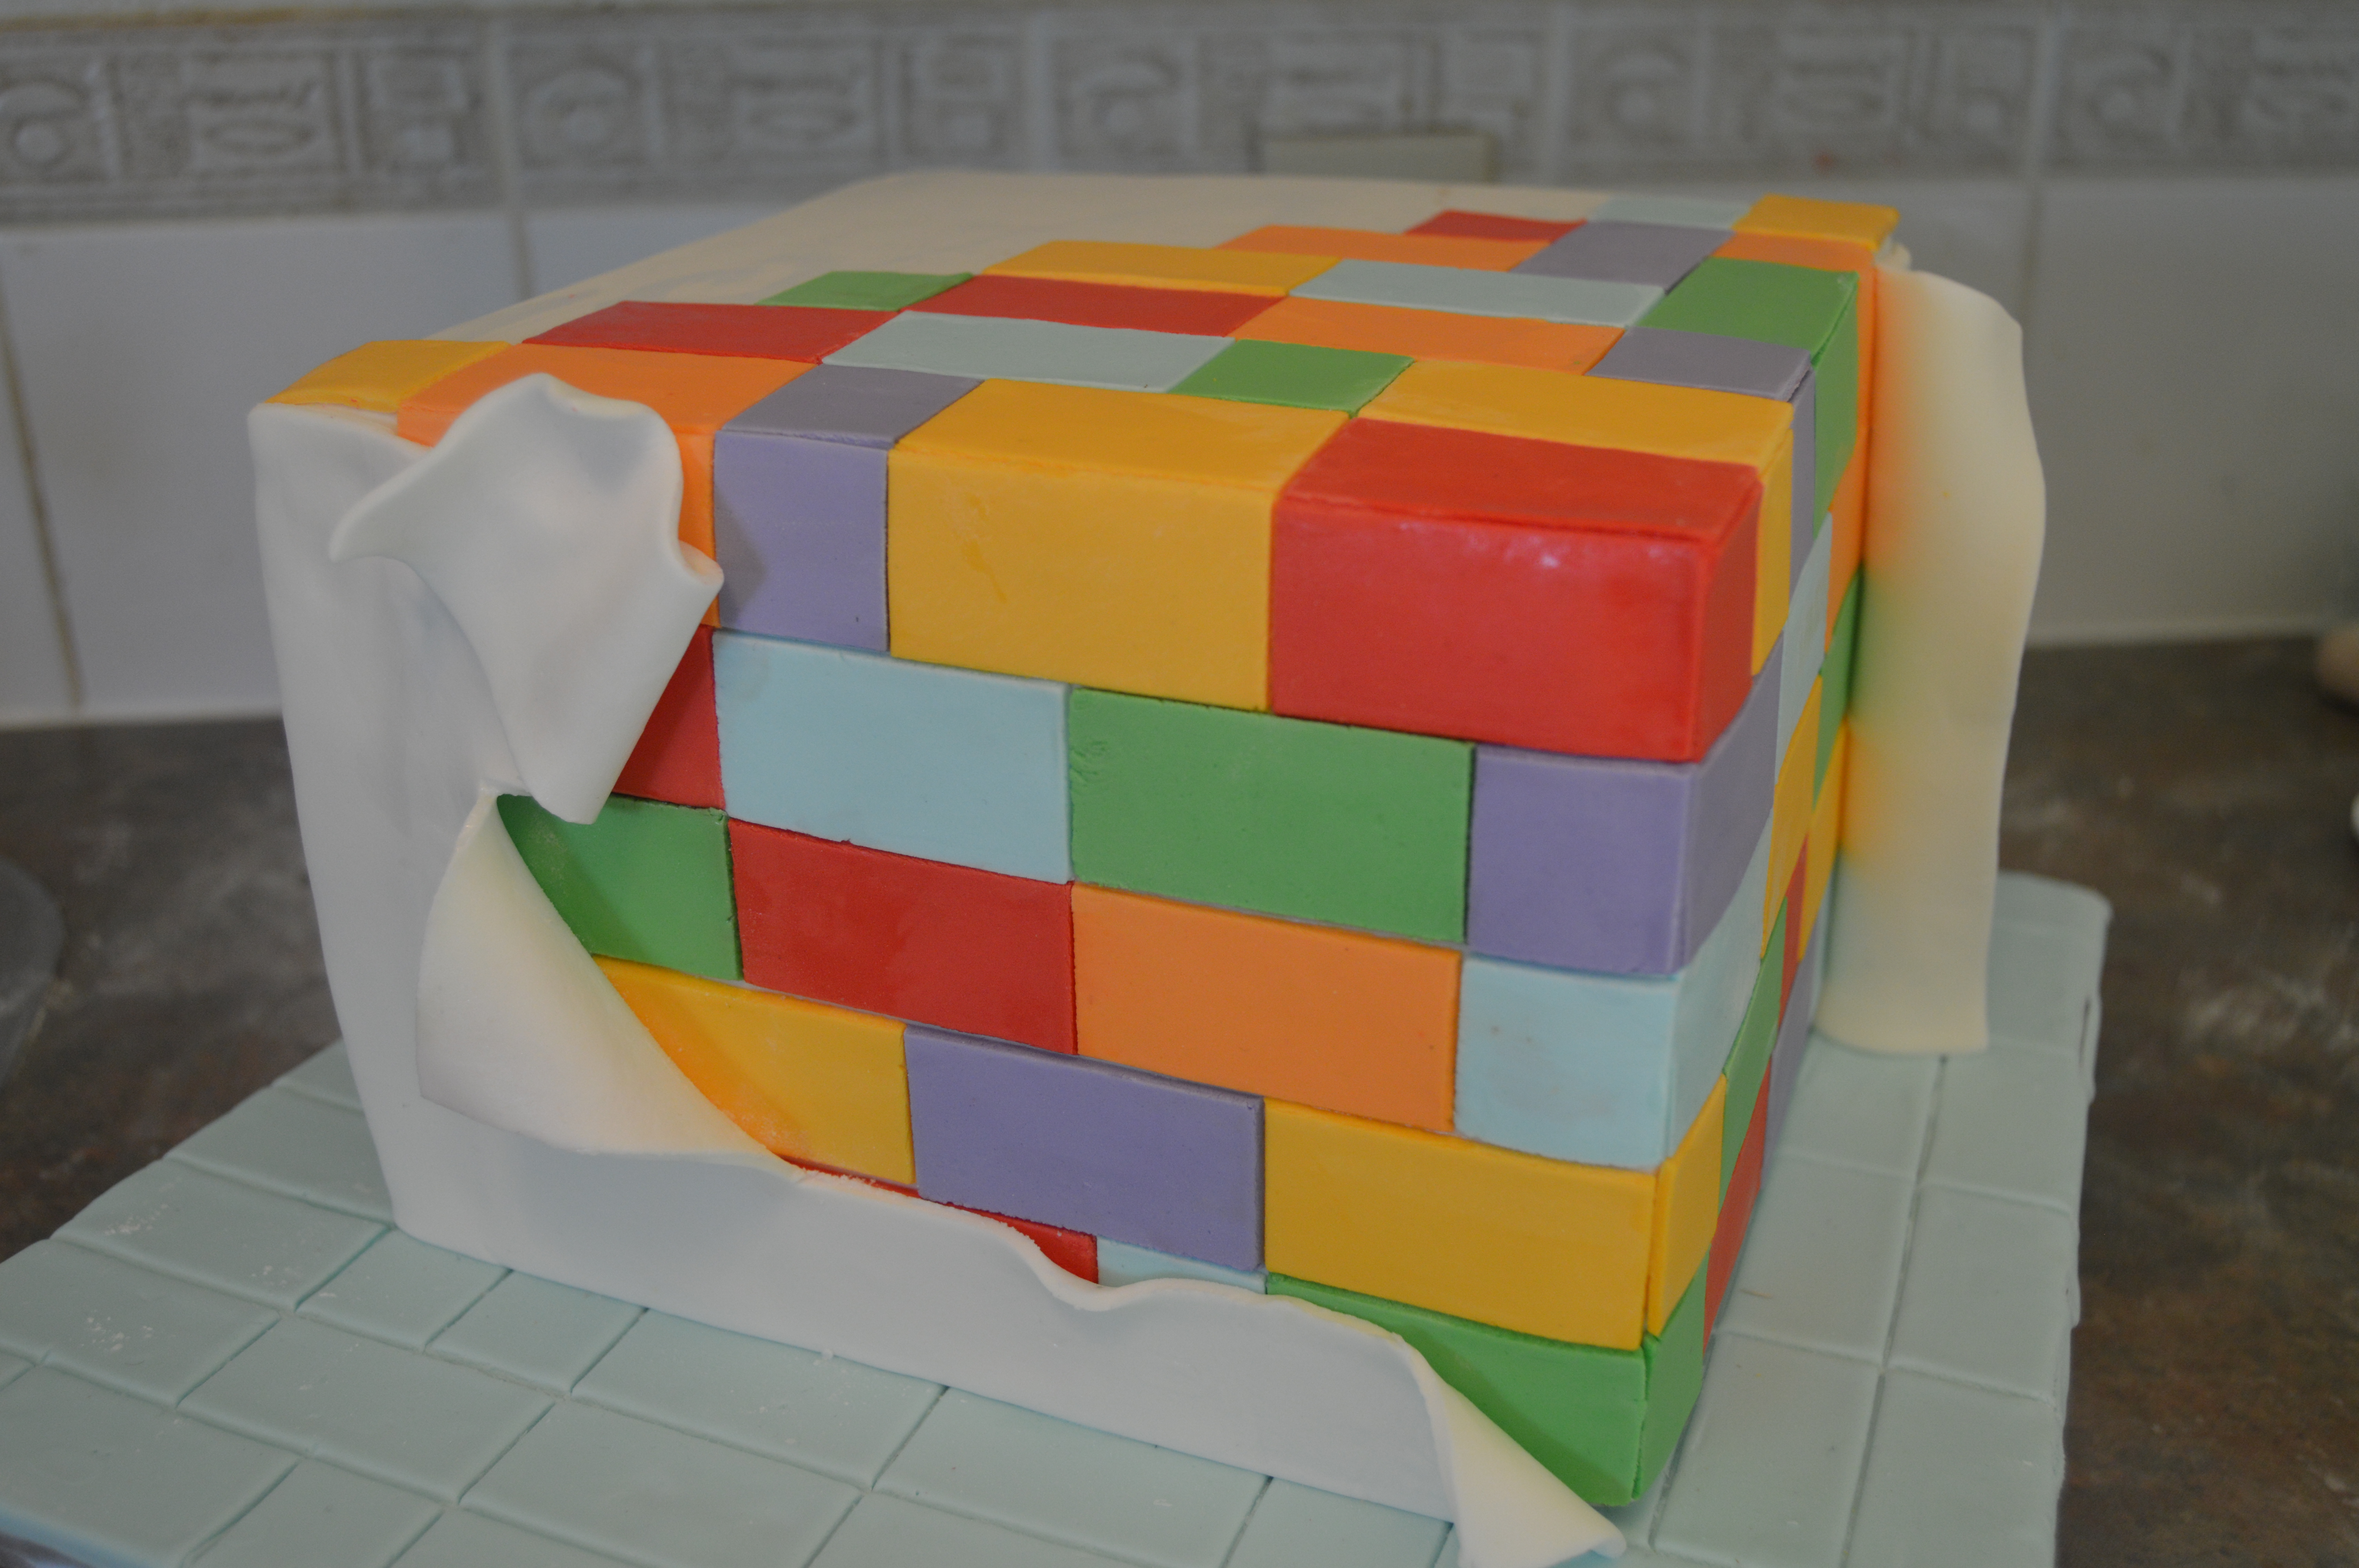
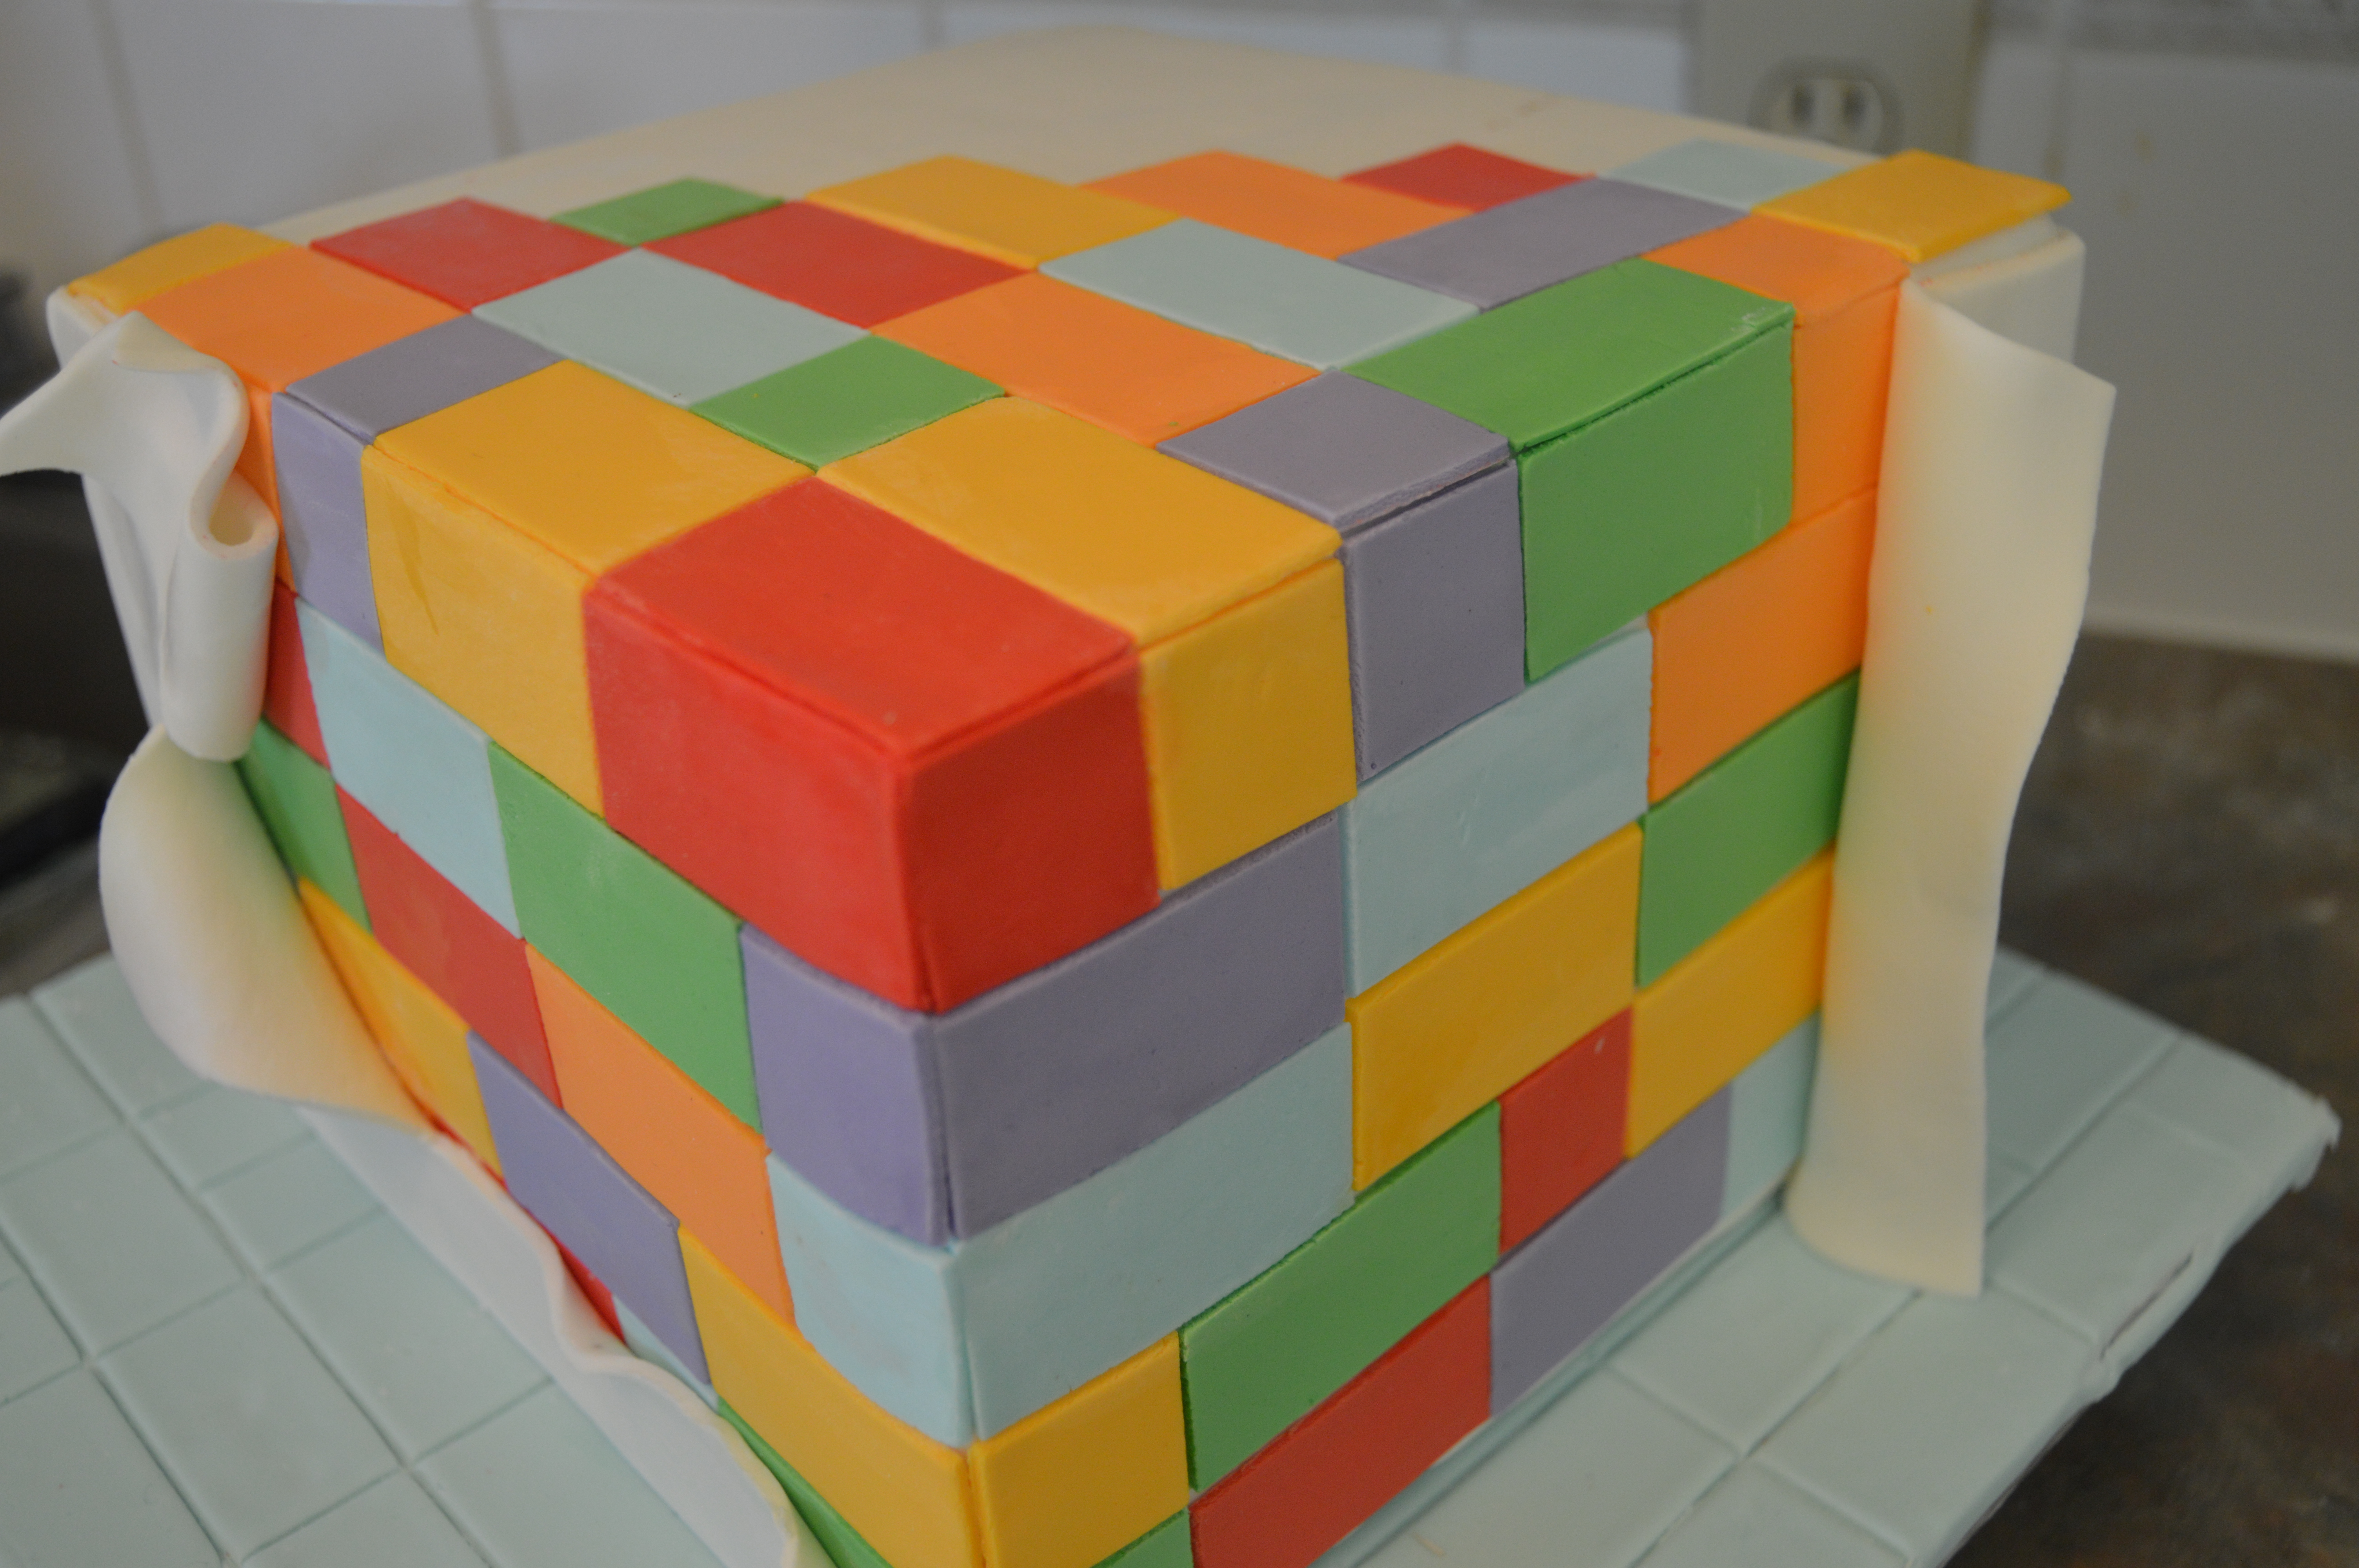
(6) Next, cut out a square piece of fondant the same size as the cake and cover the top of the cake, folding the fondant at an angle to expose the Lego design.

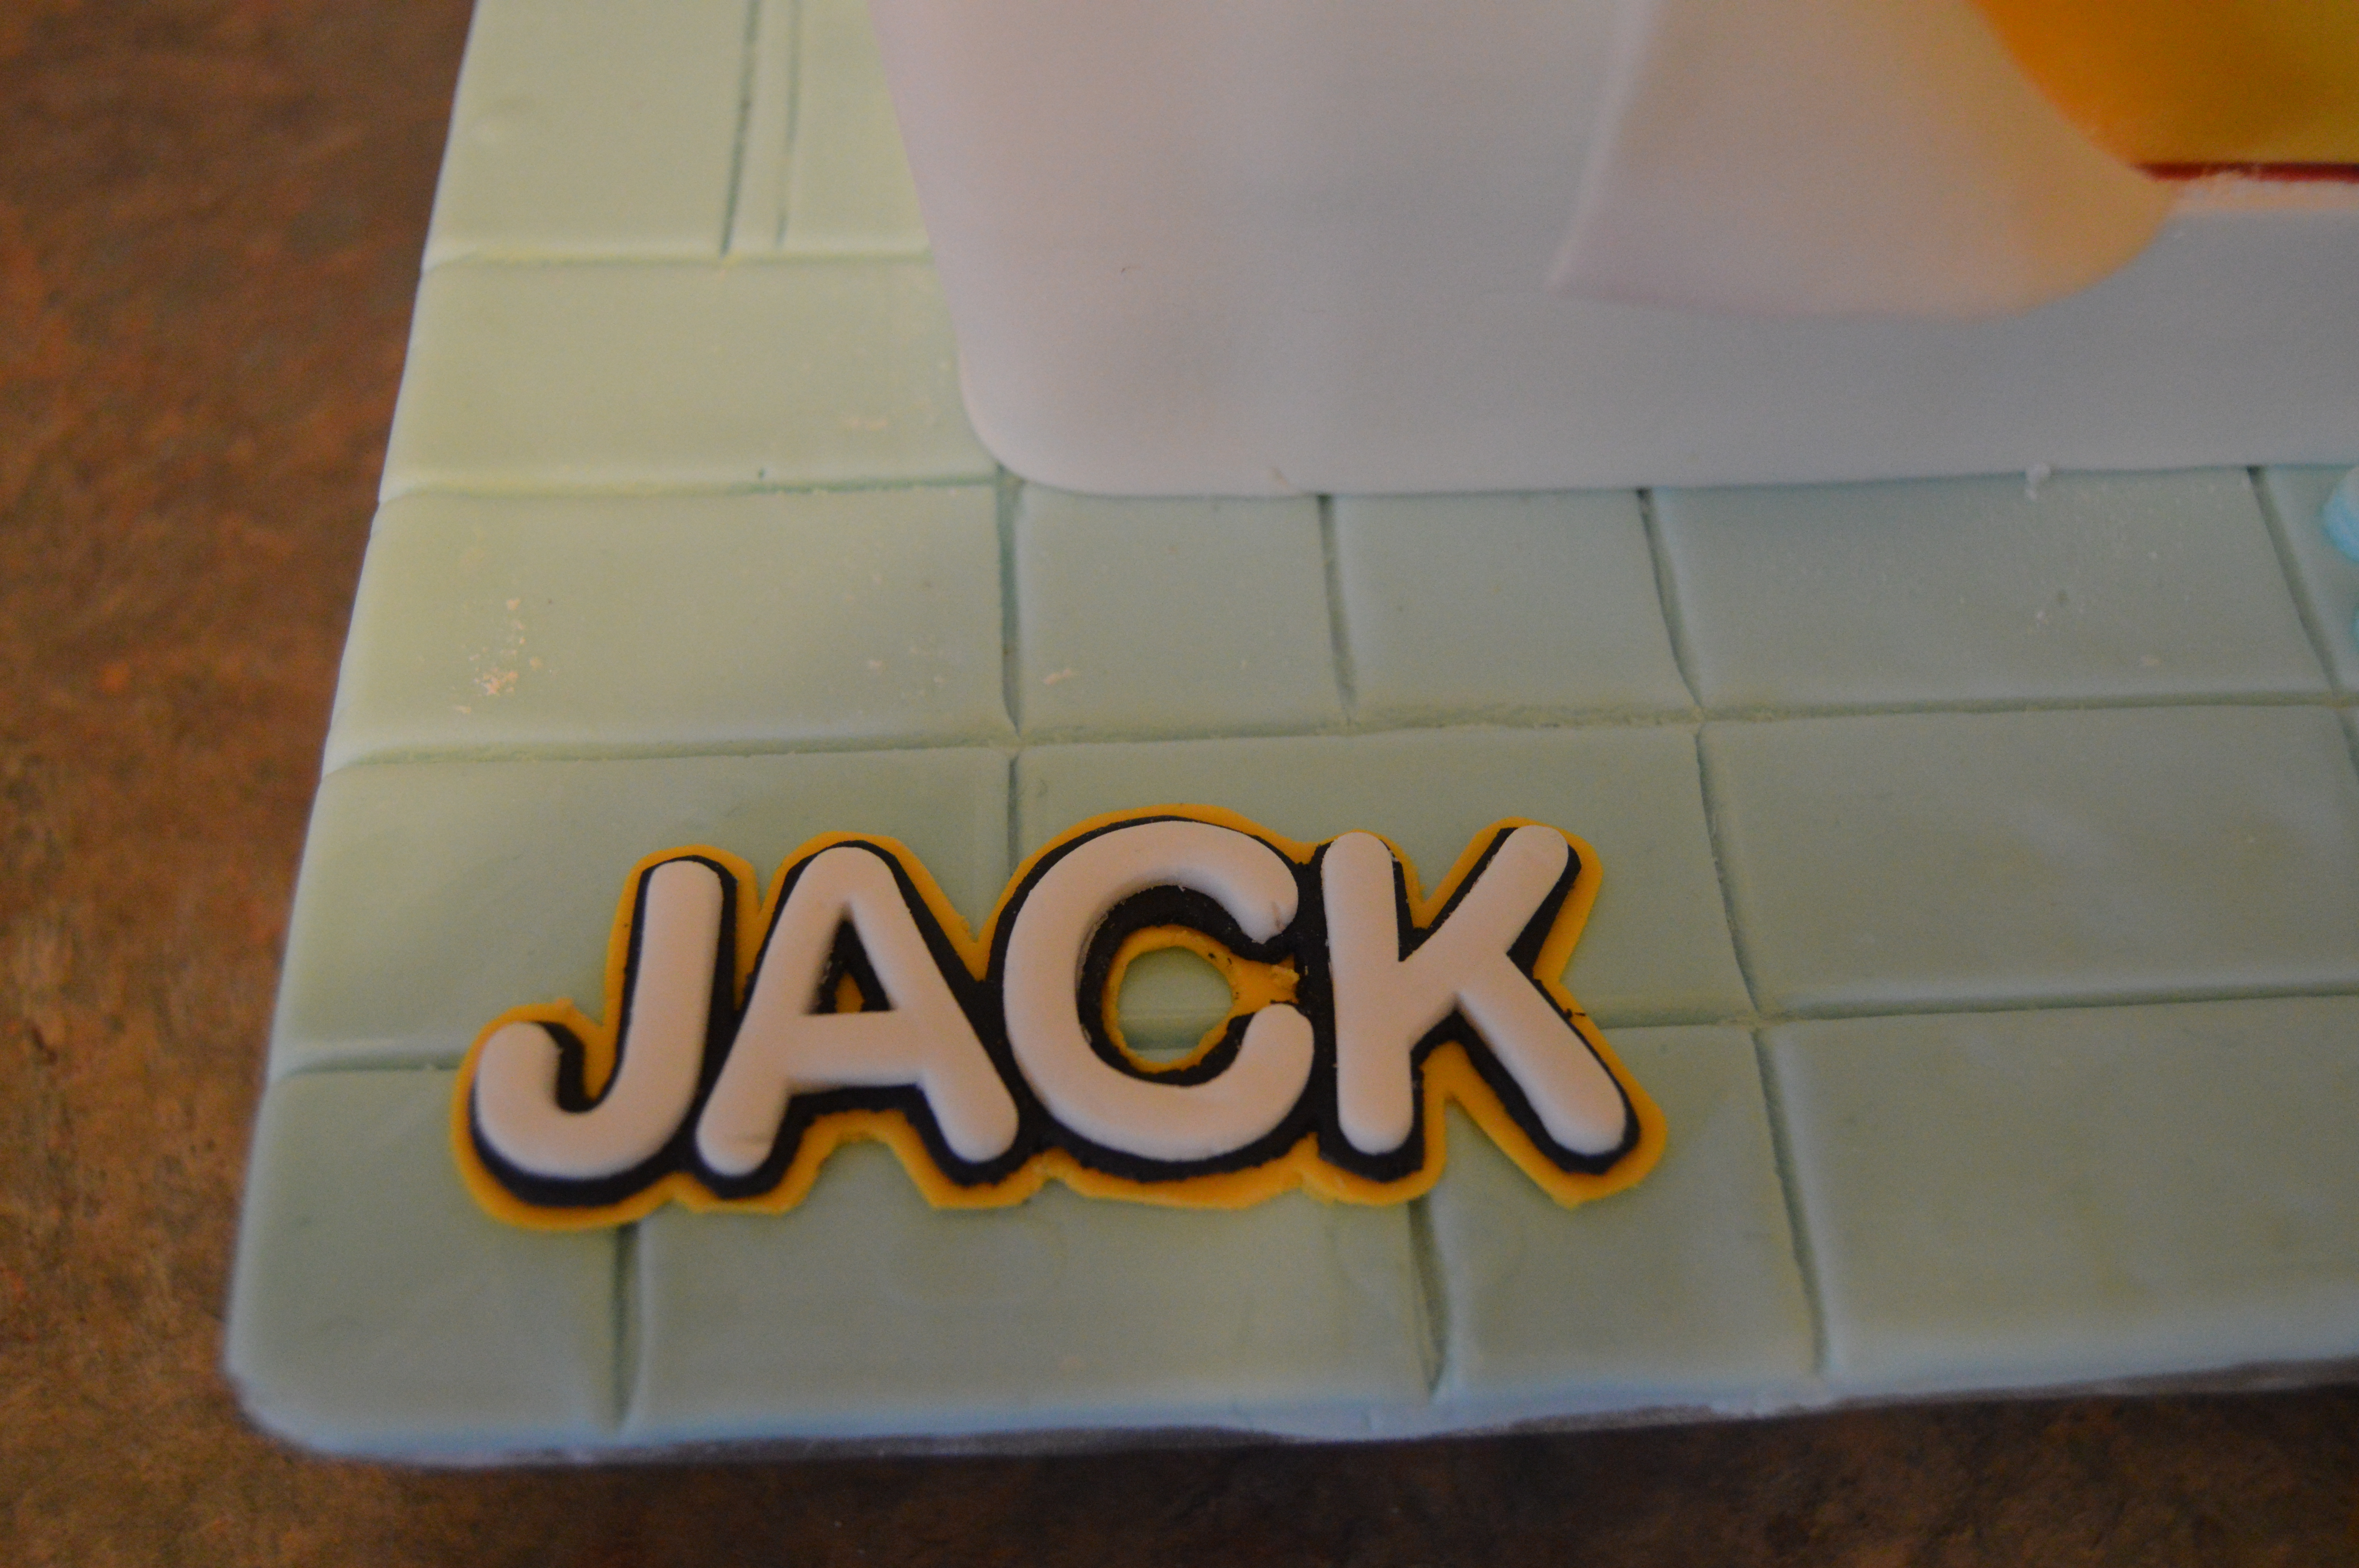
(7) Next, make the name of the celebrant in the Lego logo colors. Read this post on how to do this. Stick the name to the cake drum.
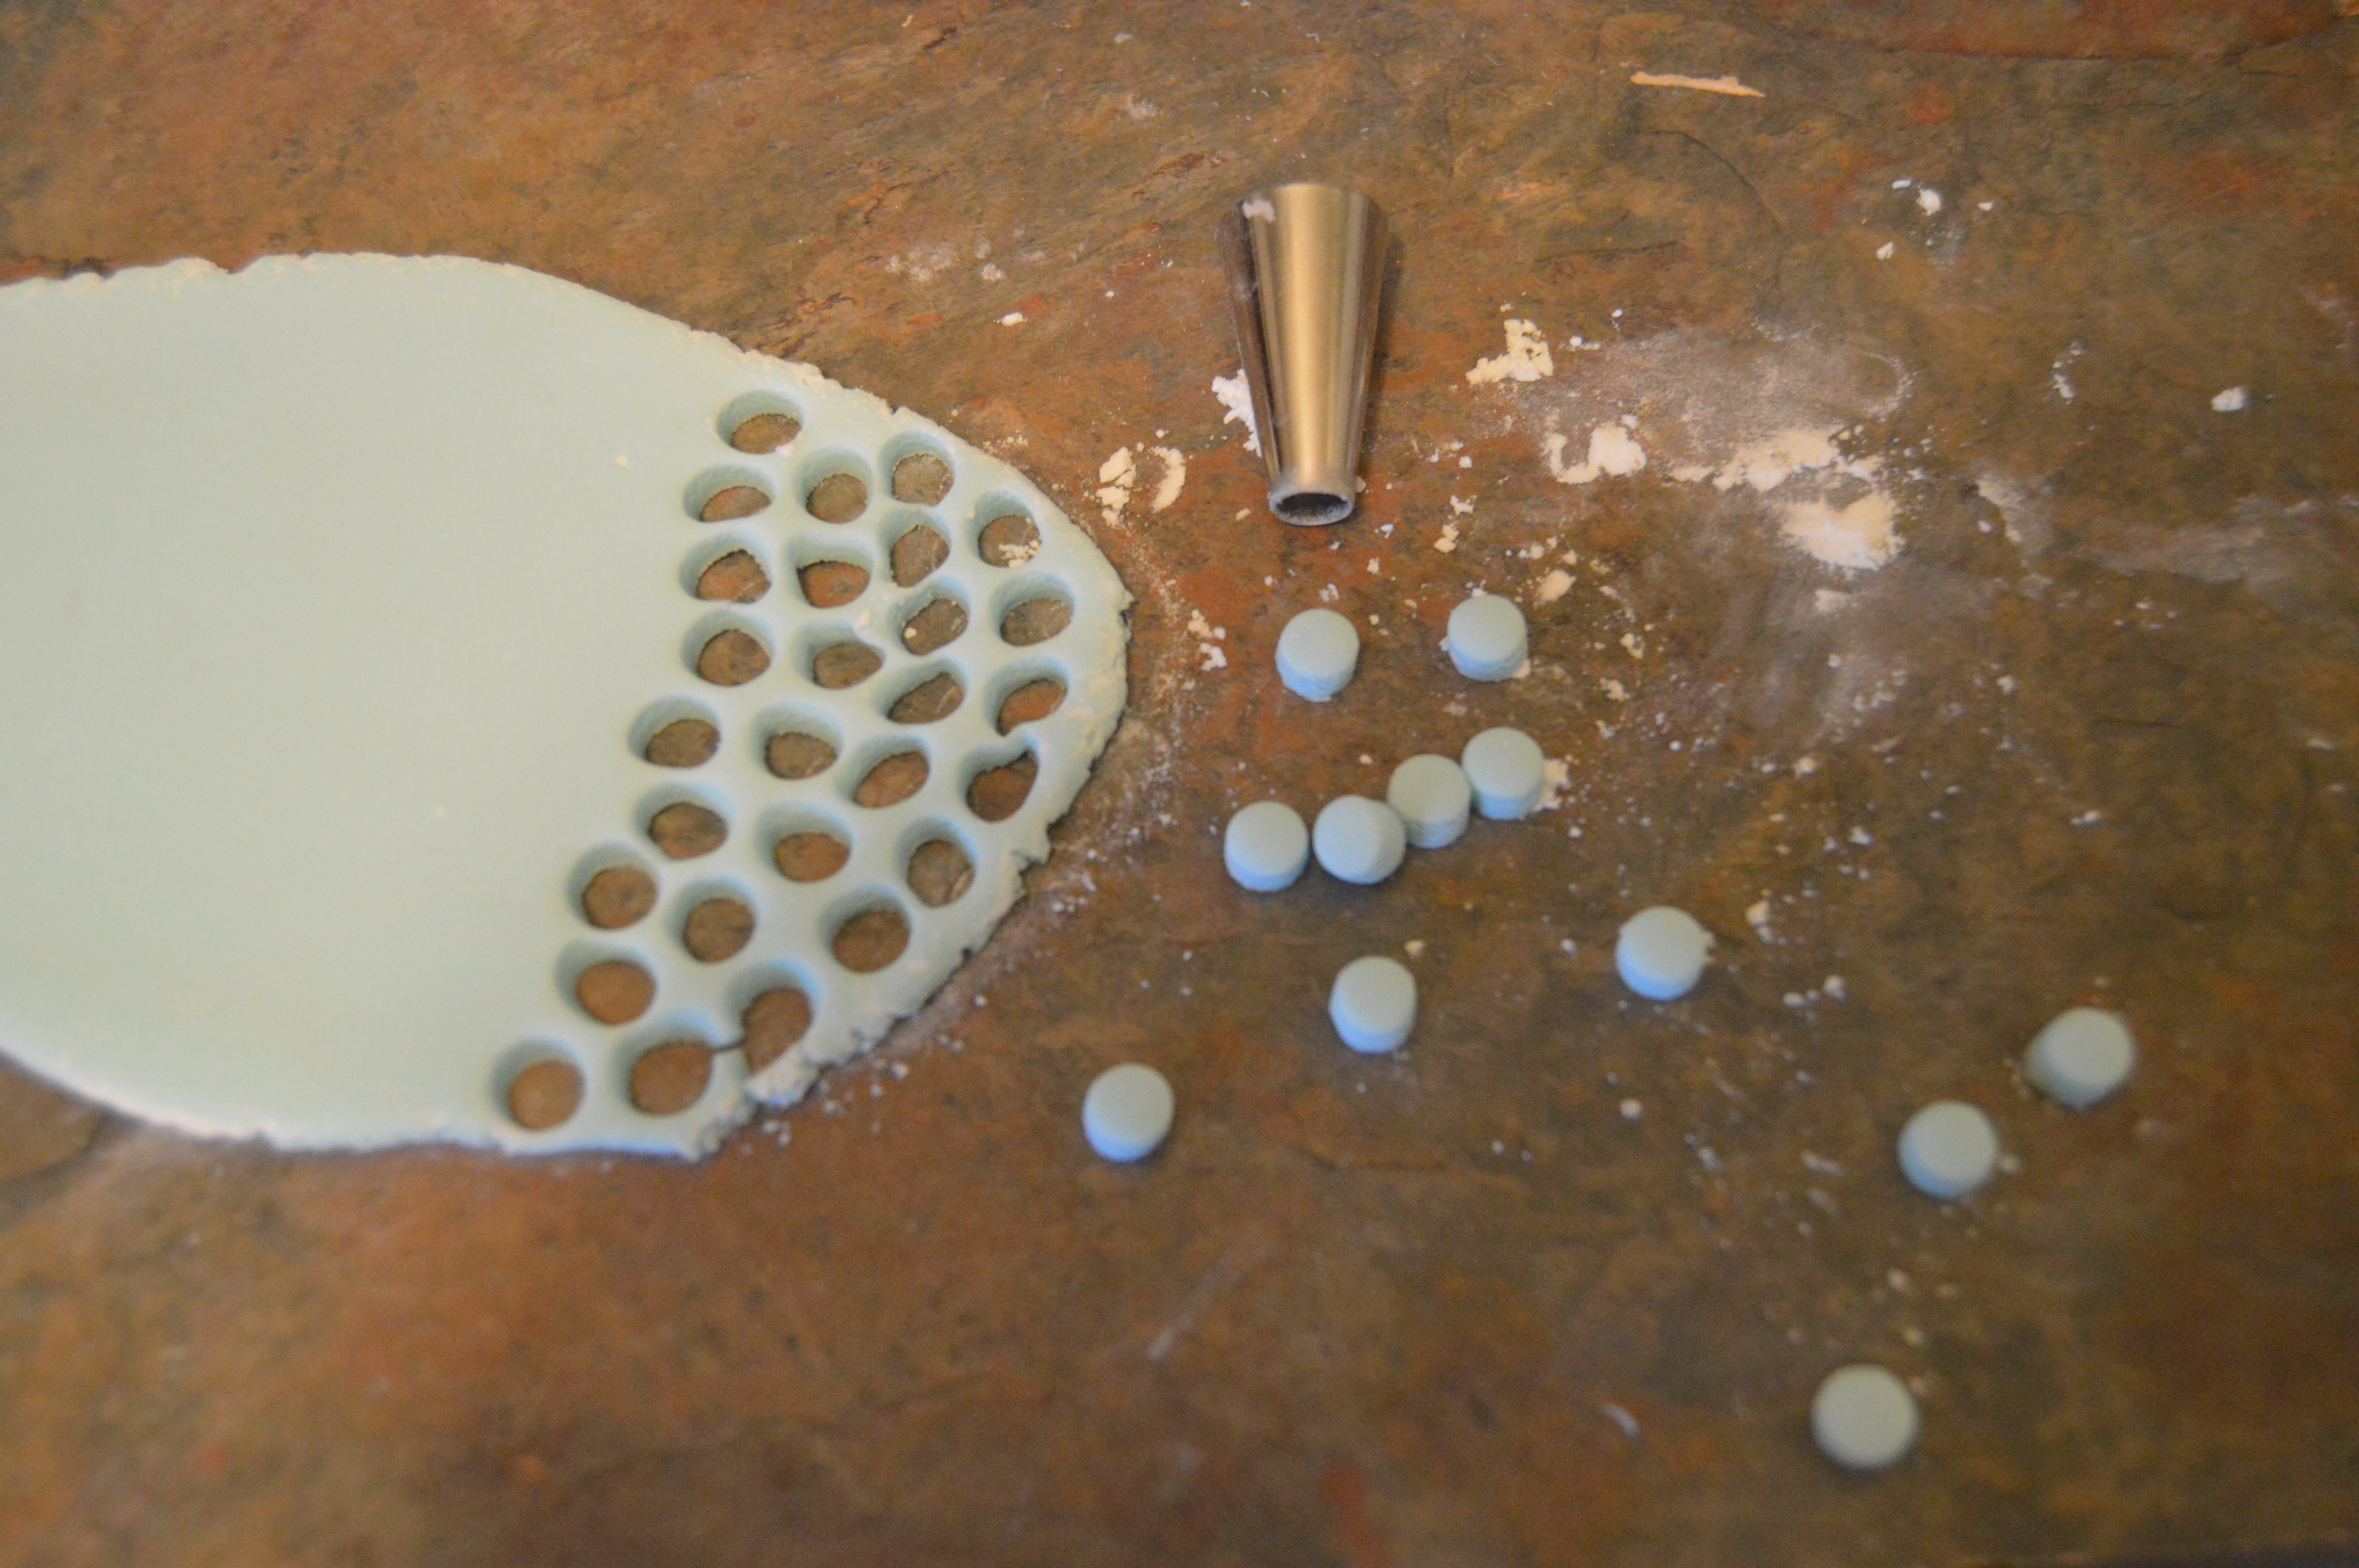
(8) Next, roll out the leftover colored fondants into about 5 mm thickness and cut out circles using the tip of a round pipping tip. You will need 8 circles per rectangular Lego (Yes, it is a lot of work and requires commitment). Stick these circles to the cake board first.
(9) Complete the look by sticking circles to the Legos on top of the cake. That’s all there is to it. Happy caking!

Terry Adido is passionate about showing people how easy it is to recreate restaurant quality meals in the comfort of their kitchens. With a style of cooking he refers to as Afro-European Fusion, his meals are influenced greatly by French and Italian Cuisine with a West African twist. If you love good food, you are in for the ride of your life.
Brilliant! I’ve always wanted to know how the Lego effect is achieved.
Well done!
You are welcome Onyinye.
Wow!!!!
I duff my cap for u,terry!….
Thanks Benita.
this is a great job. kudos Terry. more grease to ur elbow
You are welcome Abiola.
Wonderful, tans will try it n send the pics to you sir
I look forward to the pic Joy.
I love da cake weldone boss…. Very lovely nd Tanks for da tips.
You are welcome Cuttie-Bee
Chi baba da da kokari! Allah ya Baka.
Na gode Gloria. Thanks
This is awesome.. how I wish I know how to bake 🙁
Thanks. Everyone can bake 🙂
Whaoo!Will surely try dis out. Weldone Terry.
You should Wumi.
Wow! Marvellous Cake god
Thanks Tito.
dis is just awesome, kudos bro
Thanks Esthery.
This is truly a beautiful cake made simply by you terry , Excellent work ! Kudos
Thanks Jadesola.
u are so wonderful boss i love this cake
Thanks
Thanks Terry this is splendid
You are welcome Oby.
This is wow!kudos,
You are welcome Lola.
God bless you real good, God almighty will continue to grant you divine inspiration.
Thanks Folake.
Great teacher you are,being wondering for months how you made this😅.thank you for the tutorial.
Thanks Dina. You are welcome.
Sannu da aiki.mr terry,you are indeed terrific in your generosity.pls does this one tier cake also need a cake card before the cake drum?
Nagode Rakiya. Yes, I put a card underneath each tier. It helps with frosting as explained here.
Thanks Terry Adido for the step by step tutorial. I tried out the cake , and I was happy with the outcome.
Awesome! I’m happy to hear that Adaku.
Thanks…gained a lot
You are welcome Funkdan.
Love it! Great instruction. Will be doing this for my 7 yr olds birthday.
Thanks. All the best with your cake.
Love this design. However it seems like an awful amount of fondant. Do you think you could ganache the cake in white, add the colored strips and them use fondant for covering and the folds? Or how would Swiss meringue buttercream work, add colored strips to that and then the fondant!
You might try your suggestions out and see how they turn out. I personally do not think you will get as neat a finishing.