
3D Fondant Eiffel Tower

This is a tutorial on how I made this 3D Fondant Eiffel Tower cake topper. This tower topper is great for Paris themed cakes. As you will see below, the process is really quite straight forward.

TOOLS:
(1) Eiffel Tower Printout
(2) Rolling Pin
(3) Pizza Cutter or Sharp Blade
(4) Scissors
(5) Paint Brush
(6) Ruler and Pen/Pencil
EDIBLE COMPONENTS:
(1) Fondant. I use Marshmallow Fondant
(2) Vodka
(3) Water
(4) Silver Luster Dust
(5) Silver Sprinkles
(6) Silver Pearl Sugar
(7) Melted White Chocolate
(8) Black Color Paste

THE PROCESS:
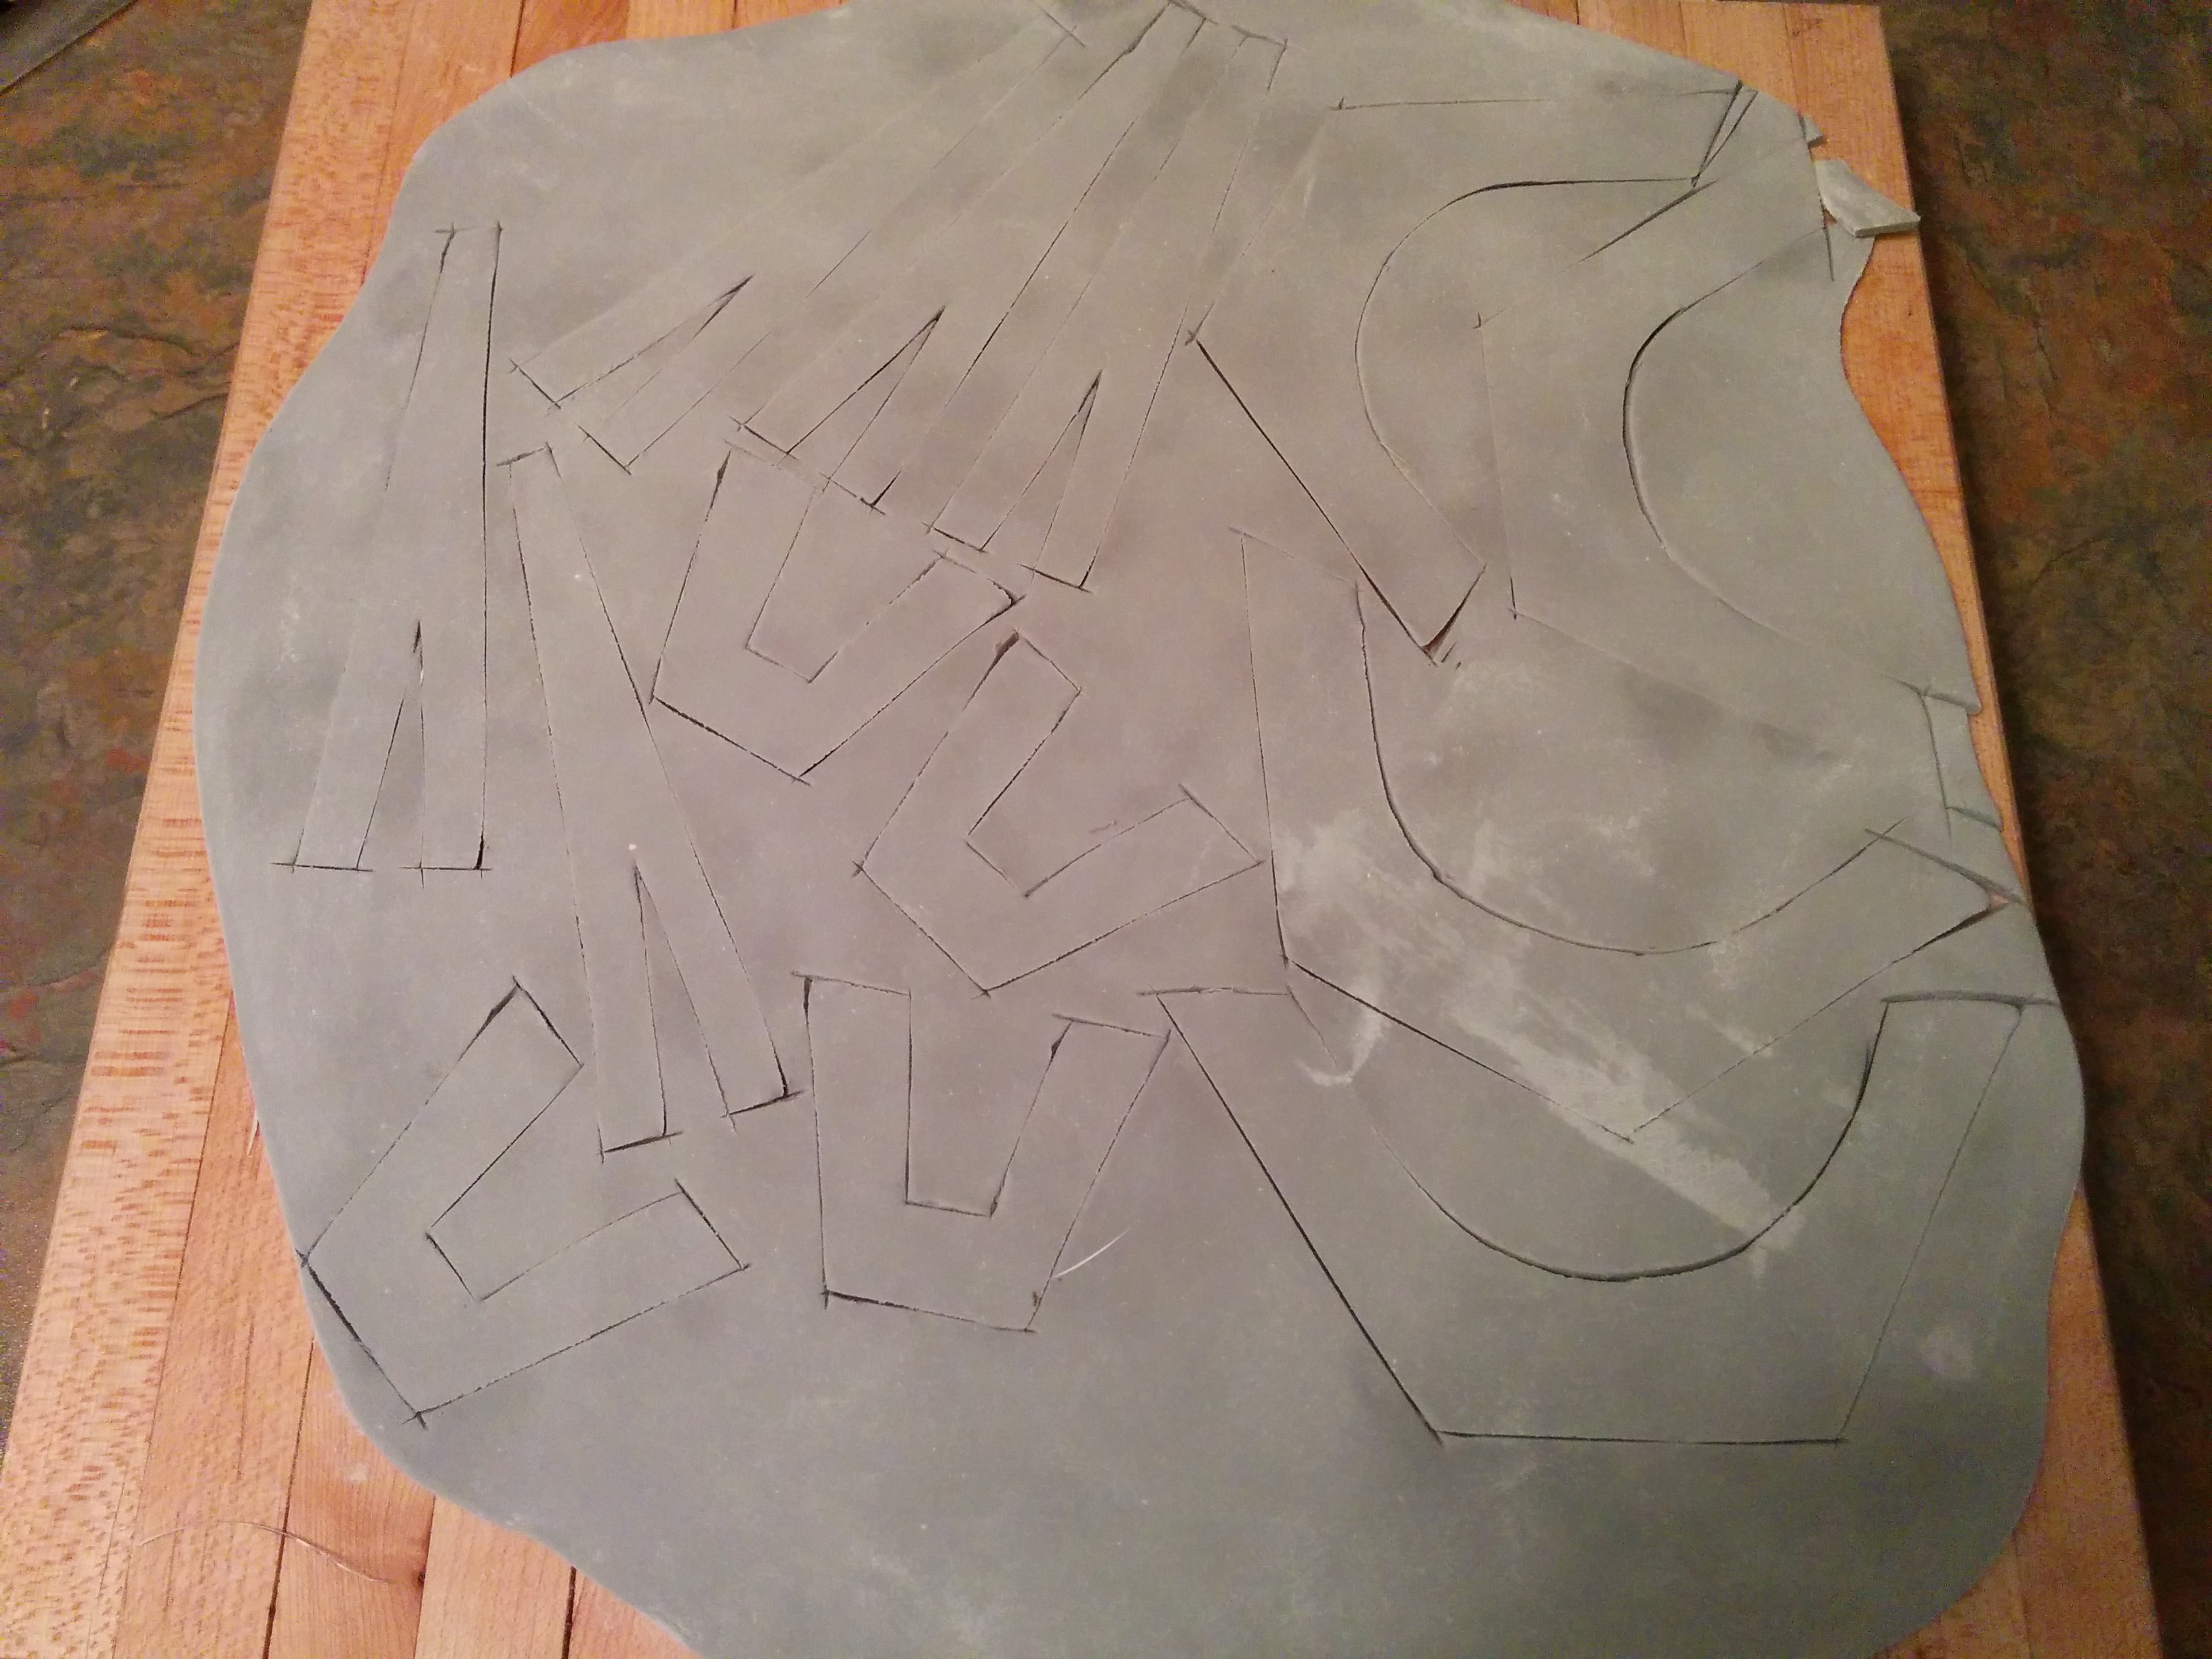
(1) Print out a picture of the Eiffel Tower from the net. Pictures of the Eiffel Tower usually show the Eiffel Tower divided into 3 or 4 separate levels. The sides of each level is usually curved inwards and you will find protrusions at the point where each level meets. Using your ruler and pen, make the sides of the tower straight as opposed to curved. If you leave it curved, the sides wont come together when you want to stick the parts of tower together. Also cut out any protrusions as these will become obstacles when the fondant dries. After editing the drawing, divide the tower into 4 parts using a scissors and cut out the template with a sharp blade.


Note: You will notice that I divided the picture into 3 templates. I later on had to divide the top portion of the tower into 2 as it was too long to manage during the gluing process.
(2) Color your fondant grey using some black color paste. A little color goes a long way. Roll out the fondant into about a third of a centimeter thick. It is best if the fondant is firm. Thus using some “old” dehydrated fondant will be great here. The firmer the fondant, the sharper the cuts and the most chance it will not lose shape during cutting. If your fondant is too soft, leave it to air a bit after rolling before cutting out the parts.
(3) Using the templates and a sharp blade, cut out the various levels of the tower. Each level should have 4 parts. Also make a pointed part which will be attached to the top of the tower.
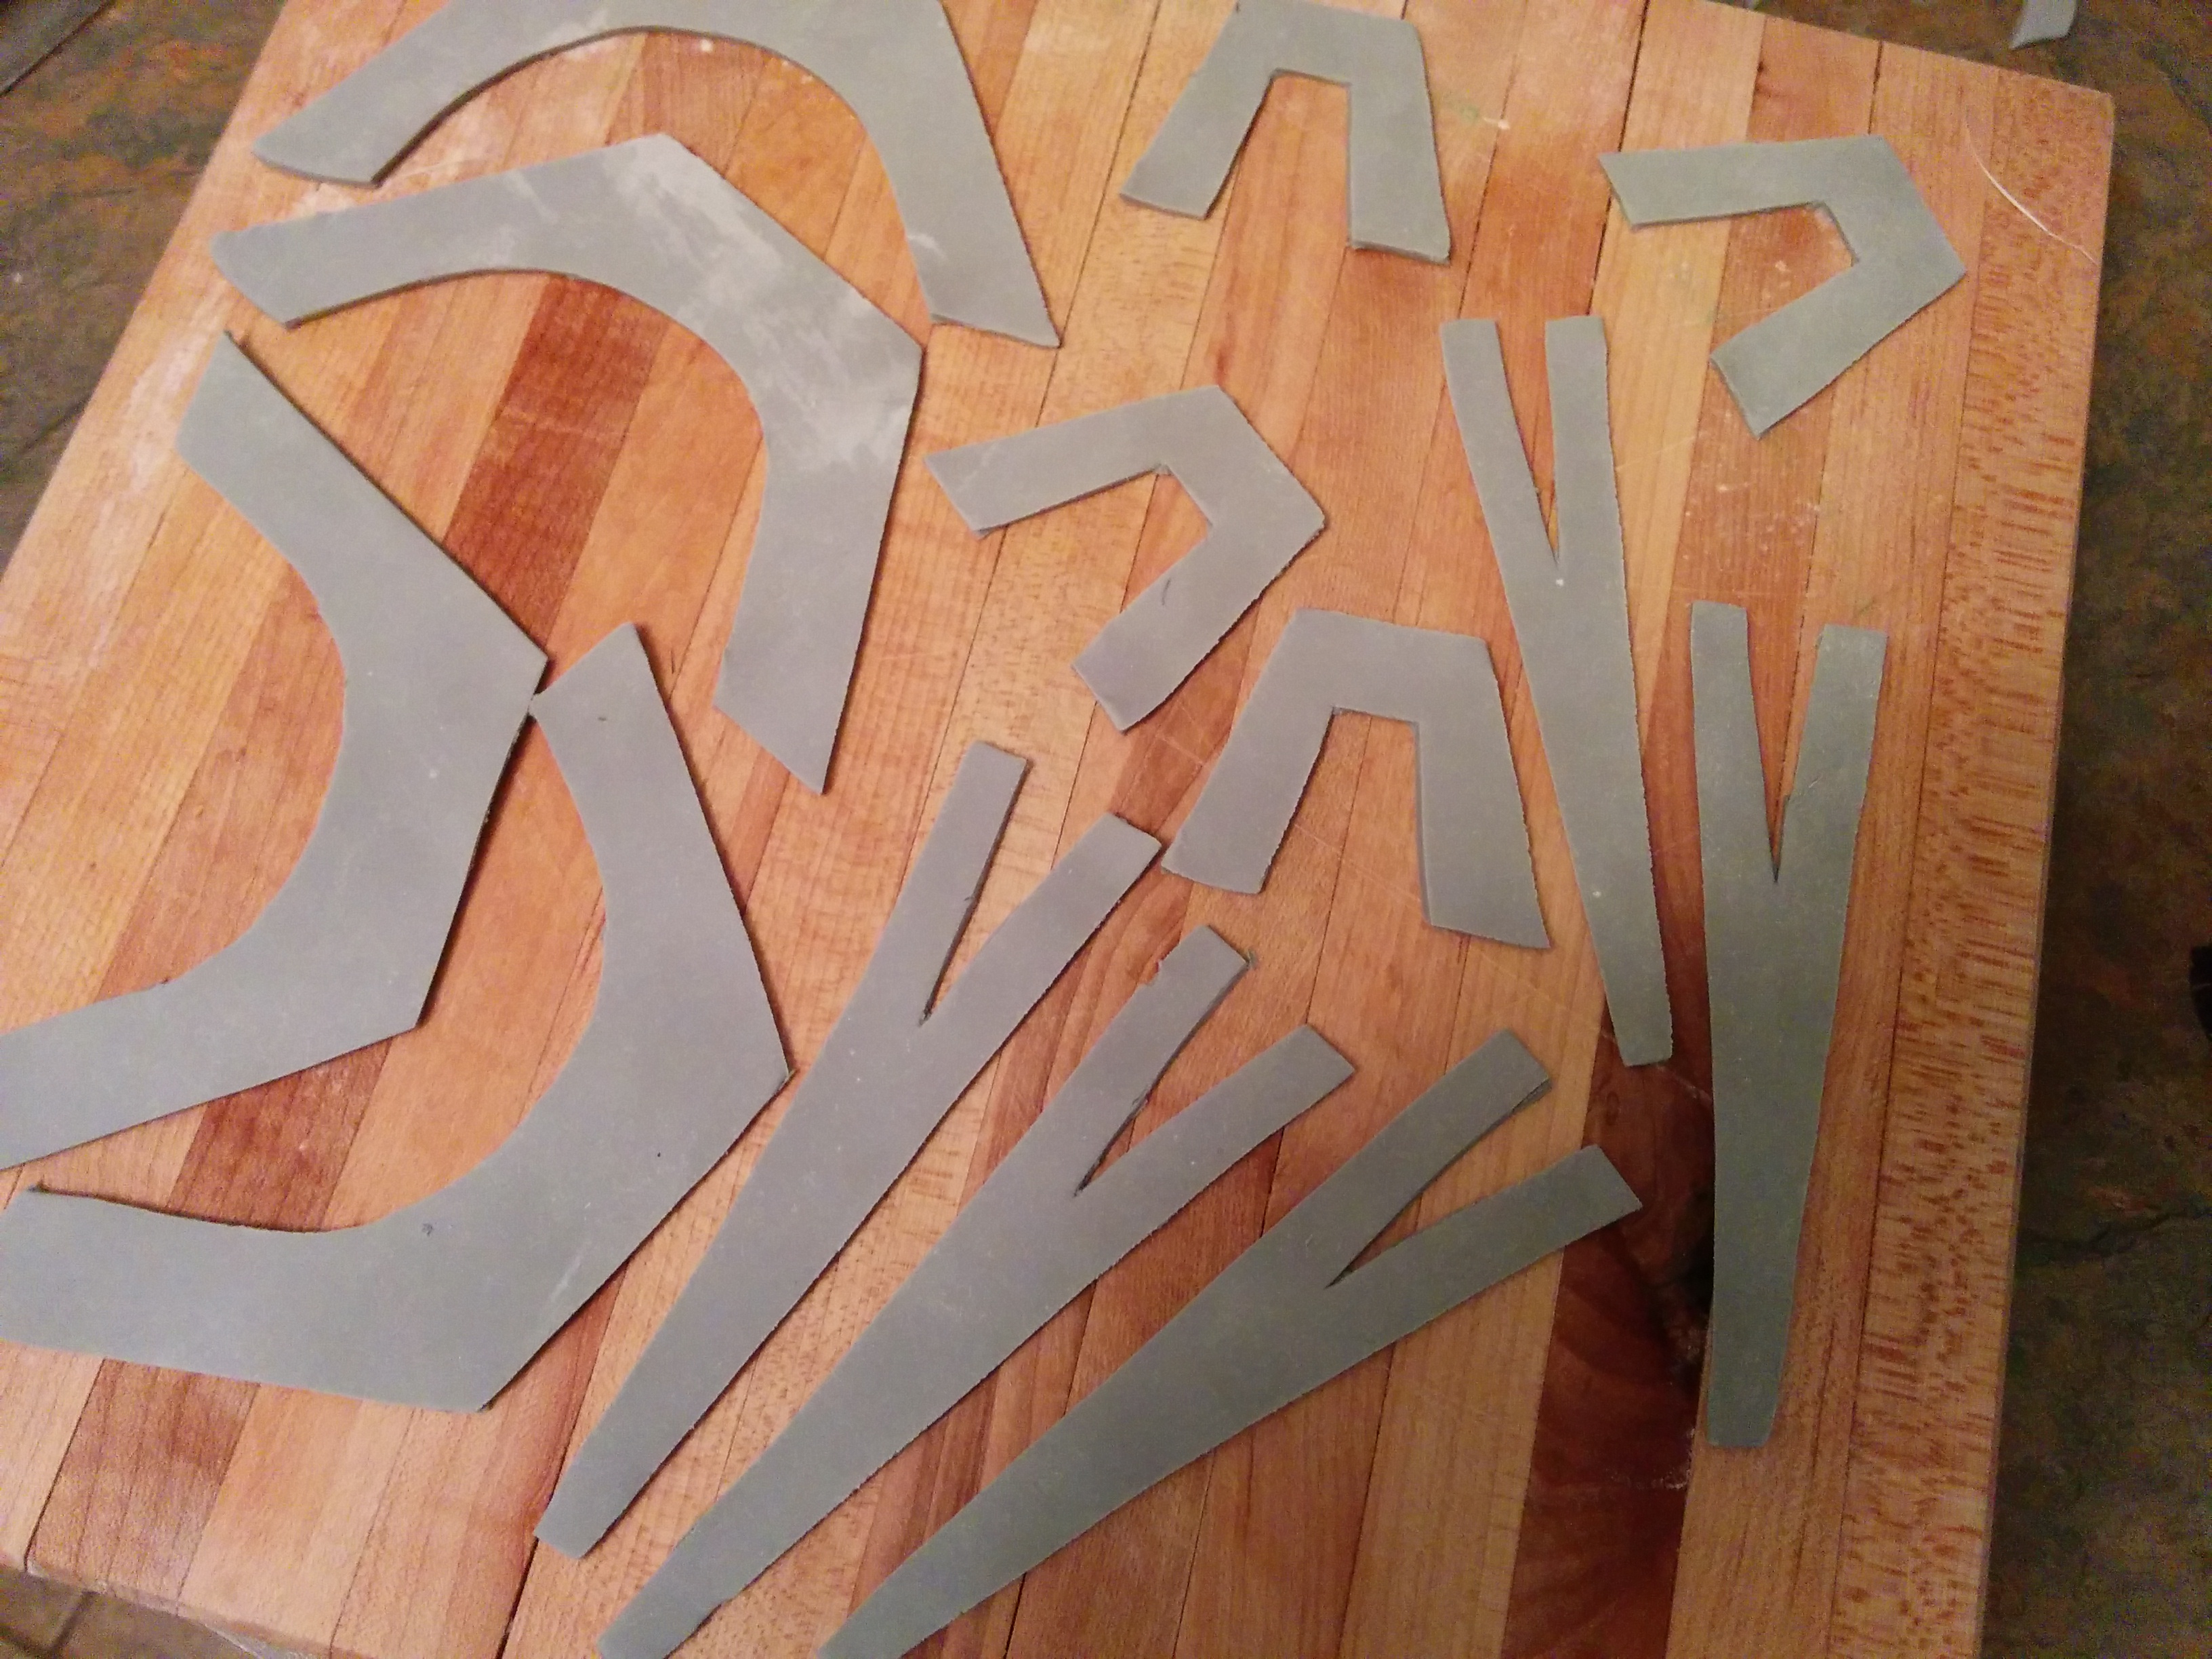
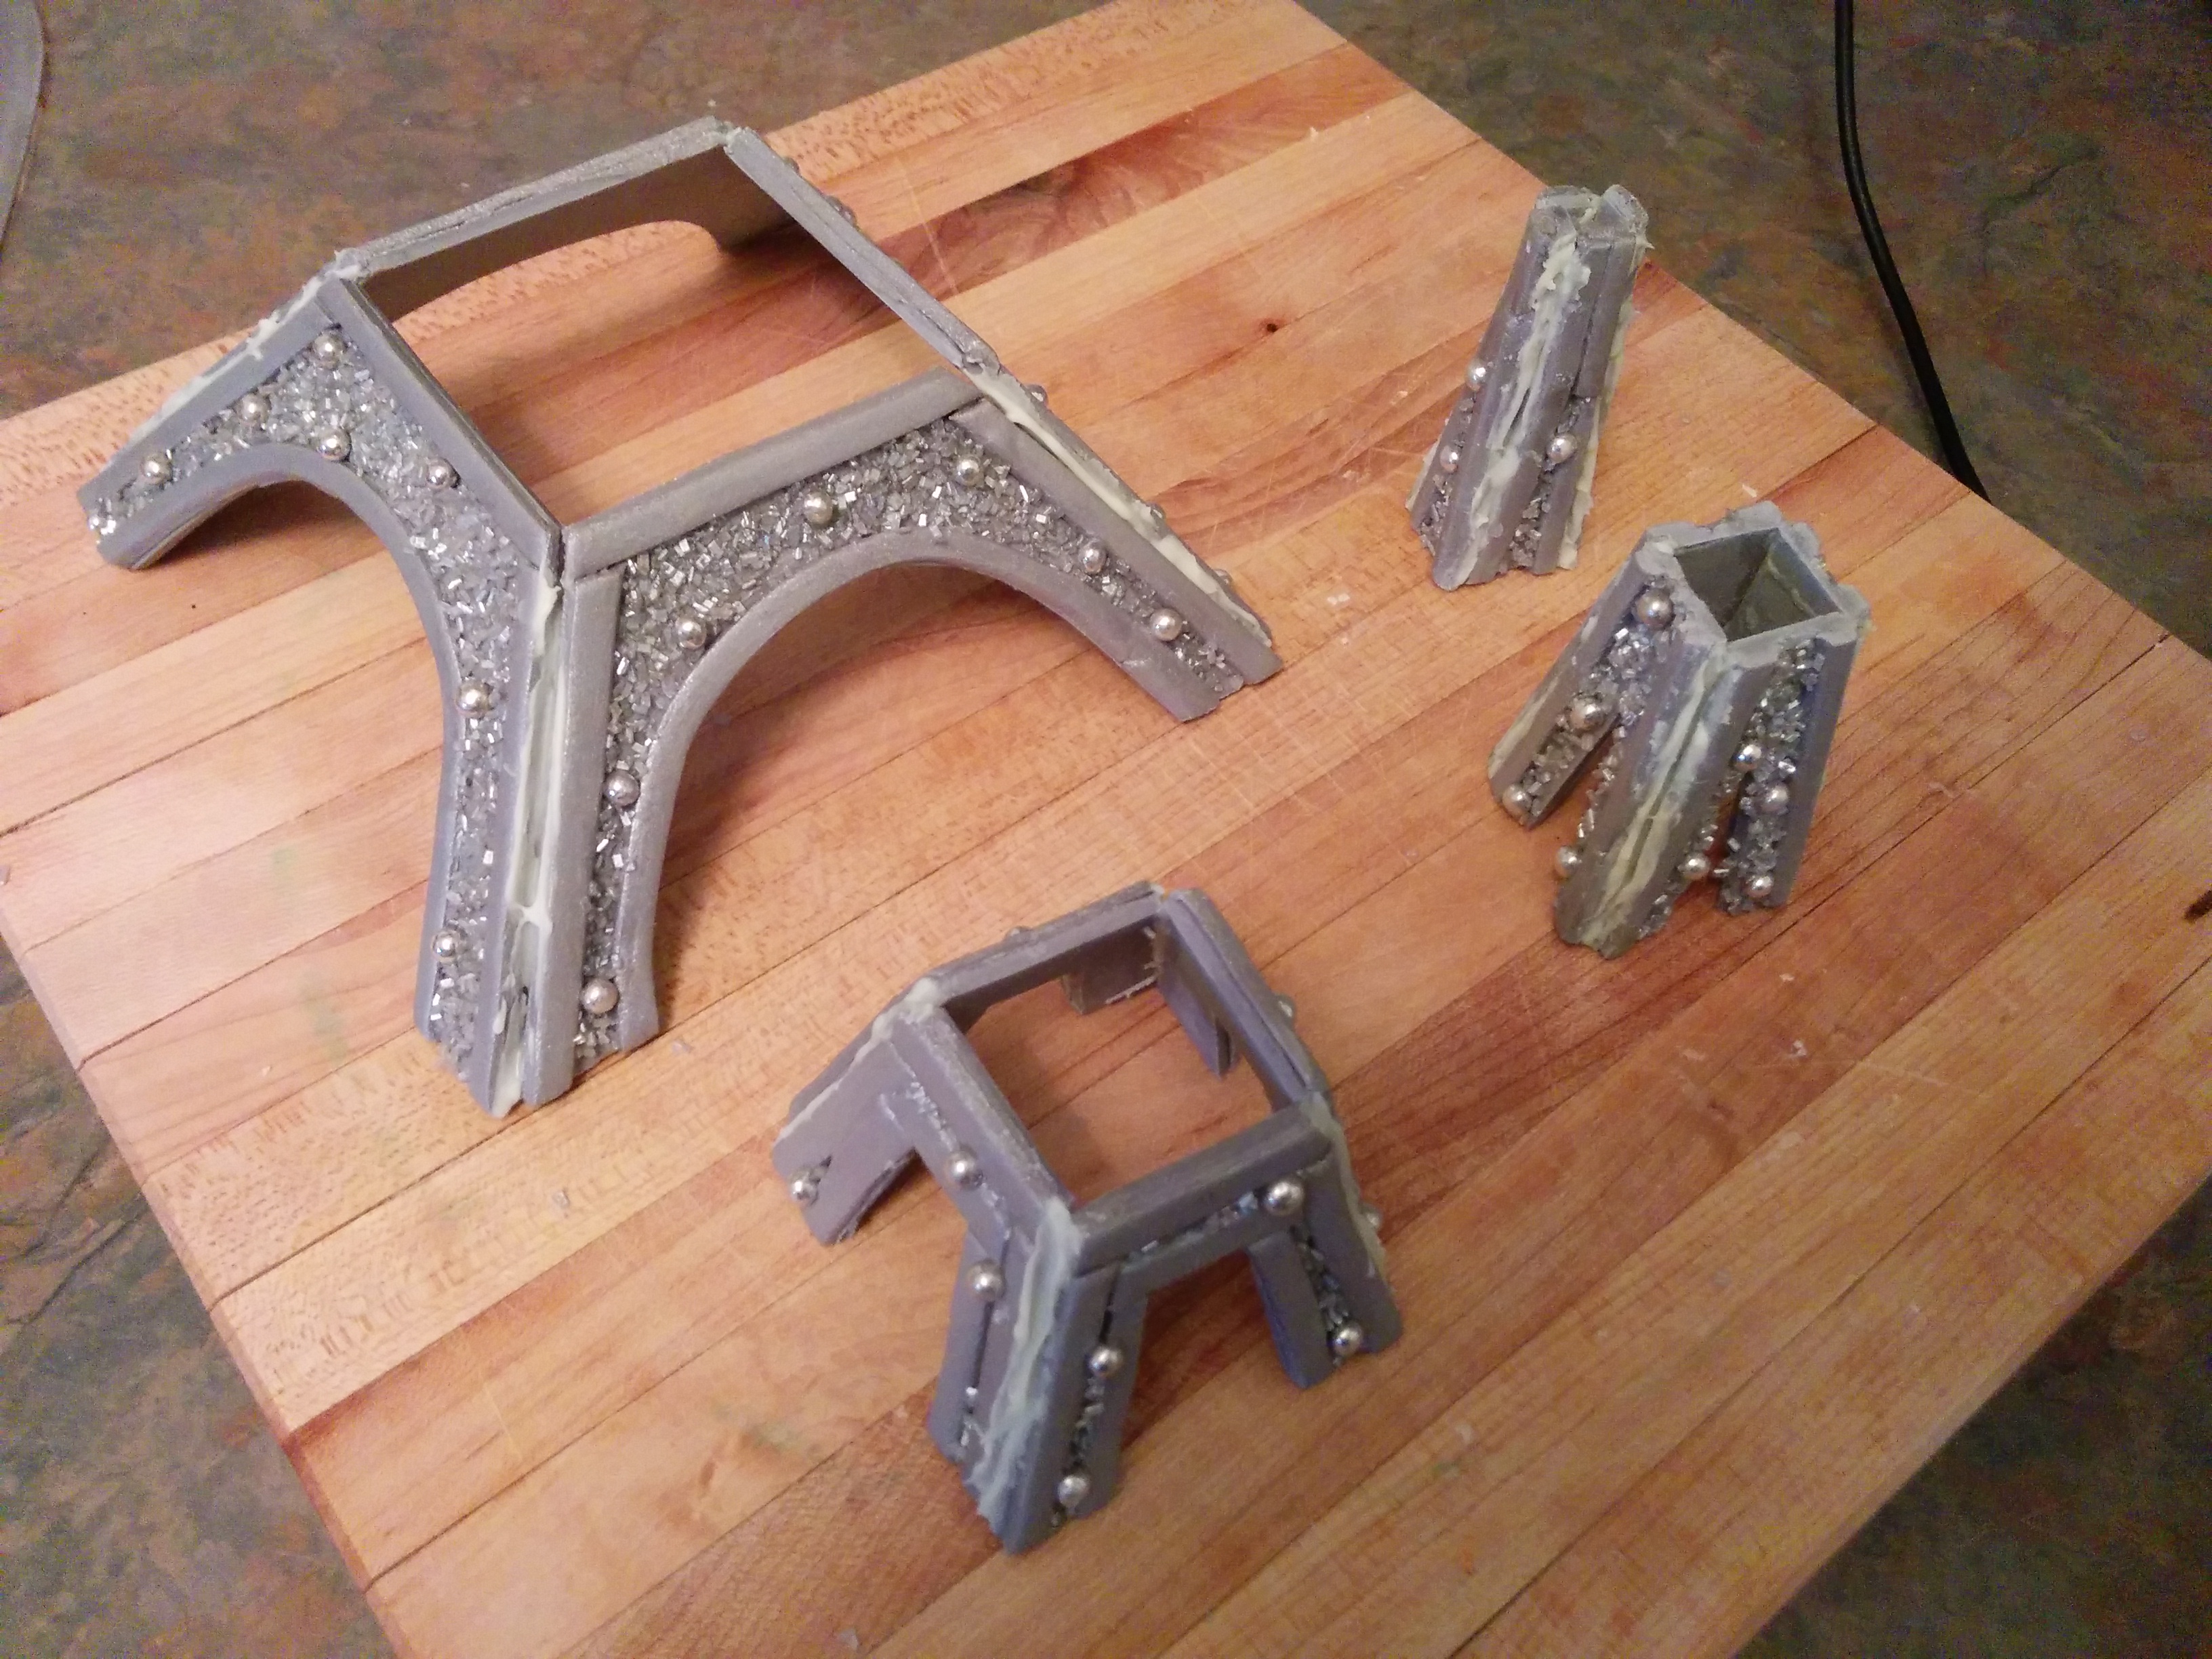
(4) Bring the leftover fondant together, roll it out into the same thickness as the tower and cut out thin strips about 5 mm thick. (To be honest, I didn’t have to do this. The was enough space between the fondant cutouts to produce these strips). Stick these strips at the top and sides of each tower part as shown in the picture below. Use water or vodka to stick them on the tower parts.
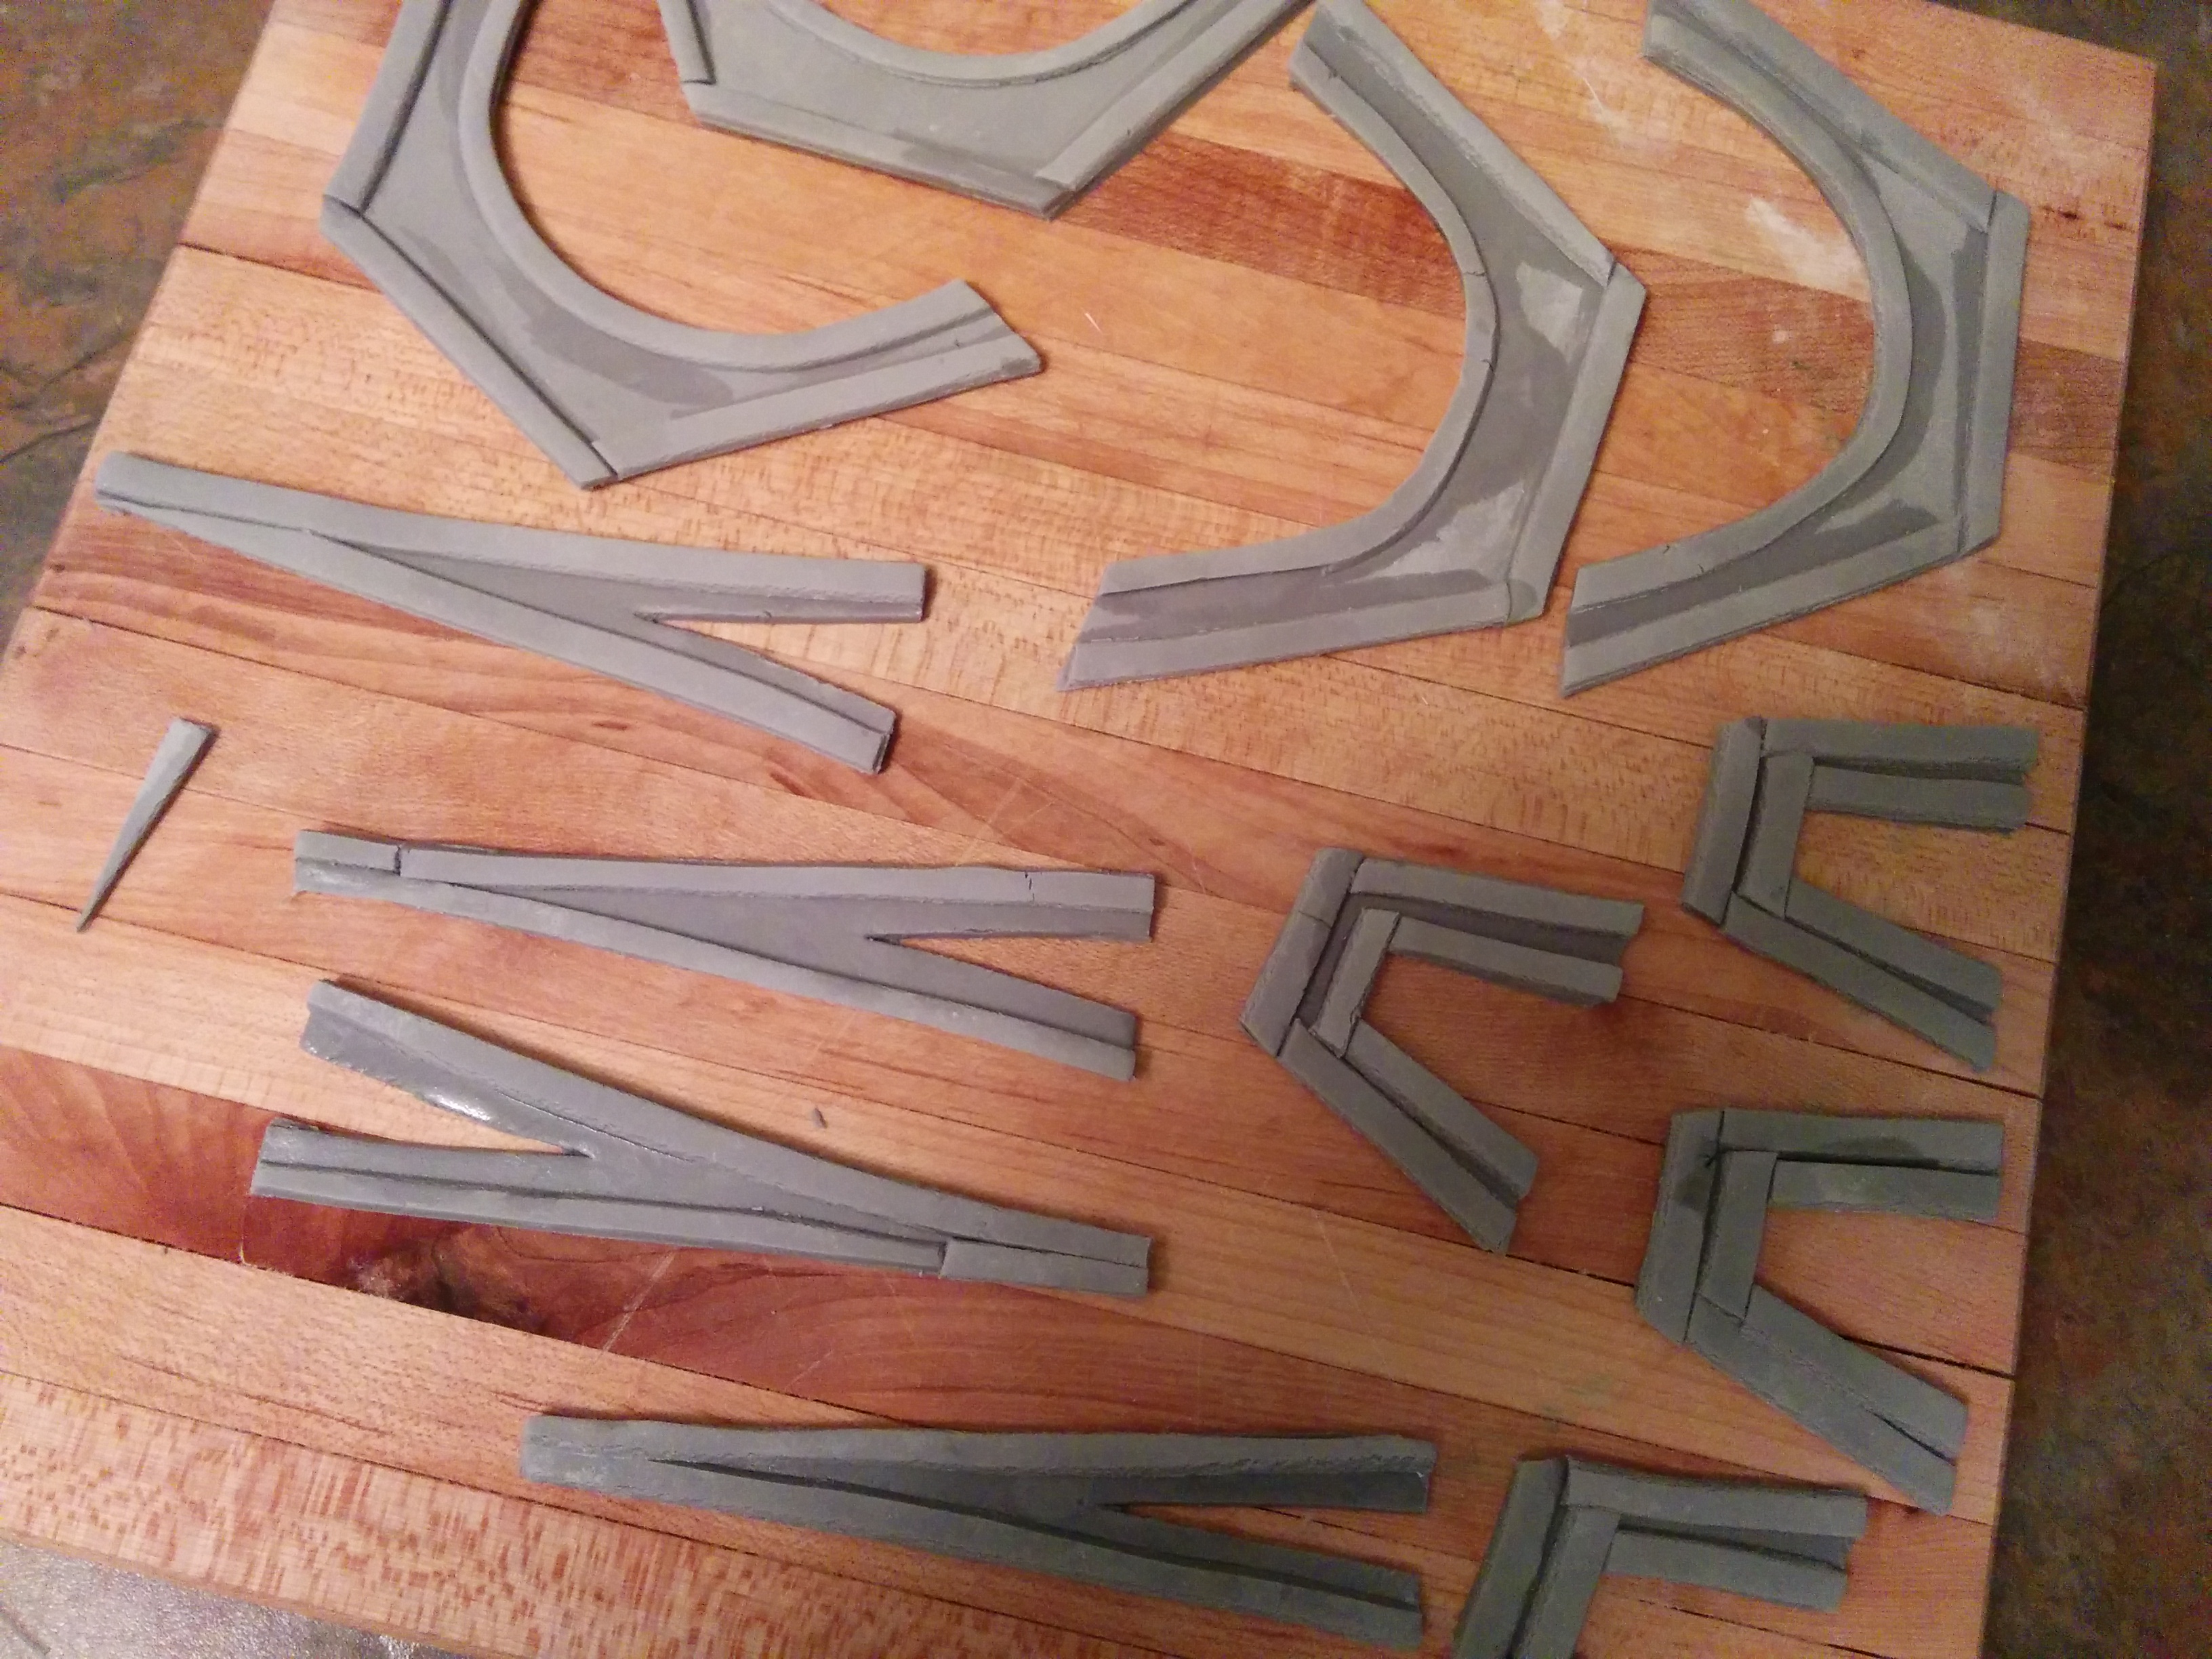
(5) Mix some silver luster dust with vodka and brush the elevated portions of the tower parts.
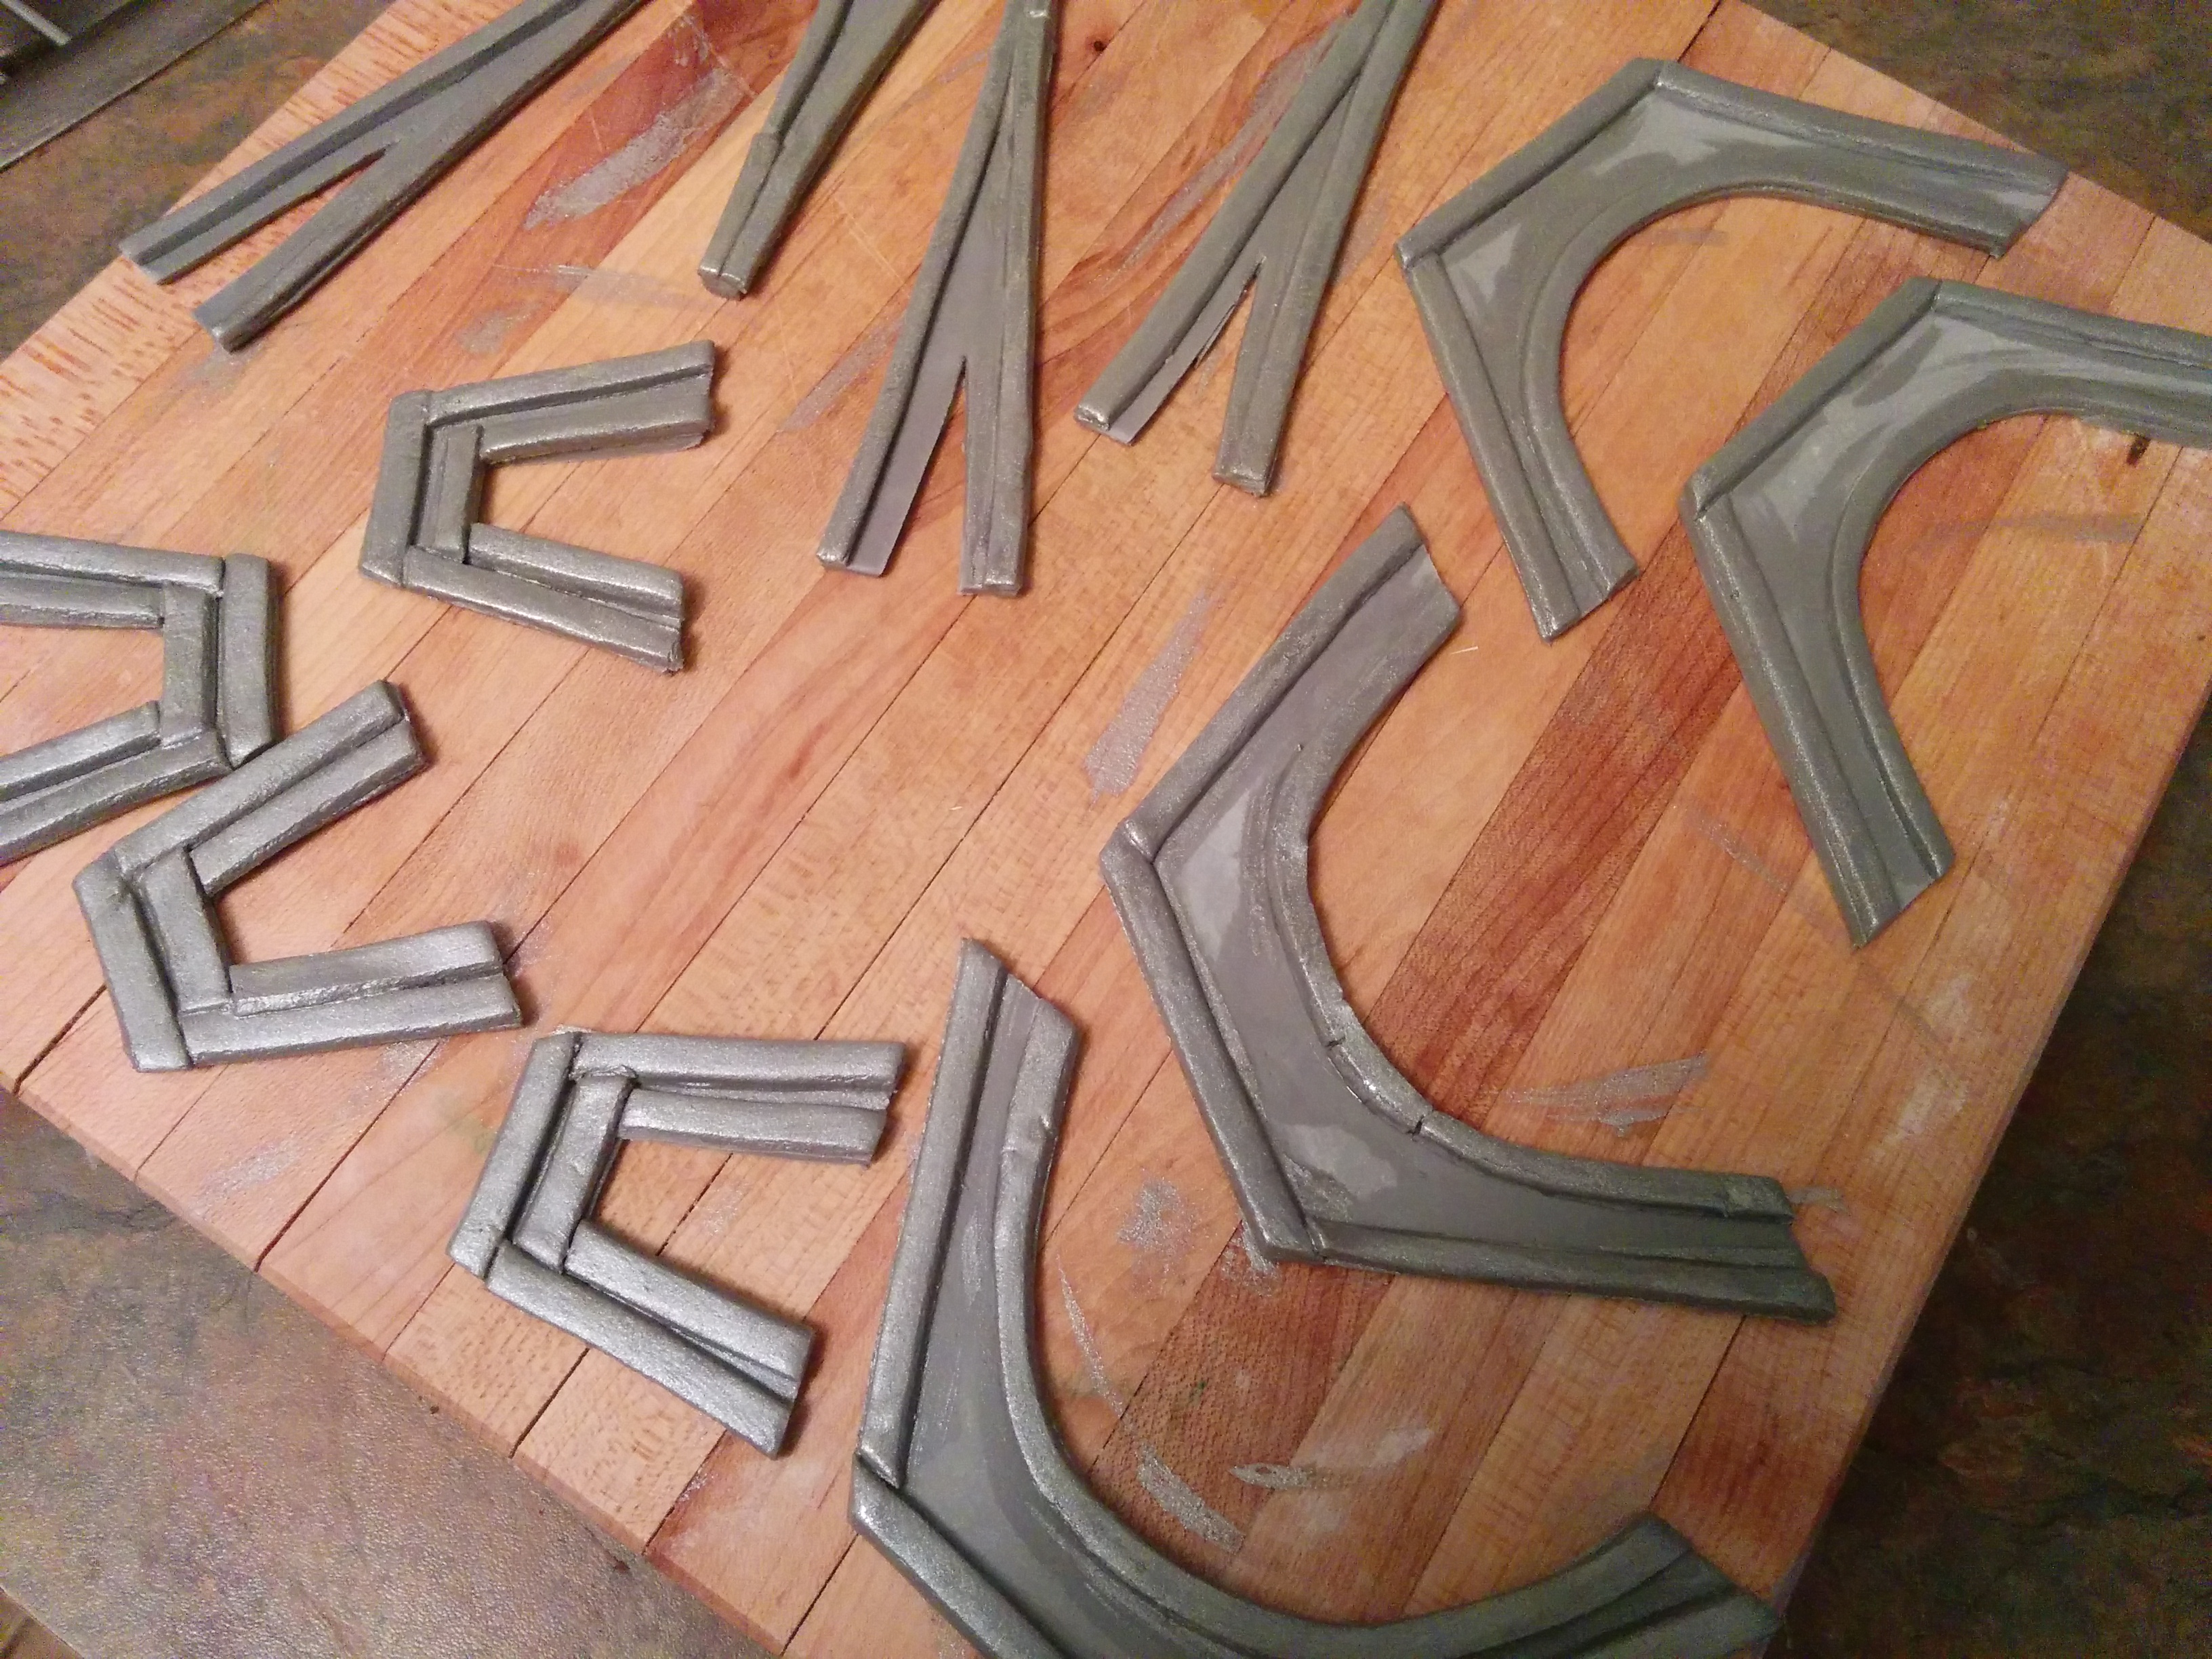
(6) Brush the inside of the tower parts with some vodka and fill them with silver sprinkles. Place some silver pearl sugar at random locations. Leave these to dry. Now, the longer time they have to dry the better. Mine dried over night as my fondant was quite firm.

(7) After the tower parts have dried, use some melted white chocolate to build the several levels. As you will notice, I had to divide the top level into two in order to make it easier to stick together. Leave these to dry for about an hour.
(8) Build the rest of the tower by sticking them on each other with melted chocolate. Mix some more silver luster dust with vodka and paint over any exposed white chocolate. Allow this to dry for about an hour before using.
Terry Adido is passionate about showing people how easy it is to recreate restaurant quality meals in the comfort of their kitchens. With a style of cooking he refers to as Afro-European Fusion, his meals are influenced greatly by French and Italian Cuisine with a West African twist. If you love good food, you are in for the ride of your life.
Wow! You really simplified this as usual.
Thanks Terry.
You are welcome Liz.
This is so wonderful.
You really put in more time and attention to achieve this. Kudos Terry, it is a job well done.
Thanks Chinyere. I appreciate your feedback.
waow!! u mk tins dat seem “impossible” for non professional bakers like u so easy n simpe!! more power tu ur gifted mind n hands!!! kip it up
Thanks Aisha. With passion, there is nothing you can’t achieve.
This is very luvly. Thanks for sharing
You are welcoe Ibelema.
Whao…Terry great job from a great bakers
Thanks Kemi.
Wow thank you Terry for sharing….
You are welcome Lolo Taiwo.
Am short of words, cos I look wit lots of interest 2 c d outcome, indeed it ws great. May Godbless u 4 sharing dis idea with a learner lik me
You are welcome.
my 8 year old daughter is crazy about Paris…she would LOVE this on her birthday cake in a couple of weeks and thanks to the simple instructions I think I might be able to pull it off! Thanks so much!!
Glad you found the tutorial useful Tracy. I’m sure she will be head over hills in love with it. I’m also crazy about Paris.
Hi thanks for sharing this, you are very talented! Just wondering what is the purple base made from that you’ve put between the Eiffel Tower and the cake? Thanks
Thanks. Its a cake card covered with purple fondant.