
The Making of a Diaper Bag Cake.

This is a tutorial on how I made this diaper bag cake. This cake is one which involves a lot of layering, draping and trimming. Having said that, it really is not difficult to make. Below, I will be showing you the steps I took to achieve the look of this cake. You can see several views of this cake here.
THE PROCESS:
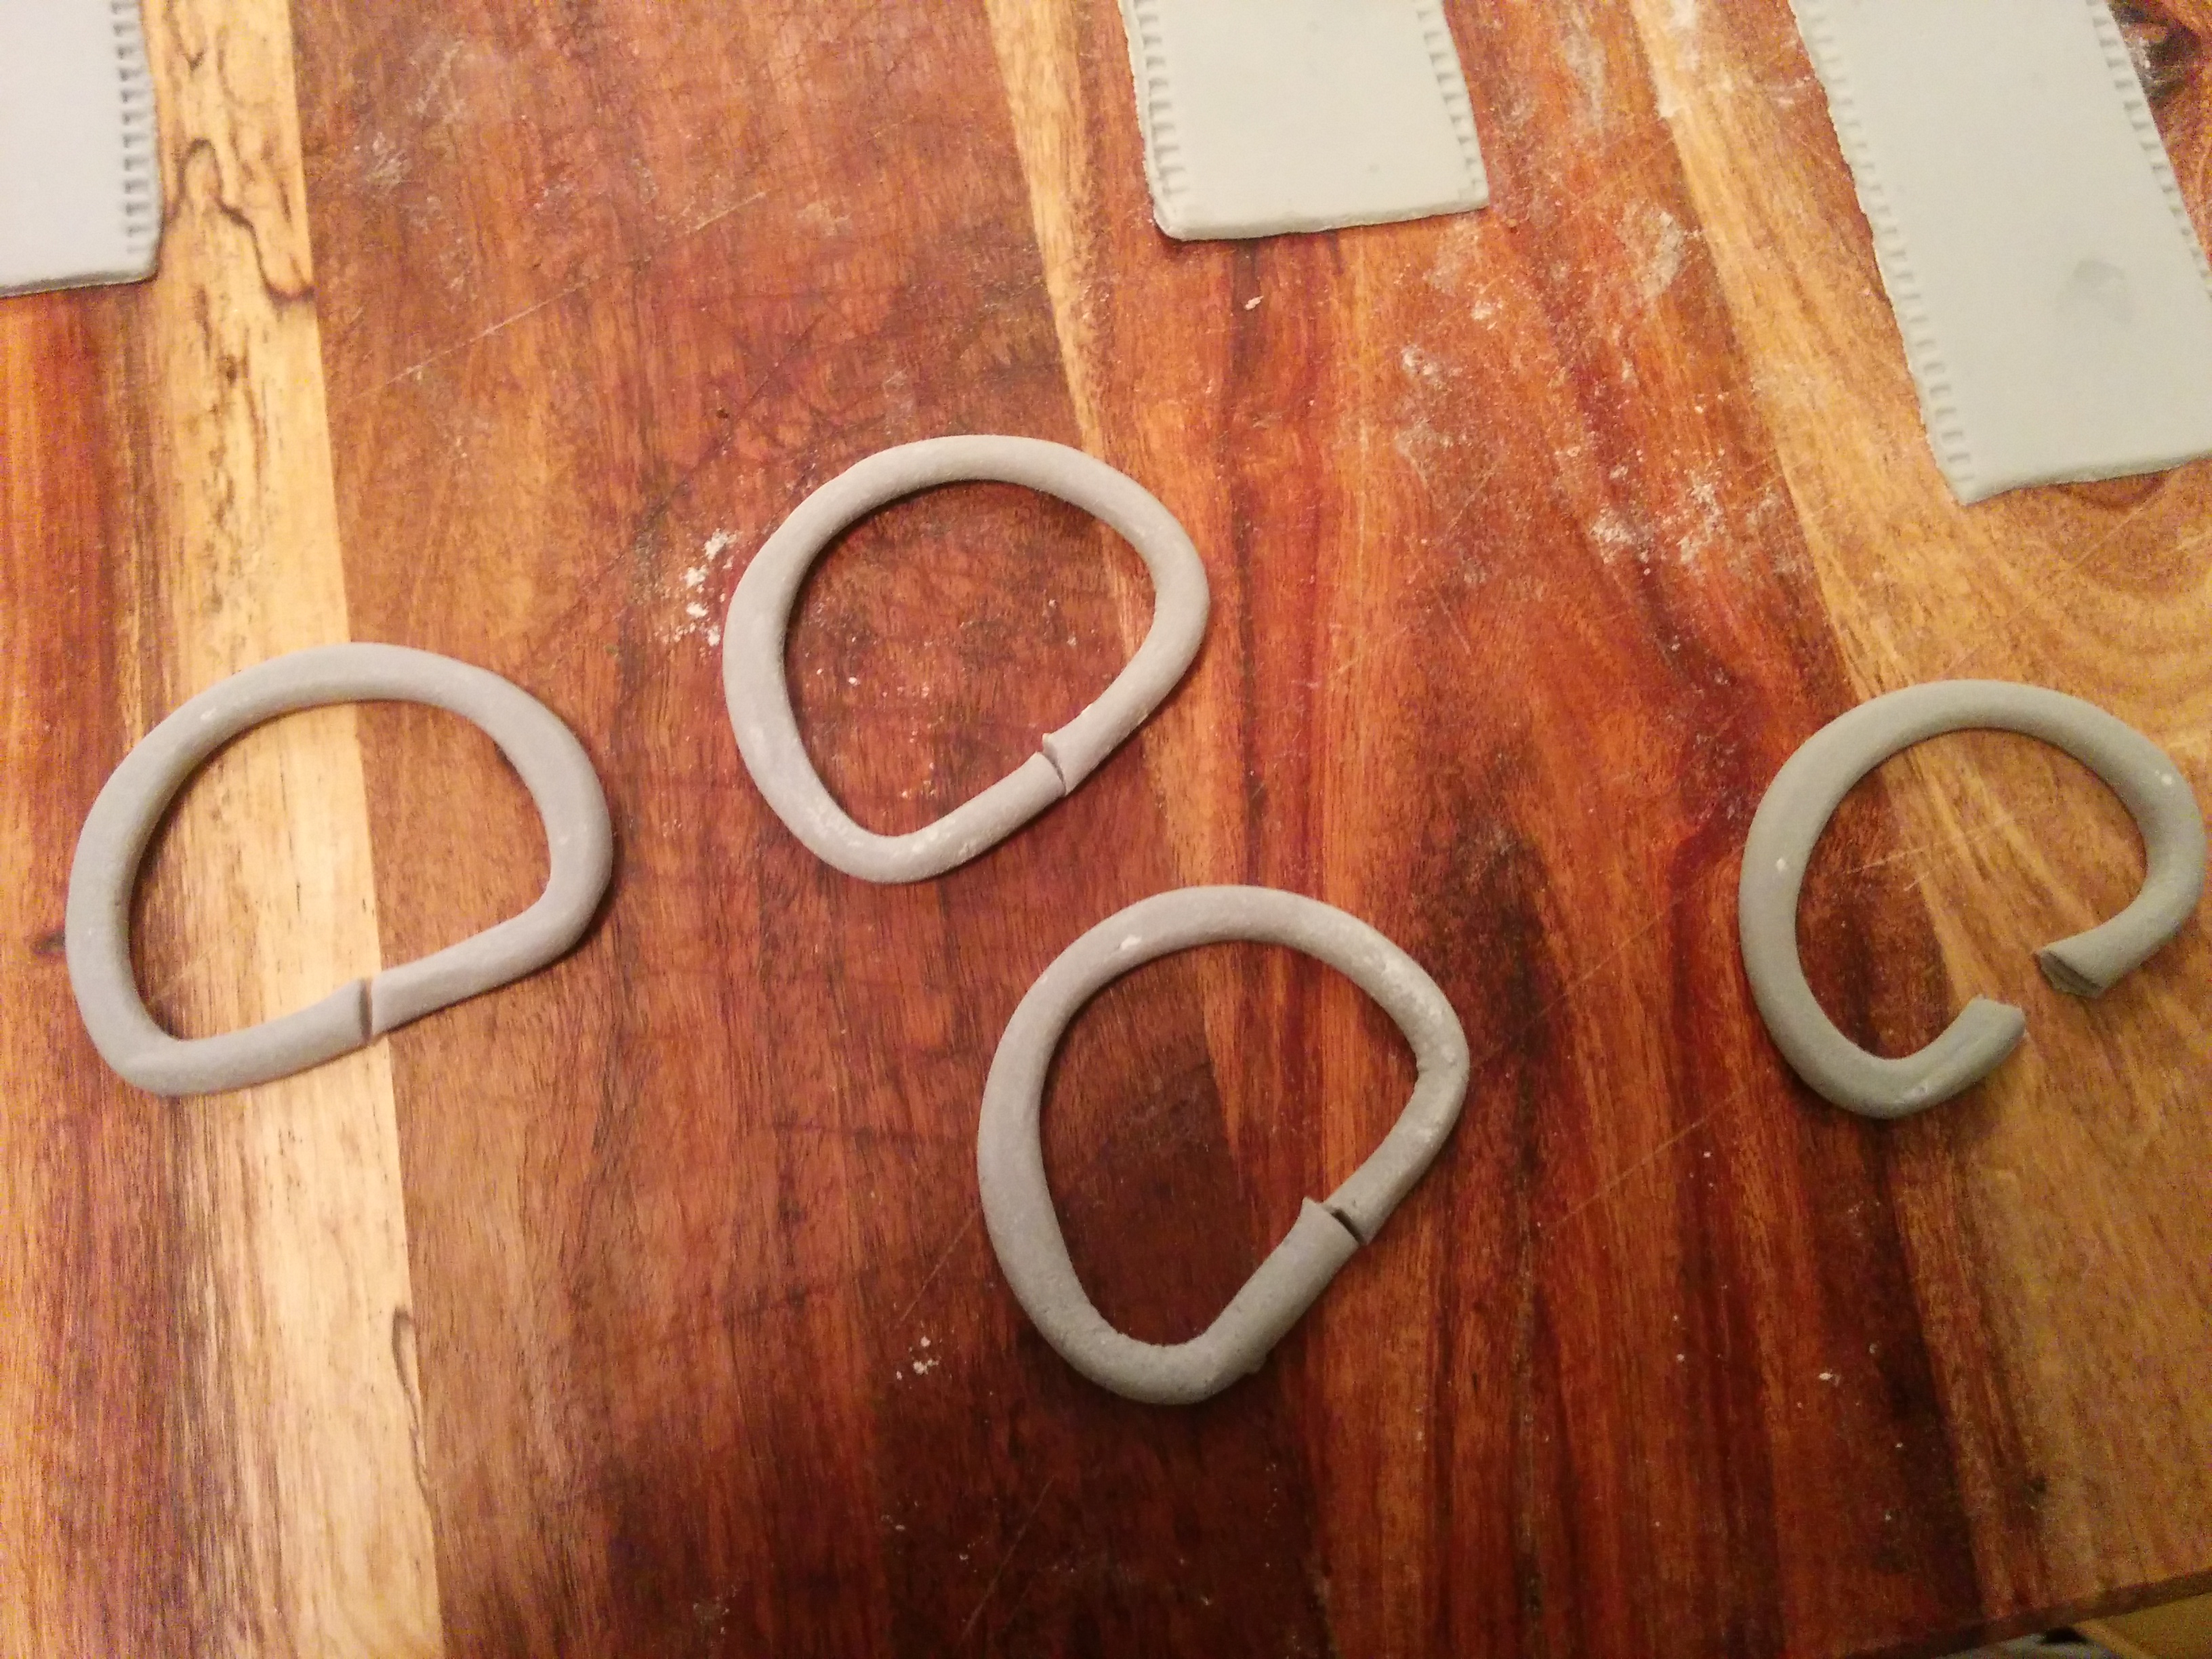
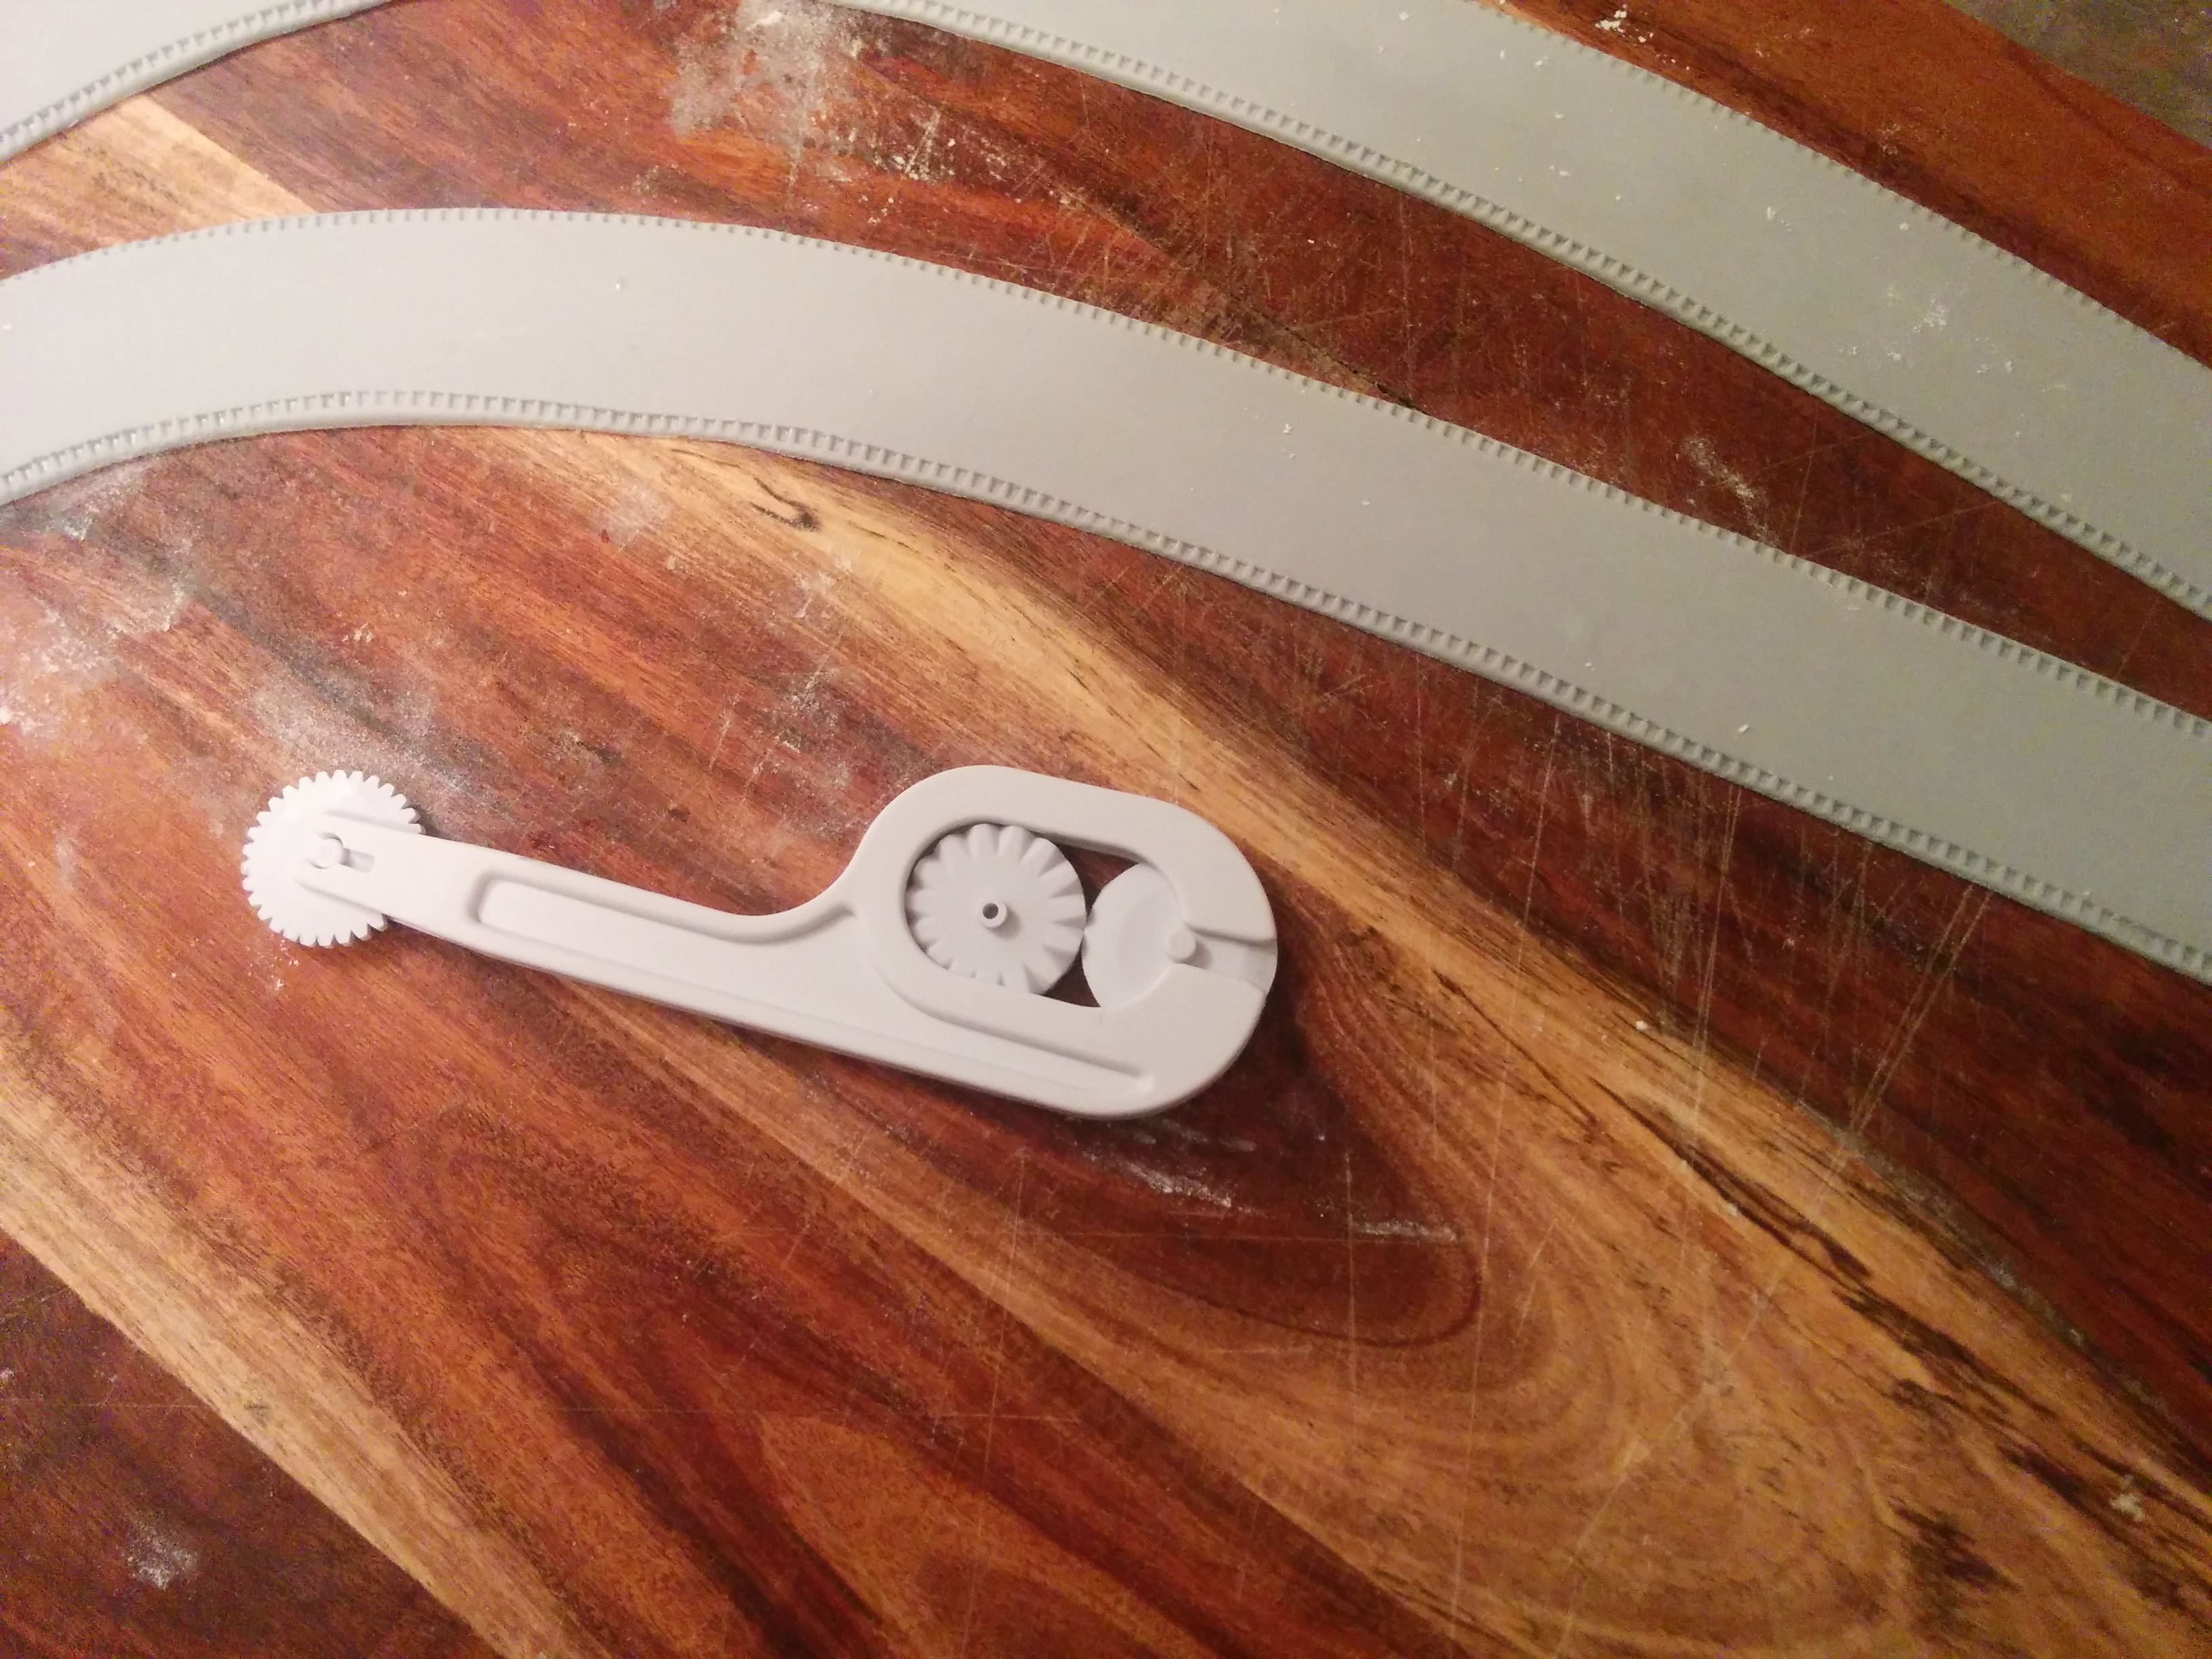
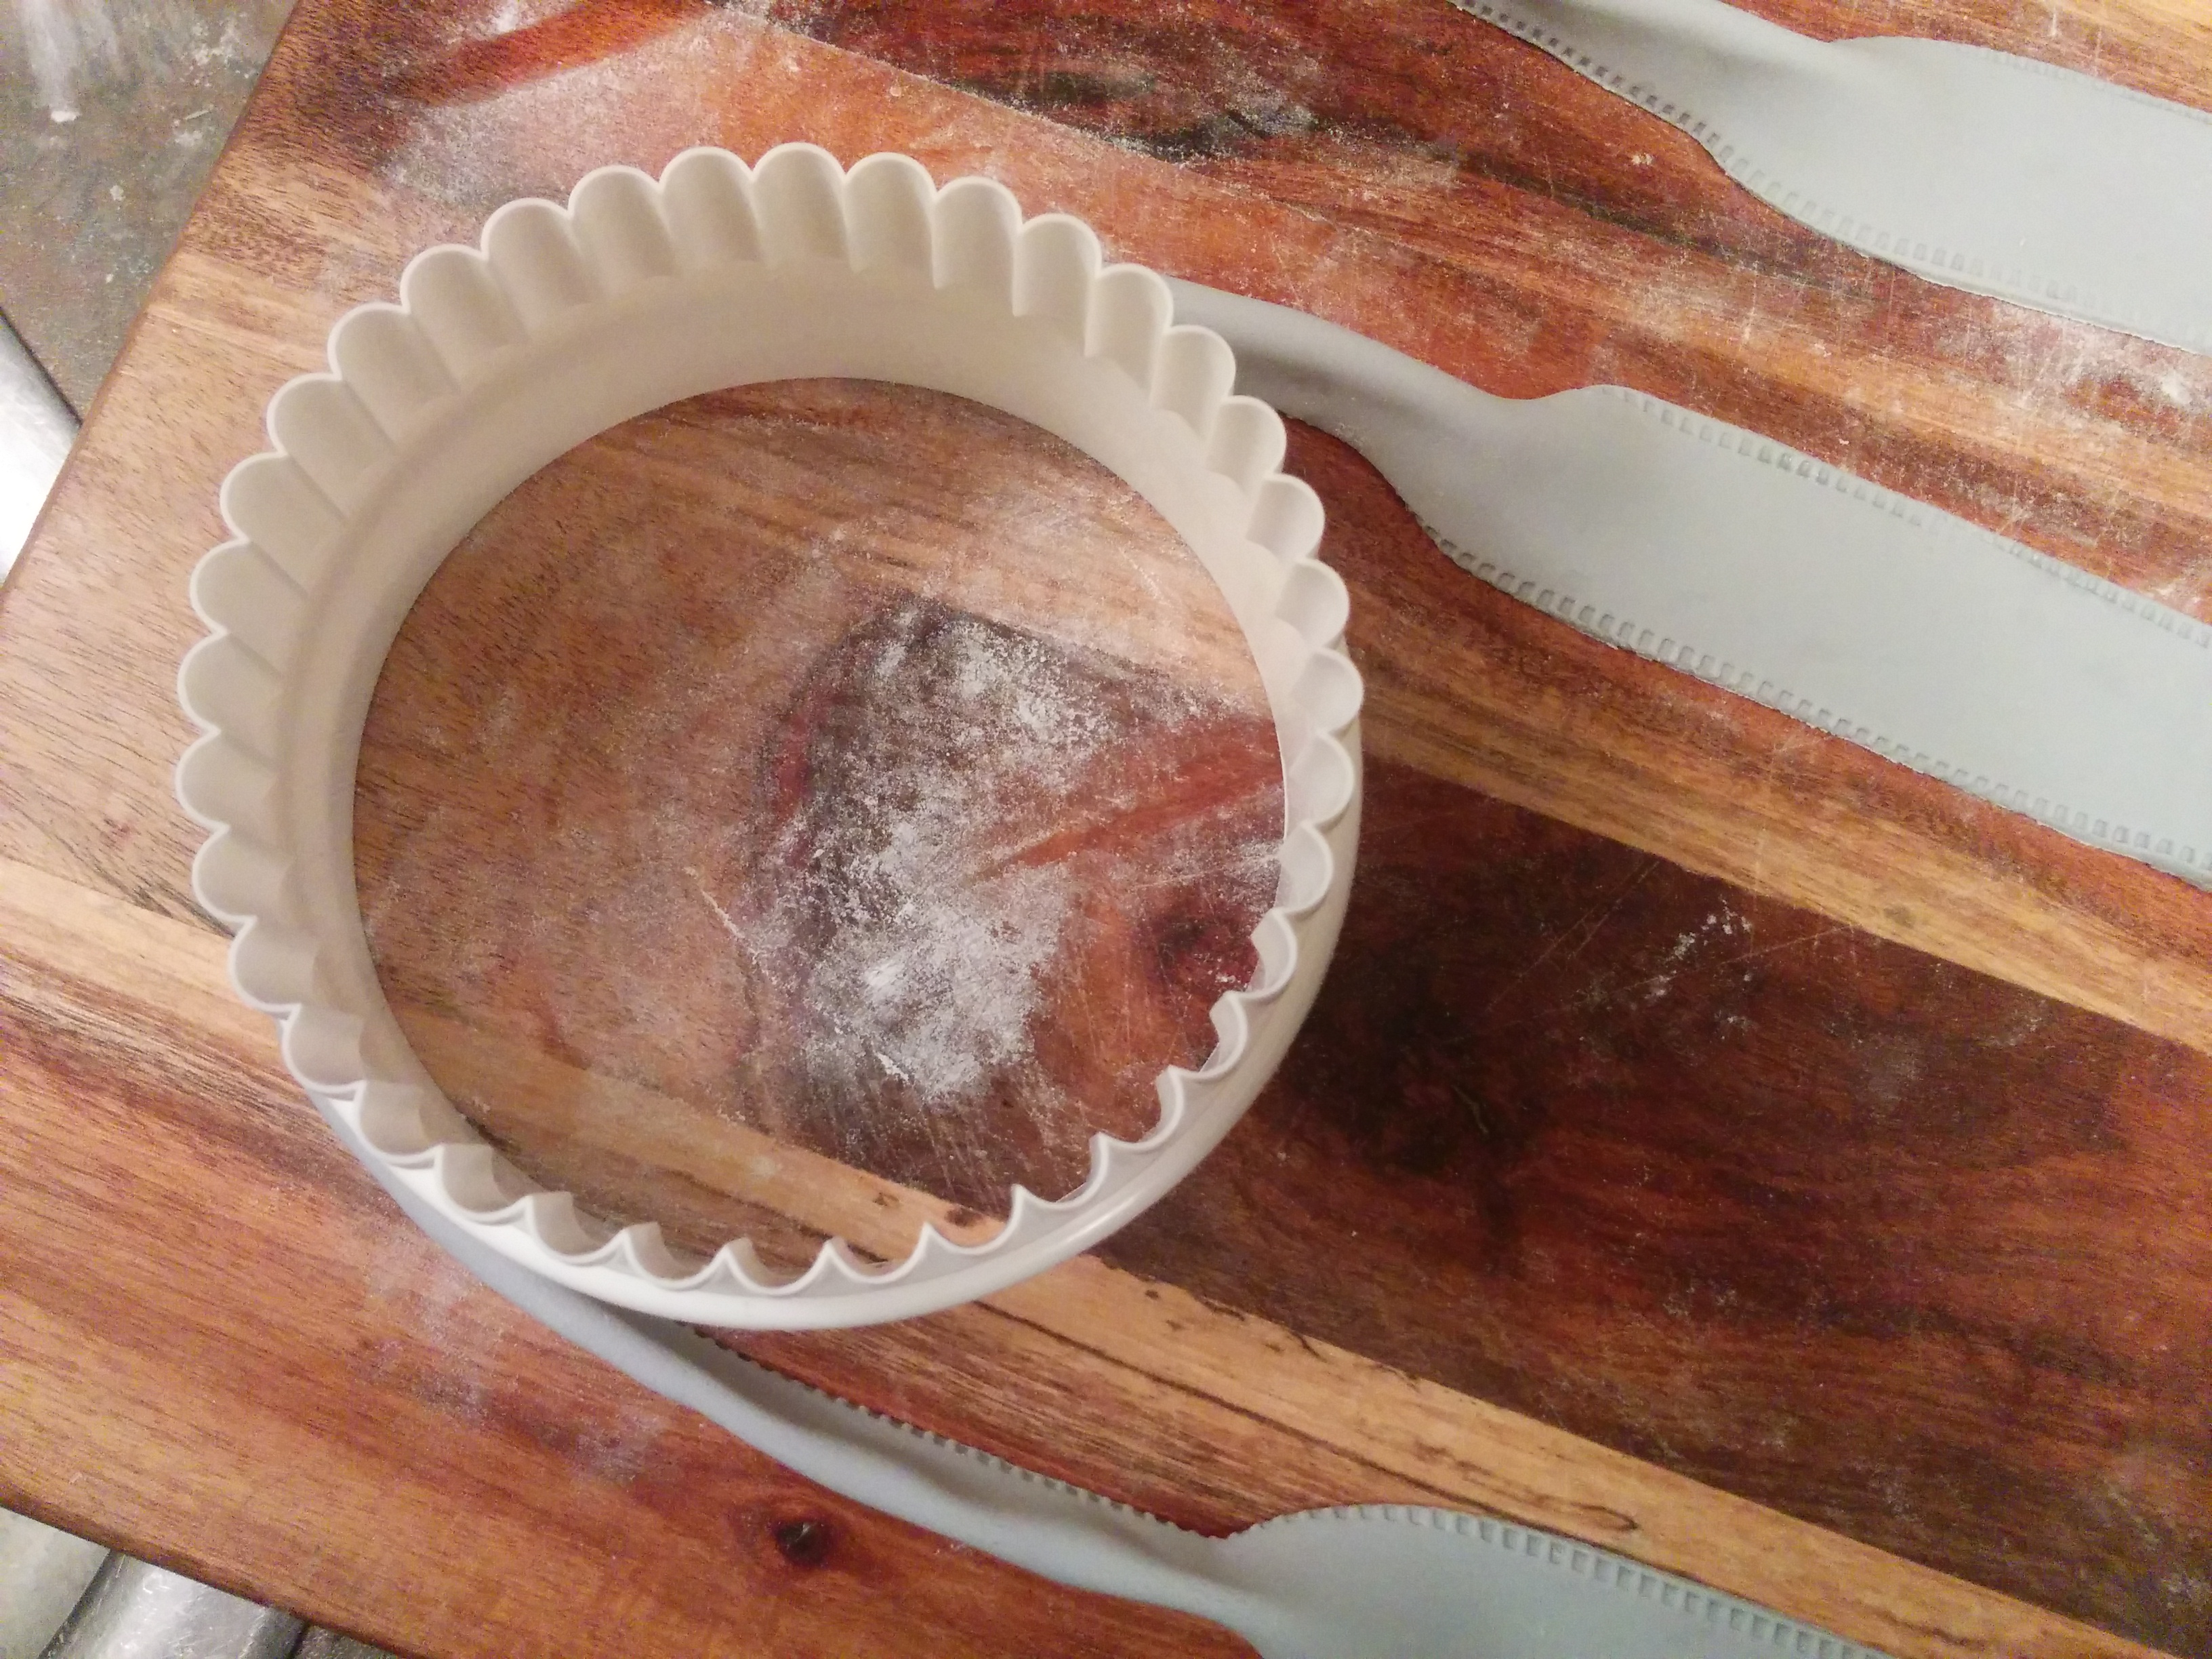
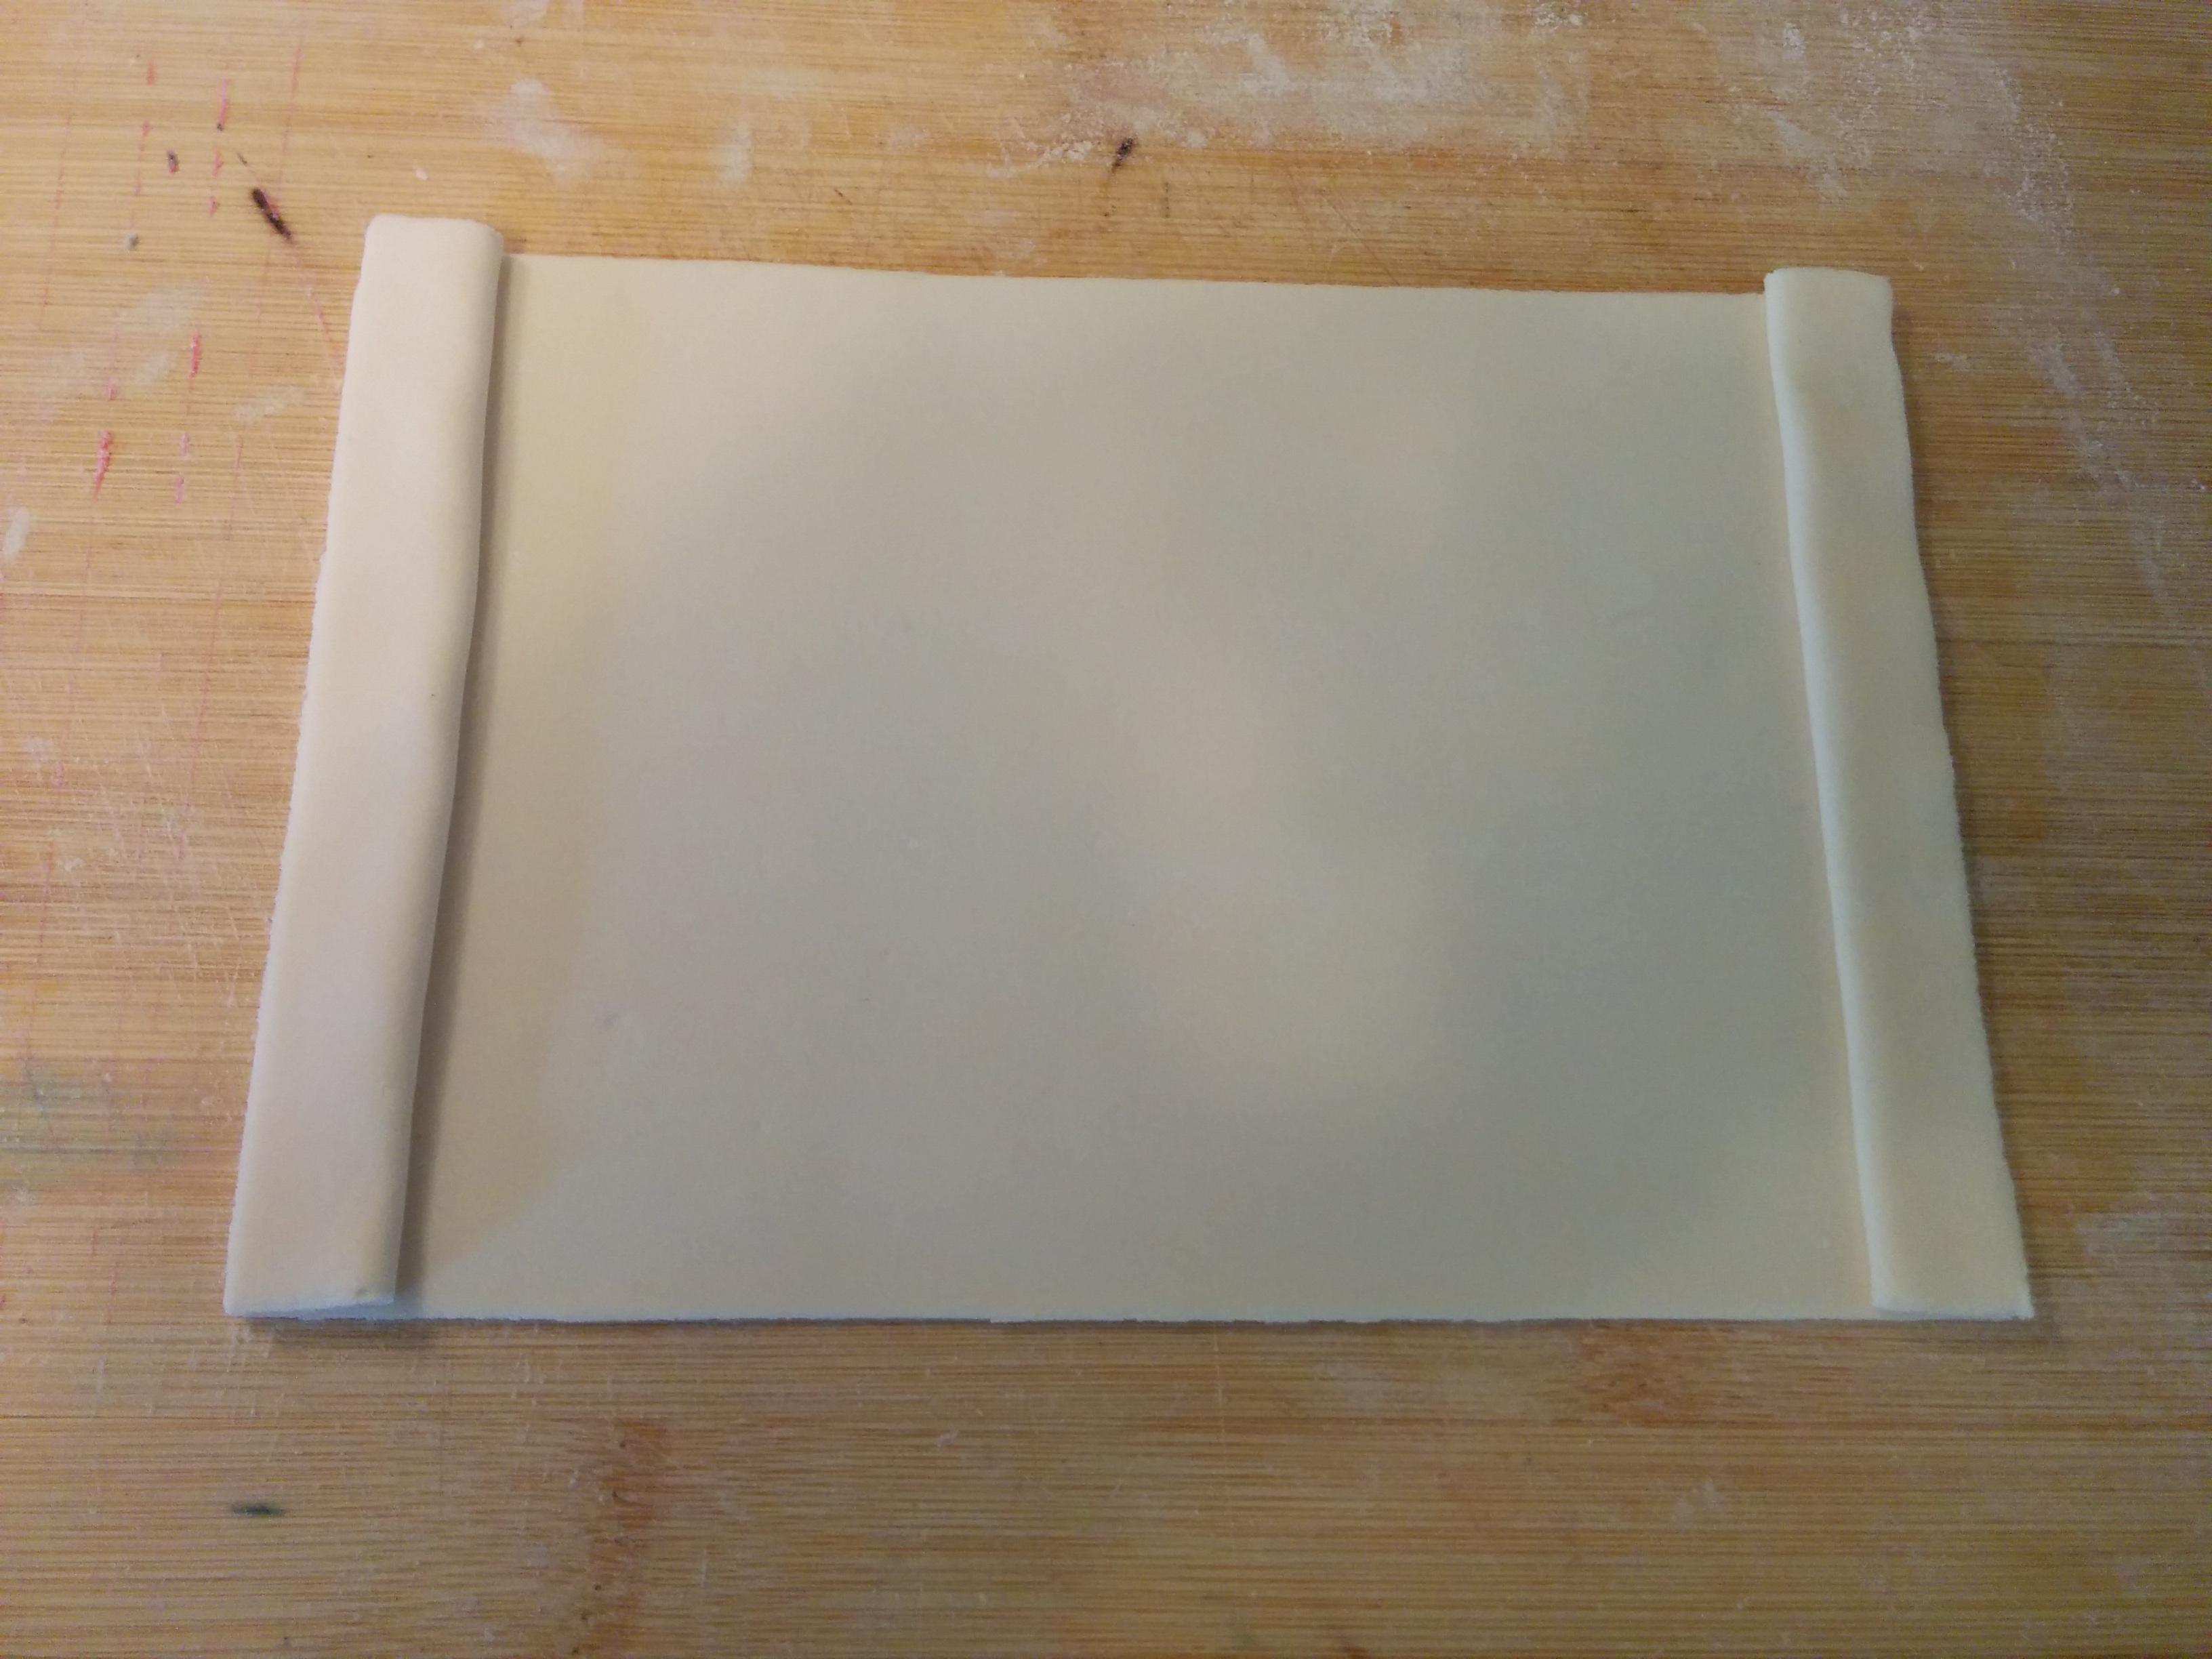
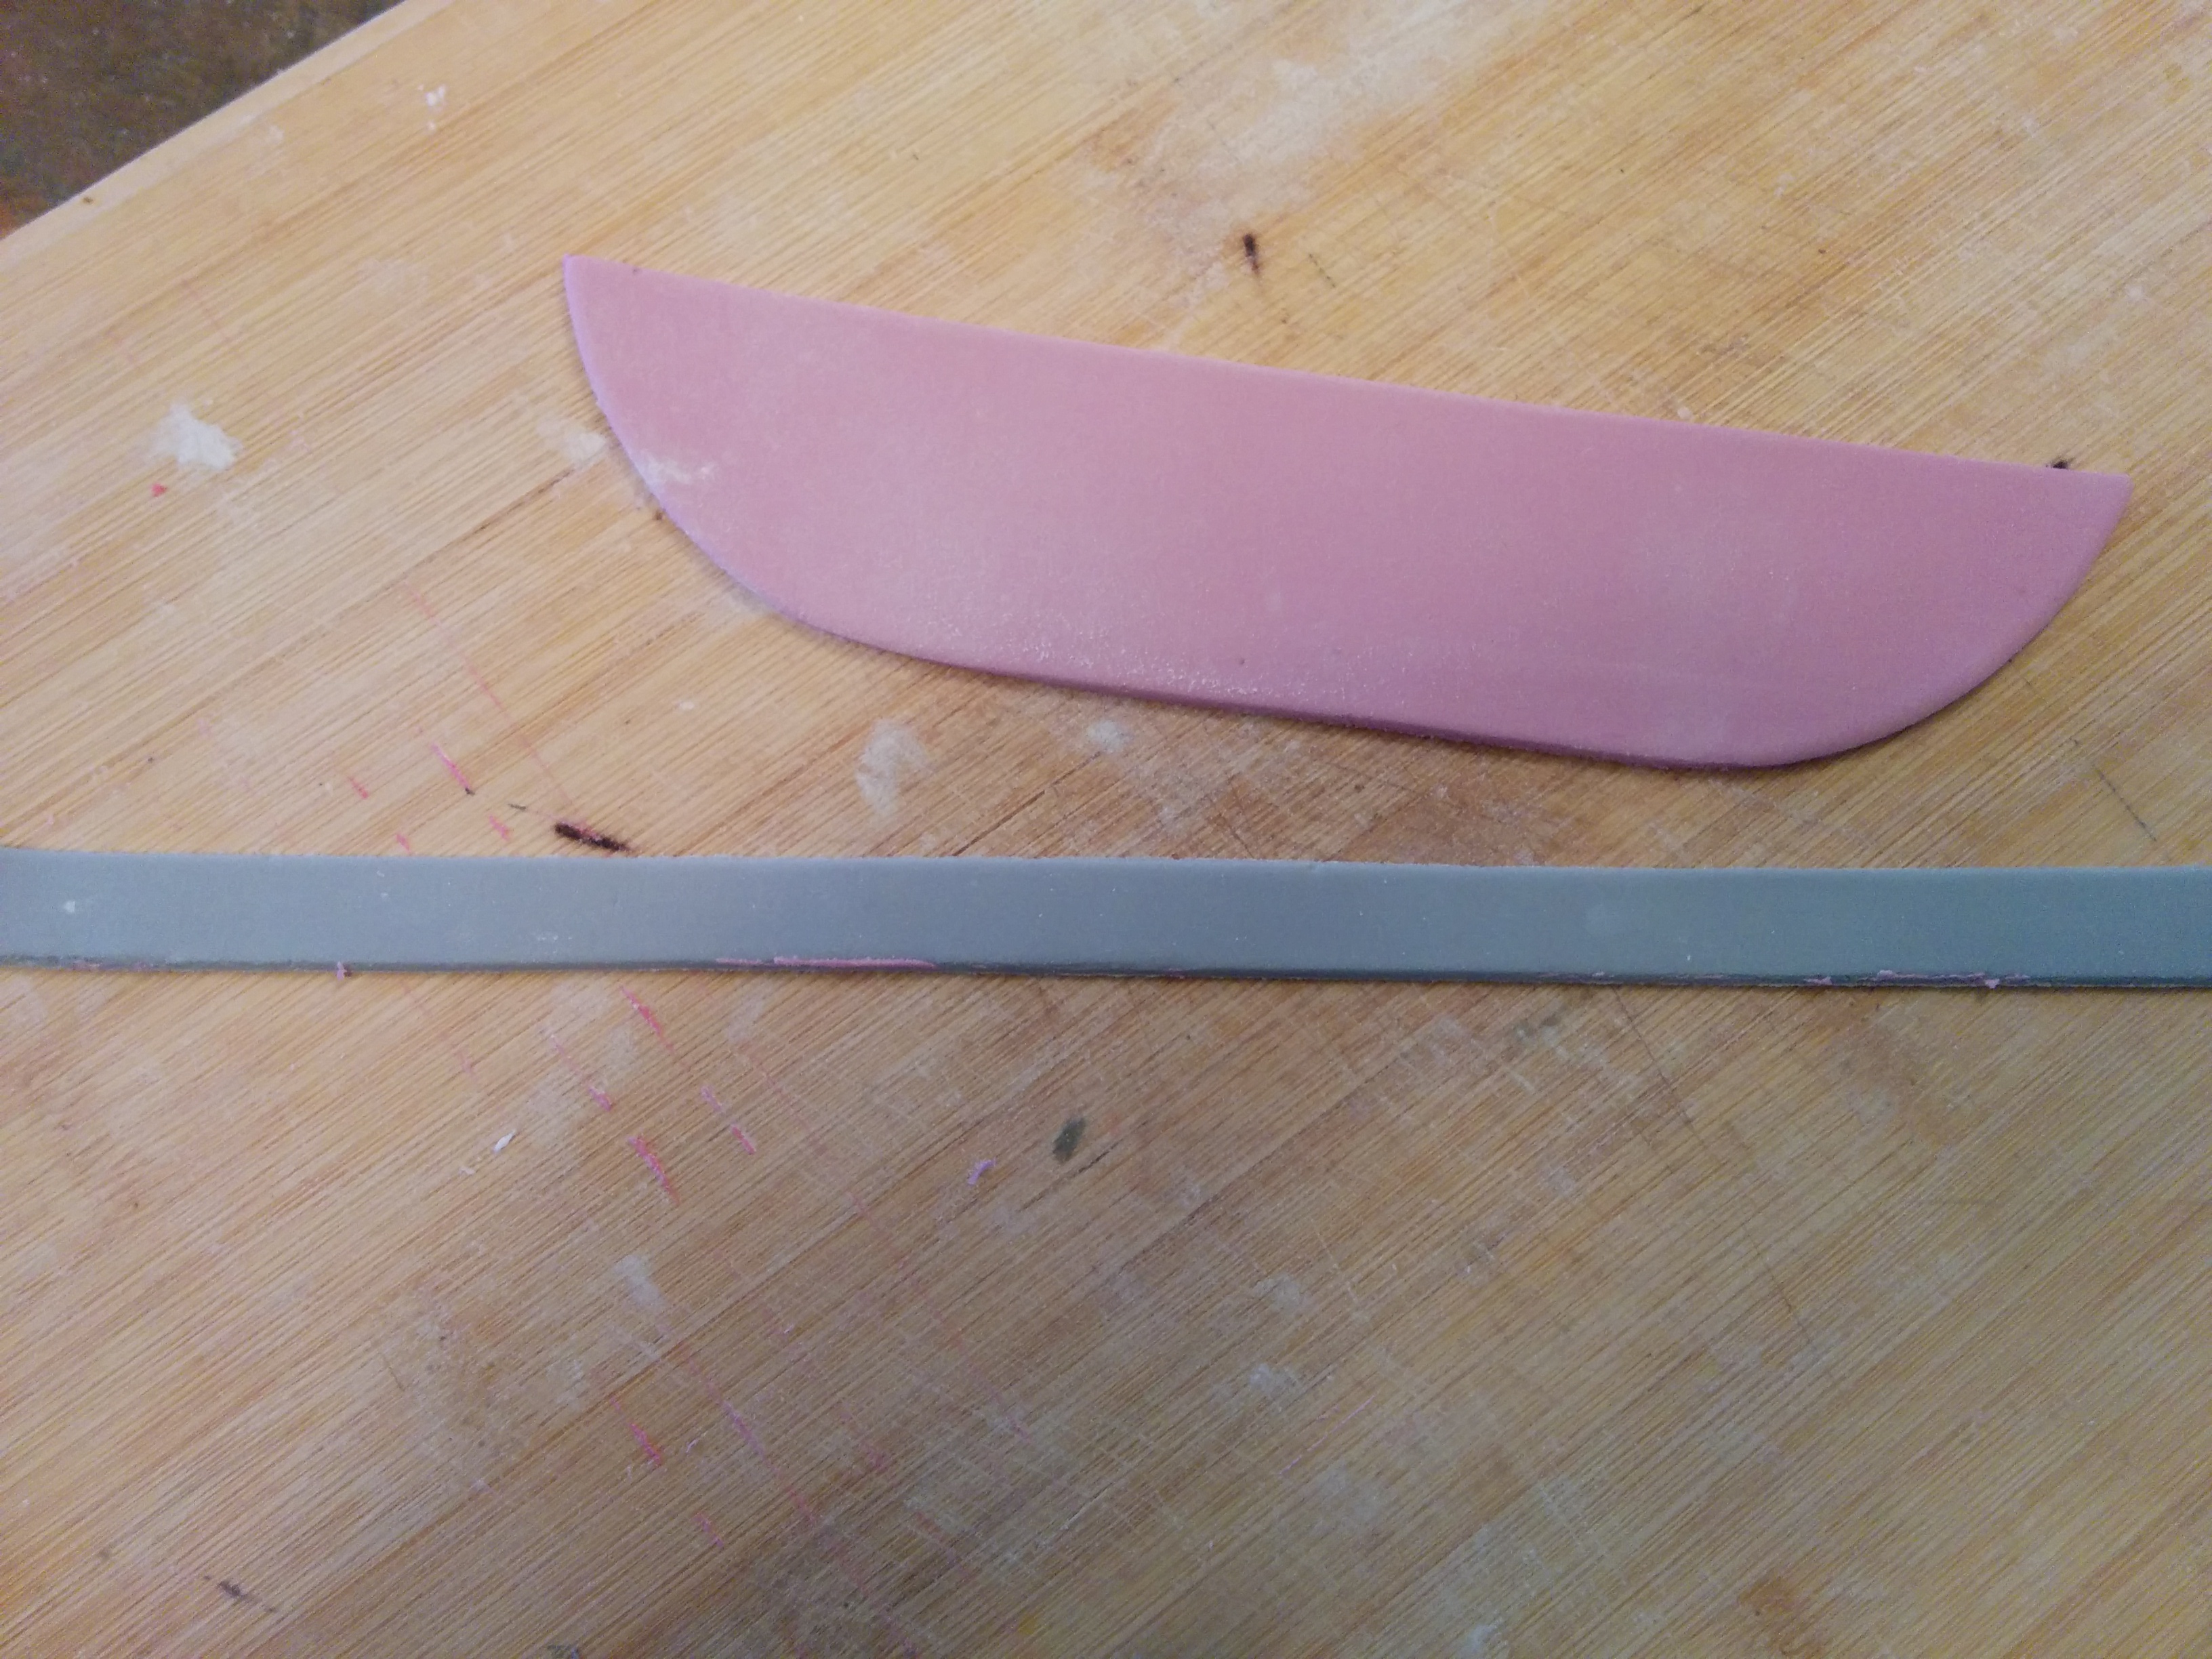
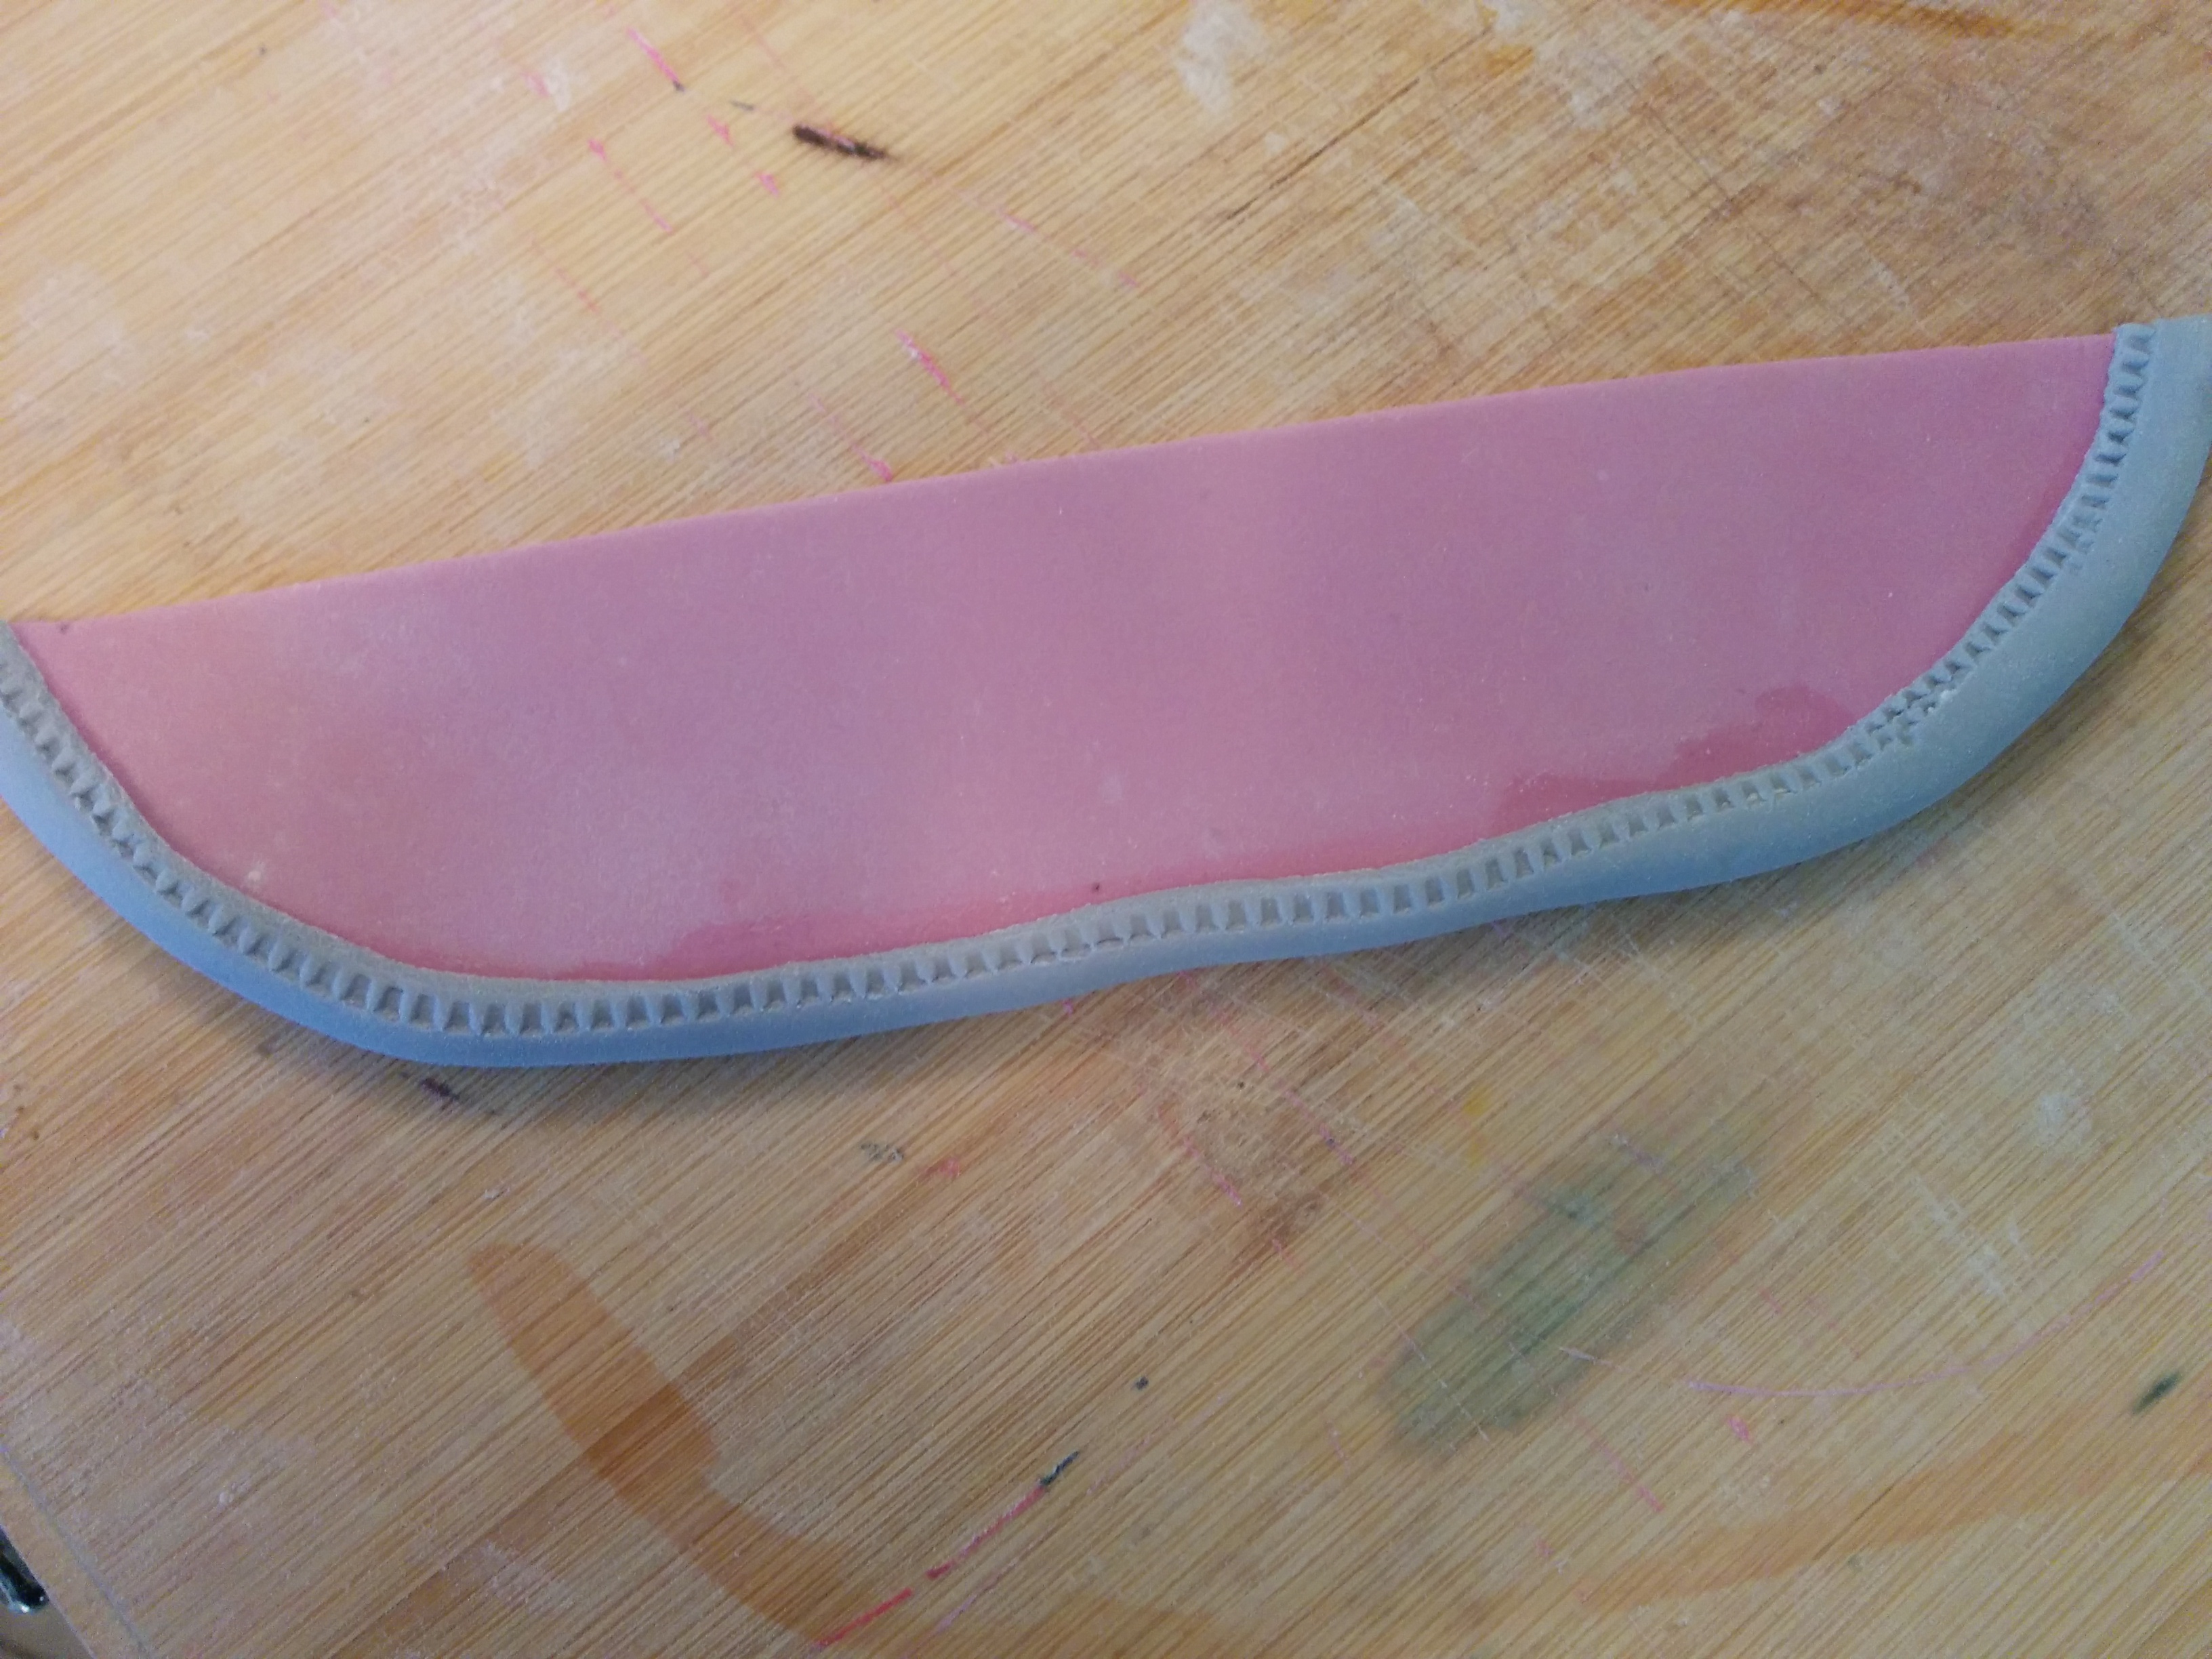
(1) The first step is to make the straps and rings and leave them to dry. The straps are about 10 inches in length. First, make the rings by shaping fondant strings into half circles. Leave them to dry for 24 hours.
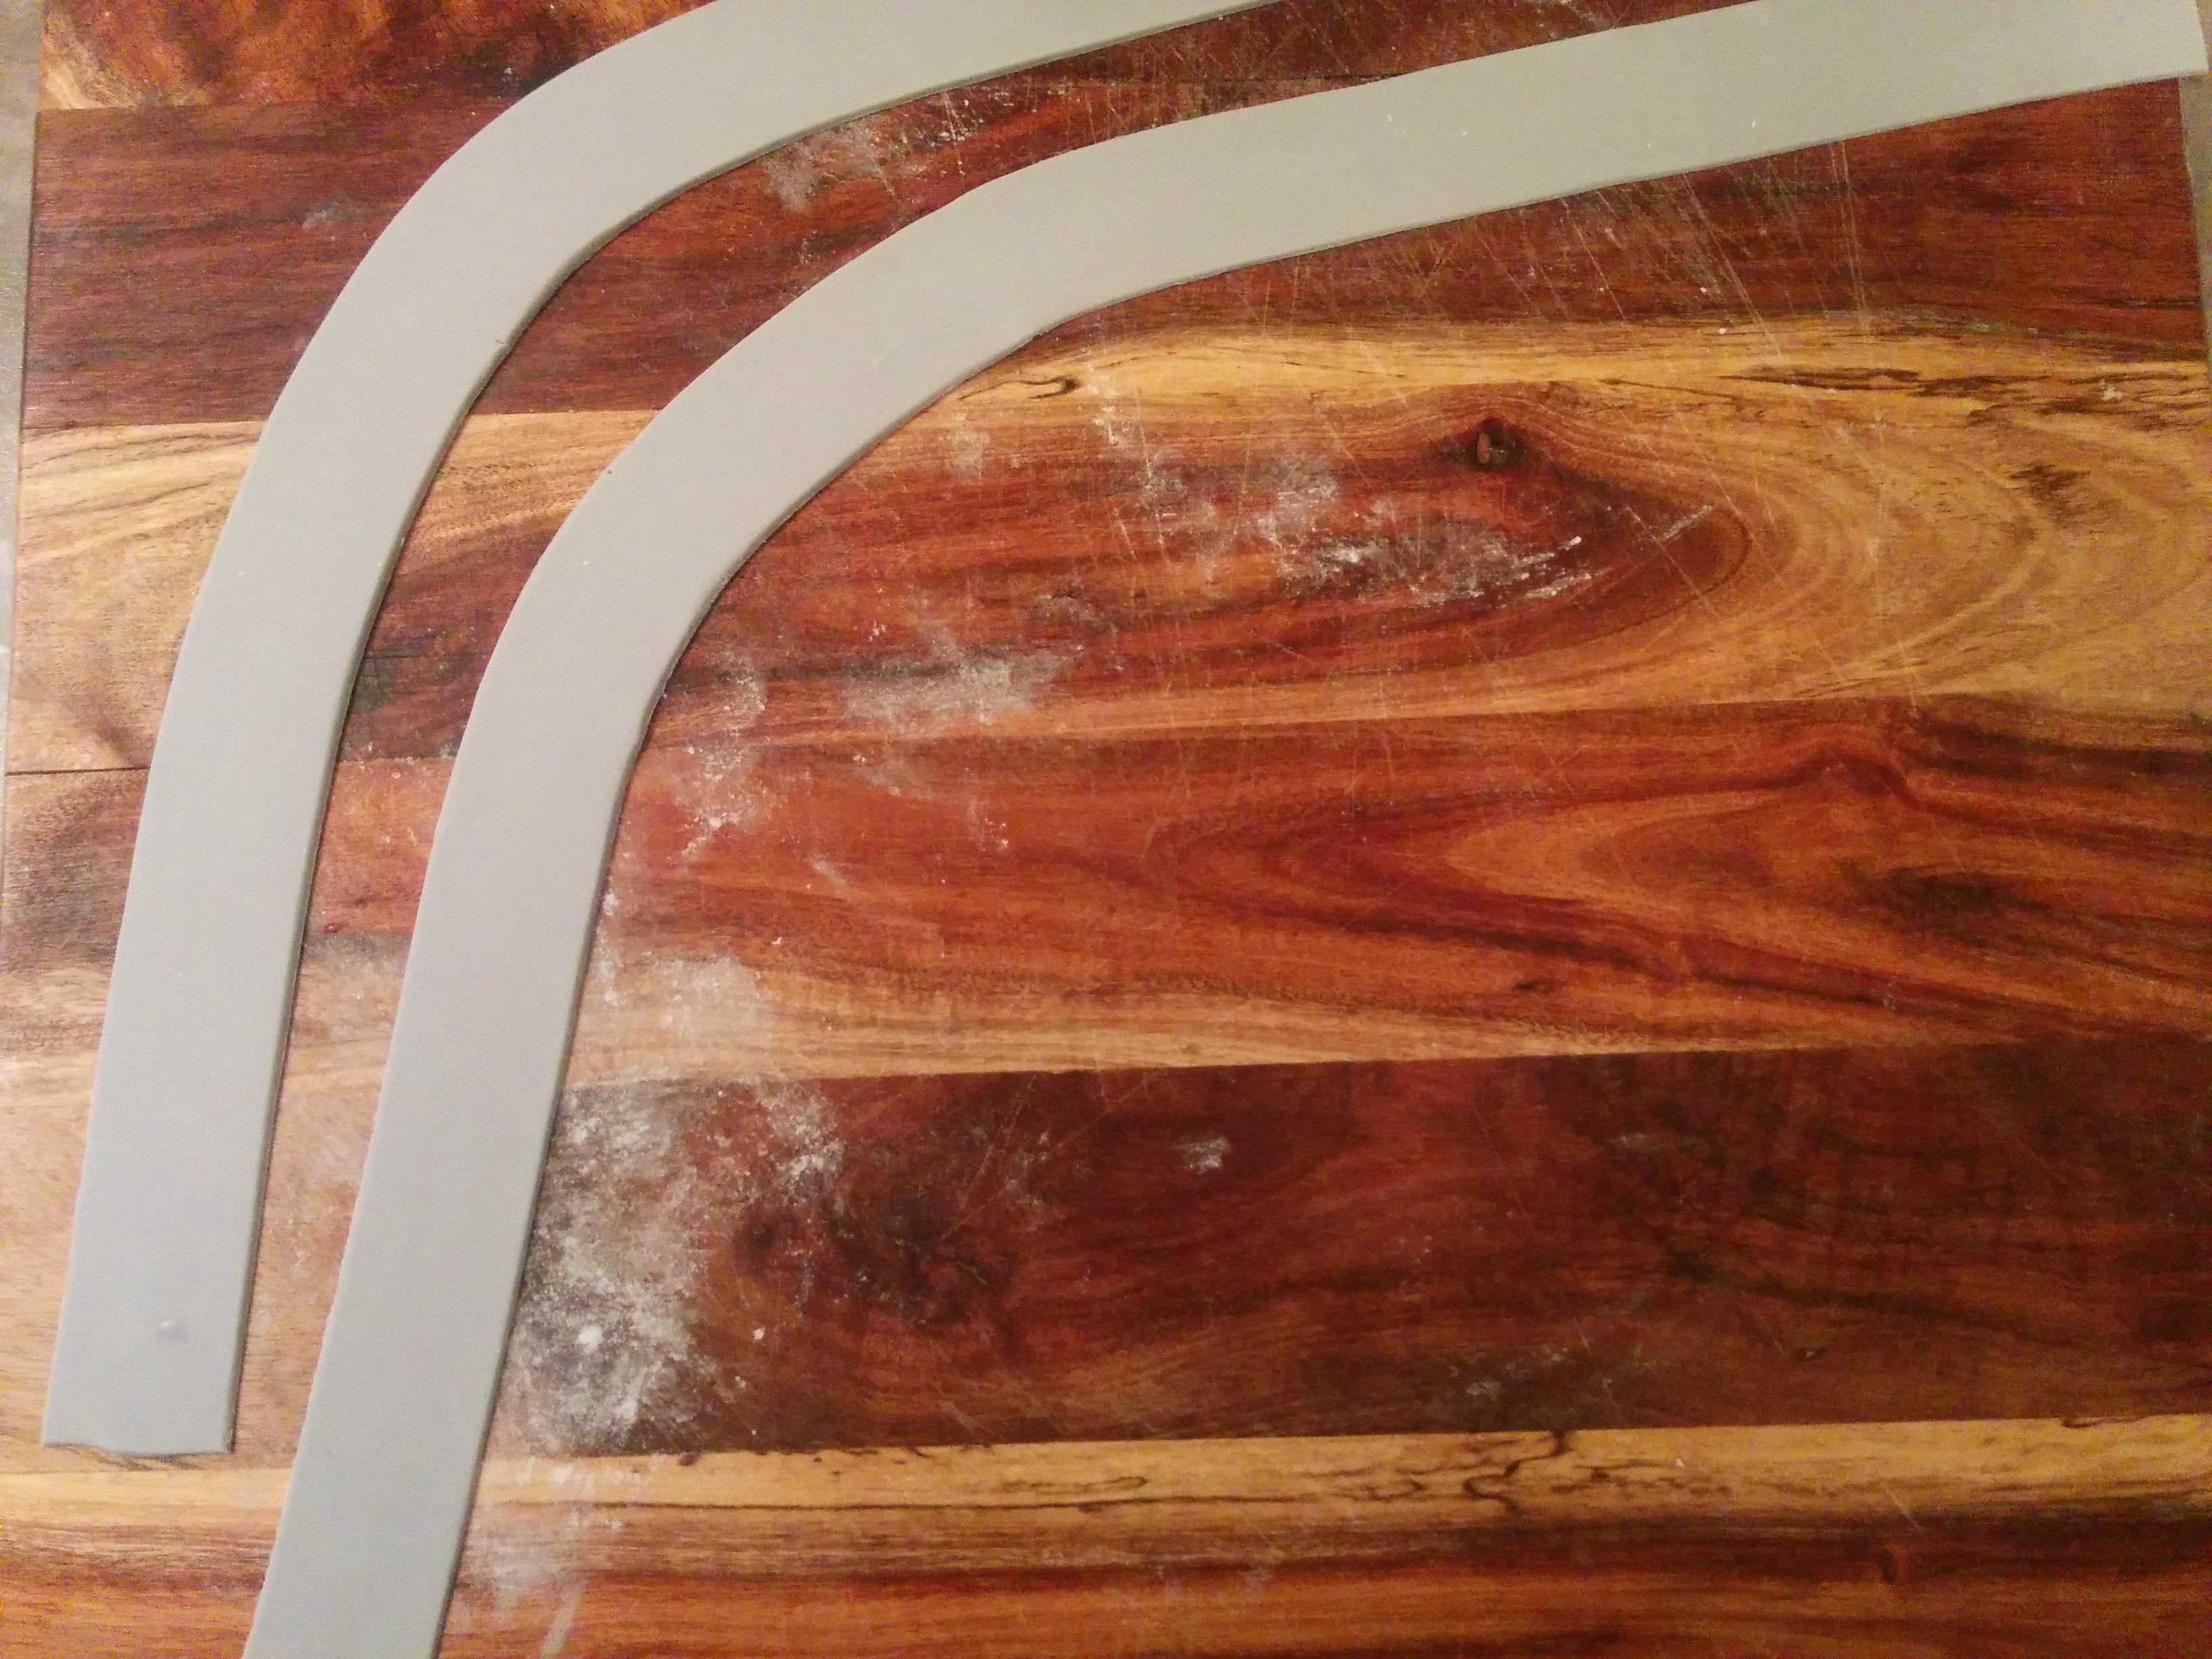
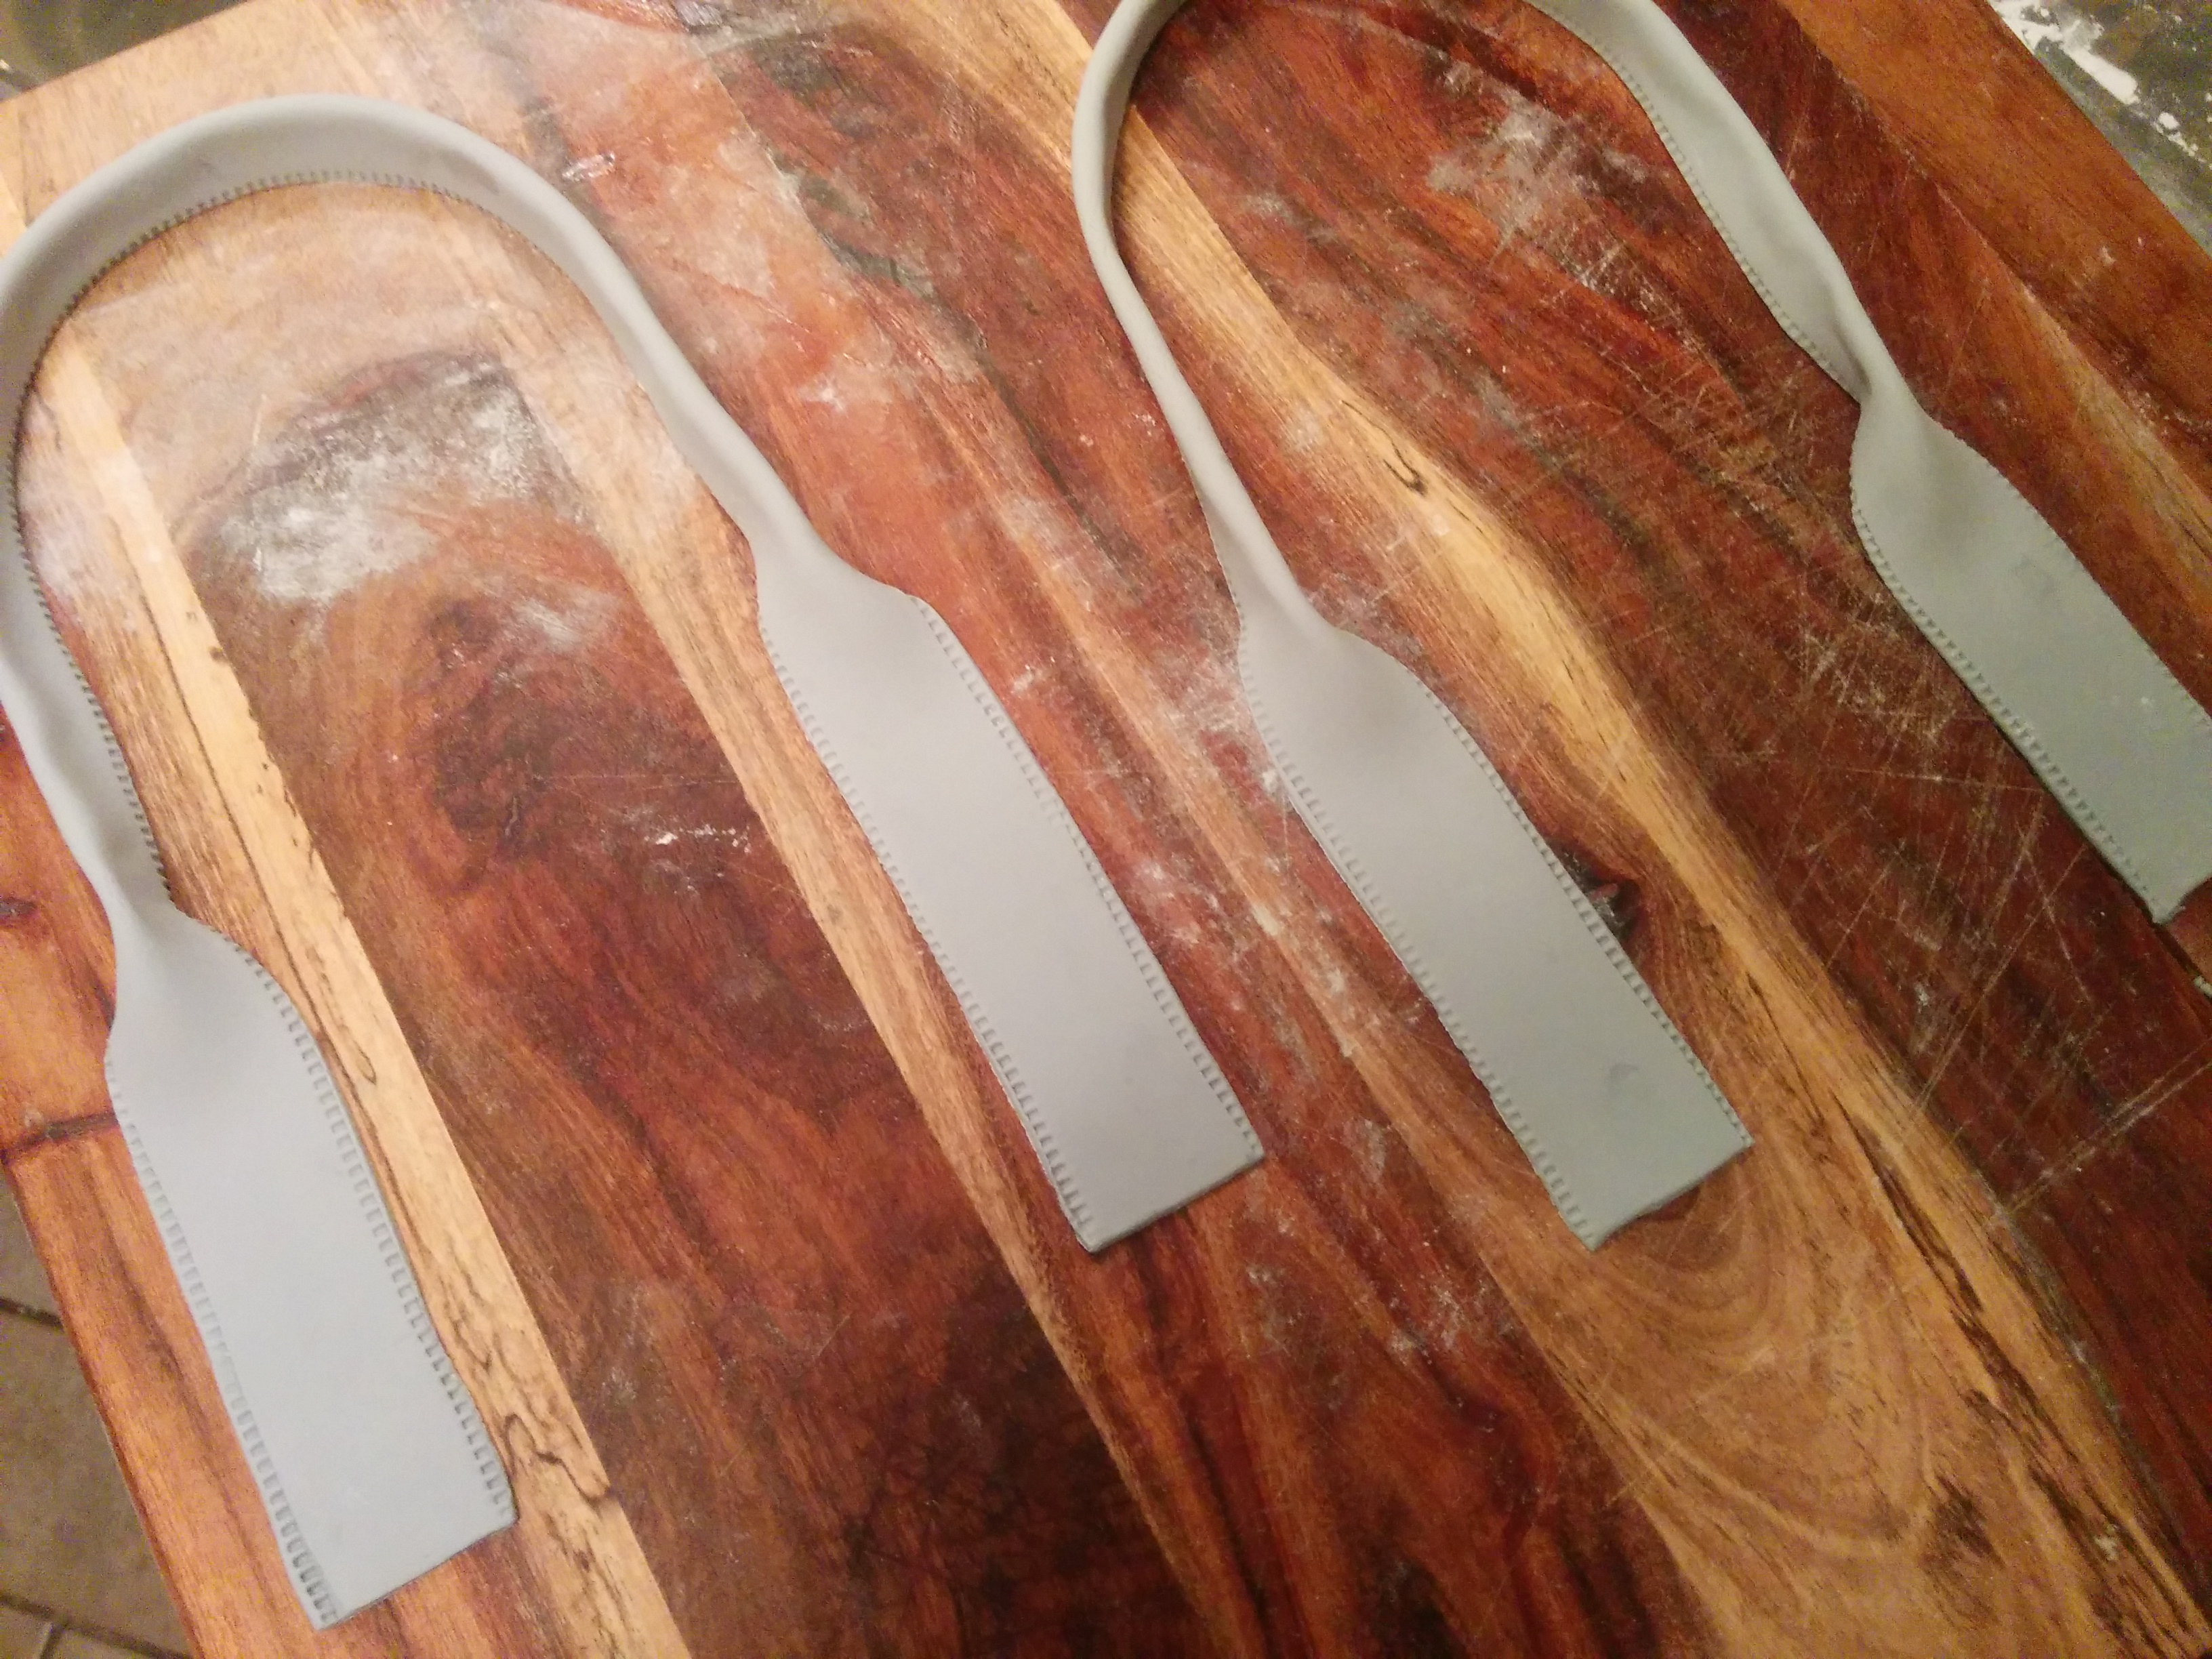
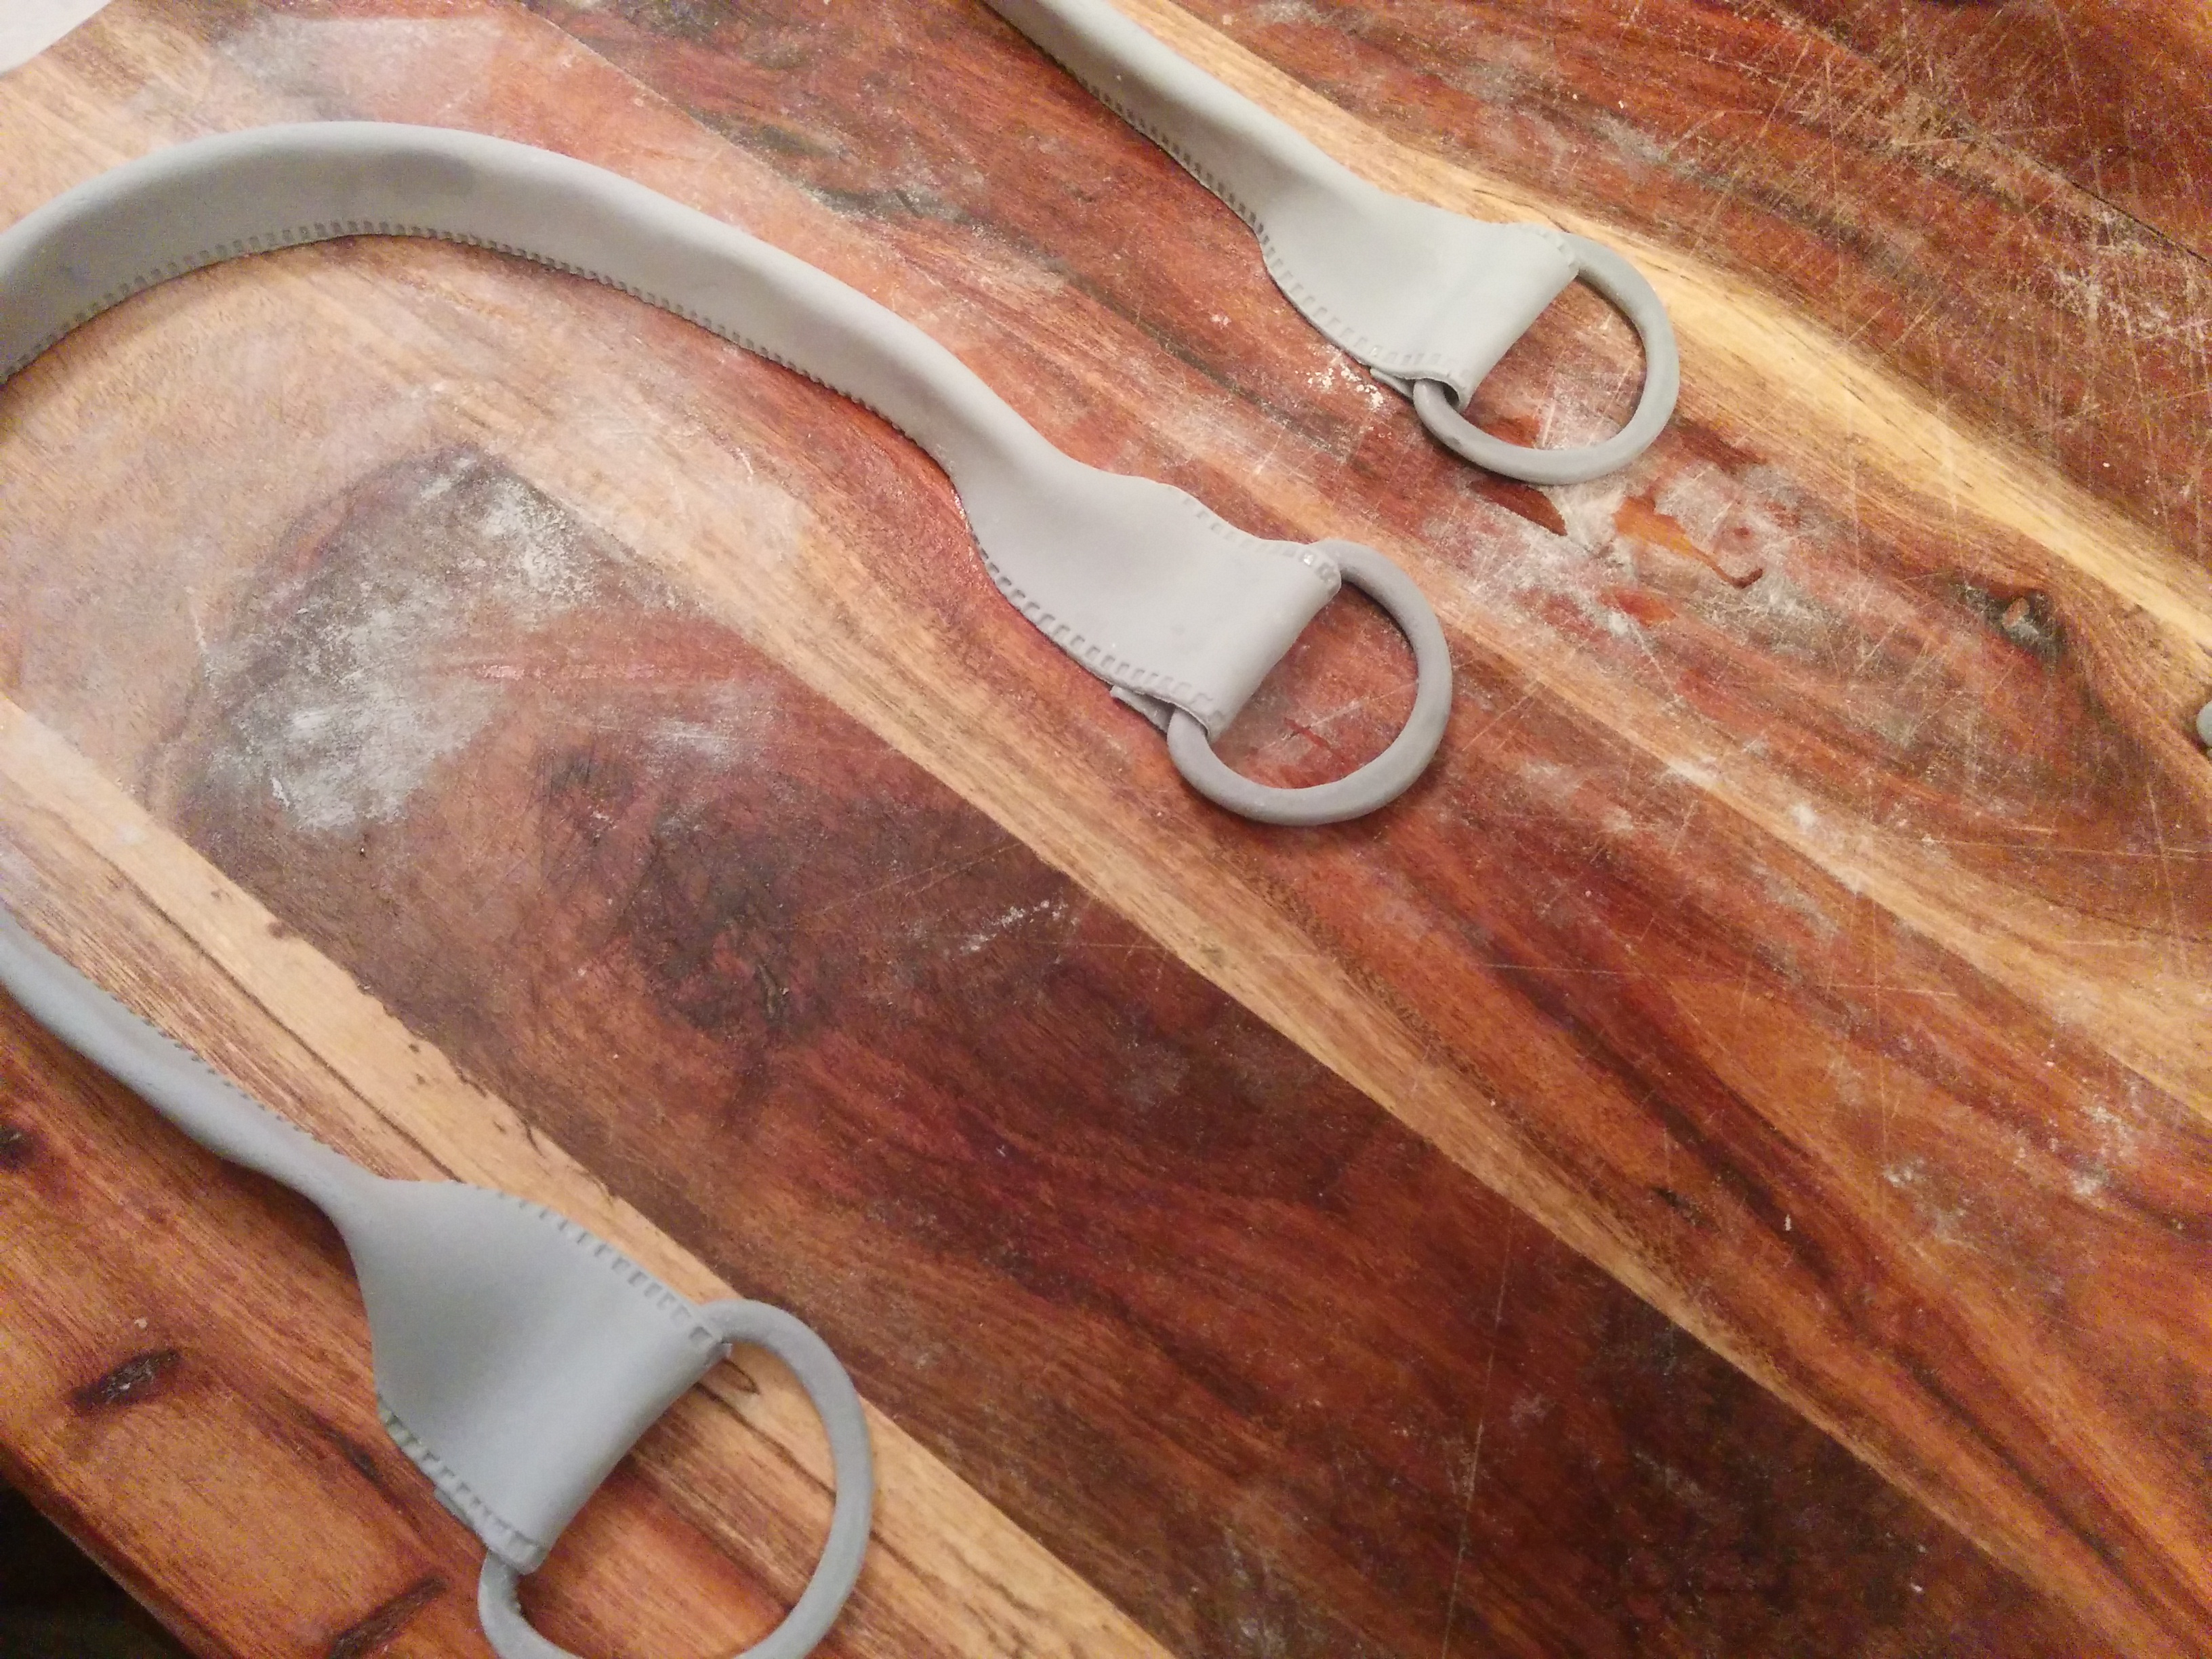
(2) Next, make the straps. Cut out grey fondant into 1 inch straps. Run a fondant stitching wheel along the edges. Brush the center of the straps with water and fold the center leaving the ends flat. Curve the straps at the center to form the bag straps. Lastly fold the ends of the straps over the dried rings and leave them to dry. This step should be done at least a week before the actual cake is made as the straps need a lot of time to dry properly.
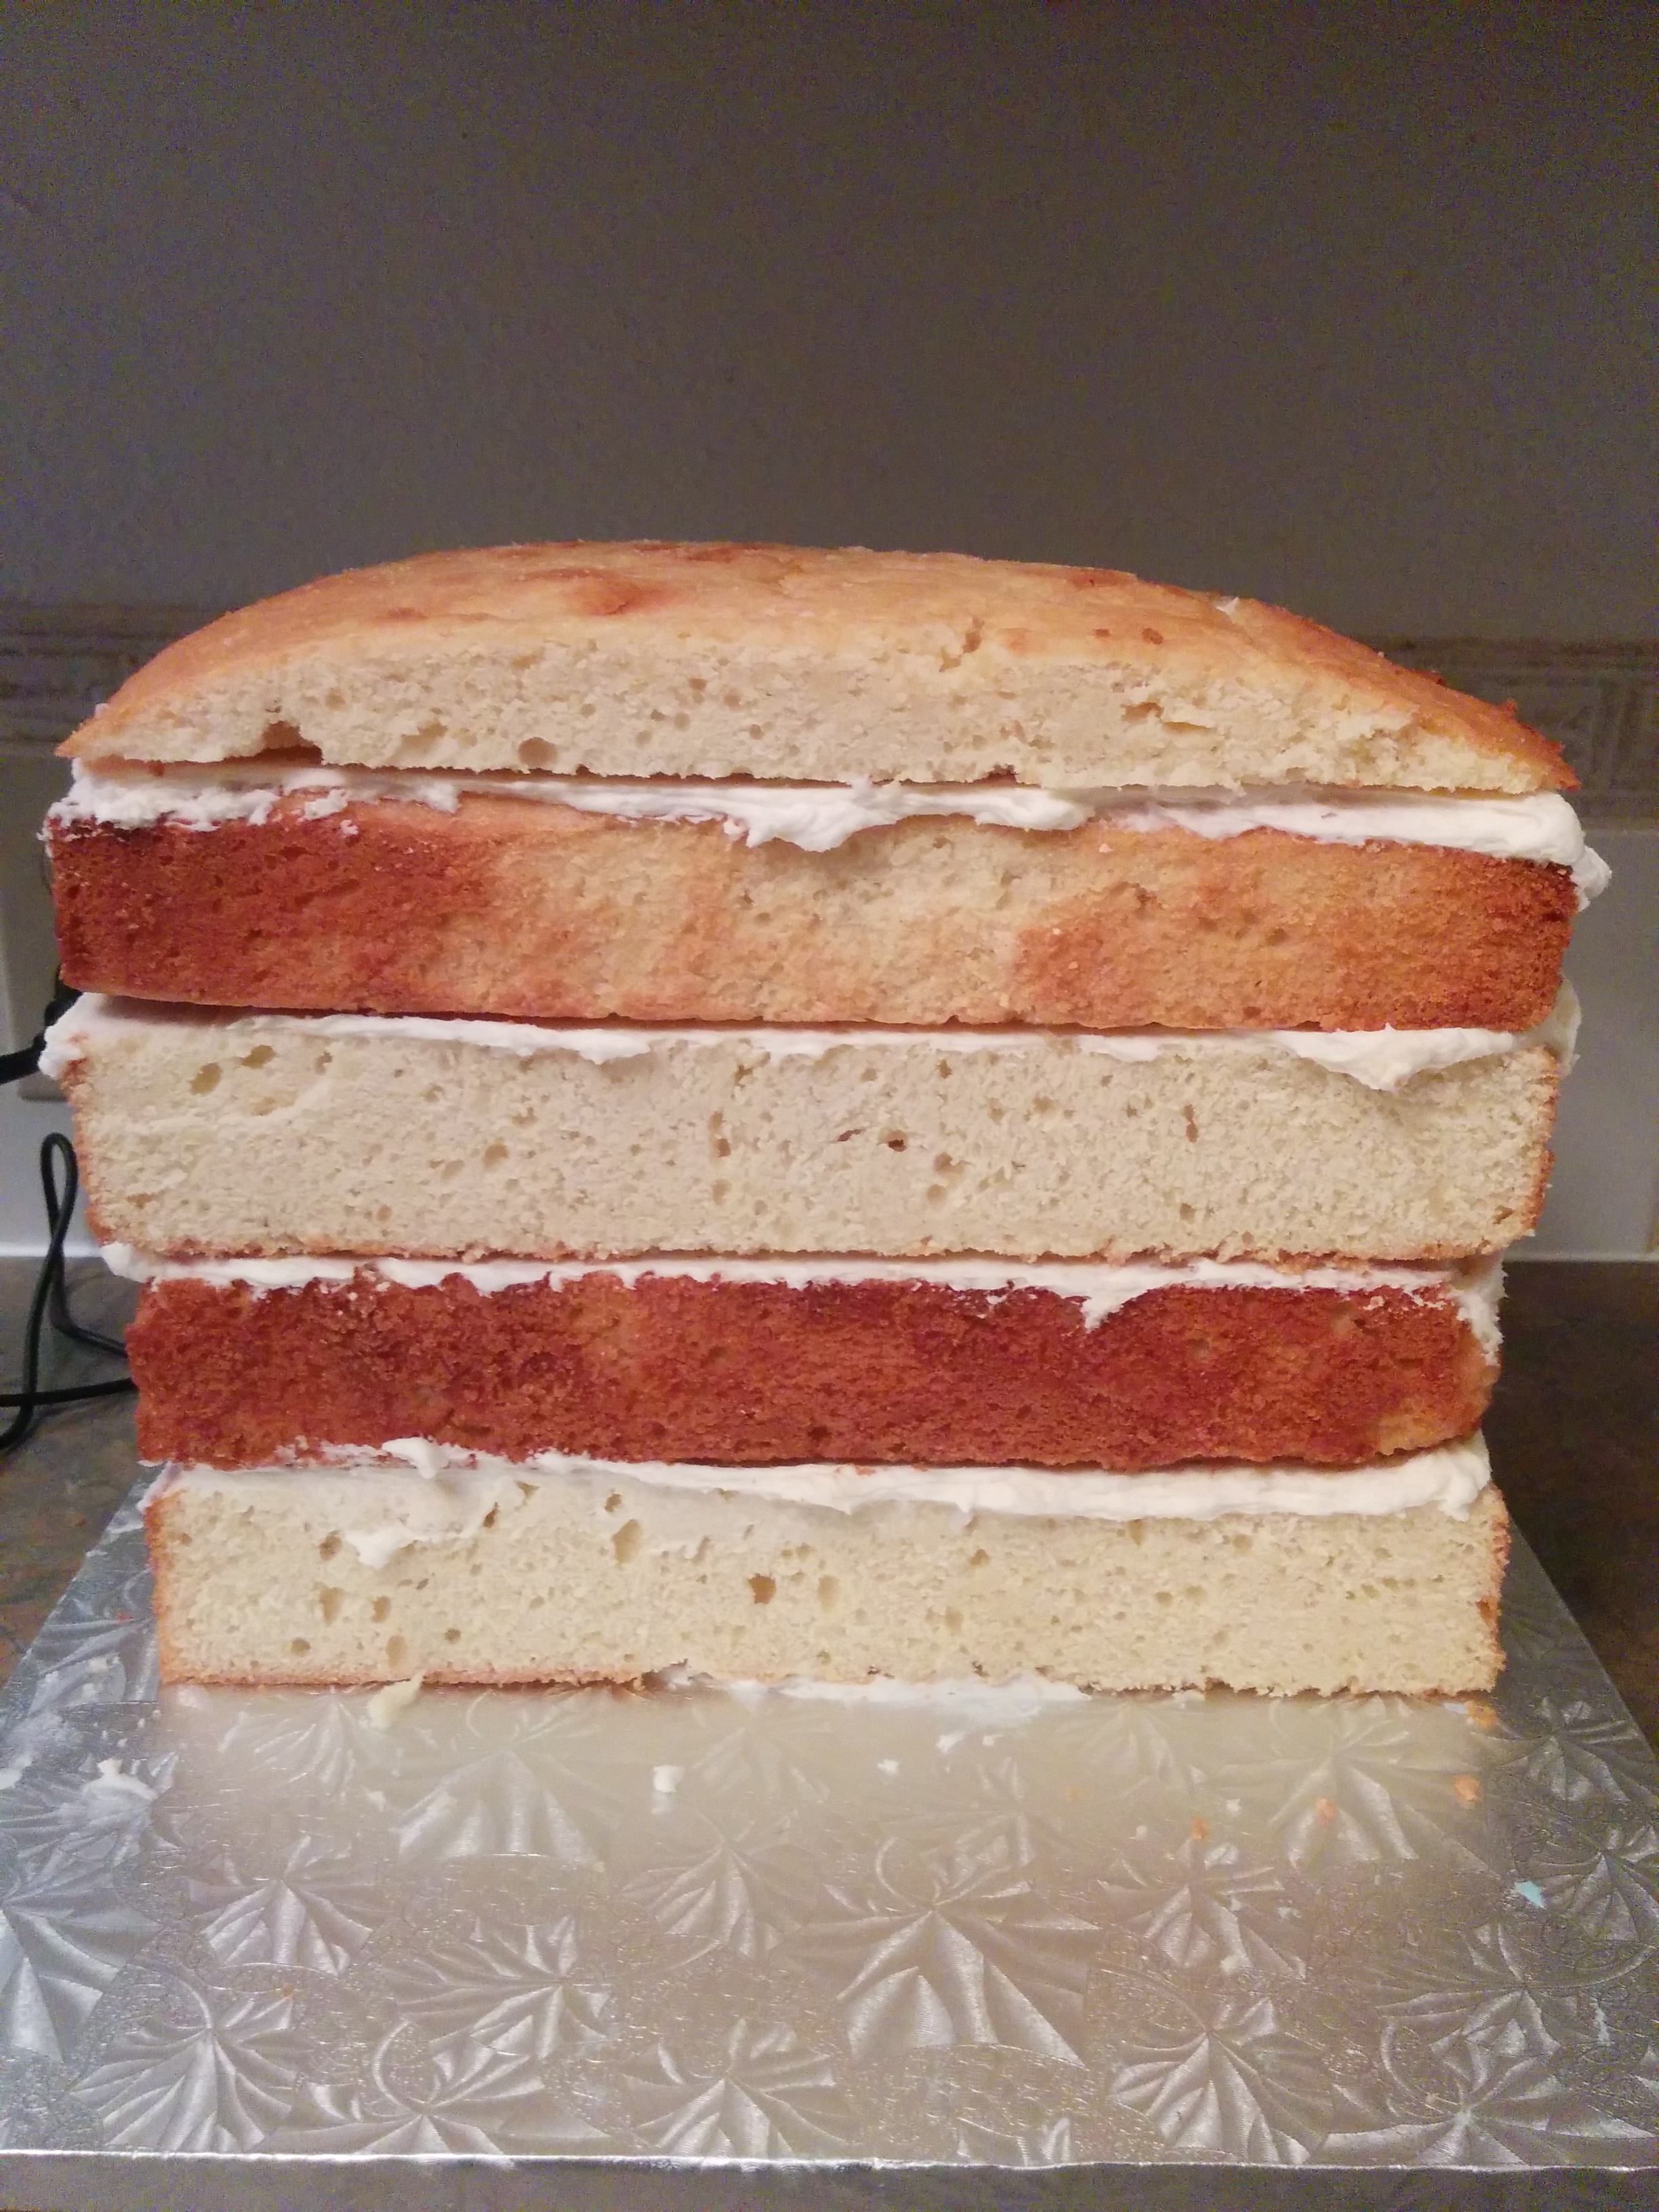
(3) To make the cake, bake two 9 inch square cakes. Level and divide each cake into two equal parts, Stack the halves of the cake on each other while frosting to build the bag. Finish the top of the frosted cake with a cut out cake dome to give the bag a curve at the top. Carve the top of the cake so the cake is narrower at the top and wider at the bottom. Finish frosting the cake and allow it to sit in the fridge for at least an hour before covering it with fondant.
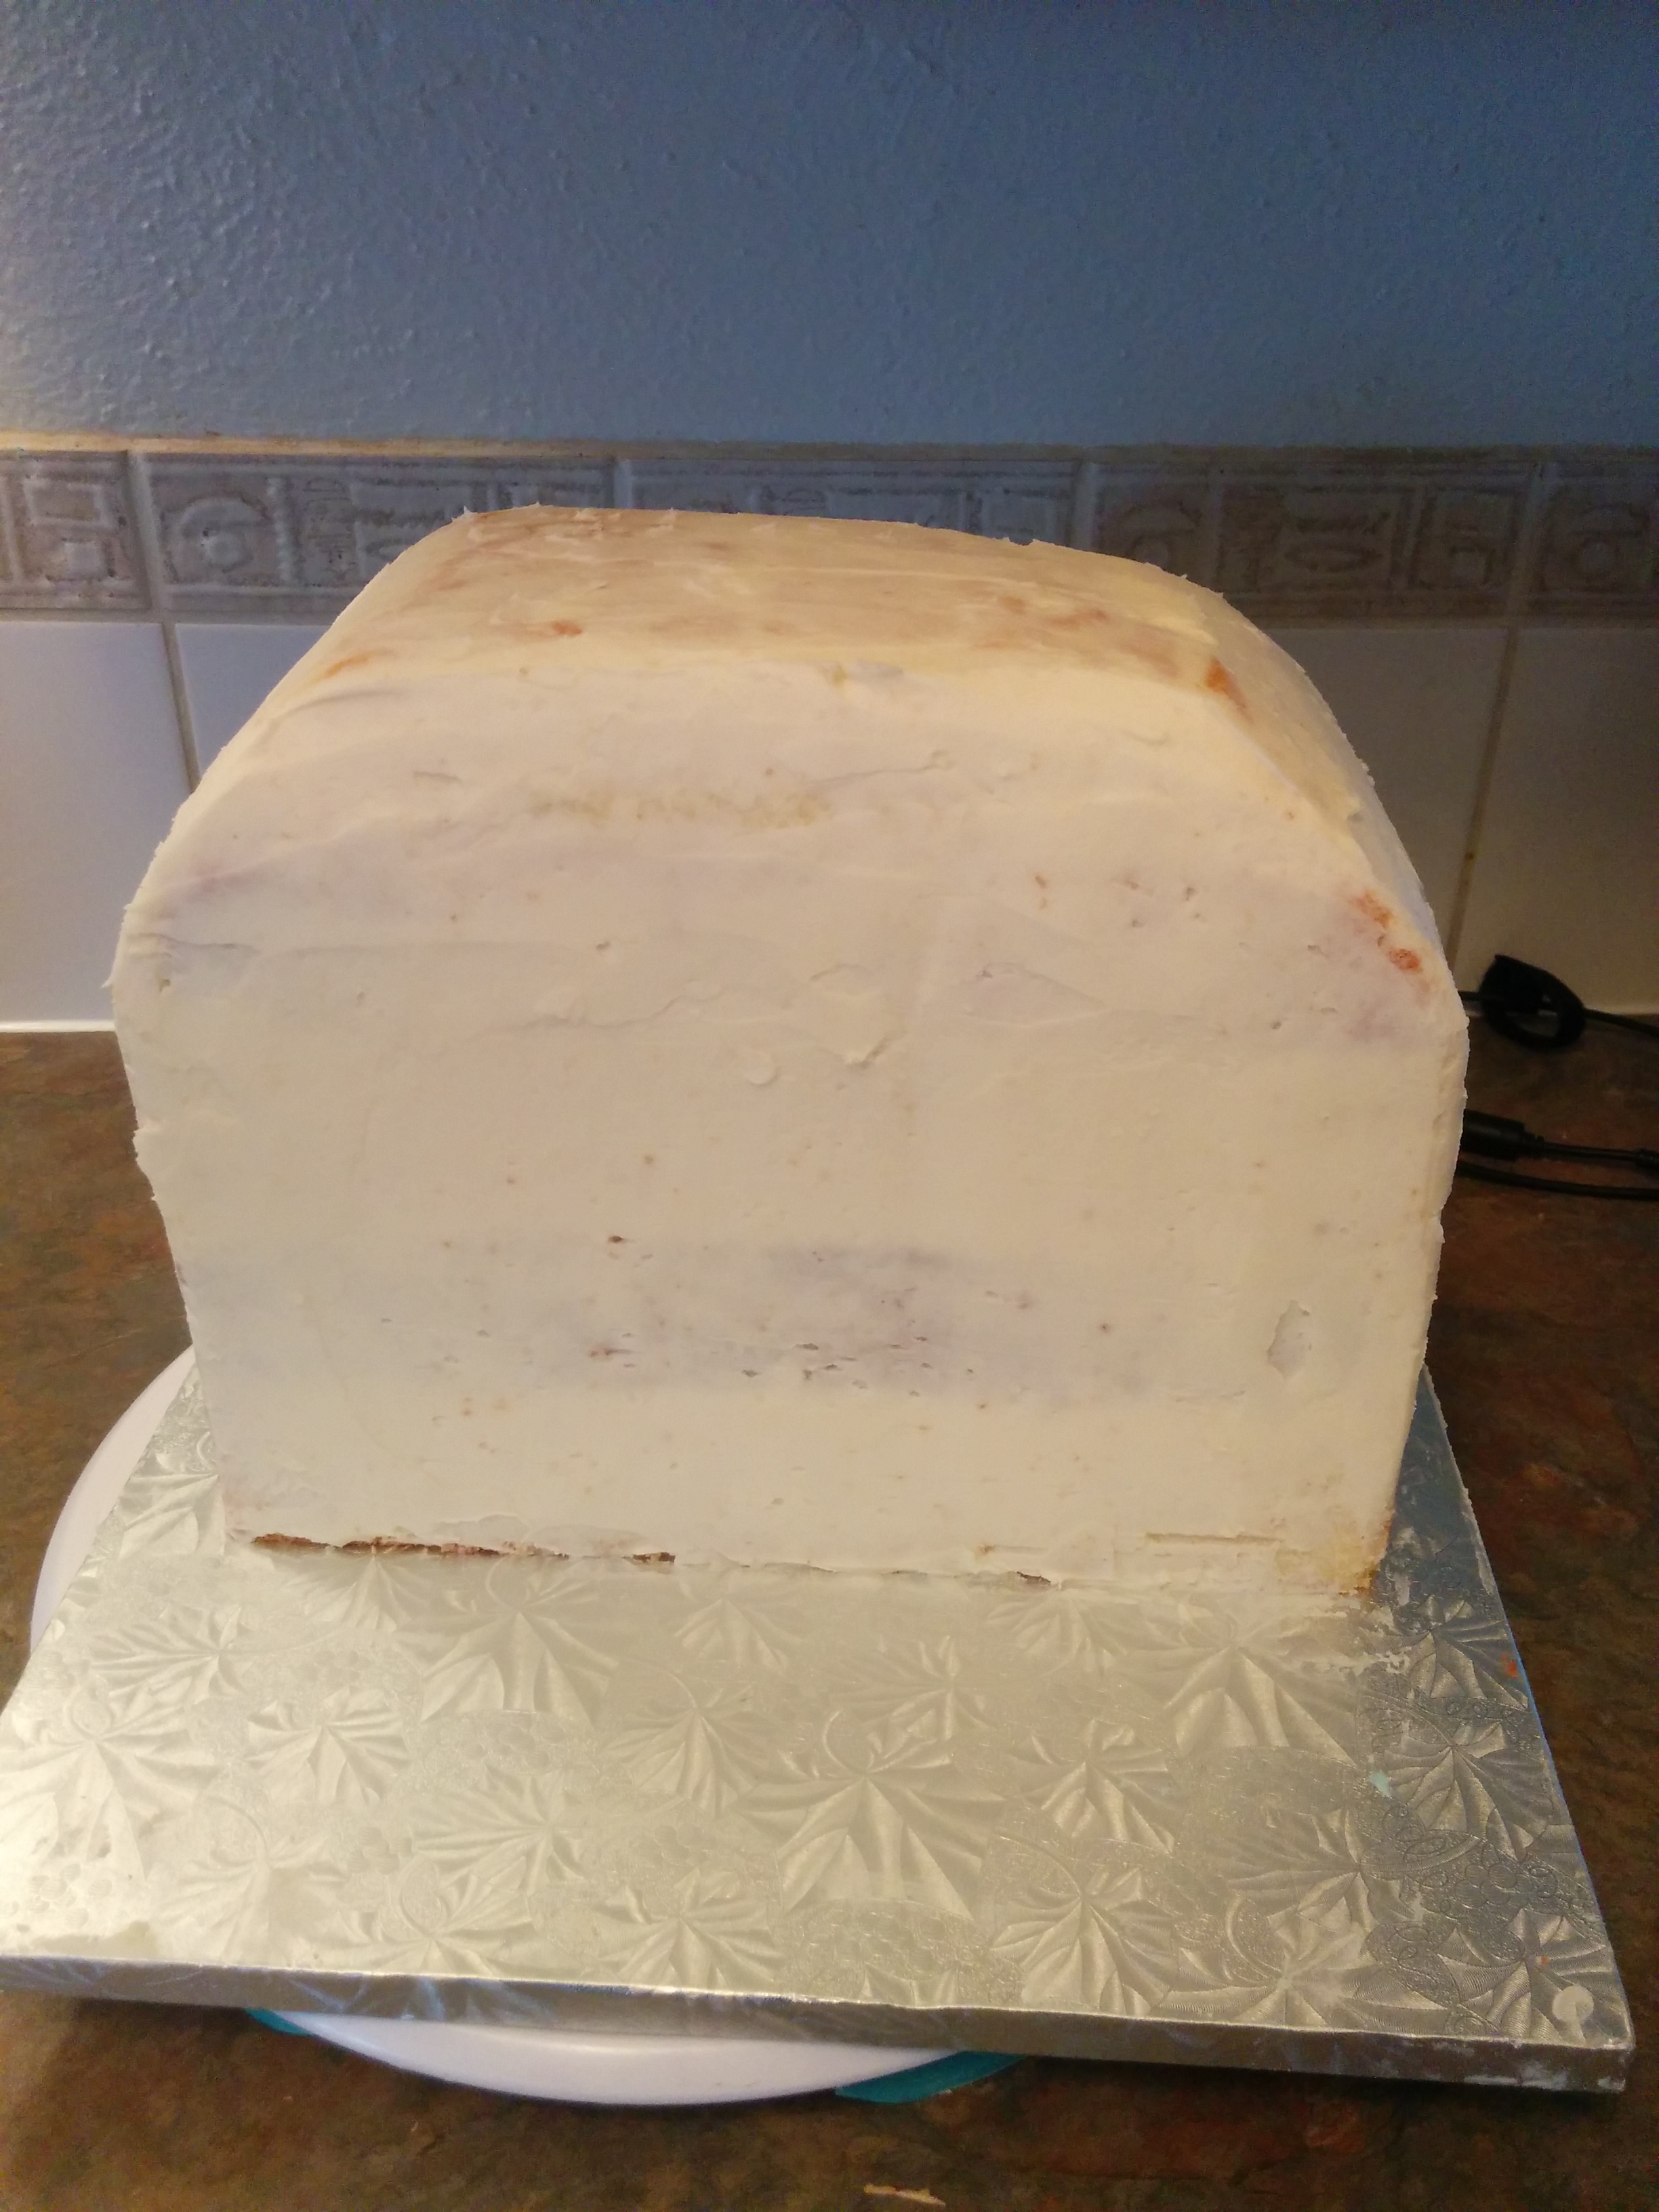
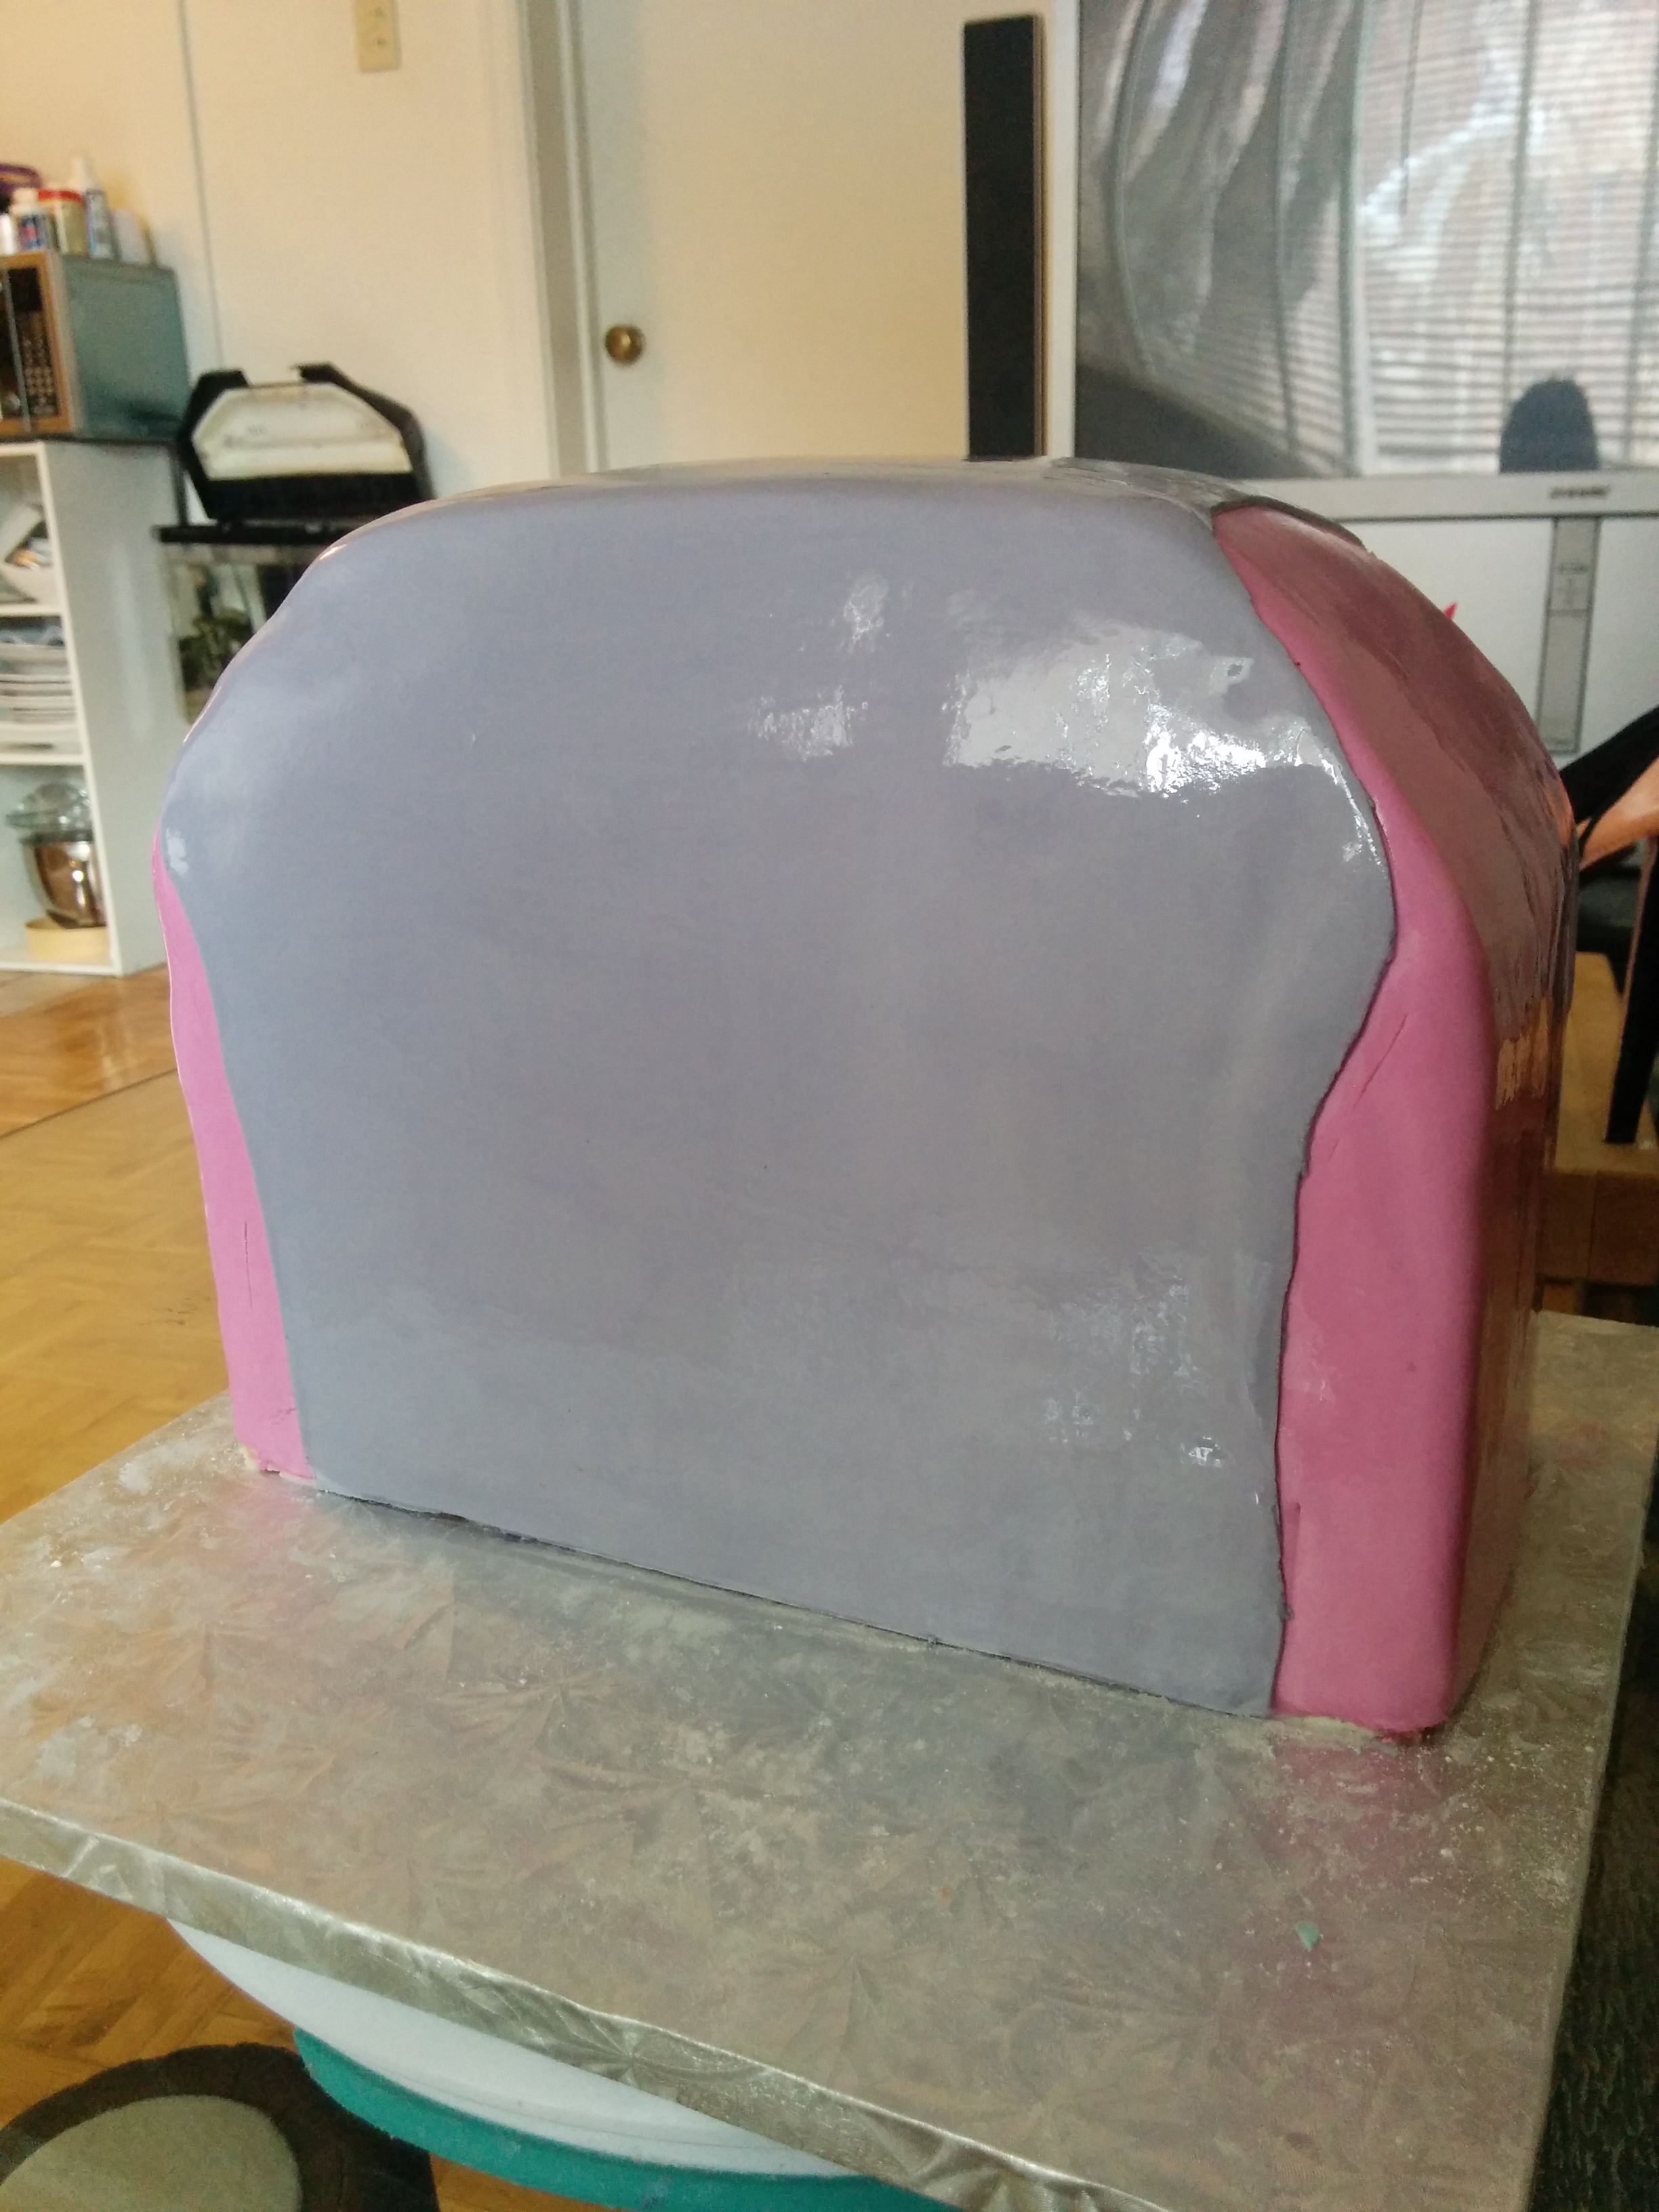
(4) Designing the cake. Brush the sides and top of the cake with some water. Roll out some pink fondant and drape it over the top and sides of the cake, making sure some fondant spills over to the front of the cake.

(5) Use a very sharp blade or x-acto knife to cut off the excess fondant at the top and sides of the cake, leaving some to overlap in the front.
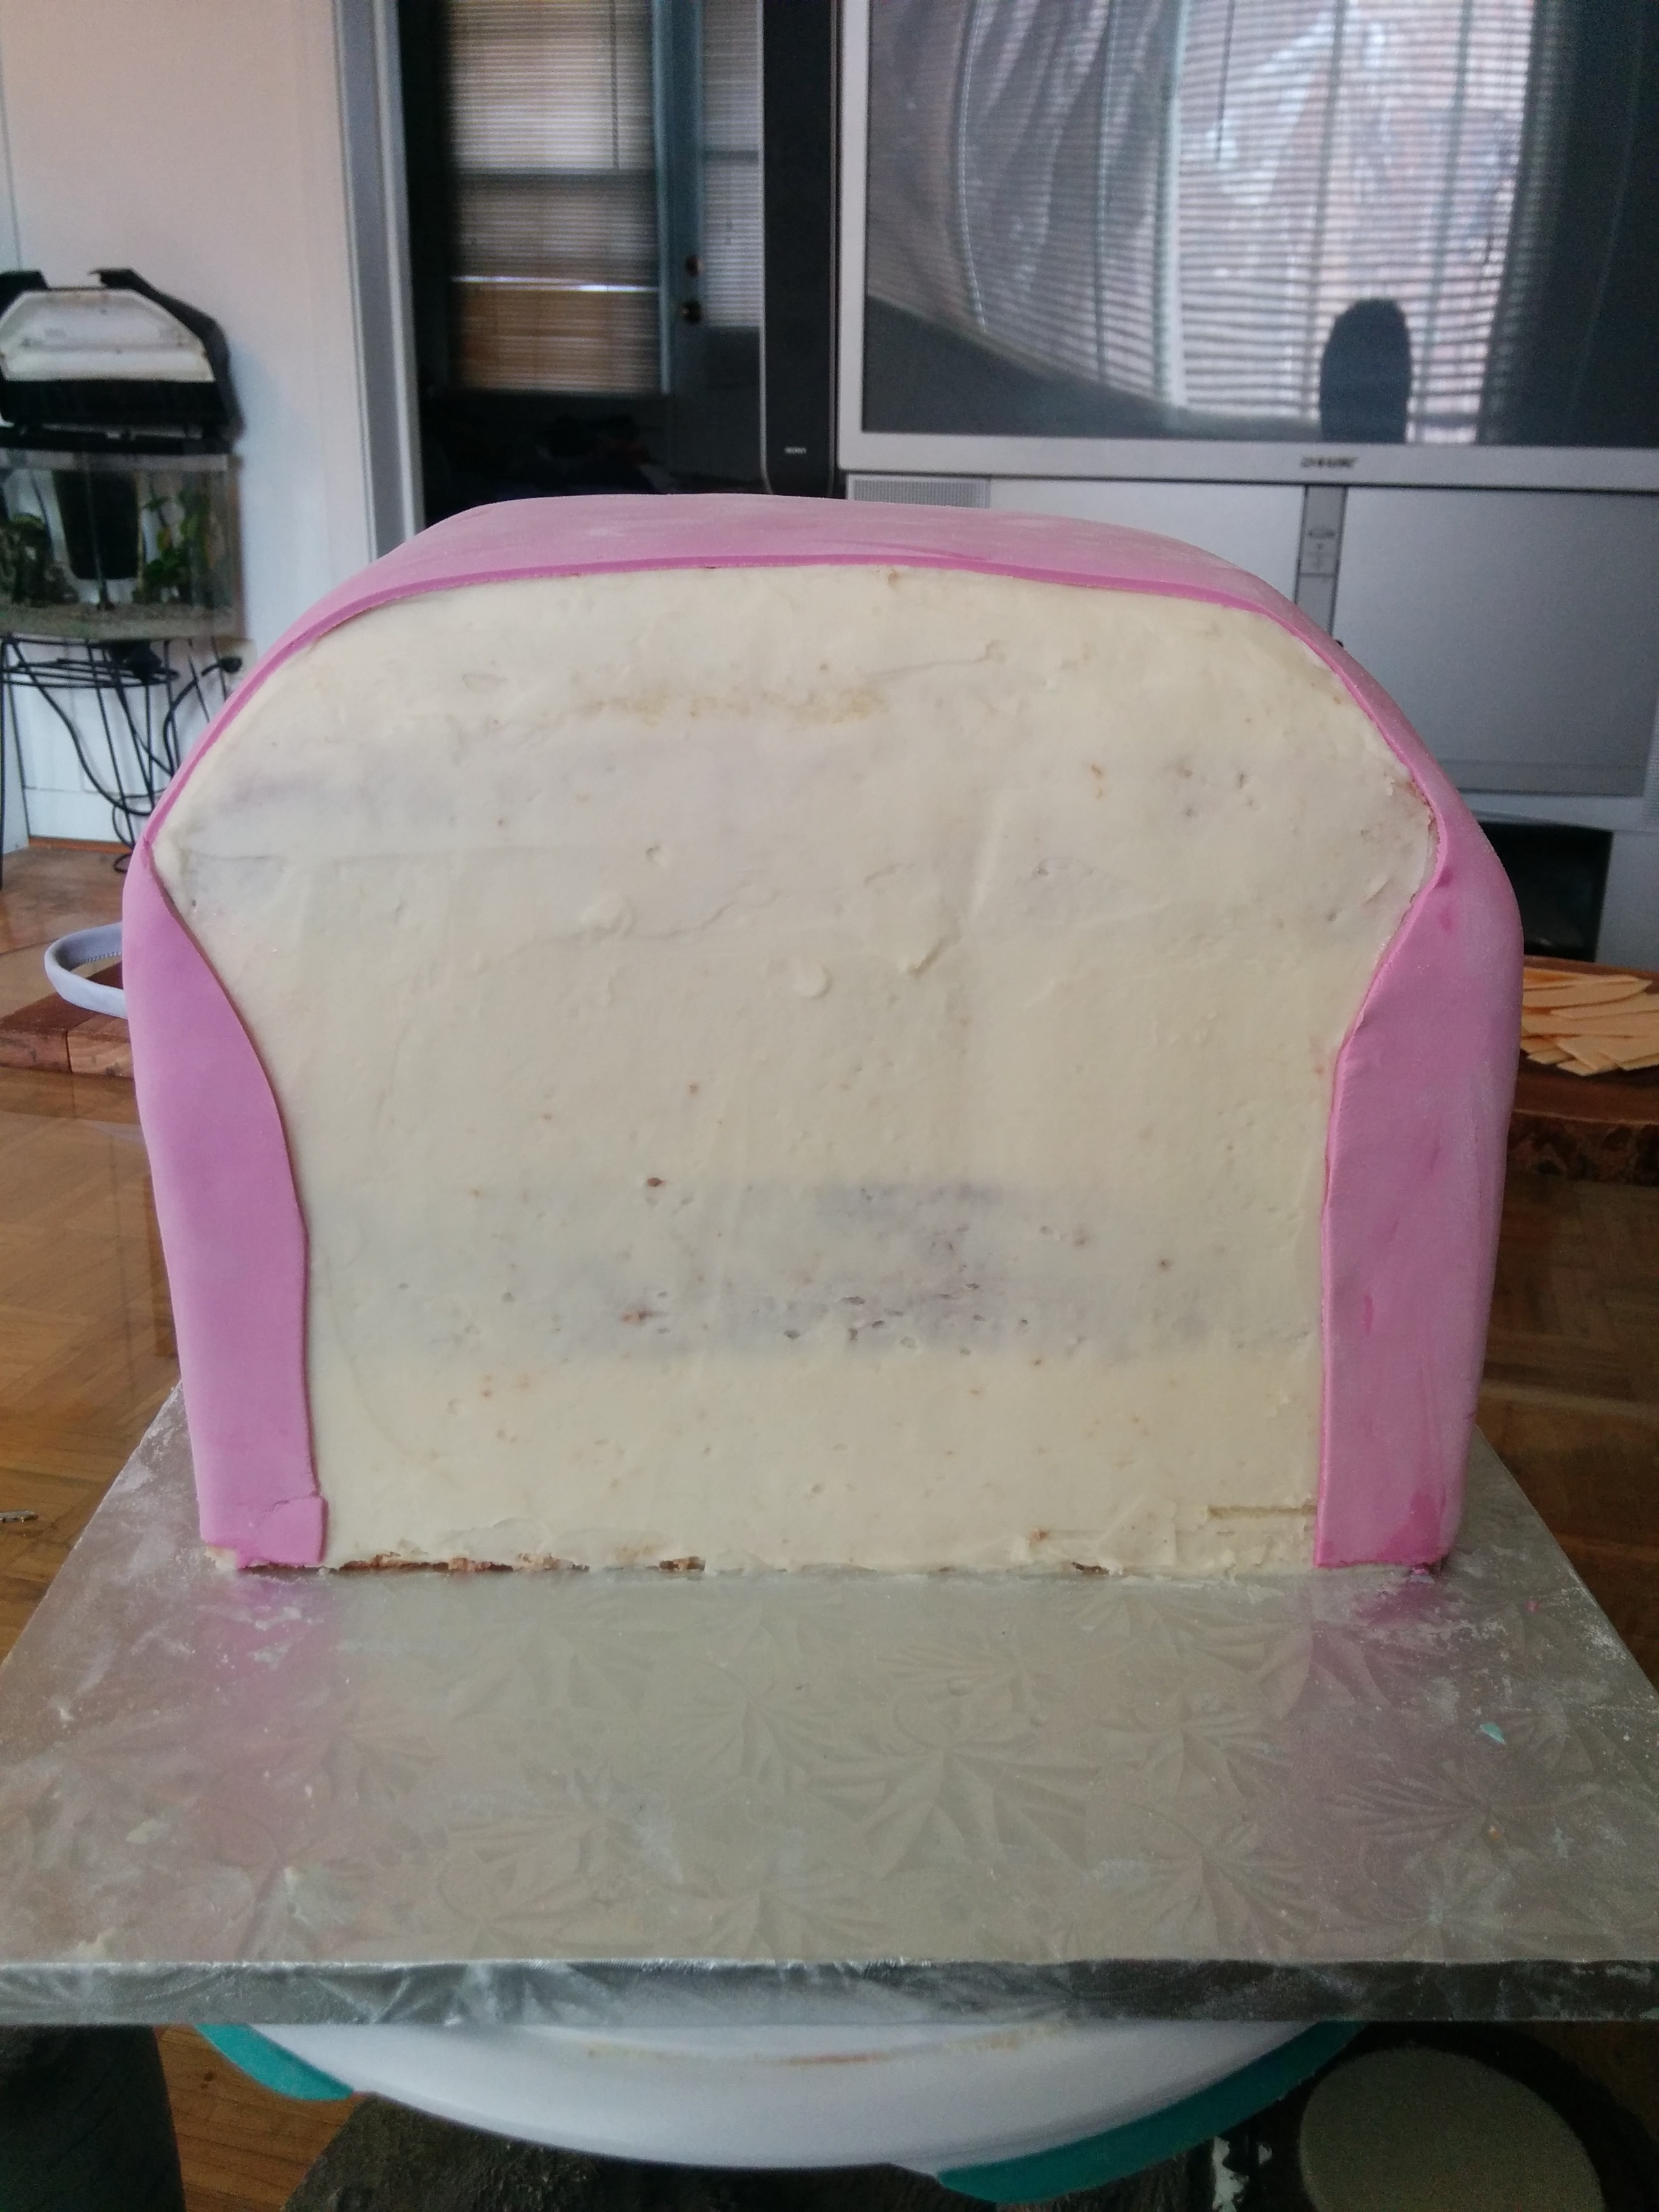
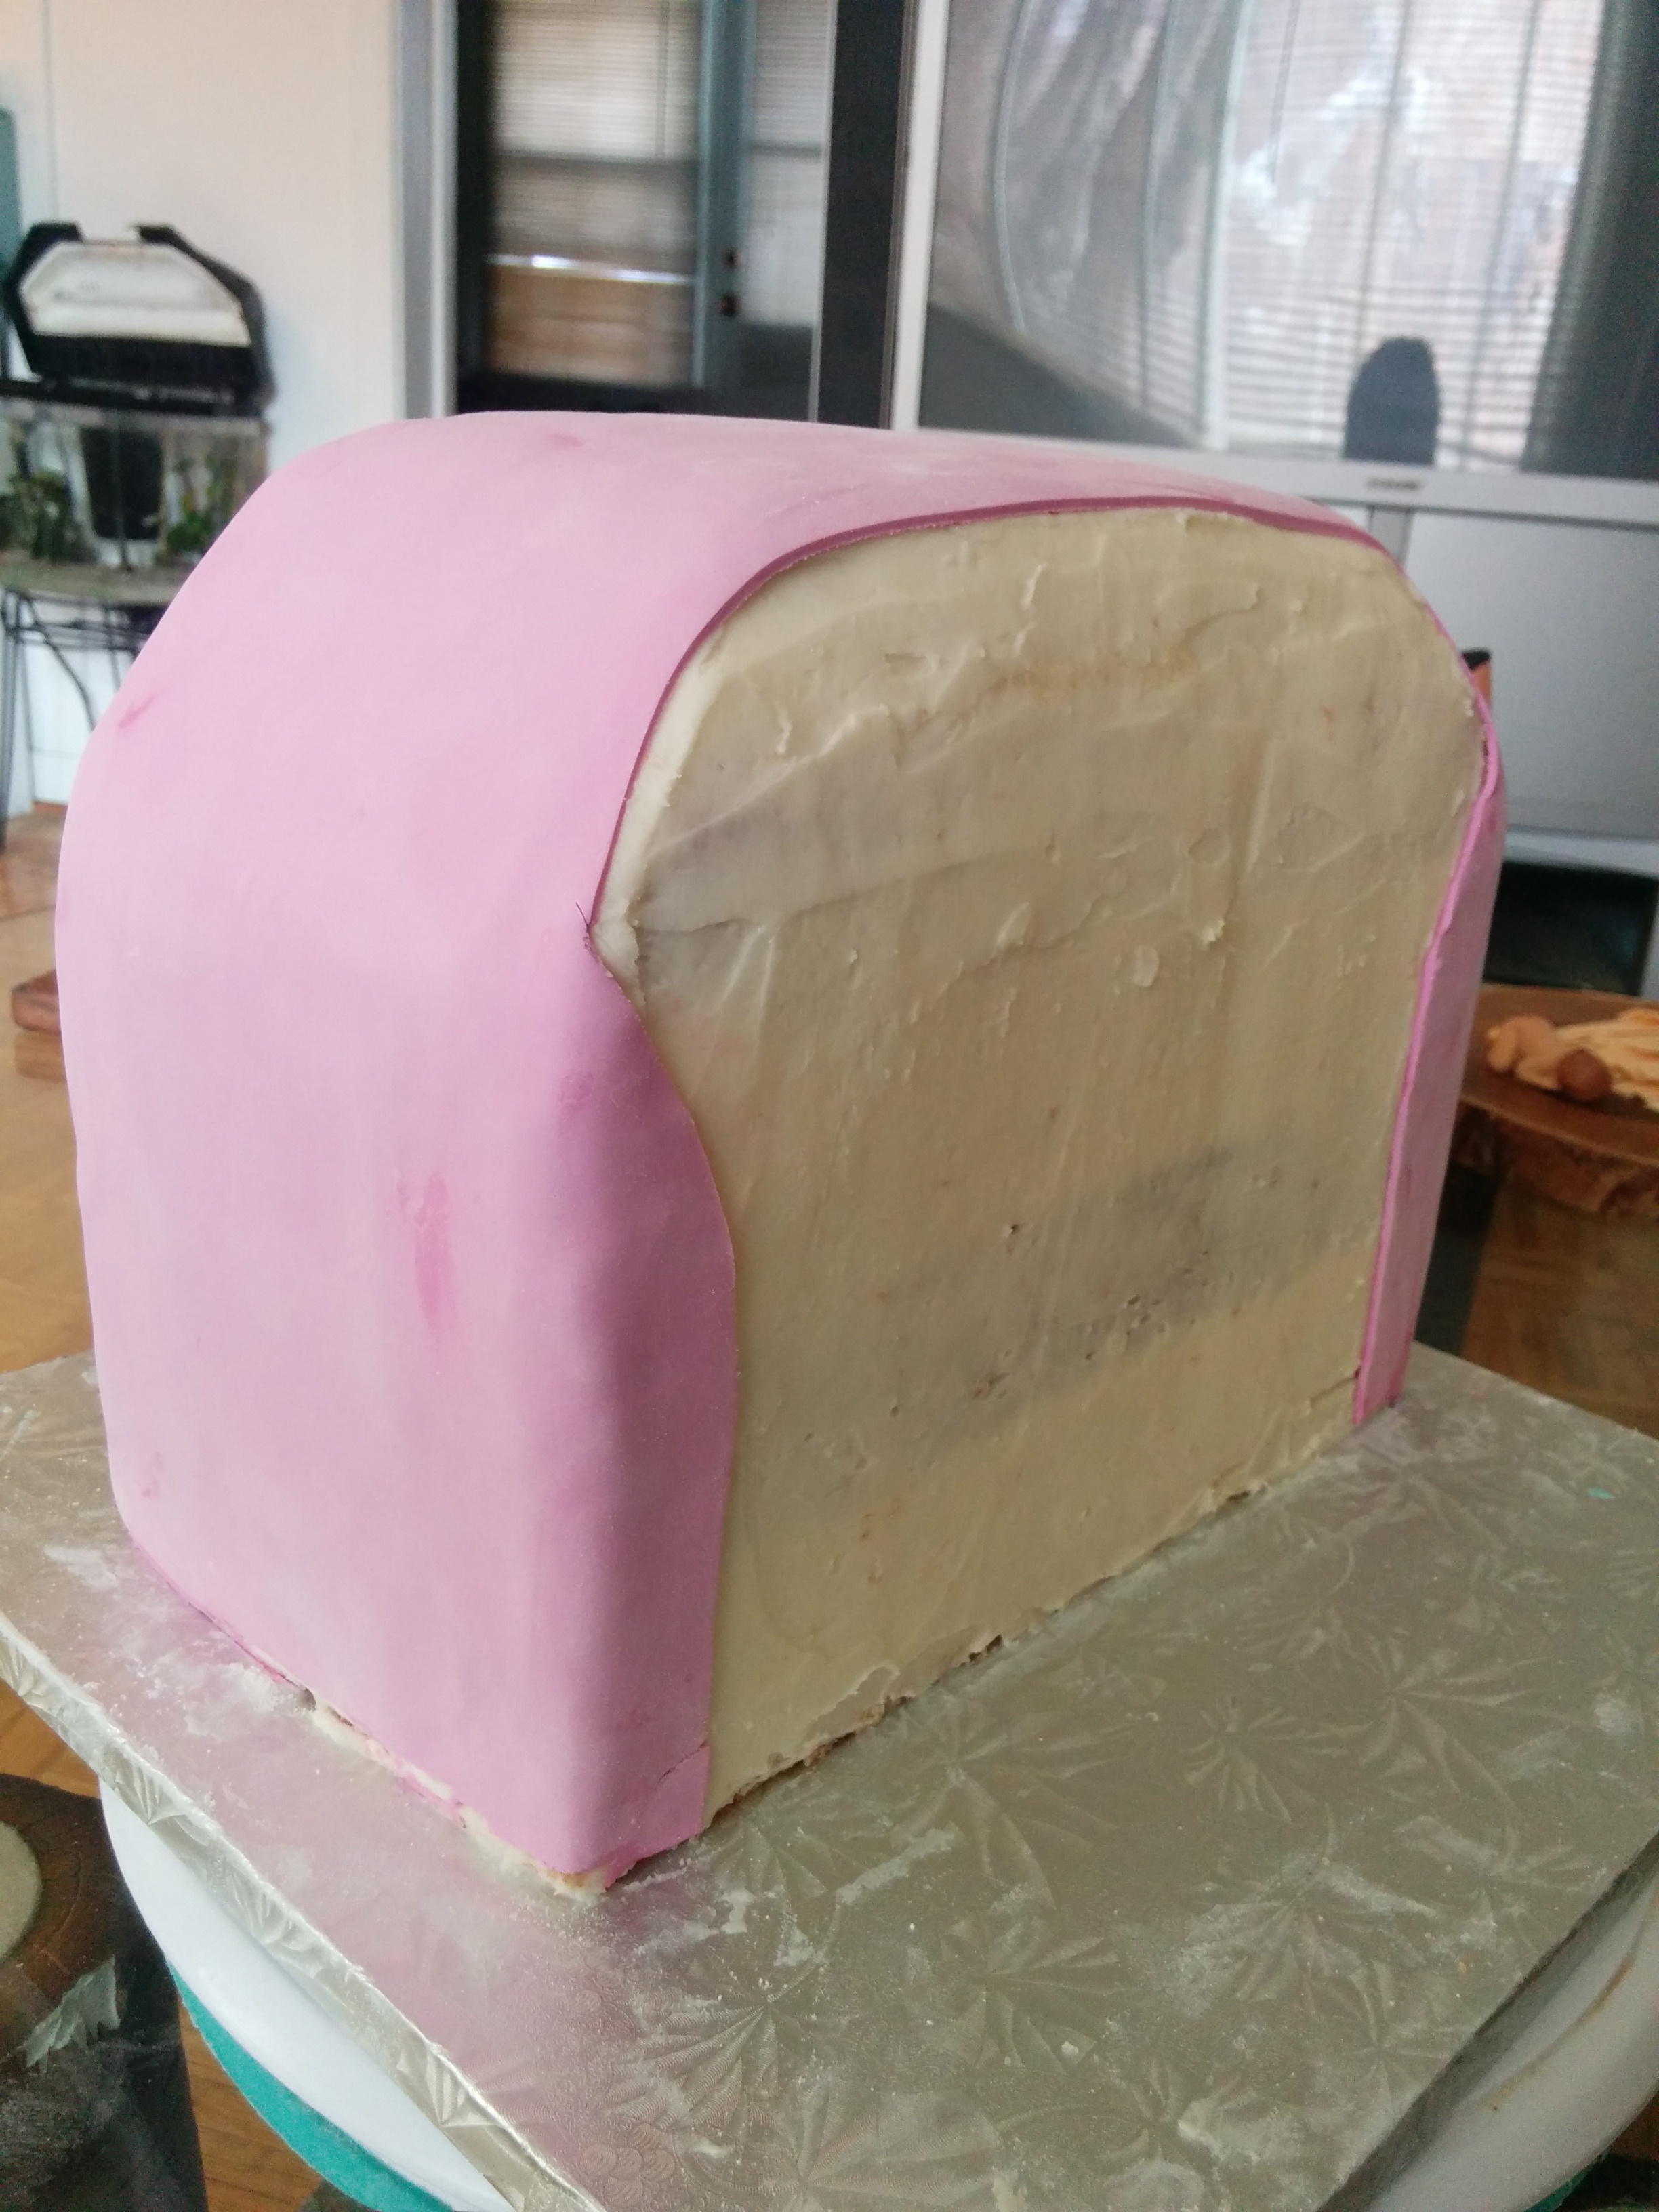
(6) Next, roll out some grey fondant, brush the front and back of the cake with water and drape the fondant over the cake.
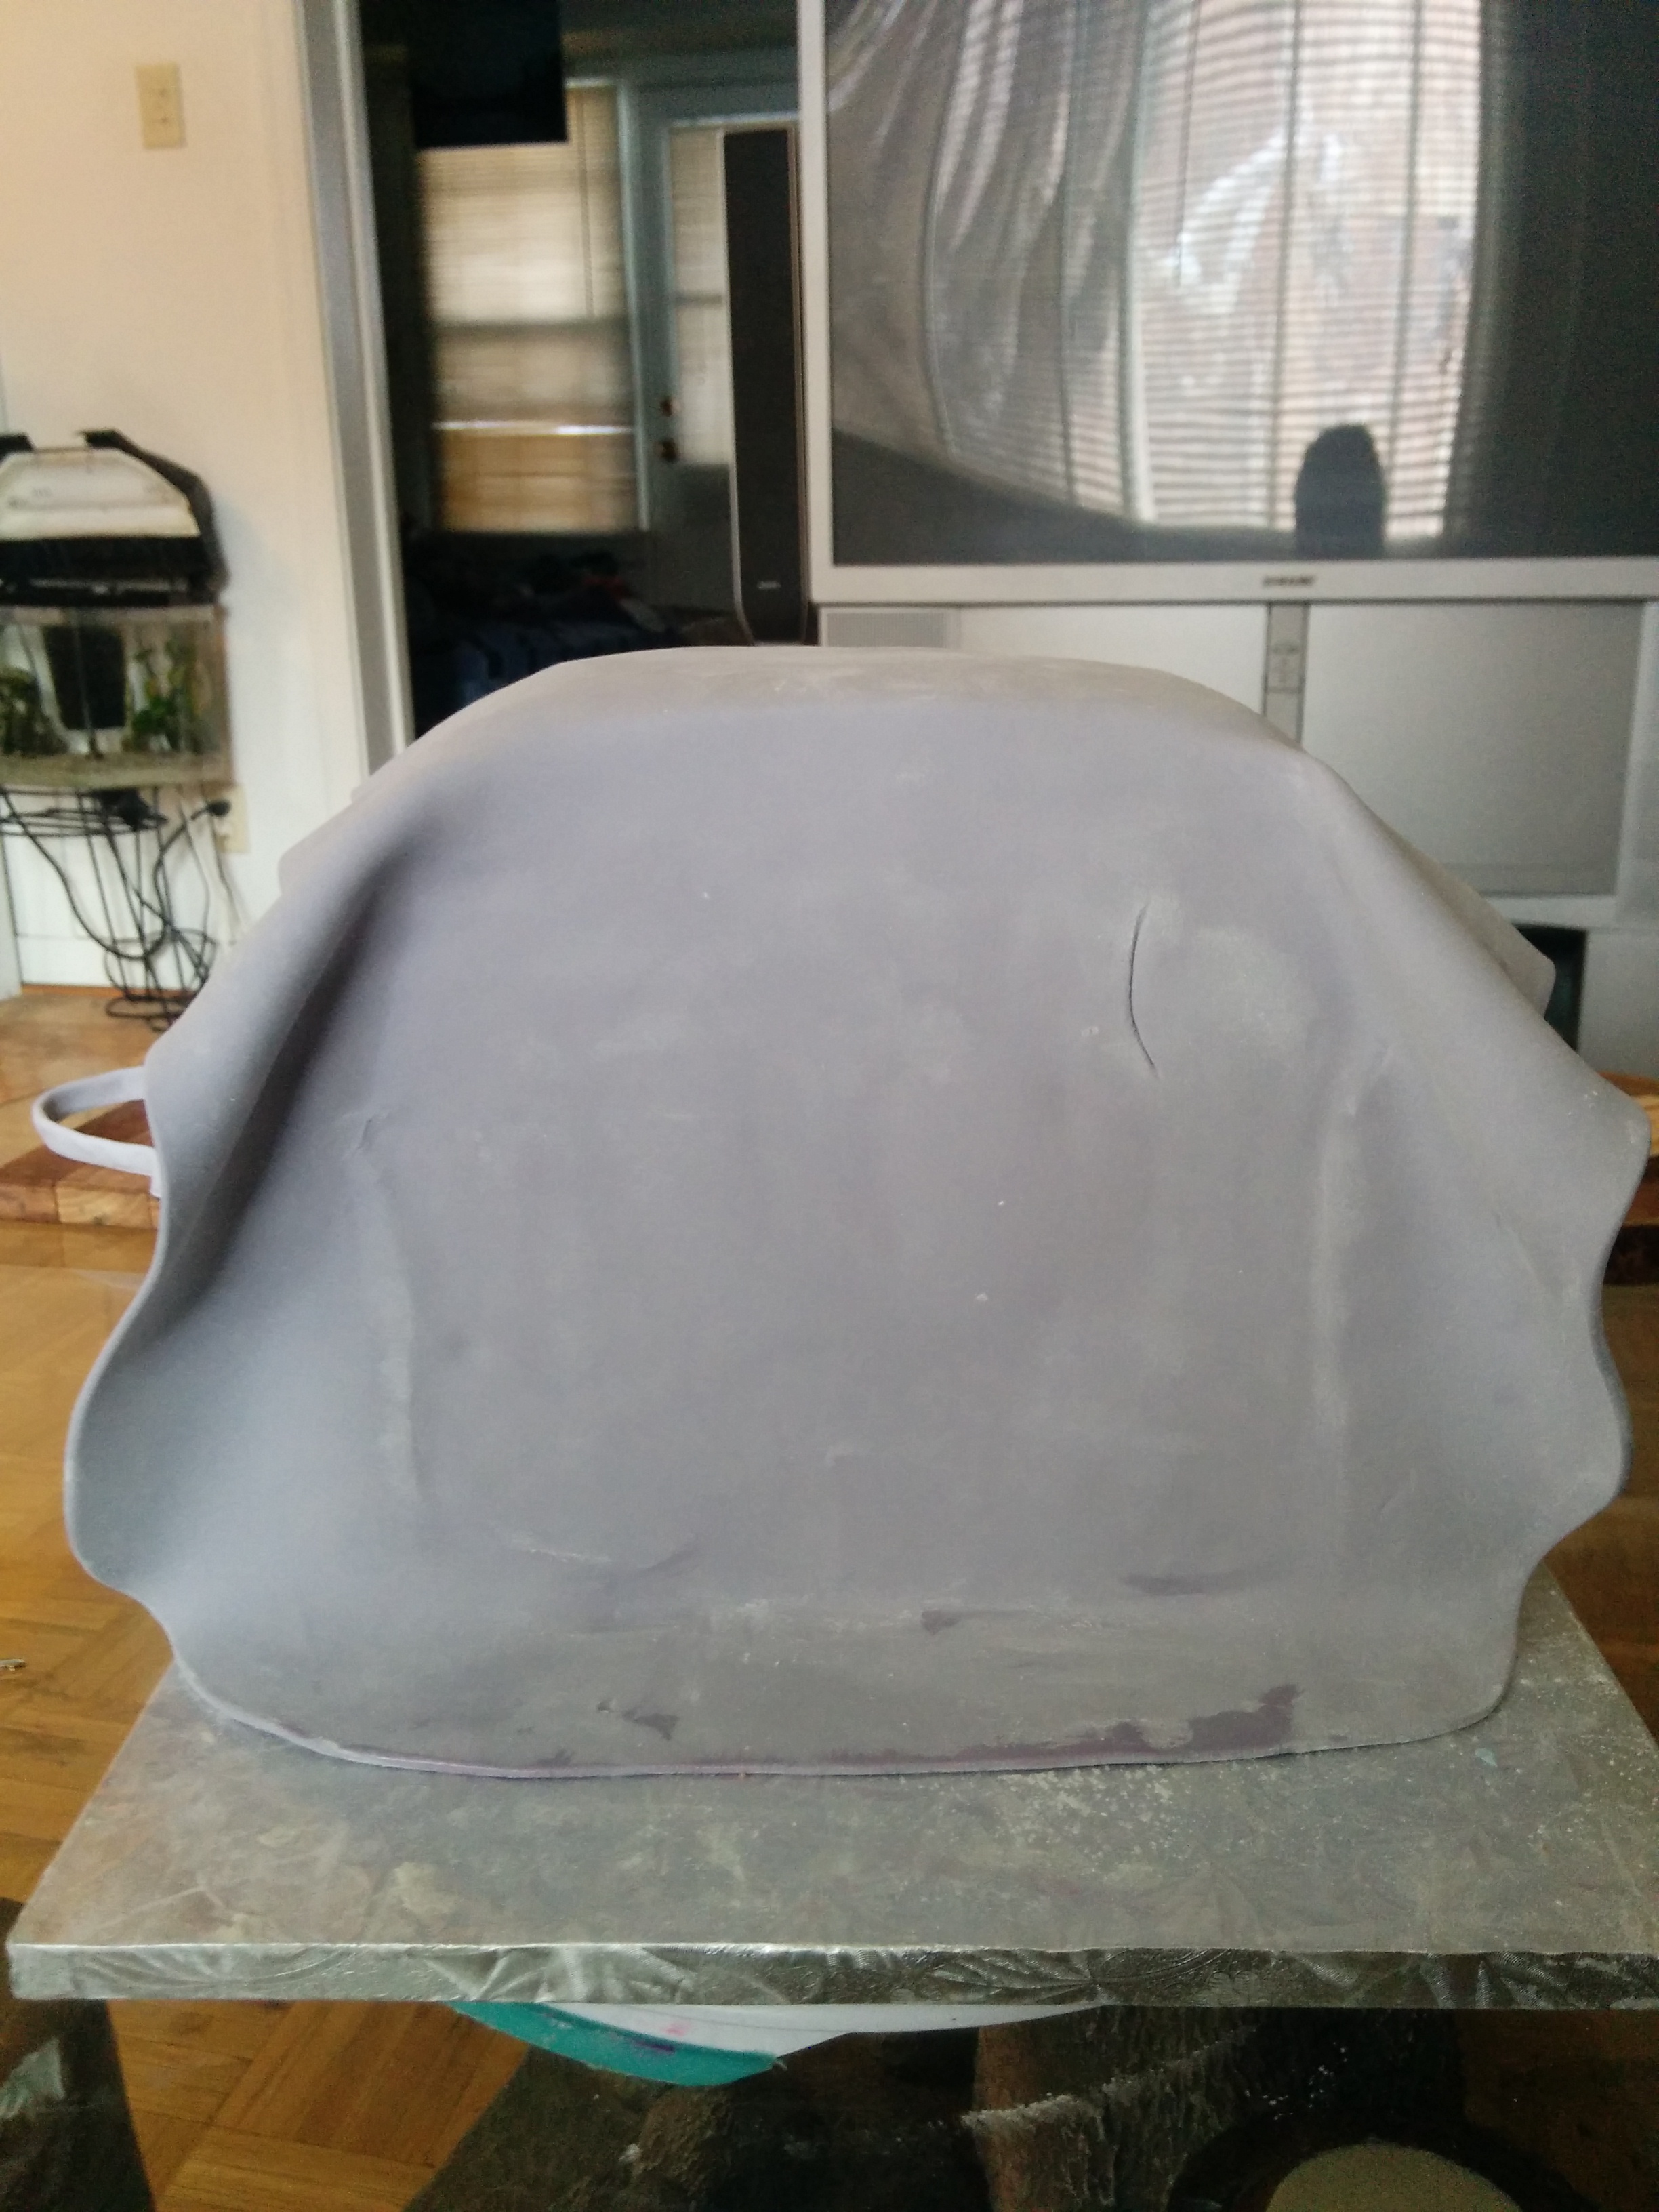
(7) Use the blade to cut off the excess fondant from the cake and brush the cake with some vodka to remove any icing sugar residue.
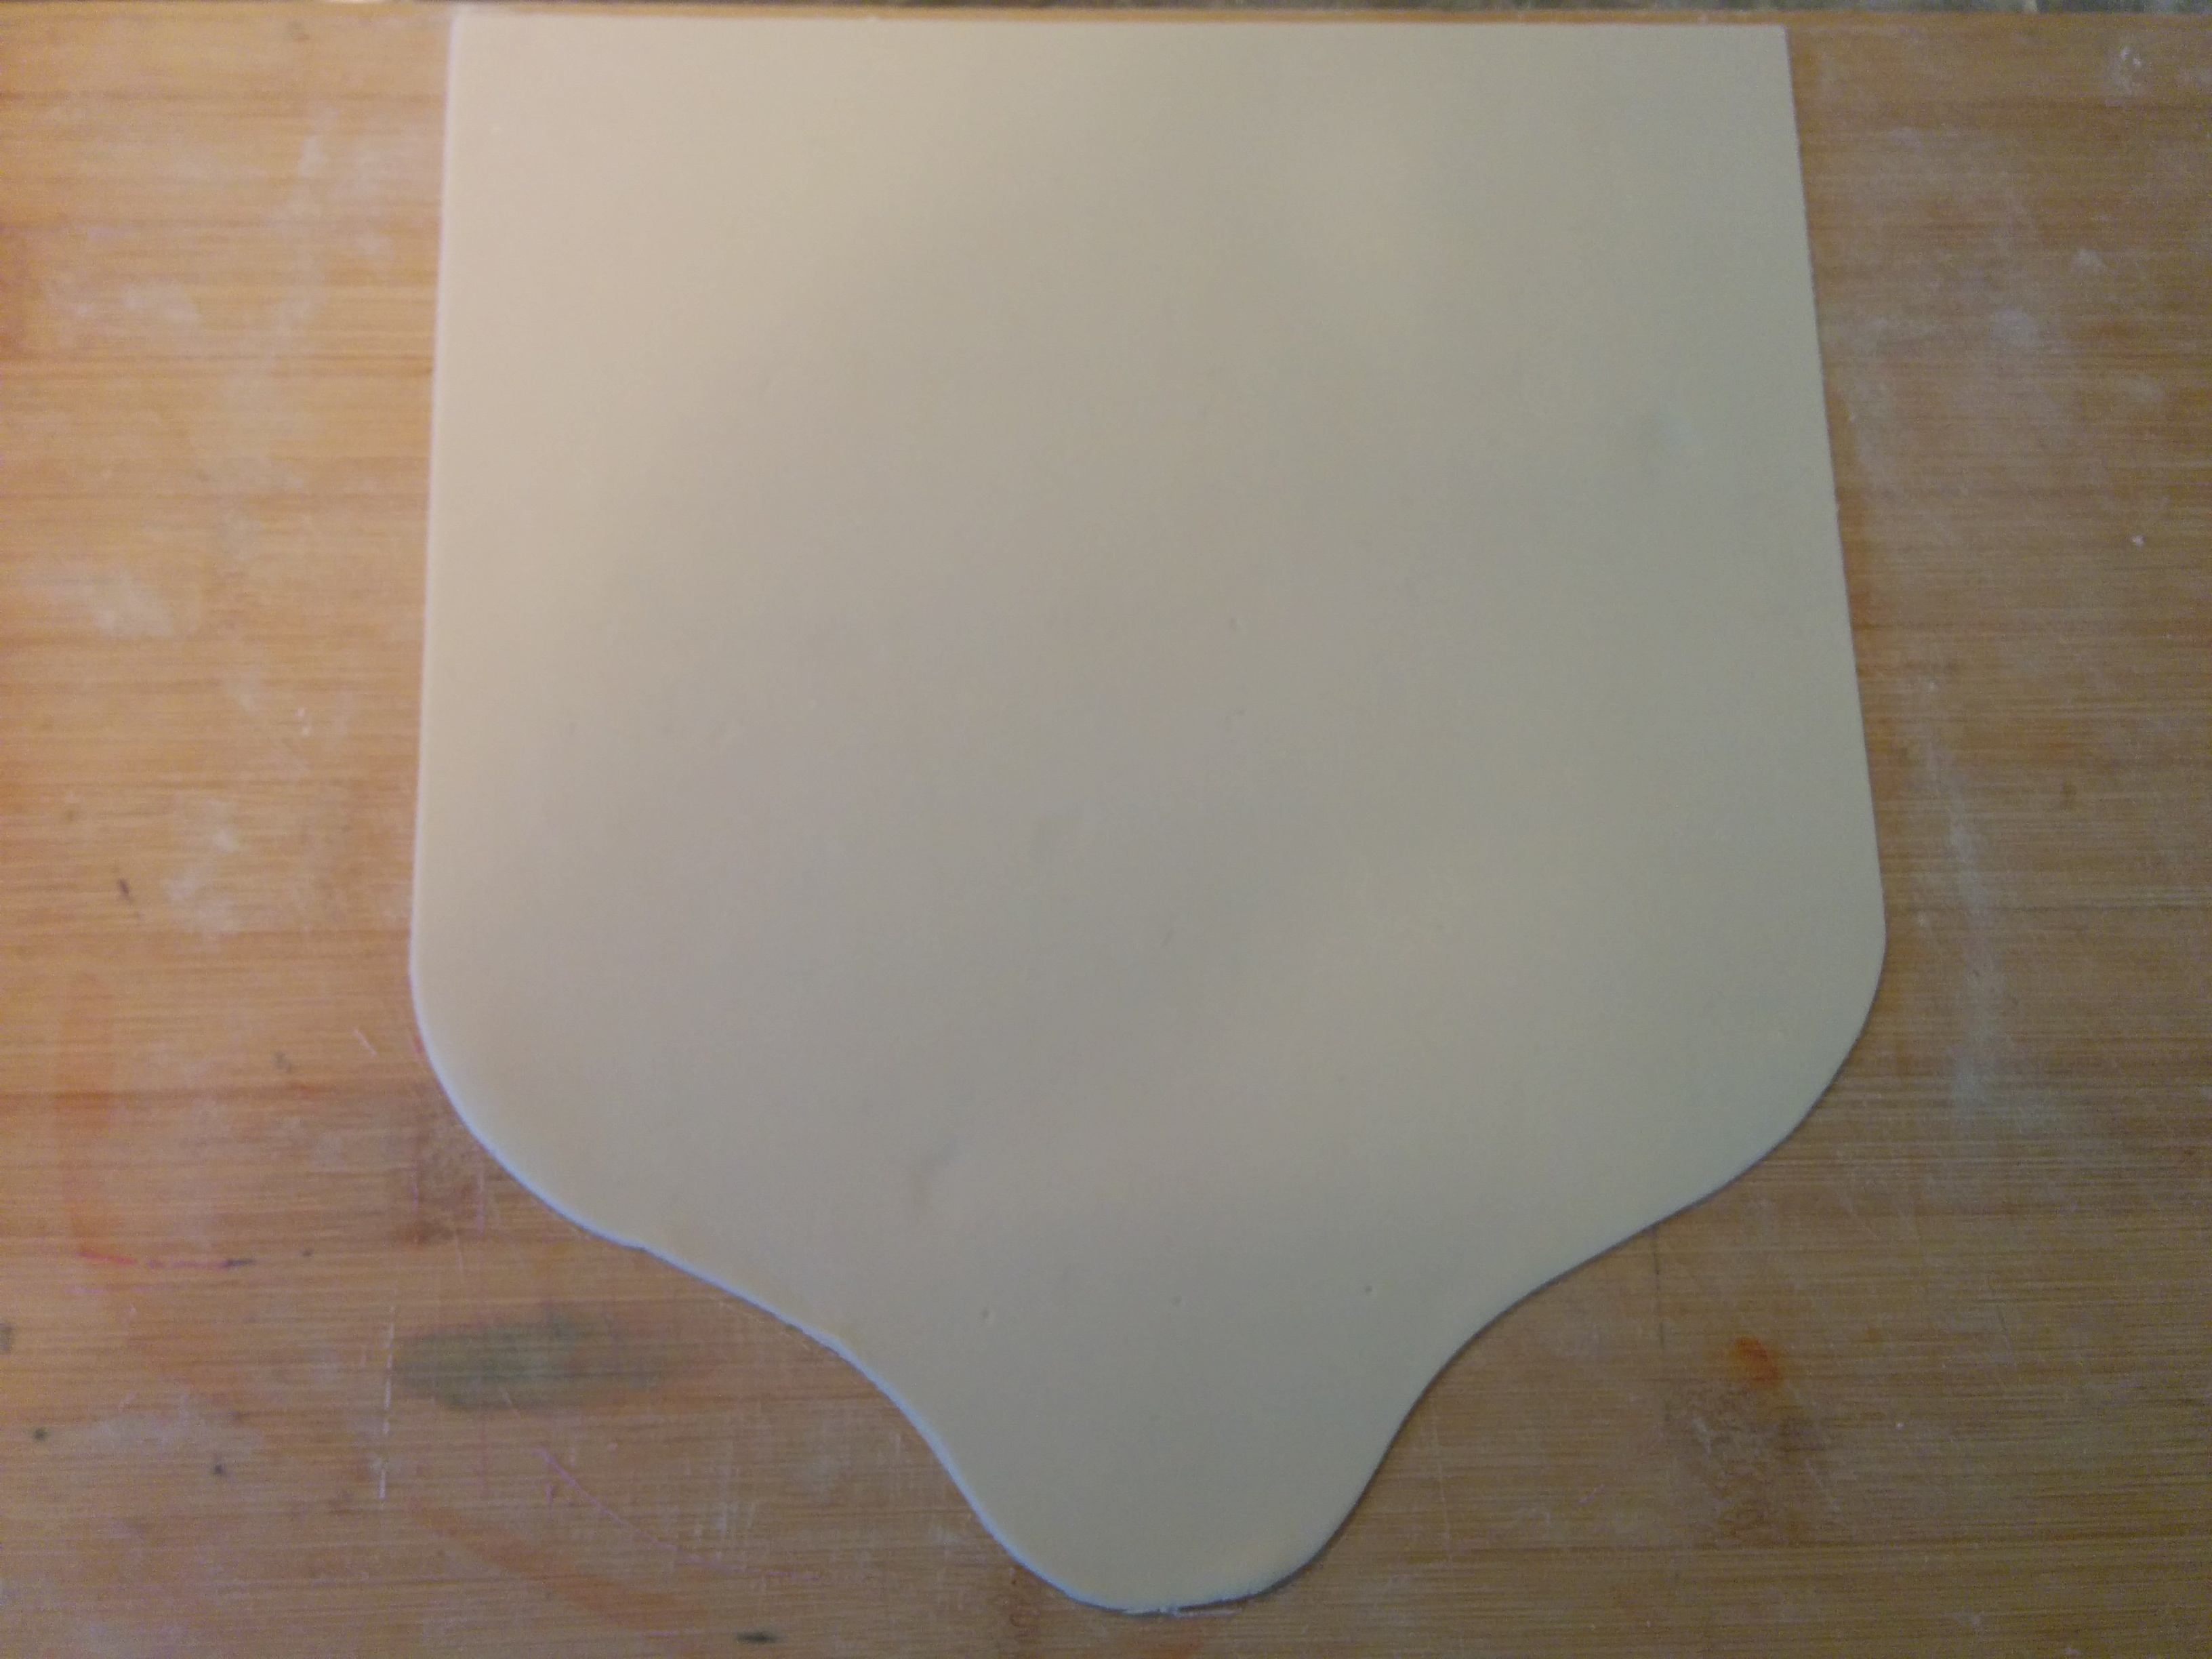
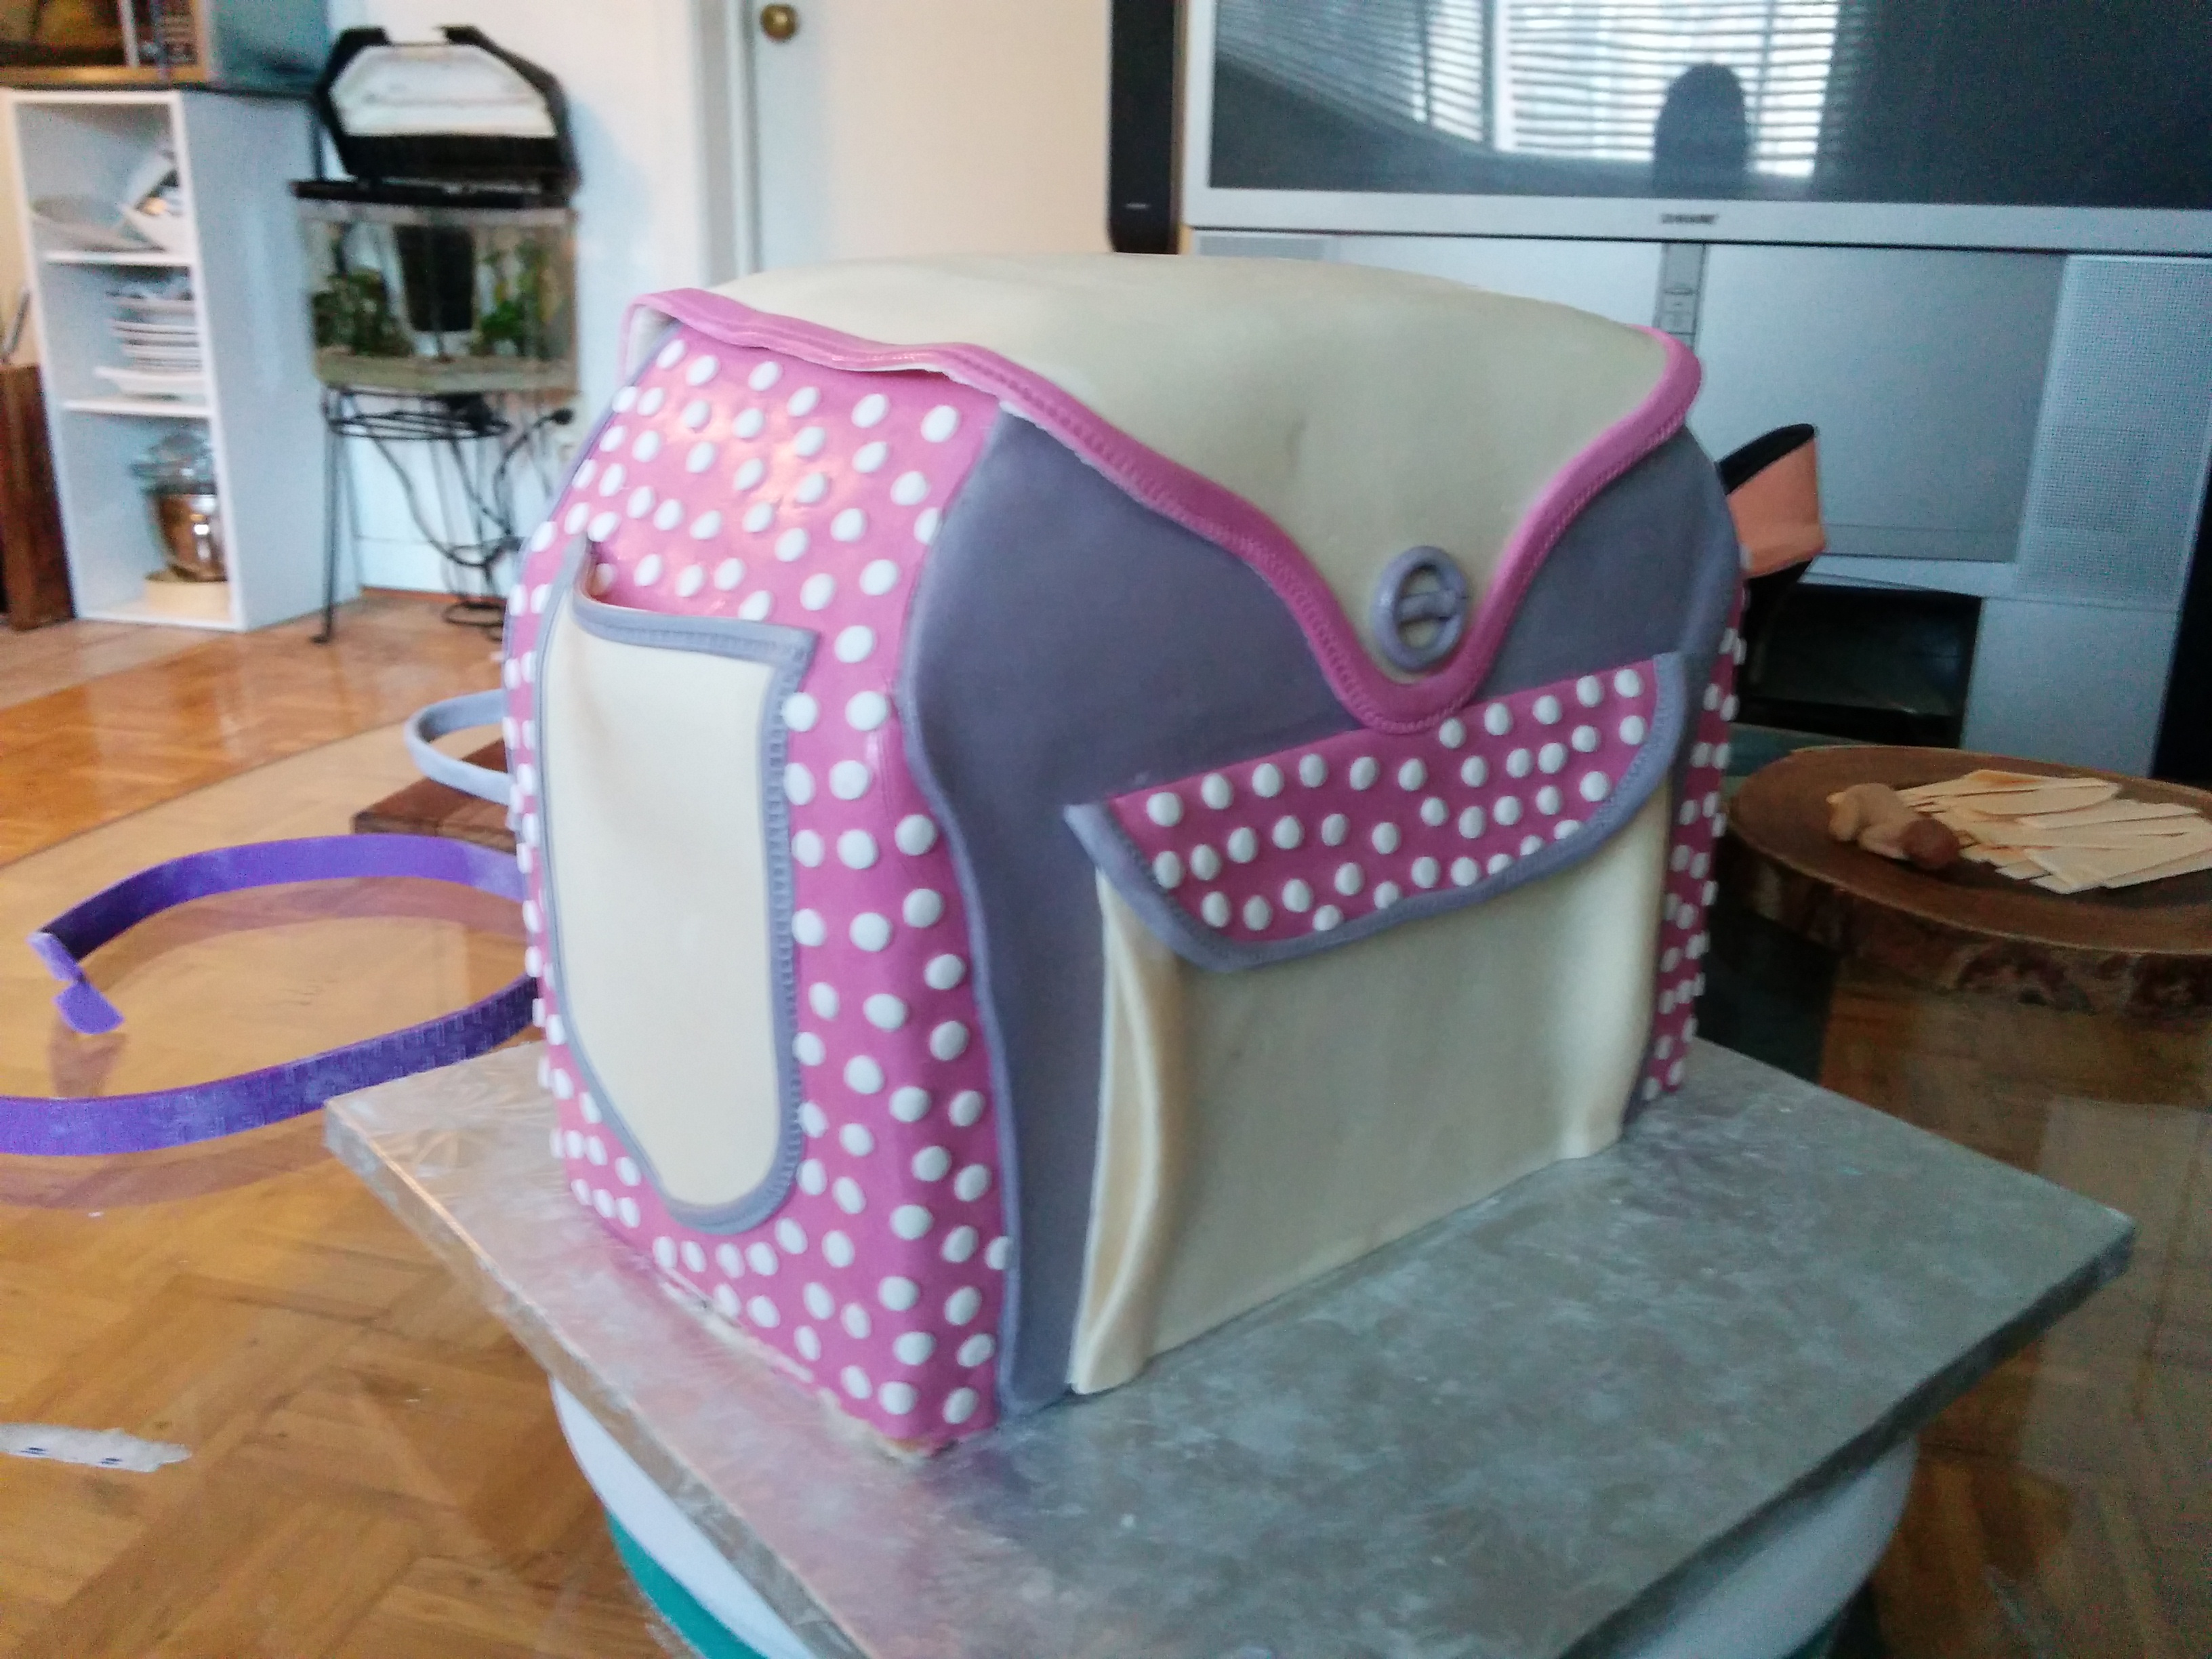
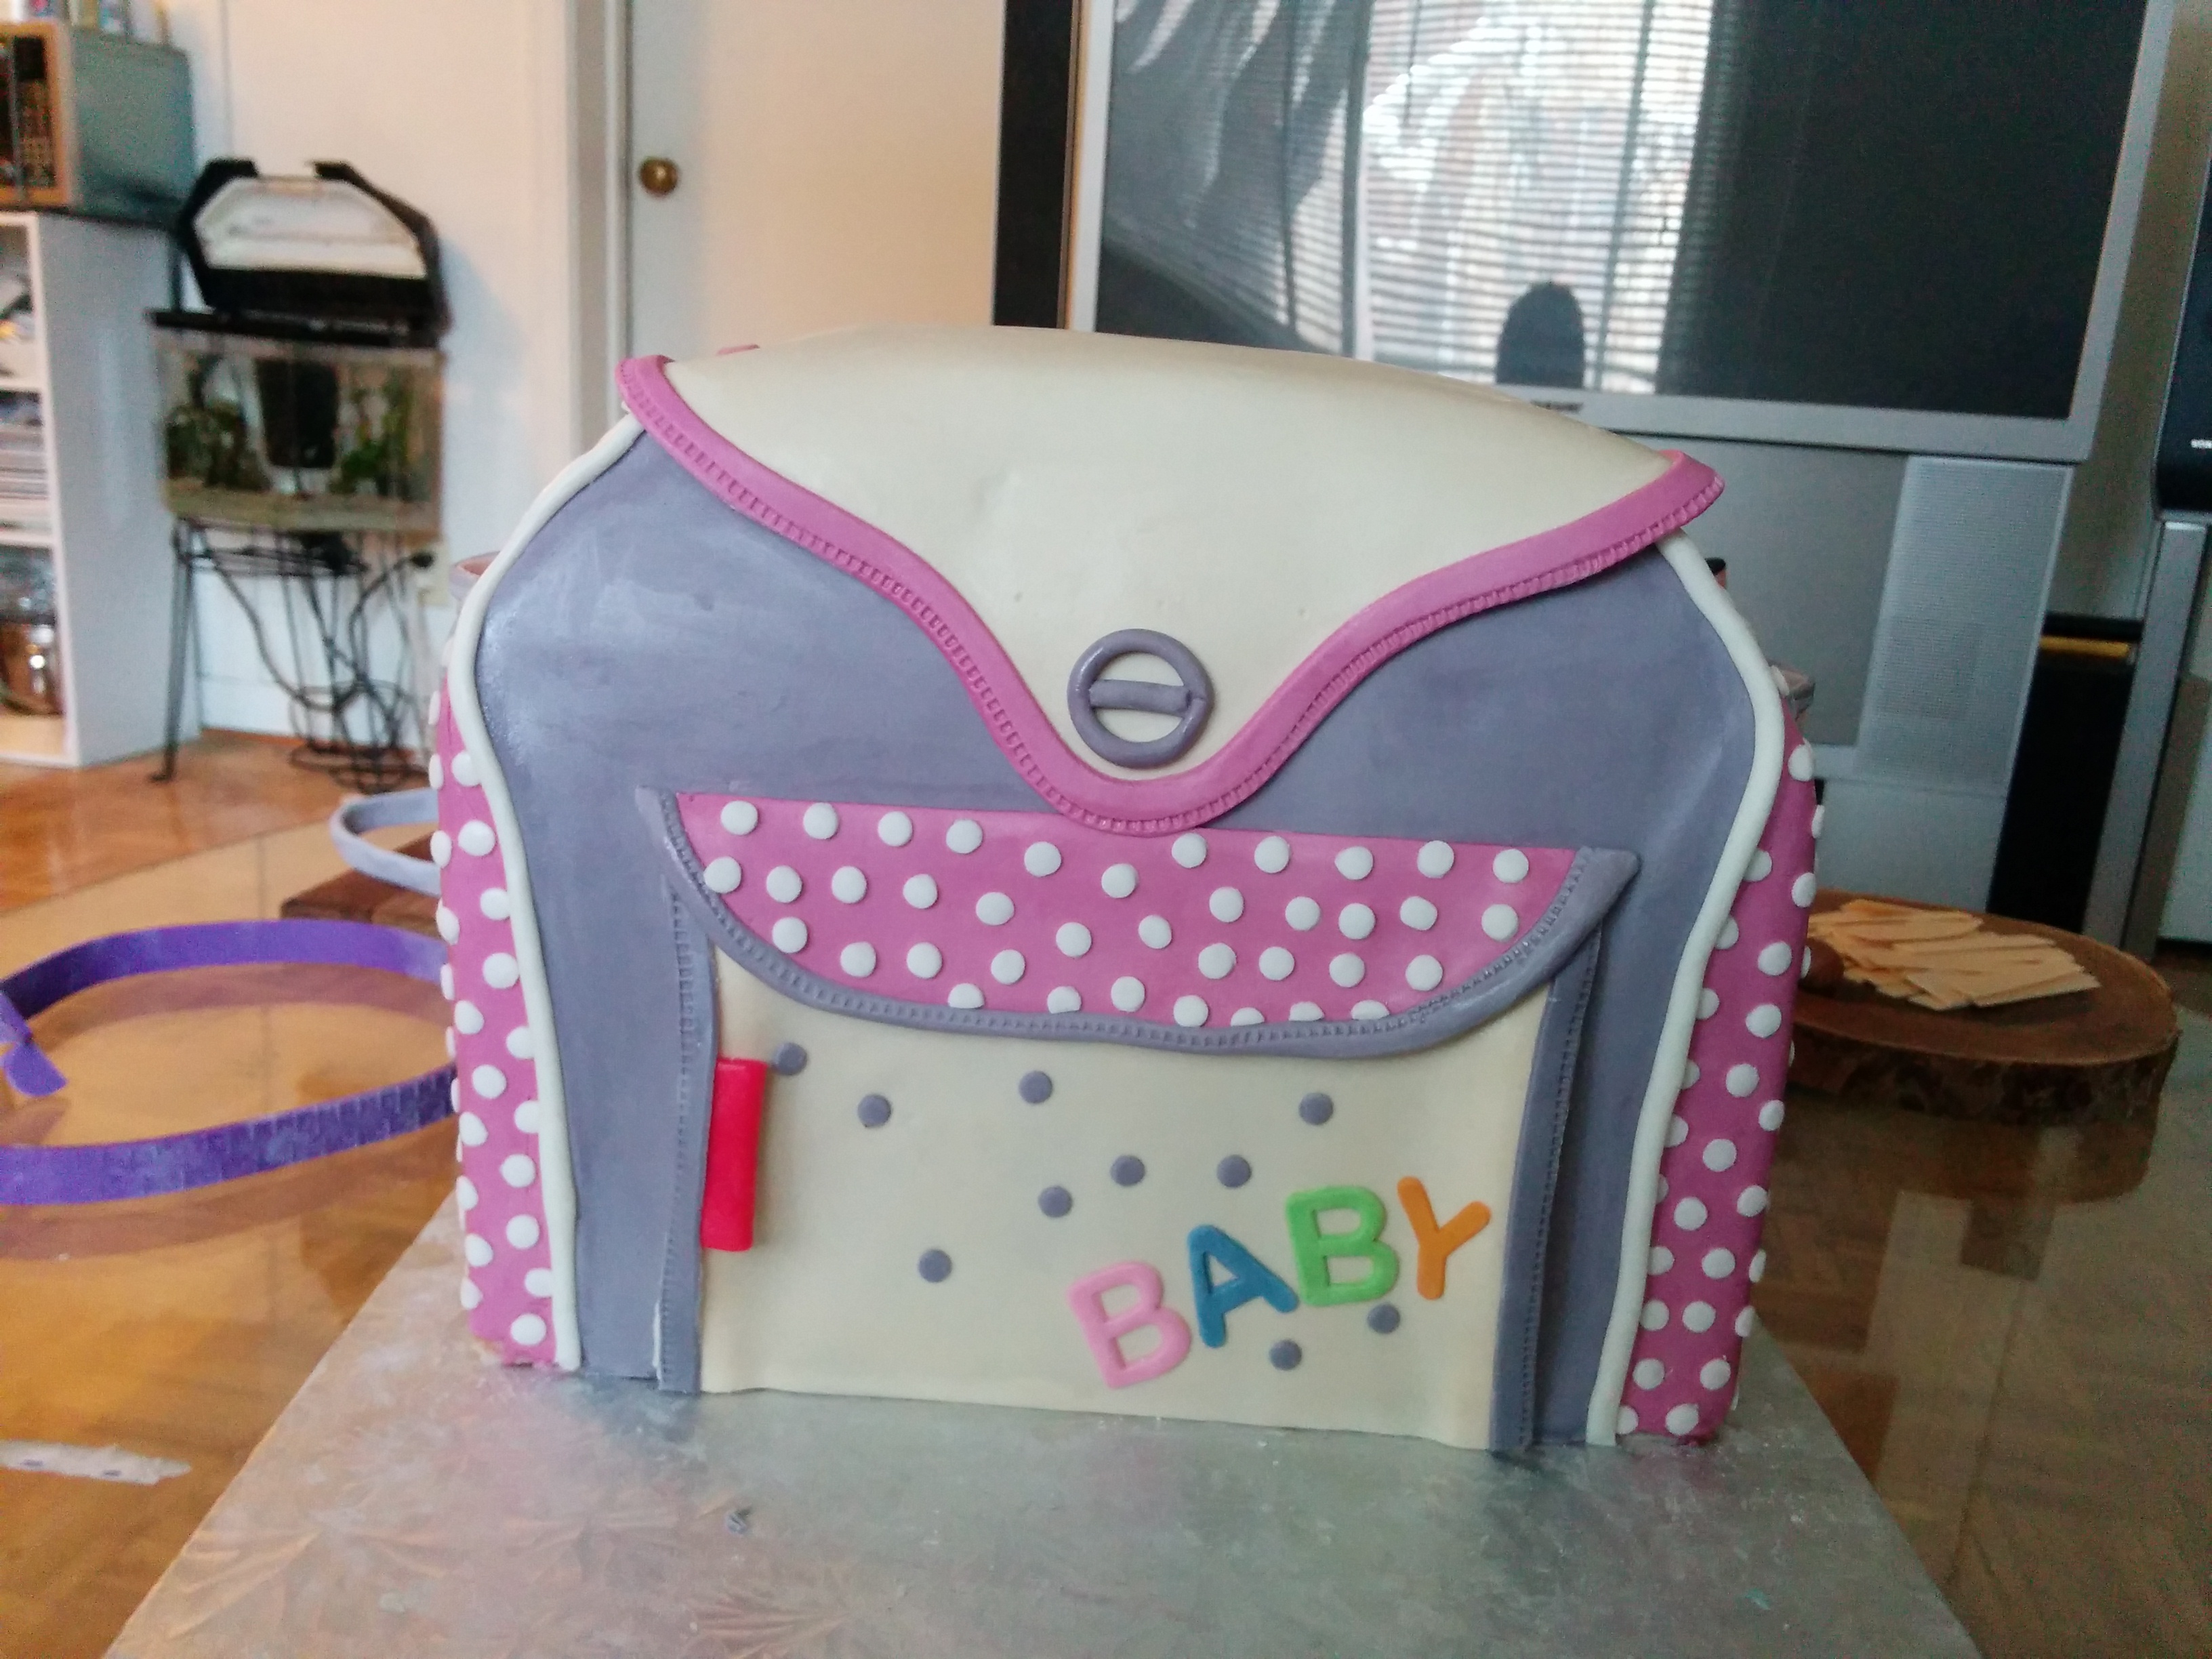
(8) Next, make the front pocket of the diaper bag. Cut out a rectangular cream fondant and fold in both ends. This will create volume for the pocket.
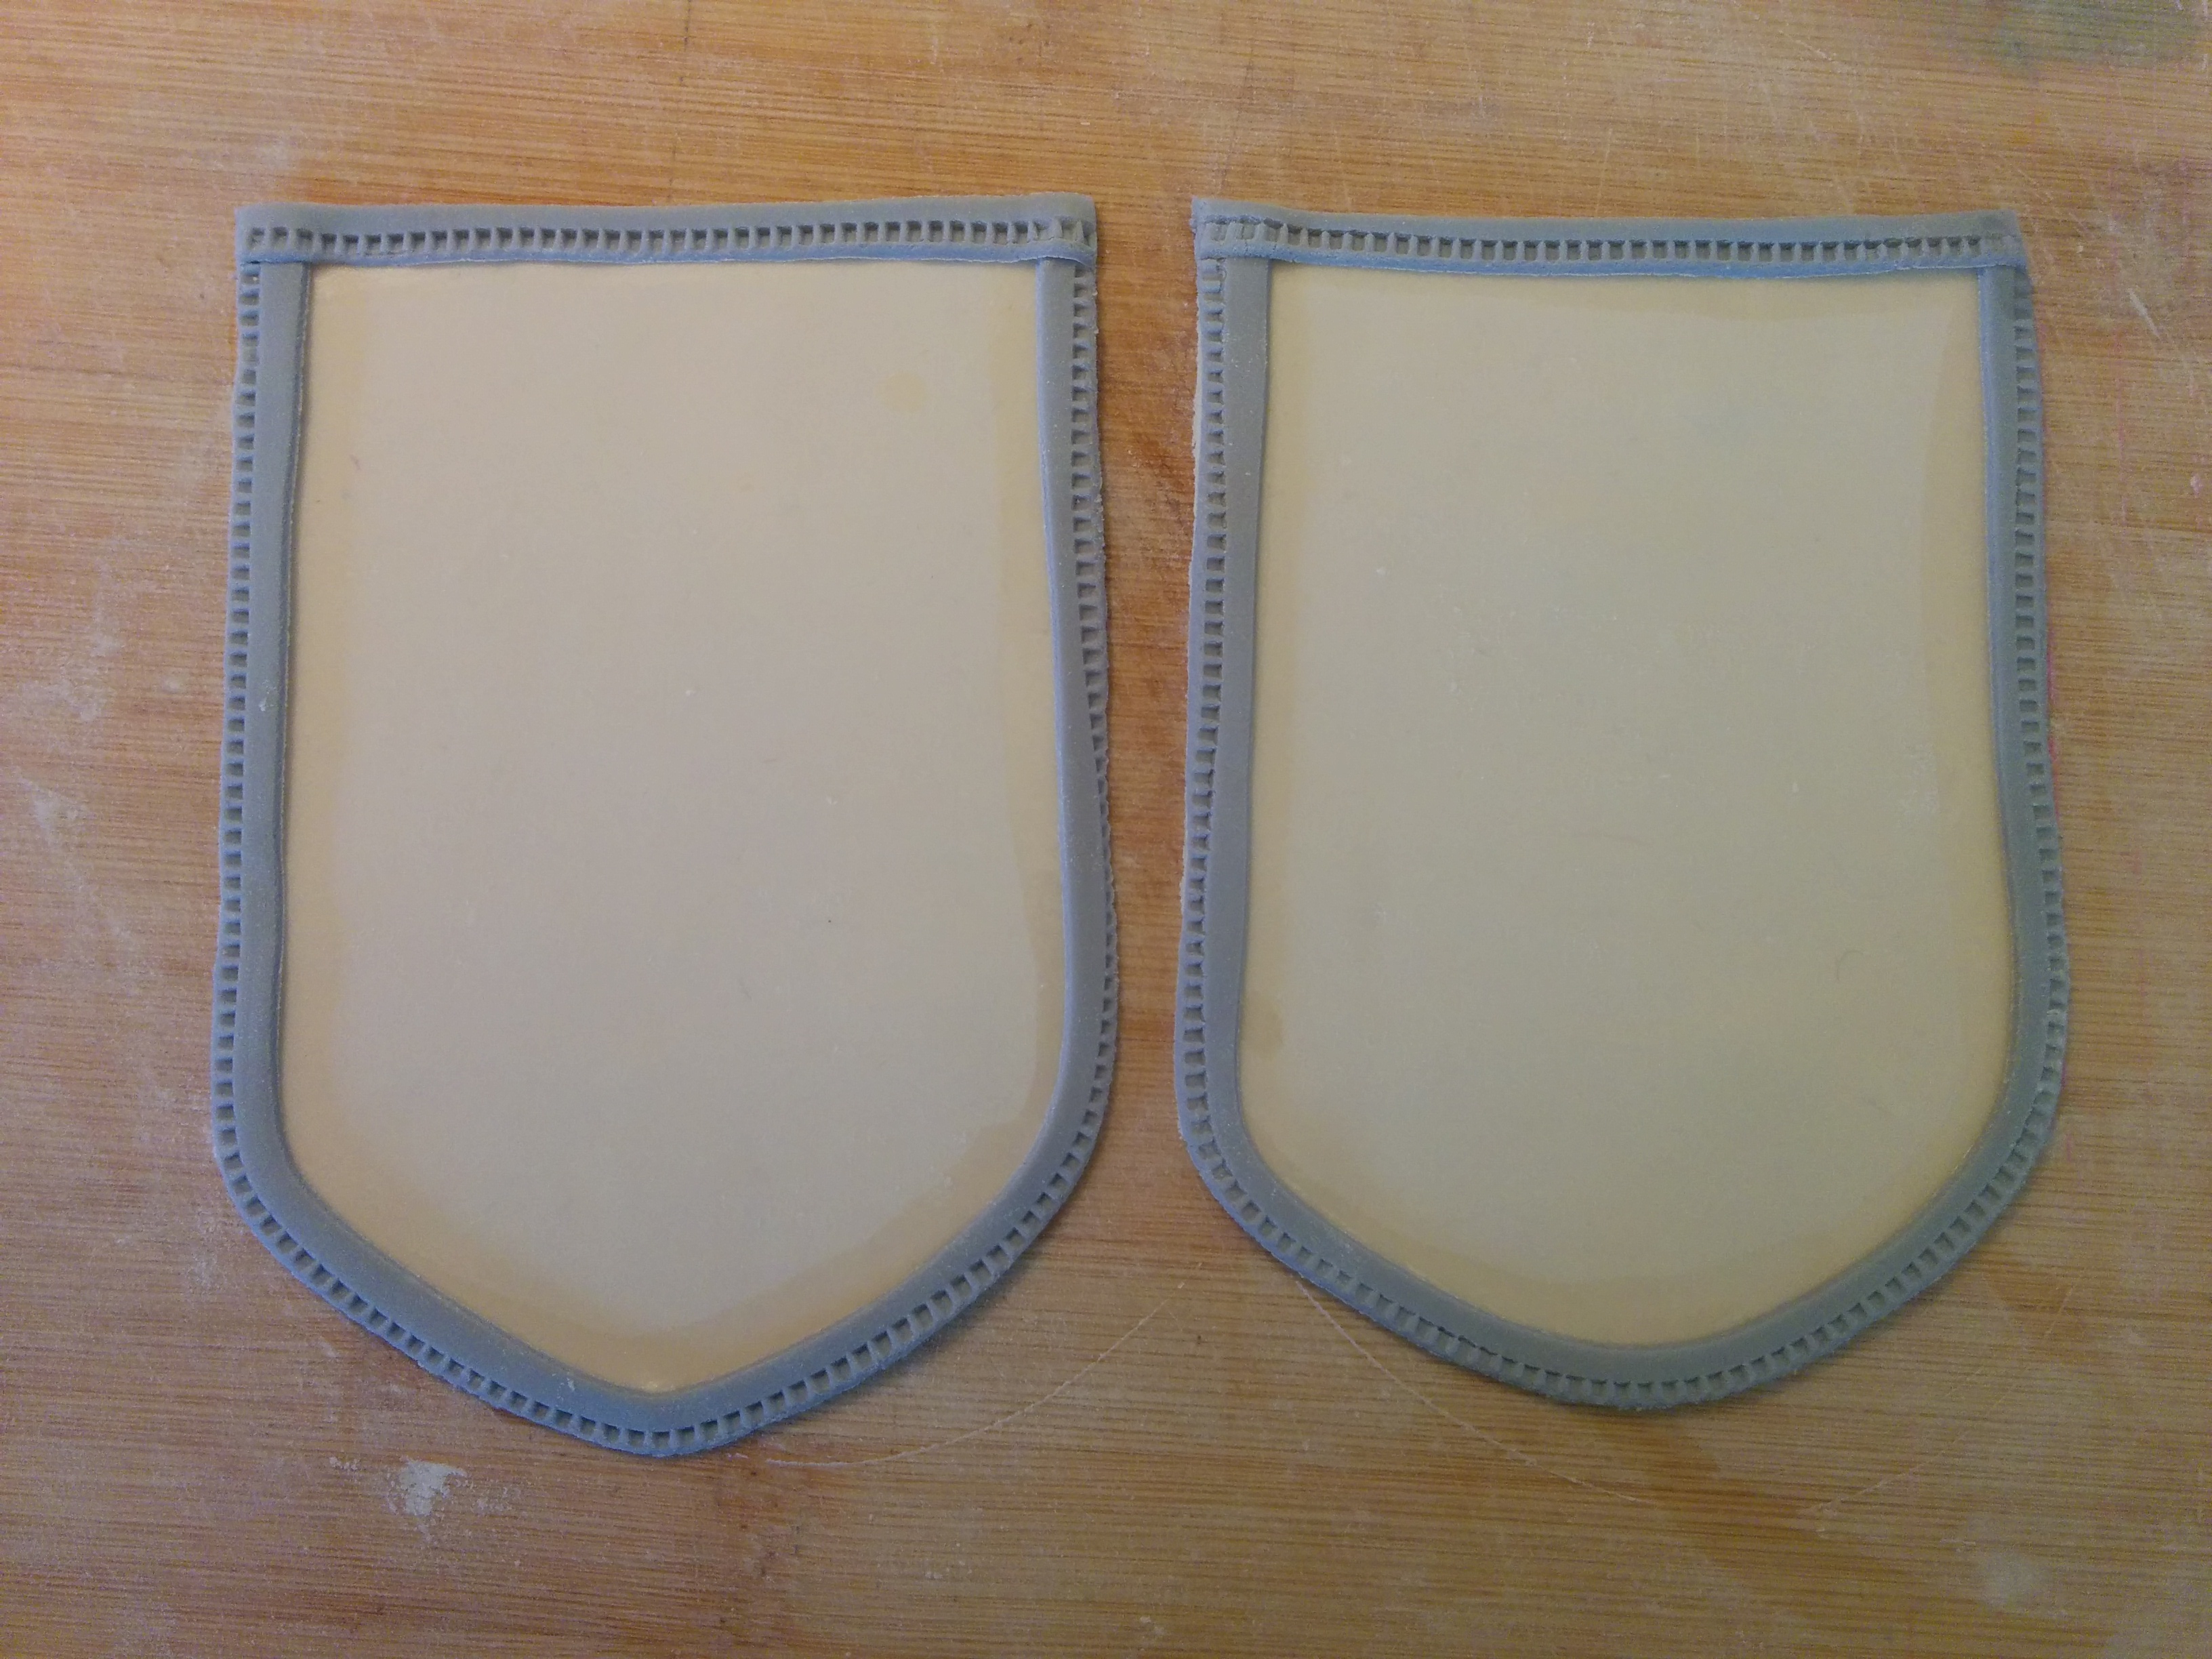
(9) Cut out the flap and trim of the pocket and stick them together using water. Run a fondant wheel over the trim.
(10) Next, stick the pocket and flap to the bag with some water.
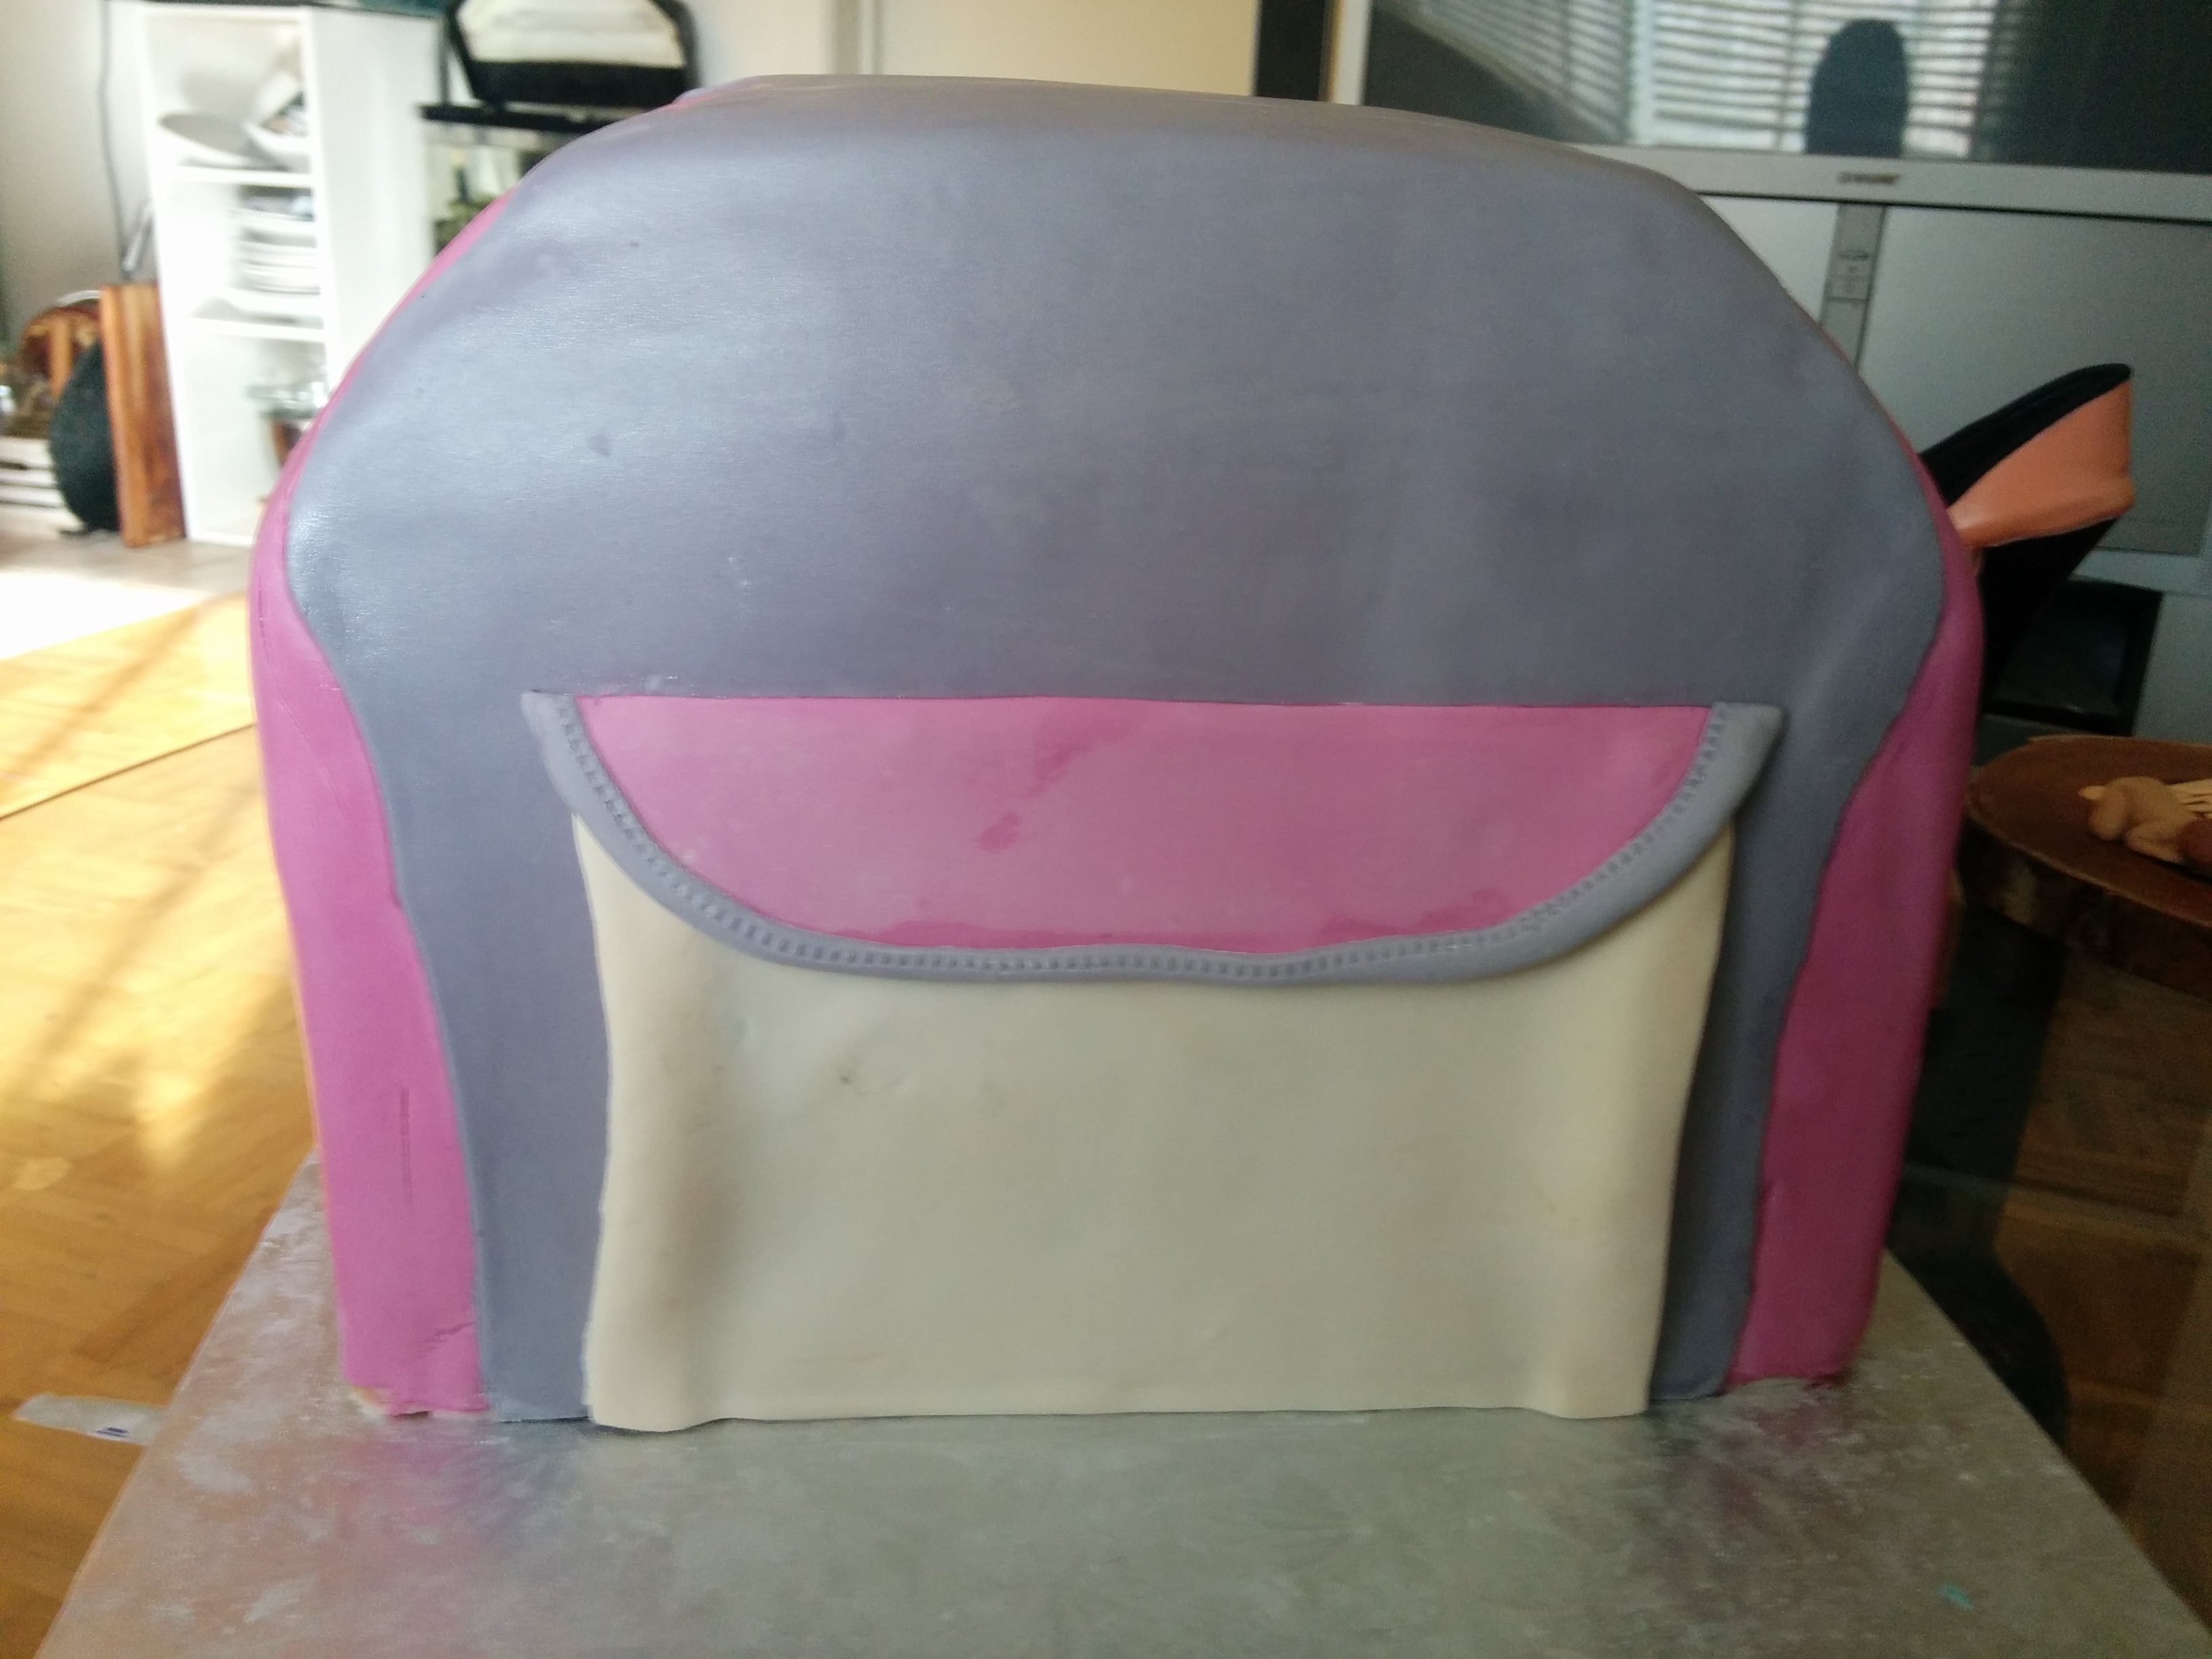
(11) Next, make the flap of the bag using cream fondant. Create a pink trim for the flap and stick it around the flap. Run a fondant wheel over the trim.

(12) Next, Stick the flap to the bag with some water.
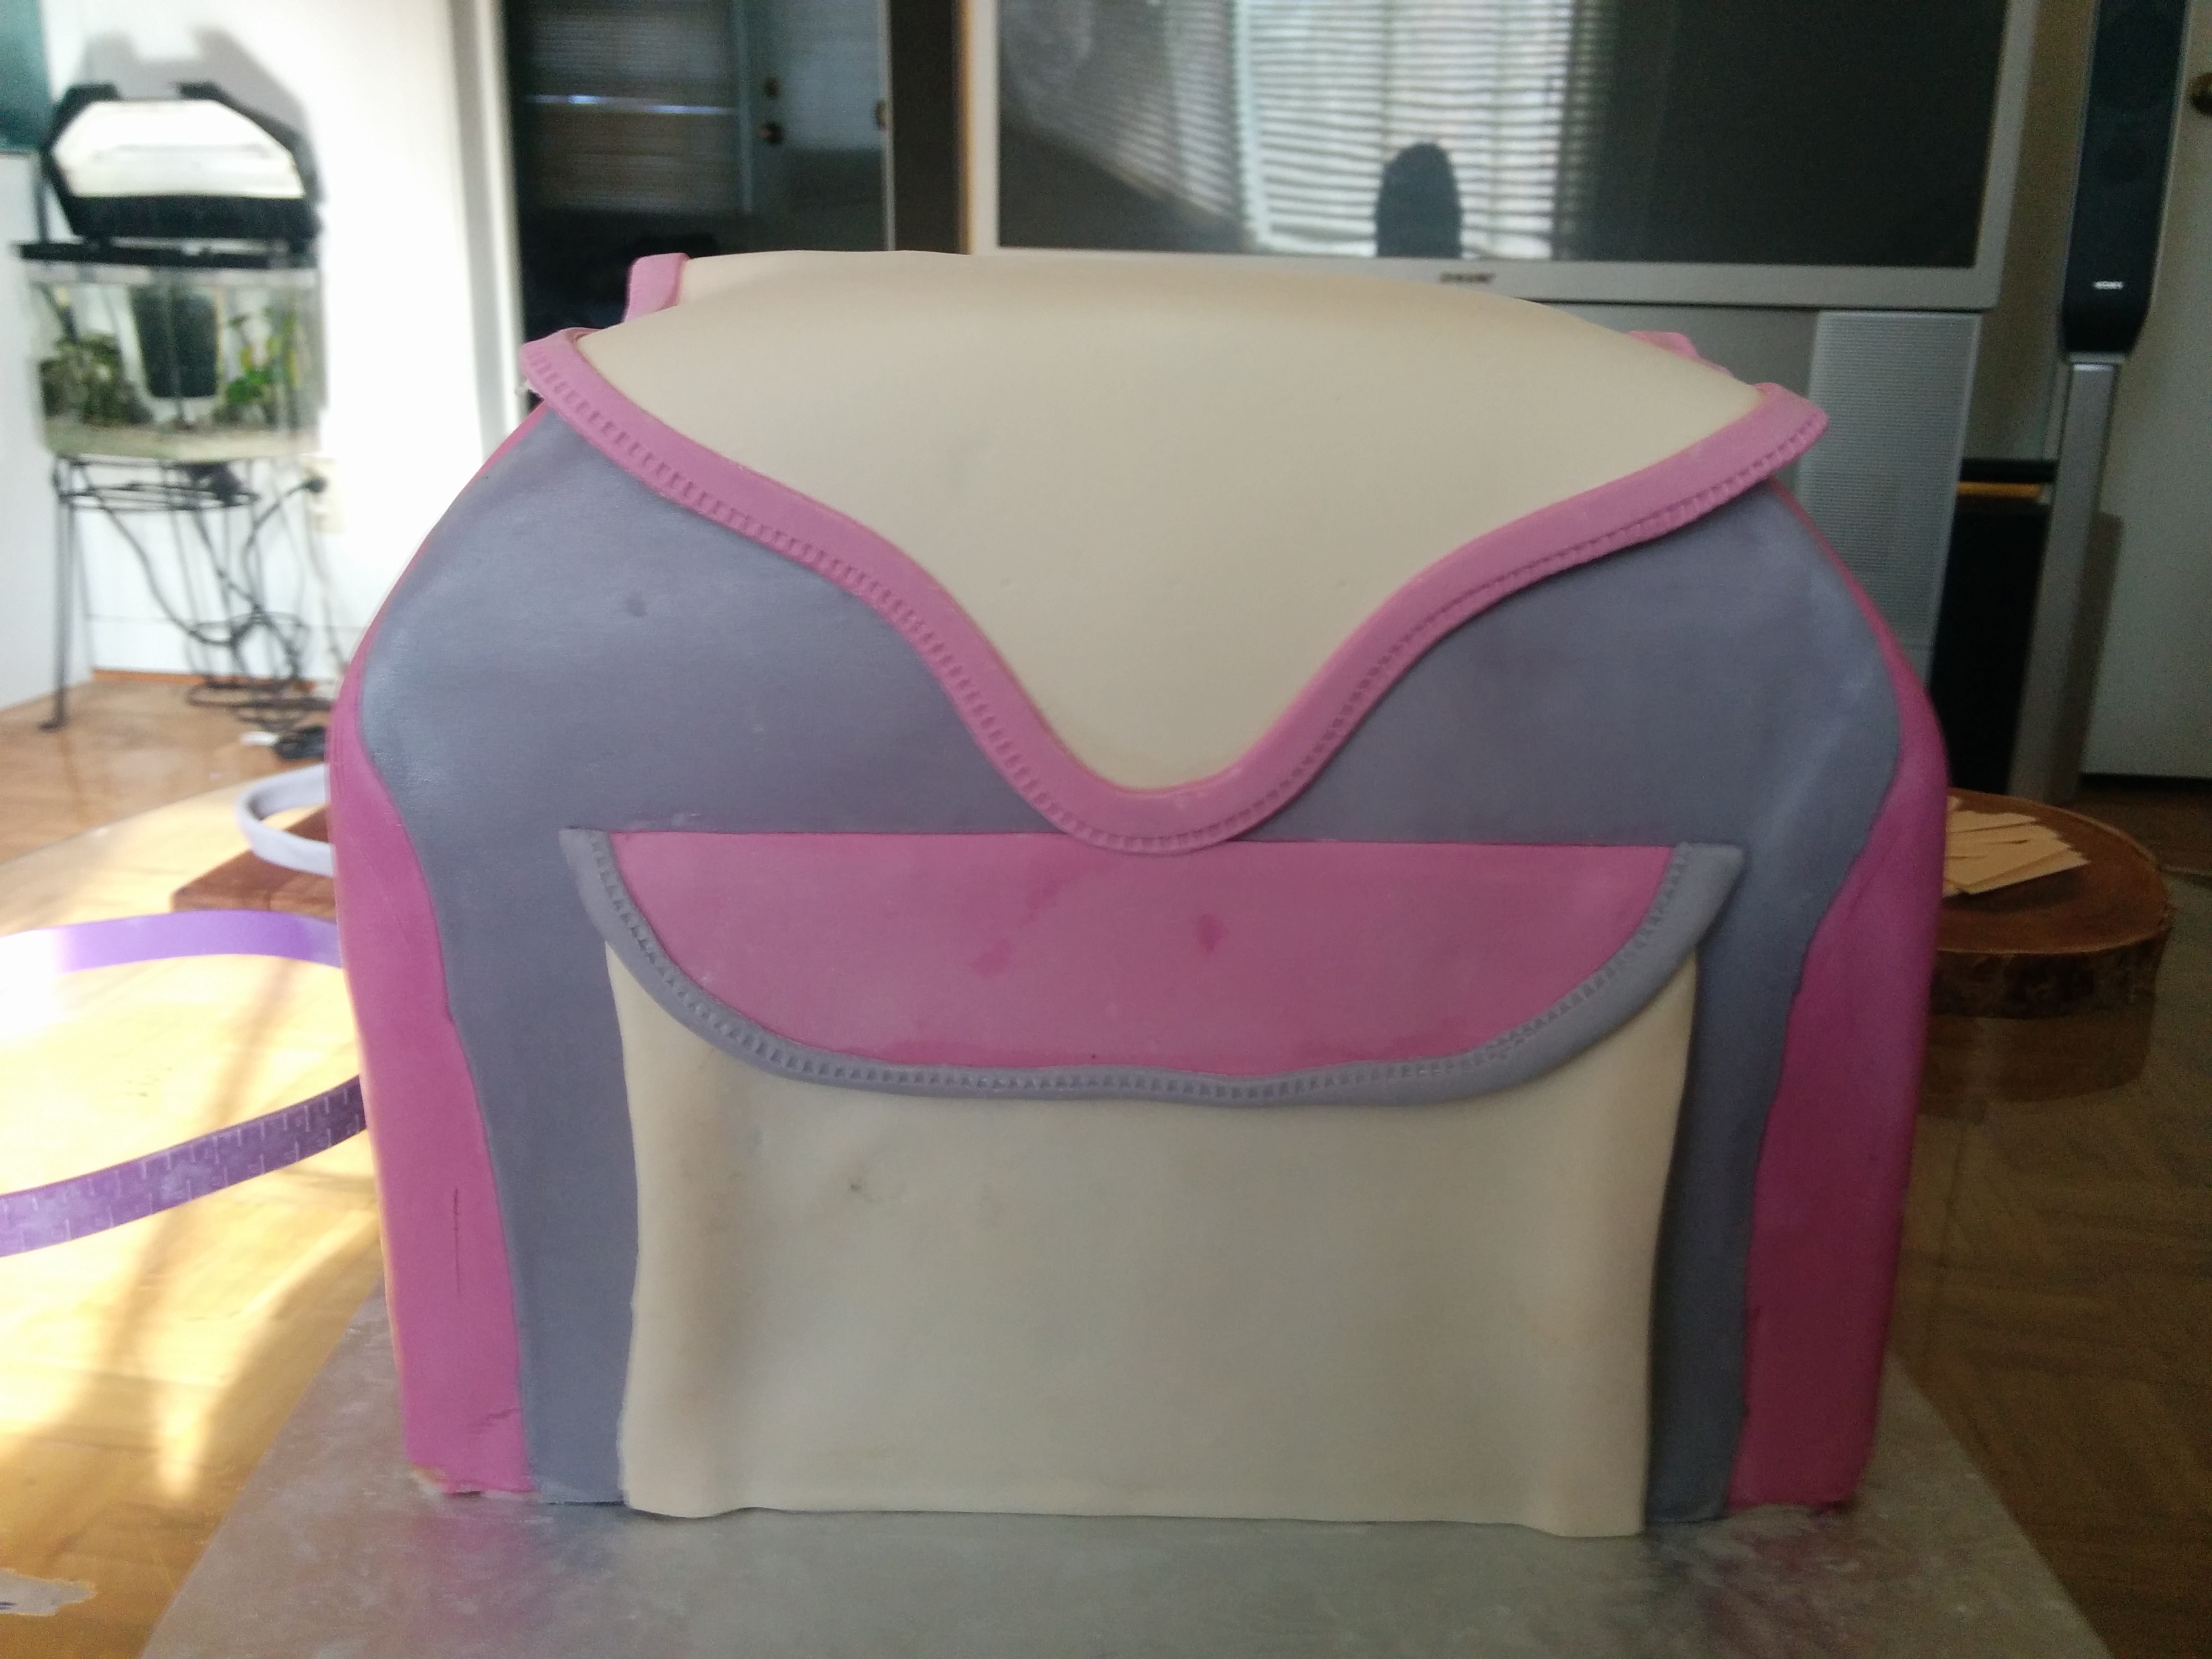
(12) Next, create the two side pockets with grey trim around them and stick them to both sides of the bag.
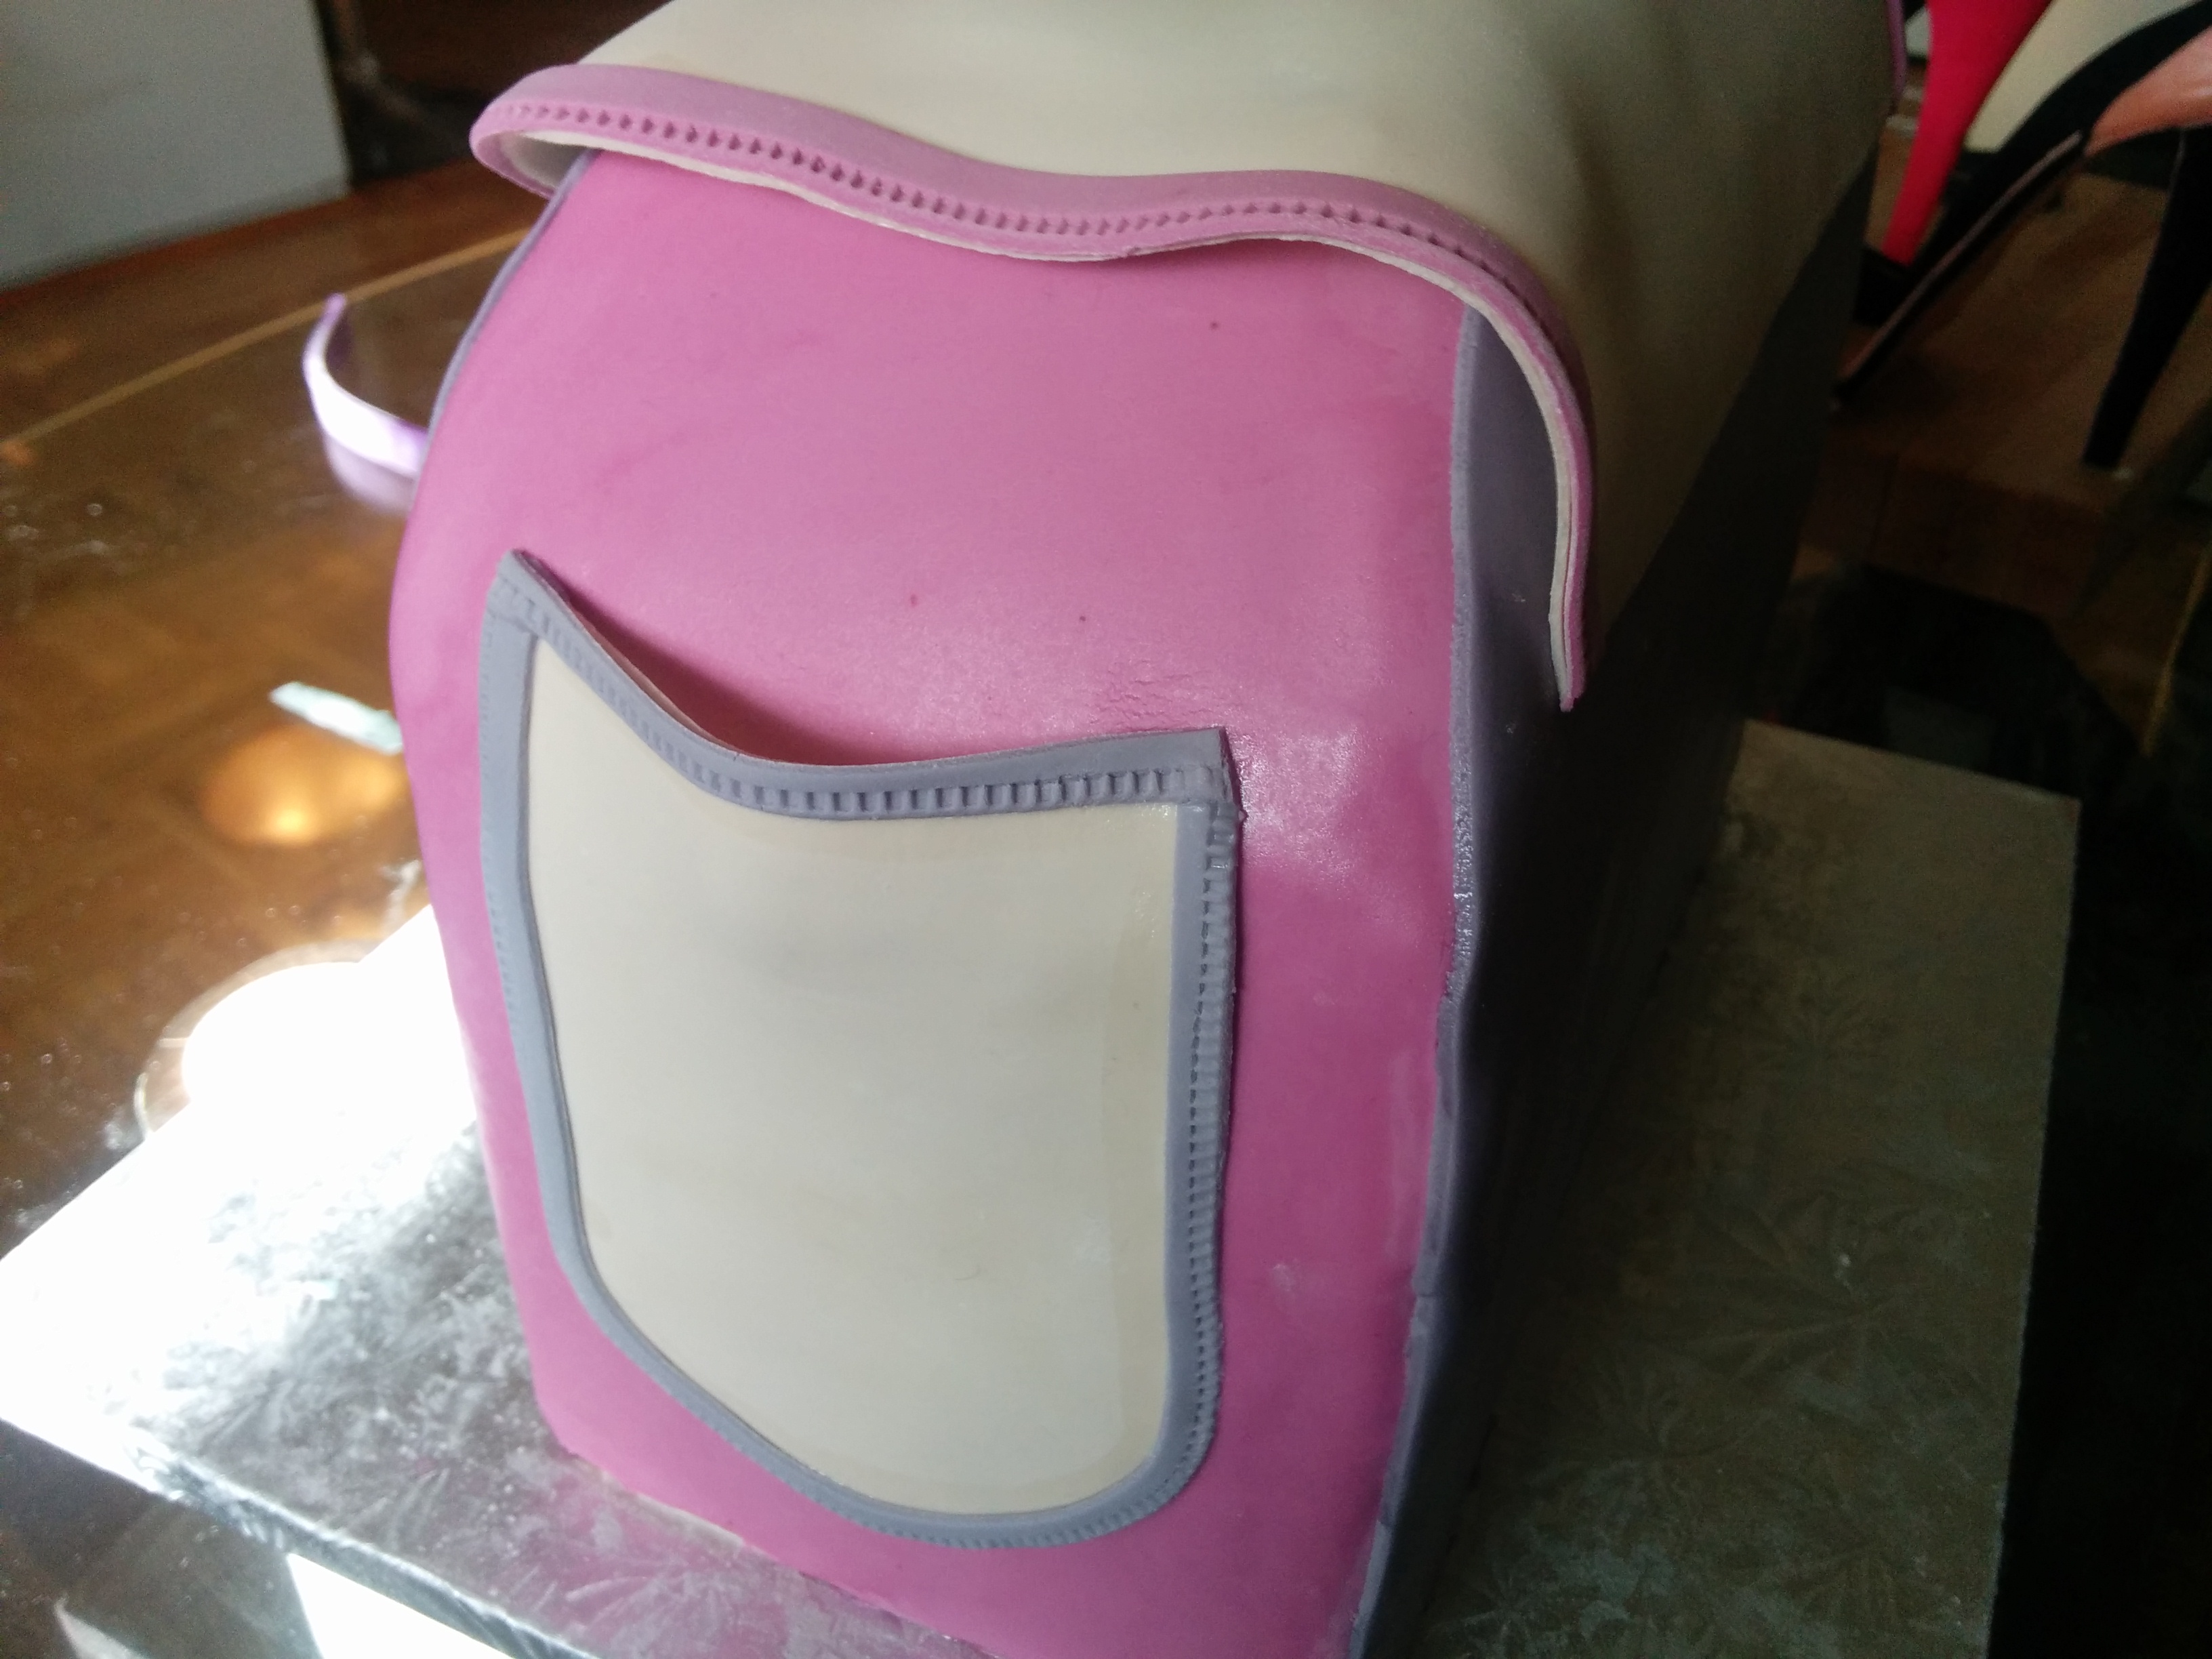
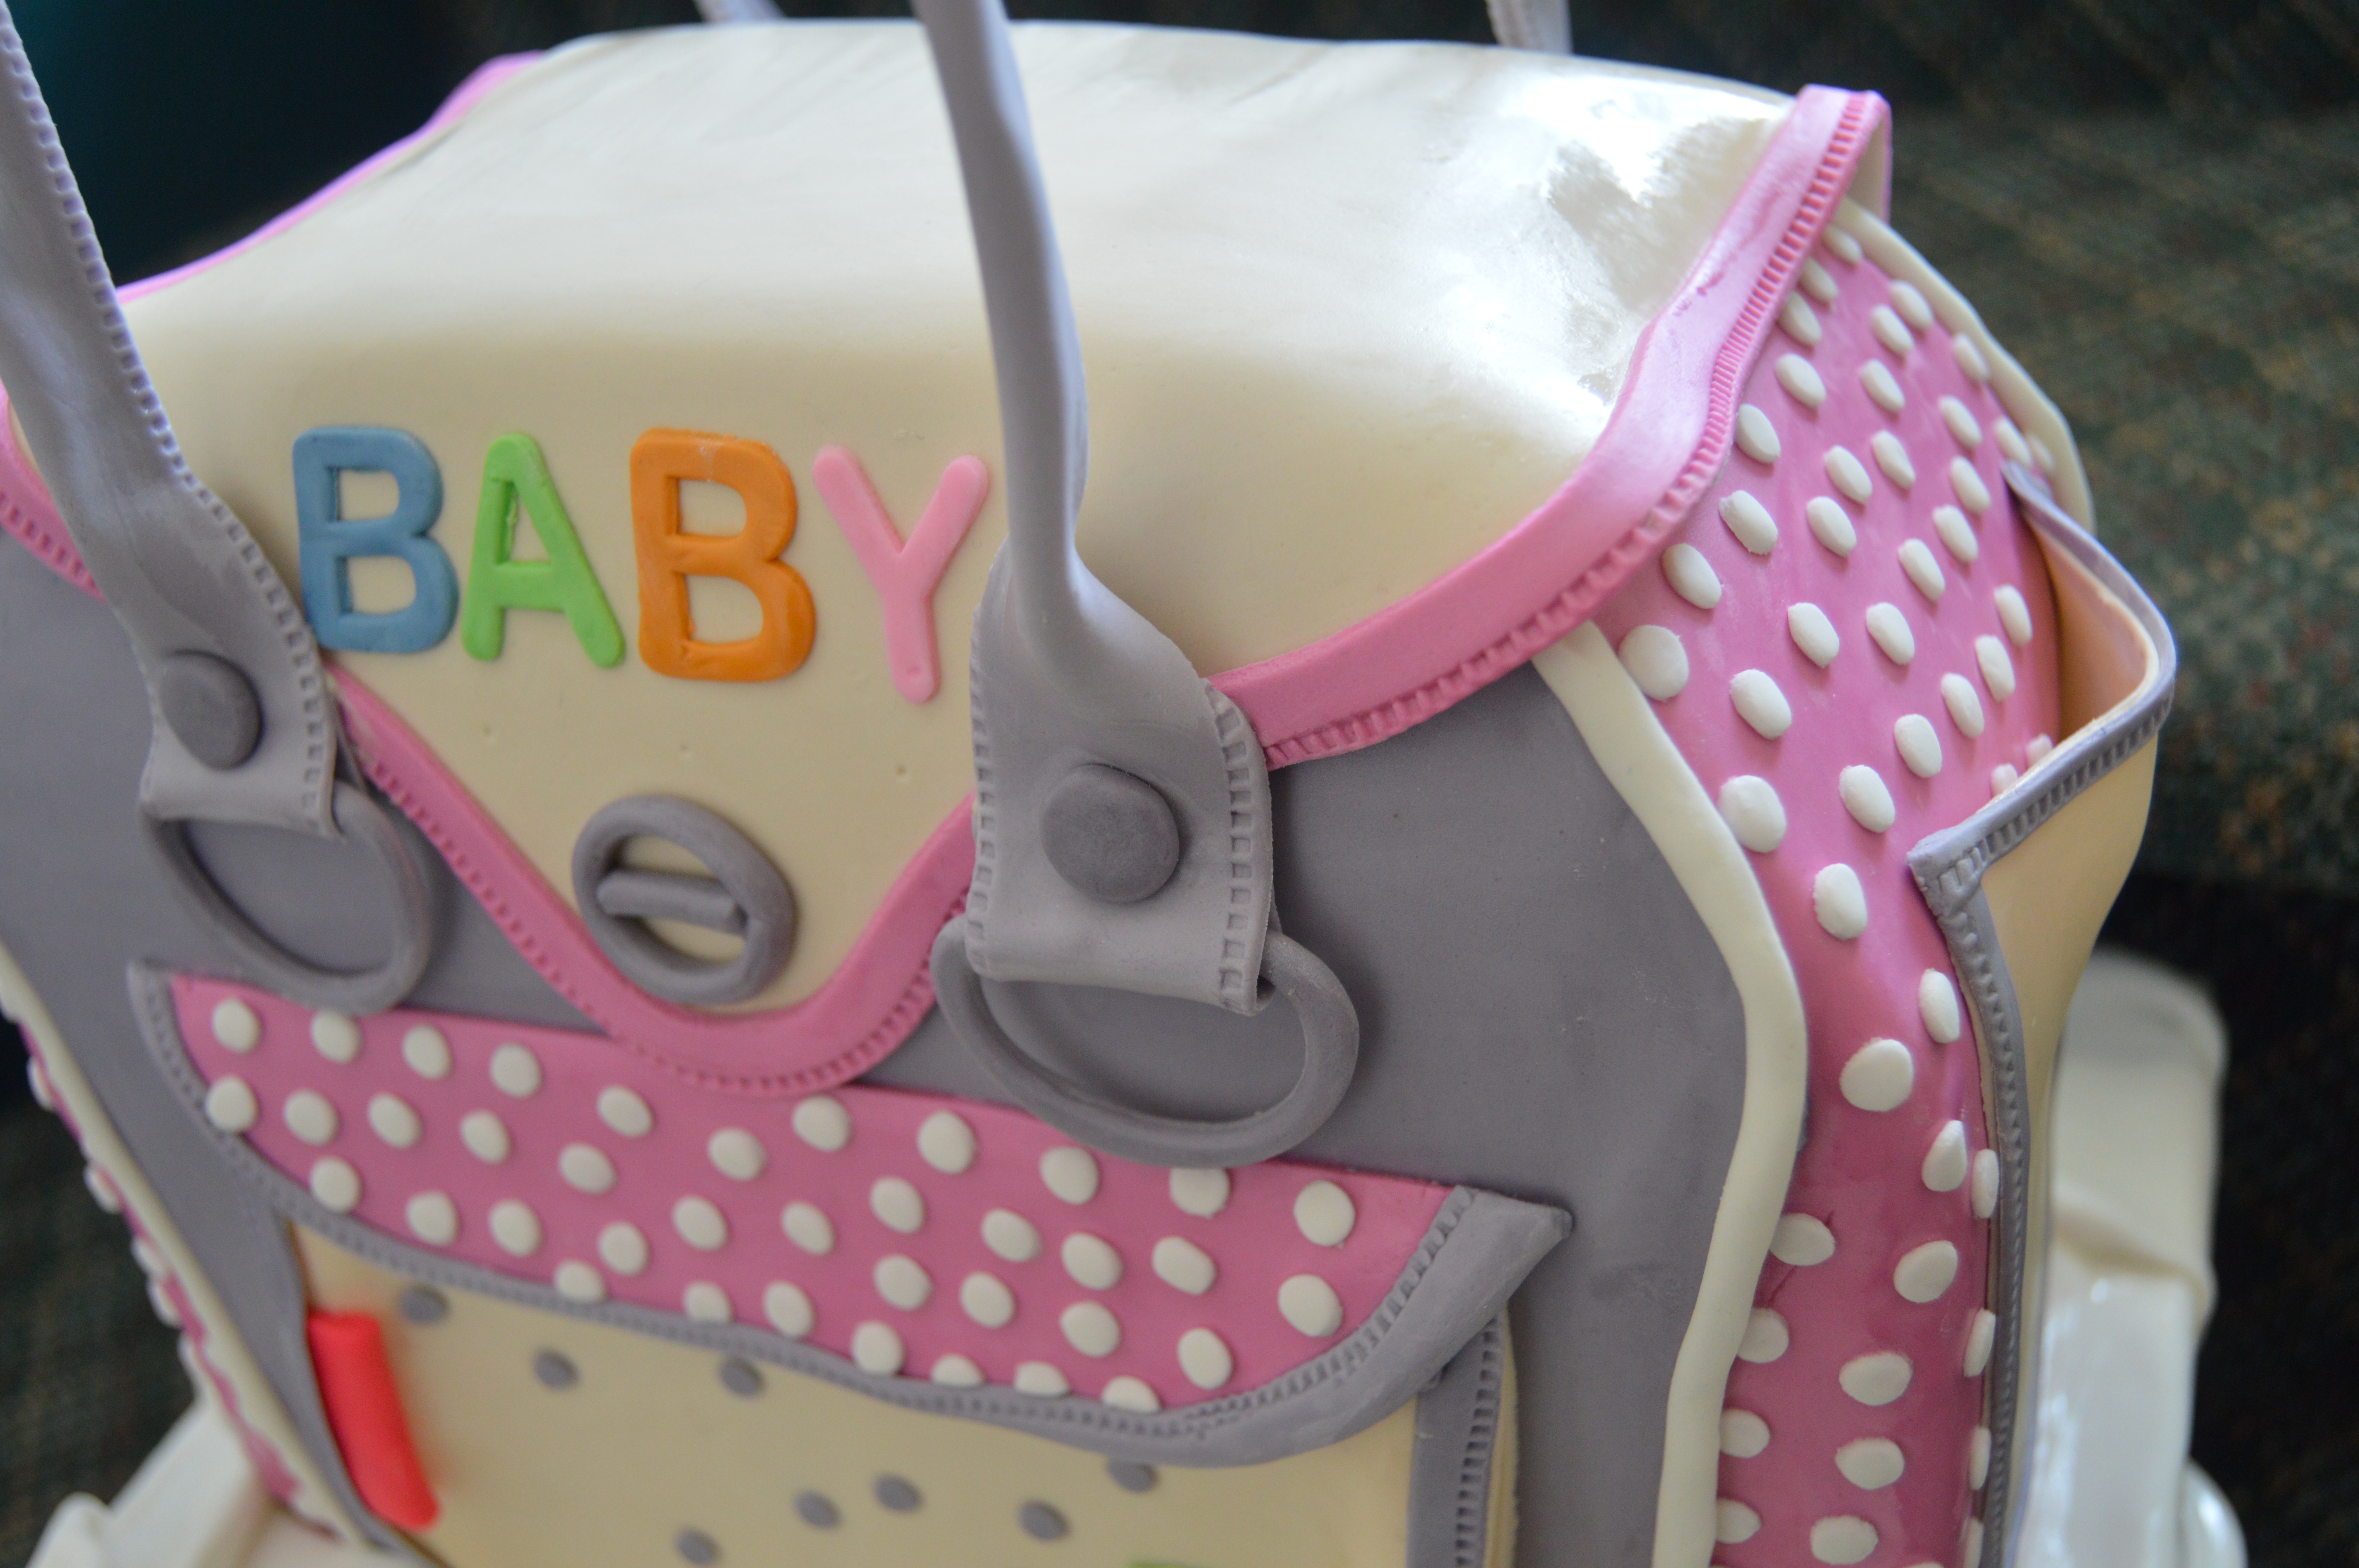
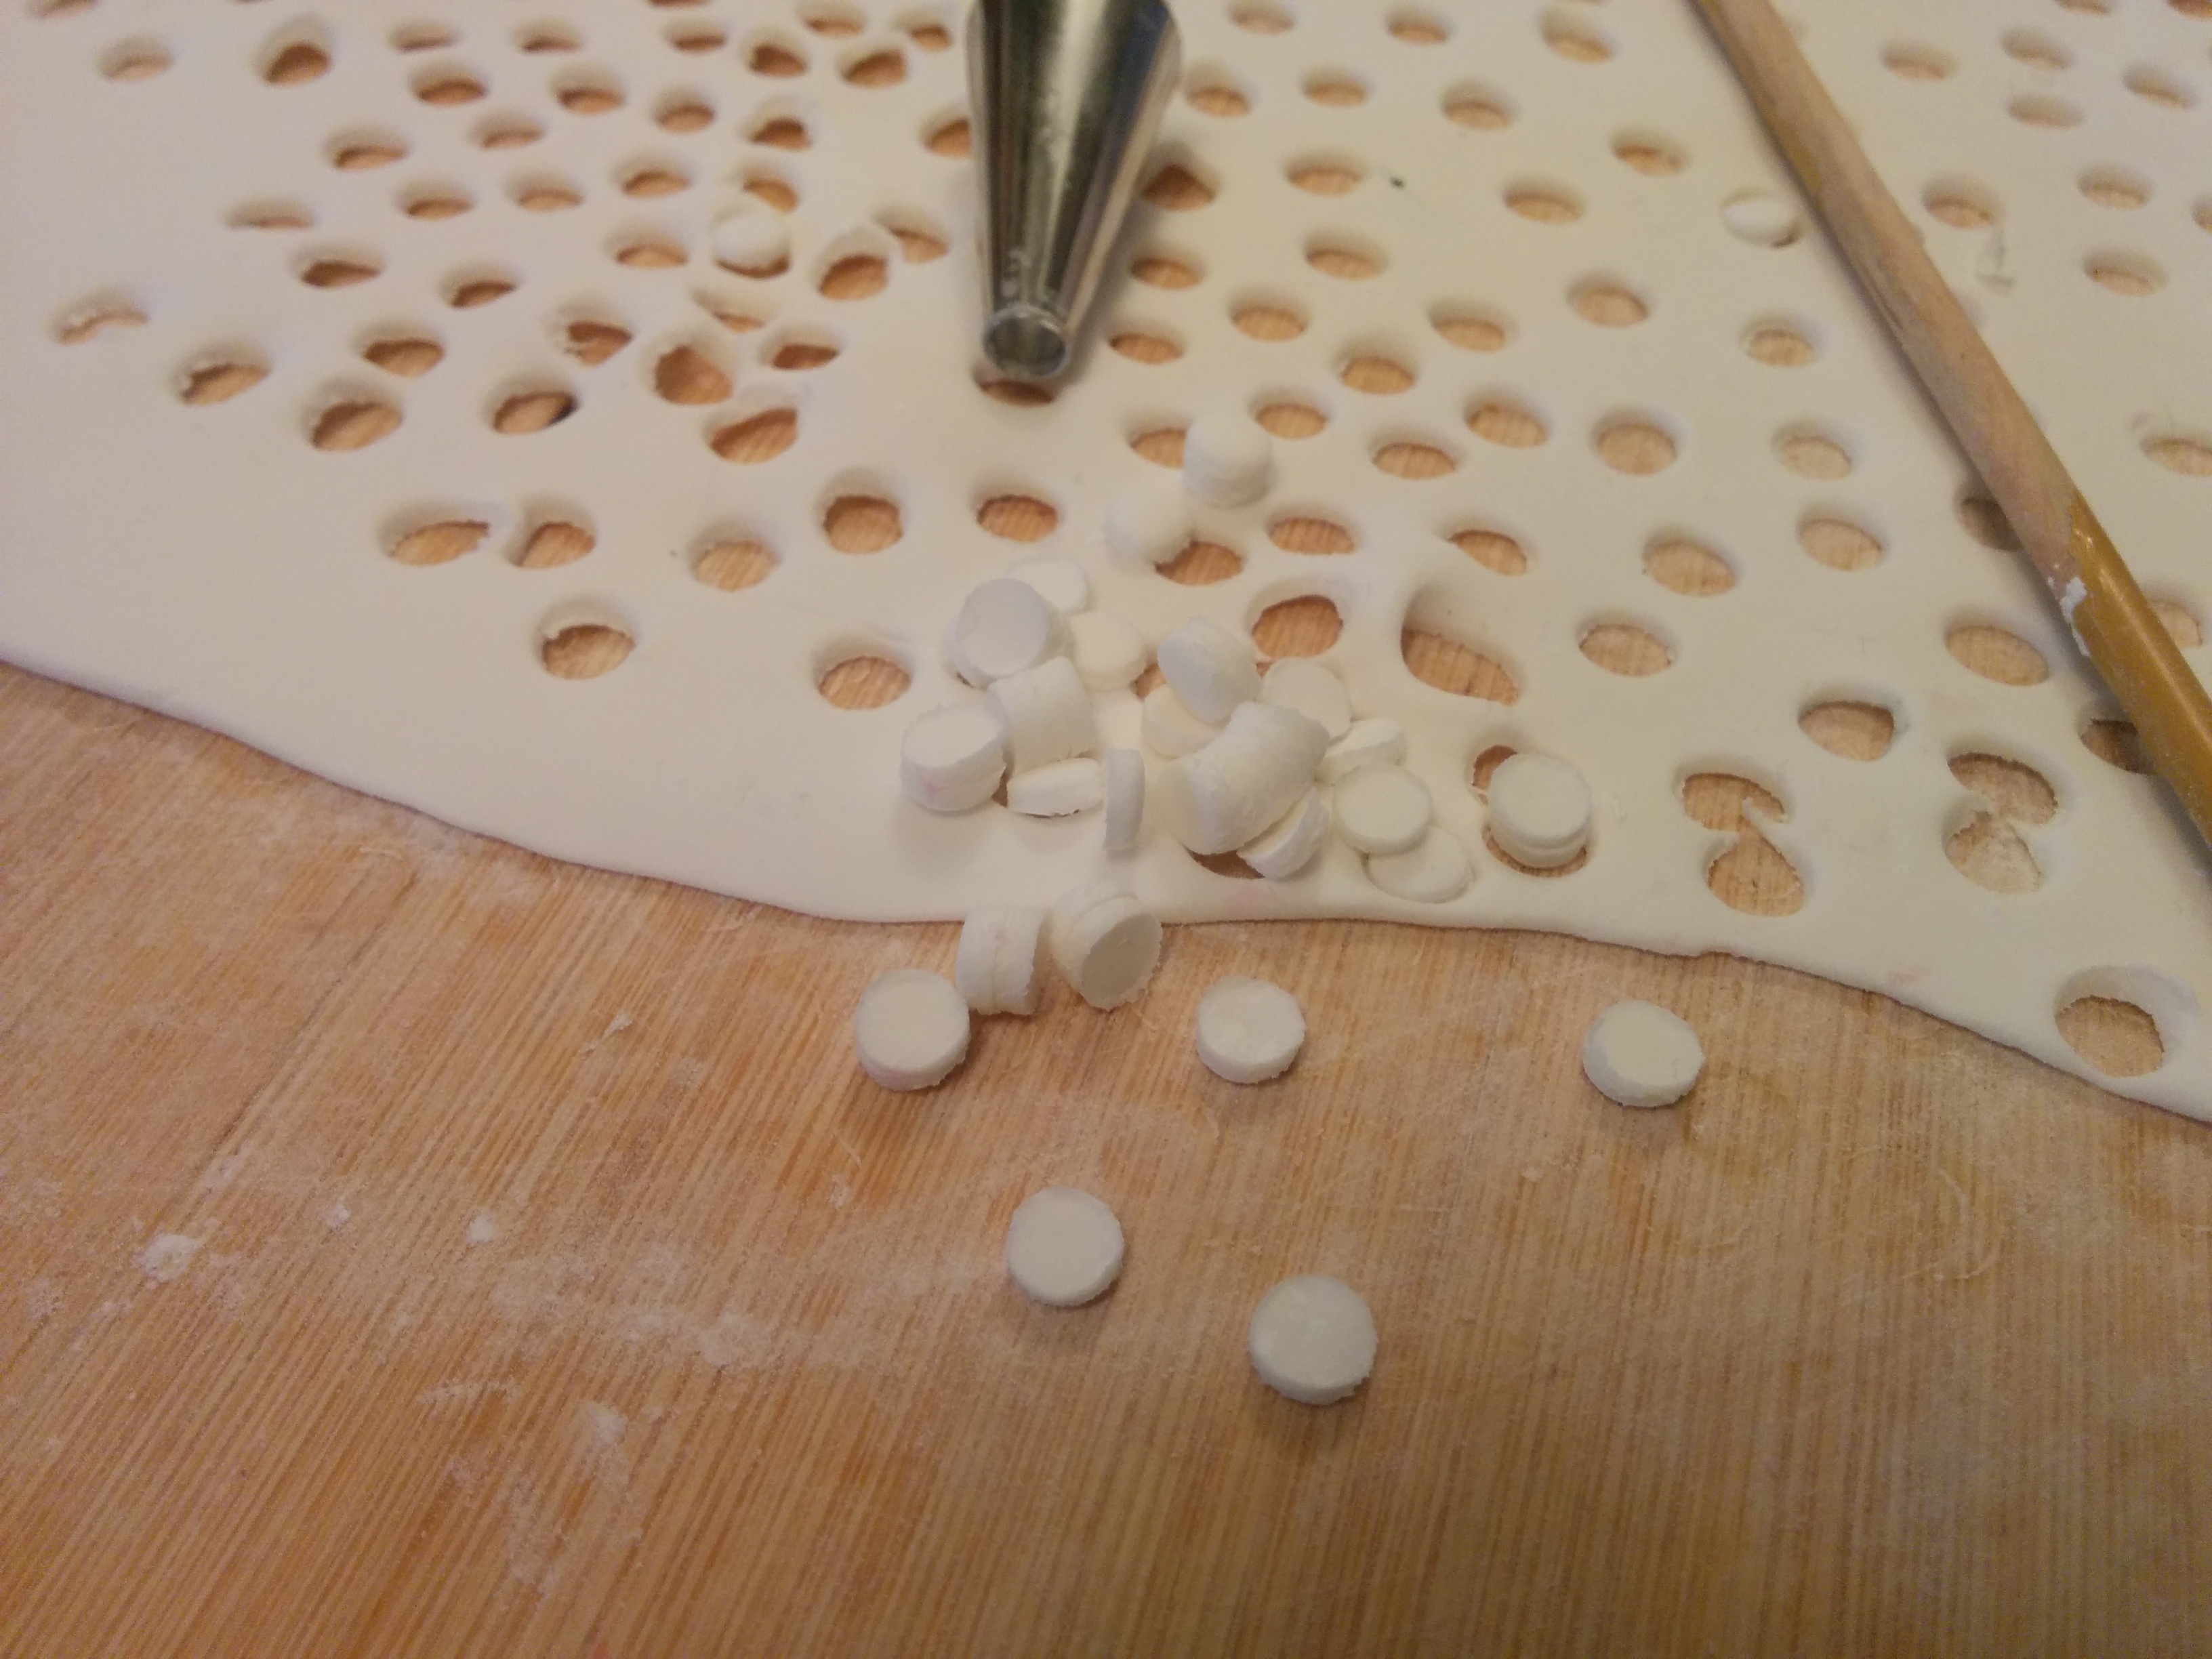
(13) Next, use a circular pipping tip to cut out which fondant dots. Stick these to the pink portion of the bag to create a polka dot effect.
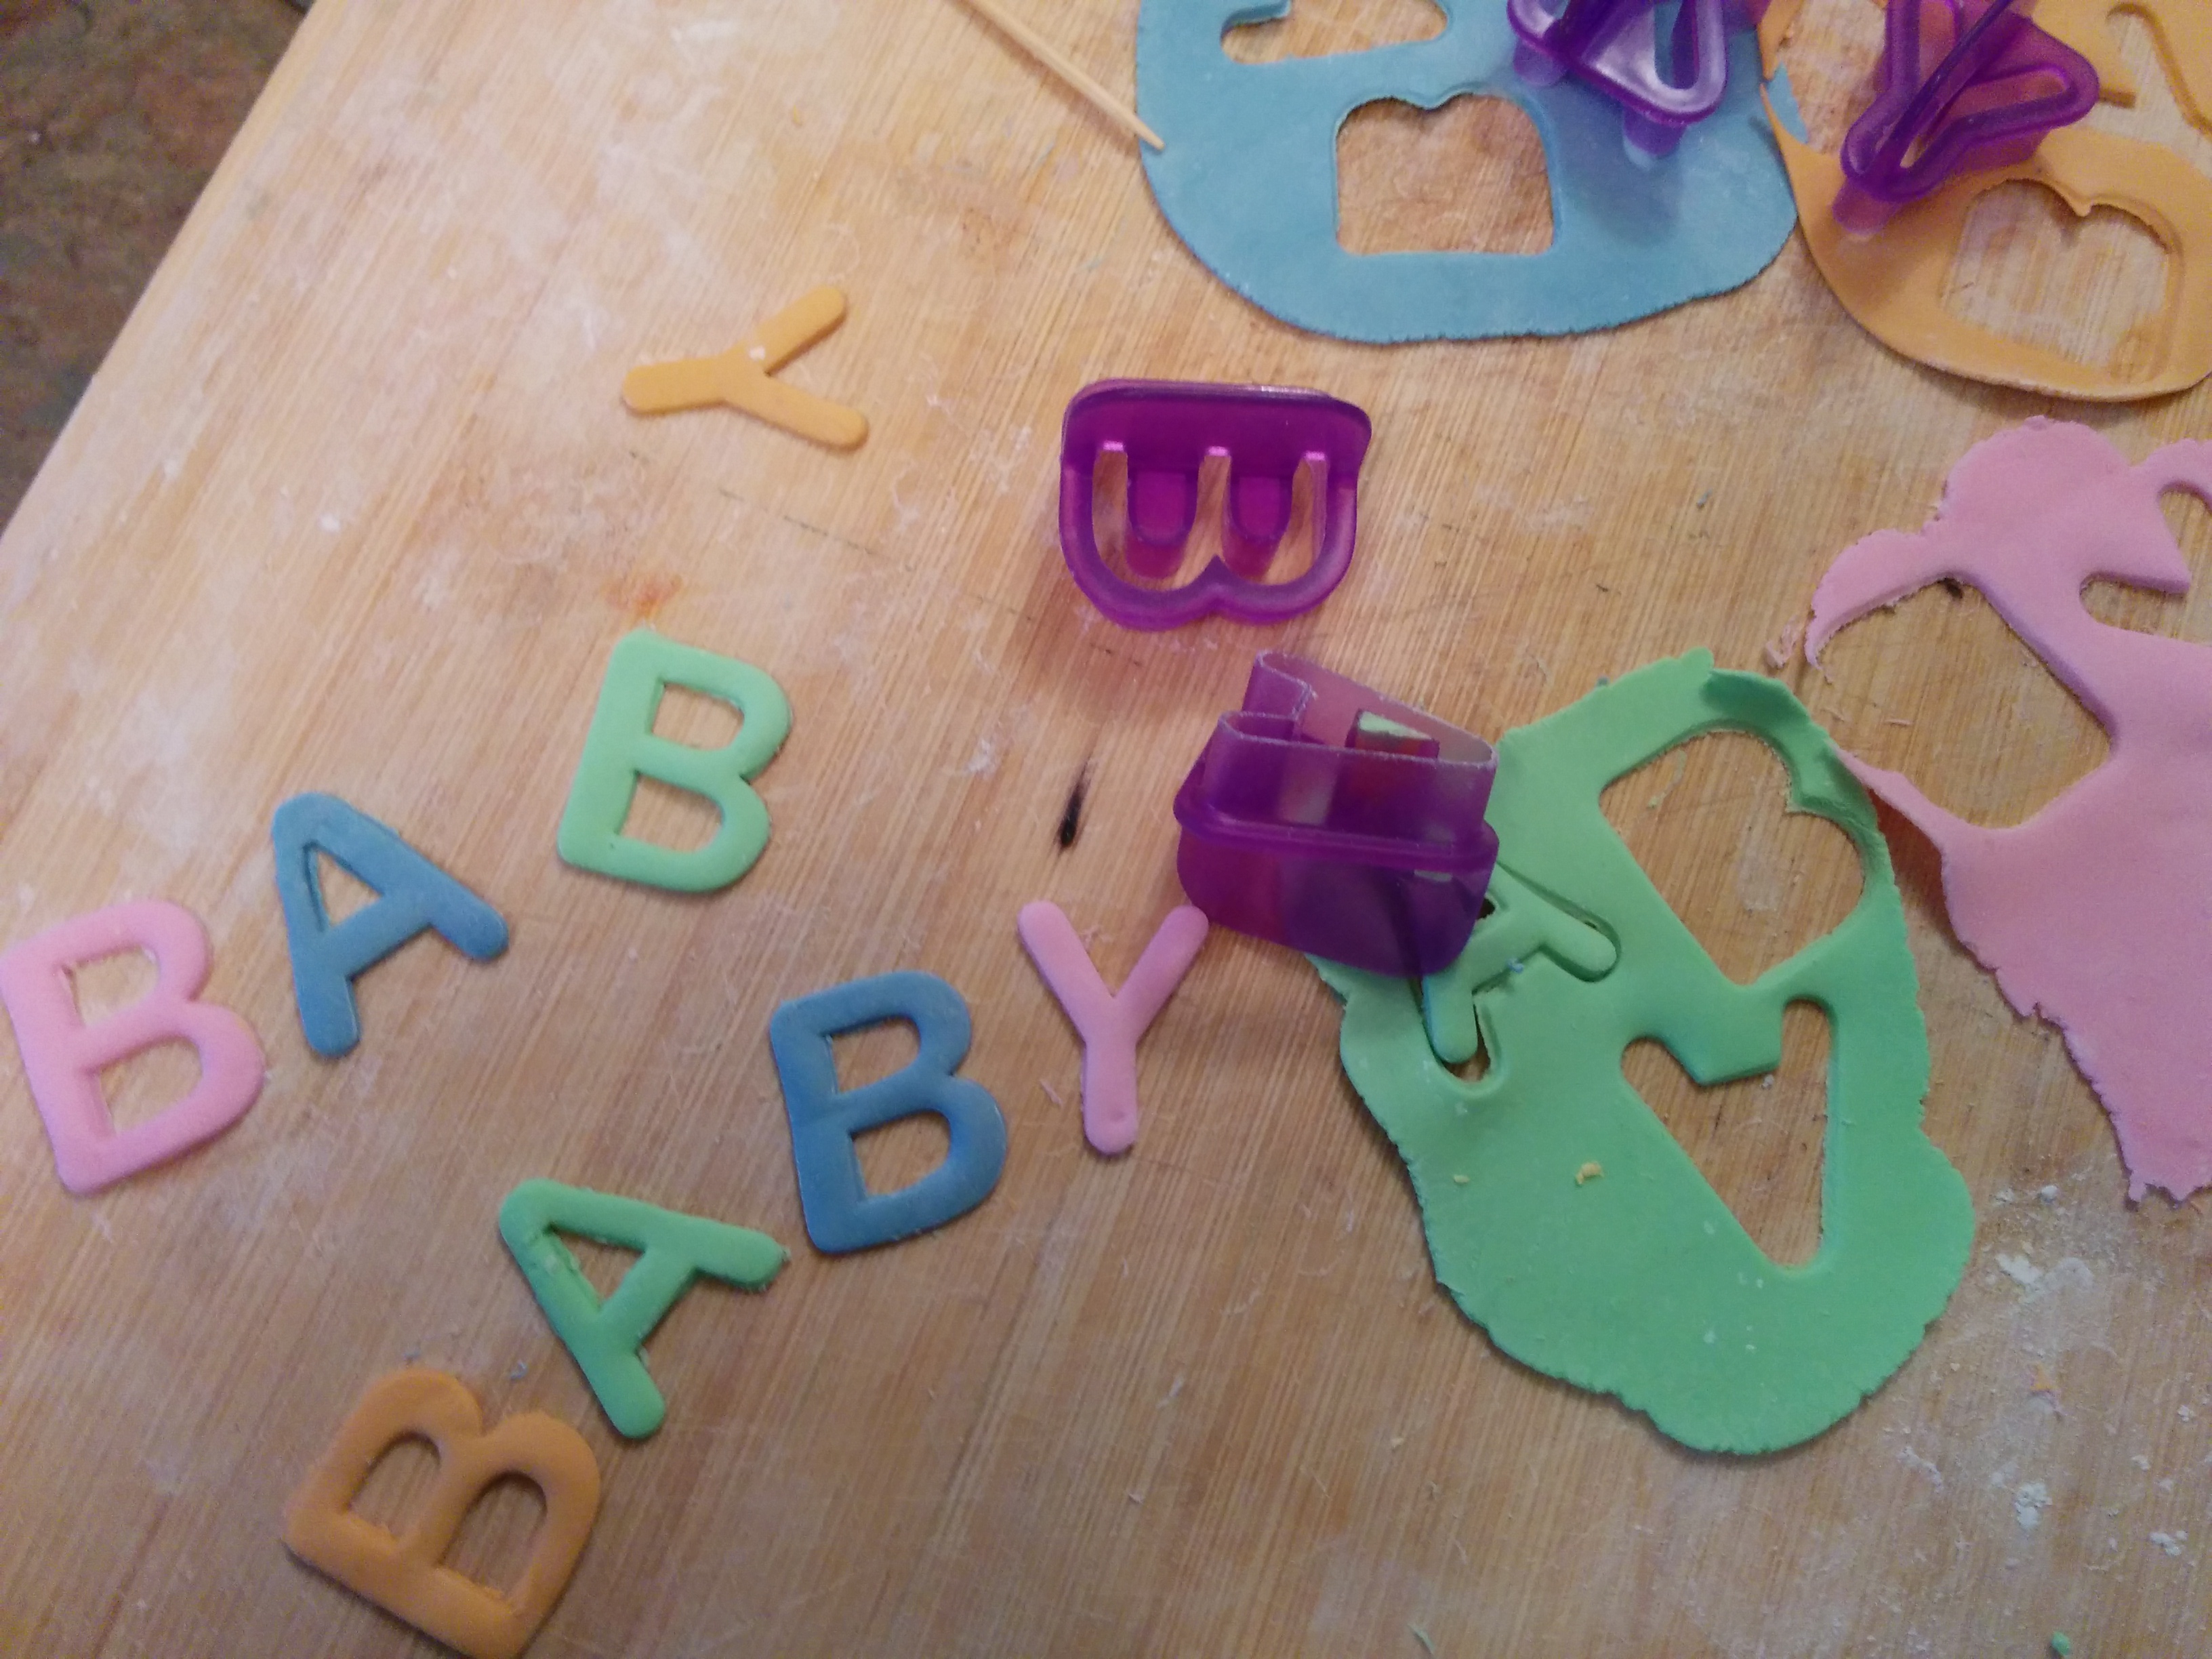
(14) Next, complete the designs on the front pocket of the bag. Use letter cutters to cut out the word baby in various colors of fondant. Cut out two sets of each letter, one for the front pocket and the other for the bag flag.
(15) Stick the word to the front pocket along with a few grey polka dots and a red tag.
(16) Next, stick the straps and rings to the front and back of the bag using some melted white chocolate. Also stick the second baby to the flap of the bag.
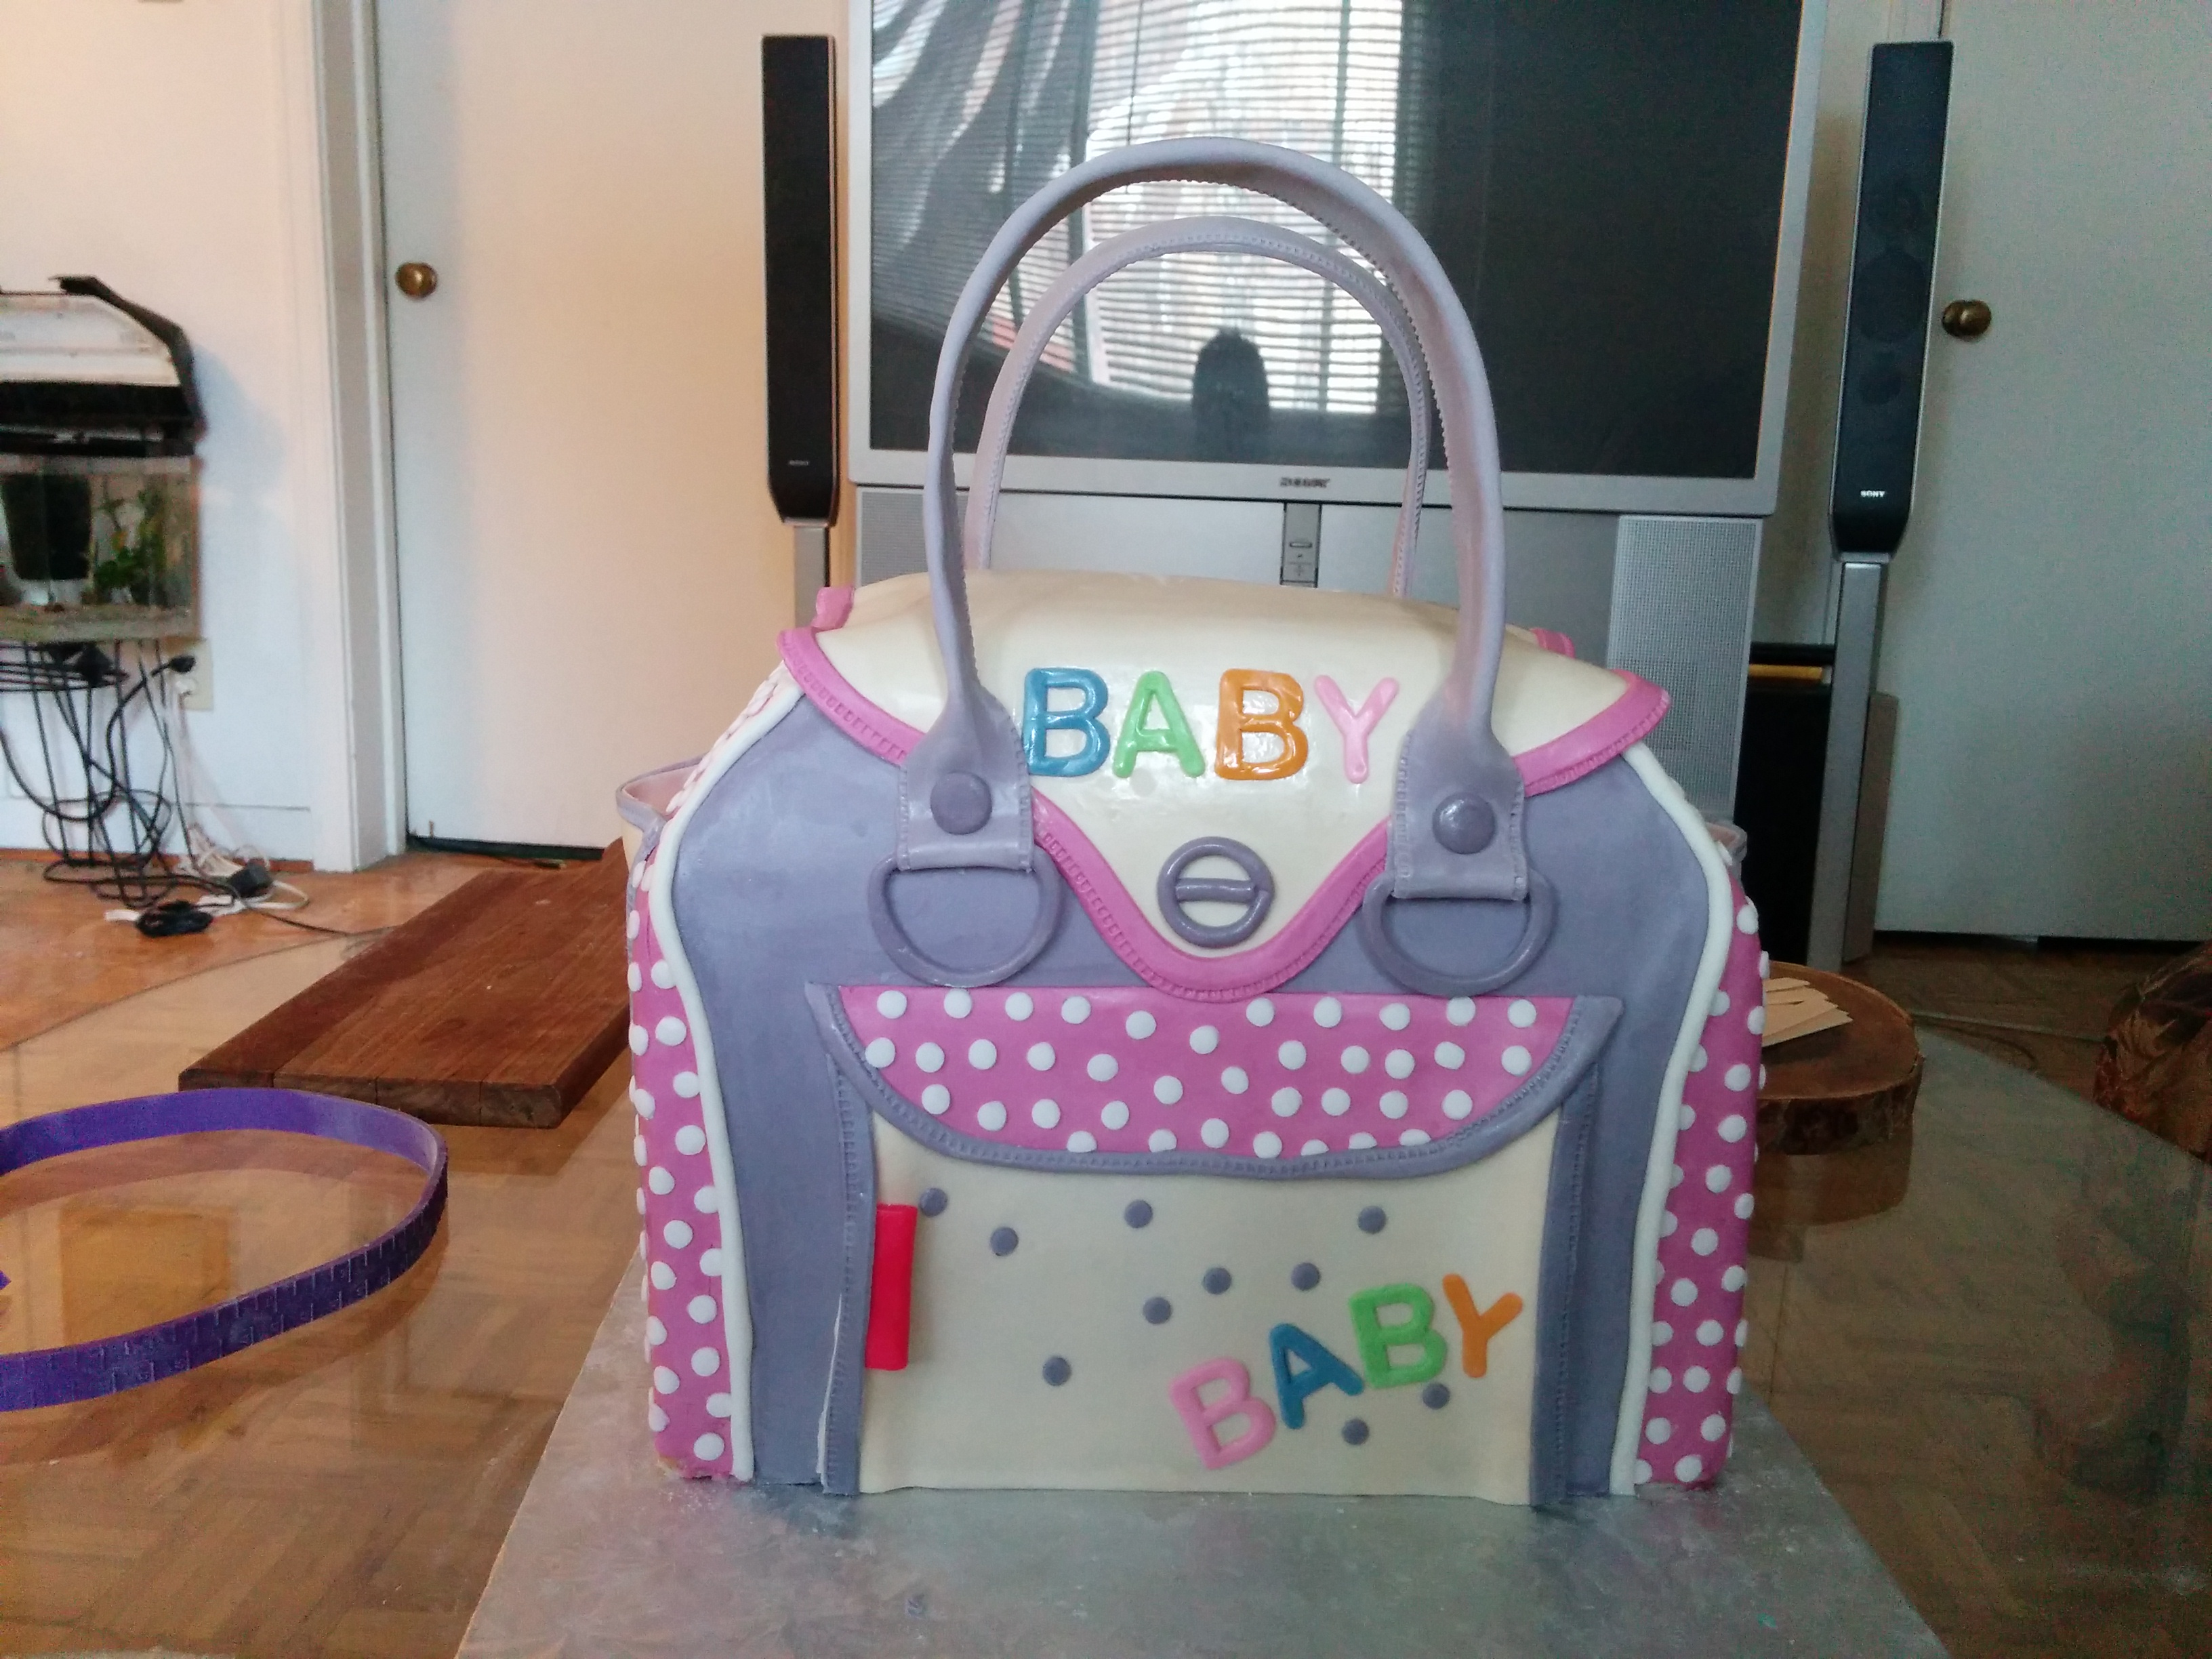
(7) Finally, cover the cake board with white fondant, creating folds. That’s all there is to it. Happy baking.
Terry Adido is passionate about showing people how easy it is to recreate restaurant quality meals in the comfort of their kitchens. With a style of cooking he refers to as Afro-European Fusion, his meals are influenced greatly by French and Italian Cuisine with a West African twist. If you love good food, you are in for the ride of your life.
Wow. Well done Terry and a very big thank you for sharing your wonderful cakes tutorials. You are indeed a master cake decorator. Your cake designs are unique and speak volume. You already have a student in me. Pls don’t stop sharing. Remain blessed.
Thanks Florence. Glad you find the tutorials useful.
Thank a million for this tutorial… I’m a silent follower of your posts and I find them really useful.
I promise to be more vocal henceforth, lol.
More power to your elbow.
LOL. Thanks Tee.
this is very helpful thnx
You are welcome Lorraine.
I truly appreciate your talent and the time you take to make these tutorials. I also make cakes and found your site searching 2D figures. It’s a lifesaver for me this weekend. I clicked on this one about the diaper bag from curiosity because I’ve long wanted to make a diaper bag cake and your tutorial here is the best I’ve found. I may finally have the confident to tackle it. Thank you truly!
You are welcome. I appreciate your feedback.
Thank you terry for the tutorial
You are welcome Jennifer.
God bless Terry, you God sent to help people like me.
Thanks so much.
Wow… thanks a lot boss
You are welcome.
Wow…thank u so much dear
You are welcome Xolisile.
Great work could I use gumpaste for straps and buckle?
Thanks and yes.