
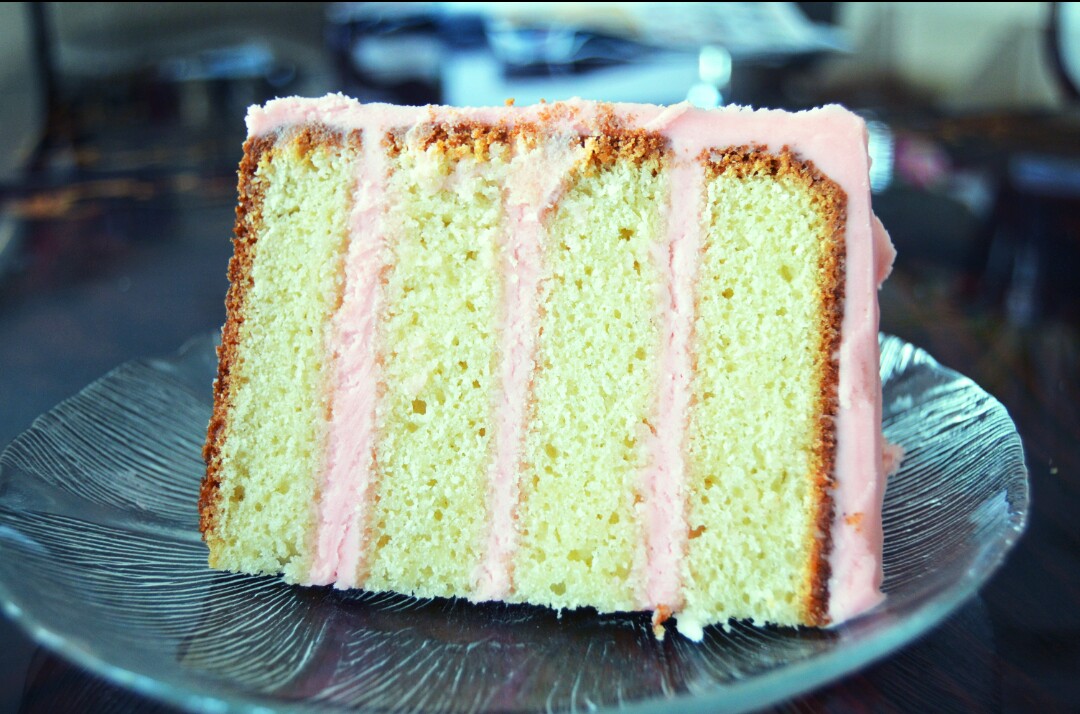
How to Level and Torte a Cake
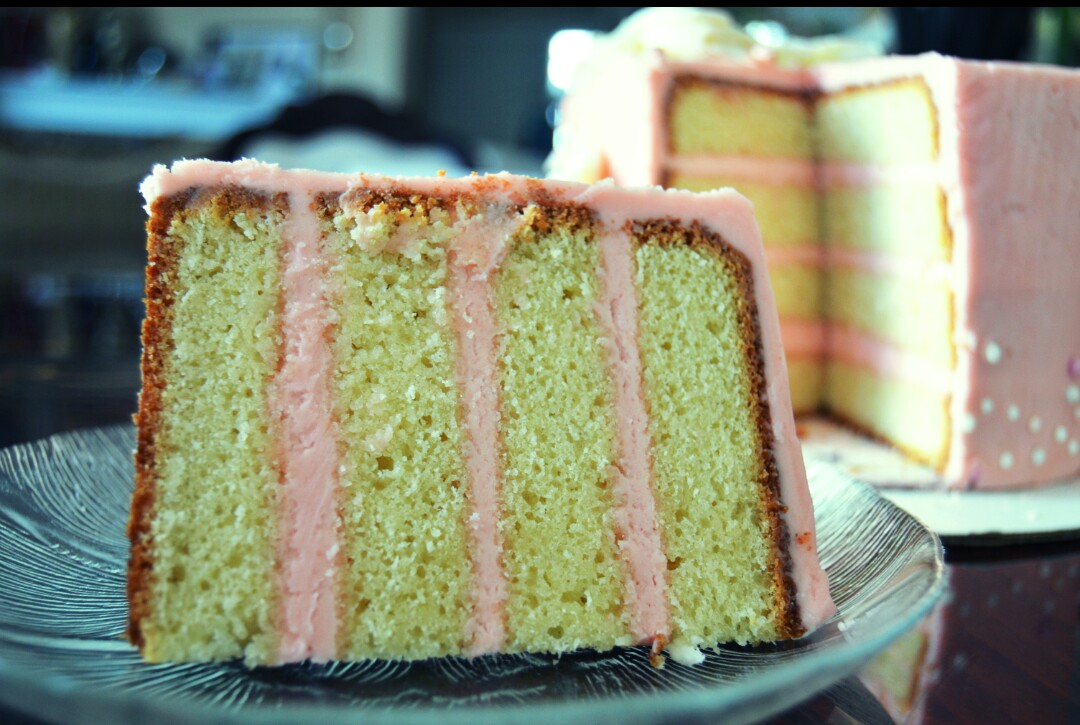
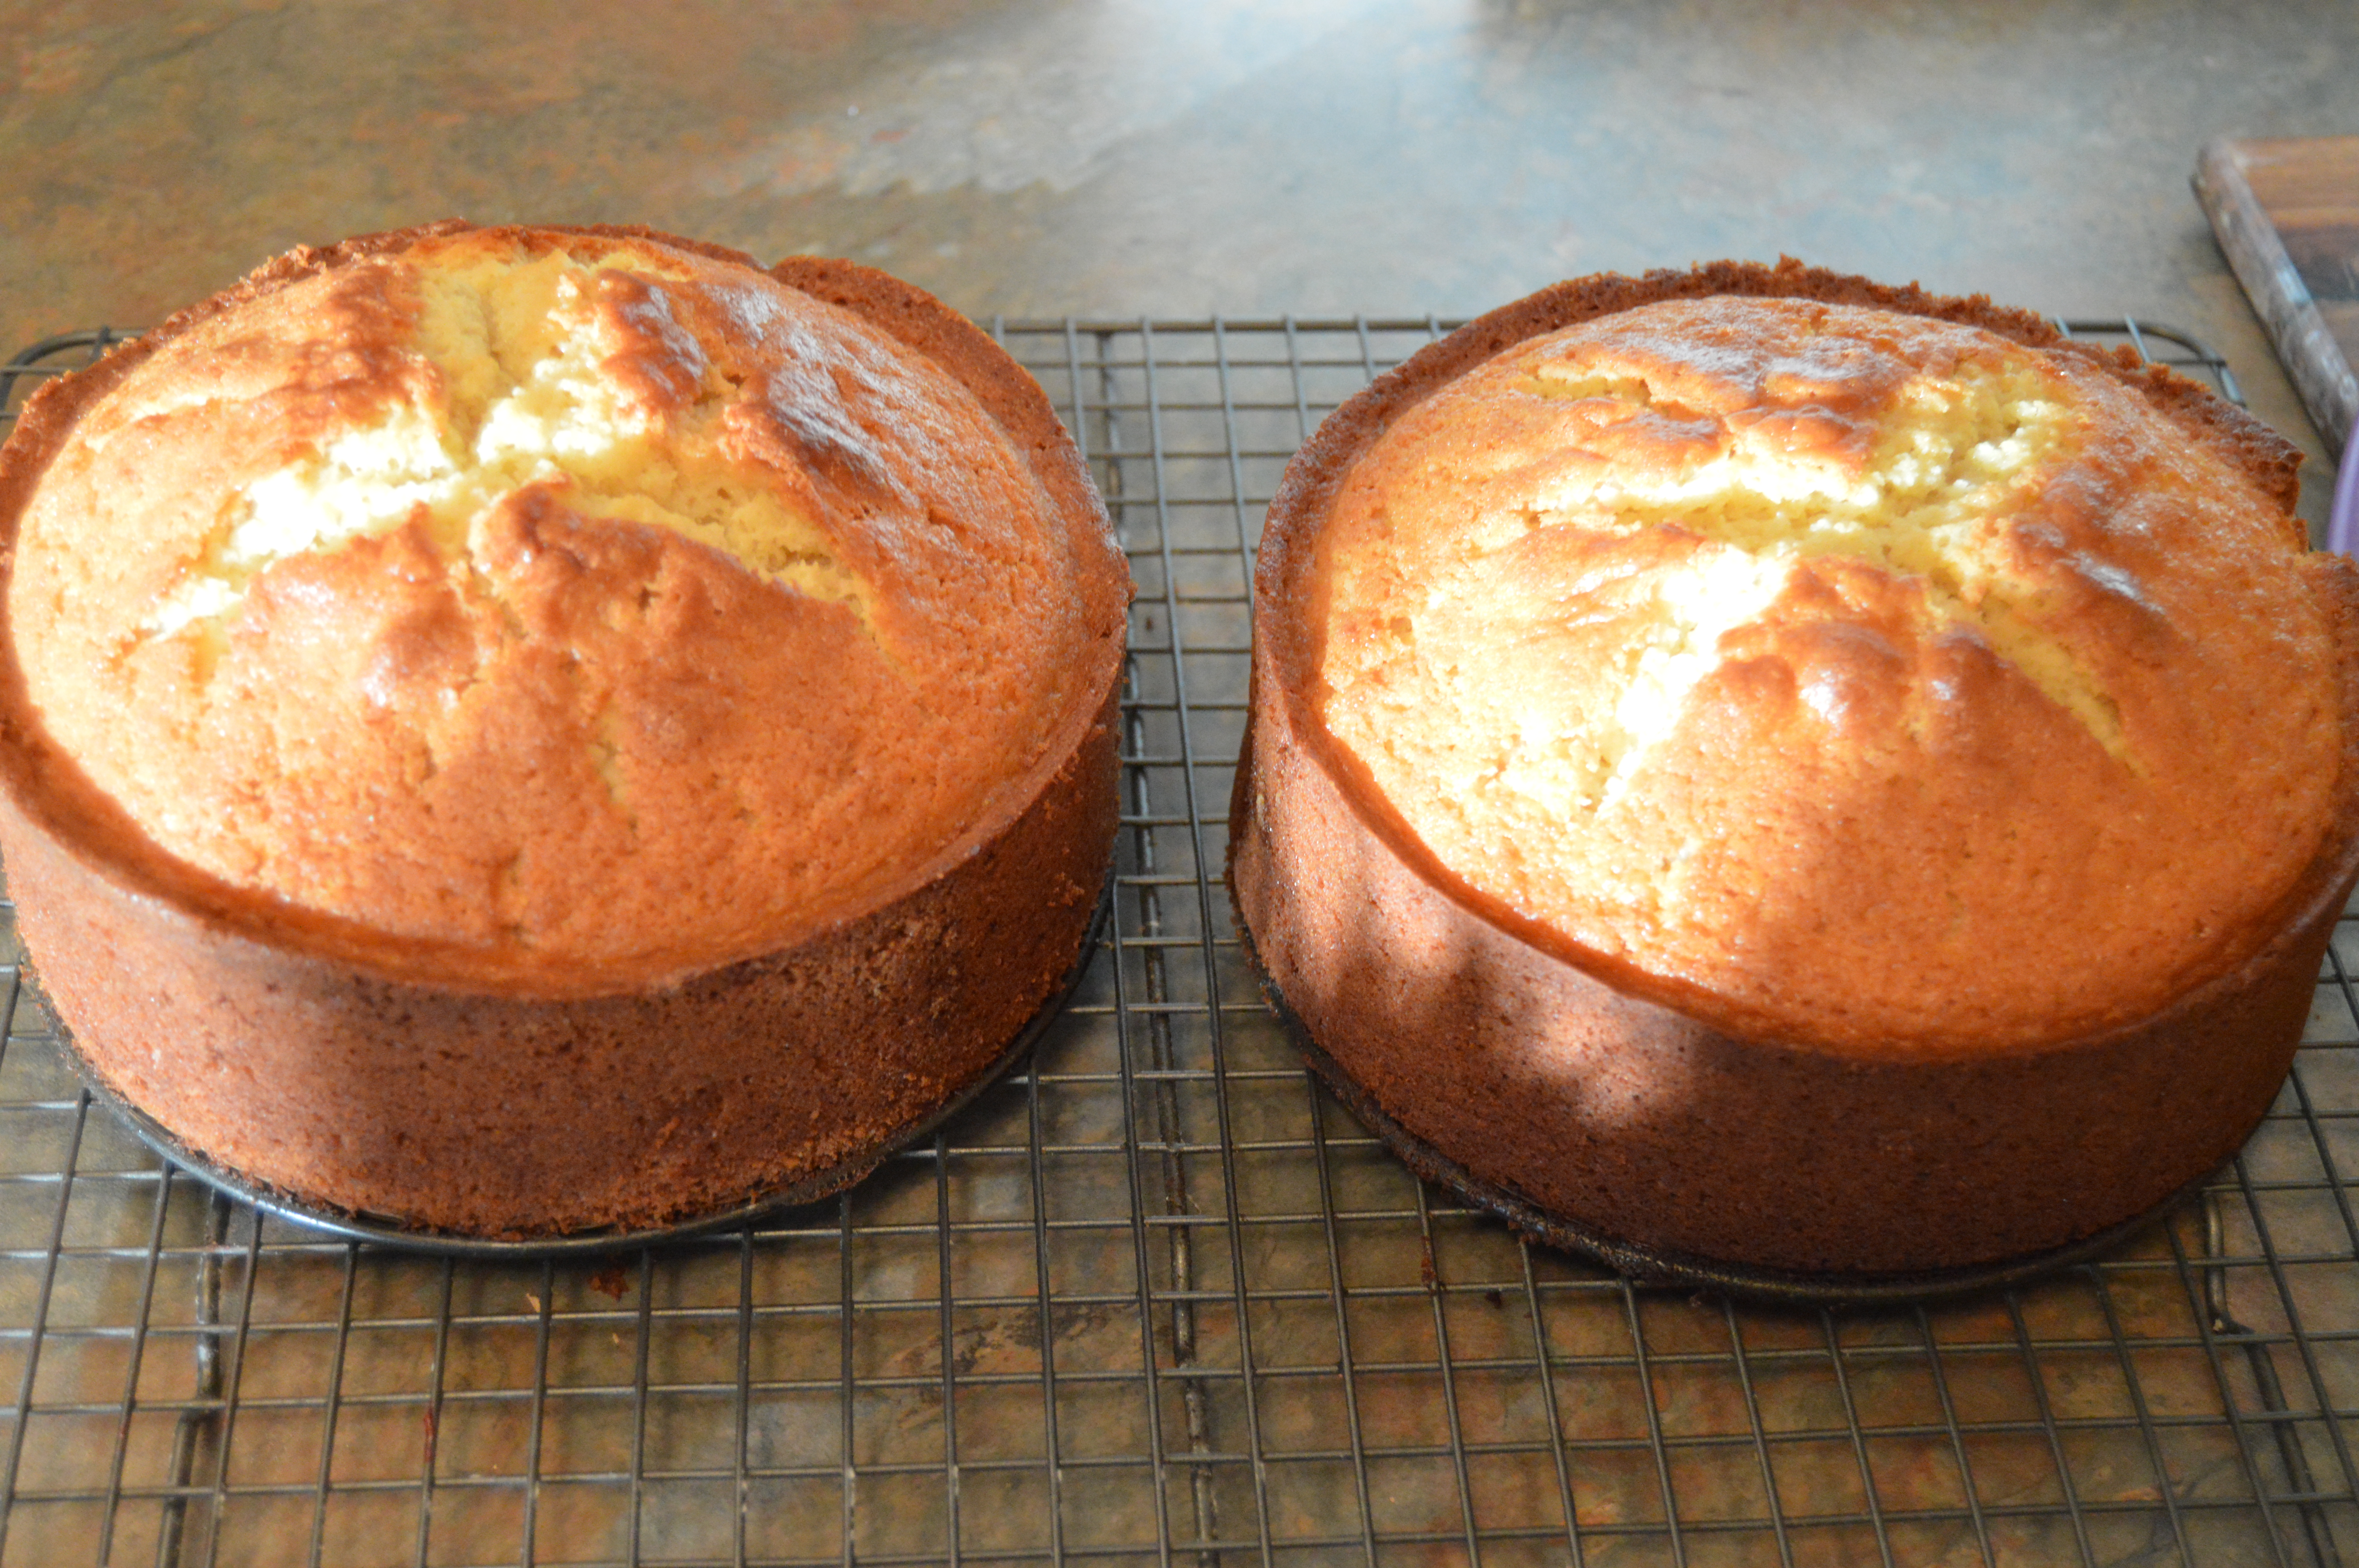
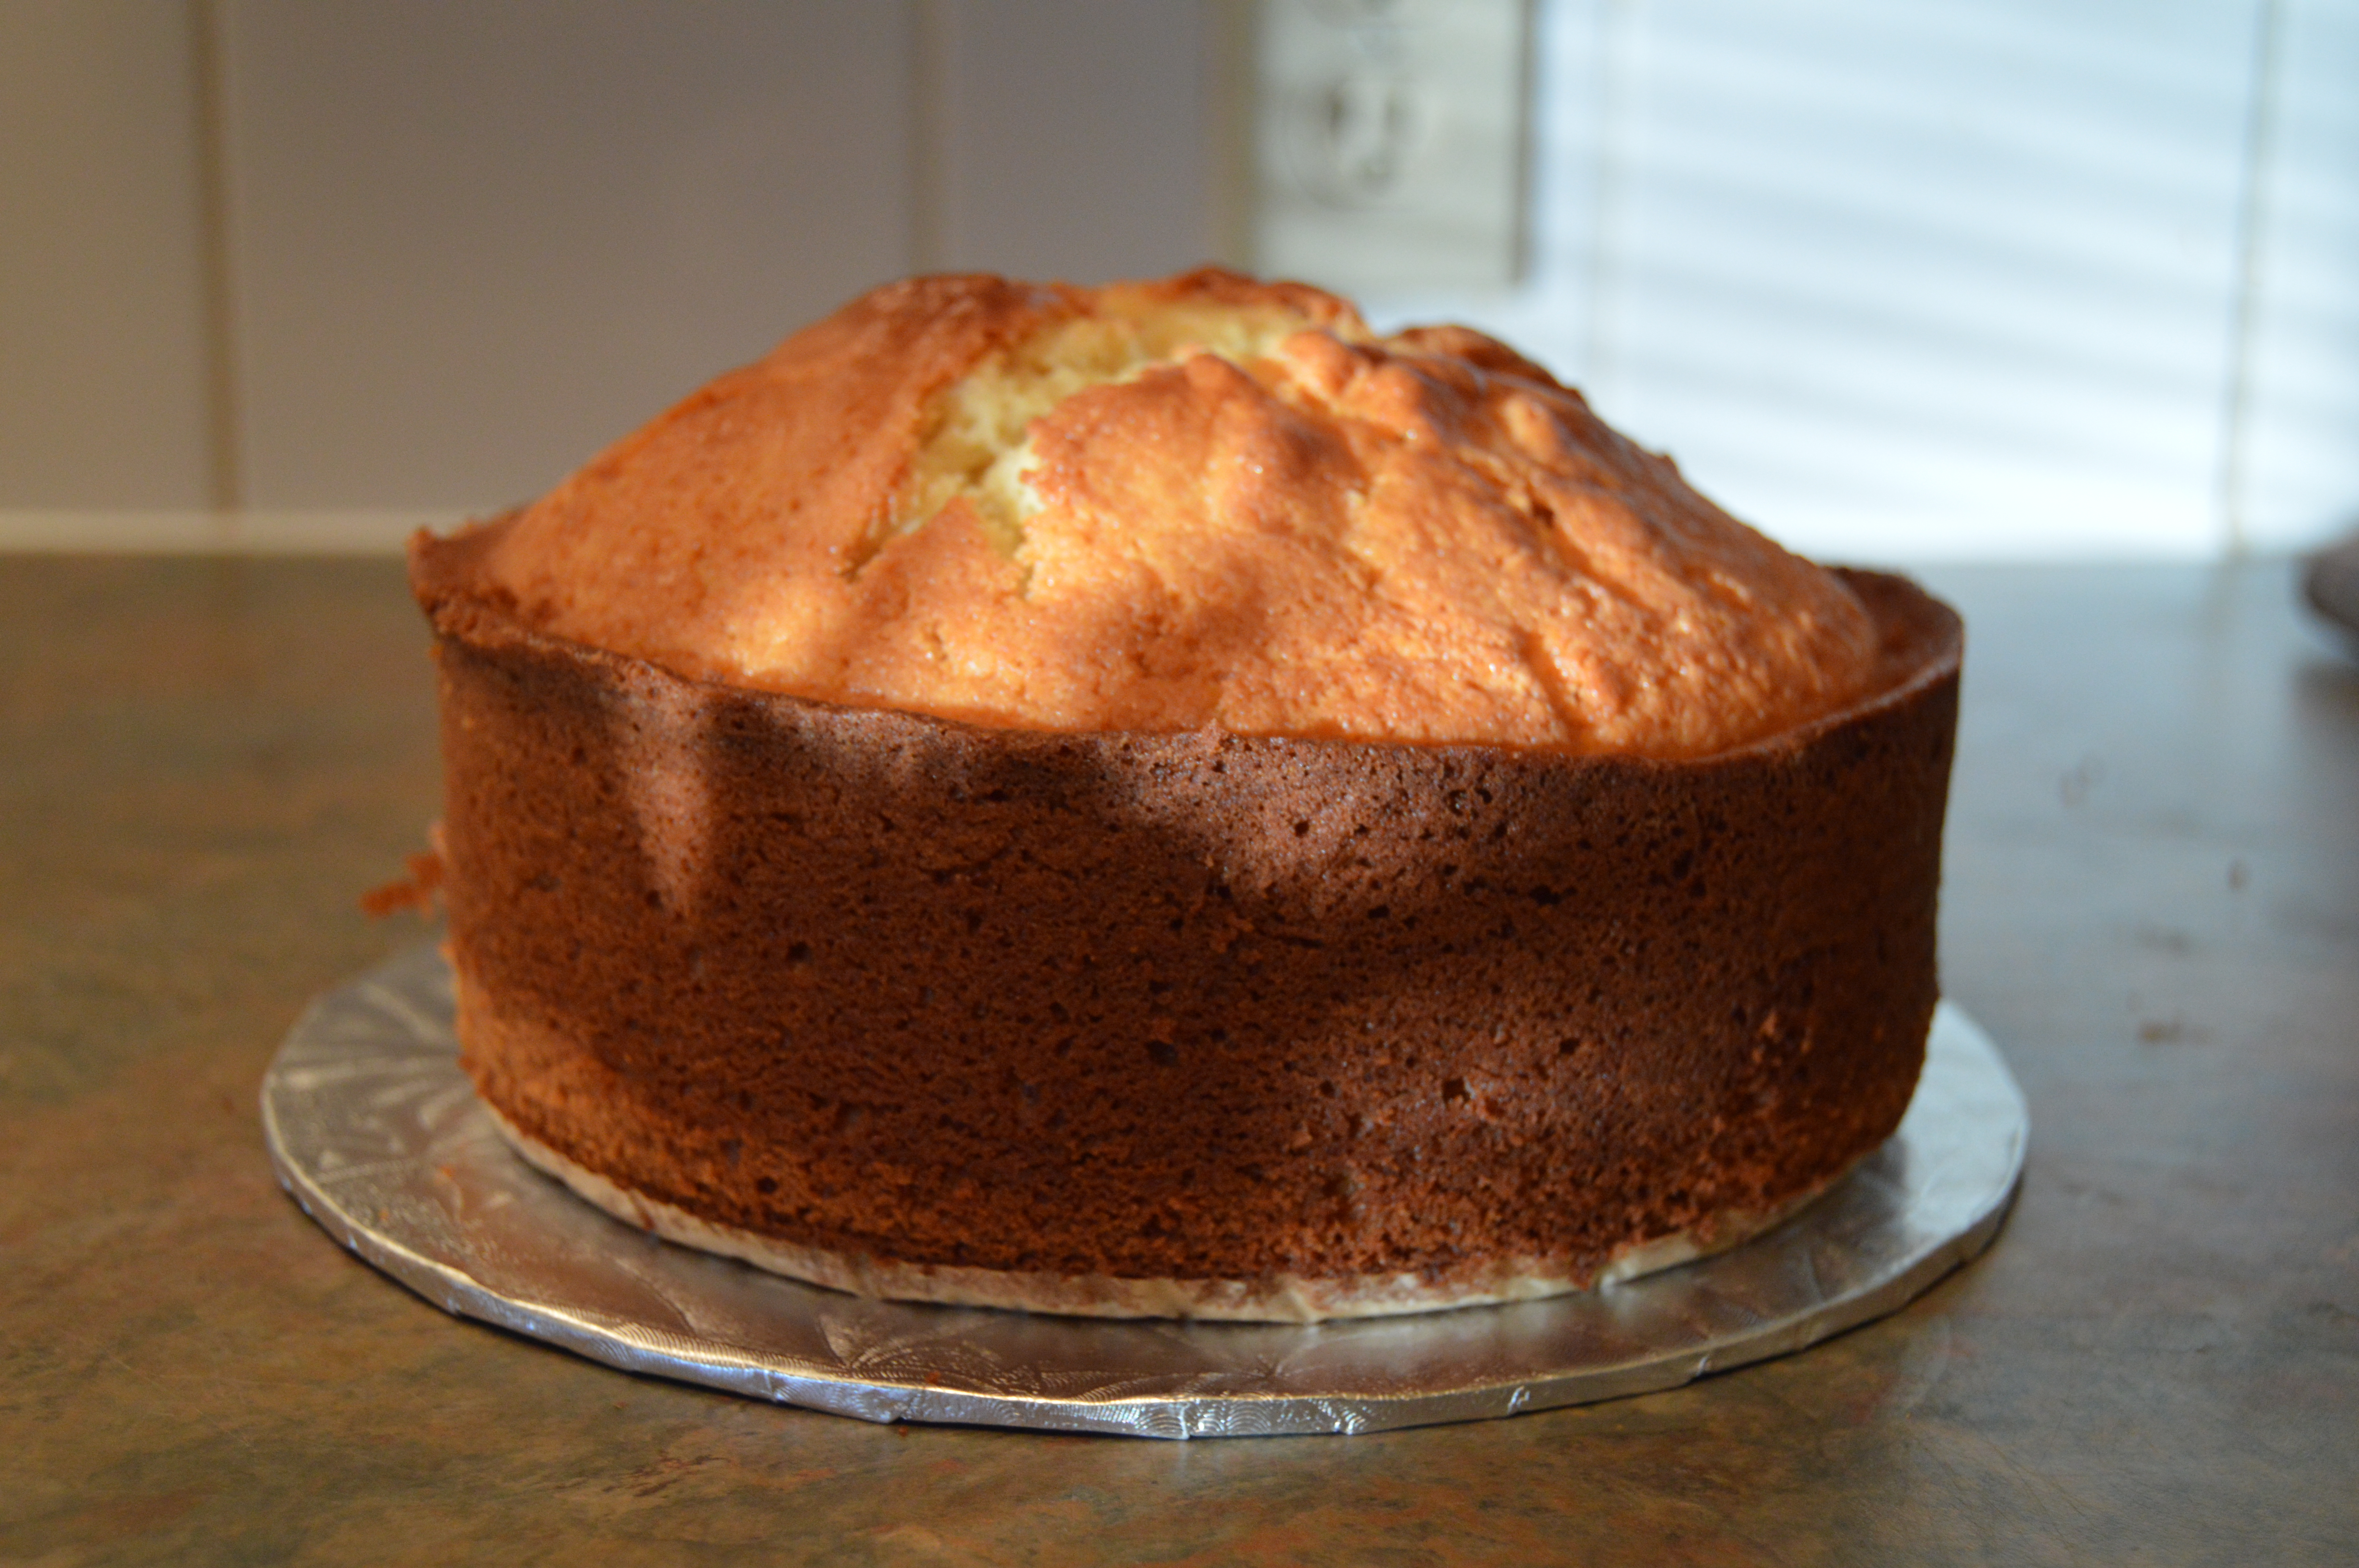
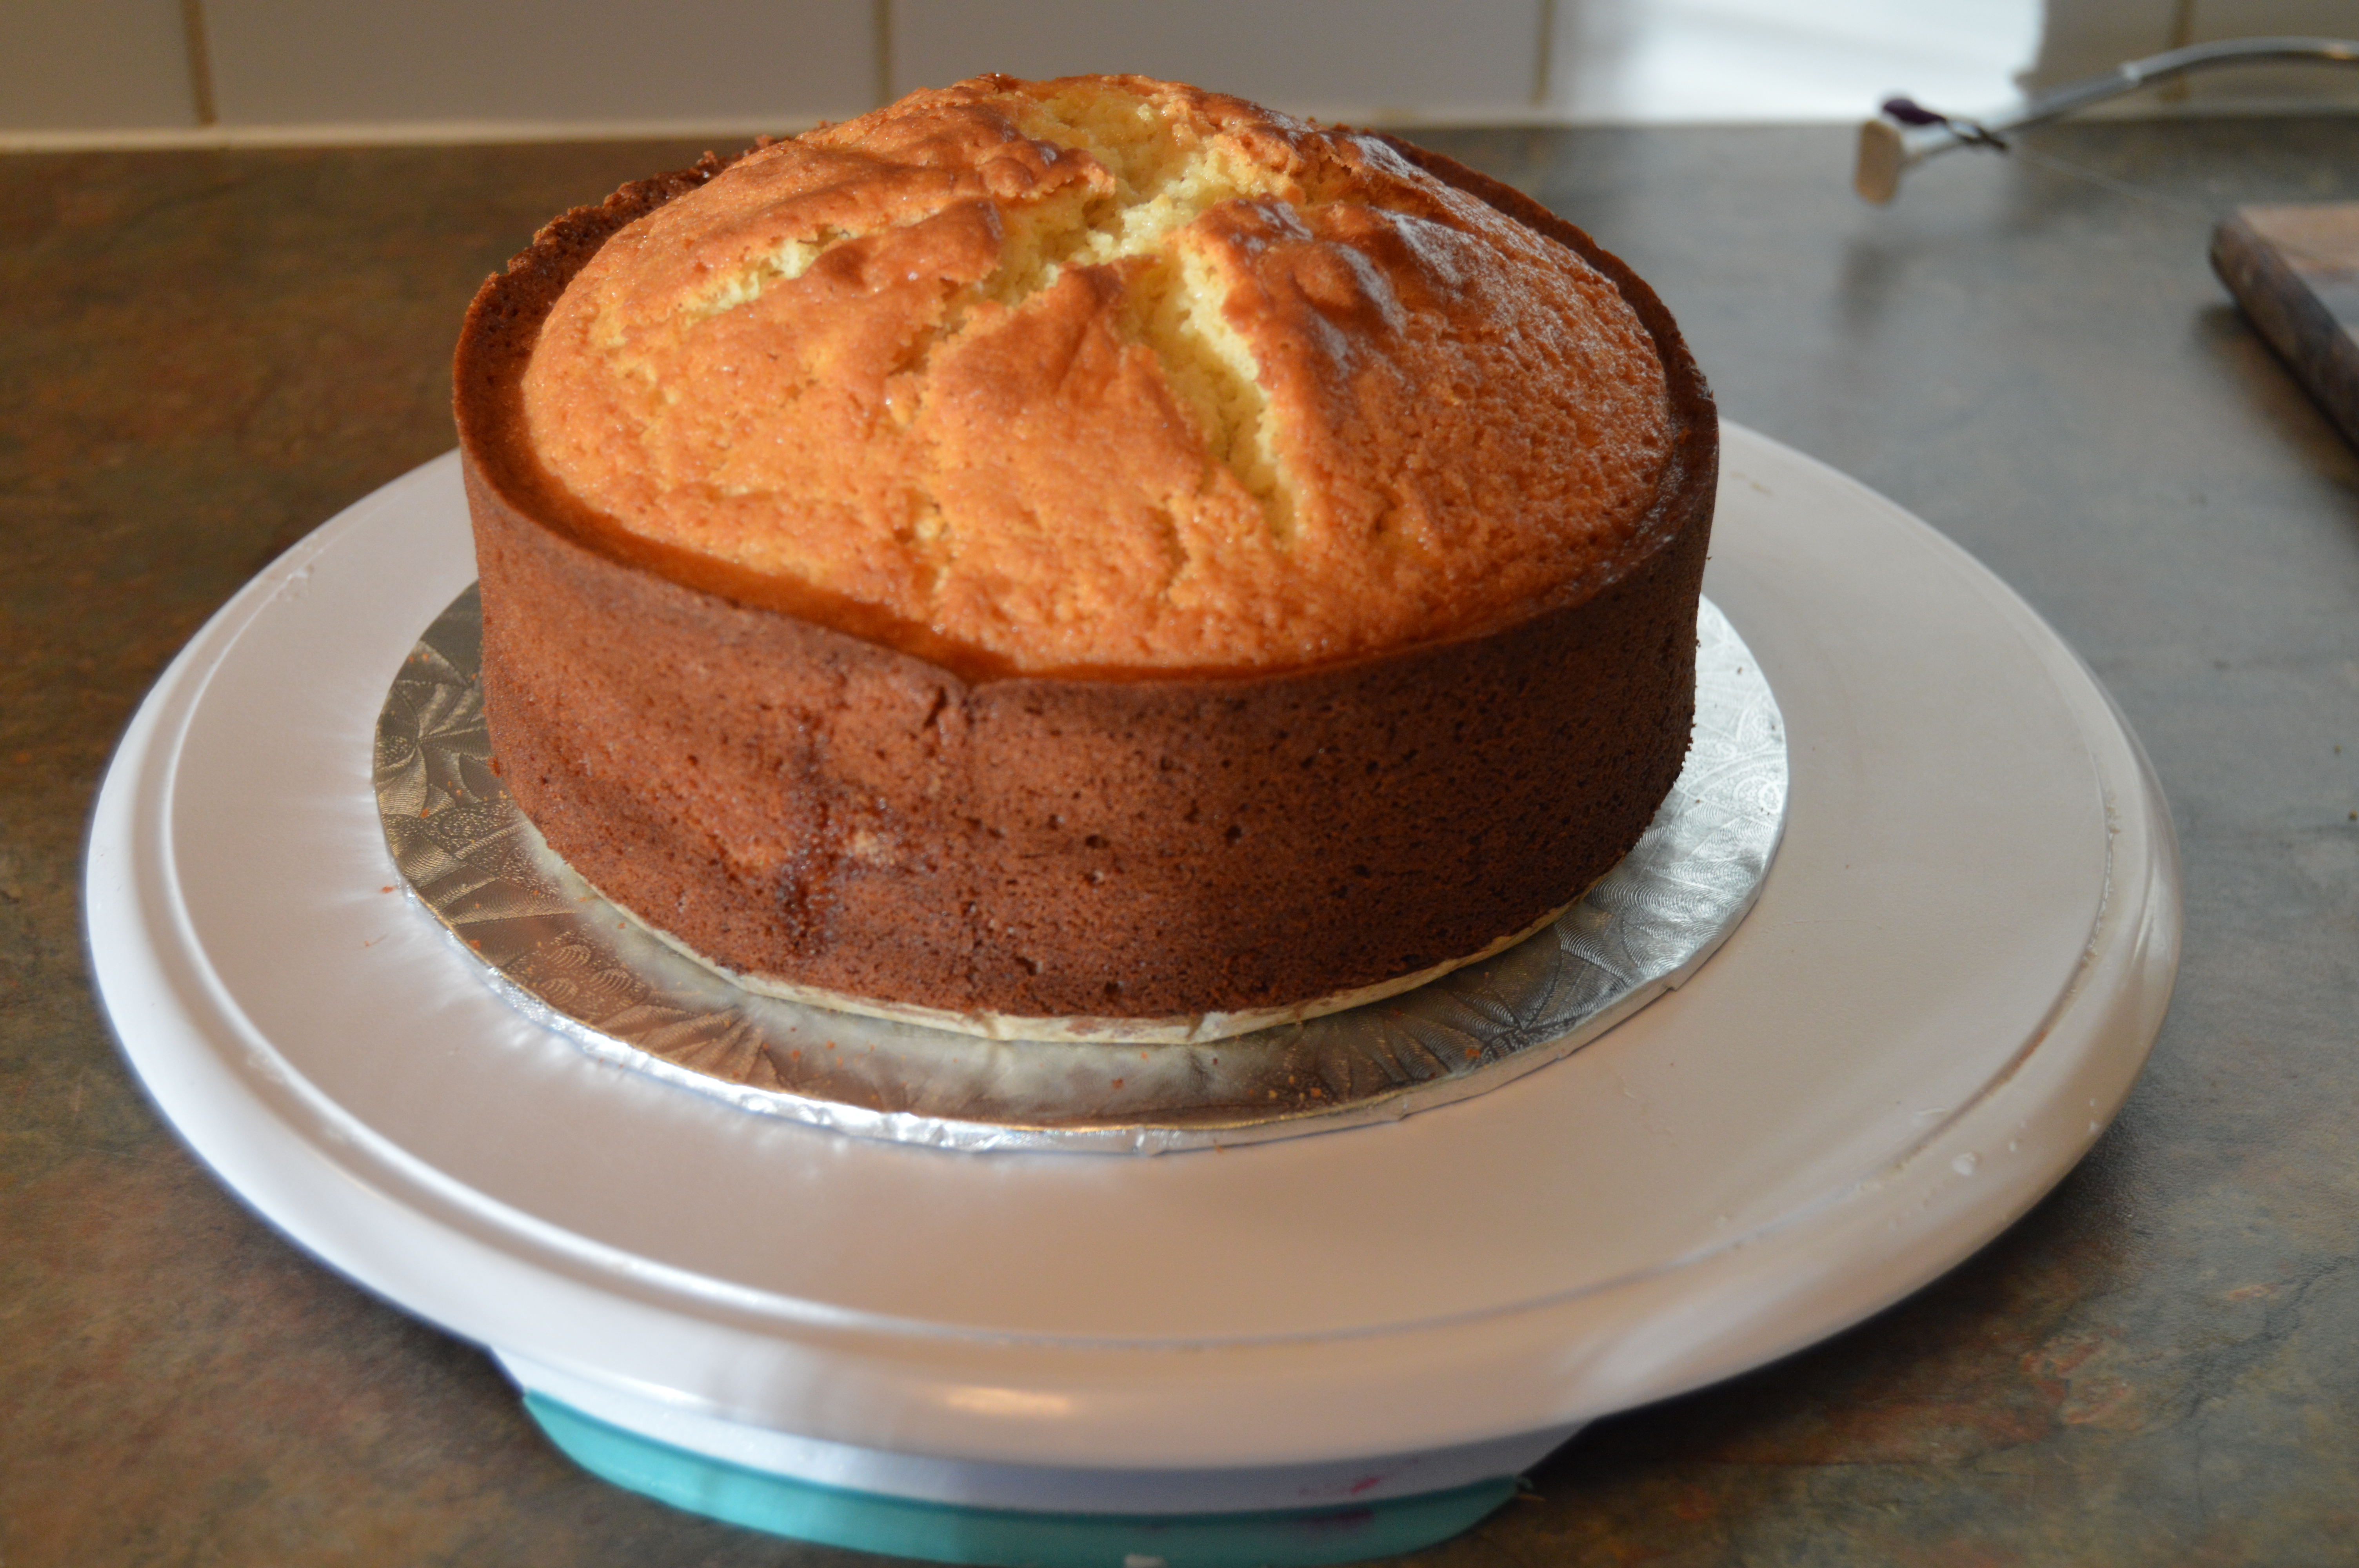
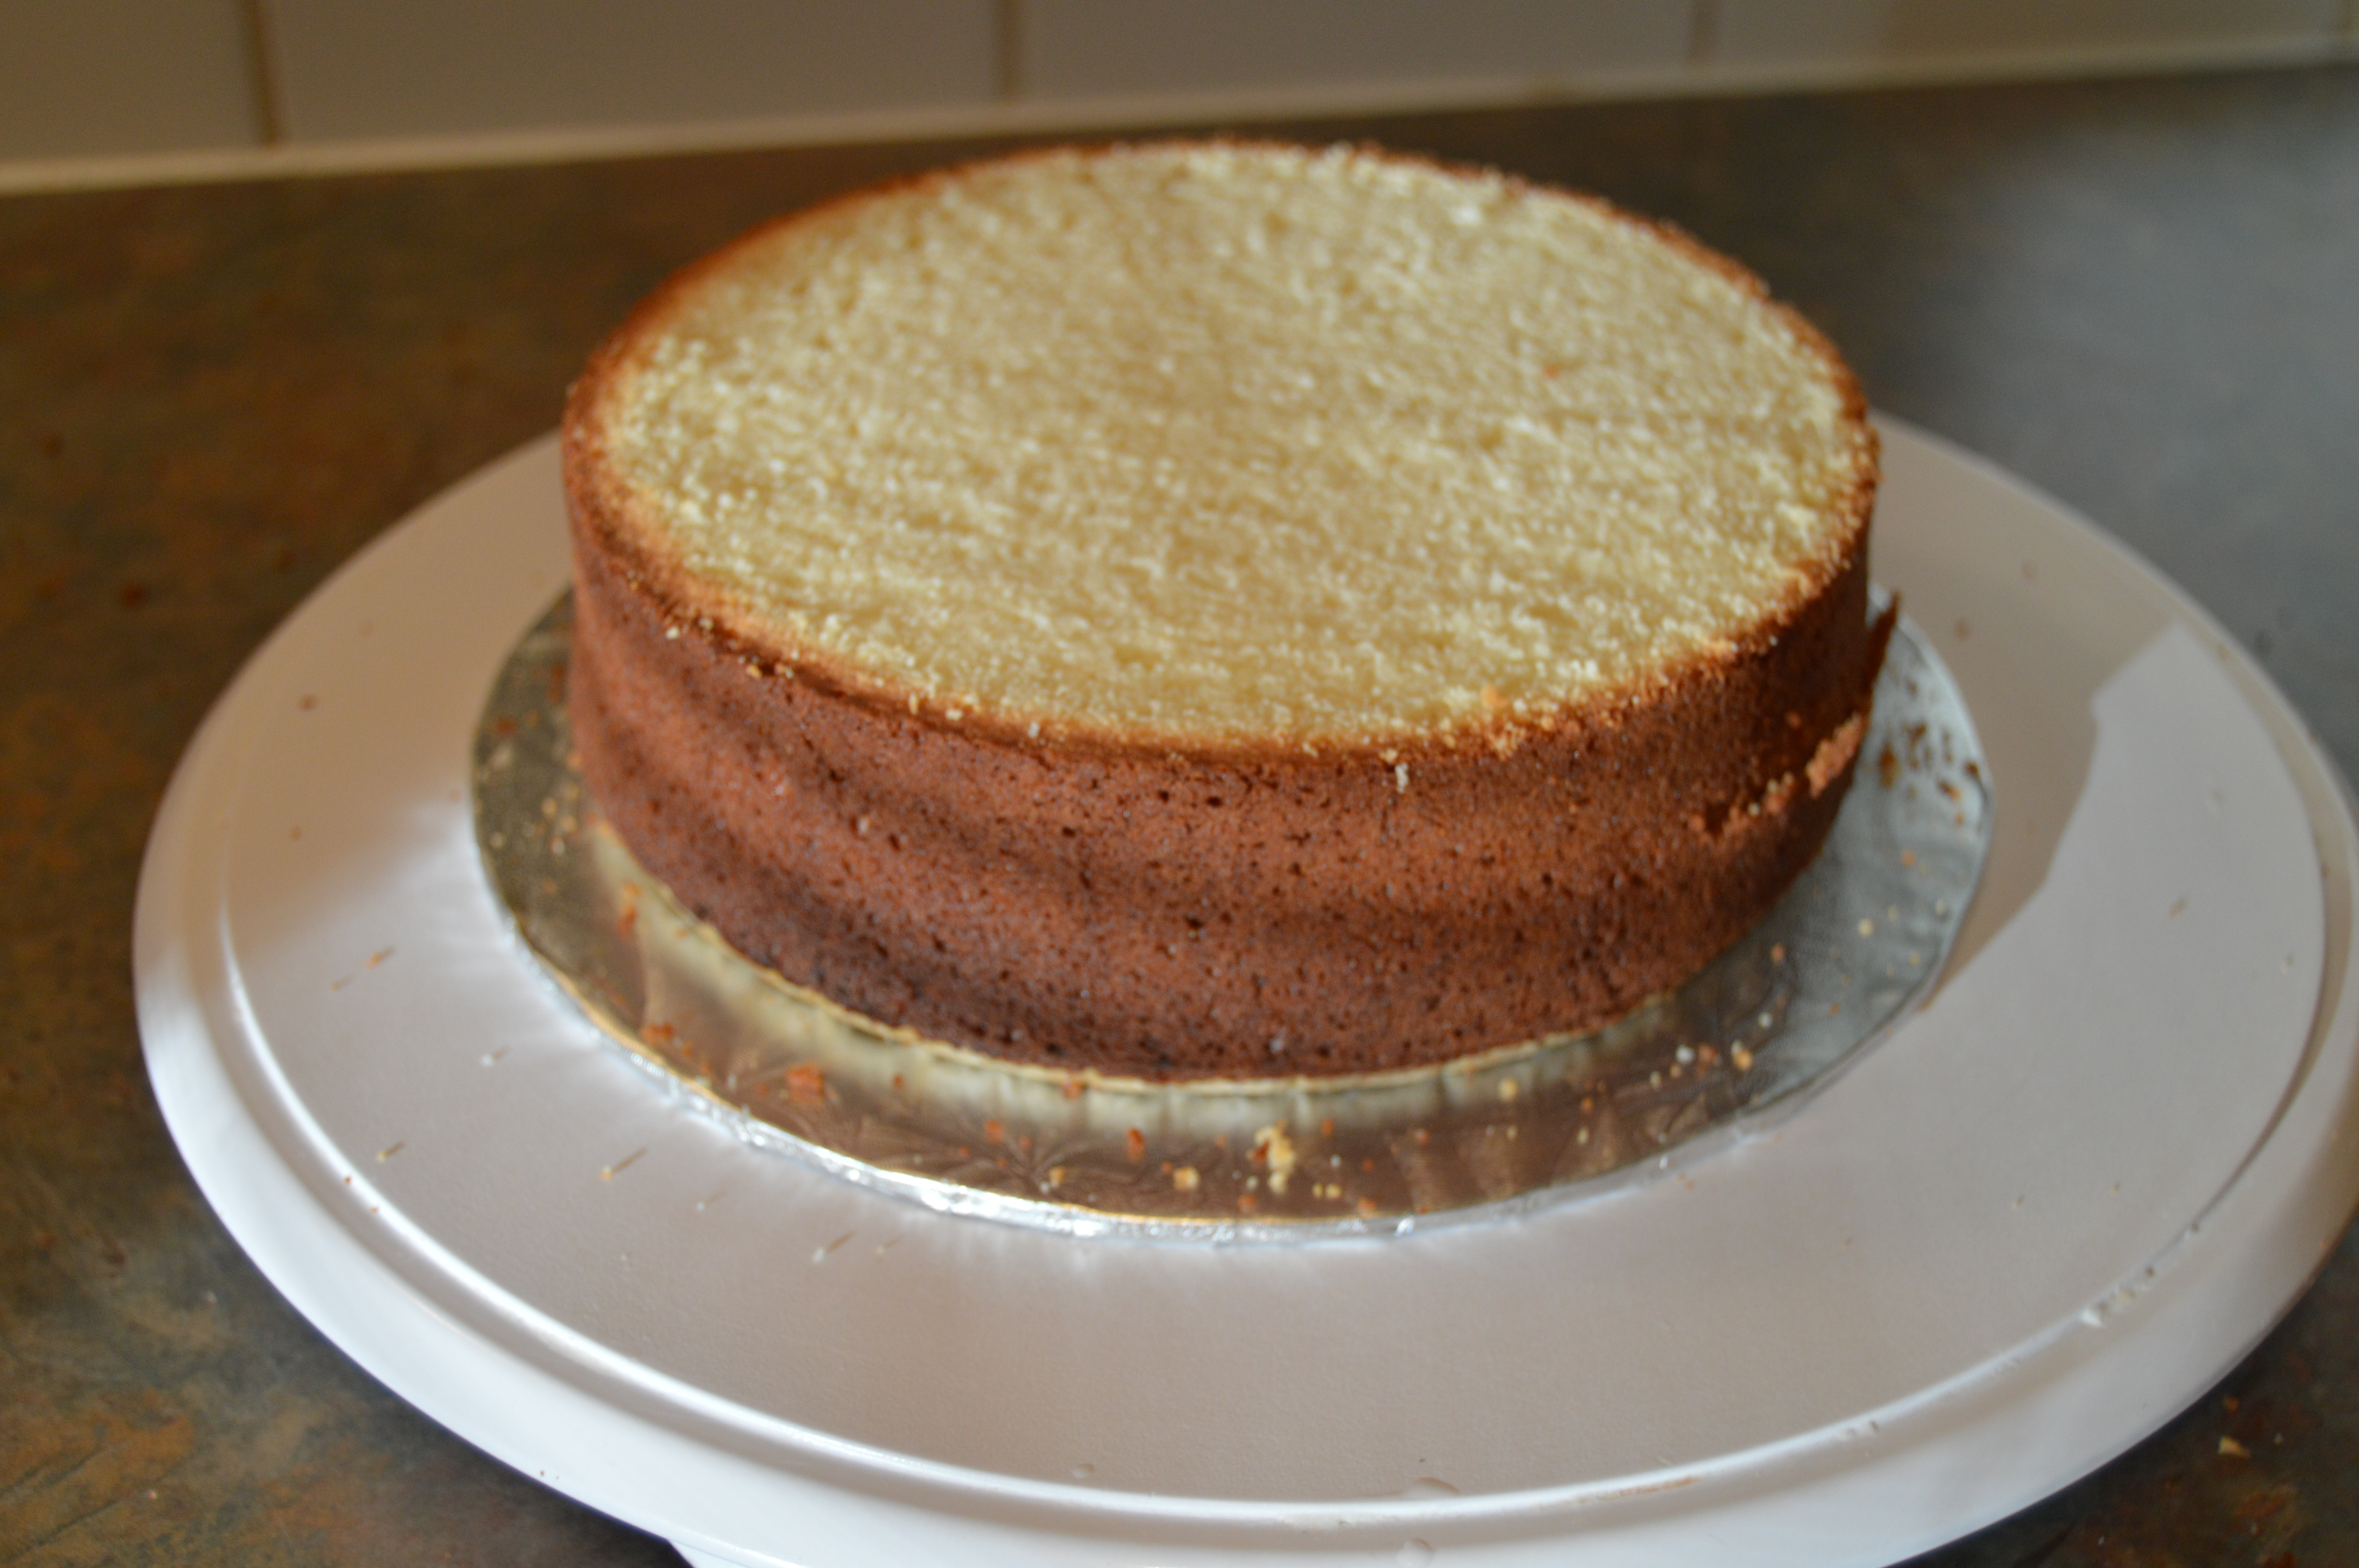
When a cake bakes, it sometimes develops a dome which is also referred to as a crown. Whether or not your cake develops a dome will depend on the type of the cake and the size of the pan among other factors. It is important to cut off this dome in order to get a flat and even cake which will make decorating easier and give better aesthetics to your cake. The process of removing the dome is called leveling. Apart from the aforementioned uses, leveling also prevents your cakes from cracking when they are stacked. Leveling is also useful even is situations where your cake does not have a dome like is the case in Sponge Cakes. The sides of the cake might be uneven and in need of leveling. To torte a cake on the other hand means dividing the cake into layers. It is always beautiful to cut into cakes and expose their even, well frosted layers. When you torte a cake, you are also creating more room for frosting or filling. Below, I will show you how to properly level and torte a cake.

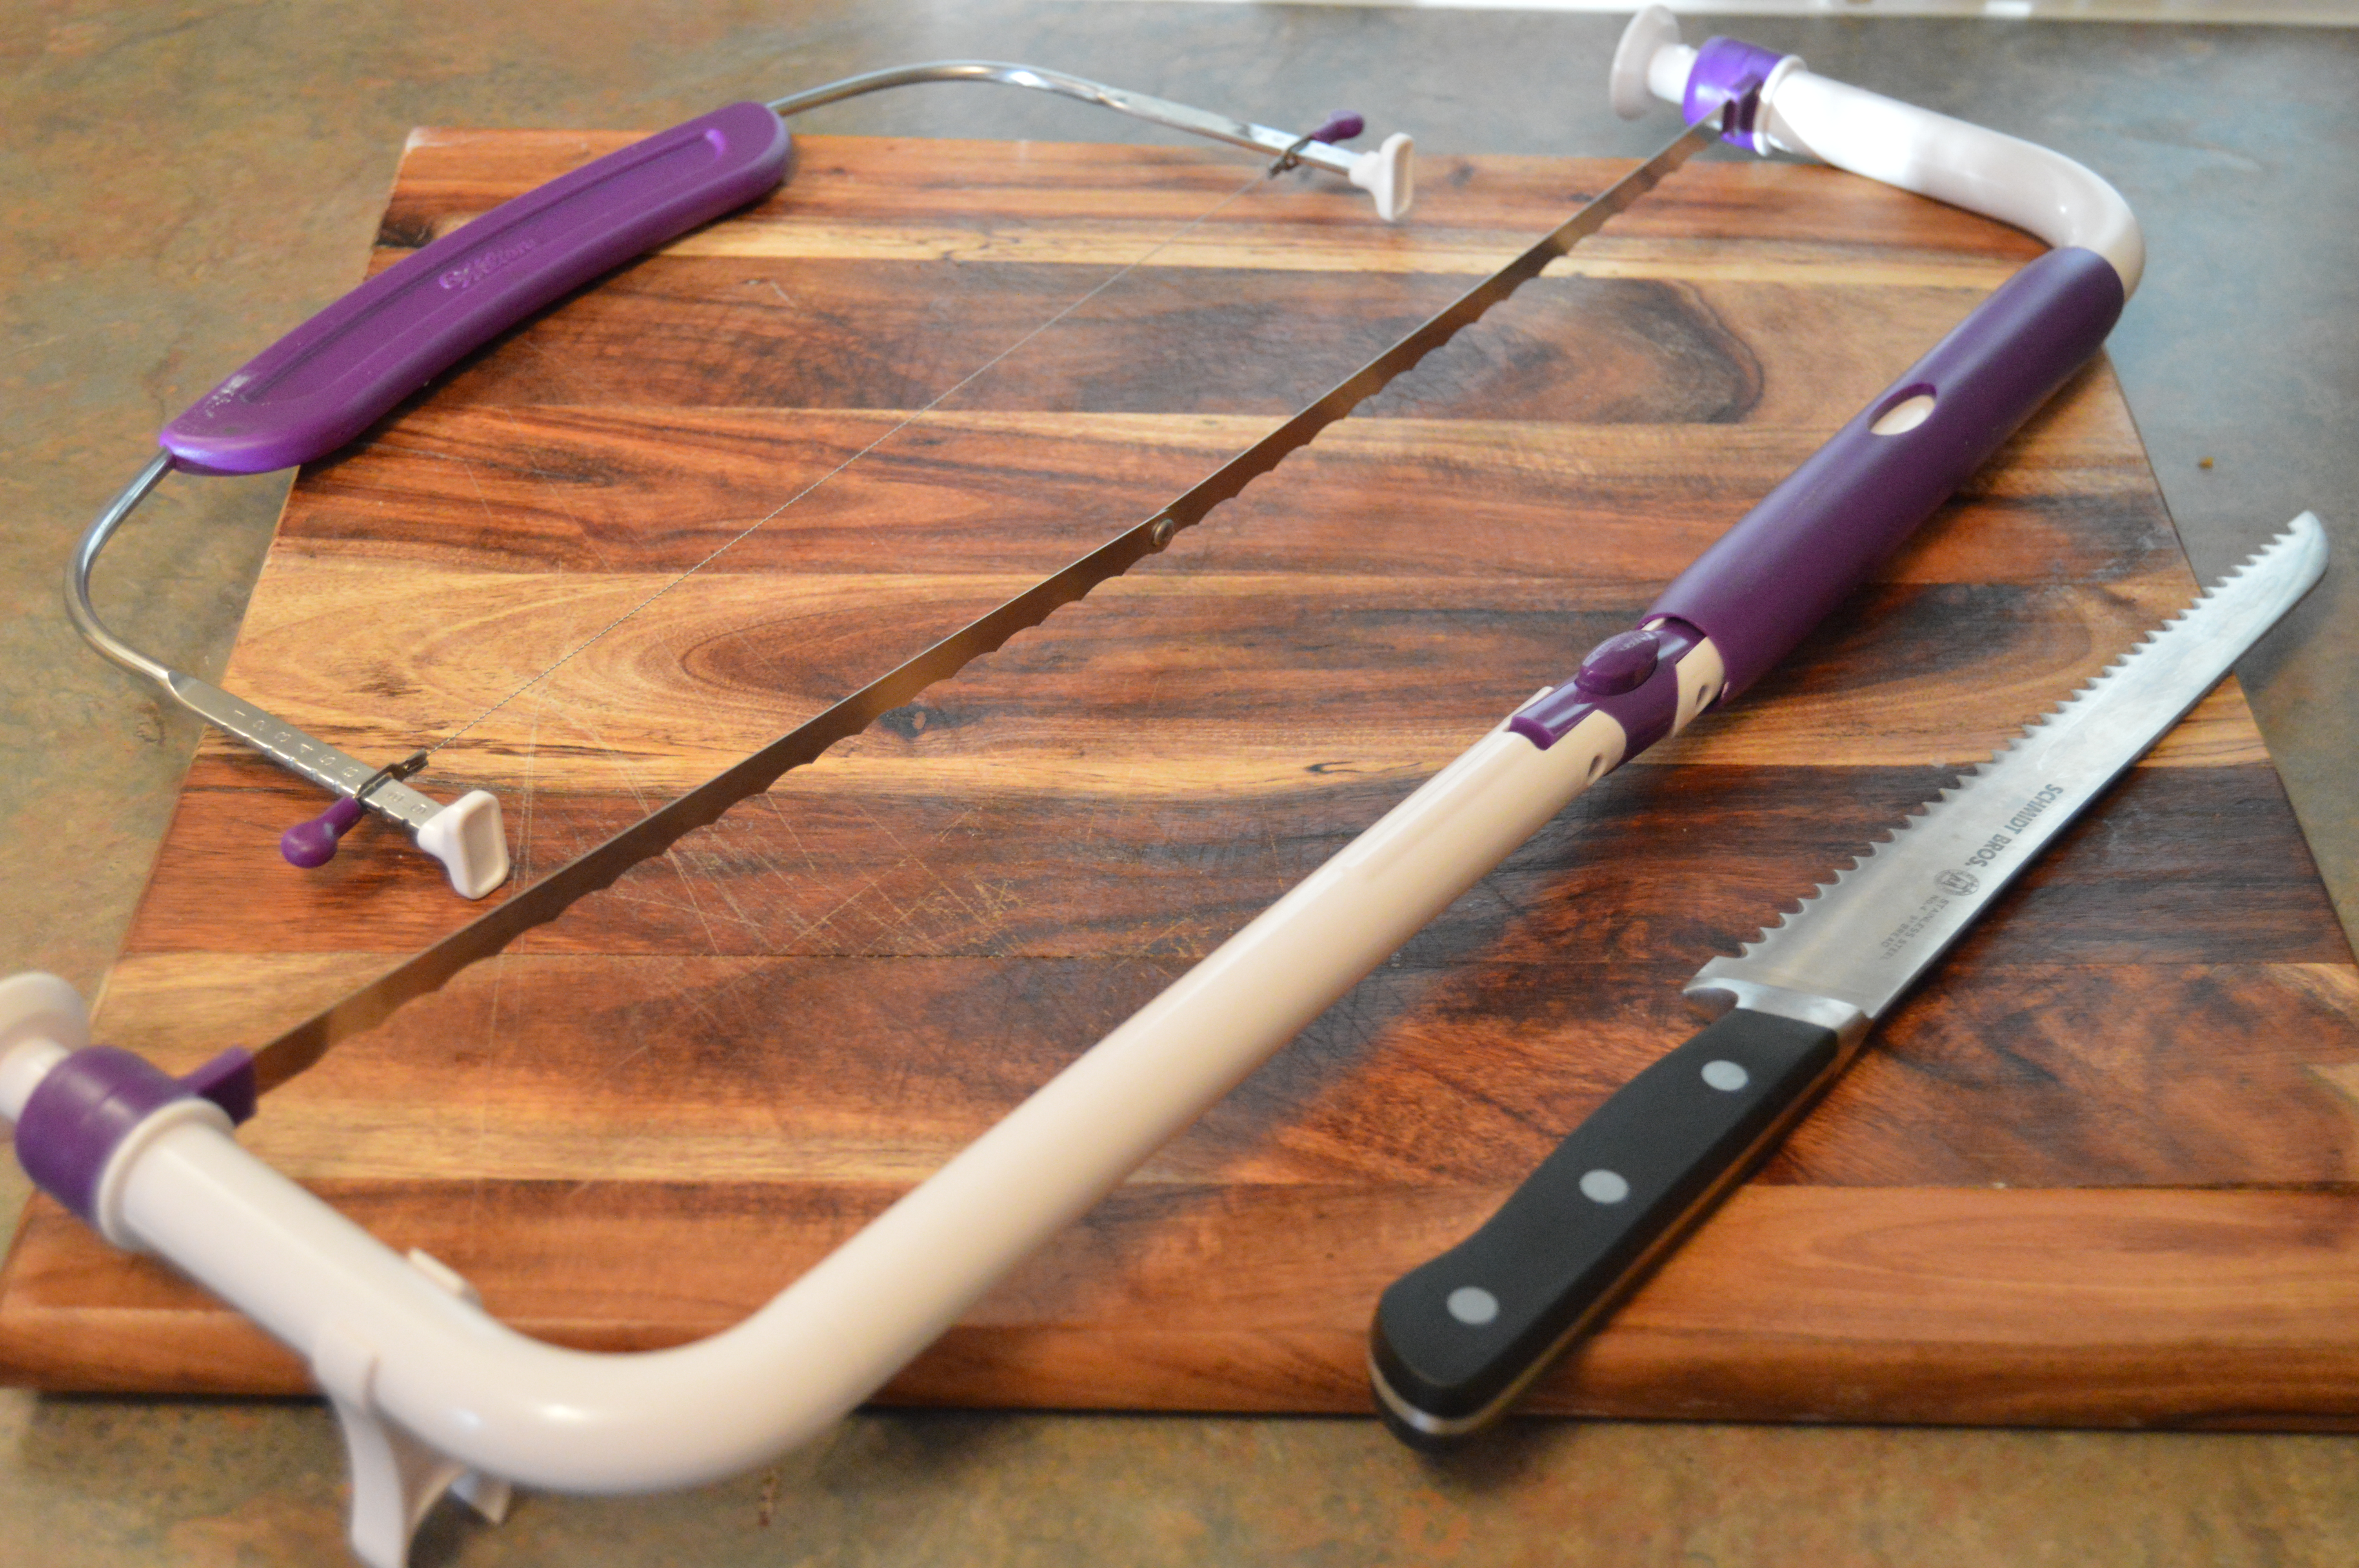
TOOLS:
(1) A Serrated Knife of a Cake Leveler (See Note 1)
(2) Toothpicks (See Note 2)
(3) A Cake Card (Board)
(4) Turntable or Lazy Susan
NOTES:
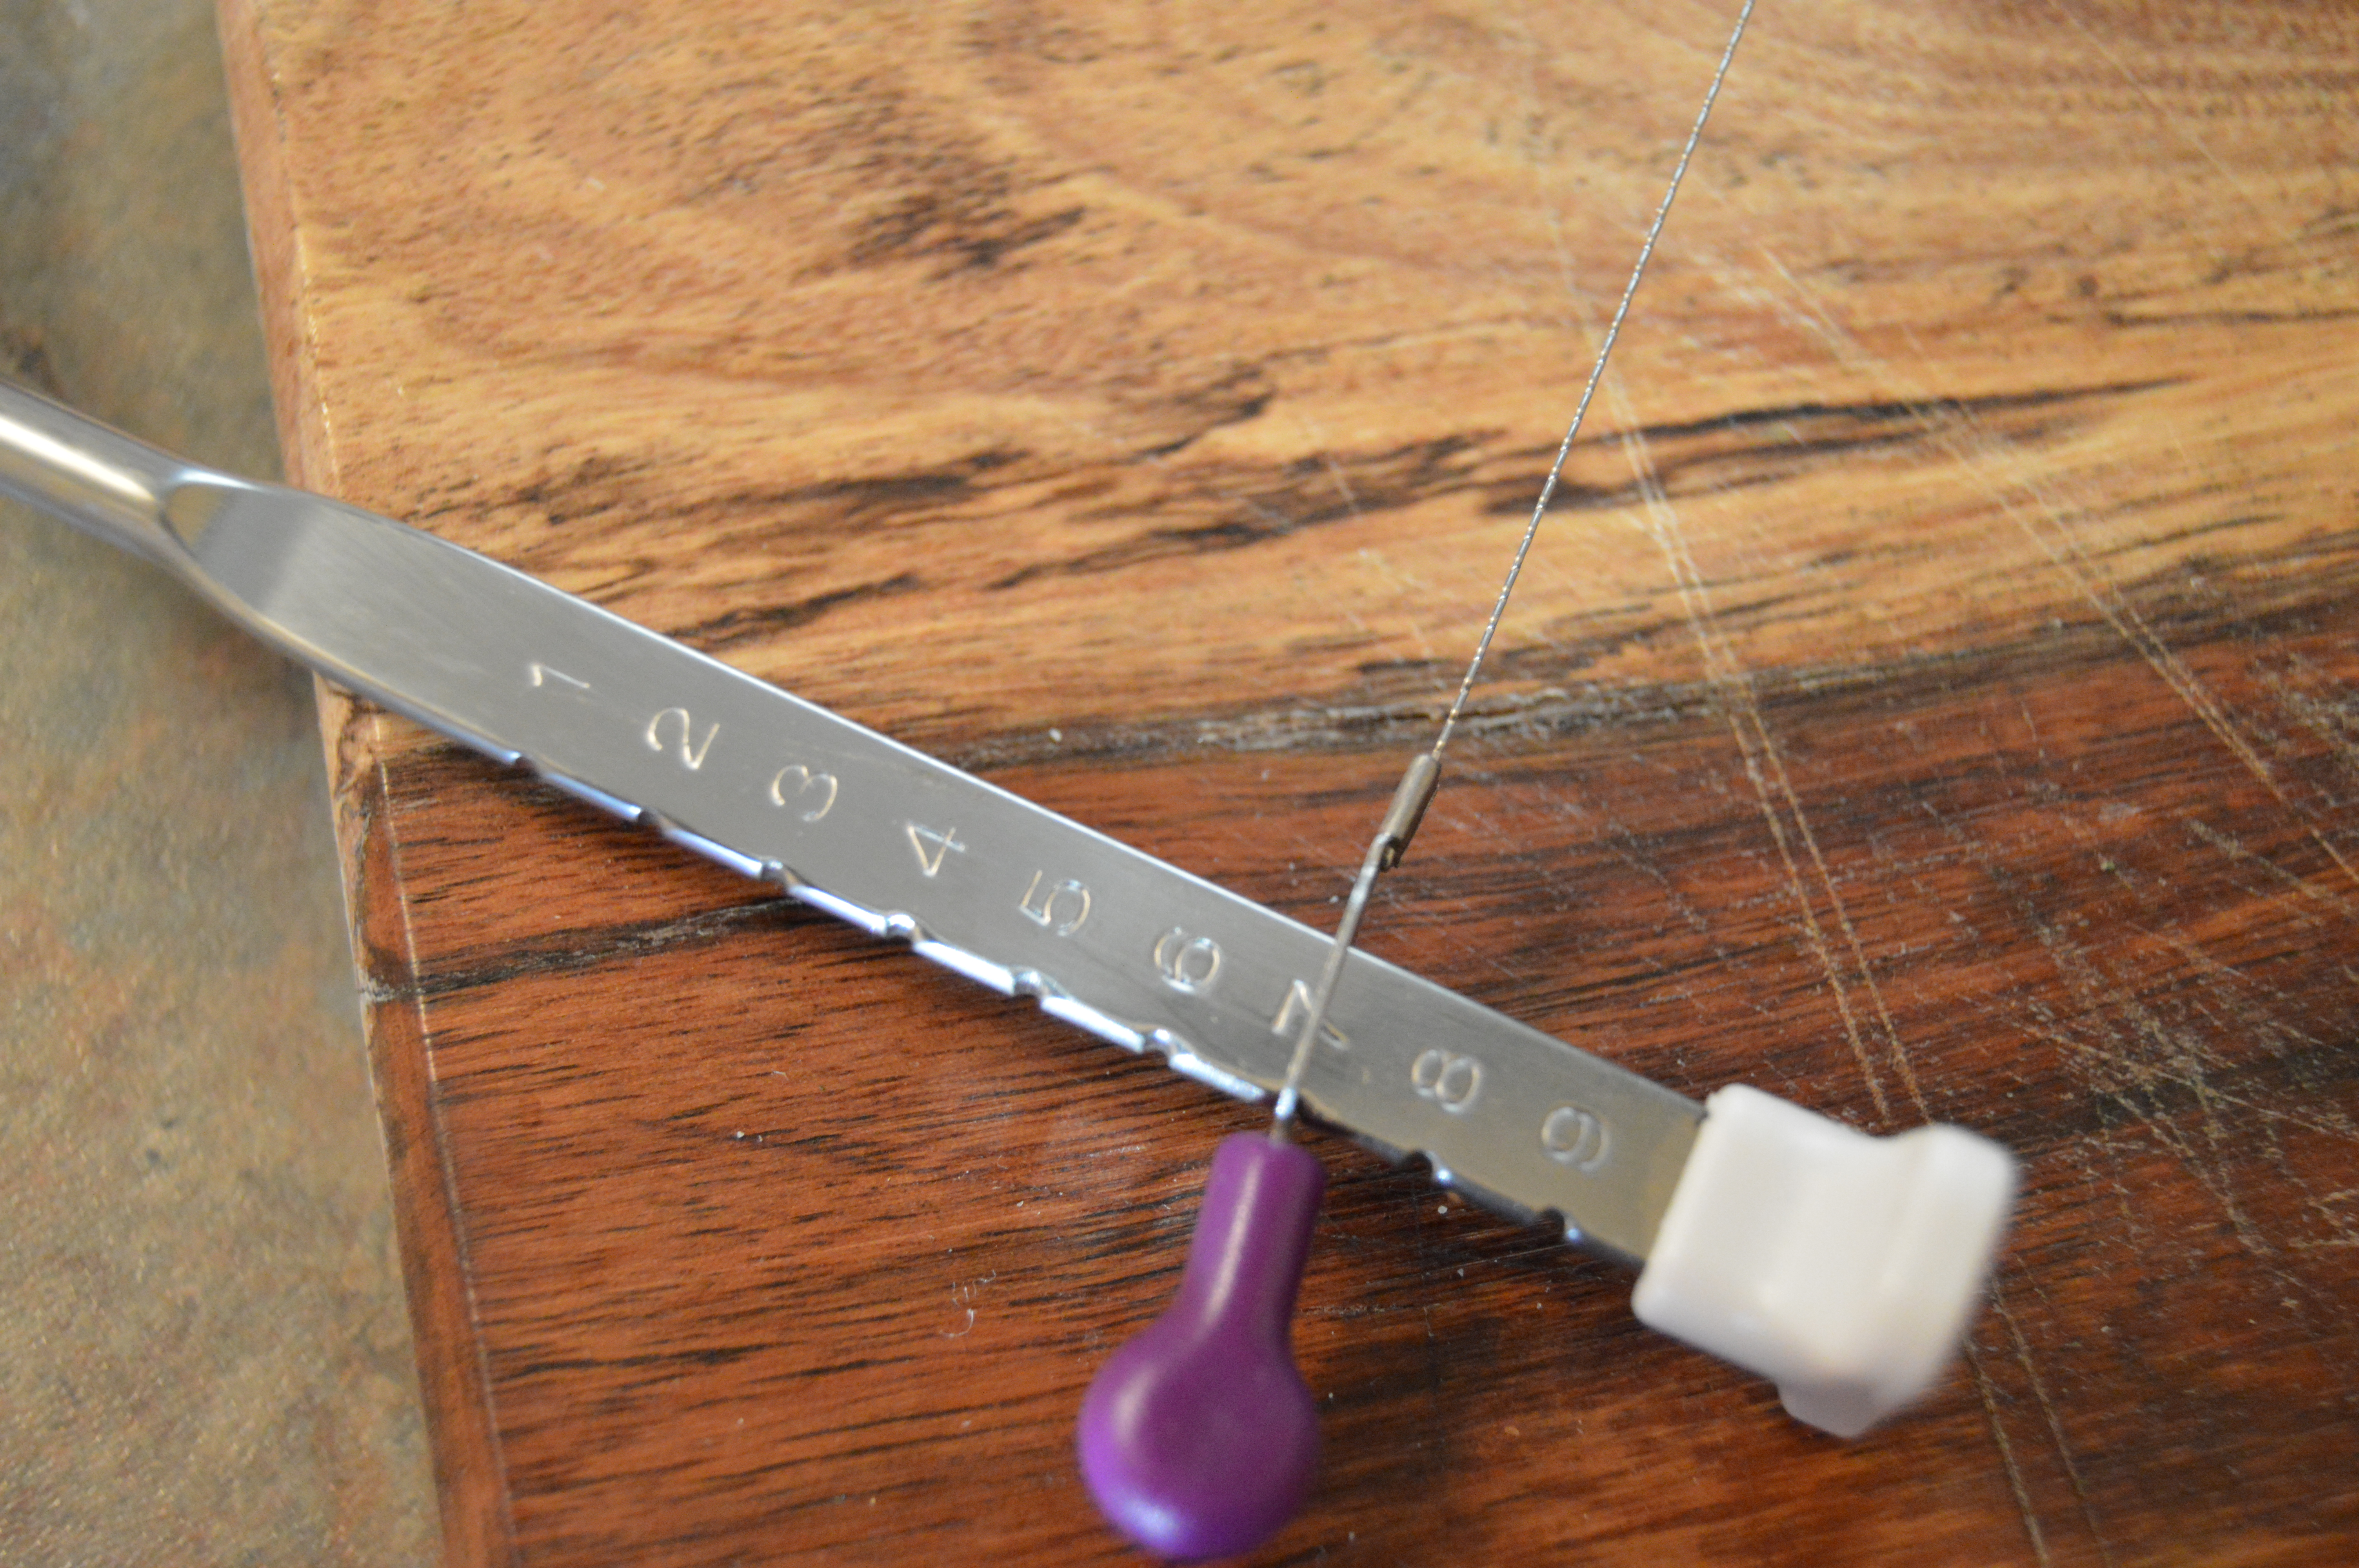
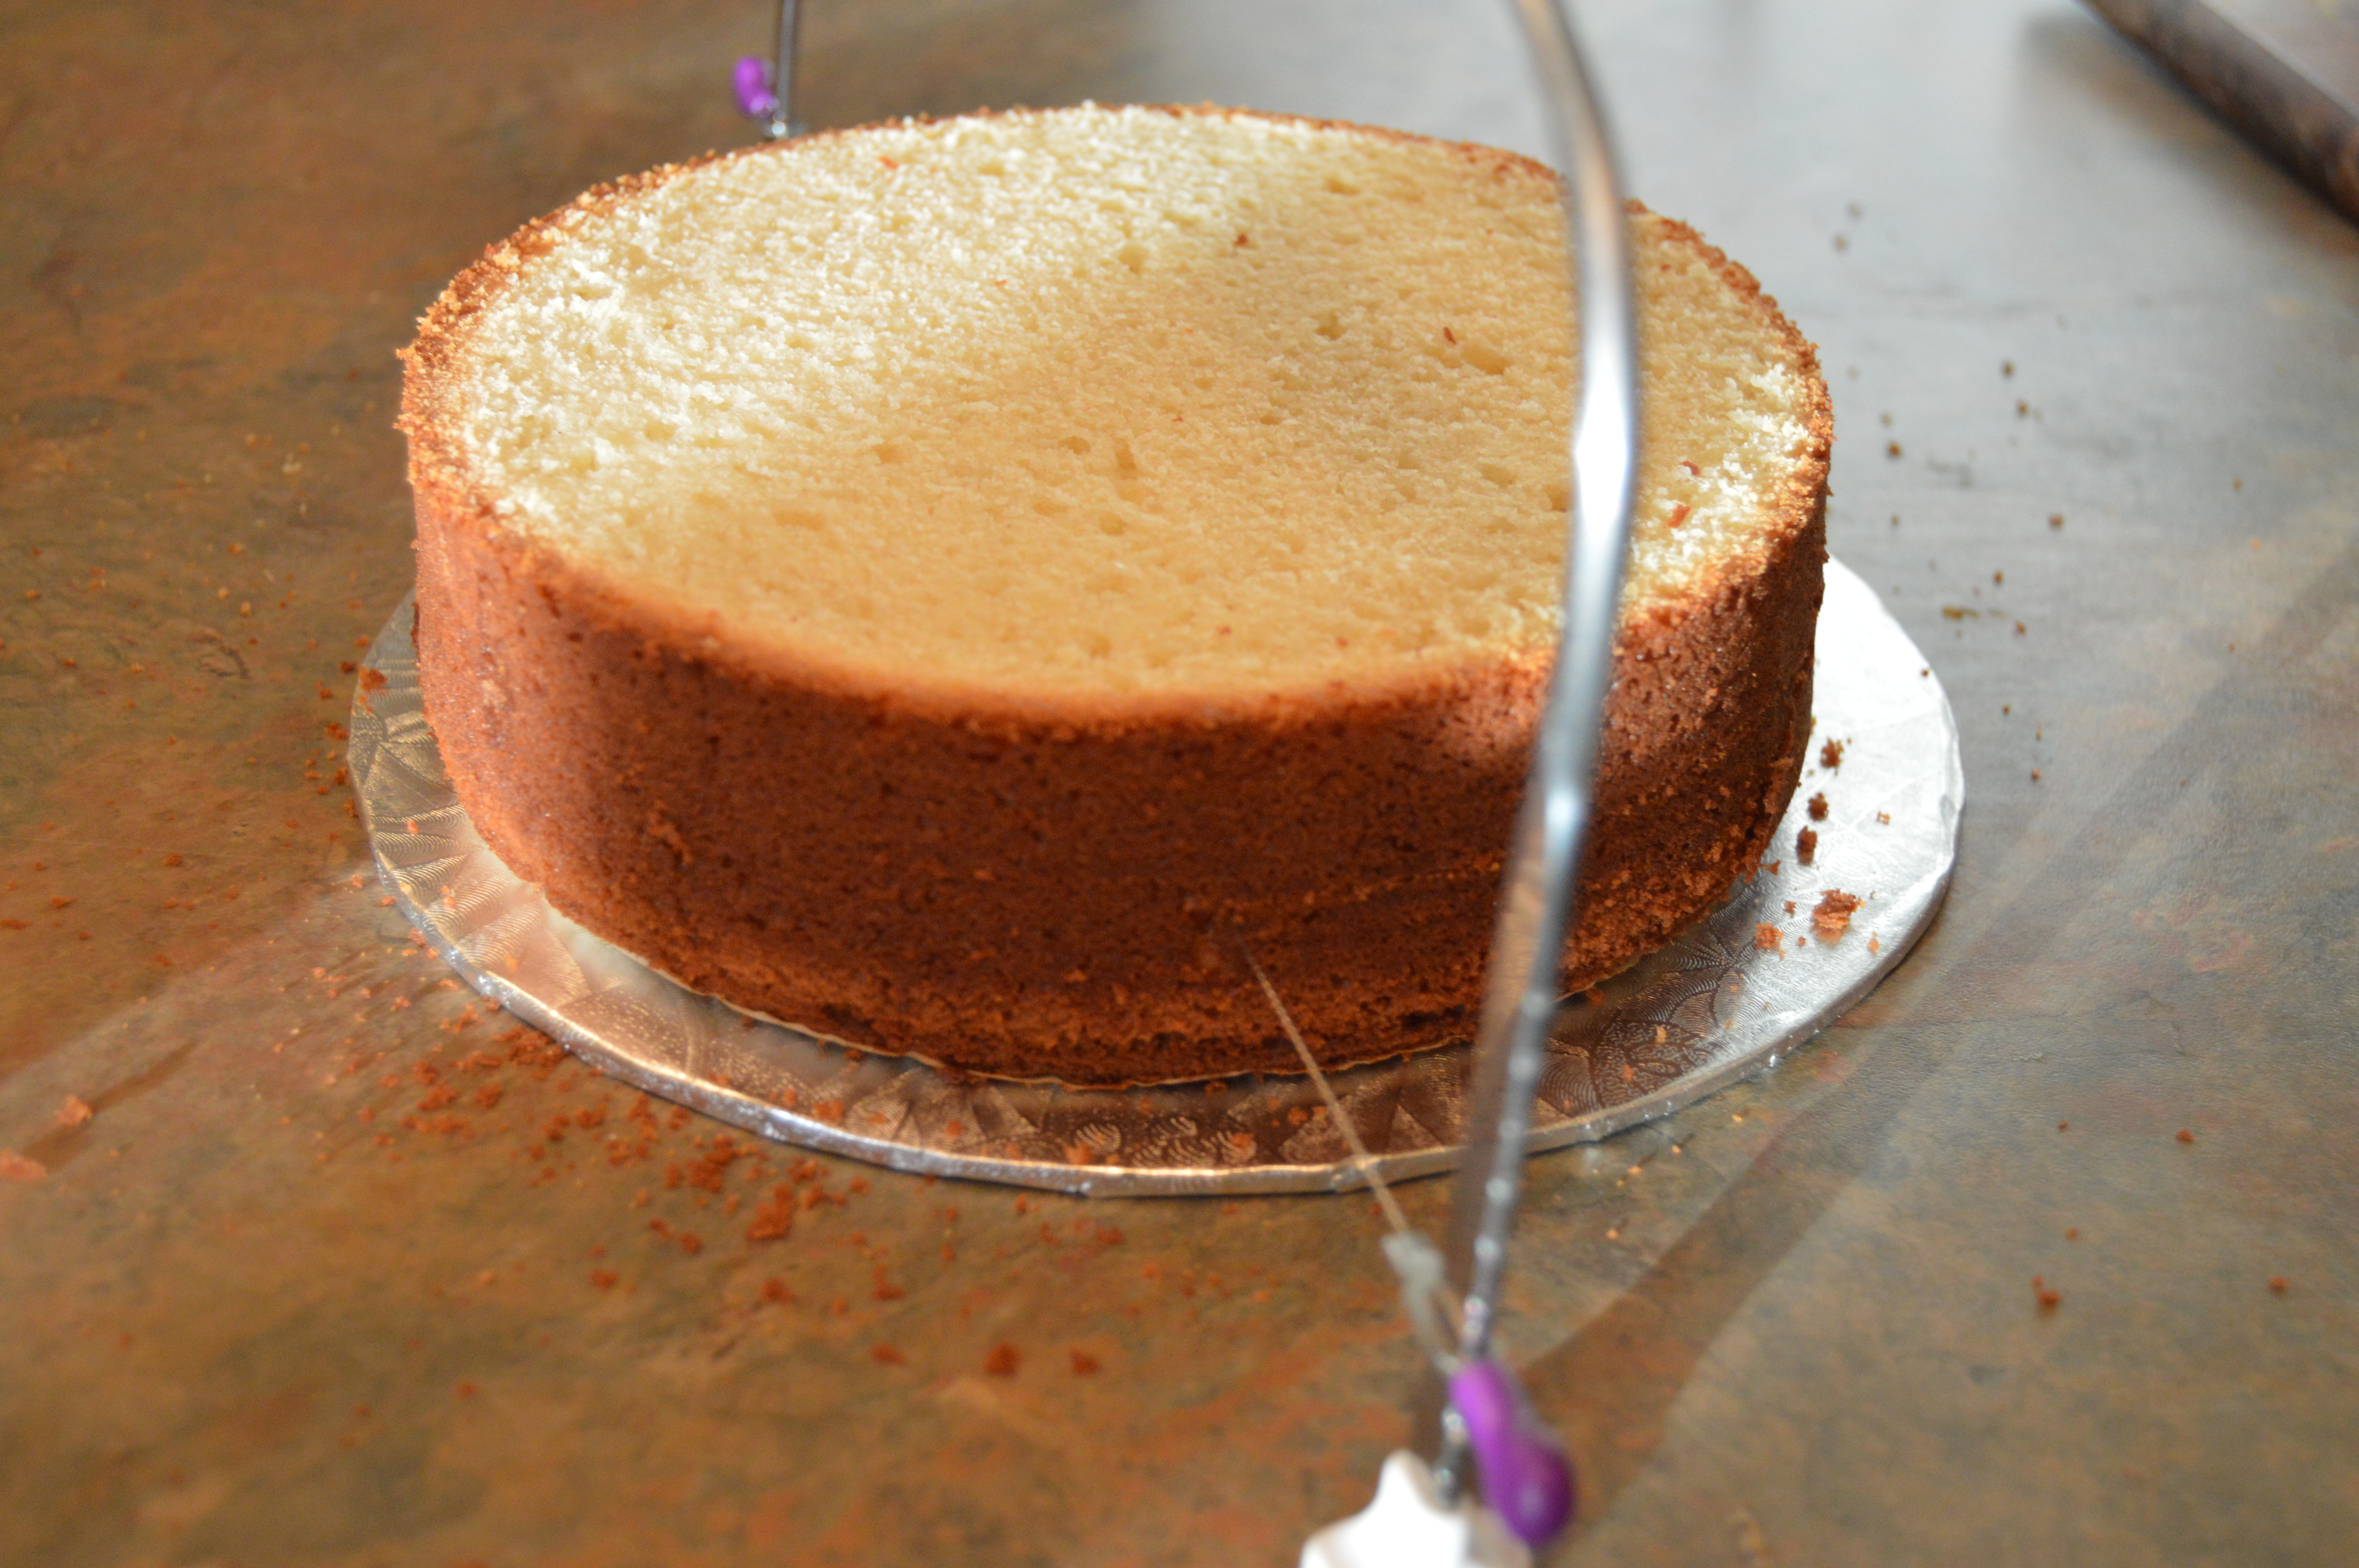
(1) The best tool to use to level and torte a cake is a cake leveler. These come in various sizes and heights. The leveler has a string which is fastened to both sides of the leveler. Some levelers have a thin serrated knife in place of a string. There are notches on the sides of the leveler which allow you to adjust the height of the string according to the height of your cake. If you use a leveler properly, you can always be sure that your cake will always be even and leveled properly. With a serrated knife however, there are no notches to keep the knife at a certain level and you have to rely on your sight, experience and the steadiness of your hands when leveling a cake. I have developed a trick to help you when leveling a cake with a serrated knife. I will be sharing this below.
(2) If you are going to level or torte a cake with a serrated knife, you might need to make use of toothpicks to help ensure that your knife remains leveled at all times. I will explain how this works below.
(3) It is good practice to chill your cakes before you level and torte them. This will serve two purposes. First, it will minimize the amount of crumbs which will be produced during the process. Secondly, it will ensure that your cakes do not tear, break or fall apart during the process. Some cakes are very soft and handling them in that state might spell disaster for the baker. Keep your cakes in the fridge for at least 2 hours after they have cooled down, preferably overnight. You can bake your cake on one day, wrap it and keep it in the fridge and level, torte and frost the next day.
HOW TO LEVEL A CAKE:
(1) If you are using a cake leveler, place the cake on a cake card which is resting on an even flat surface. It is important that your surface is flat. Place the leveler against the sides of the cake in order to know which notch the string should be at. It is good practice to go around the cake with the leveler when adjusting the height of the string as some sides might be lover than the others. Level the cake starting from the lowest side of the cake, if any. Adjust the string accordingly and saw through the cake using a back and forth motion. This motion will prevent the cake from tearing. You want to take off as little of the dome as possible.


(3) If you are using a serrated knife, place the cake card on a turntable and place your cake on the cake card. If you trust your judgement, place the knife against a side of the cake and slice through while rotating the turntable gently and moving the knife back and forth. Start with the edges of the cake and work the knife deeper until the slice meets at the middle of your cake. Do not use an ordinary knife to level or torte a cake as these knives are not built for these tasks. Do not level the cake without a turntable if you are using a serrated knife as the chances of having uneven sides will be more.
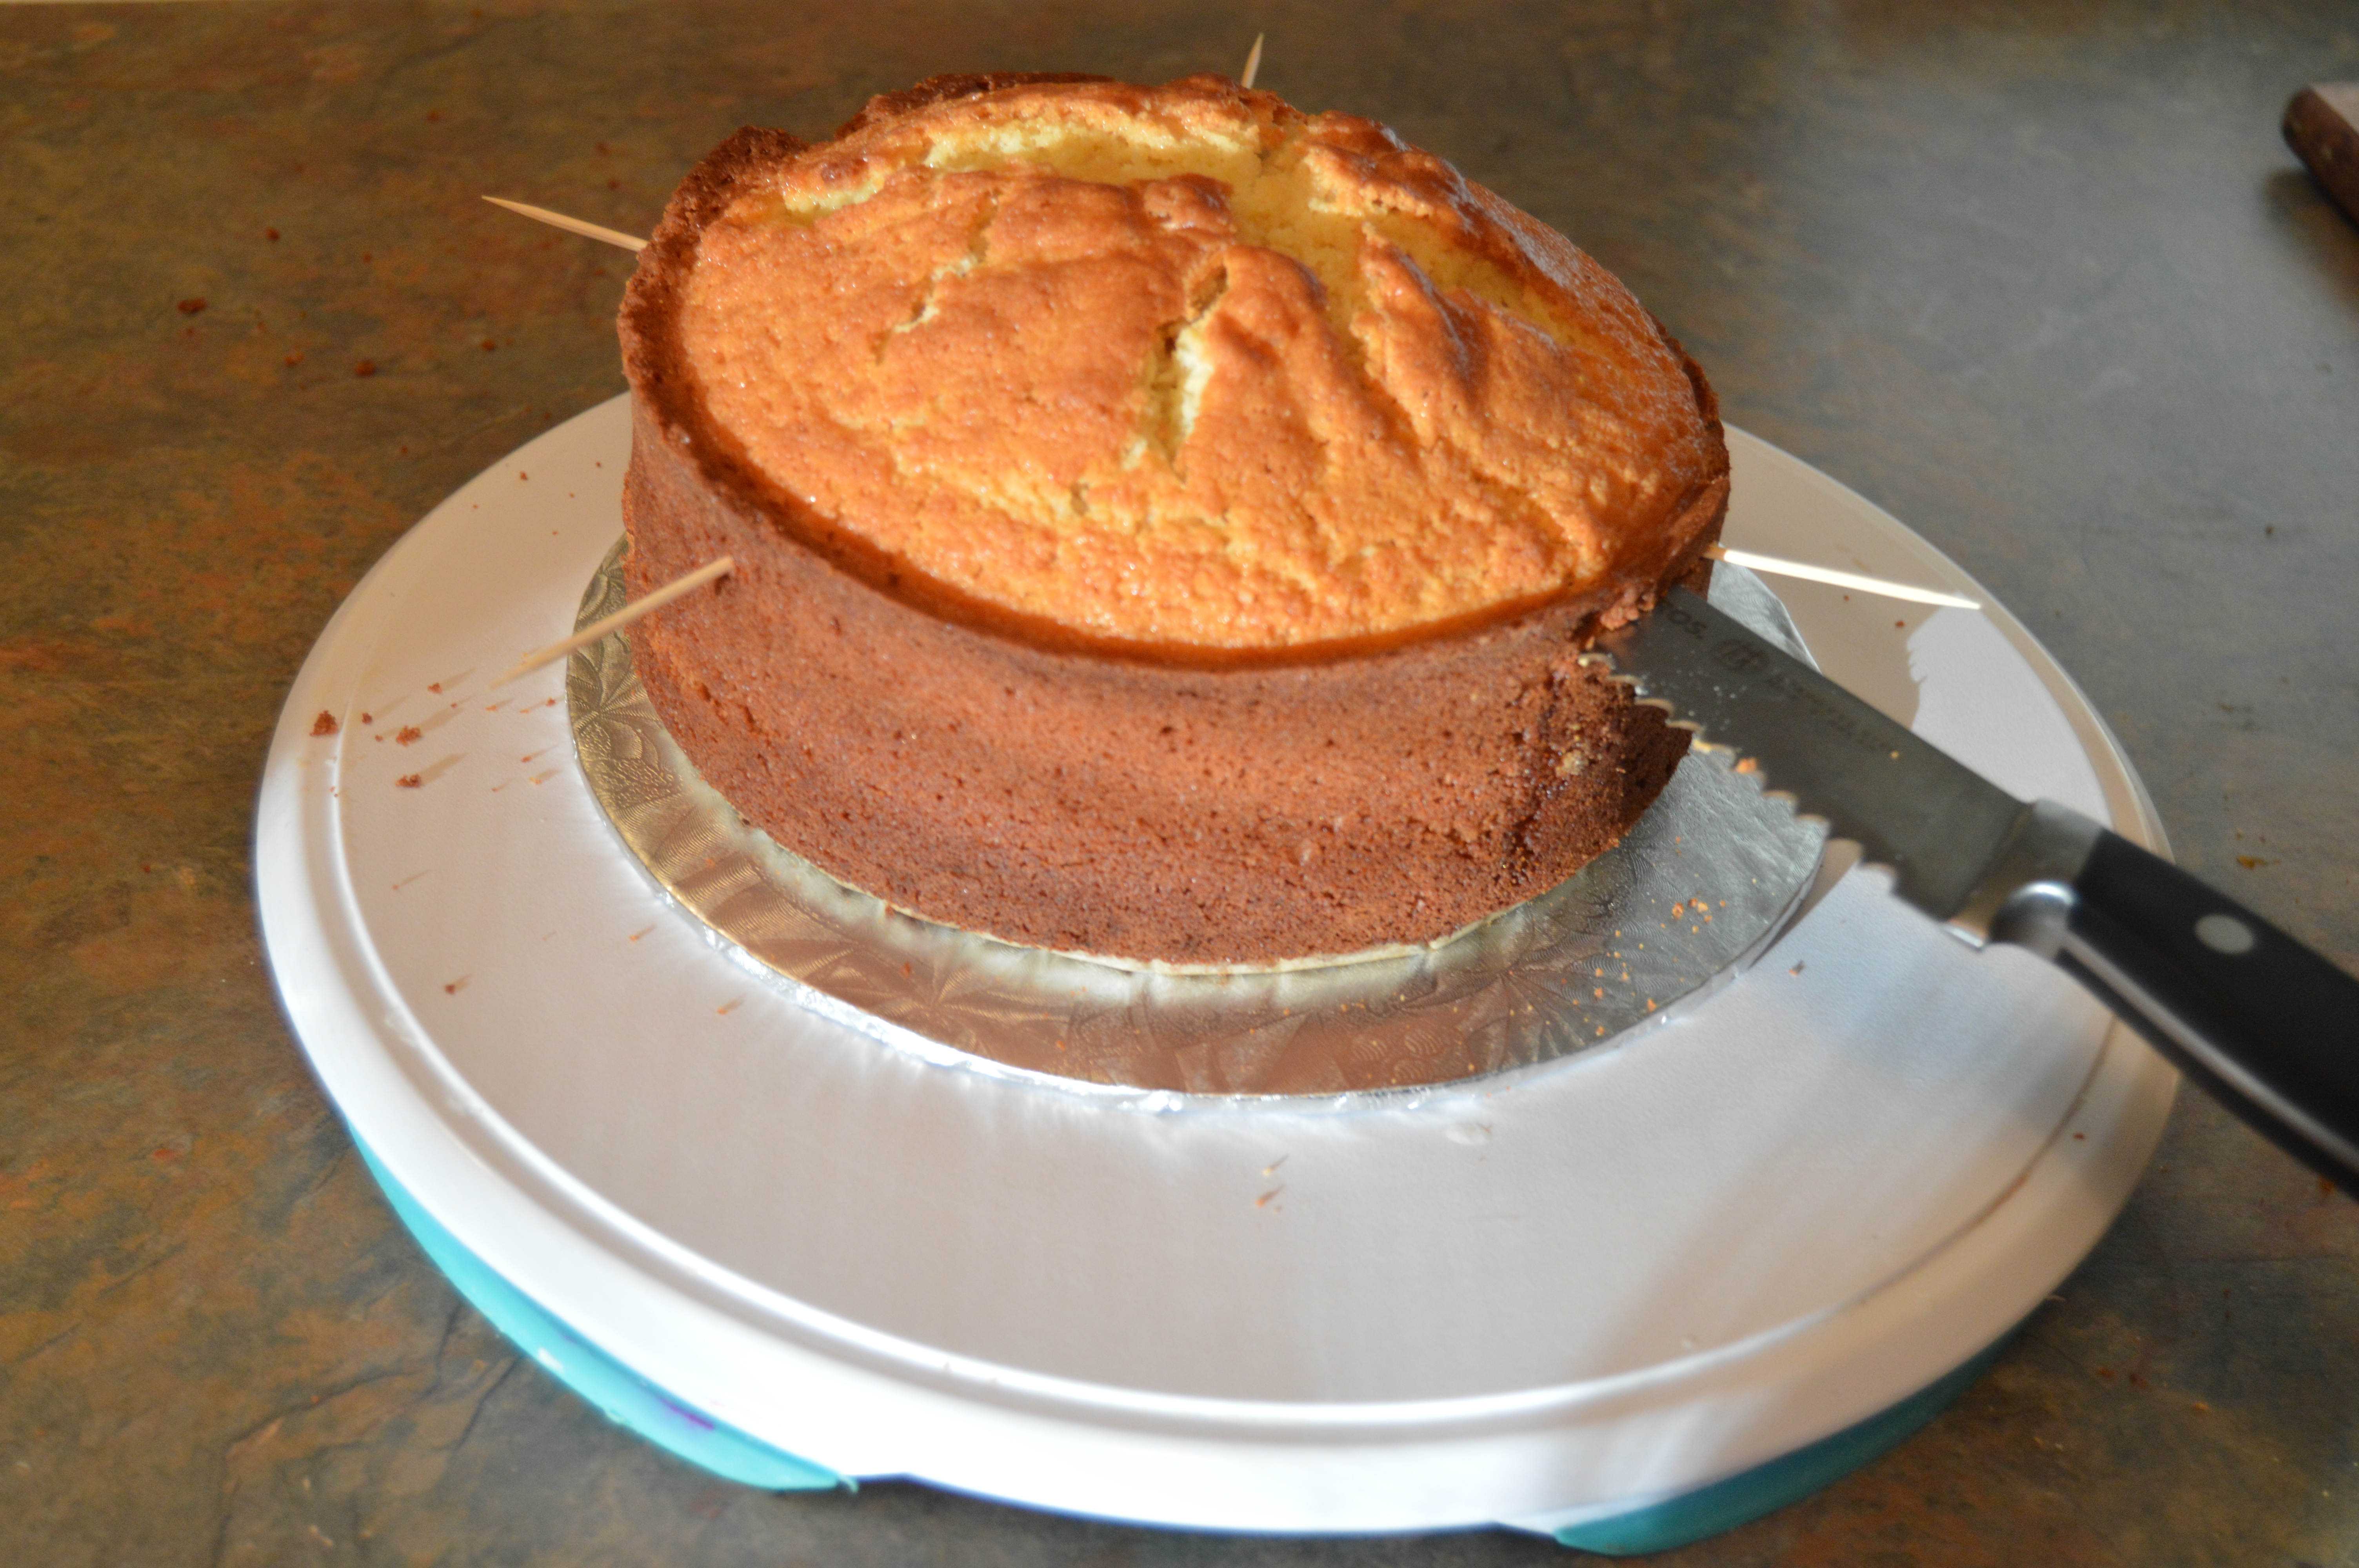
(4) If you are using a serrated knife, it might be useful to place toothpicks at the points where you intend to level the cake. This will serve as a guide for your knife. Of course, you might have to measure the height of the cake at various points in order to accurately place the toothpicks. If you are making cakes where the entire top of the cake will be covered with flowers like this cake and this cake, leveling the cake accurately might not be very important as the flowers will cover any dome and uneven sides.
If you are wondering what to do with the sliced off cake dome, you can make cake pops, trifles or truffles.
HOW TO TORTE A CAKE
(1) If you are using a cake leveler, adjust the string so it is the same height as the center of your cake and saw through the cake using a back and forth motion. It is important to make your slices as uniform as possible to the cake looks pretty when it is sliced into.
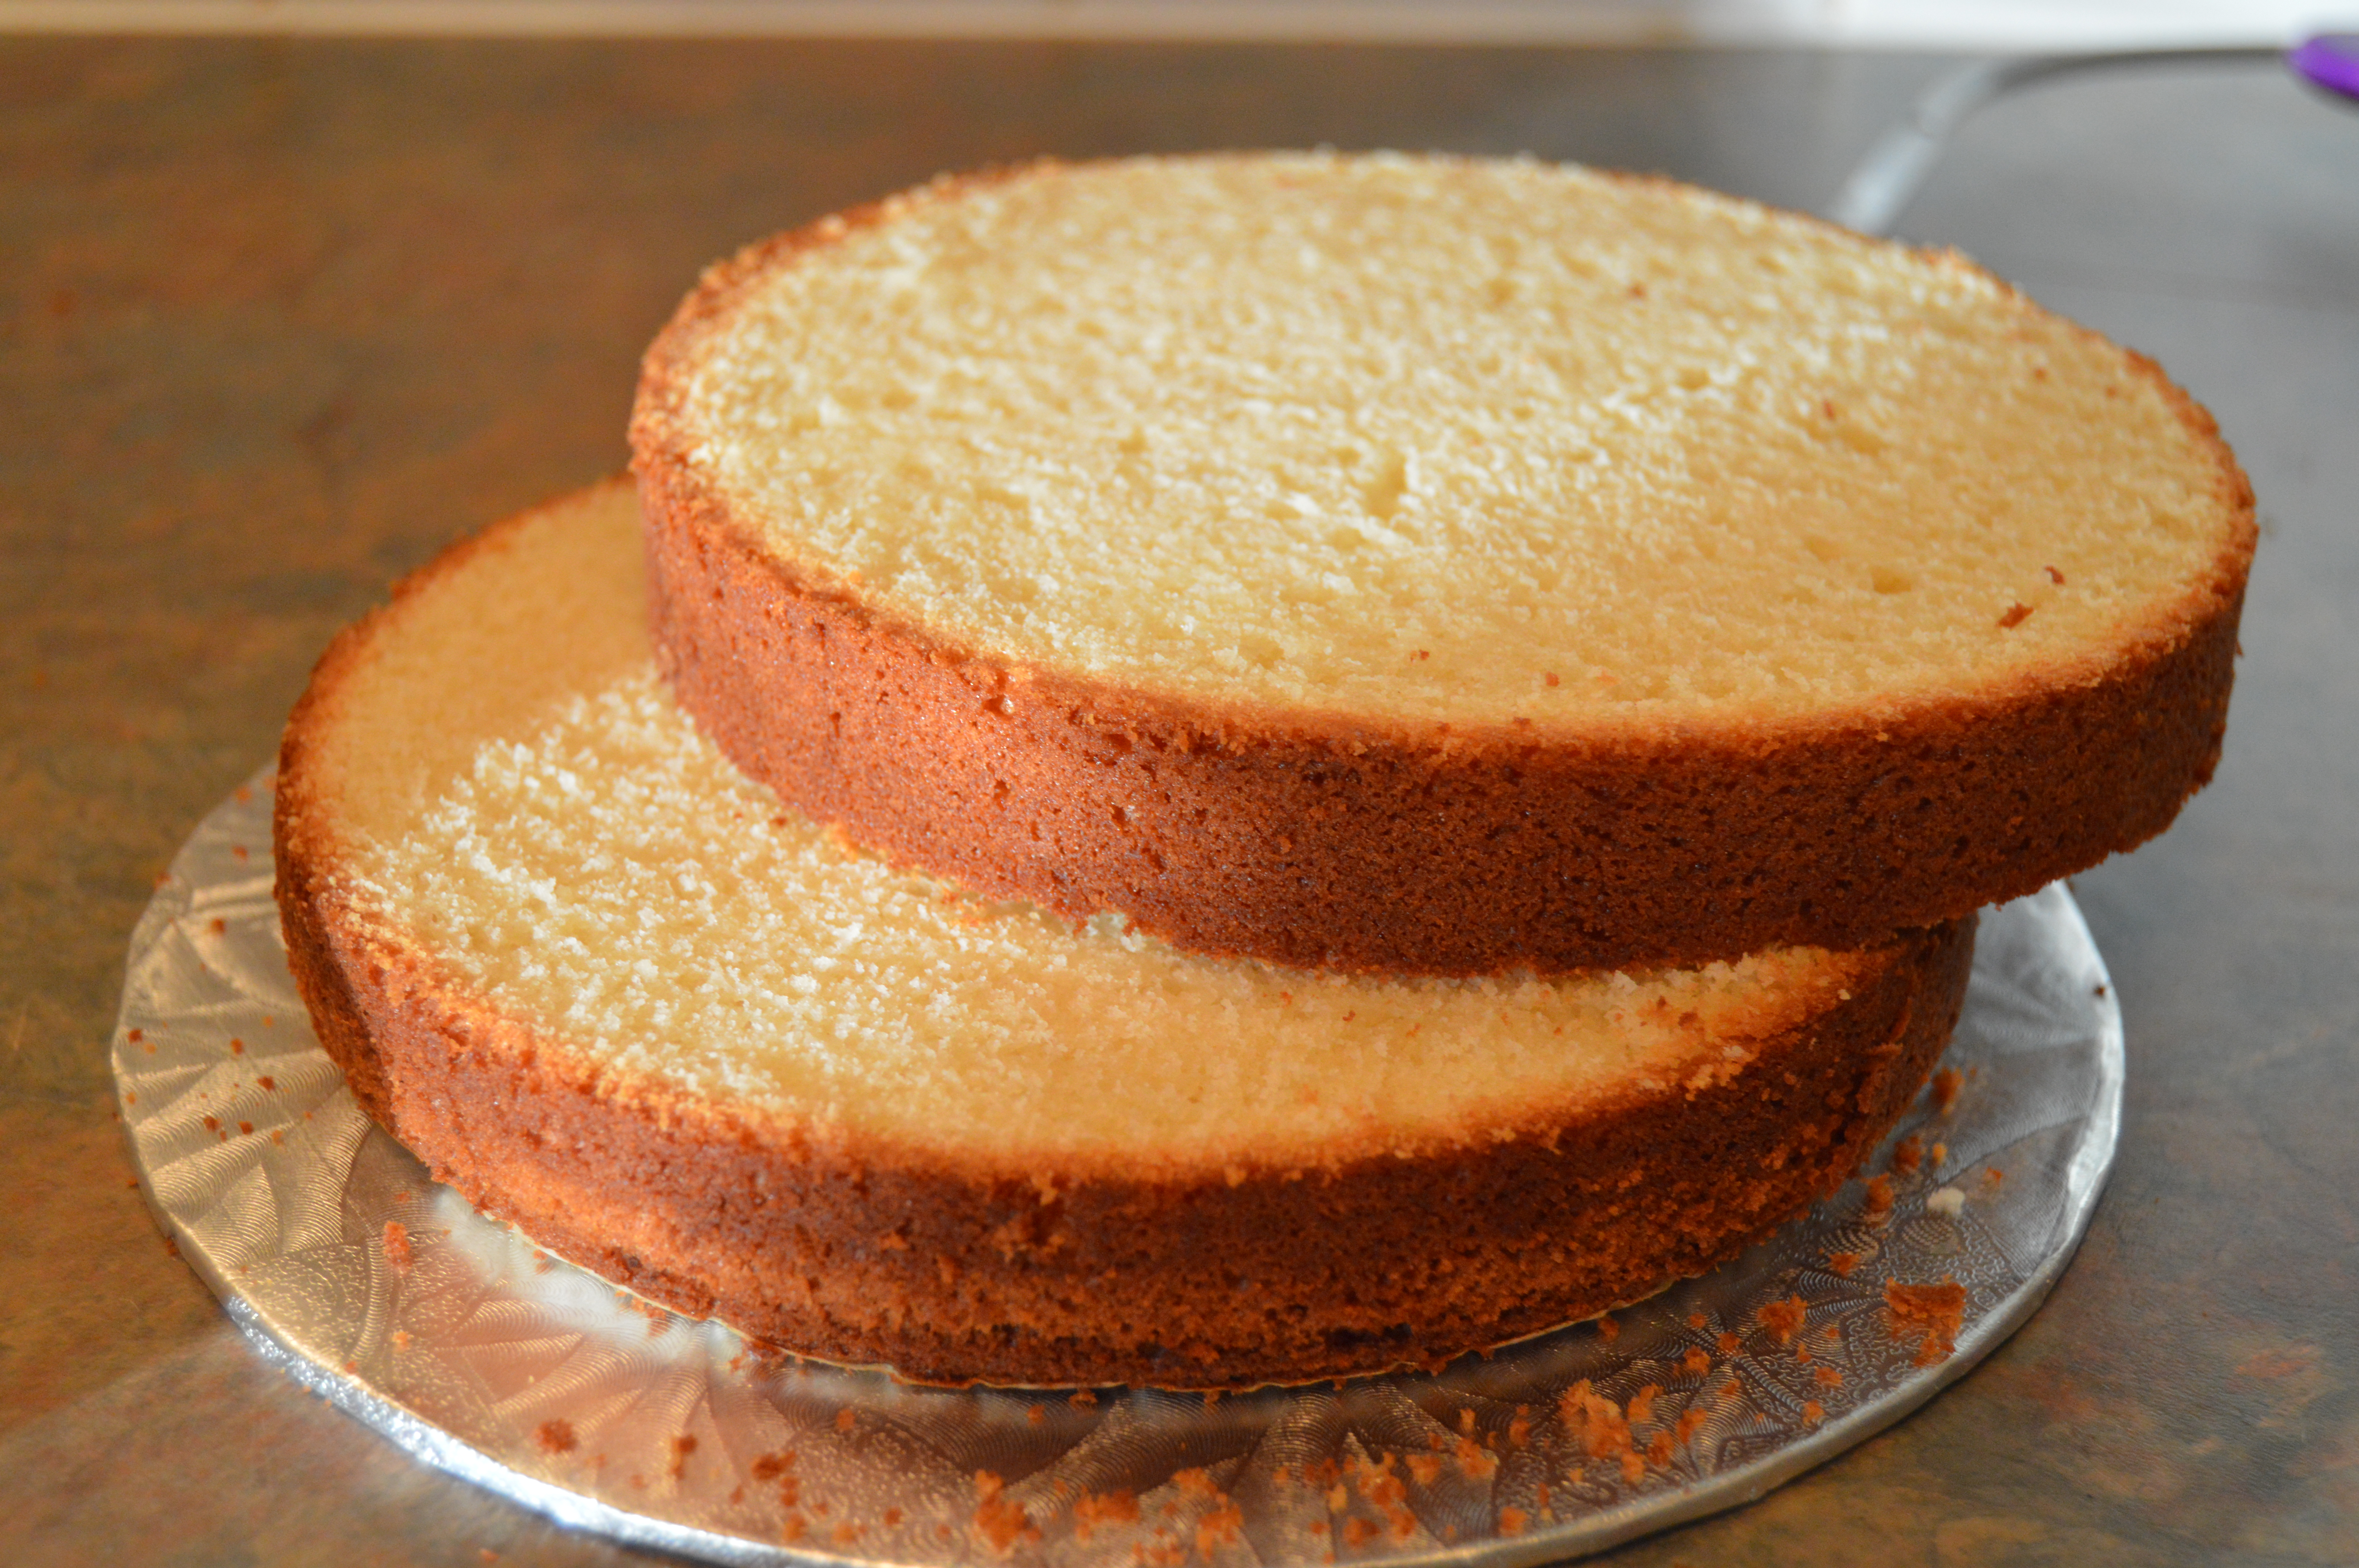
(2) If you are using a serrated knife, with the cake still on the cake board, saw through the middle of the cake as you did when leveling the cake. Divide the cake horizontally while rotating the table. Again, you might want to place toothpicks at strategic locations in the middle of the cake to help guide your knife and keep it leveled.
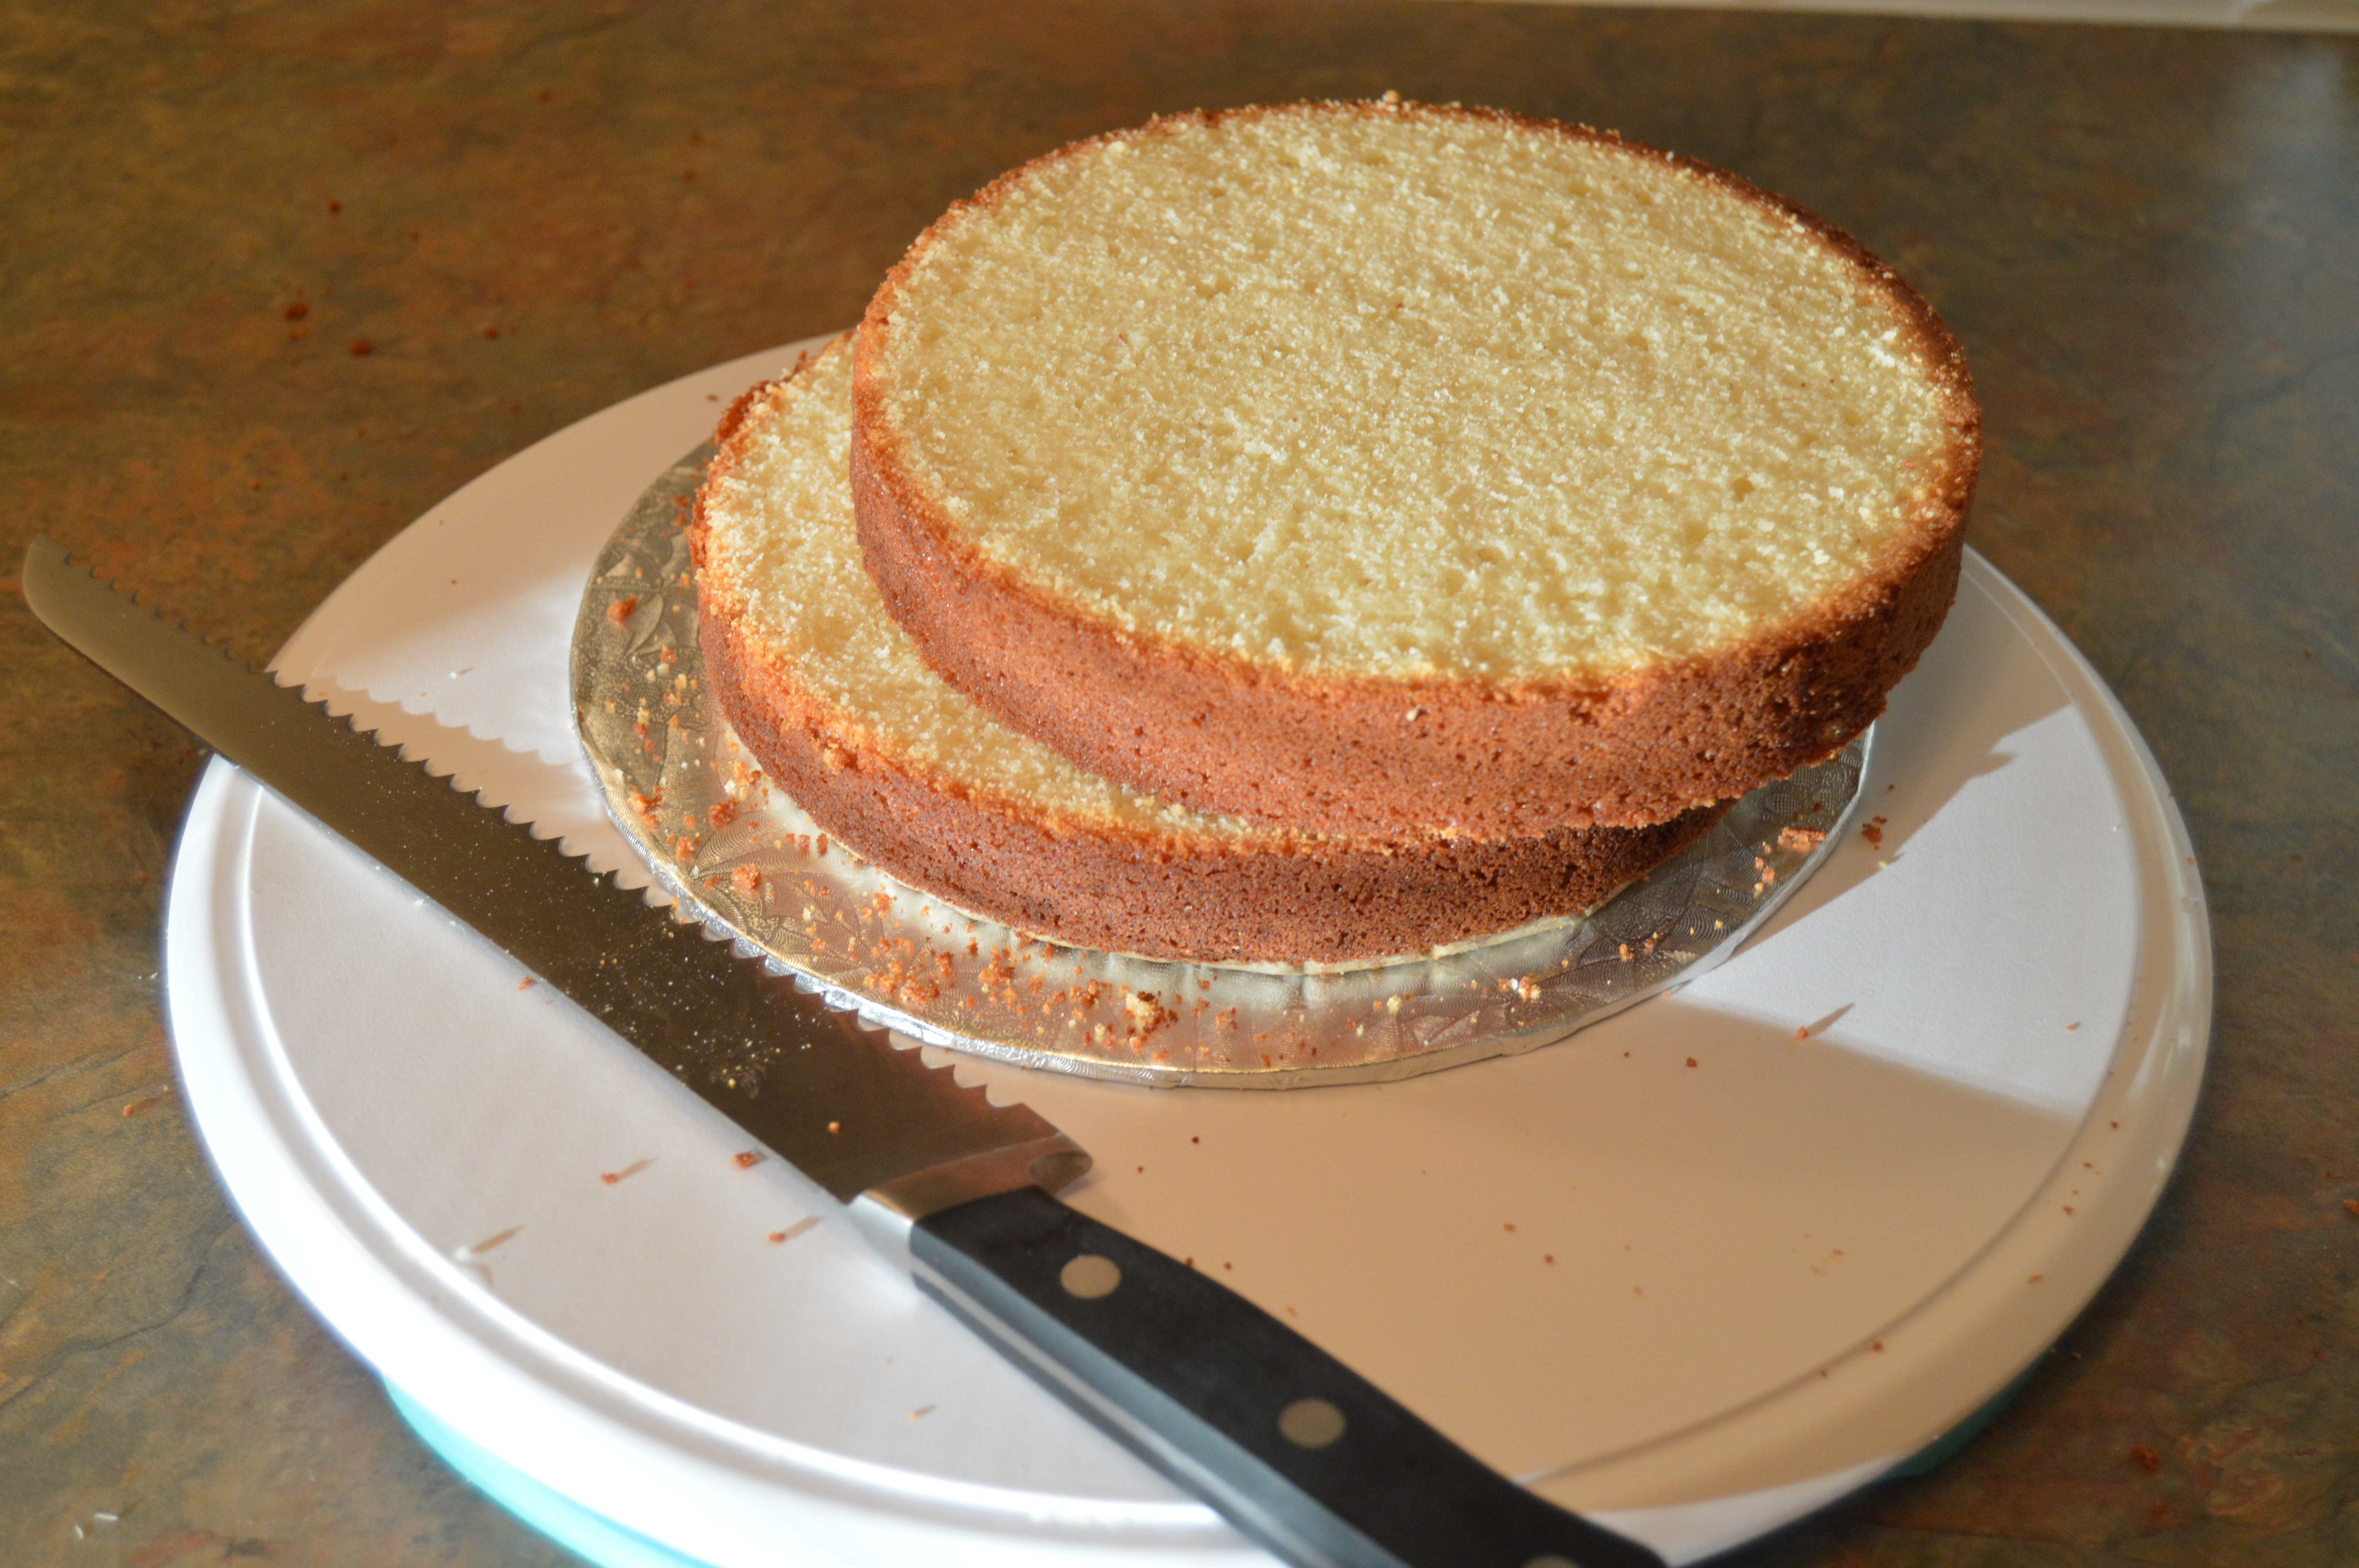
(3) Stick toothpicks into the cake halves after it has been divided. The toothpicks should be properly aligned so one is directly above the other. This tip will help you align your cakes properly during frosting so that the edges of the cake come together at the same spot. This will ensure an evenly frosted cake without tilts or uneven tops.
Your cake slices are now ready to be filled, stacked and frosted. A post on how to fill and frost cakes can be found here.
Please ask whatever questions you might have about the above tips below in the “Leave a Reply” box and I will be happy to respond.
Terry Adido is passionate about showing people how easy it is to recreate restaurant quality meals in the comfort of their kitchens. With a style of cooking he refers to as Afro-European Fusion, his meals are influenced greatly by French and Italian Cuisine with a West African twist. If you love good food, you are in for the ride of your life.
Thanks for the tips,God bless ur hand work
Thanks Kike
It’s true what they say, you’re a darling Terry. I gave up on my cake leveler cos it’s never worked well for me,but I’ll try again following your steps. Thank you.
Awww. Thanks. I hope it works well this time around.
Wow! Great job well done
Thanks Buki.
Terry ur a darling
Thanks Brenda. Right back at you.
Thank Terry I gave up on my case leveller too it just tear my cake but this tip of urs is worth trying
Yeah, please ensure that you chill your cakes before levelling. This will stop it from tearing.
Terry, THANK YOU SOOOOO MUCH. I always look forward to your post. Remain Blessed.
I dread cake levelling like hell. As a beginner, your post do strengthen my spirit, because some time I feel like giving up due to some complicated grammar or methods being taught by some other people.
But you really encouraged me, and I just feel like baking, every time.
Once again, Thank You.
Thanks Chinyere. Please don’t give up.
Those were helpful tips. You rock, Terry.
Thanks Madonna.
Hi,thanks for this wonderful page.u ve helped me so so much.I have a little problem.whenever I bake the cake takes a long time to bake and most times it gets burnt on top and under.is thy a way or temperature I can put my cakr that will stop it from burning.bcos it has to stay longer in the oven,its always comes out dry.pls need ur urgent reply via mail.
Obviously there is something wrong with the heating system of your oven. It might be a good idea to buy an oven thermometer in order to monitor the oven temperature. Also, place the oven rack in the middle of the oven.
Thanks Terry, I am gaining confidence in cake baking again. God bless you
I love reading feedback like this. You are welcome.
hi terry, u never seize to mesmerize me fb witout ur page is worthless. plss do u have any detail tutorial on how to apply frosting on cakes. thnkx dear. ur no1 fan.
Thanks Maryam. You can find a post on how to frost cakes here.
Thanks for this blog. l love the way you give detailed information about cake. I am self taught but l ve a problem. Do you ve any tutorial on moulding characters because l don’t know how to mould any characters be it mickey mouse,human character or anything .pls reply via email. God bless u and keep up the good job.
Thanks Chichi. You can find a lot of what you are looking for here.
Terry u r selfless as usual.pls i have a big cake leveller (d big one in ur pix..wilton).i never have smooth edges like yours.most times it goes higher or lower so d middle part of d cake ends up being depressed.
That big leveller isn’t the most stable. I don’t use mine anymore due to the reasons you gave. The smaller one works best for me.
dear terry, thank you for your support. pls can you share a pictorial on how to level the sides of bulging cakes. tnx dear
Hi. I have a post here on how to prevent and deal with bulges.
Thank you for these helpful tips, Terry. Your willingness to share your knowledge and skills freely, even to the minutest details are appreciated.
My pleasure.
Hi Terry. For a Cake leveler, please which would you recommend, one with a string, or one with a serrated knife? Thank you.
The string works better for me.
Hi Terry. I’d appreciate it if you could shed more light on the very last step under “How to Torte a Cake”, that is step 3. I’d like to be able to understand it better. Thank you.
What about it don’t you understand?