
How to Make Shirt Cakes

Shirt cakes are the perfect cakes for birthday parties for men. They also make great gifts for valentine and other occasions. This tutorial shows how to make a basic white shirt cake. From this tutorial, you will be able to graduate into making shirts of various colors and patterns.
For a tutorial on how to make Polo Shirt and V-Neck Sweater Cakes, click here.

TOOLS:
(1) Cake Board for the Cake
(2) A Pizza Wheel or other Fondant Cutter
(3) A Ruler
(4) A Stitching Wheel
(5) Icing Tips for Buttons and Writing
(6) A Rolling Pin
(7) Fondant Smoother.
INGREDIENTS/COMPONENTS
(1) Baked and Frosted Cake. I use a 9 x 13 inch cake pan. For this cake, I made a Nigerian Cake and frosted it with Vanilla Buttercream.
(2) Fondant. I always use Marshmallow Fondant.
(3) Food Color
(4) Vodka or Water
(5) Royal Icing for Writing.
PROCEDURE:
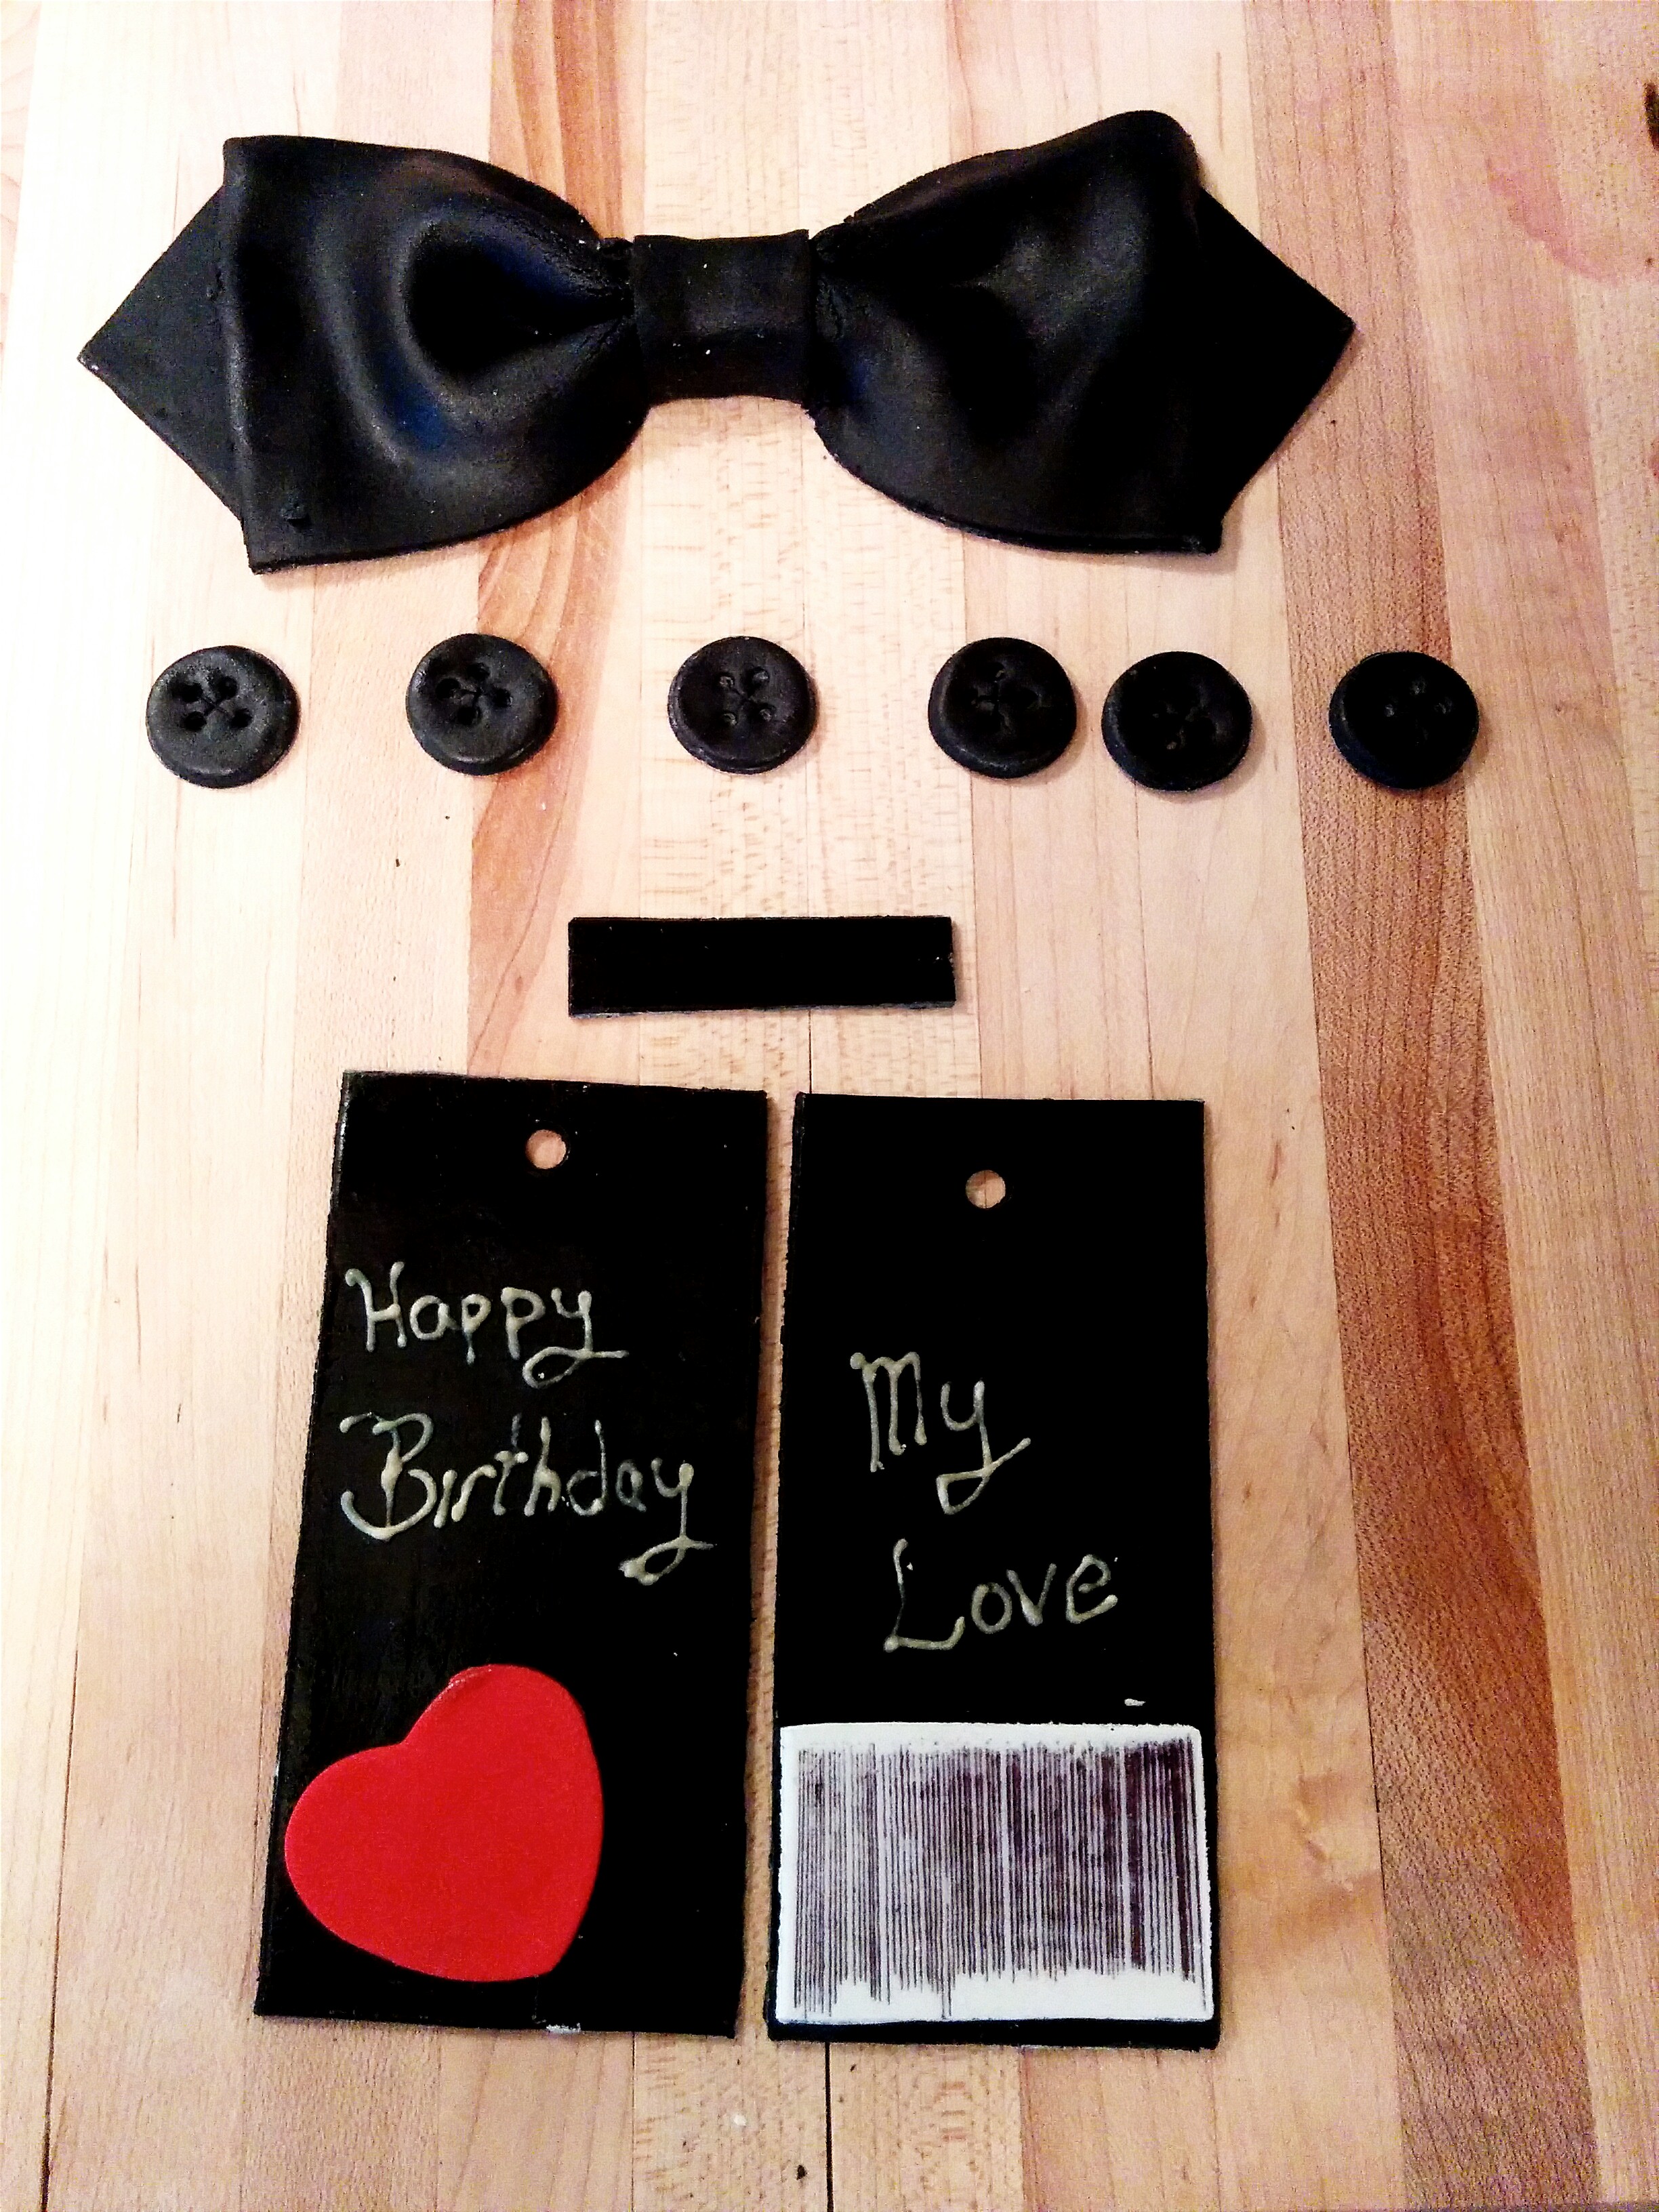
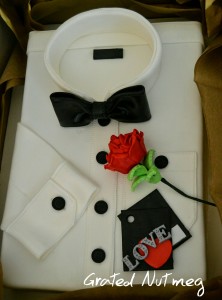
(1) It is always a good practice to make your shirt buttons, ties and tags before making the actual cake. This will give them time to dry up properly. This rule applies especially to the tie as it needs to stay straight on the collar and not slouch on the shirt. Making these items before the shirt will also ensure that they do not stain the shirt during application. This is especially so when working with contrasting colors like black and white. All the items below were made with marshmallow fondant. A tutorial for a bow tie can be found here. I also made a rose before hand, the tutorial for which can be found here. The buttons were shaped with the base of an icing tip. You can also use button molds for them. The writings on the tags were done with royal icing. I used royal icing because it dries out quickly.
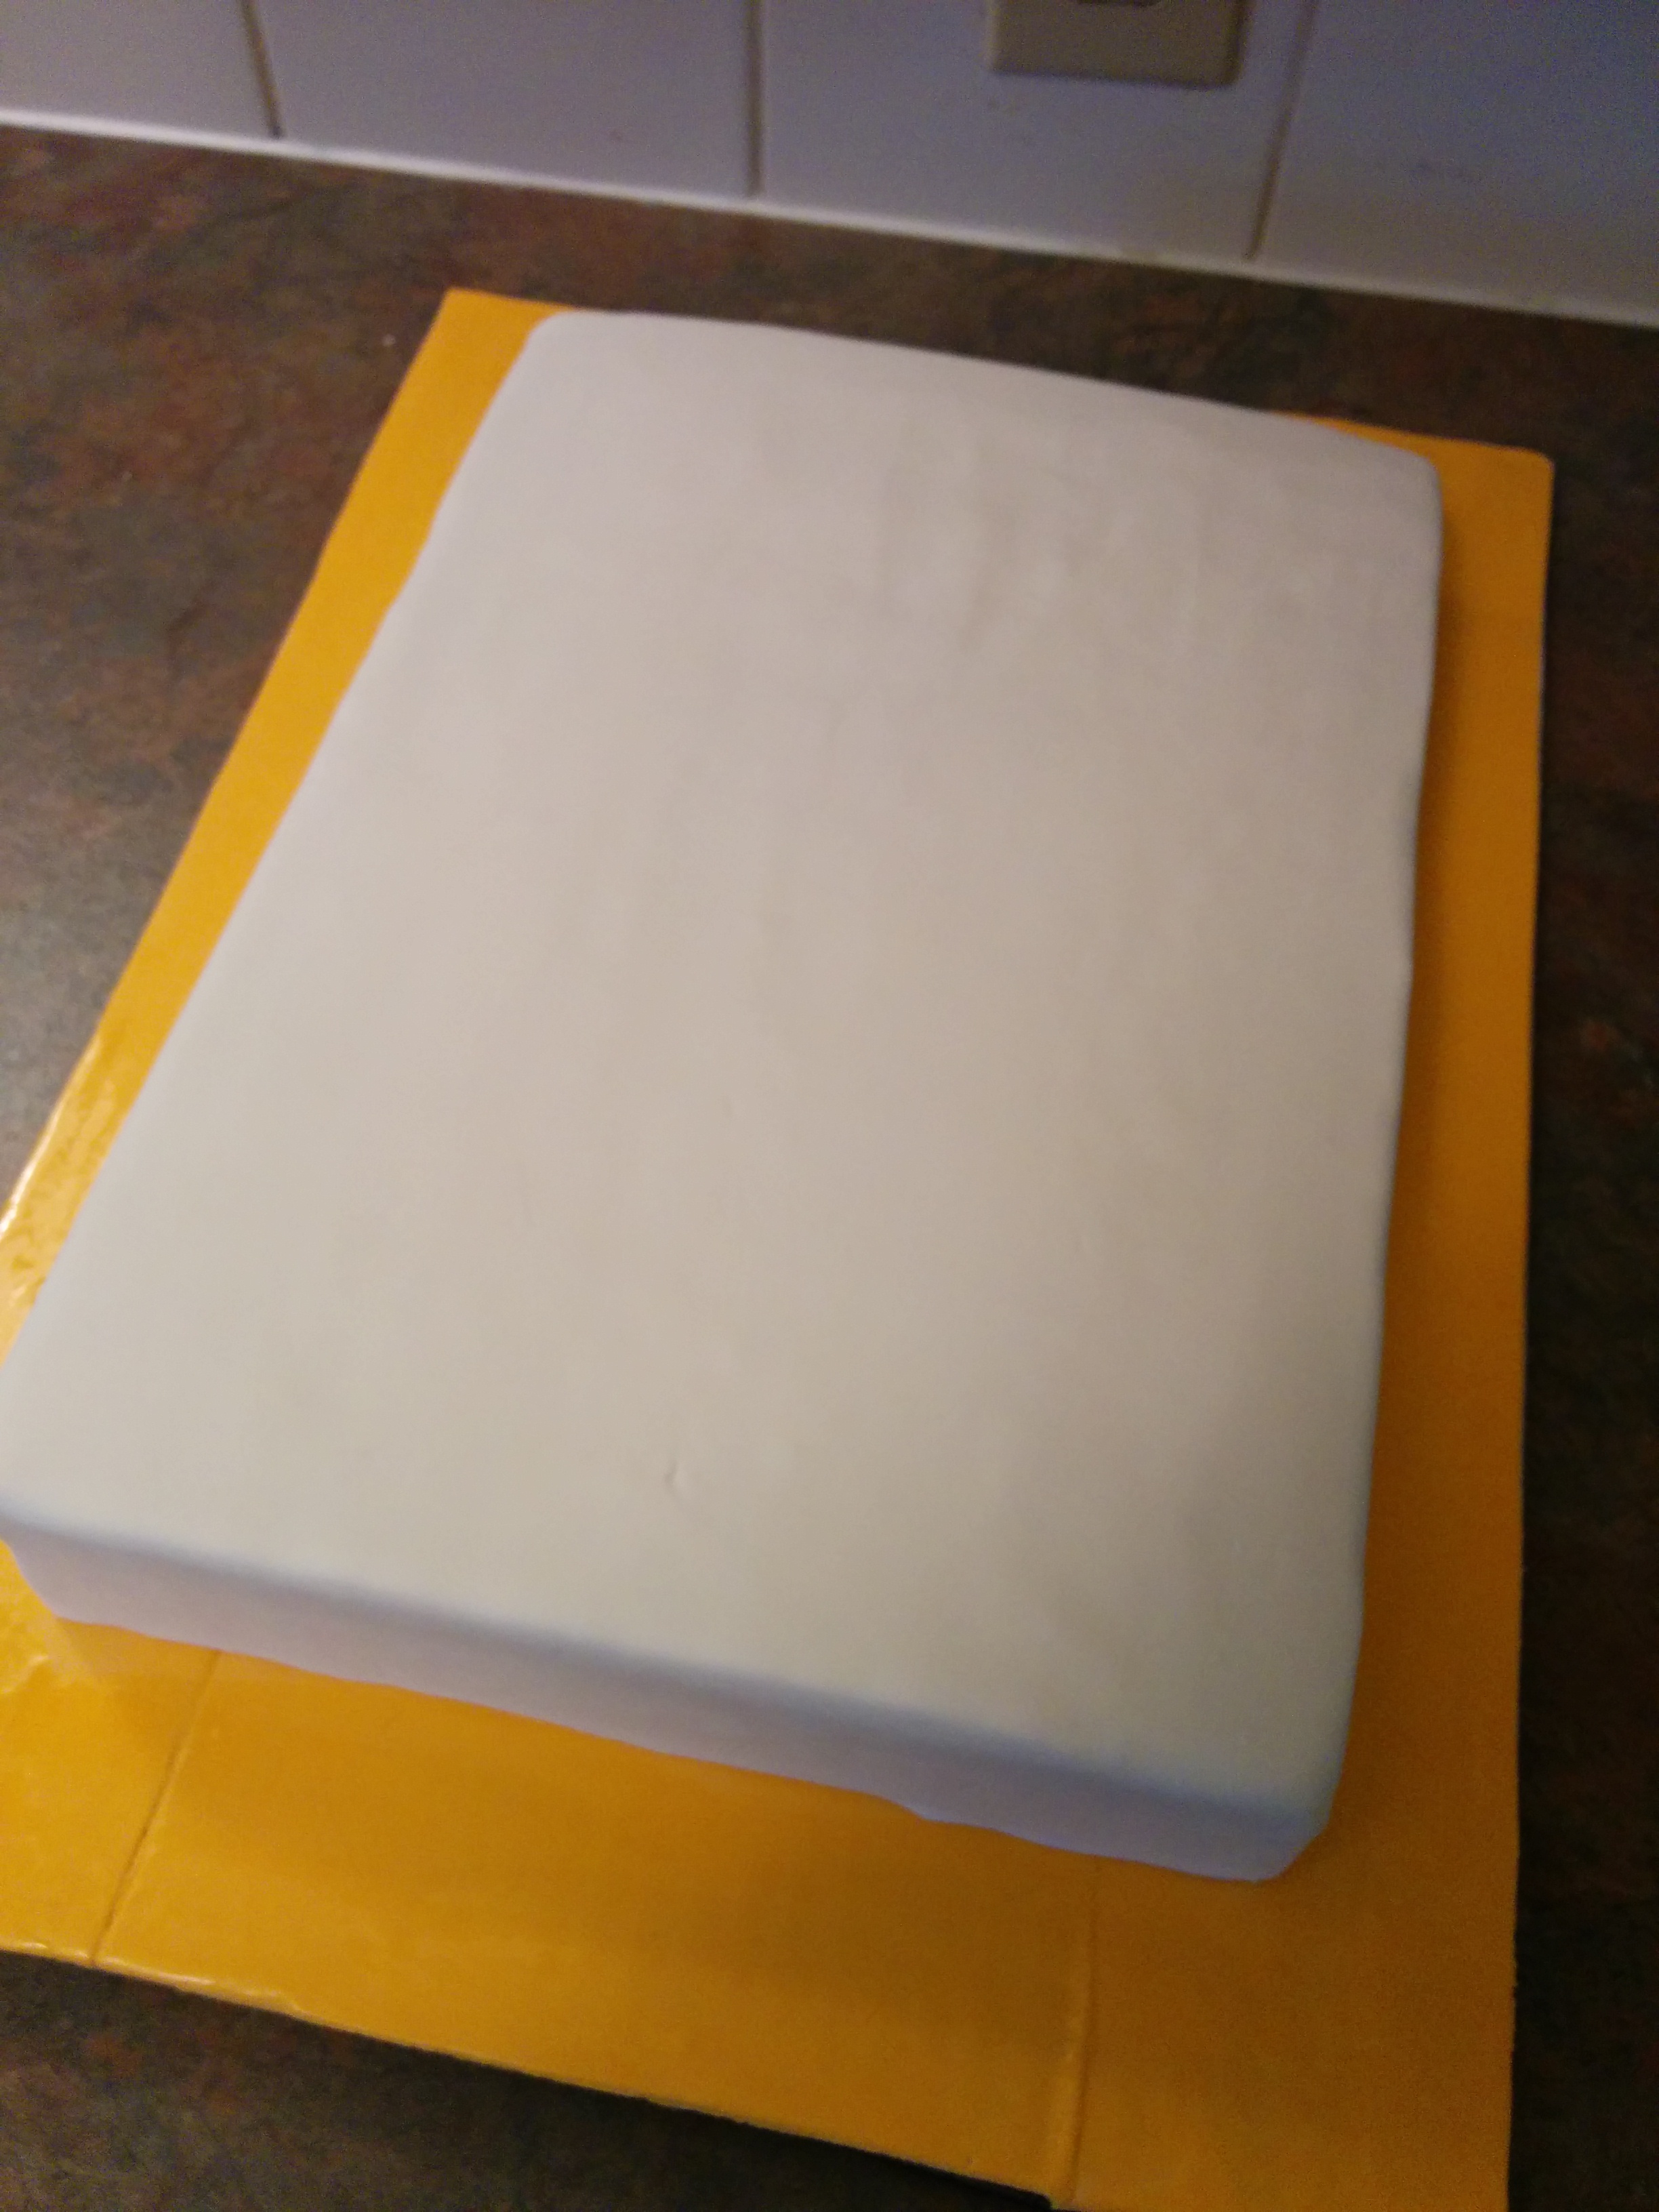
(2) The next step is to frost your cake. Keep frosted cake in the fridge for some time. This will stiffen the frosting and make the cake easier to handle. If you try to cover a cake with soft frosting, the fondant covering will not be smooth as the frosting will give way underneath. You can find various types of frosting here. After your frosting has become firm, roll out your fondant and drape cake cutting off any excess fondant from the bottom of the cake. Place cake on cake board and smooth the sides and edges with a fondant smoother.
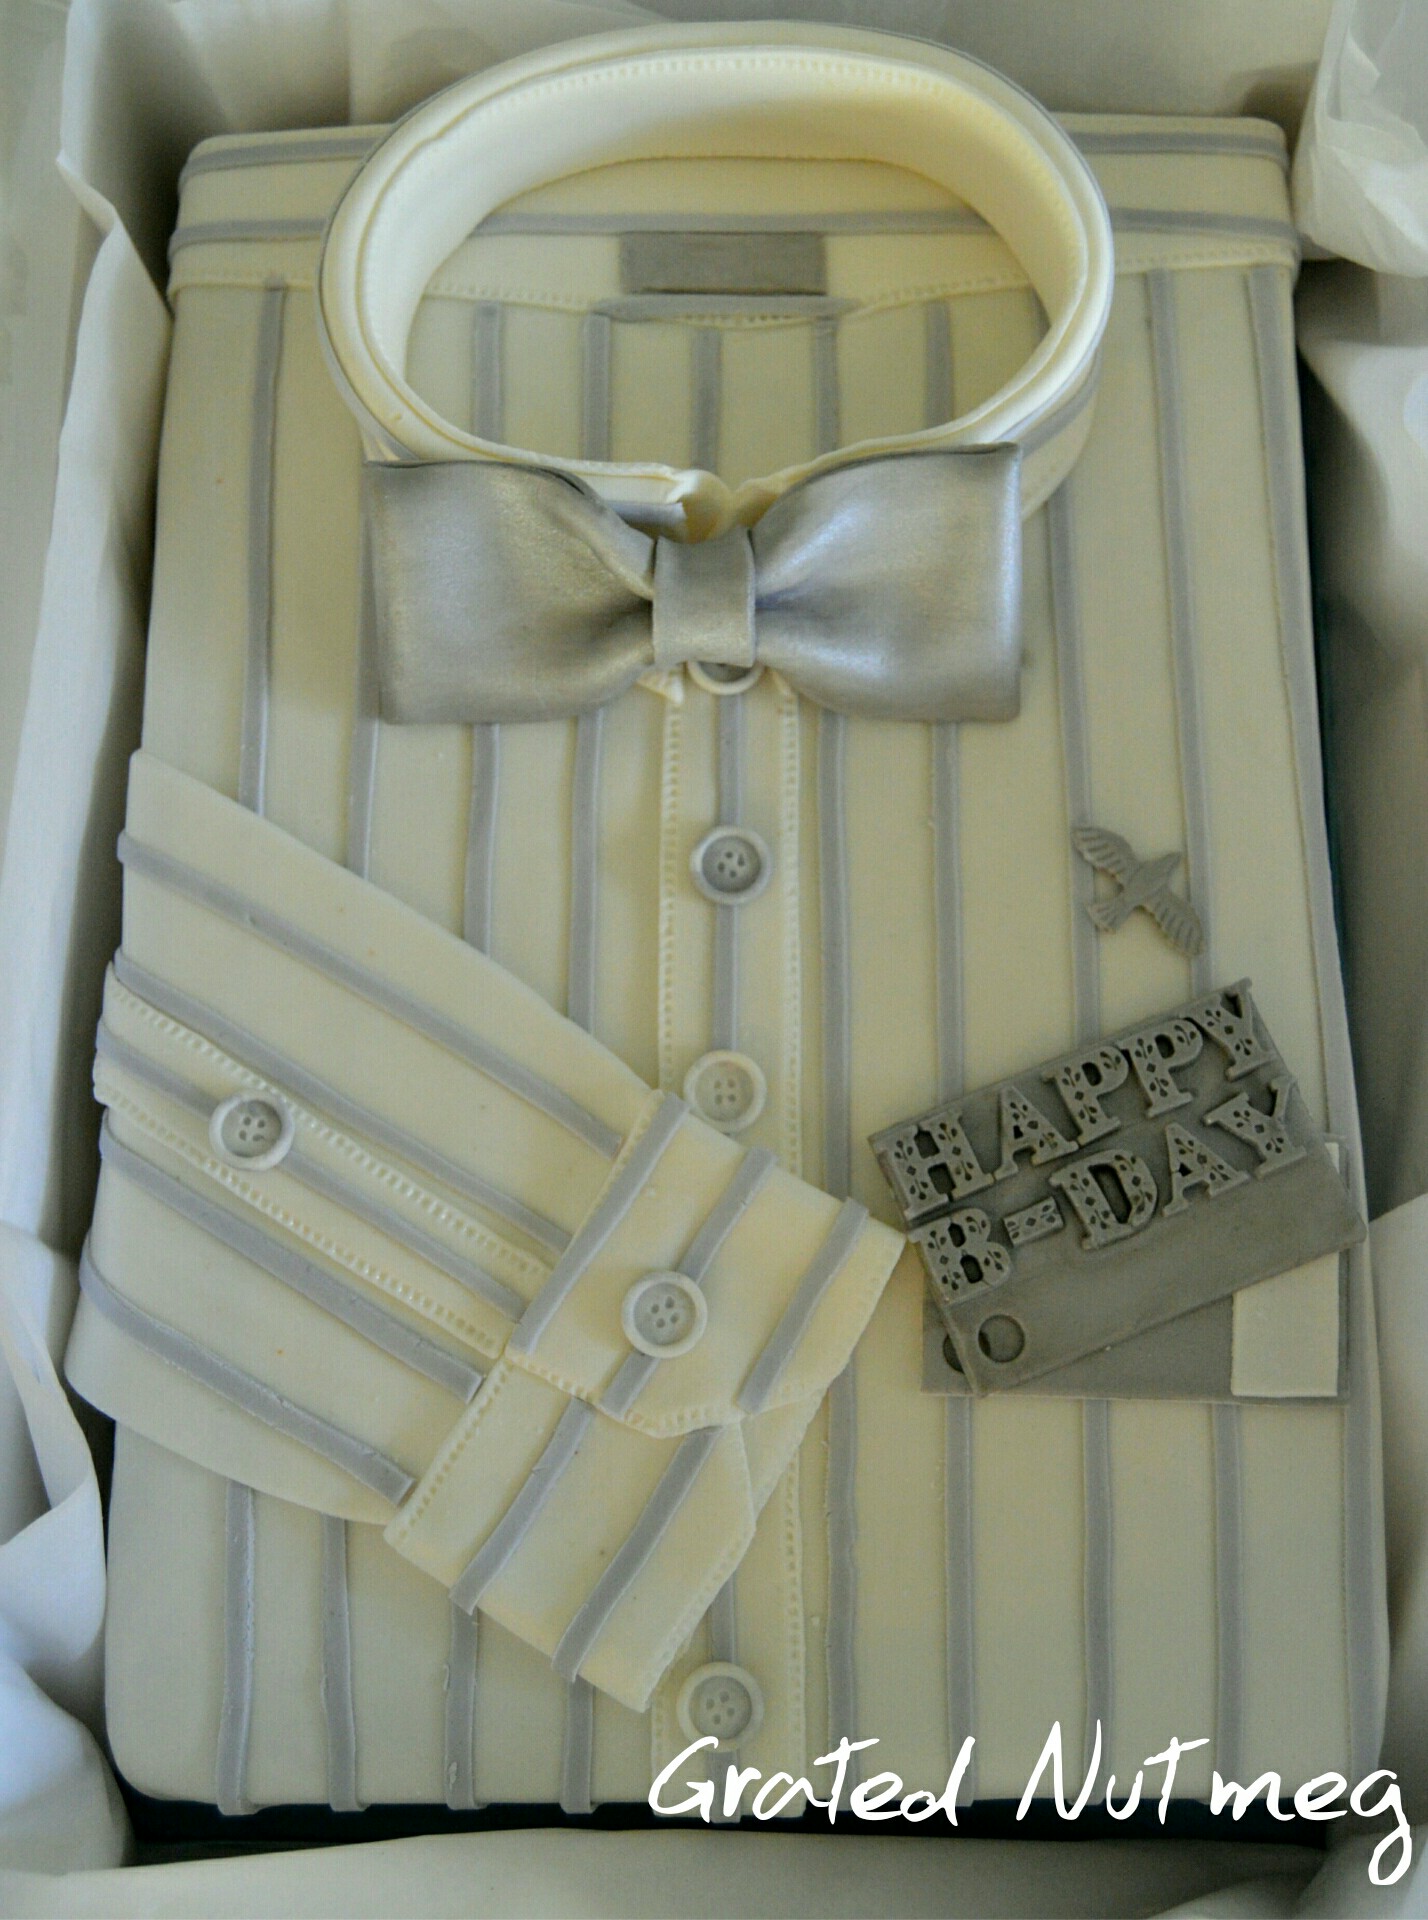
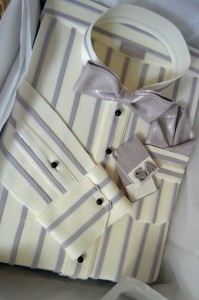
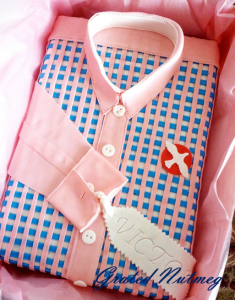
(3) If making a plaid or striped shirt, place the stripes on the cake after covering it with fondant.
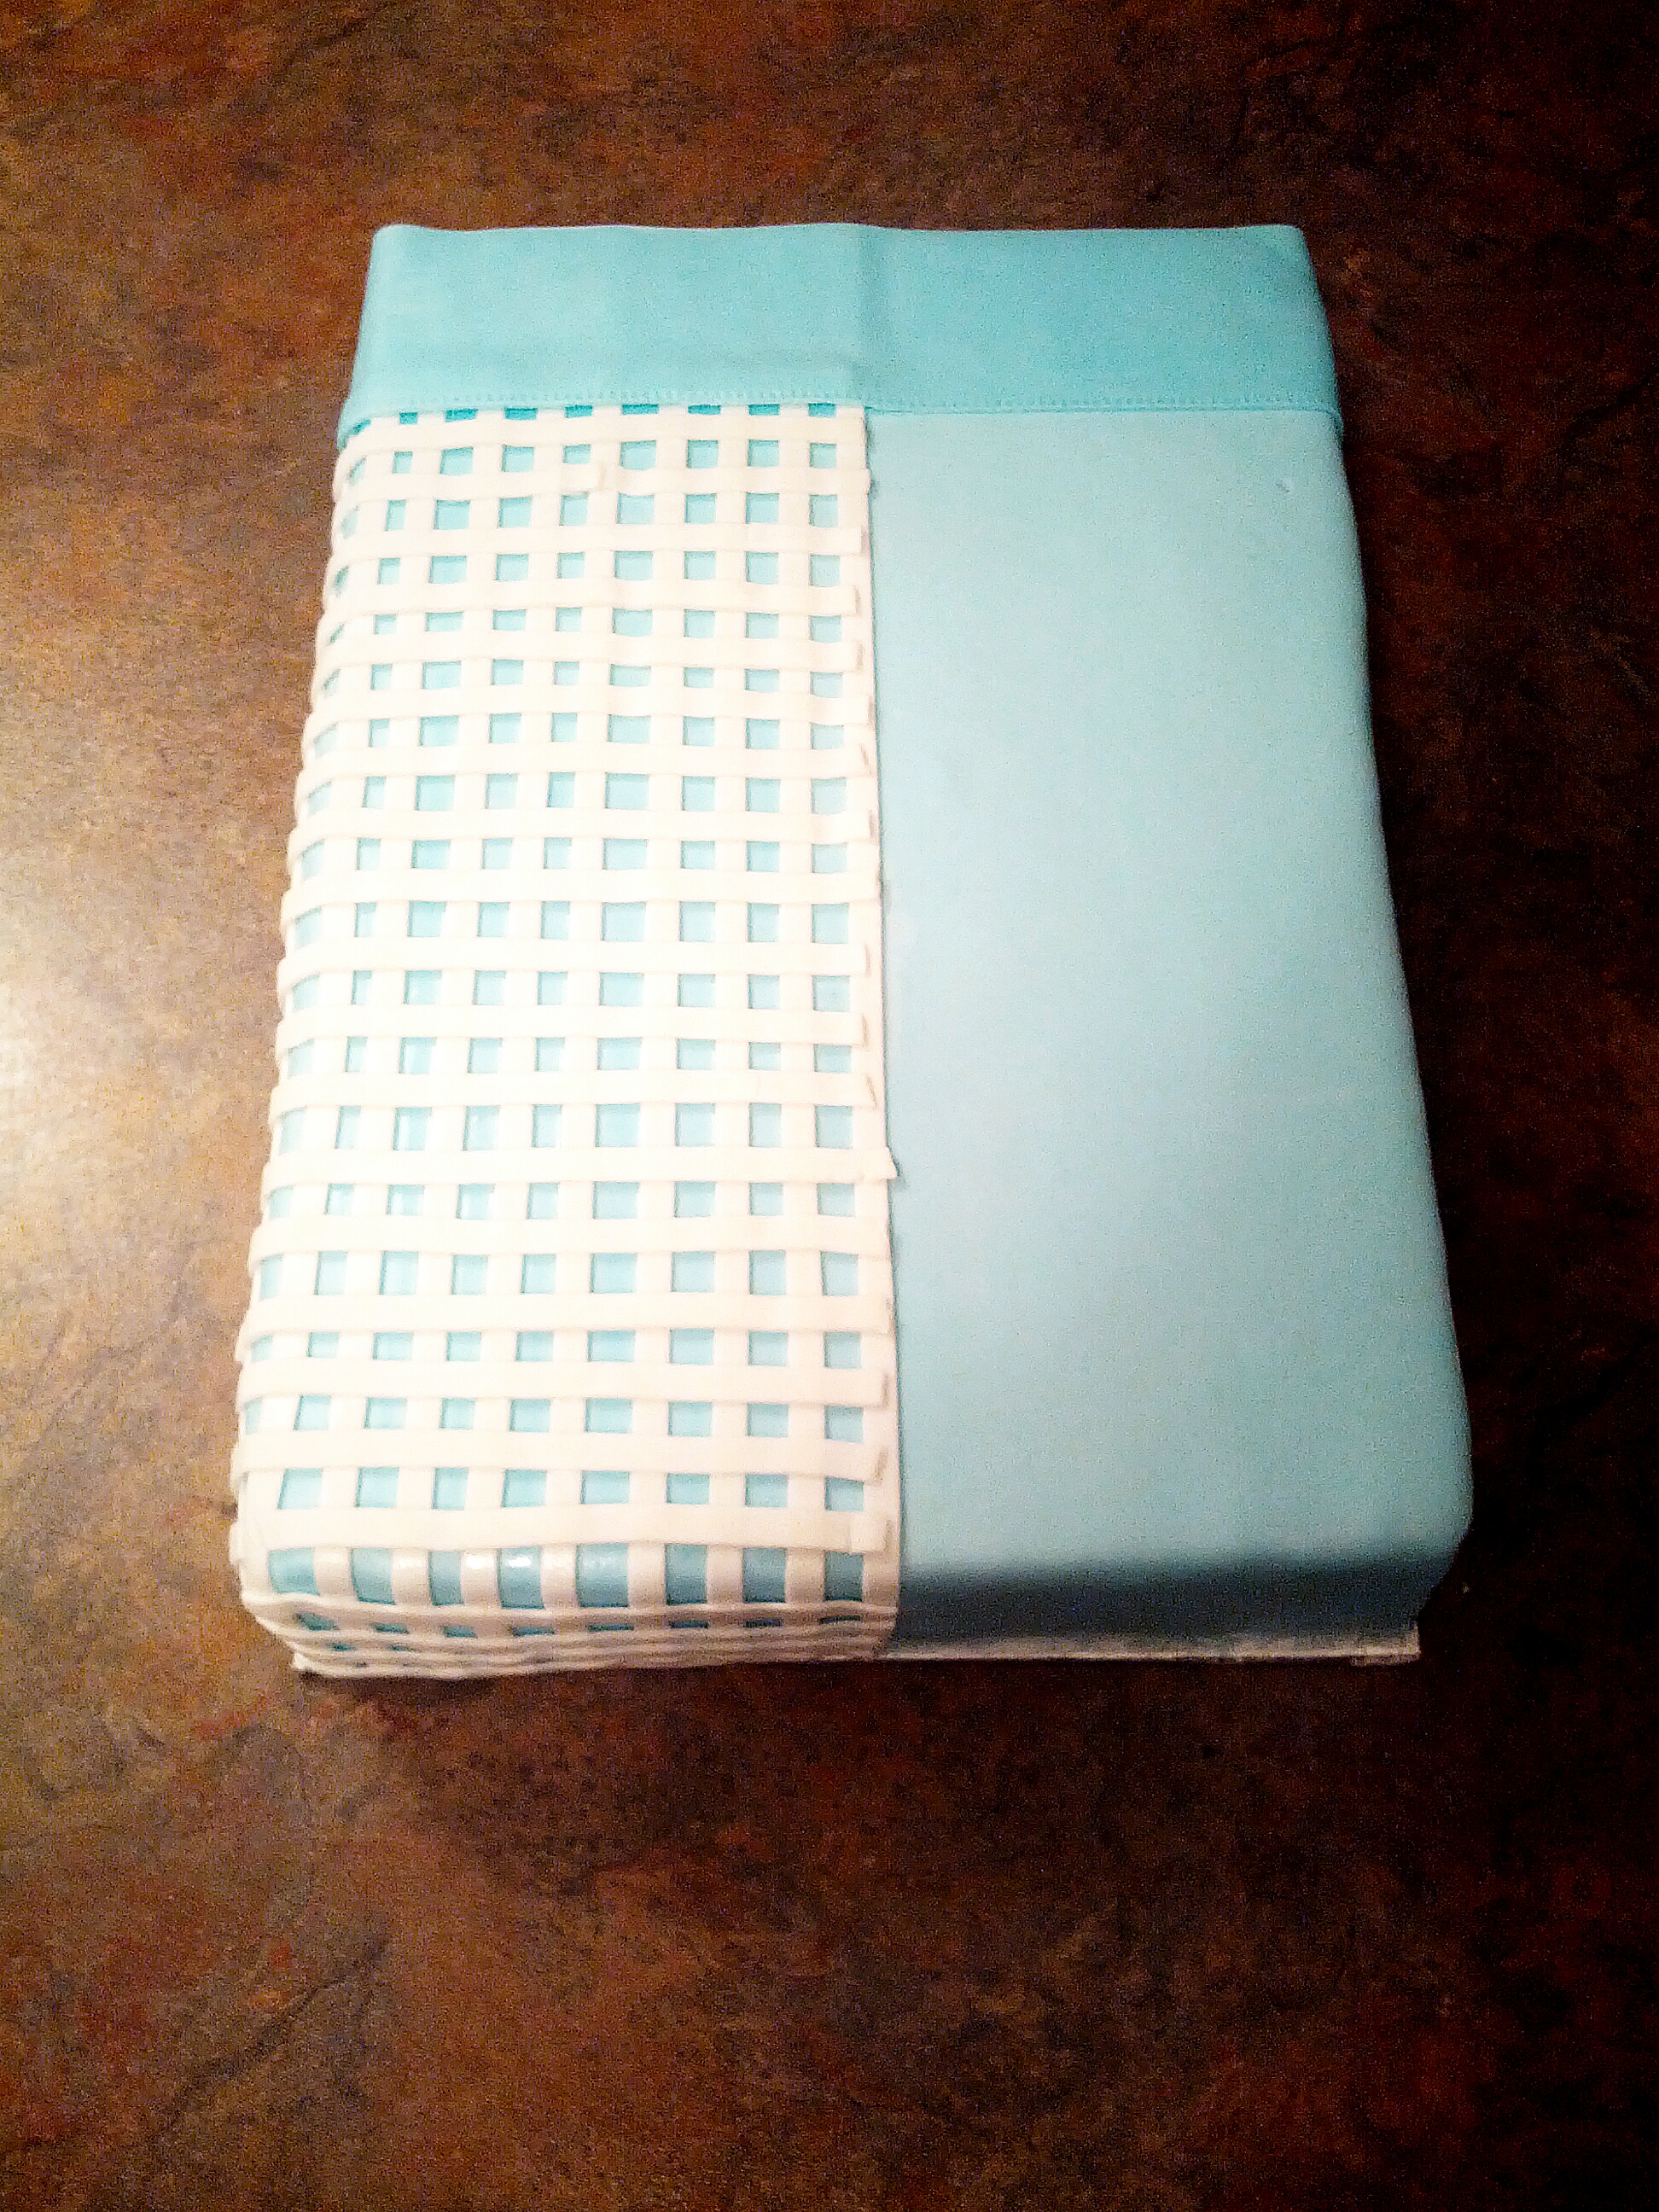
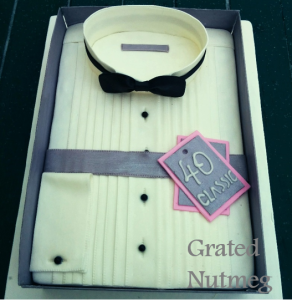
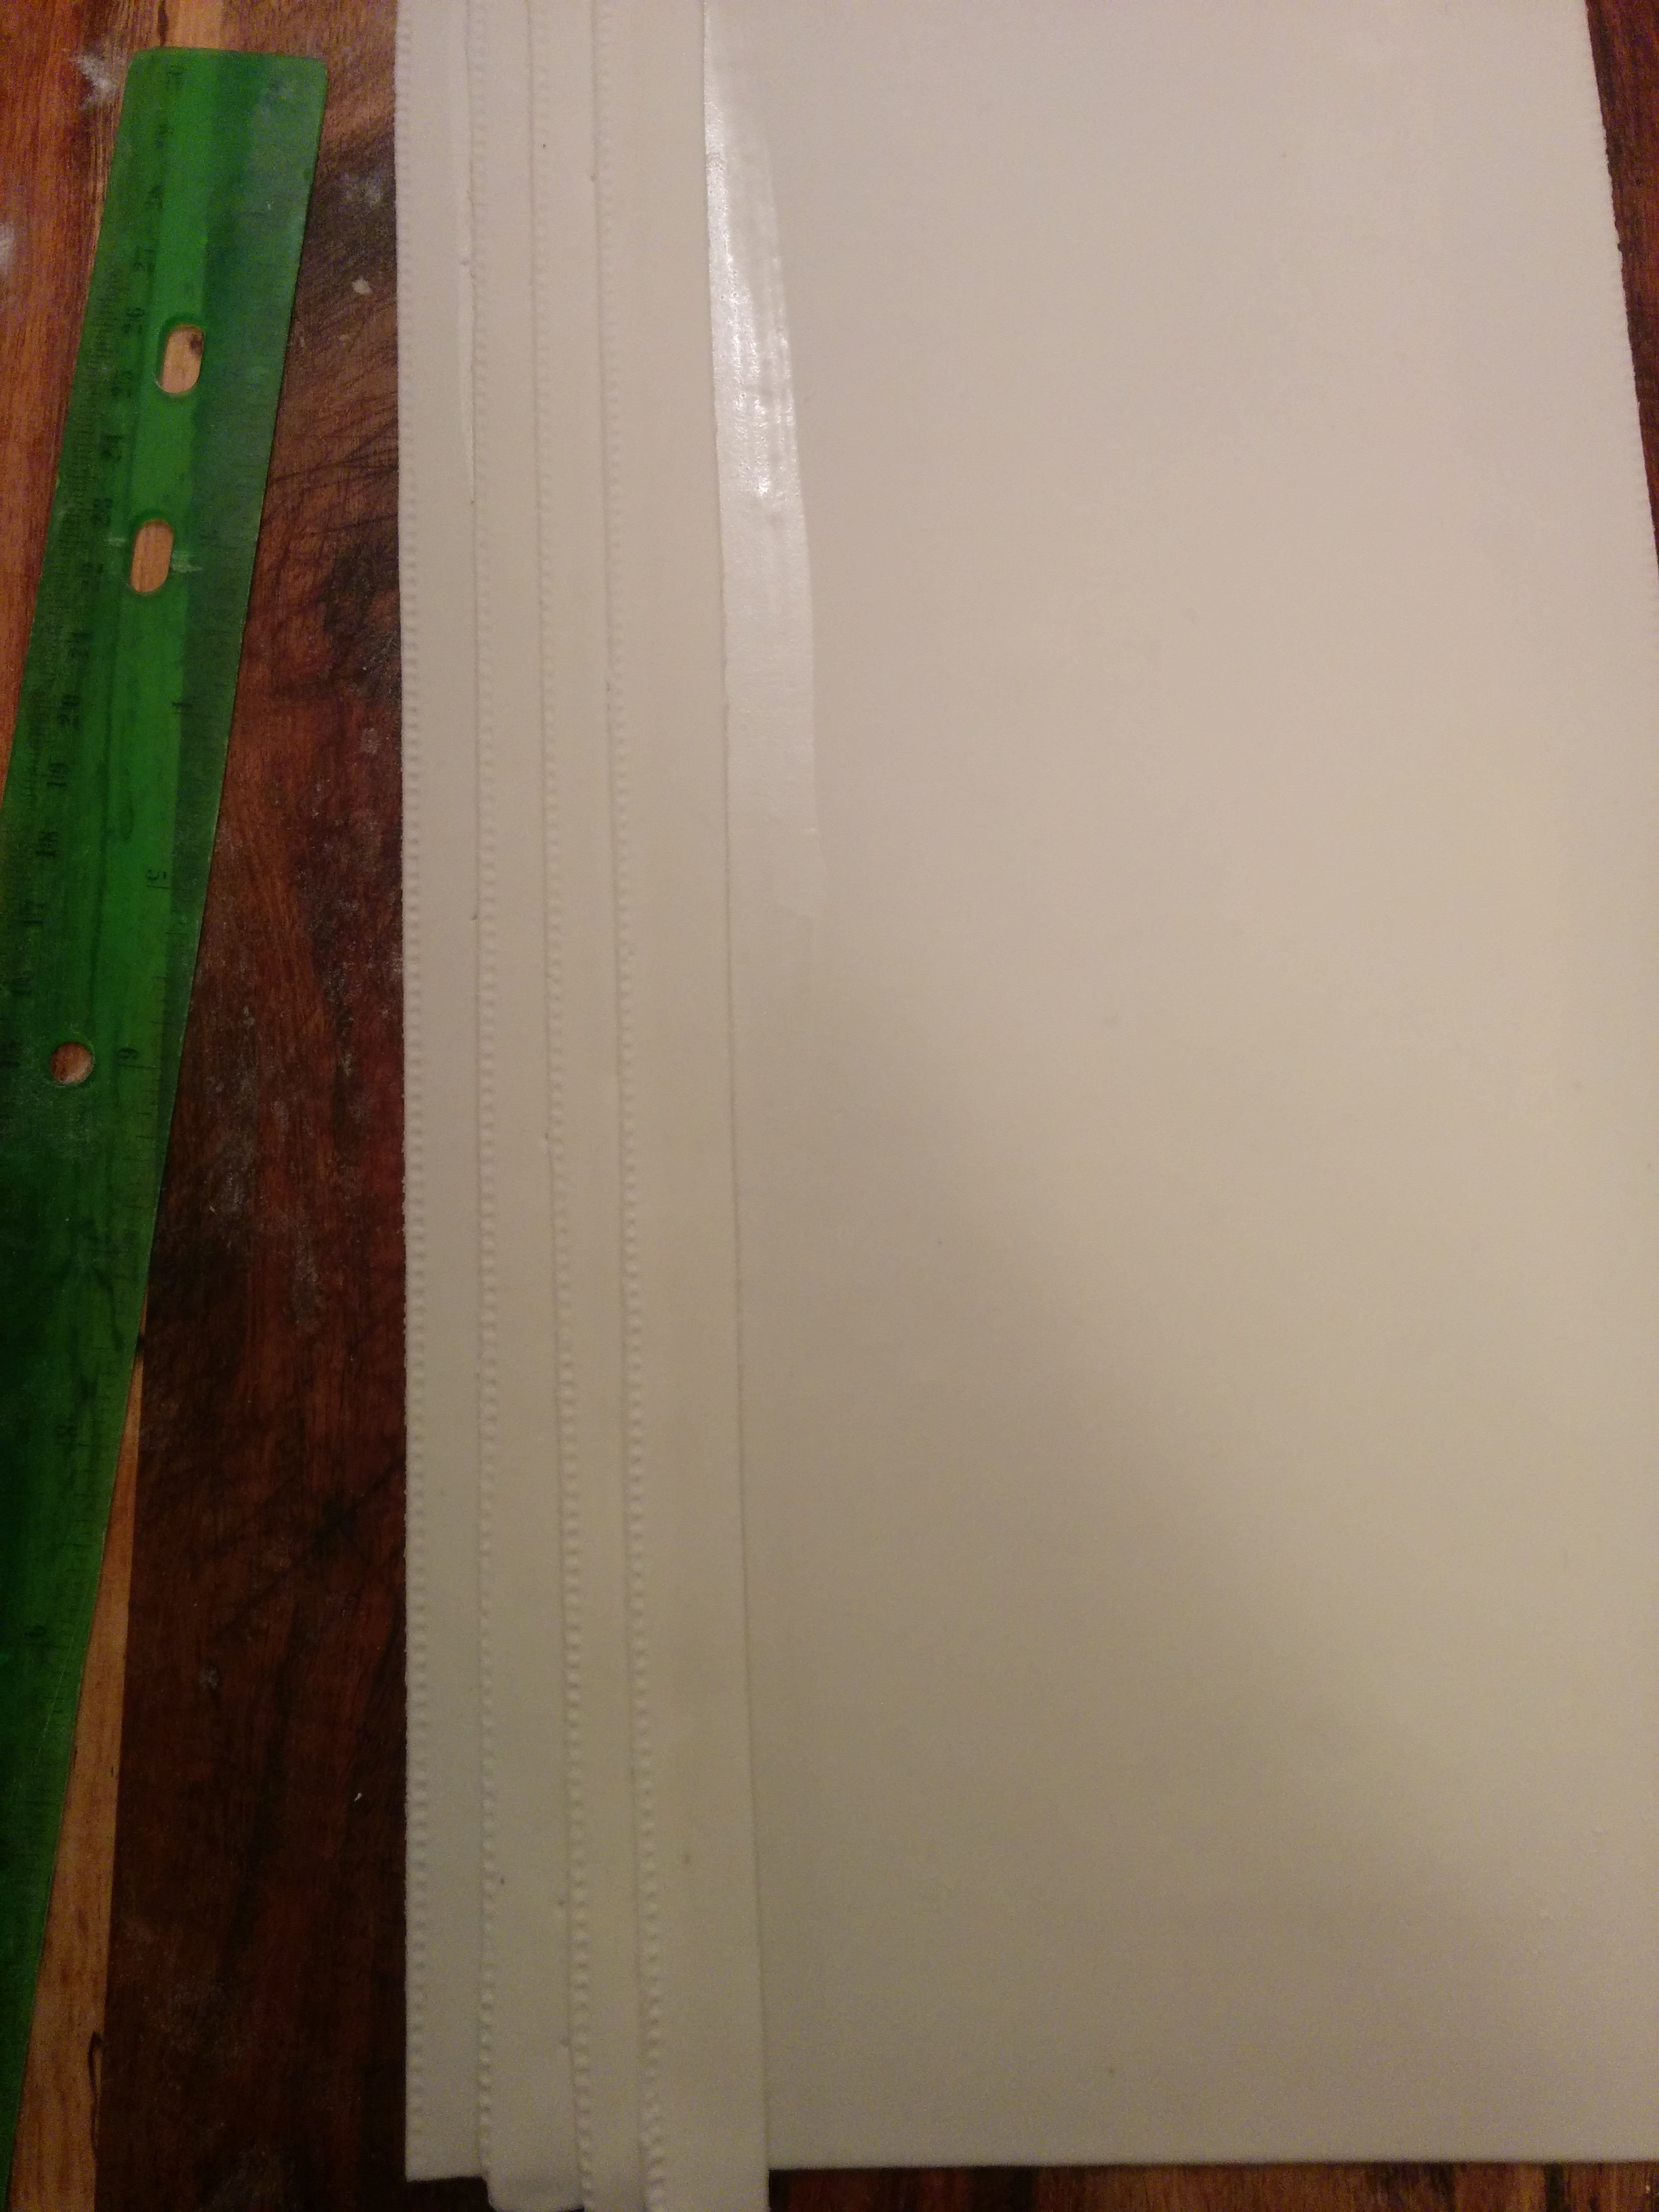
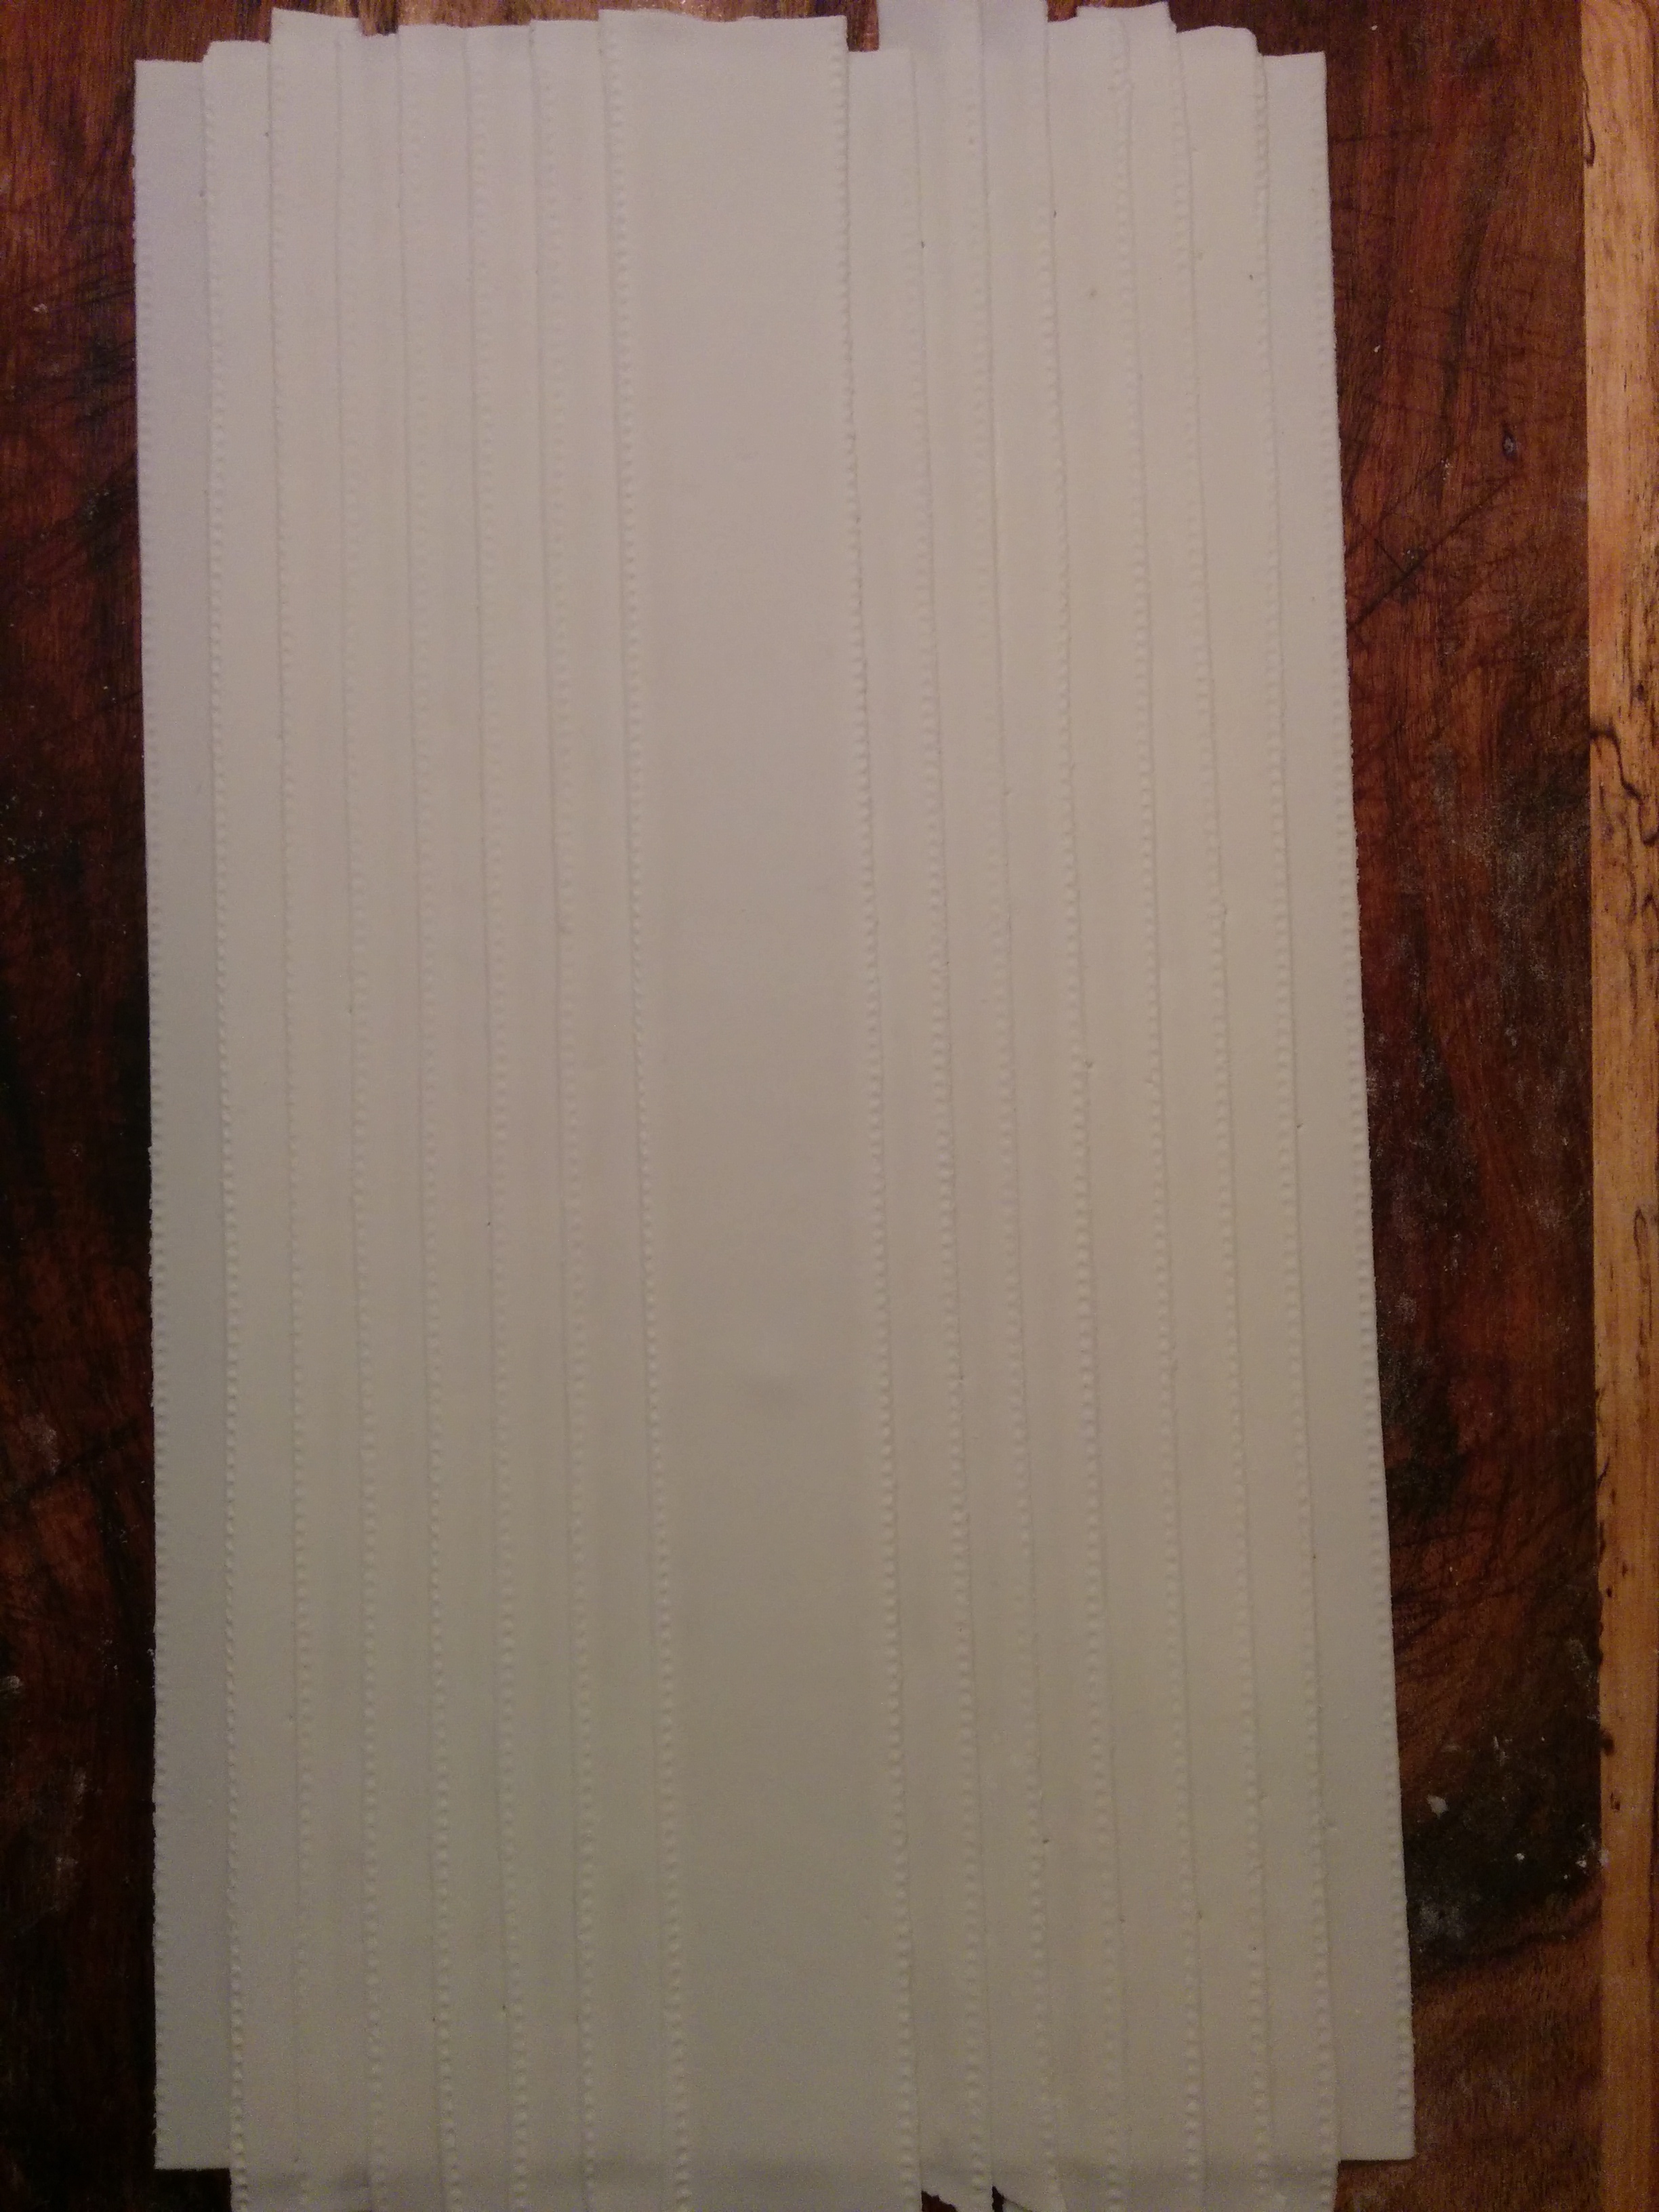
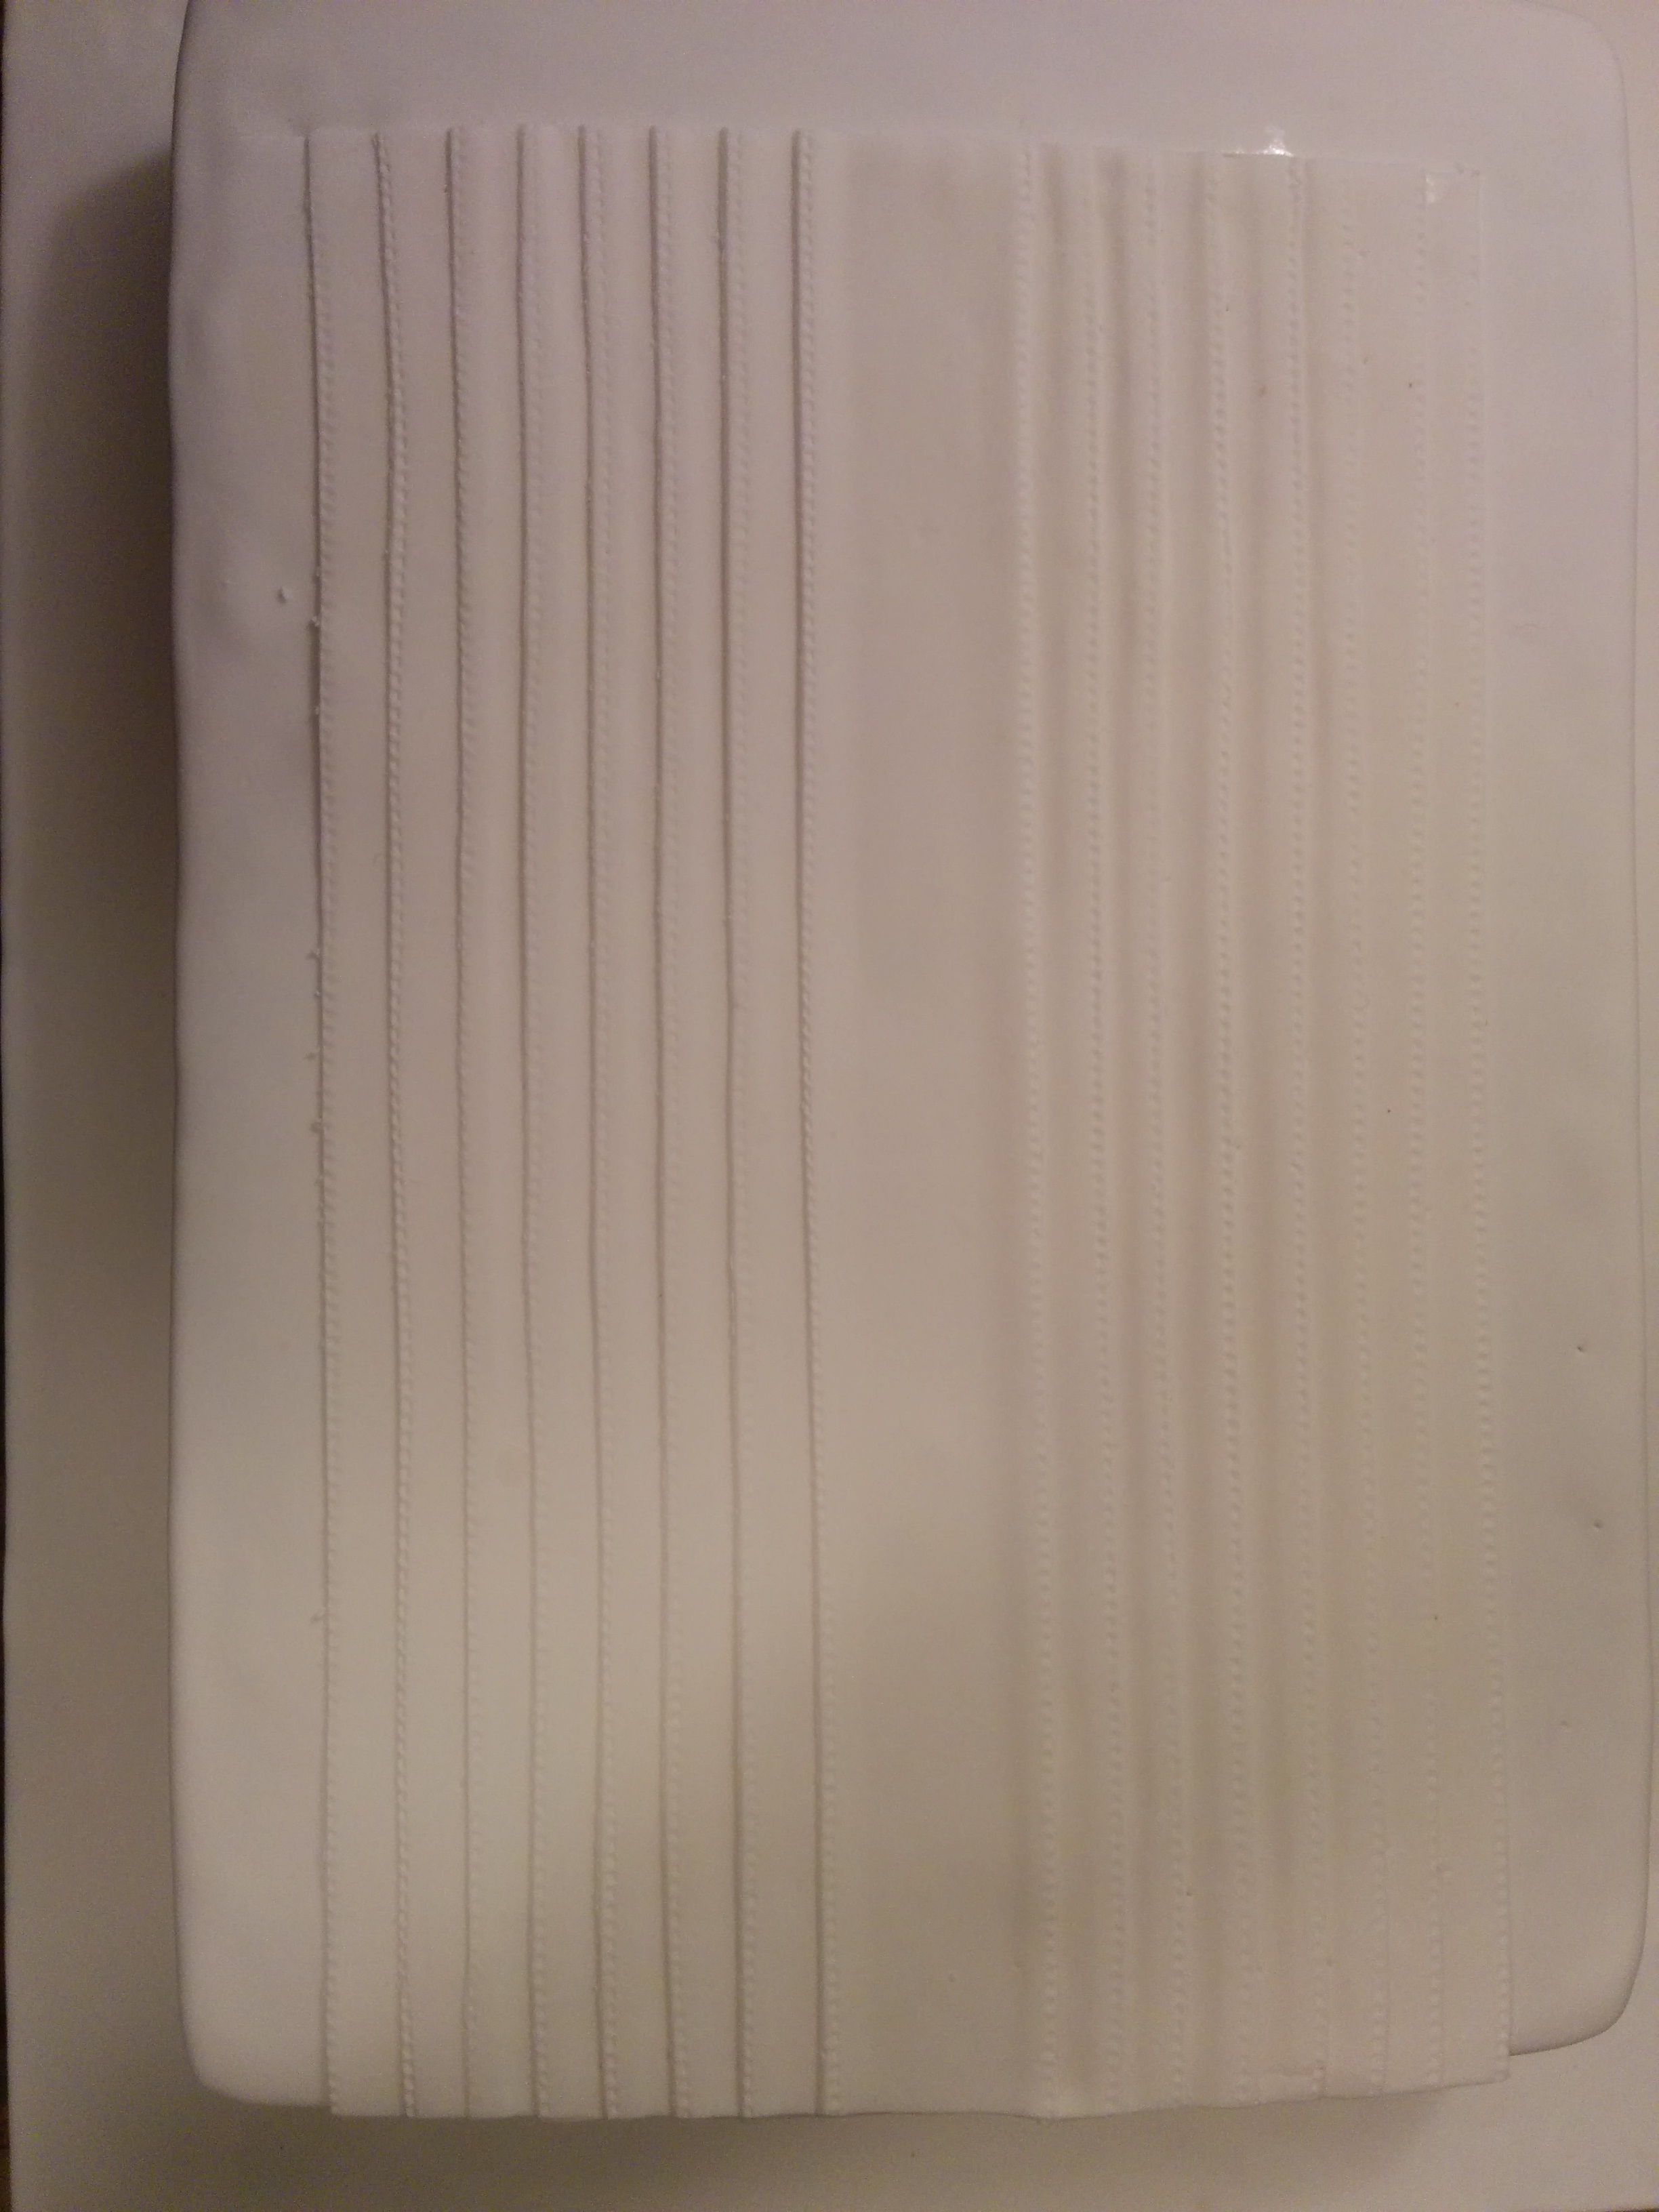
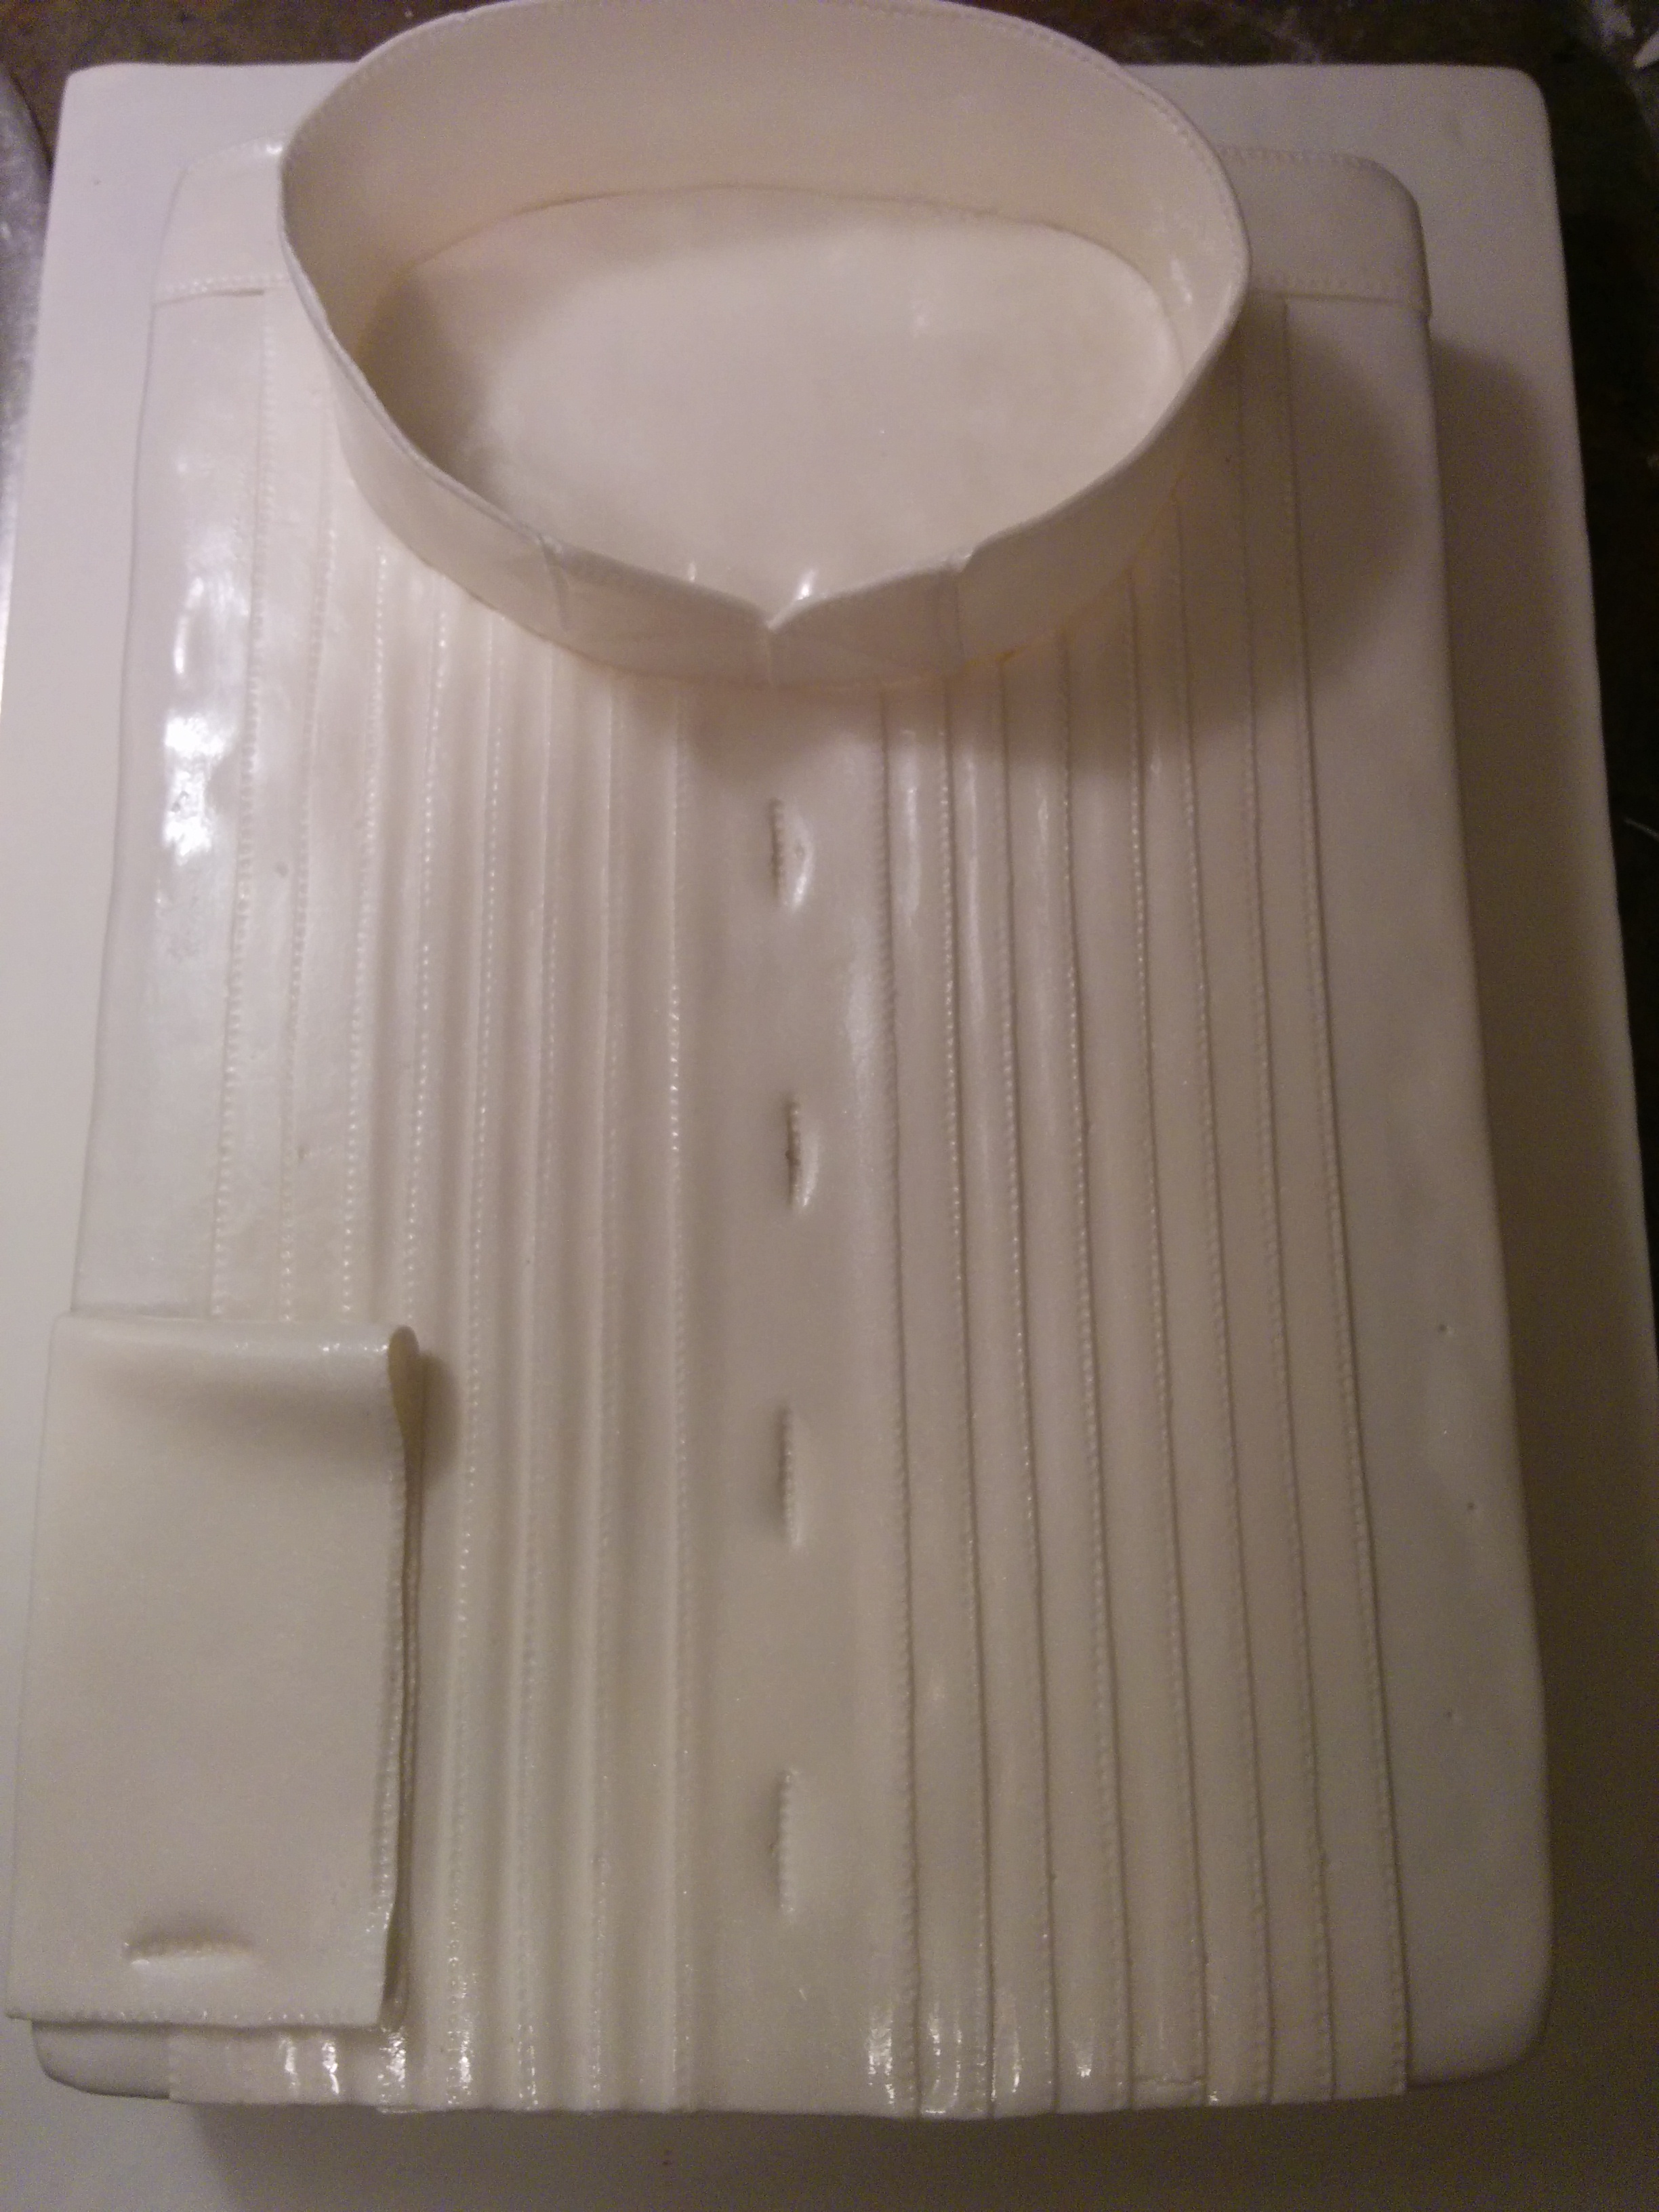
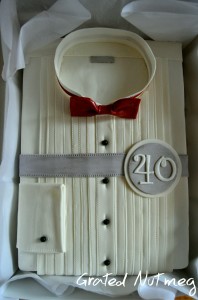
(4) If you want to make a tuxedo shirt, cut out a rectangular piece of fondant about 7 x 13 inch. Cut out smaller strips of fondant about 2 cm thick and 13 inches long. Stitch the edges. Use a ruler as a guide to lay the strips on the rectangular fondant. The strips should overlap each other by about a centimeter. I used a total of 14 strips here with a 1 inch wide placket in the middle. Transfer the rectangle to the shirt leaving about an inch space above for the shirt yoke.
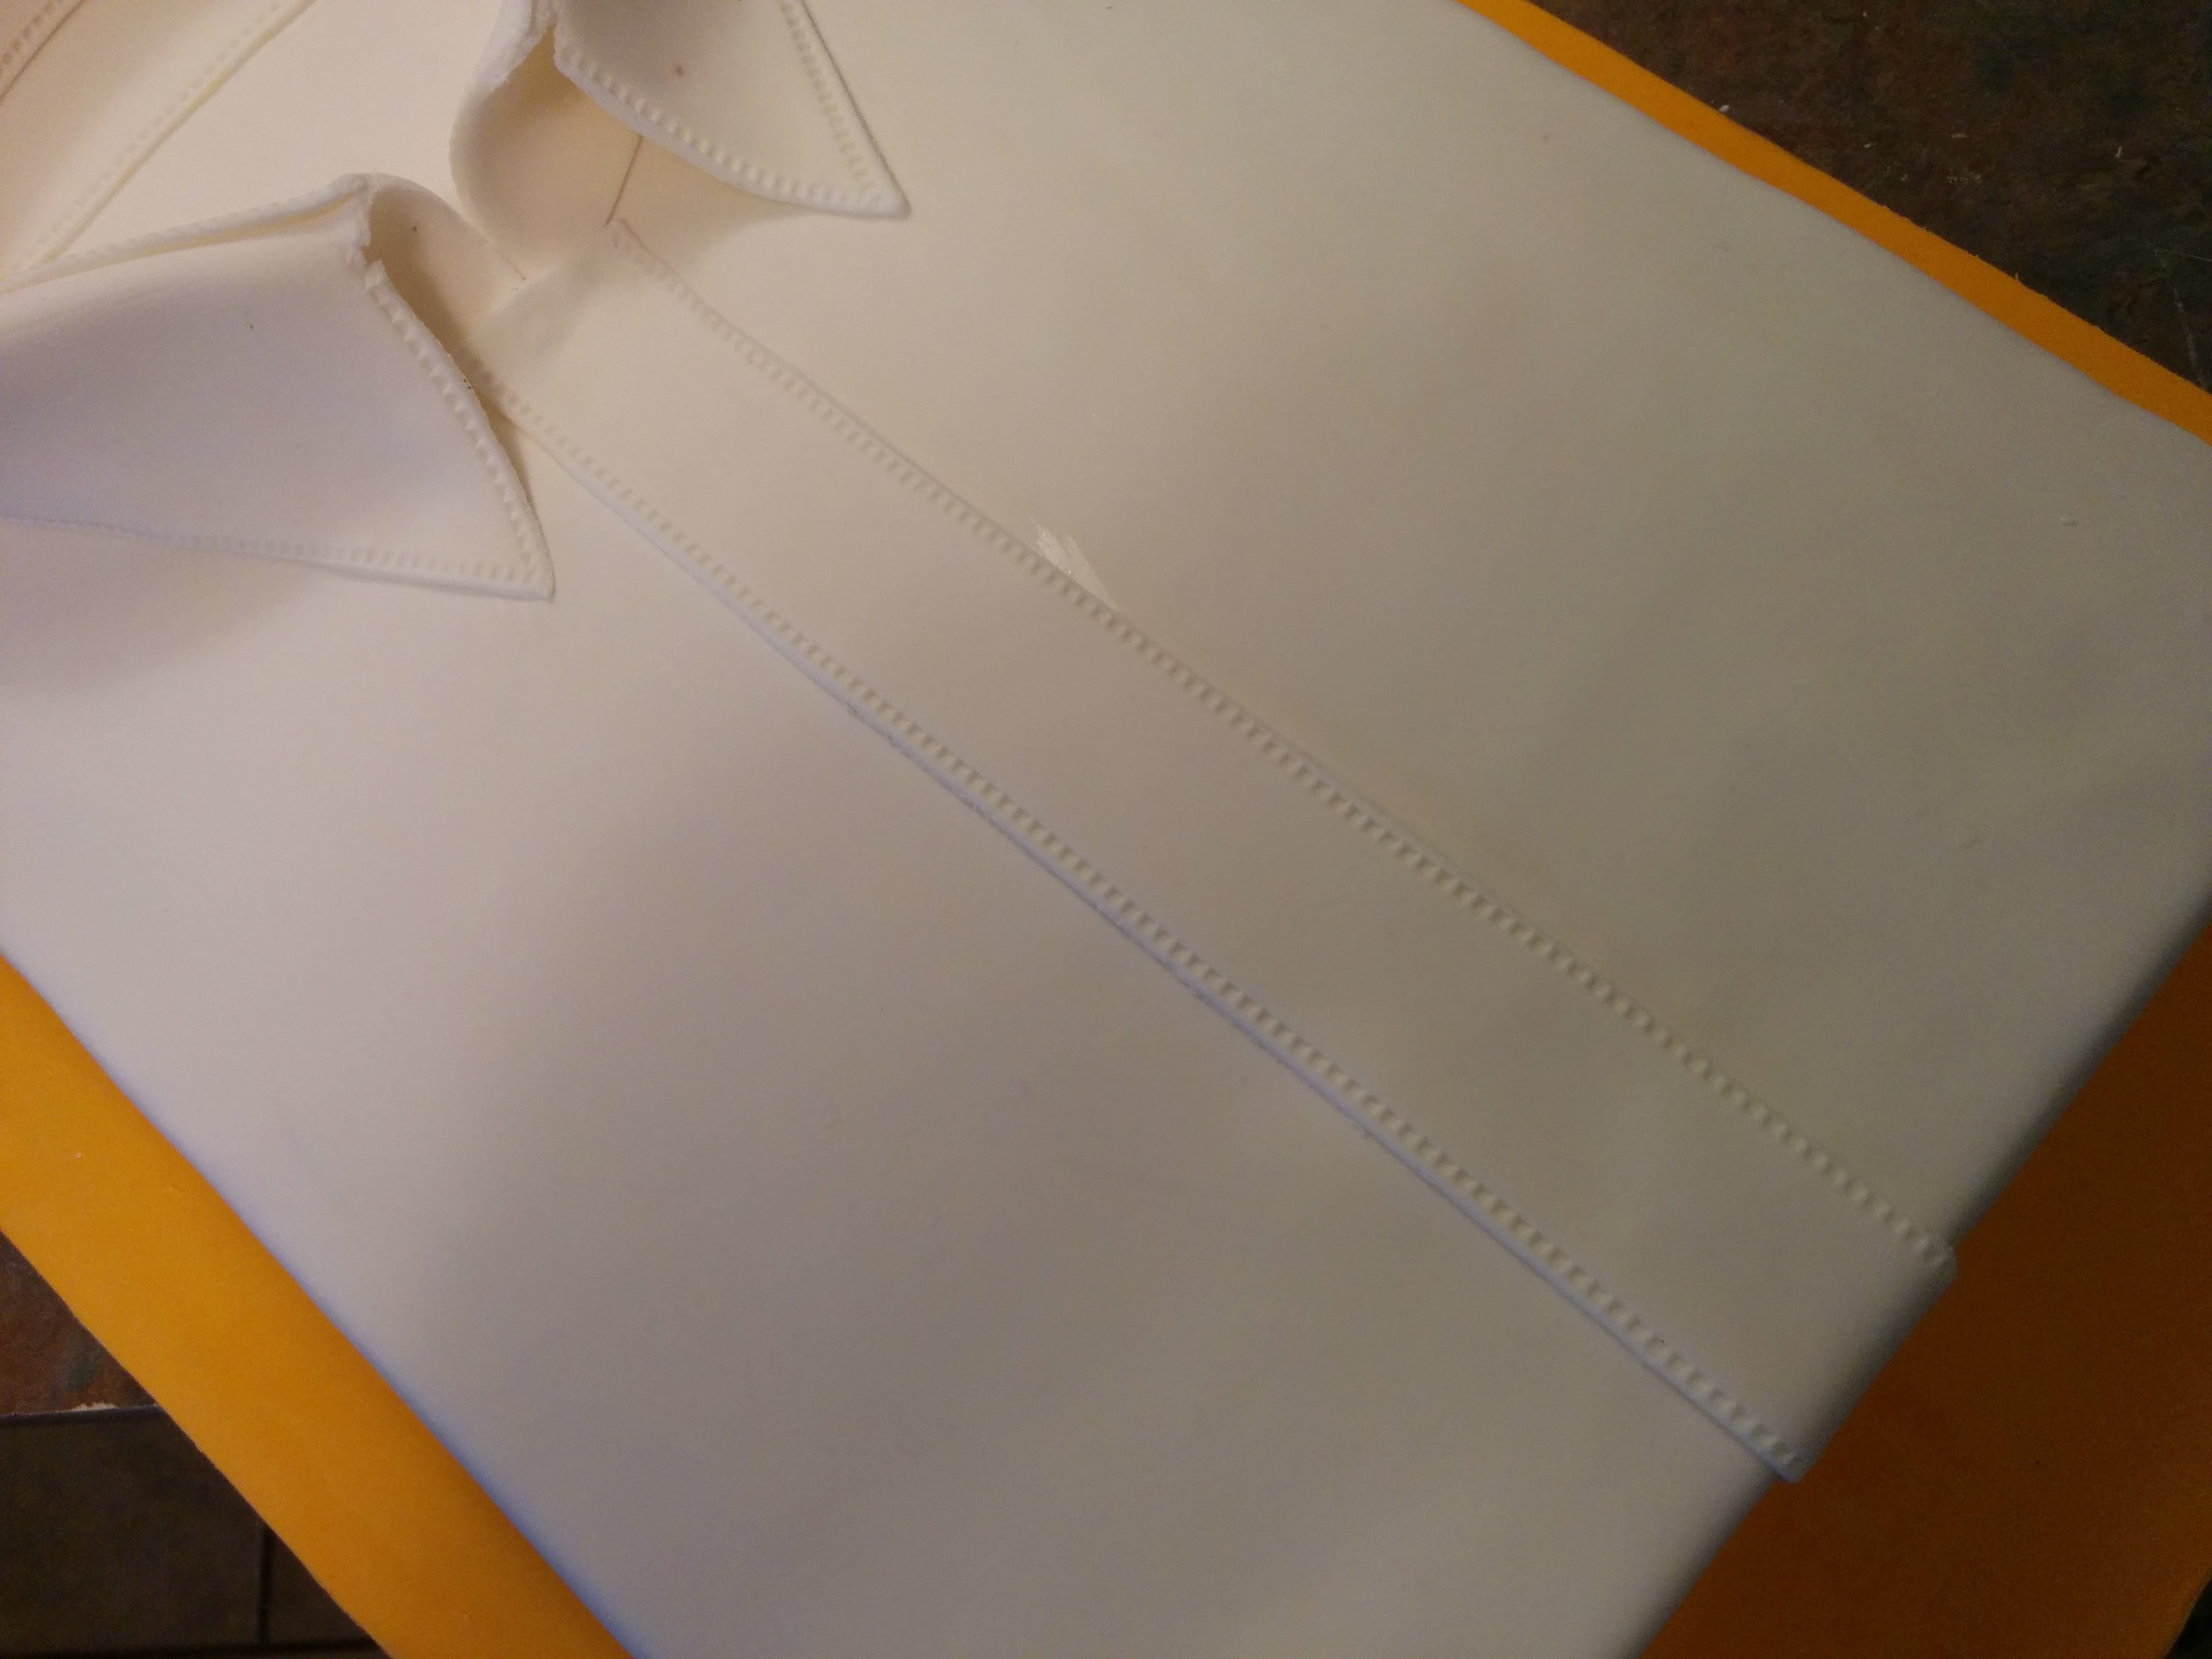
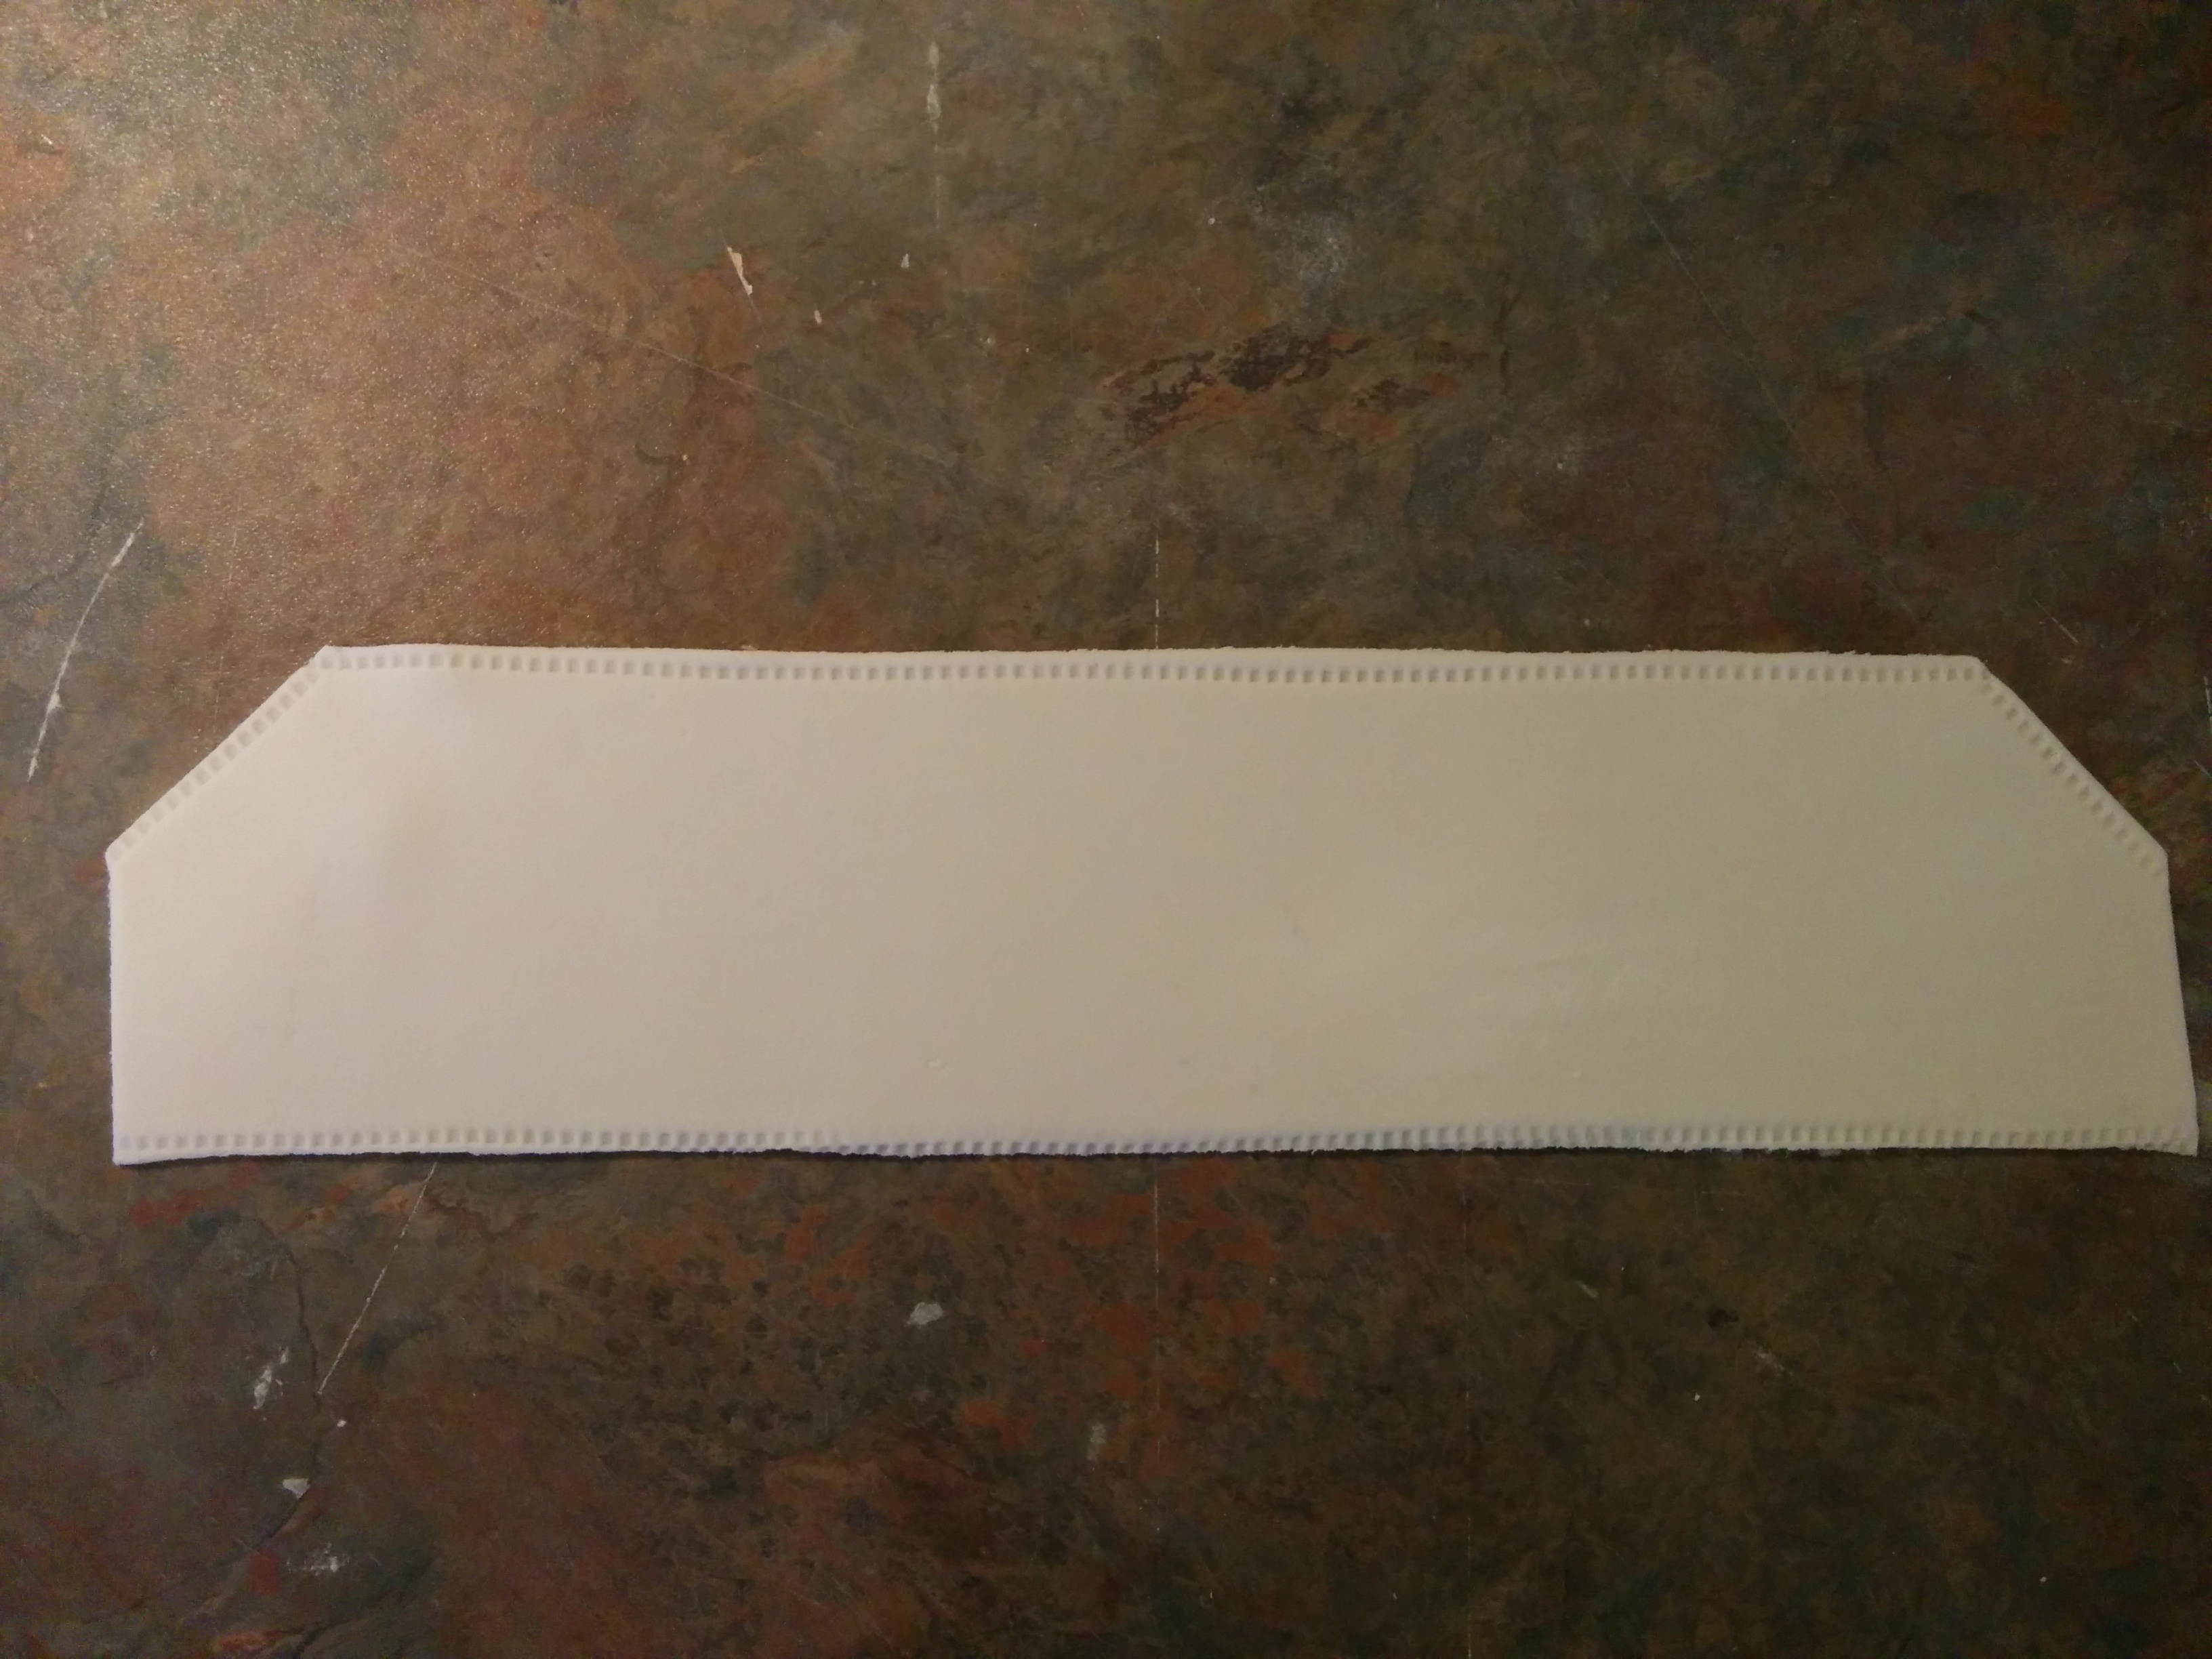
(5) The next step is to make the shirt yoke. To do this, roll out some fondant and cut out a strip measuring 1 x 13 inches. Use a stitching tool on the edges to create stitches and stick the yoke to the top of the shirt using water or vodka. The yoke should run down the sides of the shirt. Cut out any excess strip at the ends.

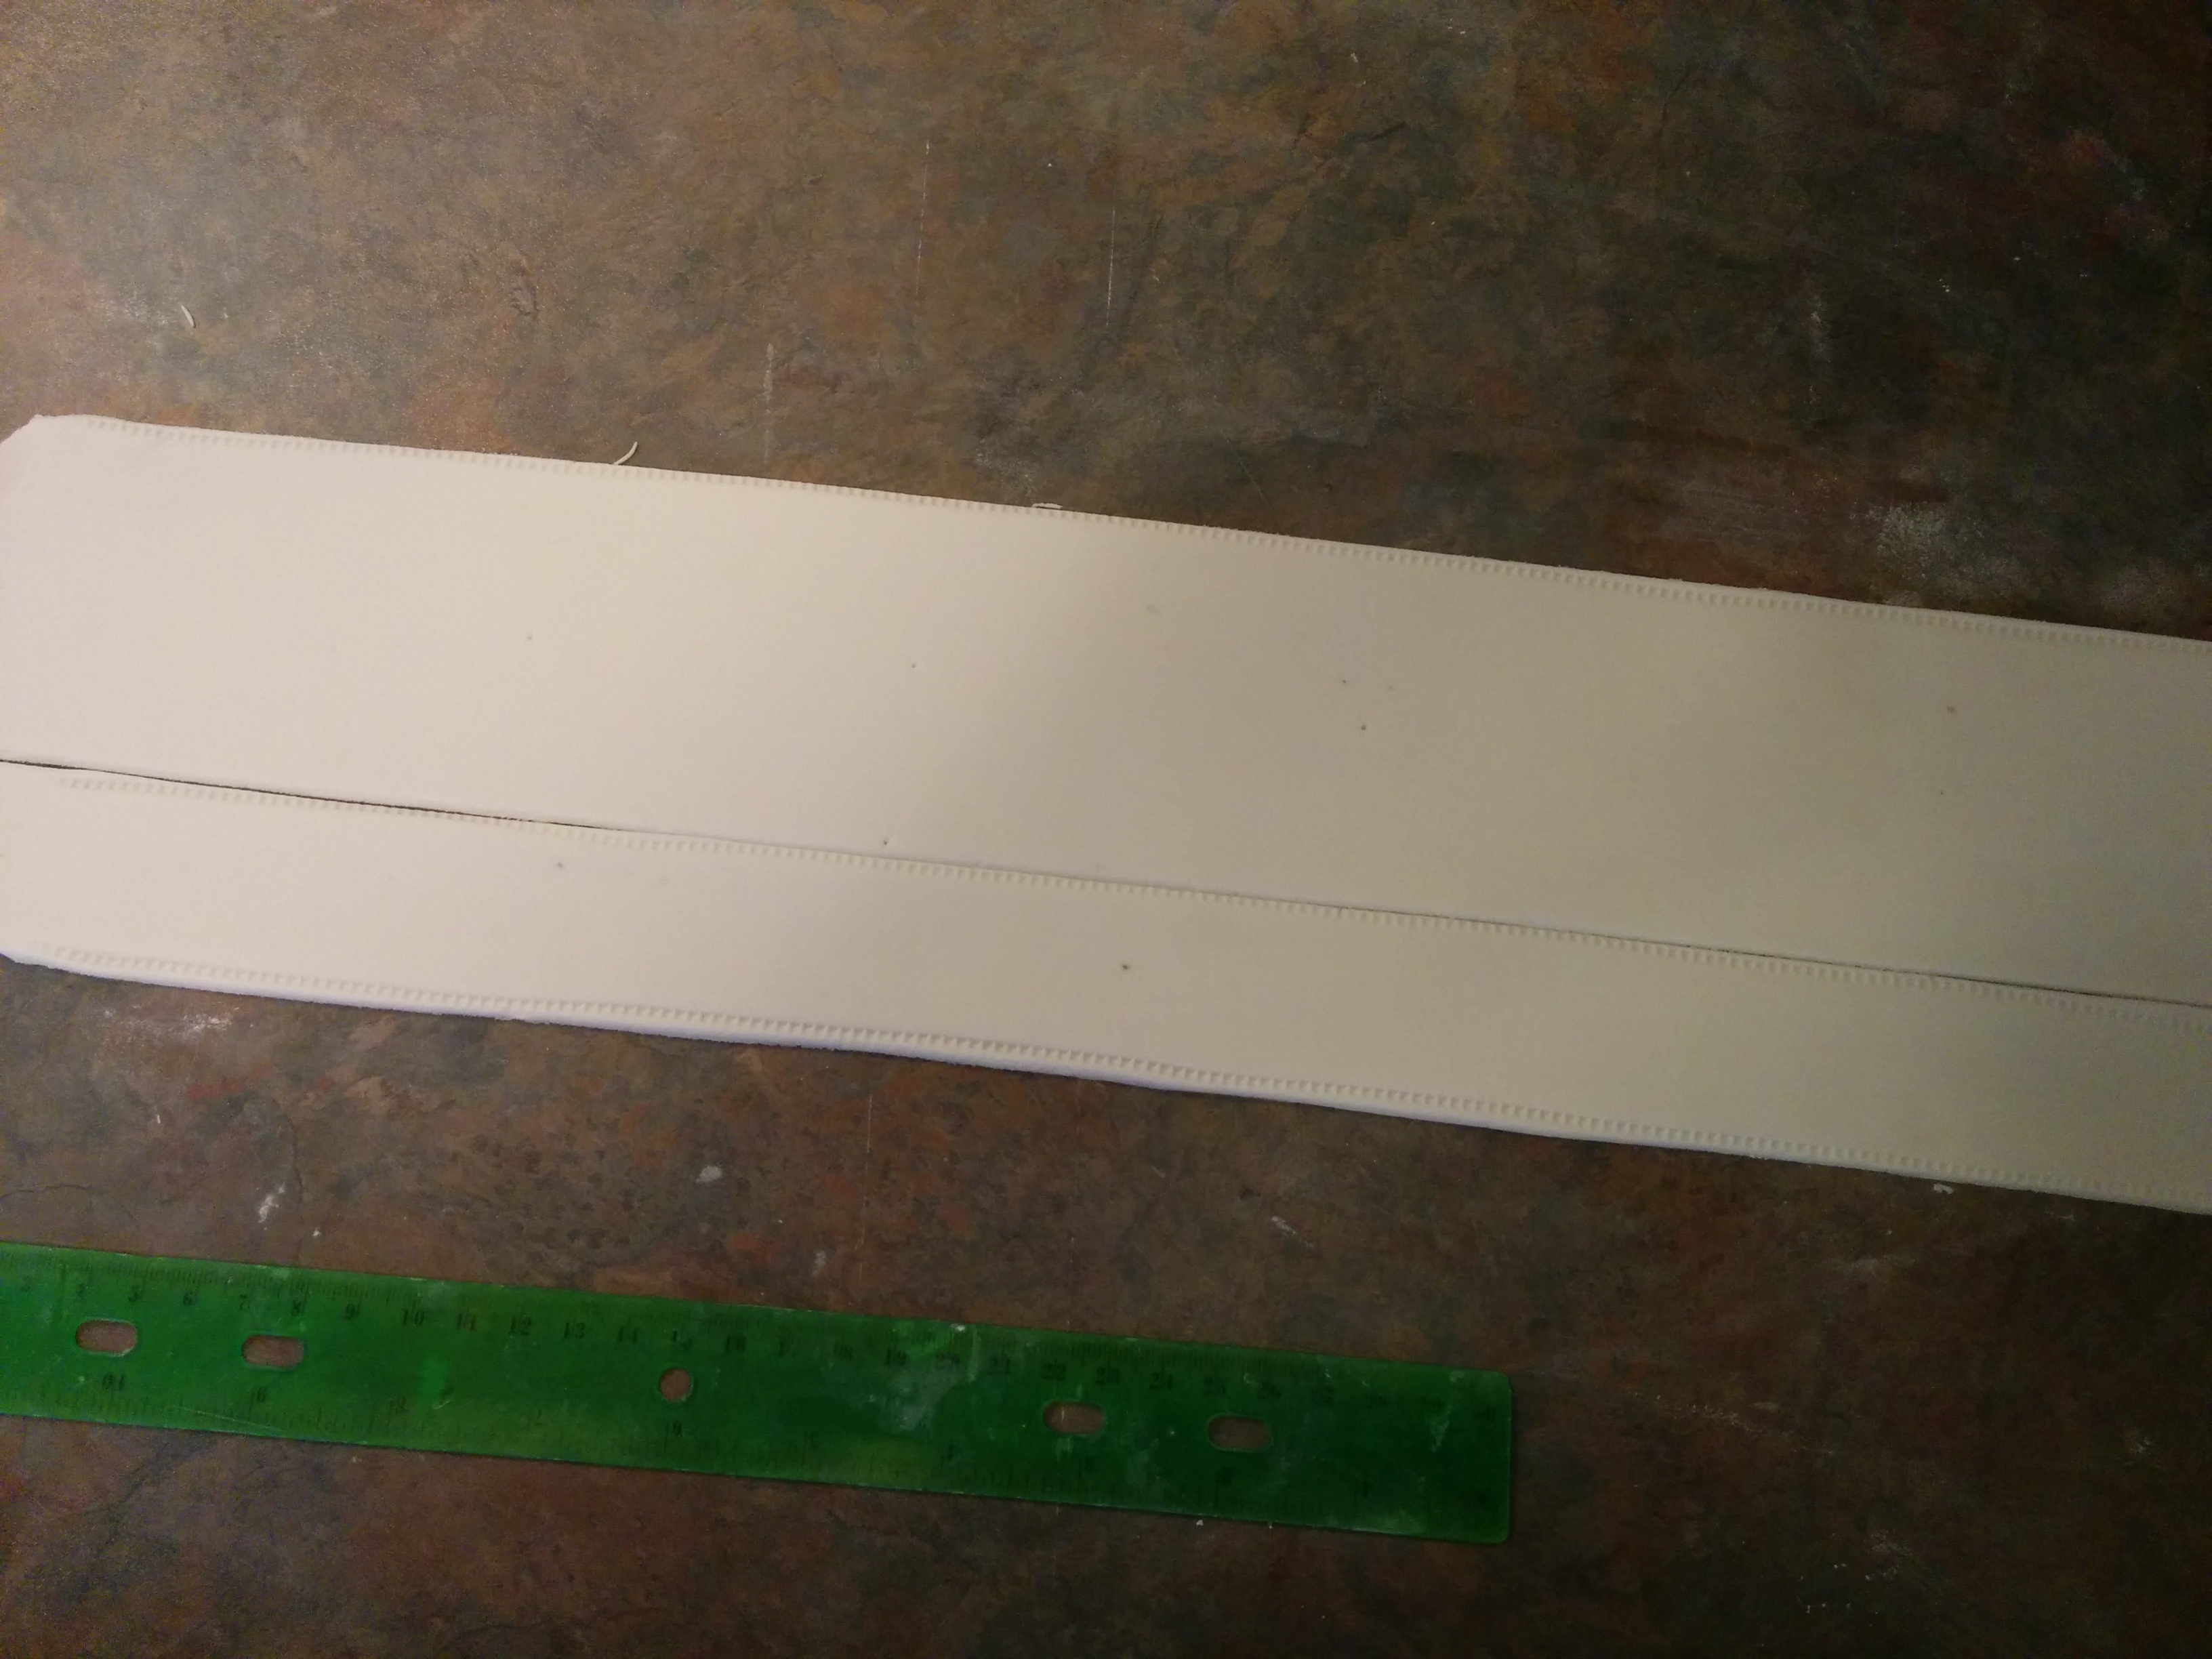
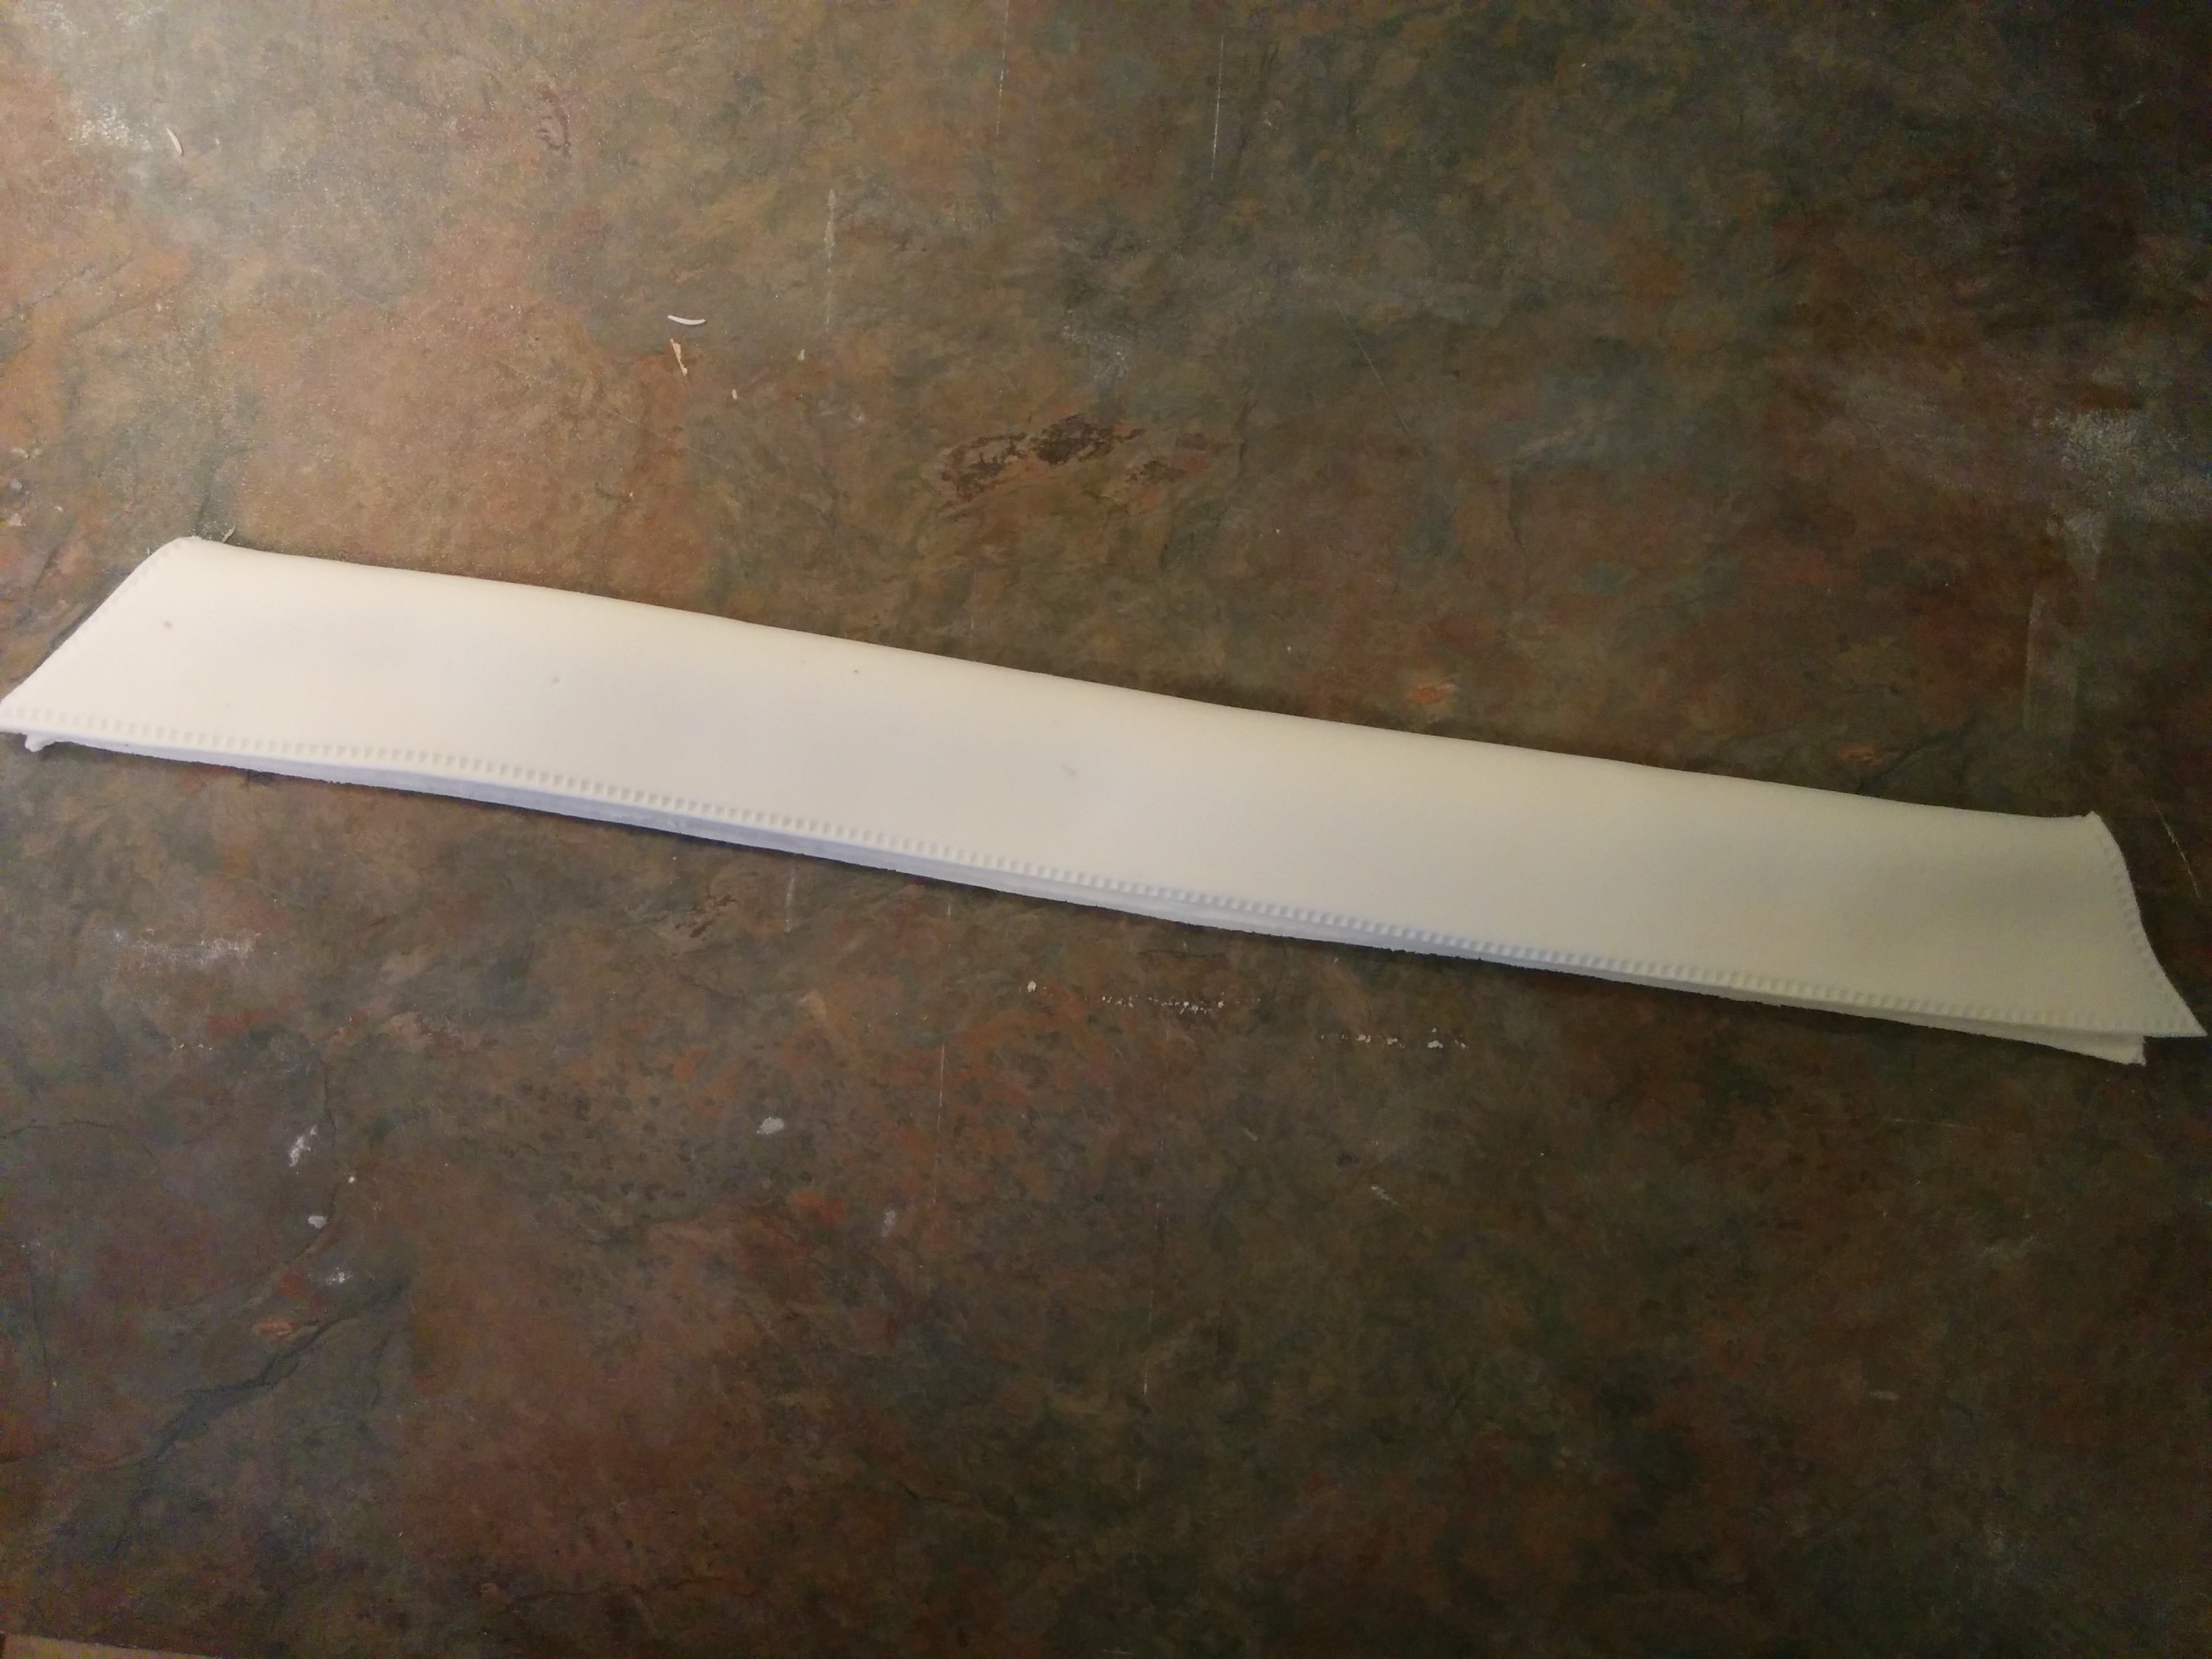
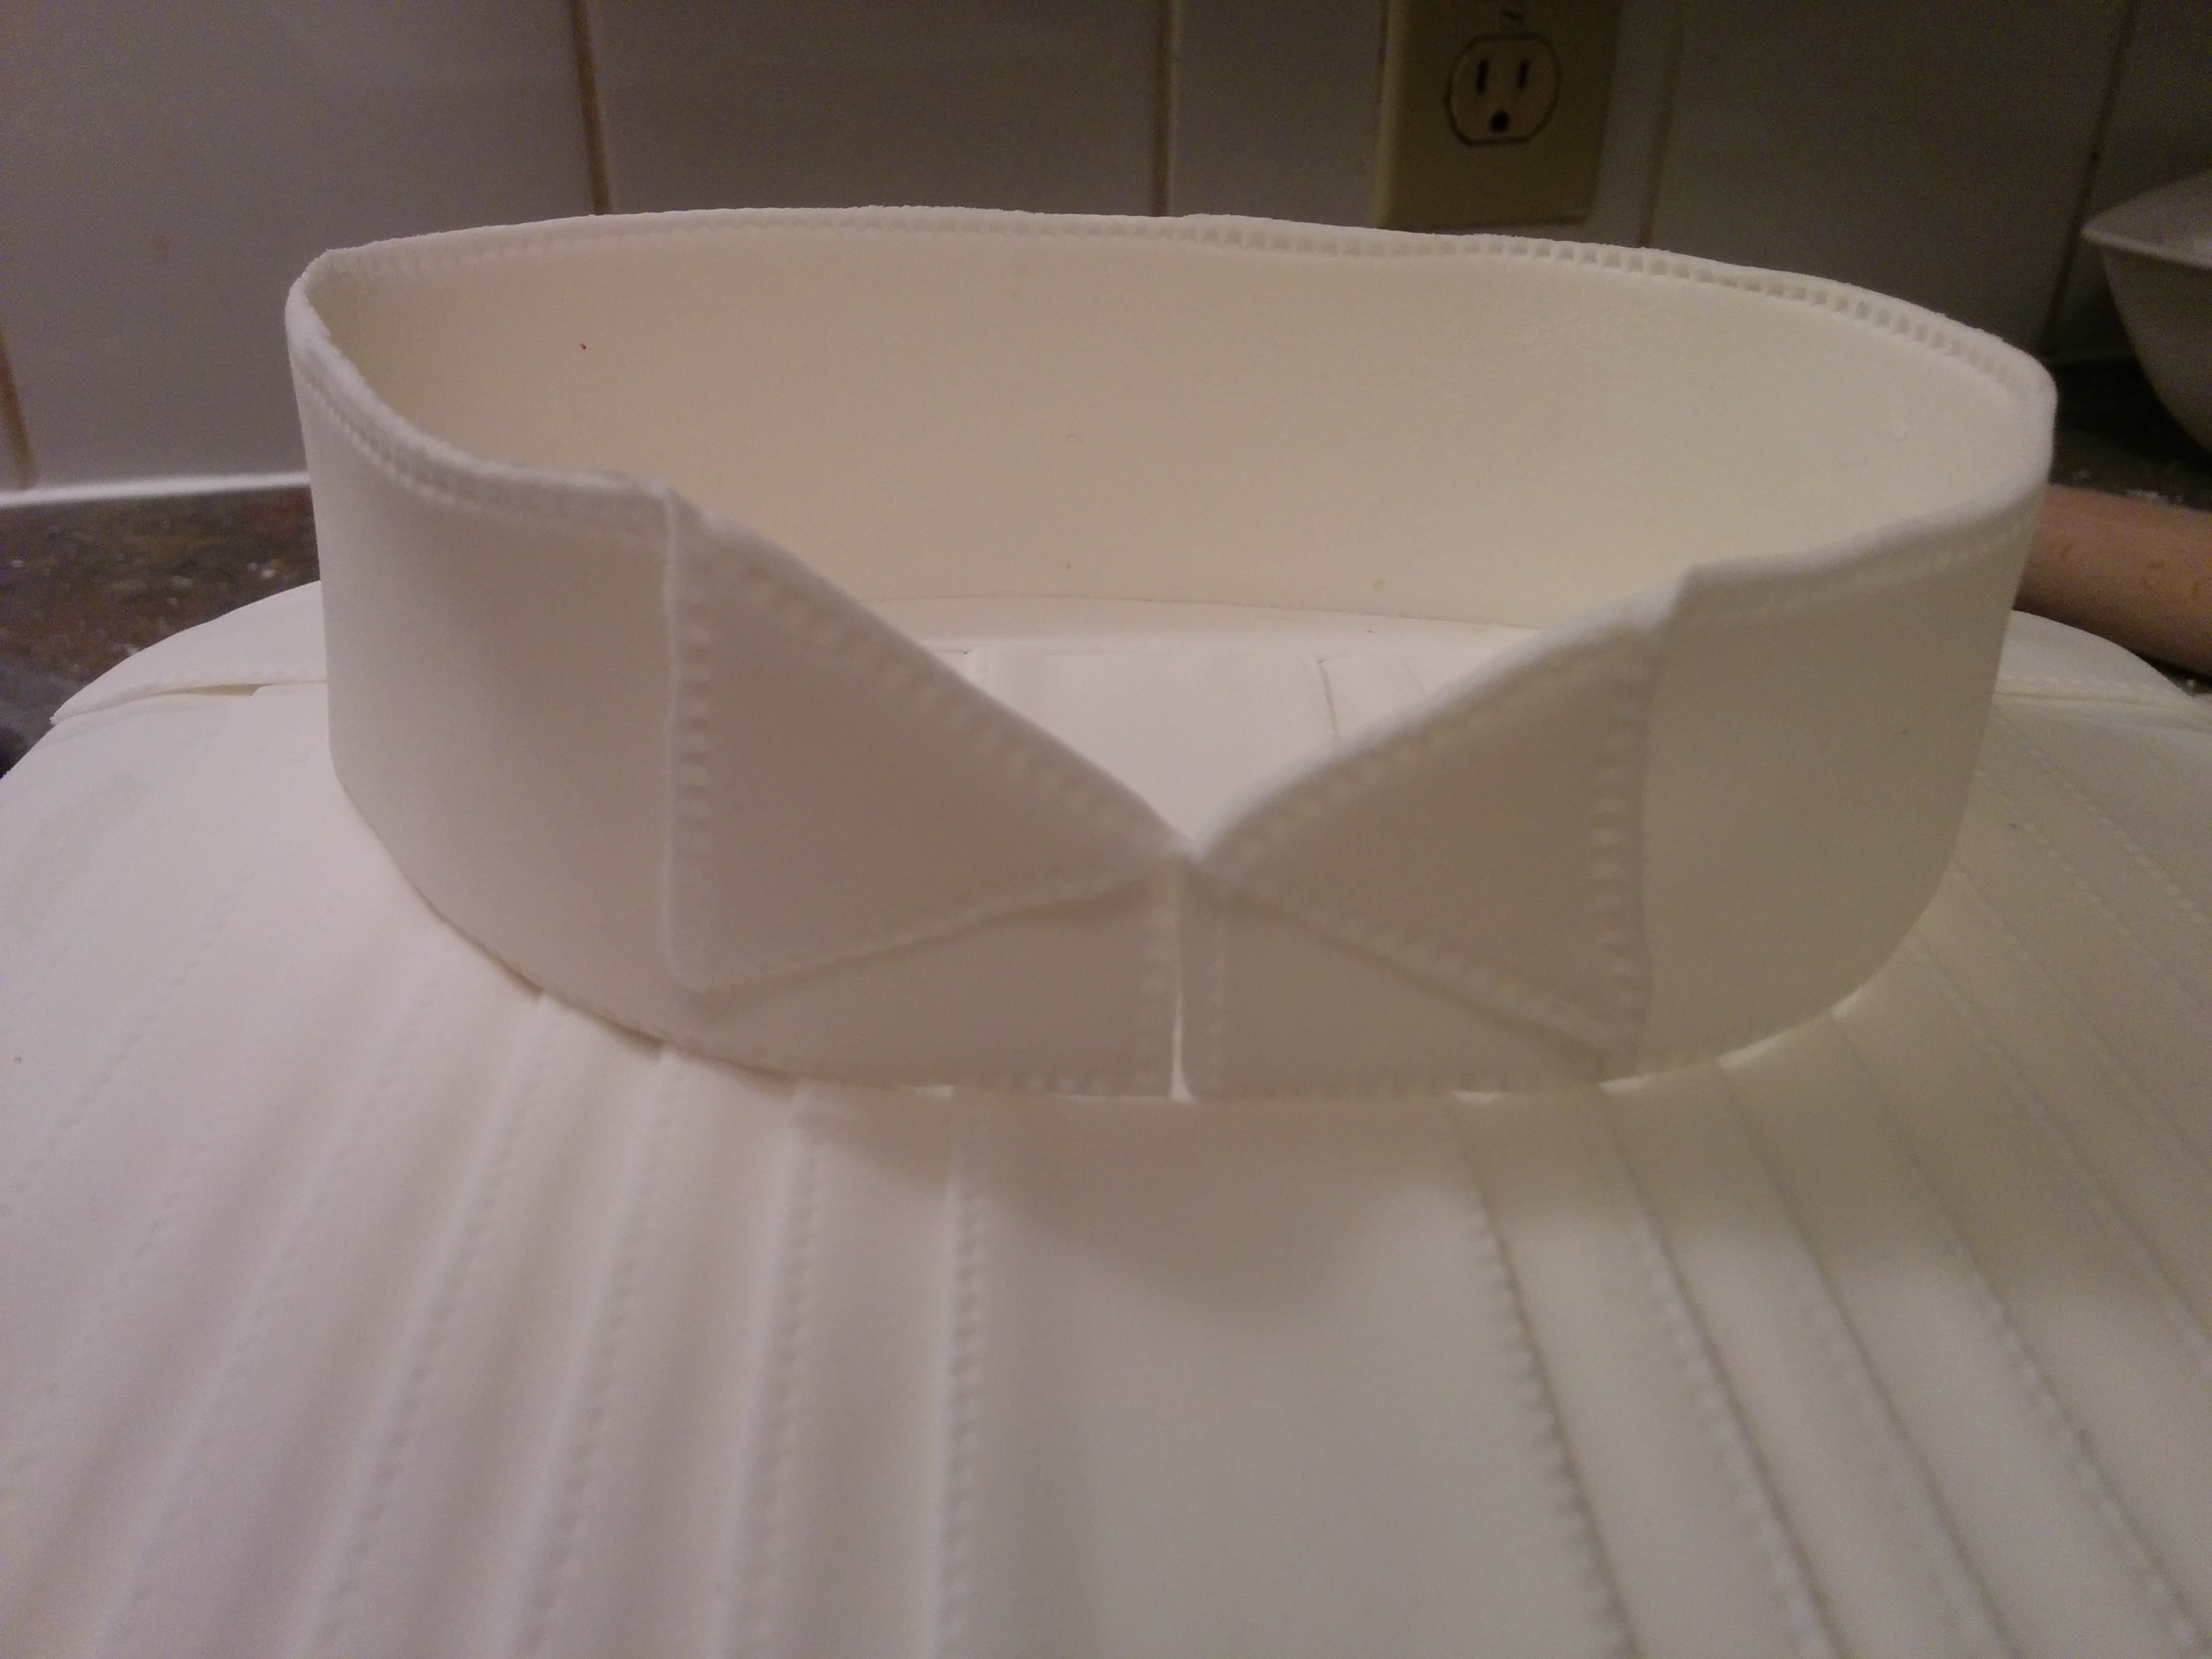
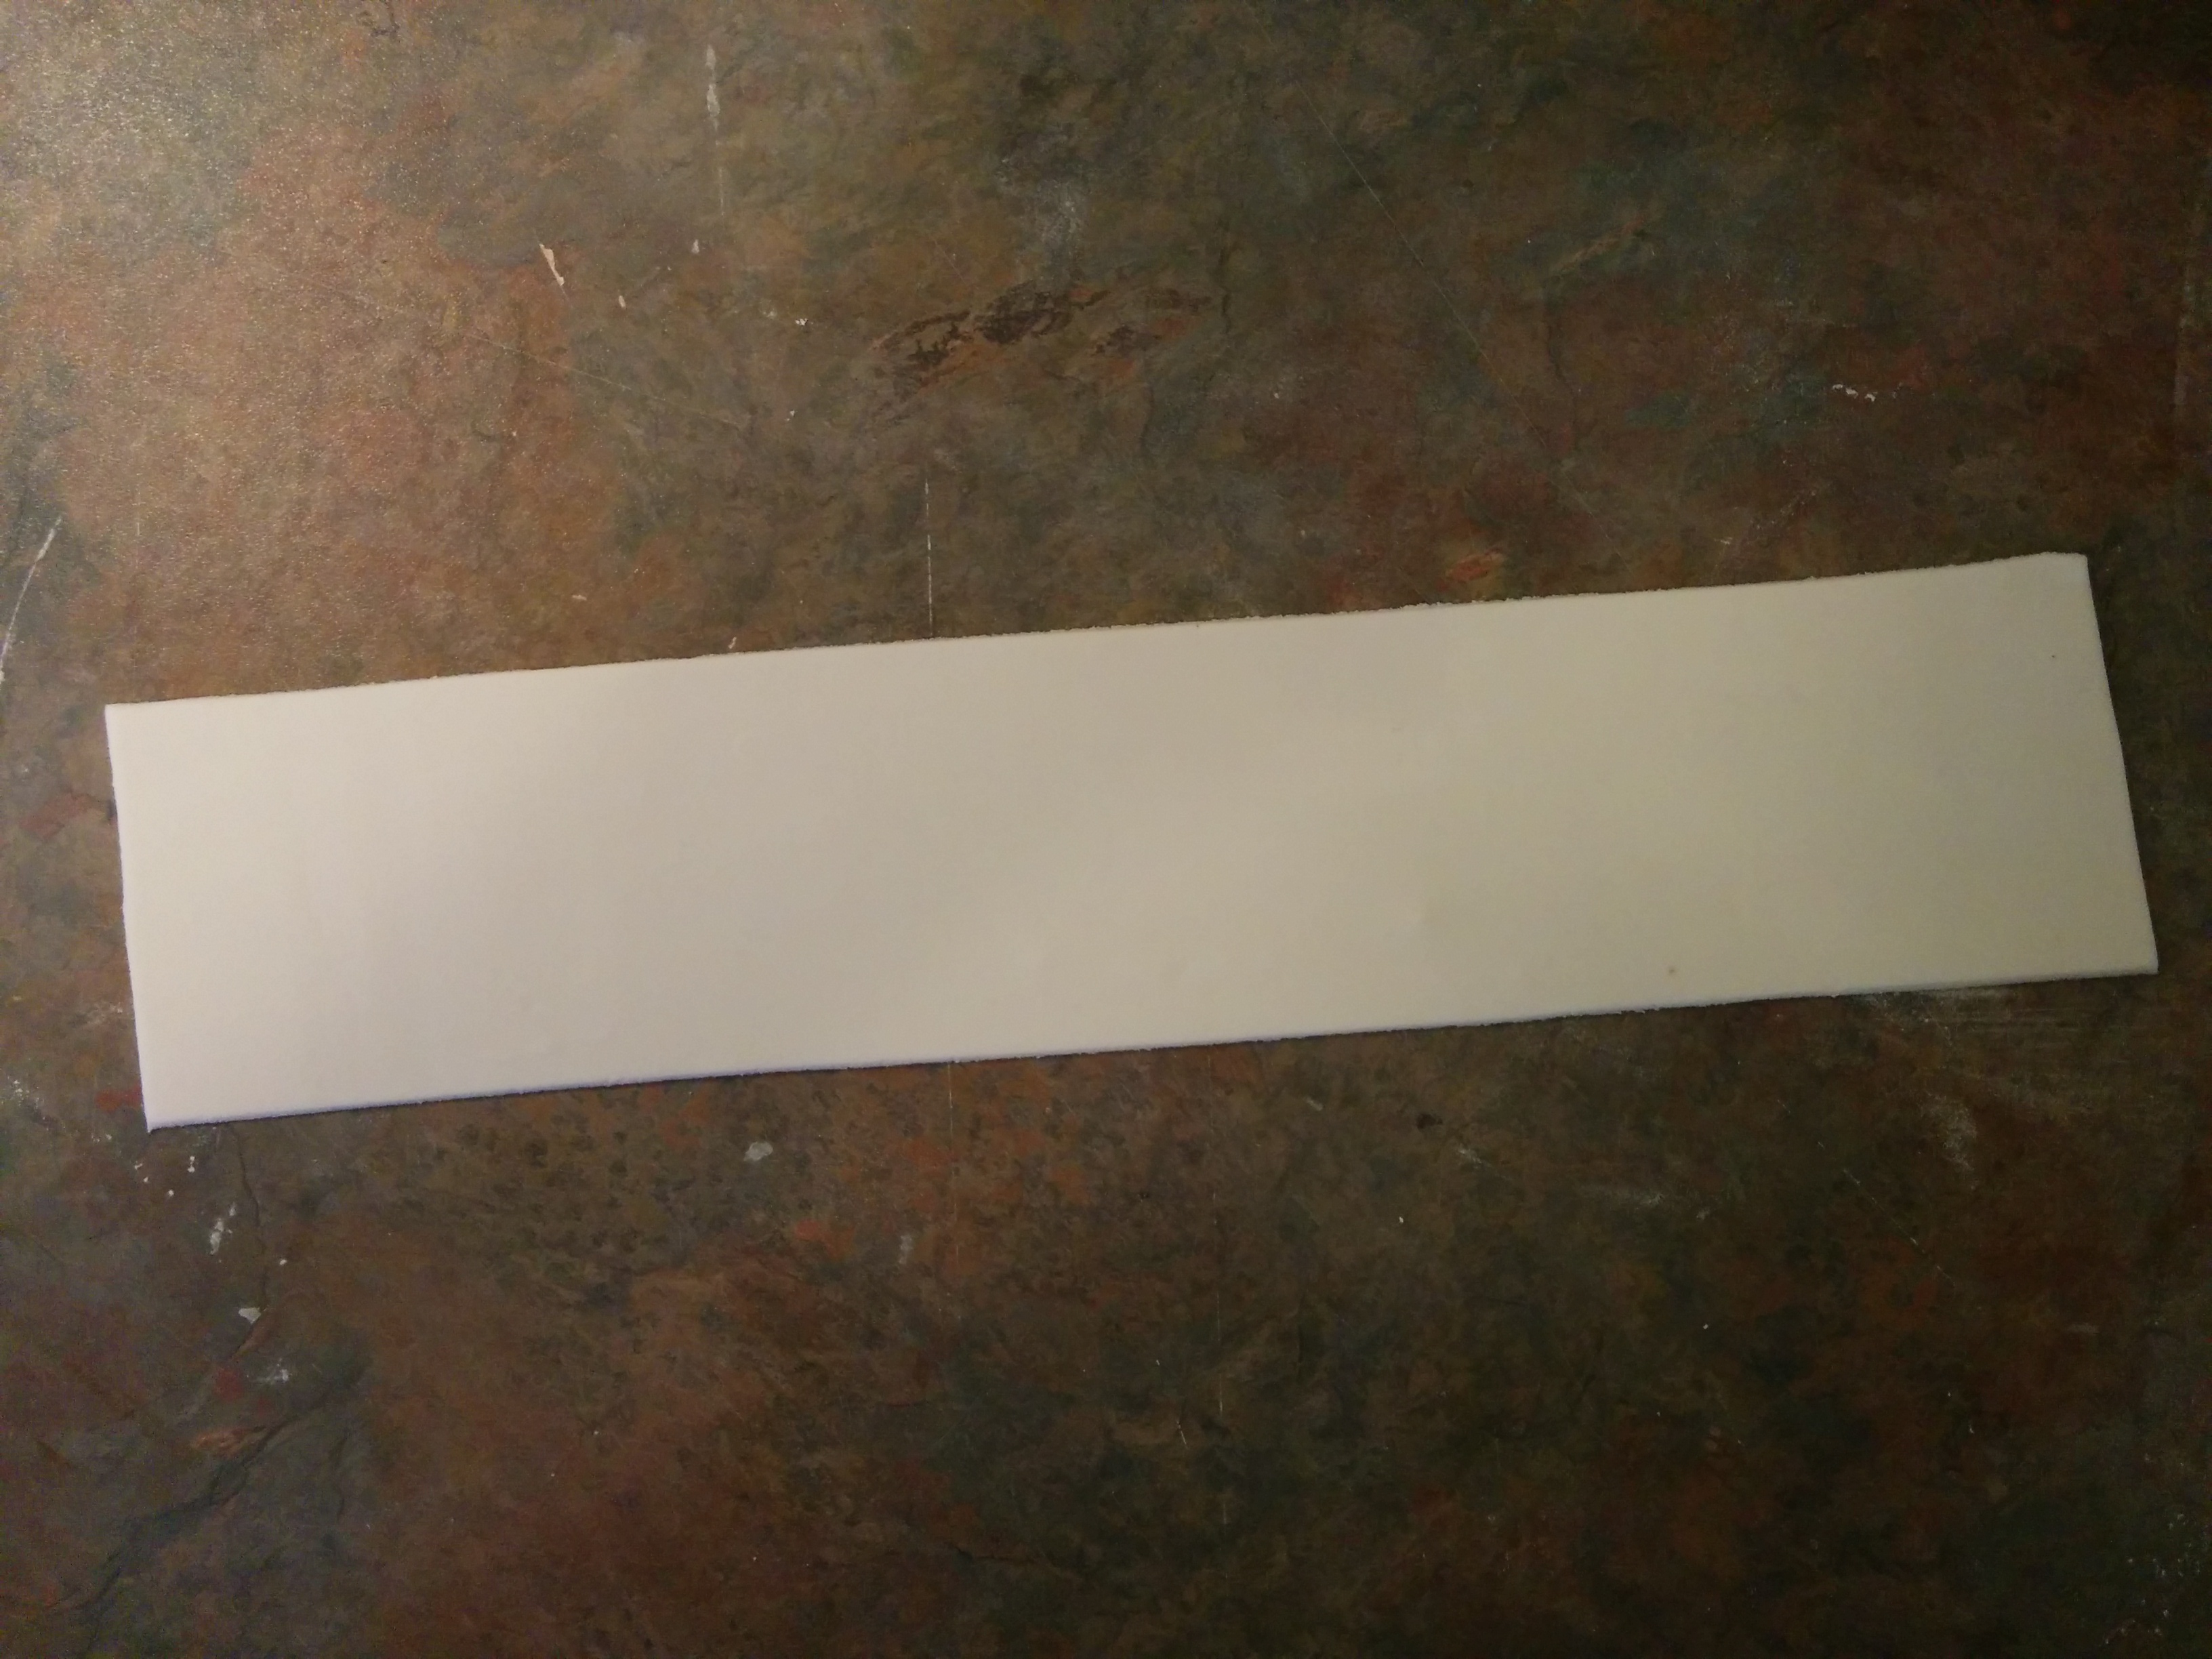
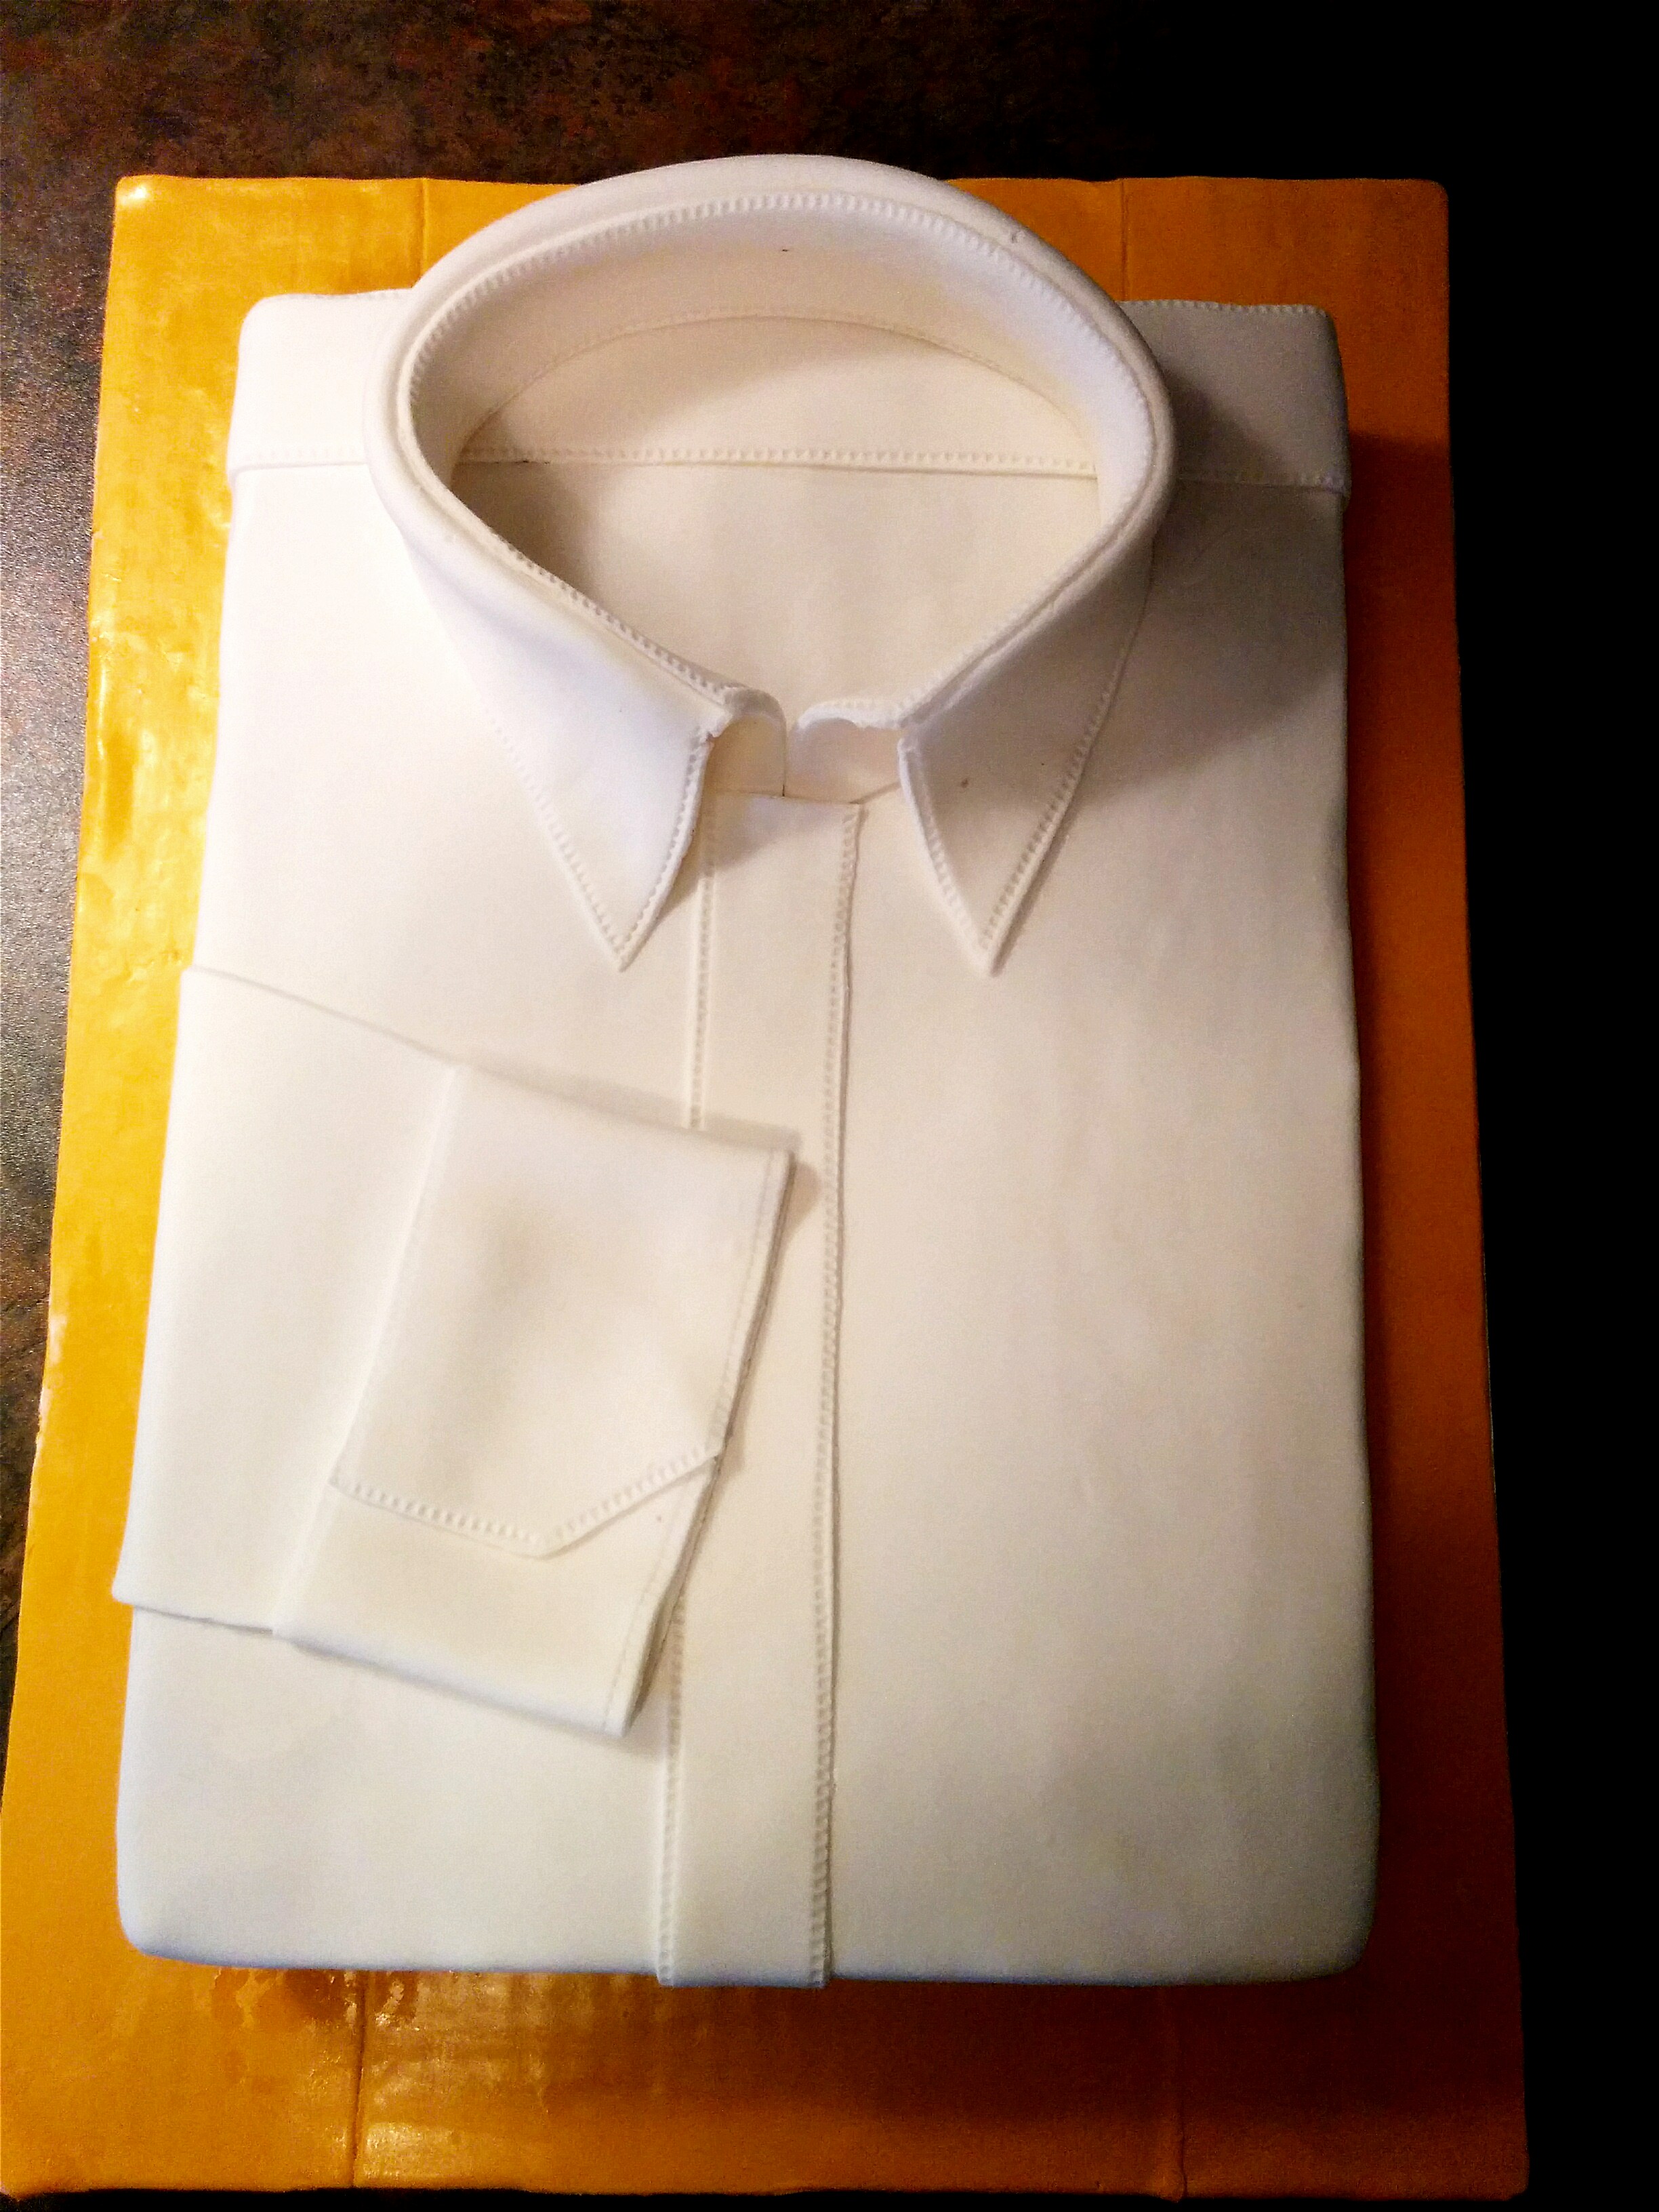
(6) Next, create the collar which is made up of the base and leaf. Roll out fondant and cut out 2 strips. One strip should be 1.5 x 16 inches (base) and the other should be 3 x 16 inches (leaf). Stitch the edges of the collar.
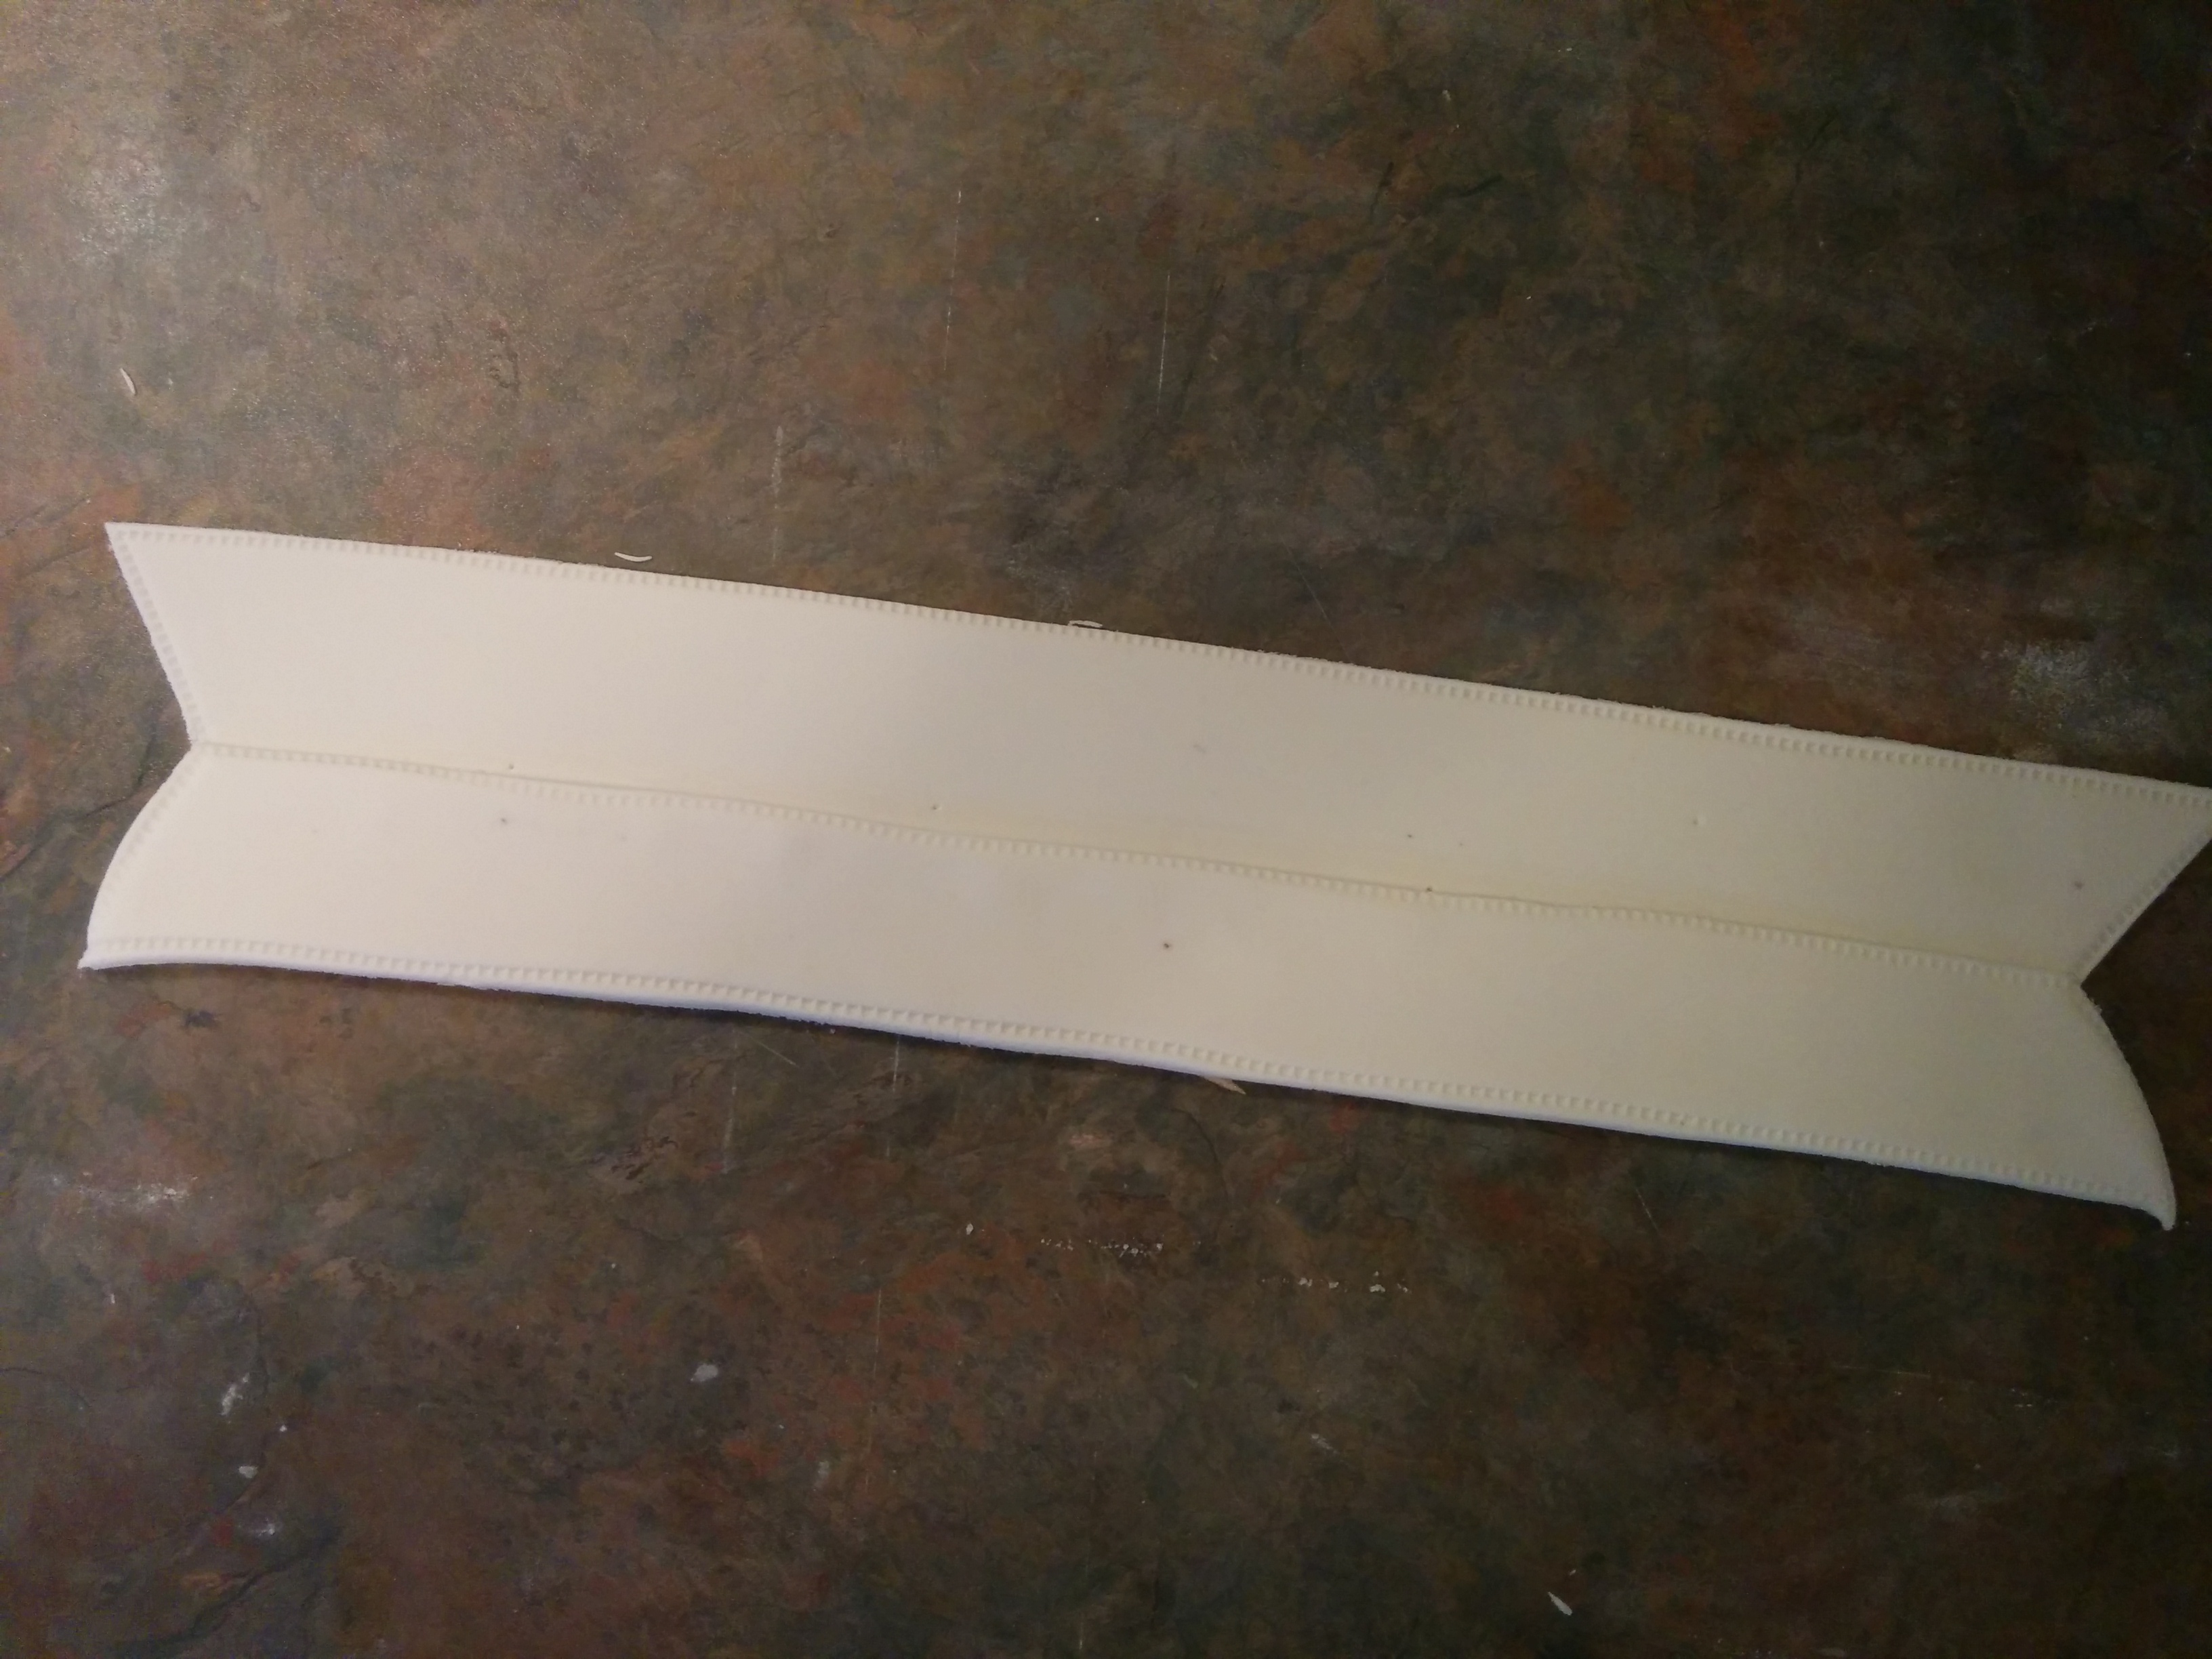
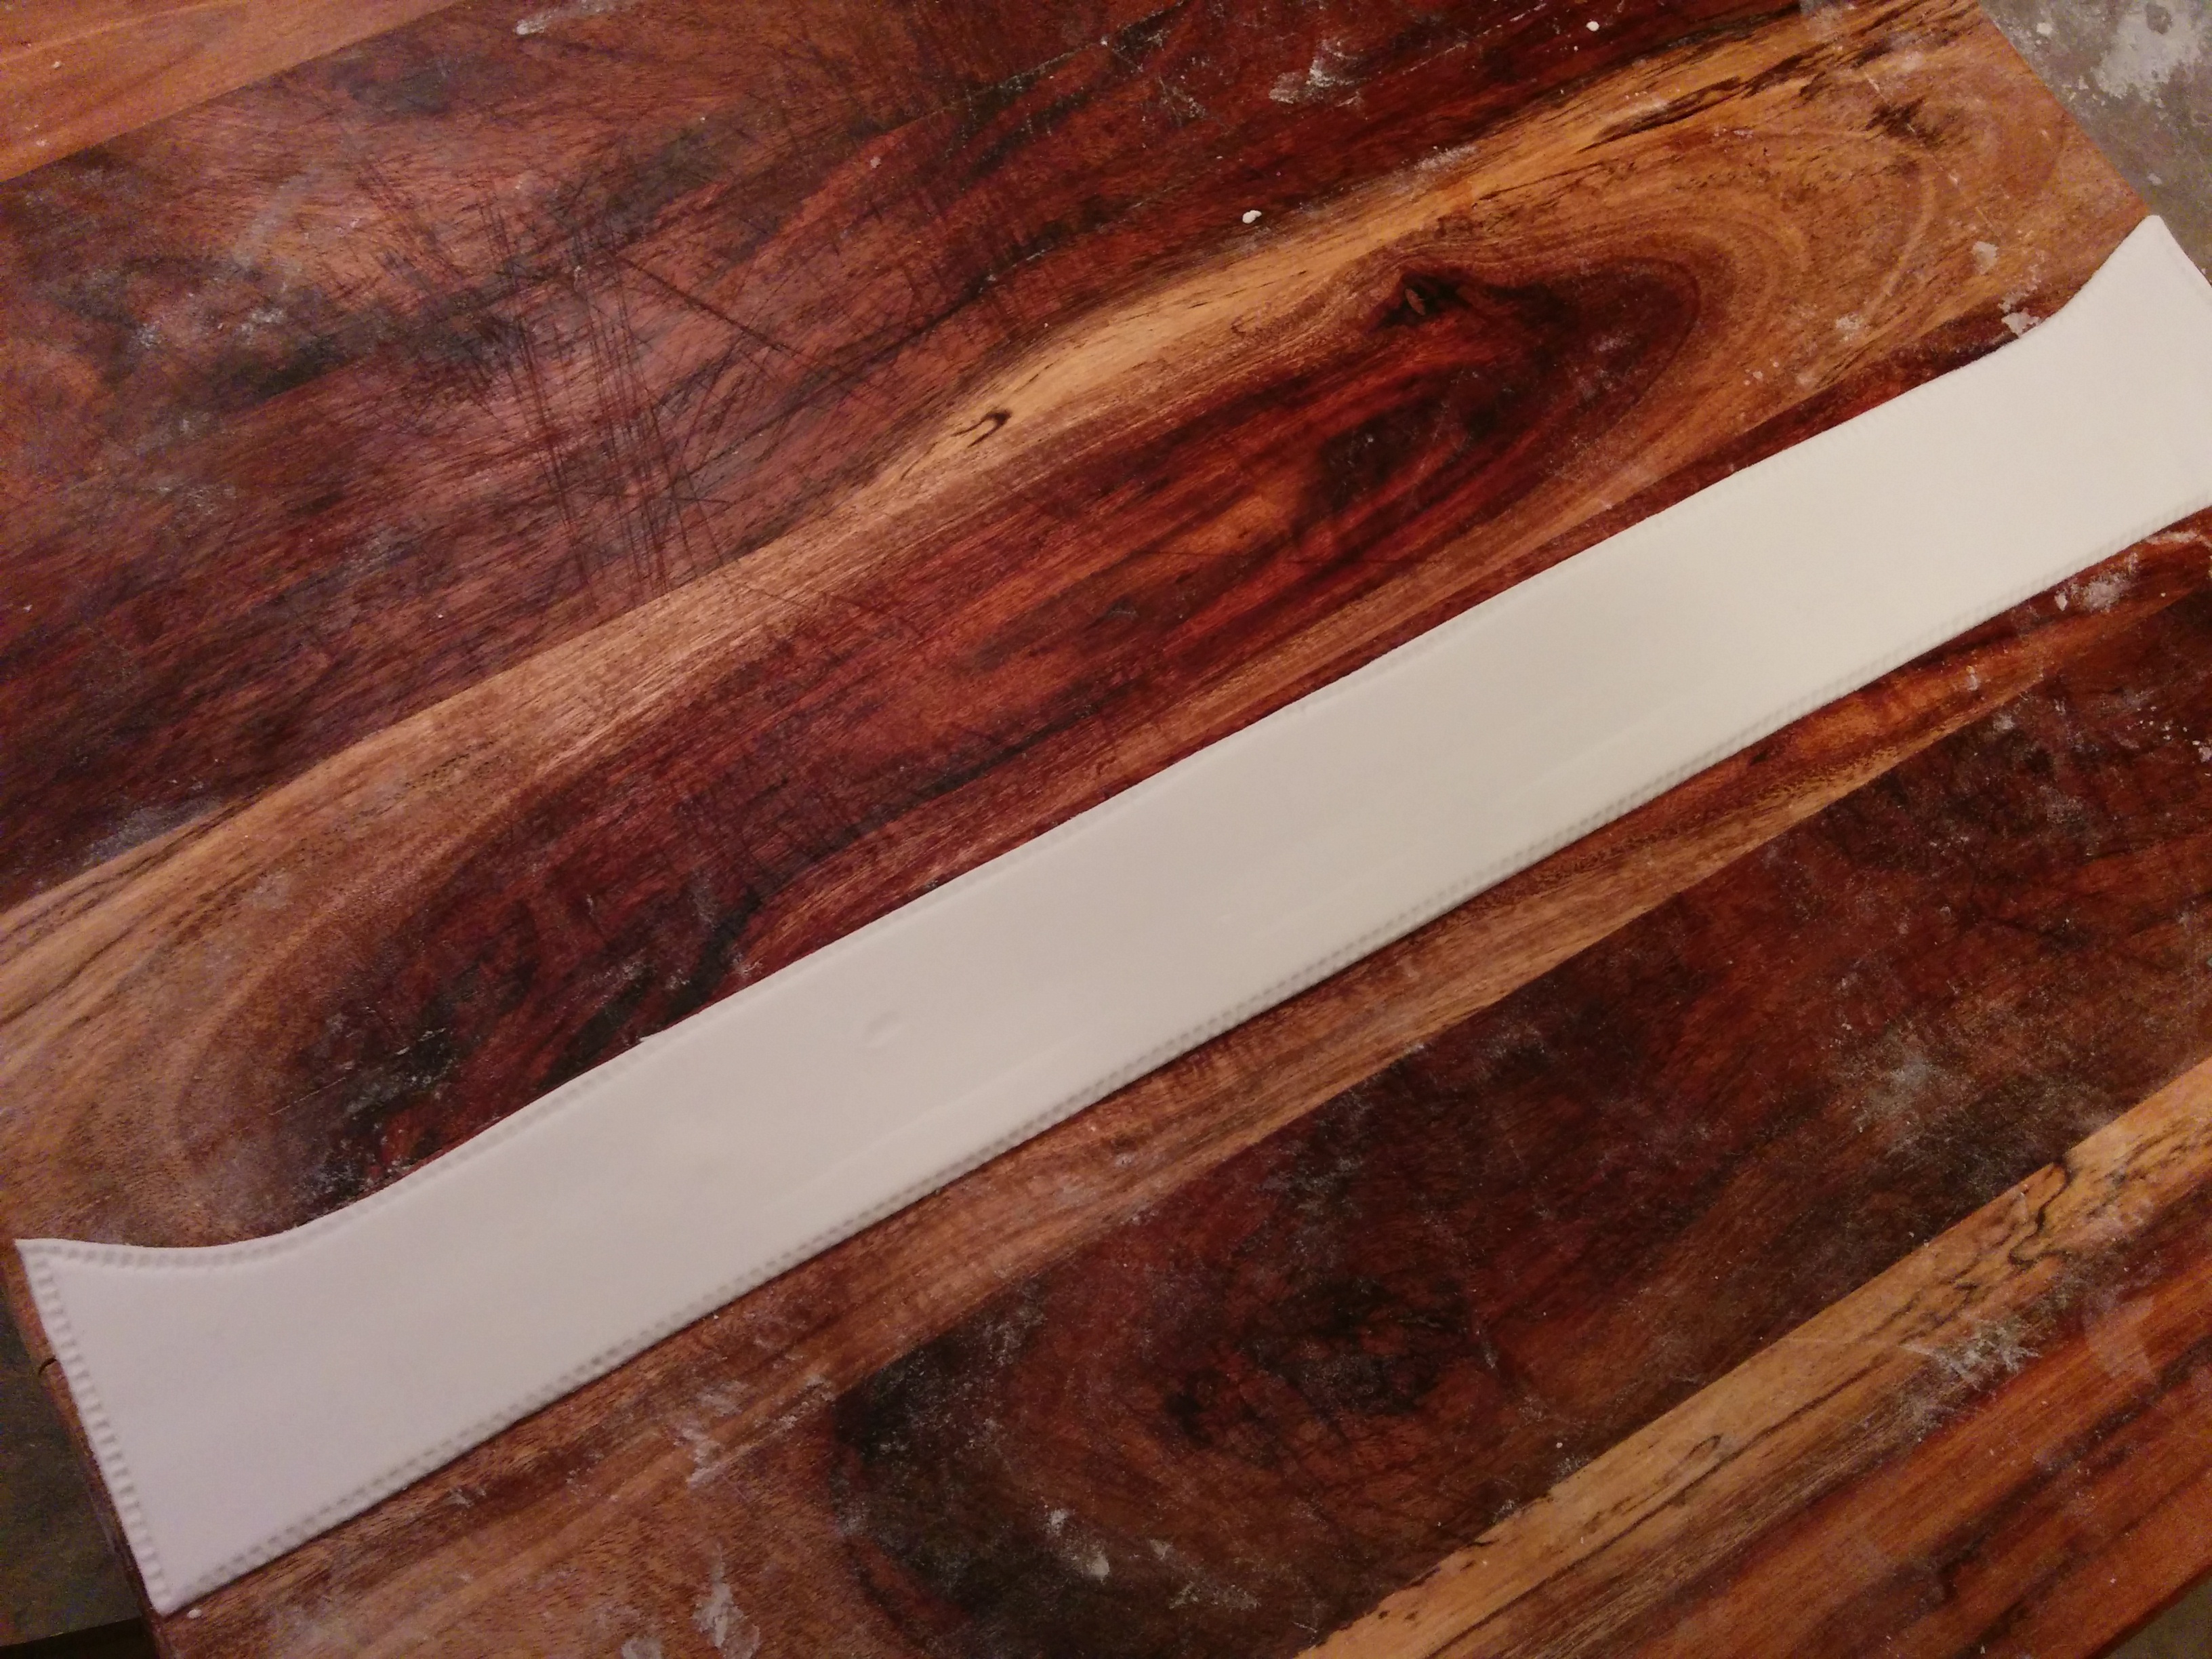
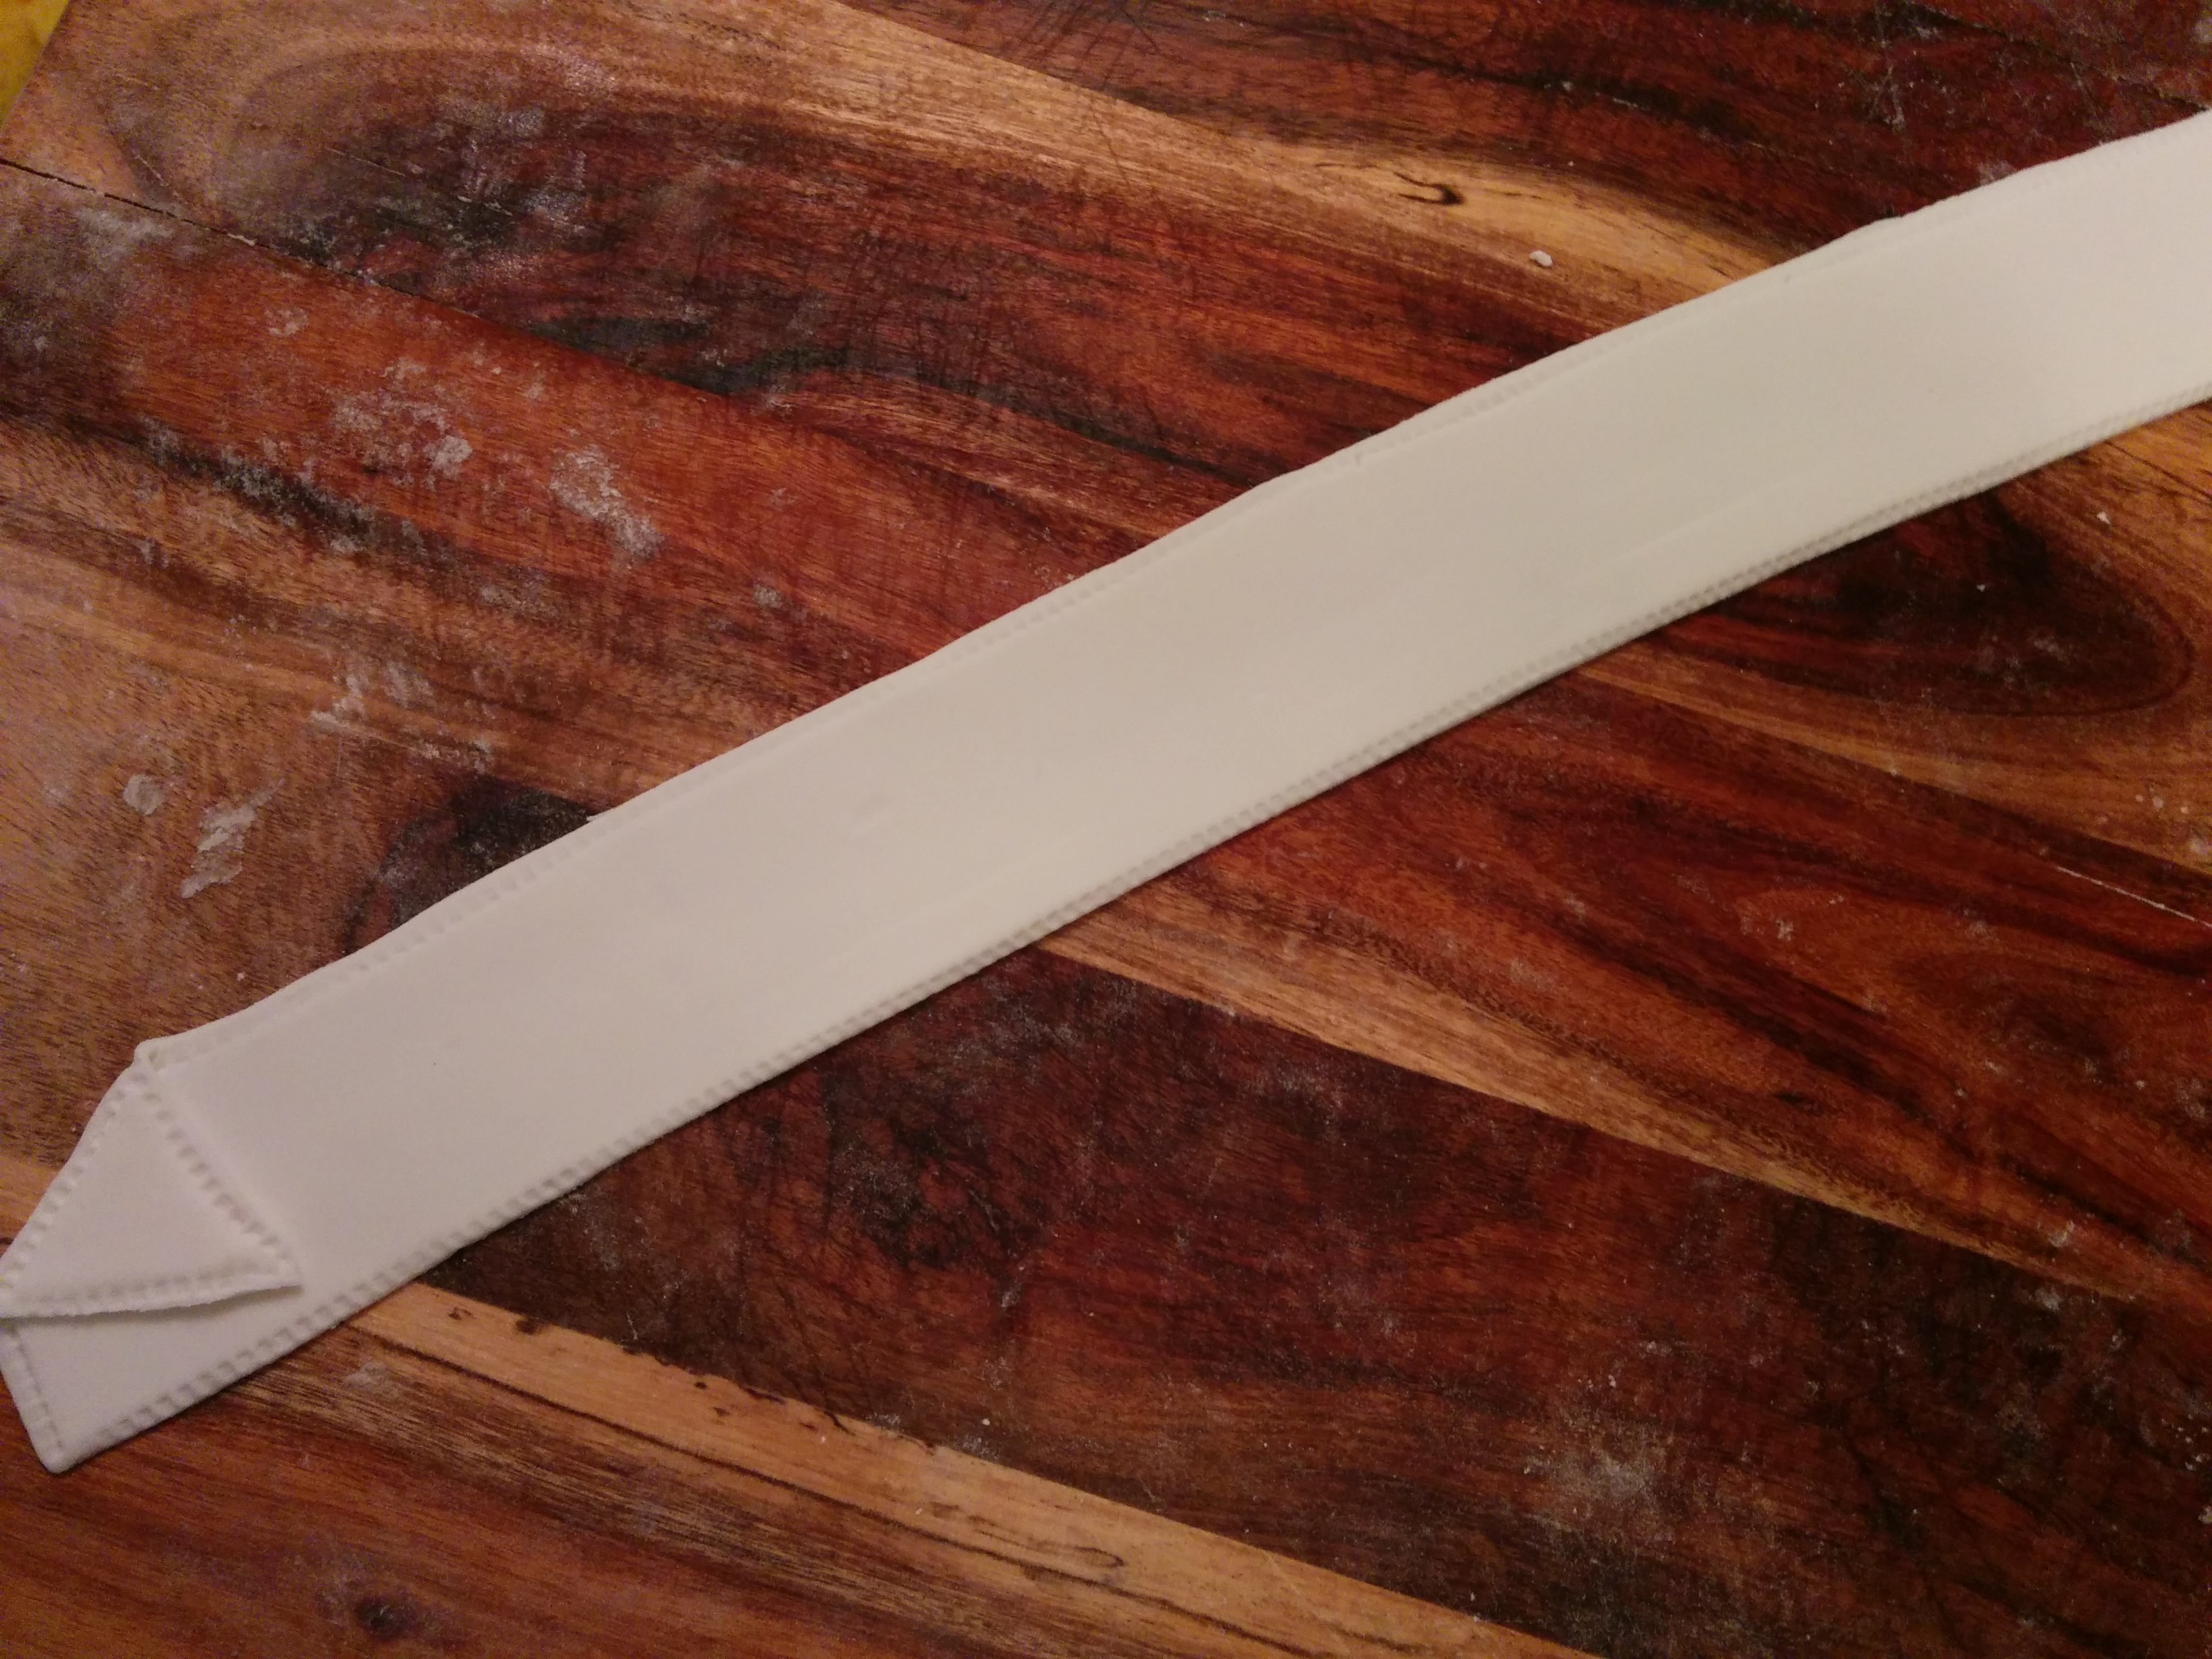
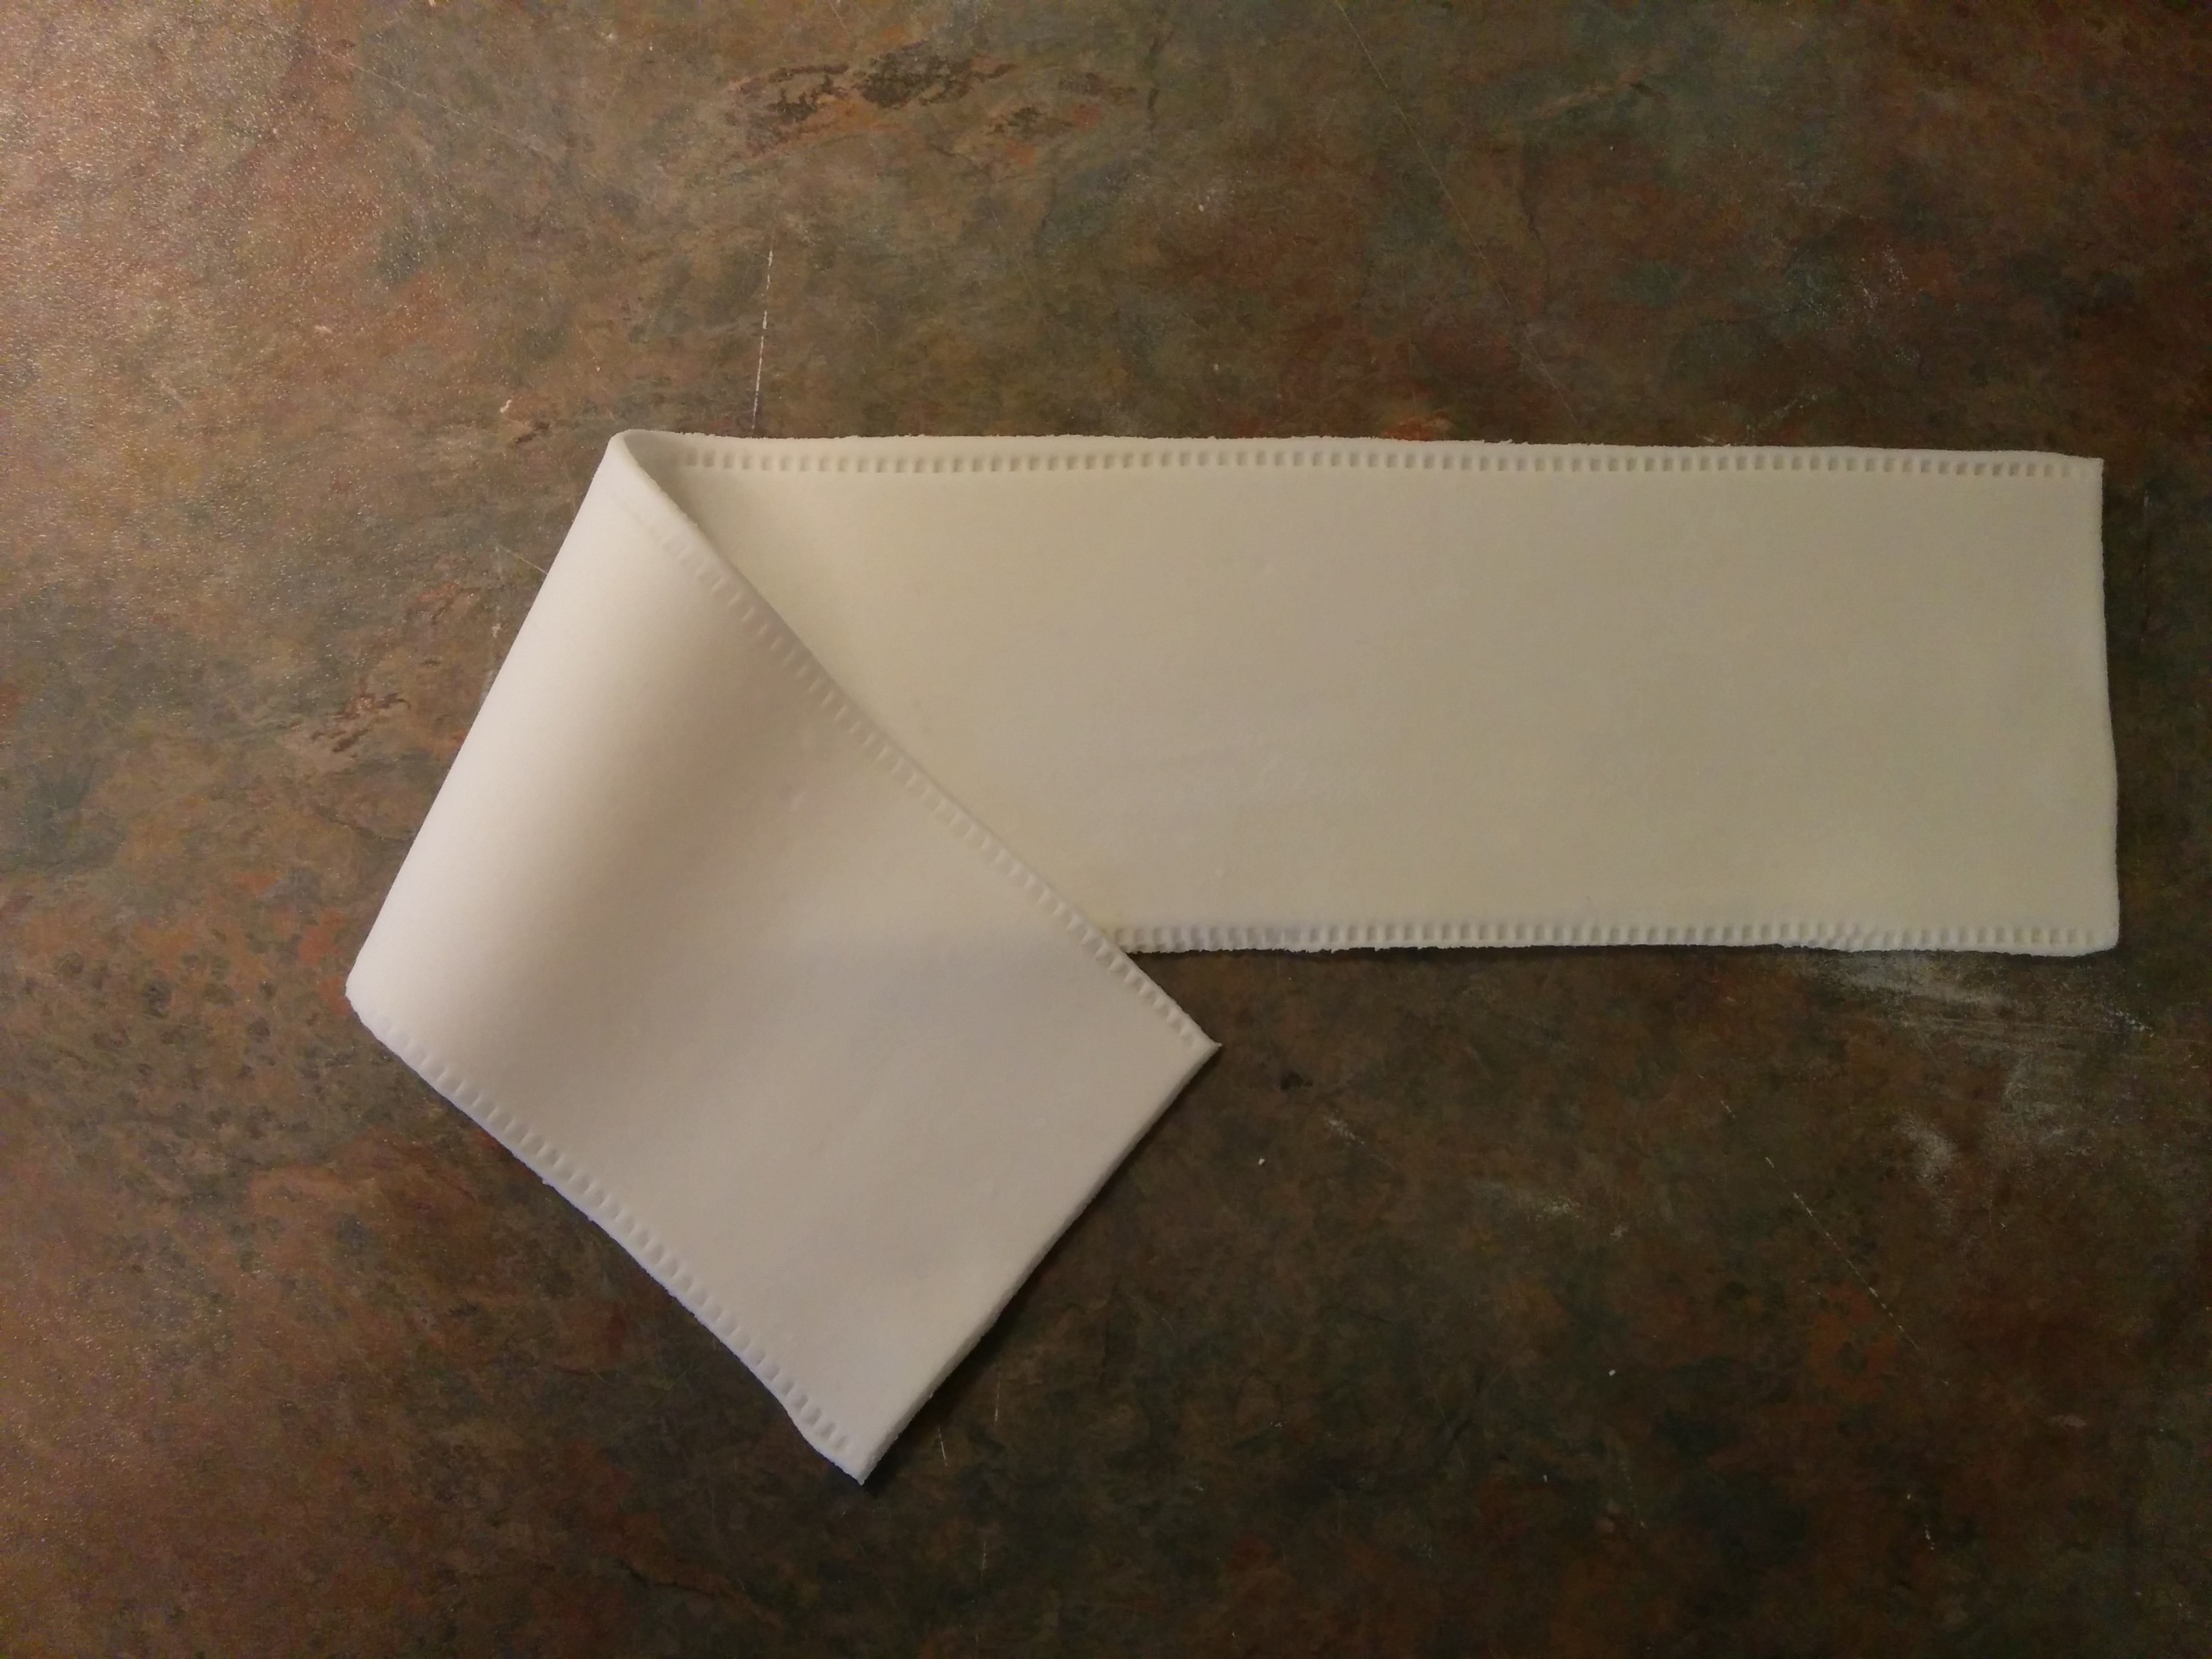
(7) Make a “V” on both ends of the collar leaf and stitch. Attach the collar base to the bottom half of the leaf and shape the ends of the base to take on the ” V” shape of the collar. Fold the collar at the point where the base is attached. Note that you have to work fast so the fondant does not dry out. If the fondant gets dry, it would crack/tear where you bend it.
(8) You might choose to make an easier collar like those on tuxedo shirts. The pictures below demonstrate how this is done.
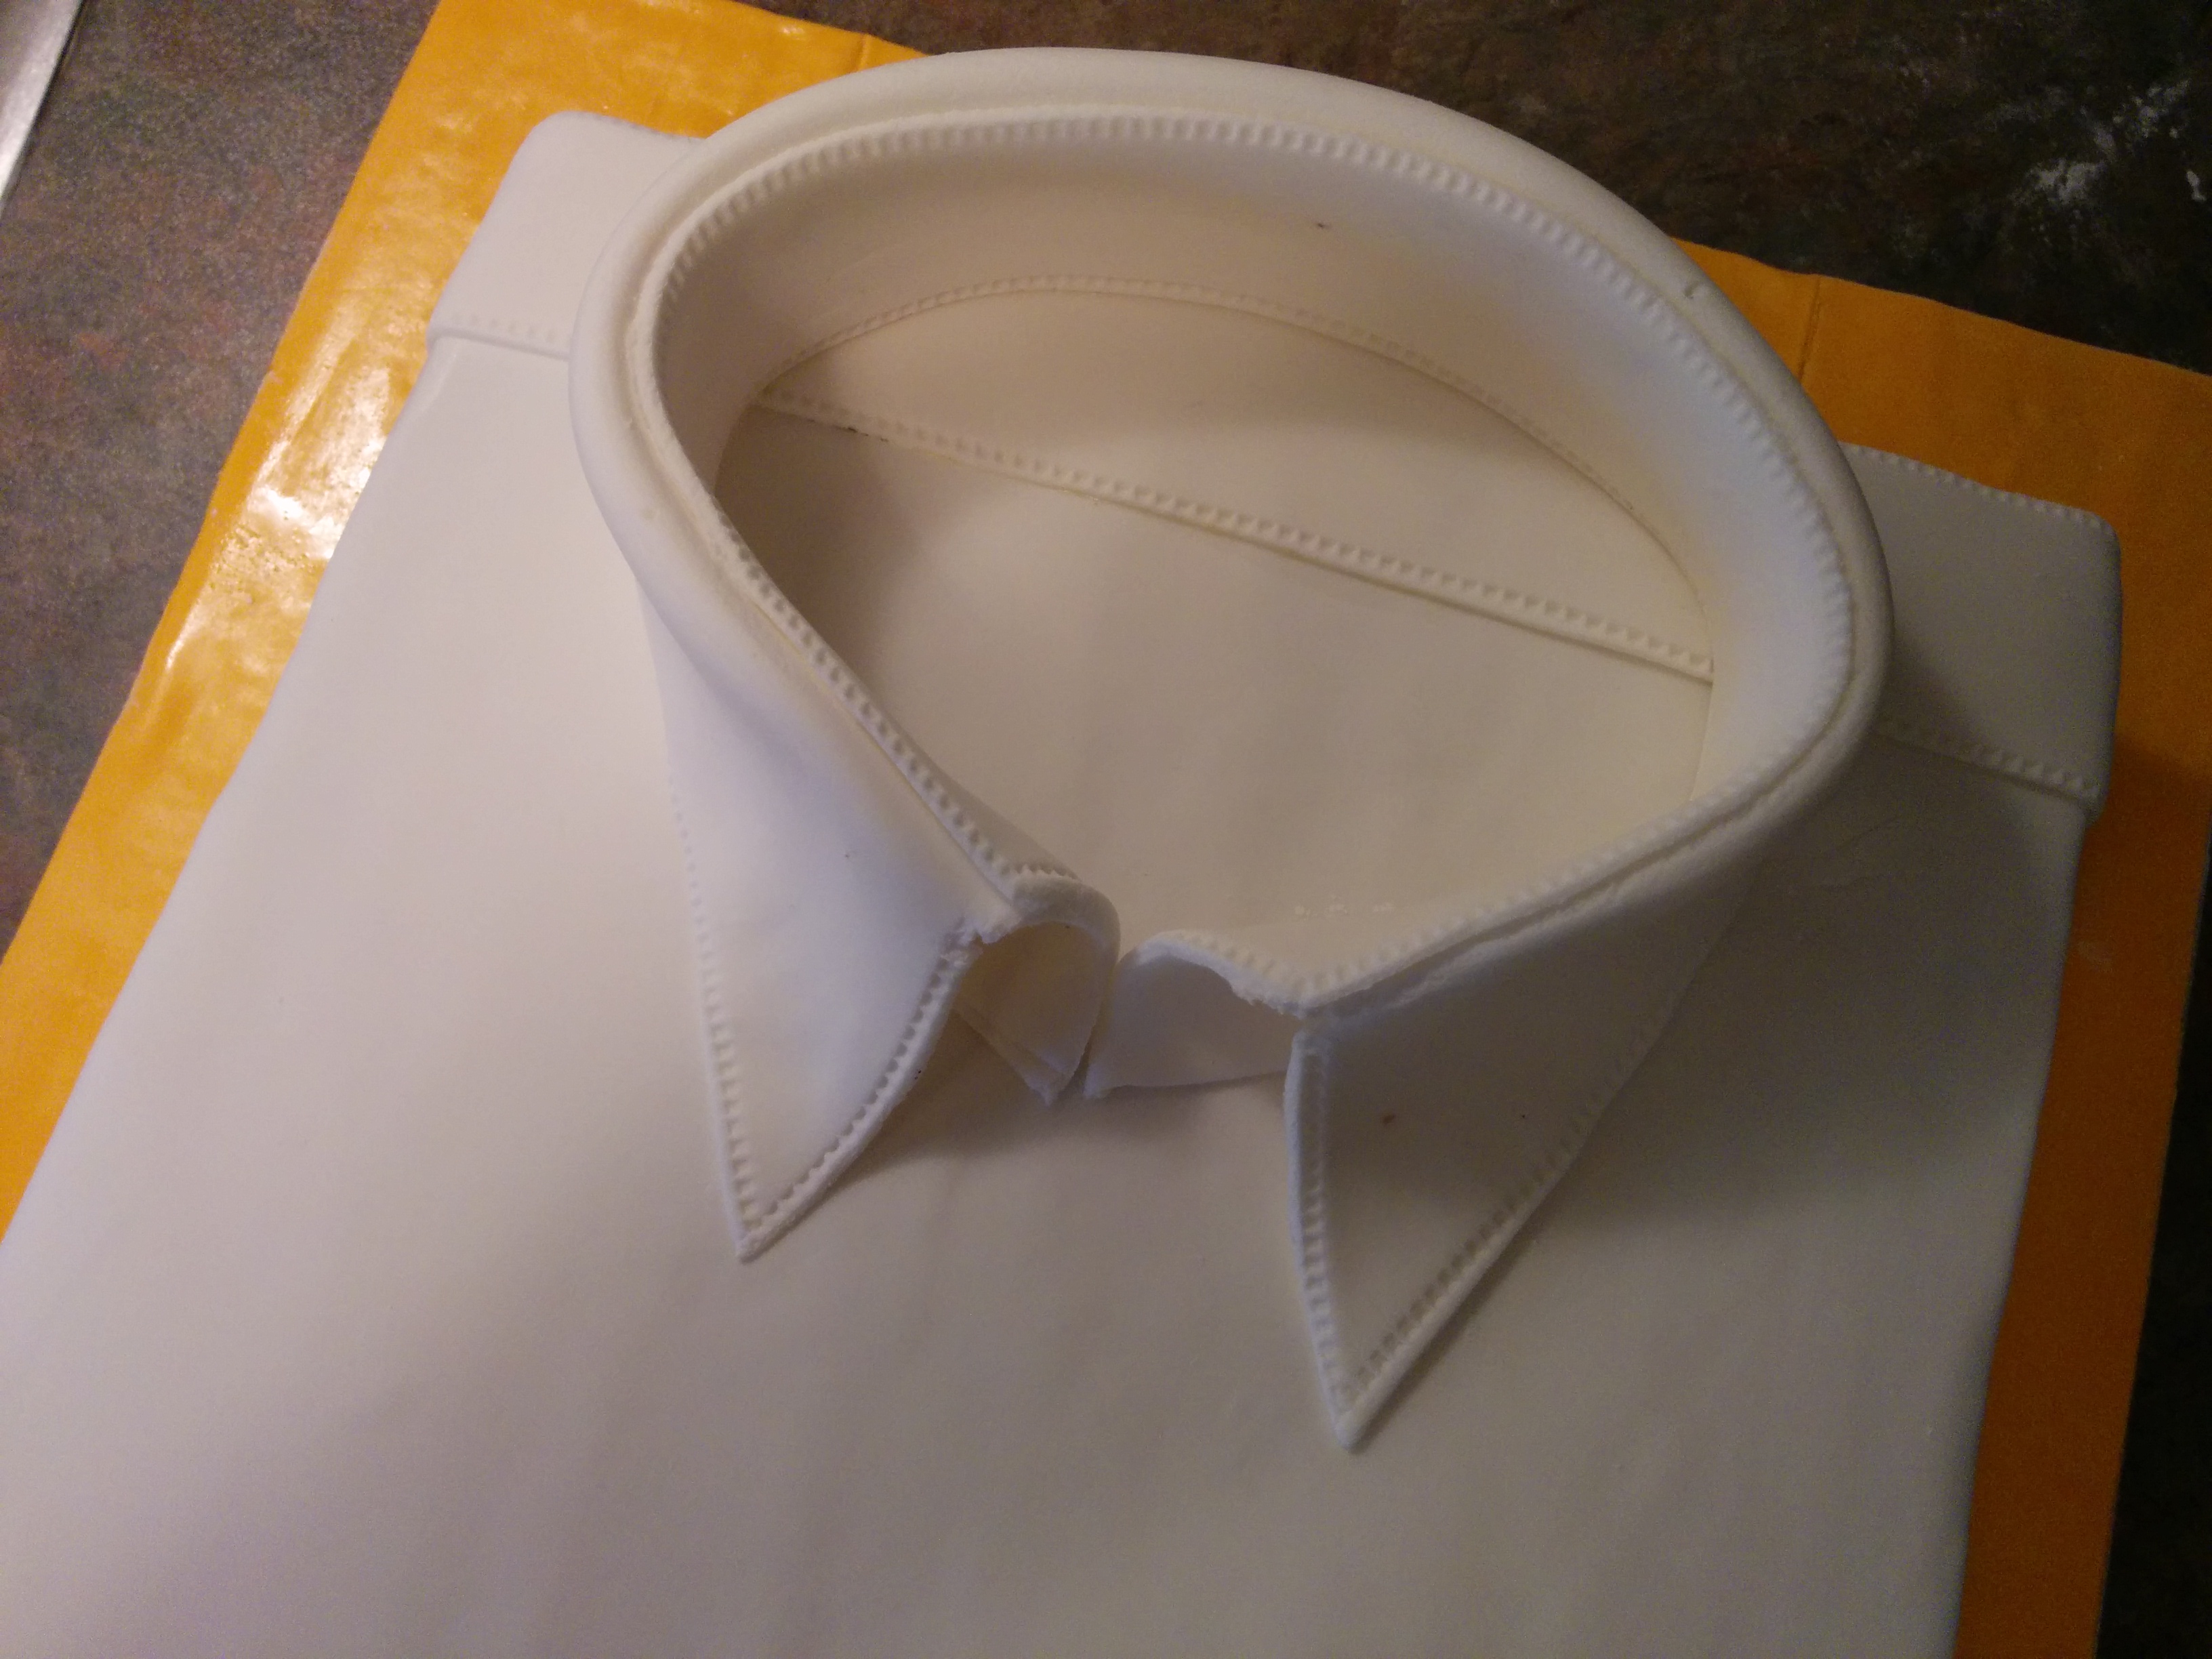
(9) Place collar on shirt on top of yoke. You might or might not need some water to stick collar to shirt. Depending on how firm your fondant is, you might need some tools (paper towels works well) to support the collar pending when it dries. Try to make sure the collar is shaped in a circular manner. You might need to use a round object as a guide when placing the collar on the shirt.
(10) Next, make the placket which will house the buttons. Roll out fondant and cut into a 1 x 14 inch strip. Stitch the edges and stick to front of shirt starting from the front of the collar all the way to the end of the shirt. Cut off any excess fondant.

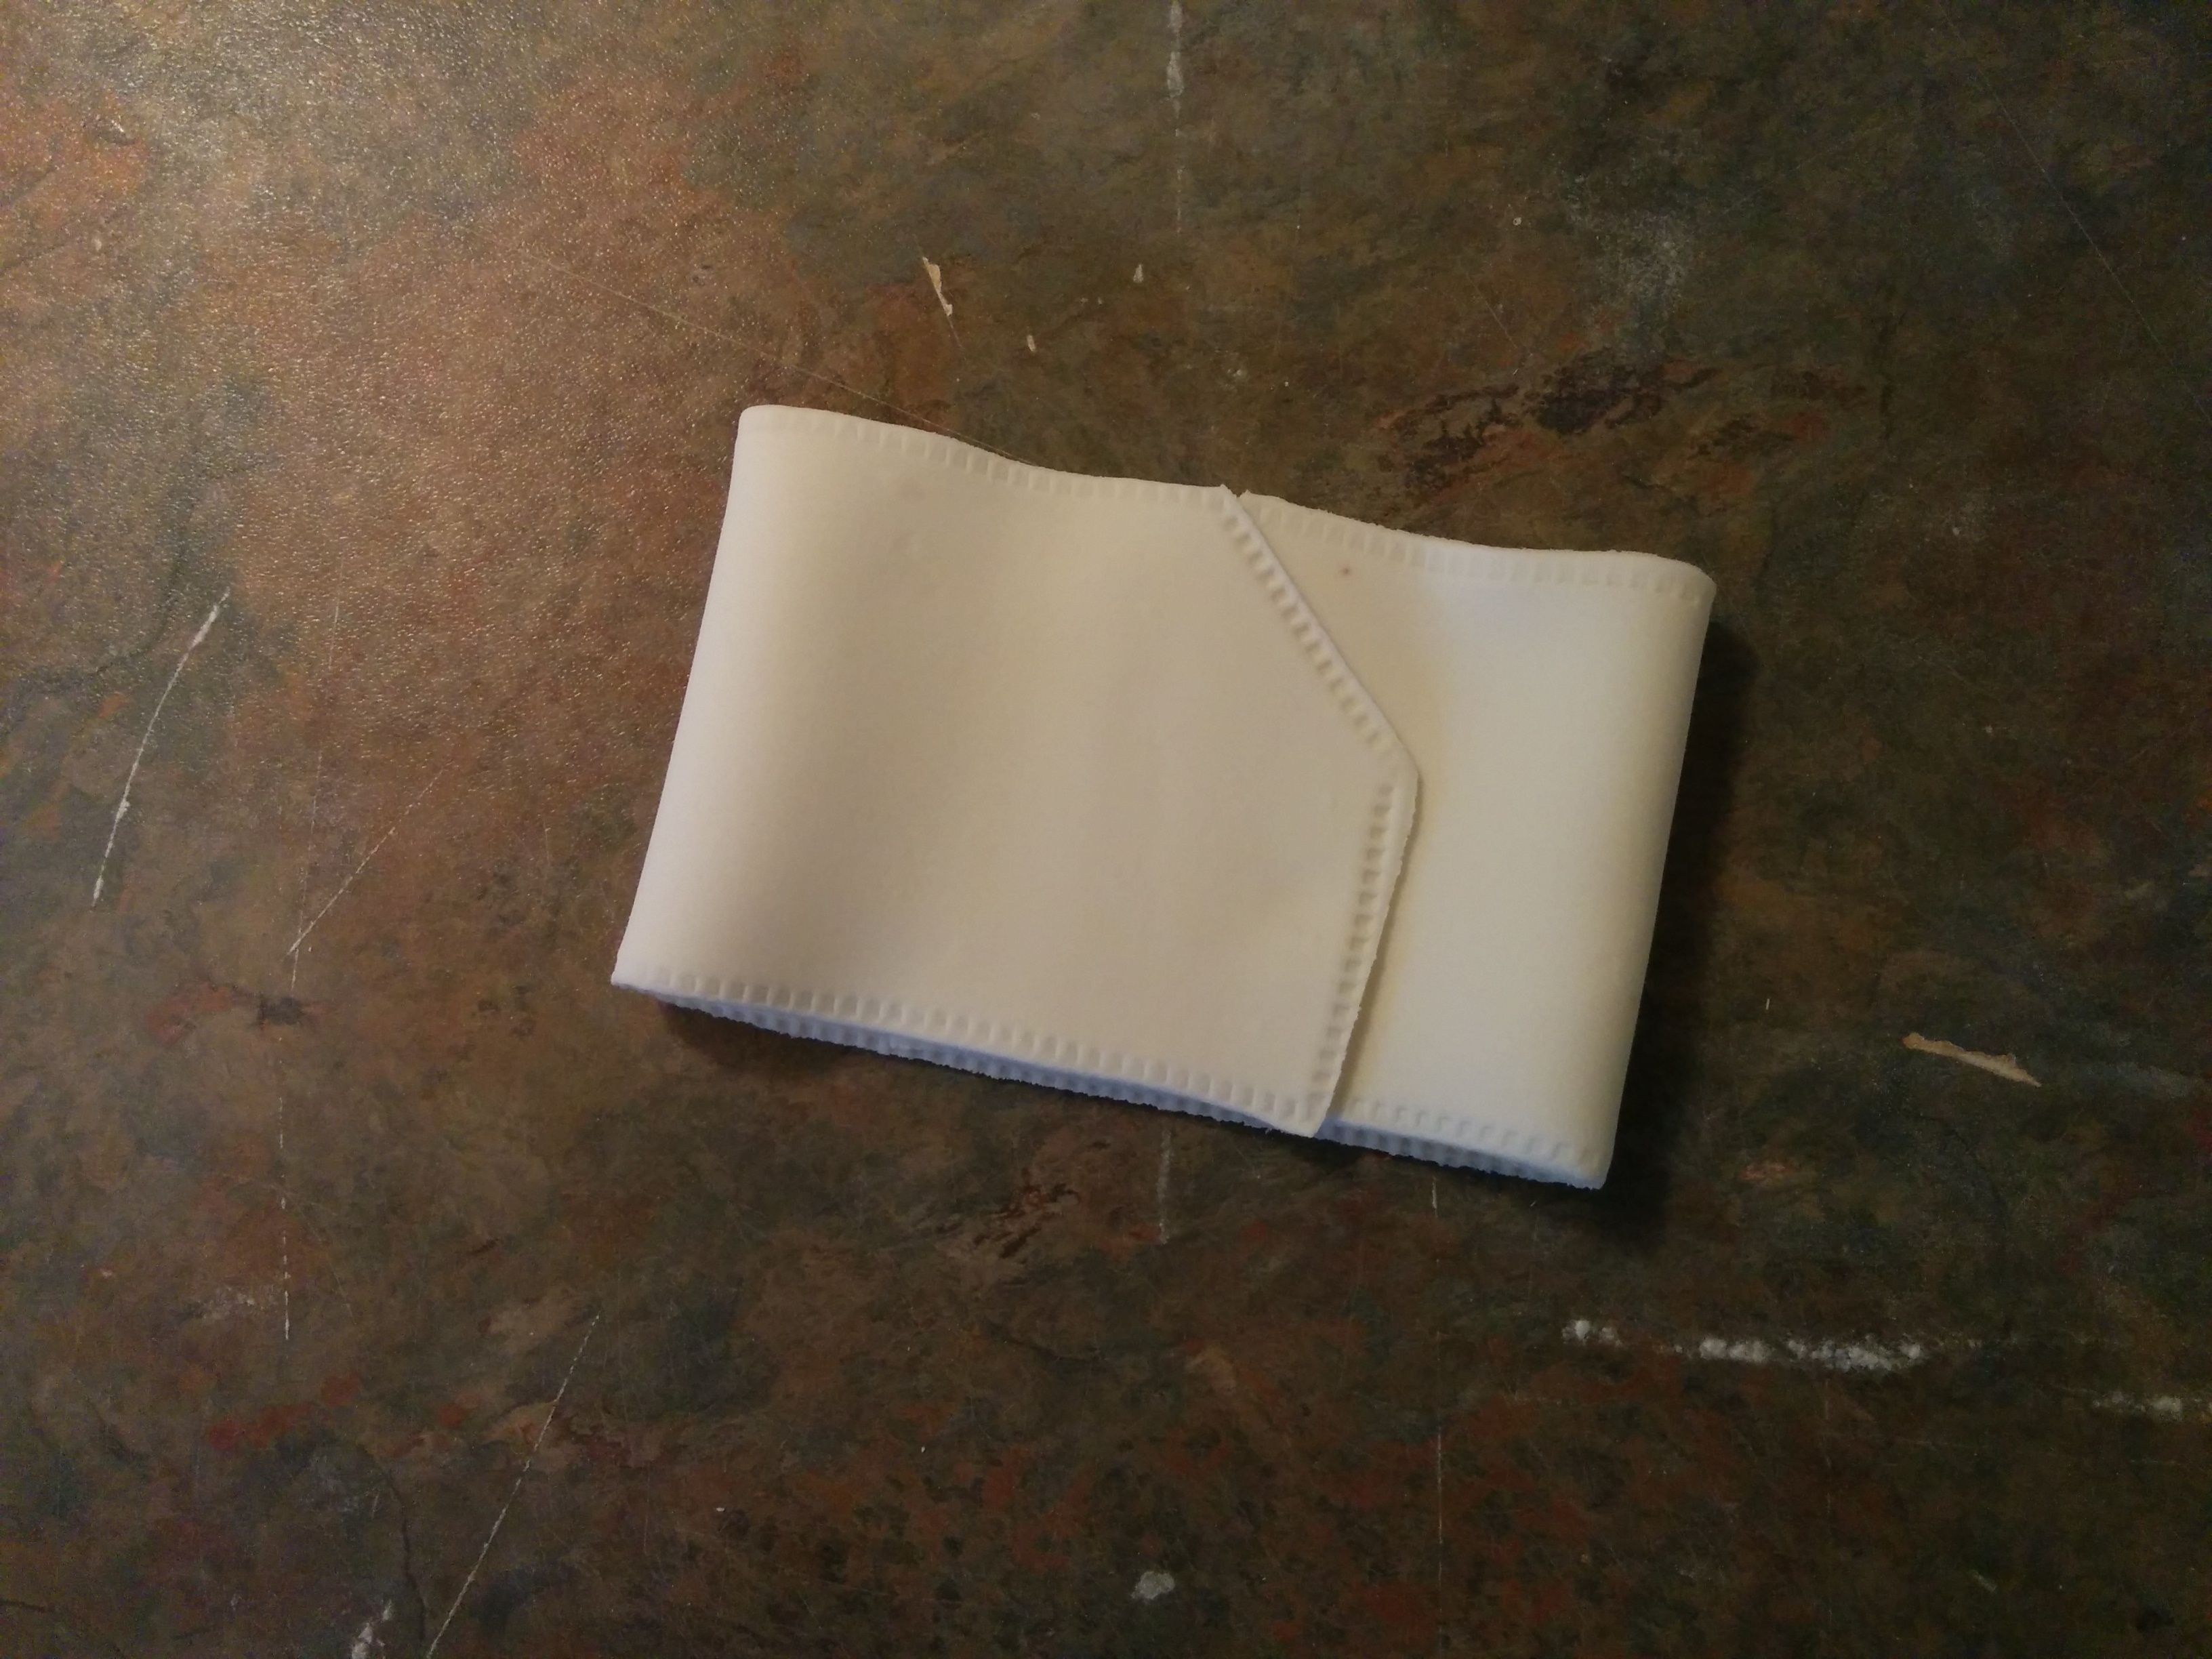
(11) Next make a sleeve which consists of a cuff and the tail of the sleeve. To make the cuff, roll out fondant into a 2 x 10 inch strip. Stitch both sides of the cuff as it would be folded. Cut out triangles from the 2 top edges of the cuffs and stitch.
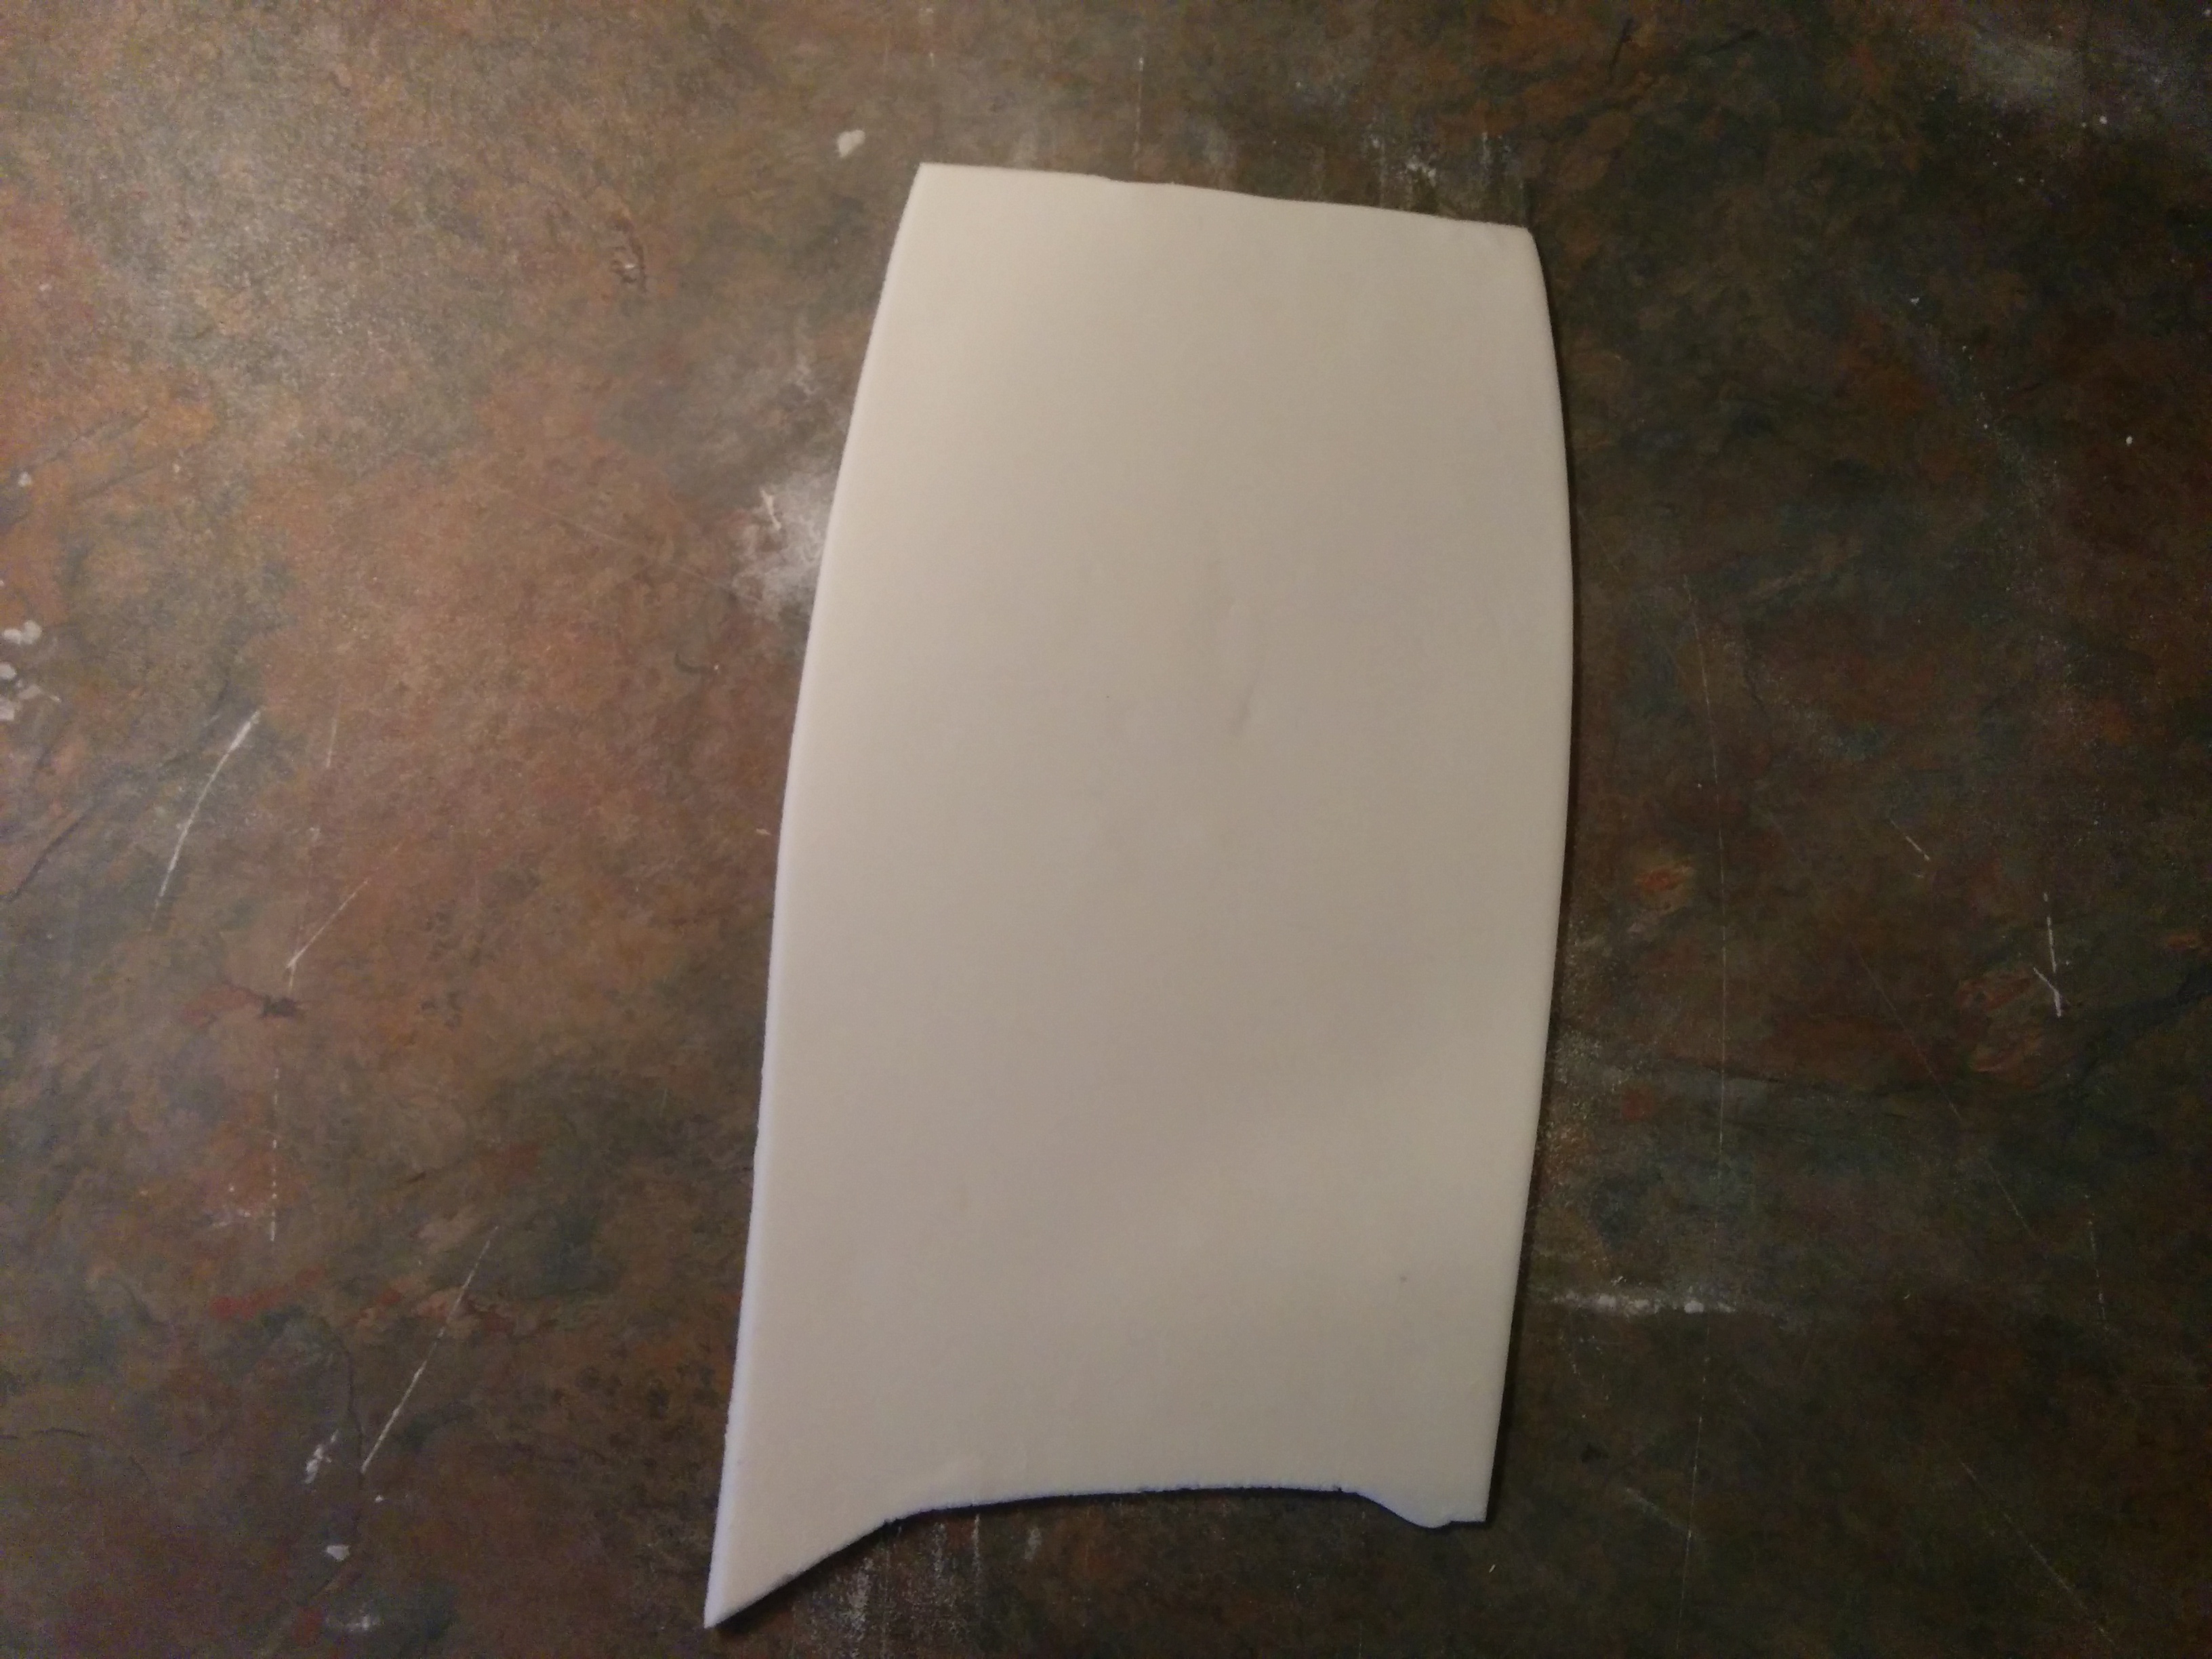
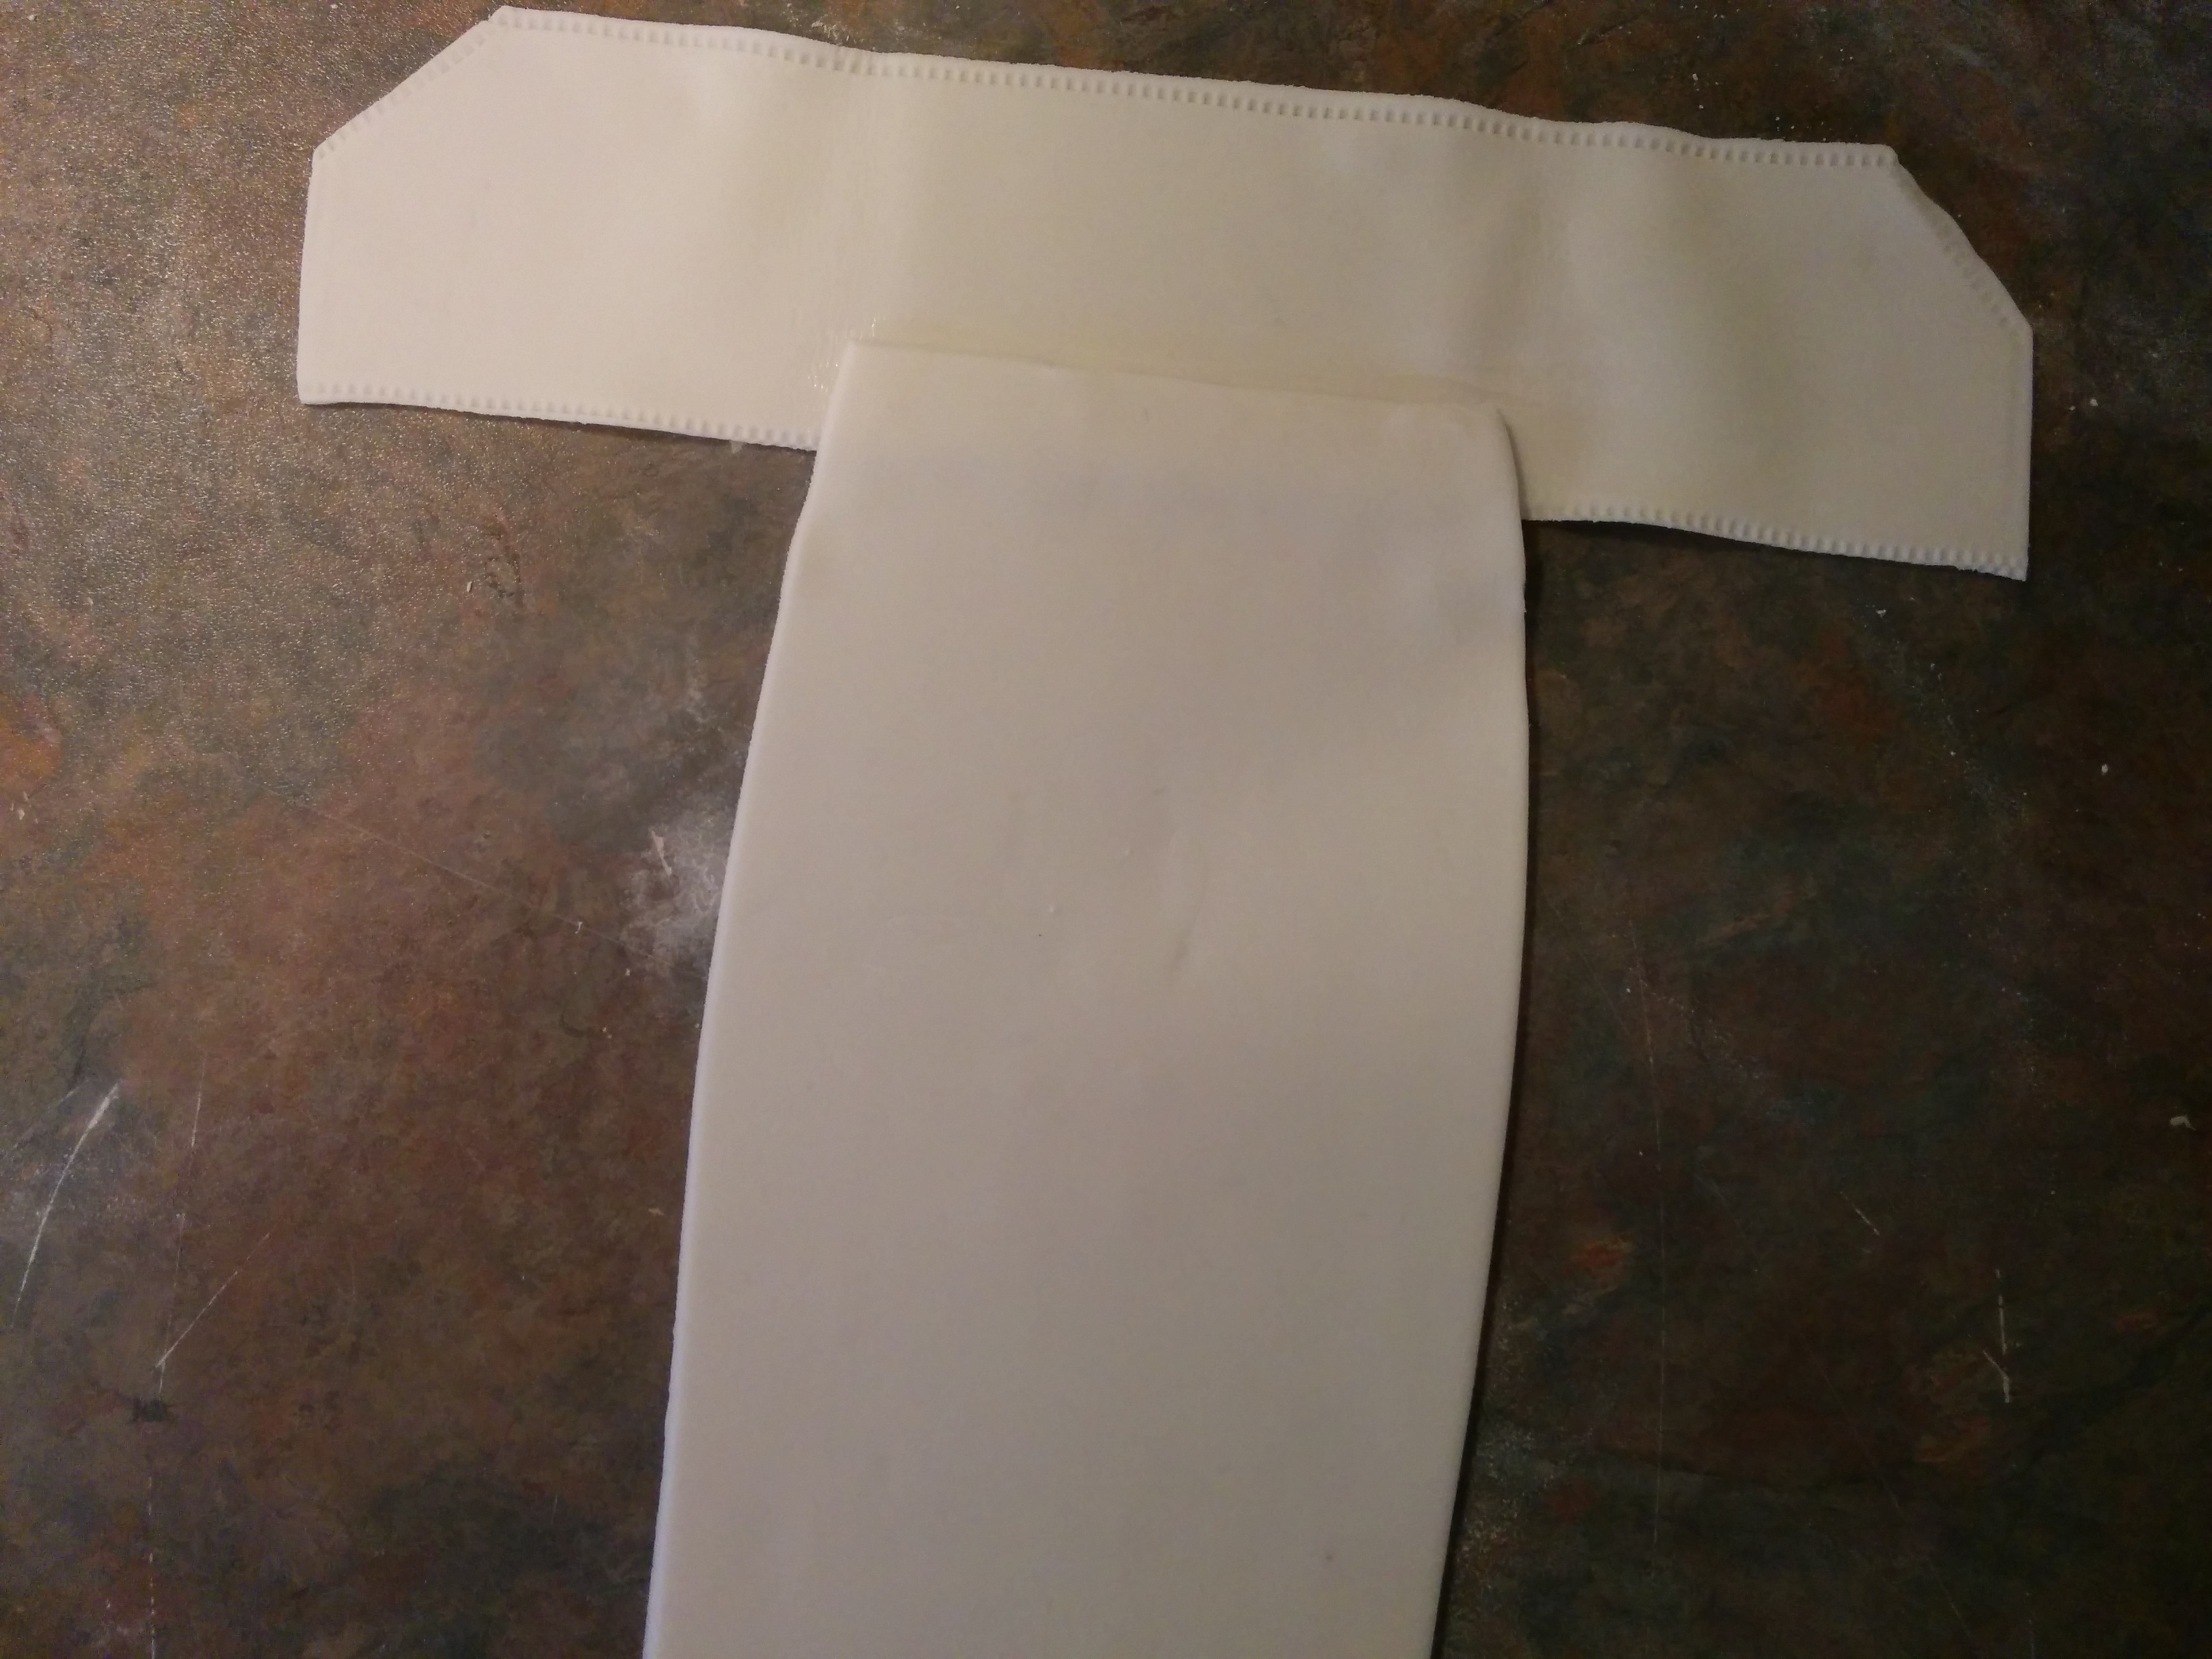
(12) To make the rest of the sleeve, roll out fondant into a 4 by 8 inch rectangle. You can choose to make the sleeve curvy as opposed to a regular triangle. Stick sleeve to inside of cuff and wrap cuff around it. You might need to reduce the length of the cuff if you find that it is too long. Both ends of the cuffs are supposed to overlap. Stick sleeve to the right hand side of the shirt, slanting downwards.
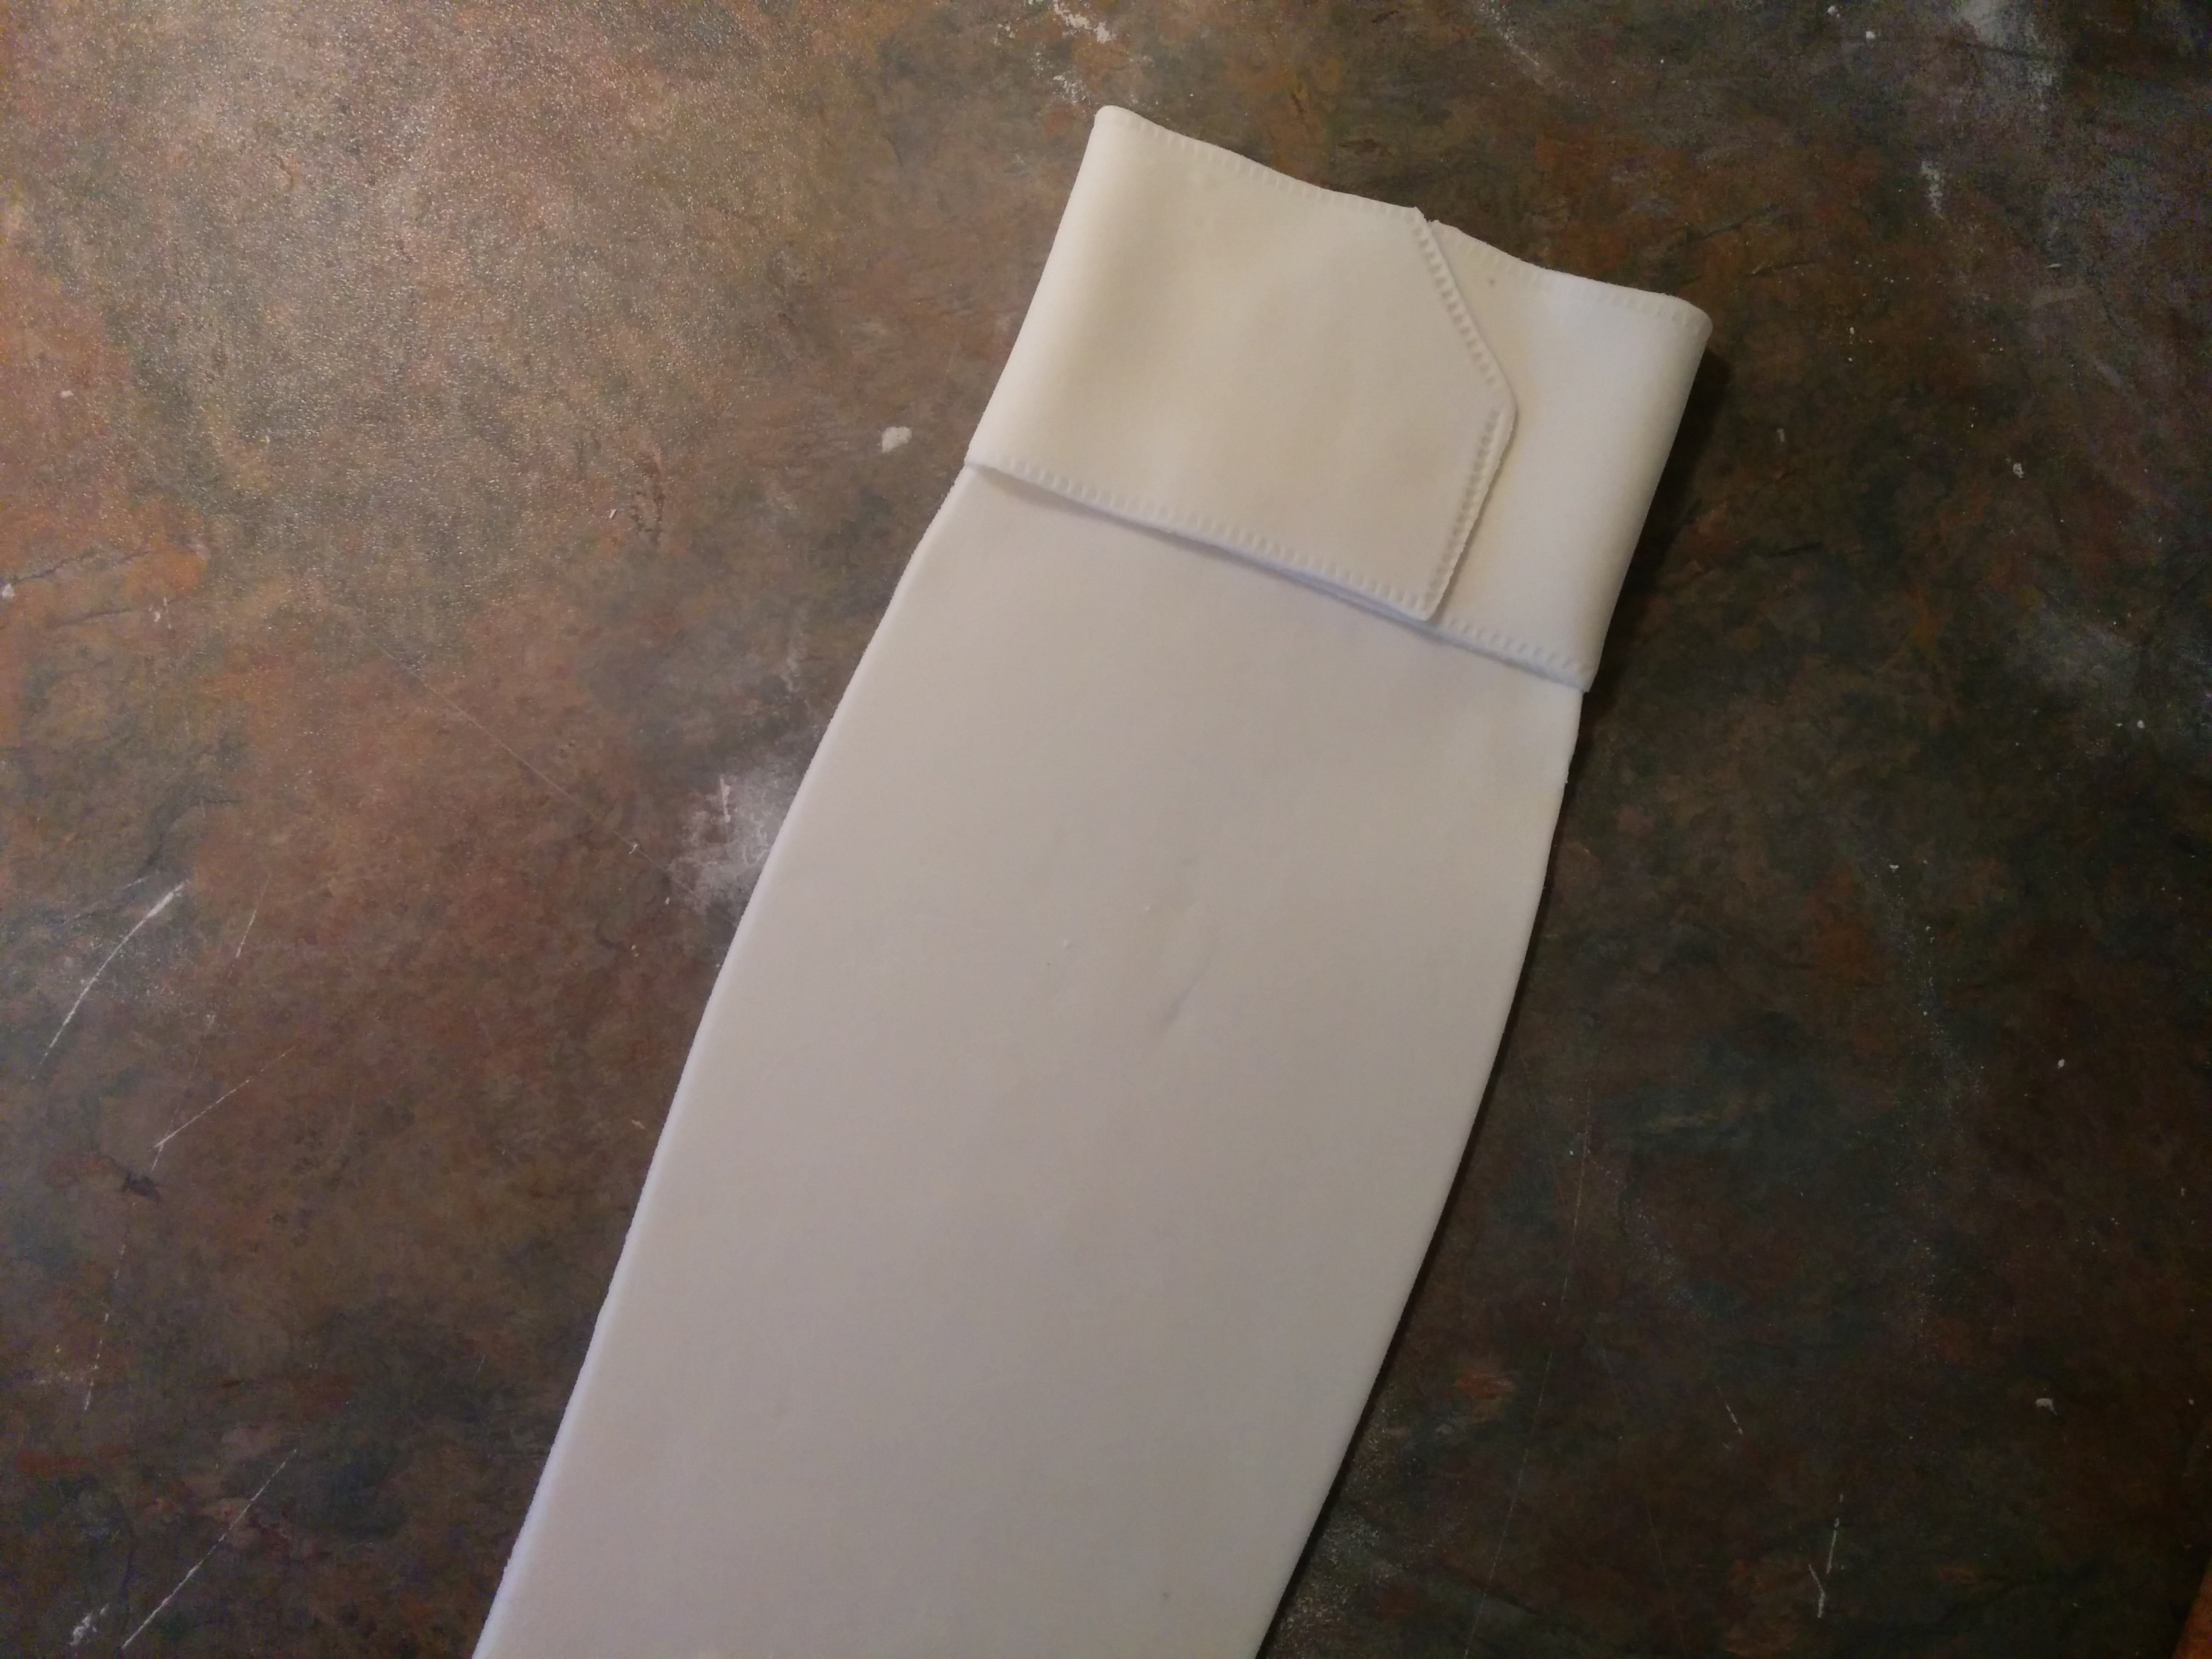
(13) You might also wish to simplify the sleeve and make only the cuffs.
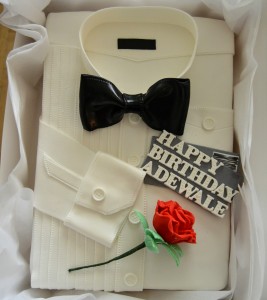
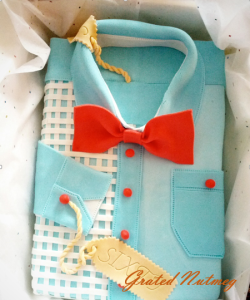
(14) Now that the shirt has been made, it is time to add the tie, buttons and other items. You might also wish to make a chest pocket on the left hand side of the shirt. Simply roll out fondant, cut into a square, stitch edges and stick to the shirt. You might wish to cut out triangles at the base tips of the square for a more fancy pocket.
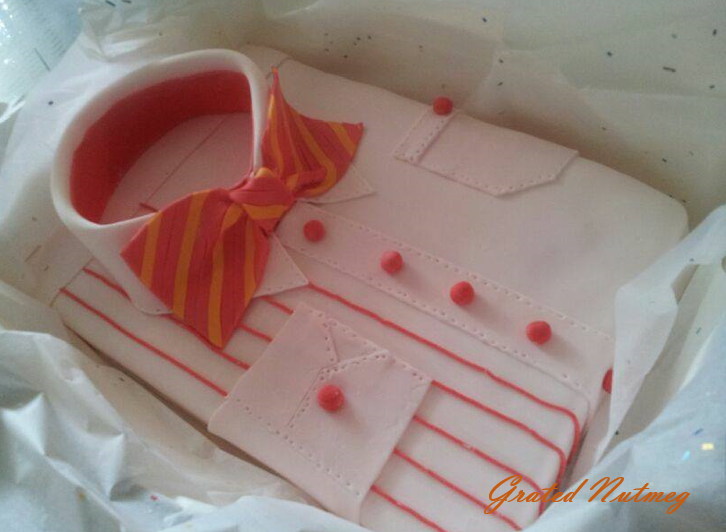
(15) Stick tie, buttons and tags to shirt using a little water or vodka.
(16) For tuxedo shirts, use black sugar pearls for the buttons. If you cannot find these, roll small black fondant into smooth balls and place on shirt. You will also notice that in the shirt below, the bow tie extends all the way around the collar.

MORE SHIRT CAKES:

Terry Adido is passionate about showing people how easy it is to recreate restaurant quality meals in the comfort of their kitchens. With a style of cooking he refers to as Afro-European Fusion, his meals are influenced greatly by French and Italian Cuisine with a West African twist. If you love good food, you are in for the ride of your life.
Very detailed explanation! Thank you Terry. You make it look so easy 🙂 i am determined to make the black and white one for hubby’s birthday #lawyertinz
I got lost between step 5and 6. The leaf of the collar is twice the base in step 5, what did you do to make it the same size in step 6? Was it folded?
I have a request: if you get a chance, can you please do a tutorial (and tips for success) for regular fondant (the type that makes use of glycerine,cmc etc) as it is more widely accessible by Nigerians.
Thank you once again
Thanks. Yes it was folded. I will work on regular fondant recipe.
this is the very detailed. keep up the good work Terry. i would like a fondant and rose flower making tutorial too.
Thanks. Maybe someday. Fingers crossed.
Nice tutorial! Will definitely try it. Thanks
You should 🙂
Pls I am a beginner, I need the ingridents for fondant and how to mix them to make it easier for me in giving this shirt cake a trial. Thanks
Hi. I do not have a traditional fondant recipe.
OMG that is a whole days job but u made it easy will make for my husband who ever he is !that will be my first gift to him as a couple
Hehehe, Nice. Do let me know when you do.
Thank you so much, you are d best
Thanks
Wow.Amazing…It comes so easy with you Mr.Terry….How do I save this for future use when I’ll love to try this shirt cake?? Do u have a blog or website where I can follow u??. Thanks for Sharing ur great skills needed ideas.God bless.
Thanks. This is my website. It will always be here for you. You can receive alarts on new post by clicking “Notify me of new posts by email” at the bottom of this page.
waoh.this tutorial came at the perfect time.I’ve been studying your previous shirt cakes.My 5yr old son insists he wants this.Thanks a lot.You’ve always been so helpful.
You are welcome Buki.
Hmmmm ur hands r so blessed. well-grated Nutmeg tnks 4 d enlightenment…hope 2 work wit u somday..pls we will appreciate if u visit nigeria n use d opportunity 2 organise a fondant tutorial 4 us,so we cud still see u in person,u deserve 2b known.. m I asking 4 d impossible? Lol
lol. All things are possible.
Nice one Terry. God bless for being generous with ur ideas. This will help a lot. Thanks
Thanks.
weldone Terry you are the best,the marshmellow fondant seem so easy,you ve been of great help.thanks so much.
You are welcome Hauwa
this is wow… A bit confused but will give it a trial
OK. Good luck
Good job Terry
Thanks Omo
Nice job
Thanks
Detailed tutorial Terry. Will definitely try it n post it for u to comment
Thanks Fatima. Looking forward to it.
Thanks for the ideas.
You are welcome faith.
I love dis. Thanks Terry.
You are welcome Toyin.
Thank you so much terry.
your explanation was very clear and straight to the point.
You are indeed a blessing.
THANKS
Thanks grace.
well explain thanks but bow tie
You are welcome. I didn’t explain the tie because I feel its pretty straight forward.
i am so happy to find a website so detailed i was wondering when do we give something out for free,God bless you. you did a wonderful work on beads please can you do one on tradtional wedding cap. thanks.
Thanks Mary. Maybe someday on the cap.
You are God sent. For free tutorial, God will reward you
Thanks Lawrita
I really lov dis @ terry, may God continue 2 mak u more creative. Kep it up
Thanks Comfort.
God bless u real gud.You ve really done well with all these free tutorials.You are a life saver.
You are welcome Tosin.
Great tutorial, keep it up.
Thanks Chioma.
Am glad I found this today. On the 1st October will be baking a shirt cake from this site,thank you so much Terry. Hope I will post for you to see.
Thank you so much
All the best with the cake. Please share it with me on Facebook when you are done. Thanks.
Hello, please can you explain how you make the tag to me thanks.
Dis is great. Txs for dis will bake dis for my hubby’s birthday 2mao. God bless d work of ur hands
Thanks. All the best with your cake.
This is a very detailed and comprehensive lecture. My client wants your shirt replicated for her hubby.
All the best with your recreation. It’s really quite easy.
Great explanation!
Thanks Minky.
Hi Terry! These shirts are amazing! The detail is on point! Did you use one layer or two for this cake? Thanks!
Thanks. They are all 2 layers (sandwiched).
You are the best. Thanks
You are welcome.
so i used your tutorial today to pull off a shirt cake… it didn’t come out as neat as yours but i did well for a first timer who absolutely hates fondant..nevertheless i was proud of myself. Thank you
I saw your picture. You did great.
Thank You Terry. Your cakes and tutorials are beautiful. Two weeks ago I made a beautiful 2tier cake for my daughter’s birthday and I used a purple fondant which I made with marshmallow. Such a beautiful taste combined with the buttercream icing and 2 layers of raspberry filling. I will never use another kind but that; so easy to work with. I made embroidery flowers out of Royal Icing and it was gorgeous. It was my first attempt at fondant and Royal Icing and it was beautiful and delicious. Wowed all my guests. I was even asked if I could make a wedding cake from 2 of my guests! I laughed non stop, but they were serious!
I love your simple explanations and I am making the tuxedo for my son’s birthday in two weeks. I am really excited to follow this from you. Would love to follow your work and other great tutorials.
Beautiful, just beautiful. Thank You
Dawn
Awwww Dawn, I am very excited that the cake came out beautiful, both in looks and taste. Thanks a lot for your feedback. It means a lot to me. I’d say go for the wedding cakes. Your friends obviously see something amazing in you. Do not underestimate your abilities. All the best with the tuxedo cake. I am sure it would come out great.
You are amazing. I will definitely try this out. You make cake decorating simpler. A zillion thanks.
Thanks Ab. Do give it a try.
Love your work. I really wish to learn these. please keep up with d good work
Thanks Henrietta.
I’ve been searching for a tutorial on stacking spherical Cakes. Please help me out. Thanks plenty. Your blog is wonderful!
Hi Chinyere, I have none. I believe the best way out will be to work with half spheres. Let me try and explain this: you frost both half spheres, pass dowels into one half, place a cake card on it, place the other half on the cake card to form a complete sphere, smooth out the frosting around the place where both half spheres meet, then cover with fondant. The bottom of the half sphere below has to be a bit flat so it sits properly on the cake board.
Thanks for the reply. But what I meant was stacking like 2 to 3 spherical /ball cake on top 1 another. Like a 3 tier spherical cake.
Oh I see, well I have no real idea. It might involve passing a large tube through the middle of all three cakes. I will however strongly advice that you transport the cakes separately and stack at the venue.
Well done Terry. Great job. I need to know what surface is the best to knead and work with fondant. My fondant always sticks to my surface
Thanks. You should get fondant rolling mats.
Thanks,Terry for sharing generously.
You’ve been our inspiration.
You are welcome Awazi.
This is beautiful…..Thank You
You are welcome.
You are indeed a special blessing to me God will continue to inspire you wish you are in Nigeria God bless you
Thanks Chioma.
Extremely Helpful…..thanks
My pleasure Benjamin.
Well detailed step by steps tutorial. I’m forever stuck to this blog.
Thanks Bose. Glad to have you here.
Thanks for the tip hope to try it this Wednesday.
You are welcome Ronke.
Thanks terry for the detailed explanations. I’m glad I found this site. Trying to make one of these today. Weather is not friendly, worse enough, epileptic power supply for the air-con to help dehumidify working area. Keep u posted on how the cake comes out. Wish me luck.
I see your cake came out beautifully. Bravo!
I eventually made it!!!! It was so like urs, power supply was on for a while and my fondant did not bleed. So sad I didn’t make the rose cos of low bidding, especially this time that materials are expensive. I’m so happy and grateful to u for sharing ur sleeve shirt tutorial. It was indeed helpfl. I wish I cld post it for u to see. Thank you sooo much. Kisses…looking forward to seeing another tutorial. Bye.
I am happy to read your feedback Bibi. Please send me a picture on my Facebook page. Thanks.
Nice 1, Thanks 4 Sharing
You are welcome Fomsky.
Please,do you post on YouTube?
No Kenny.
Terry, you are God-sent. Stumbled on your blog yesterday and i am stuck ☺. Like i should devour all your tutorials at once. I’ve liked your facebook page. I am a beginner . You made decorating so easy. I will keep you posted on my try outs. God bless you abundantly.
Glad to have you here Becky. Do keep me posted. Thanks.
I just stumbled on ds blog while out for how to make a shirt cake.ur explanation are so simple.will try it right away.thanks a lot for sharing.will love to follow your subsequent posts.
Thanks Ify. Nice having you here.
Tanx for a detailed explanation
You are welcome Jude.
This is really wonderful.. things made easier…. thank you and God bless…
You are welcome Mercy.
Very educative website. Keep it up. It will help lot of beginners like me.
Thanks Sujo.
Thanks so much. This is amazing
Thanks.
Hi Terry…lovely tutorial…very helpful..thank u so much..wanted to know how many servings does the 9*13 inch two layered cake serve?.. tganx s lot