
2D Fondant Characters

Bubble Guppies and Ariel Cake with 2D Characters
Kids love themed cakes and it is always appreciated when the cakes have the actual characters of the theme on it. There are three ways if going about this. One is by painting, another is by making 3D characters and the third is by making 2D characters. I use a lot of 2D characters for my cakes. I cannot say which is easier between 2D and 3D designs as both have their own challenges. Your choice will ultimately depend on what you want to achieve.
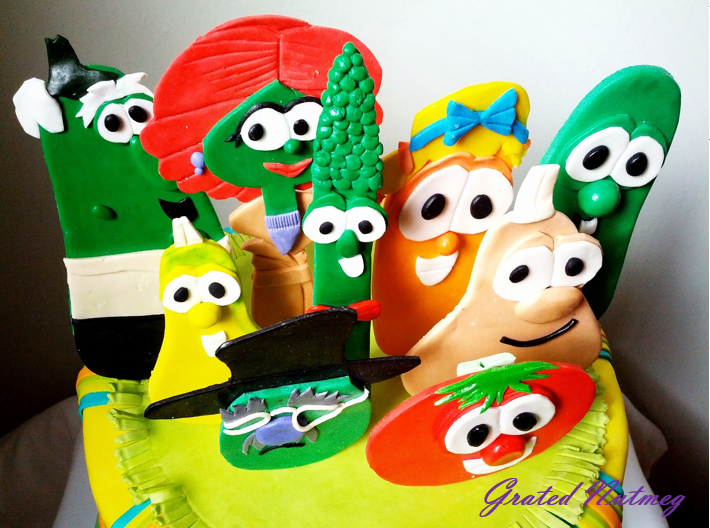
VeggieTales Cake with 2D Toppers

Batman 2D Fondant Topper
Aside from kid character cakes, 2D cutouts can also be used to make logos and badges like those for jersey cakes and other sports cakes. See how I make my logos and badges here.

Man-U Jersey Cake with 2D Man-U Logo
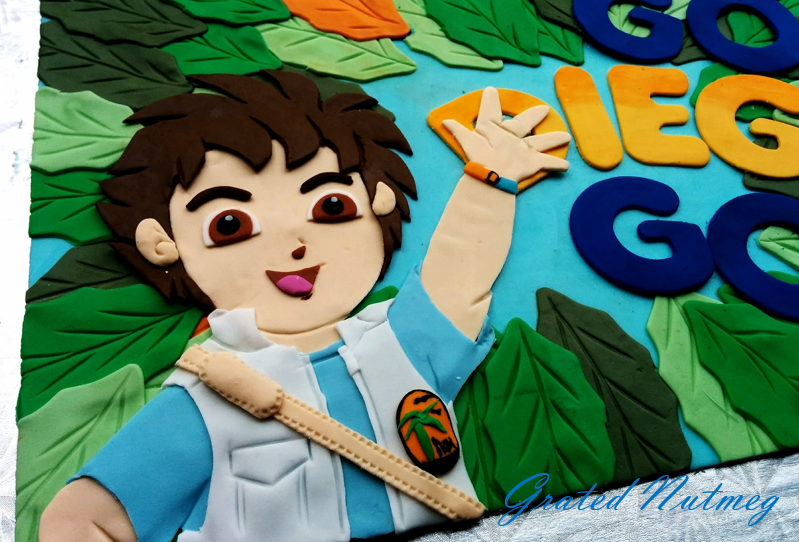
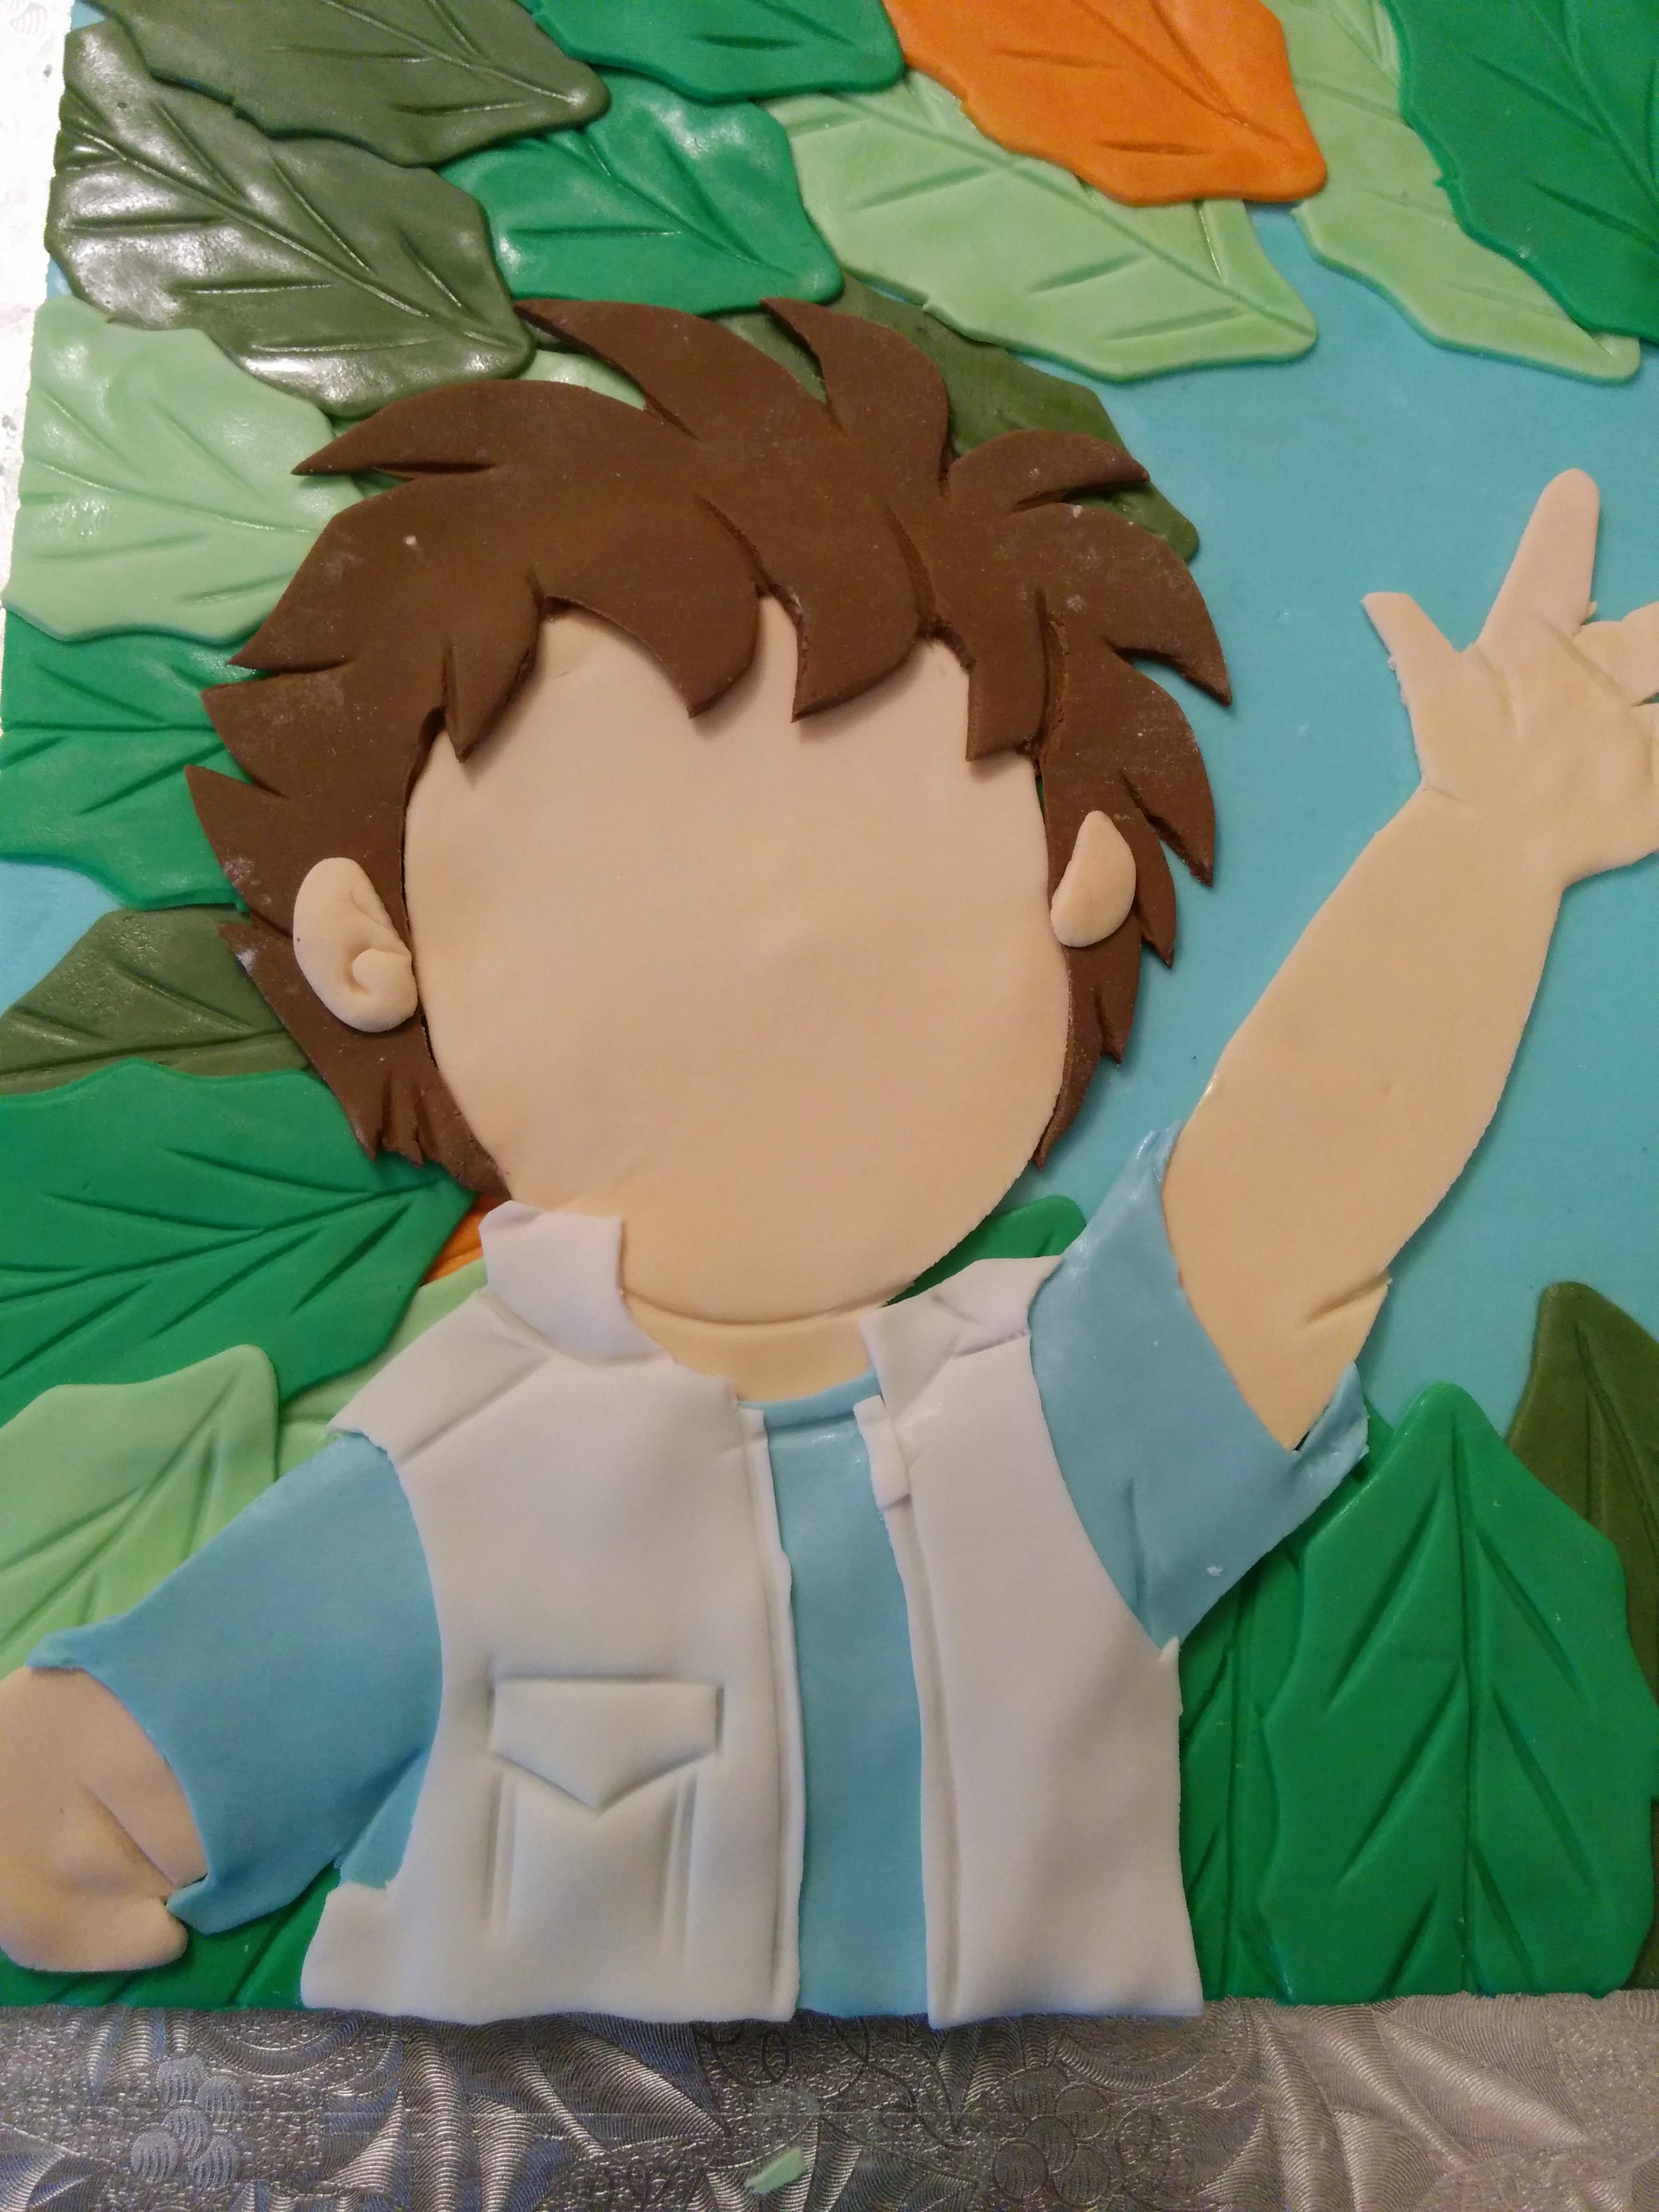
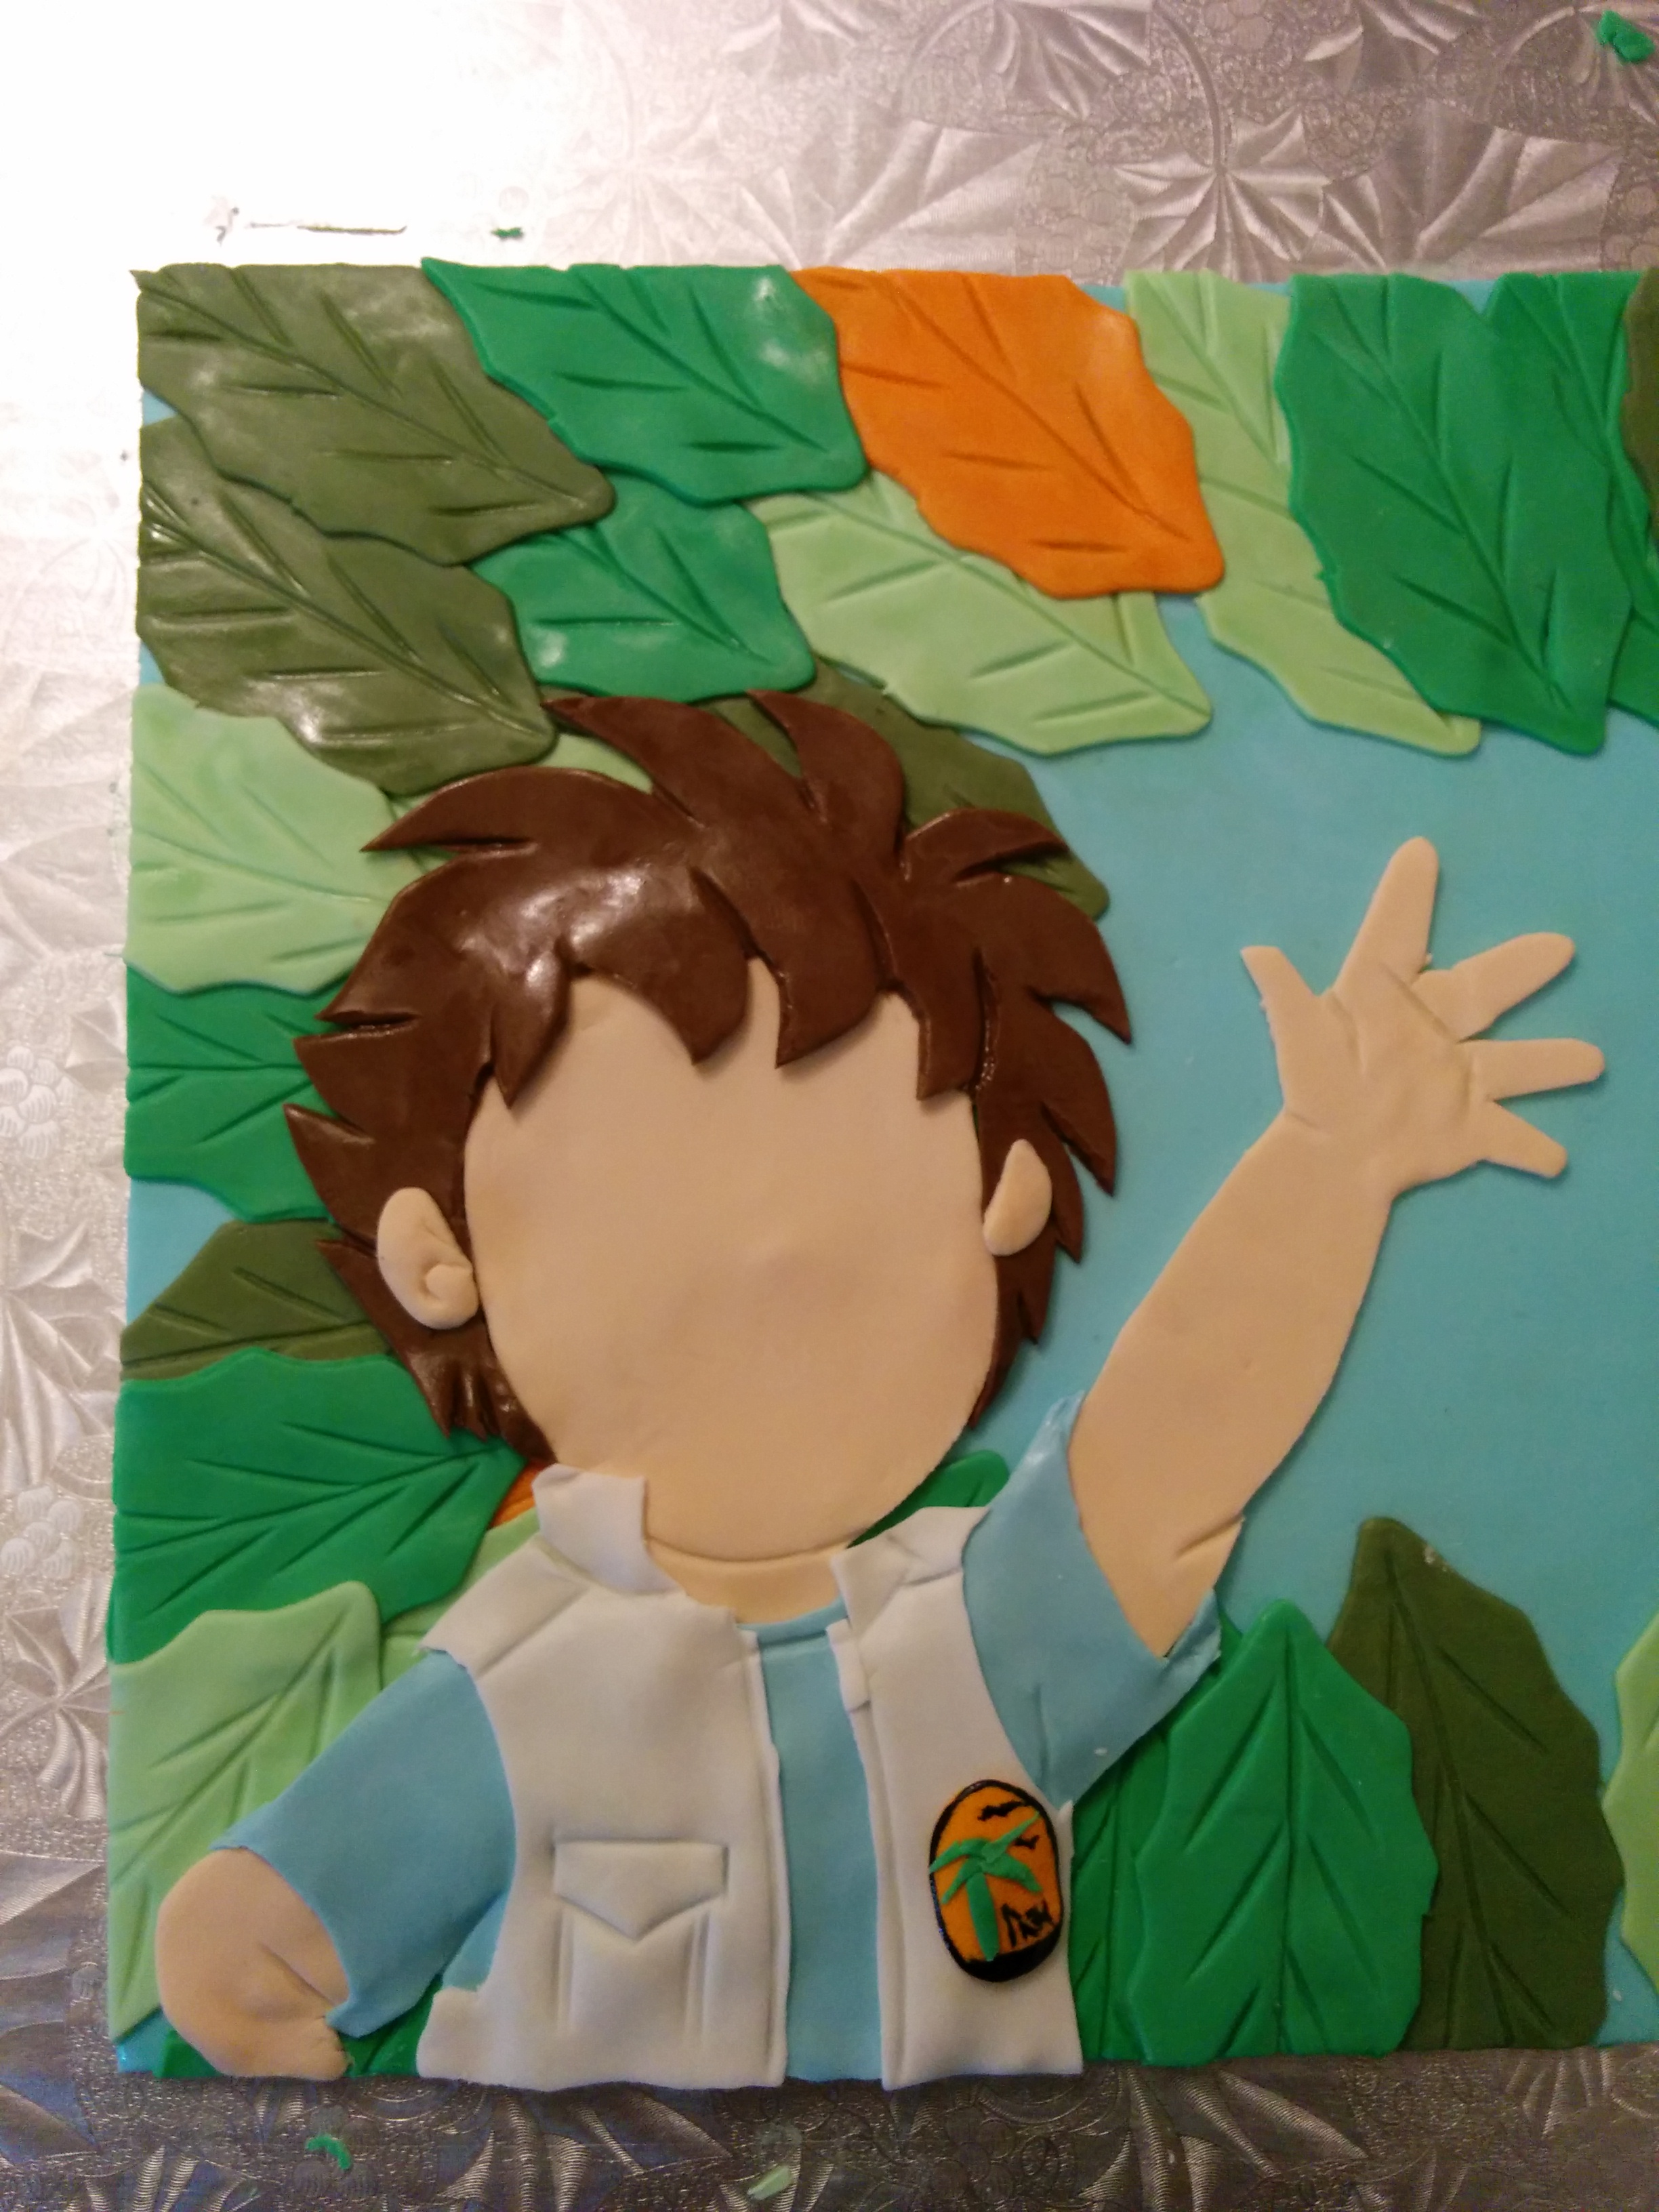
This is a pictorial on how I make 2D fondant characters for my cakes. This pictorial will start off with some basic technical points and conclude with a pictorial on one of my characters, in this case, Diego from “Go, Diego, Go”.

Avatar: the Last Airbender Cake with 2D Topper
TOOLS:
(1) Rolling Pin
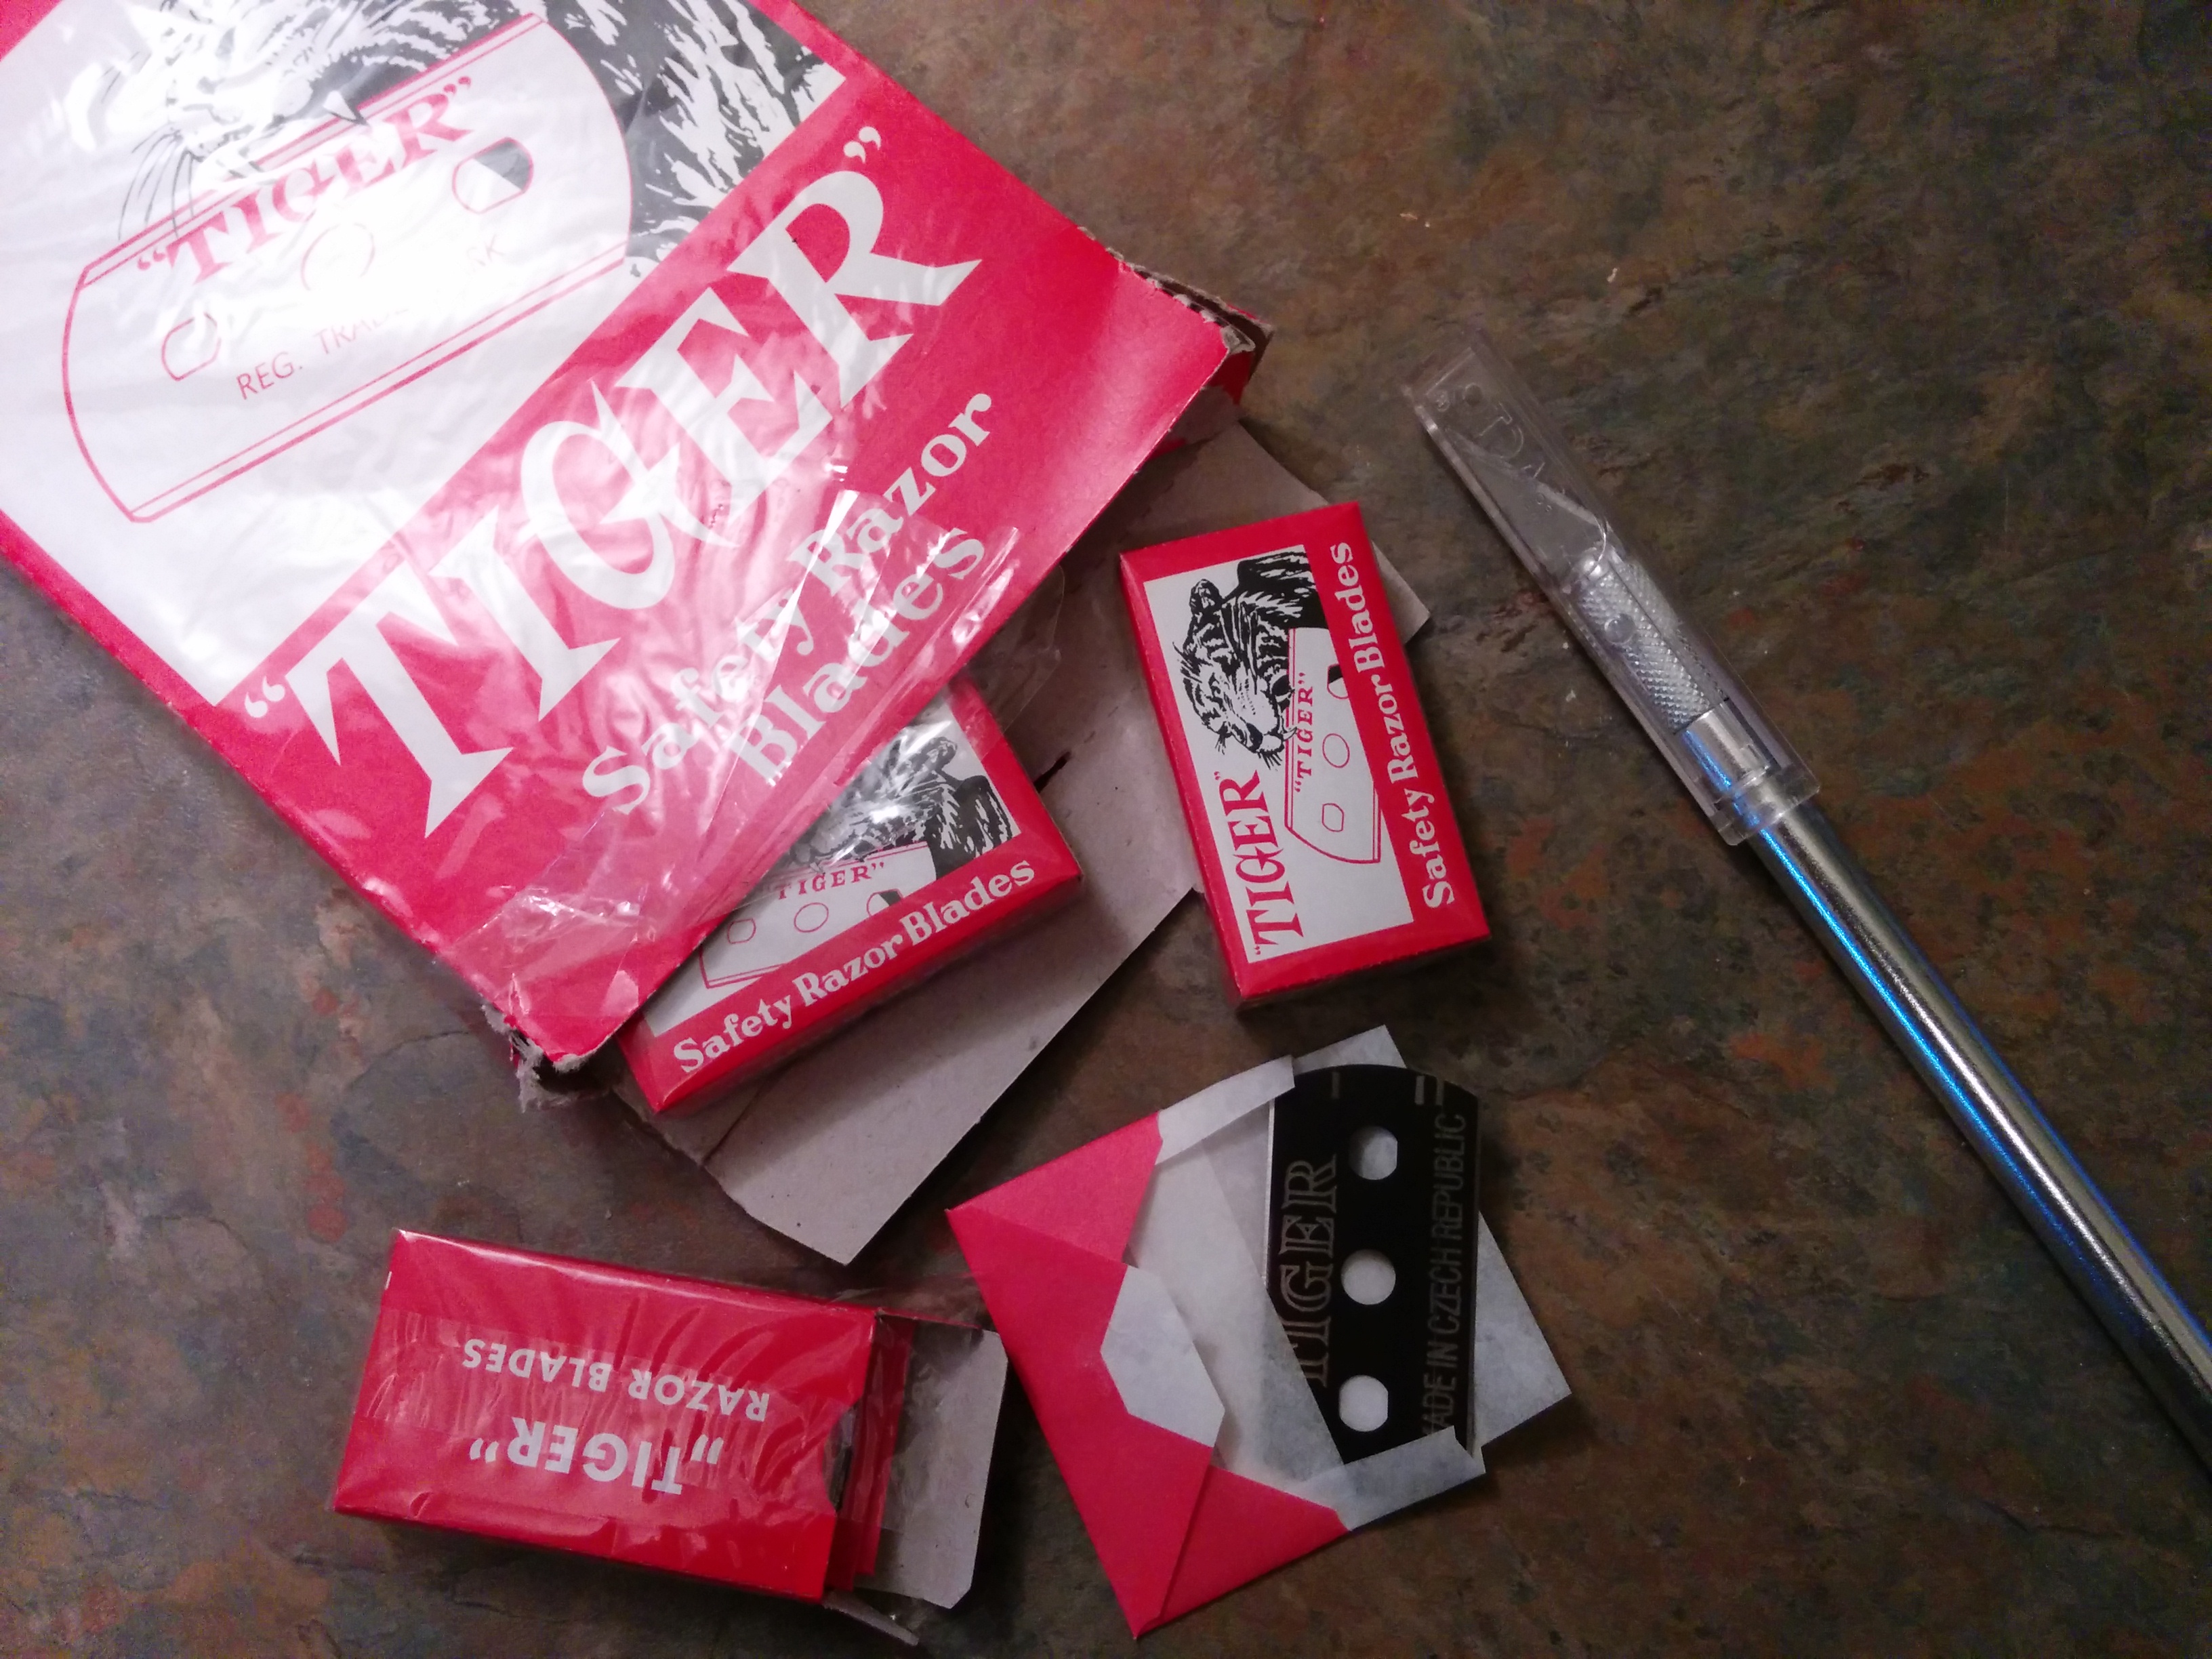
(2) X-Acto Knife or Sharp Blades
(3) Pipping tips with small round openings of various sizes (For eyes)
(4) Paint Brushes
(5) Fondant Roller or any indenting tool.
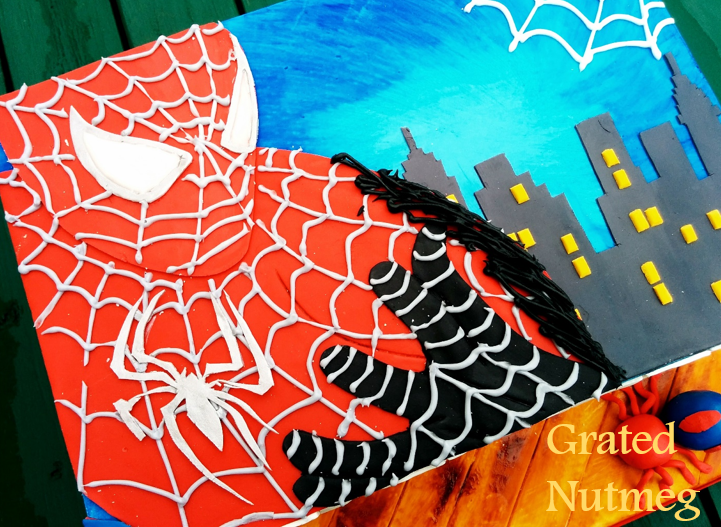
2D Spiderman Cake Topper
NOTE:
You need very sharp blades for these designs. I prefer using a new razor blade for each character as it cuts better without dragging or pulling on the fondant.
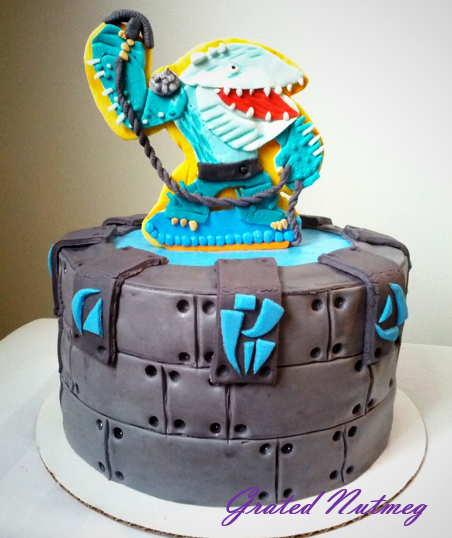
Skylanders Cake with 2D Thumpback Topper
INGREDIENTS:
(1) White Fondant. I use marshmallow fondant.
(2) Color Gel Paste. You will need as many colors as there are on the character you are trying to recreate.
(3) Water for gluing
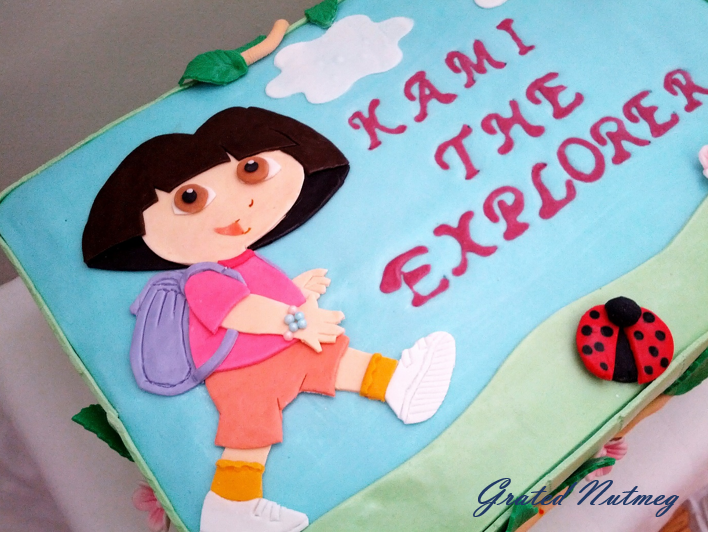
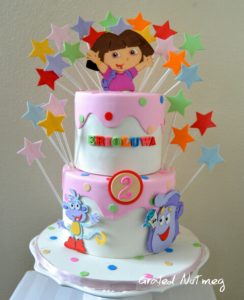
Dora Cake with 2D Dora
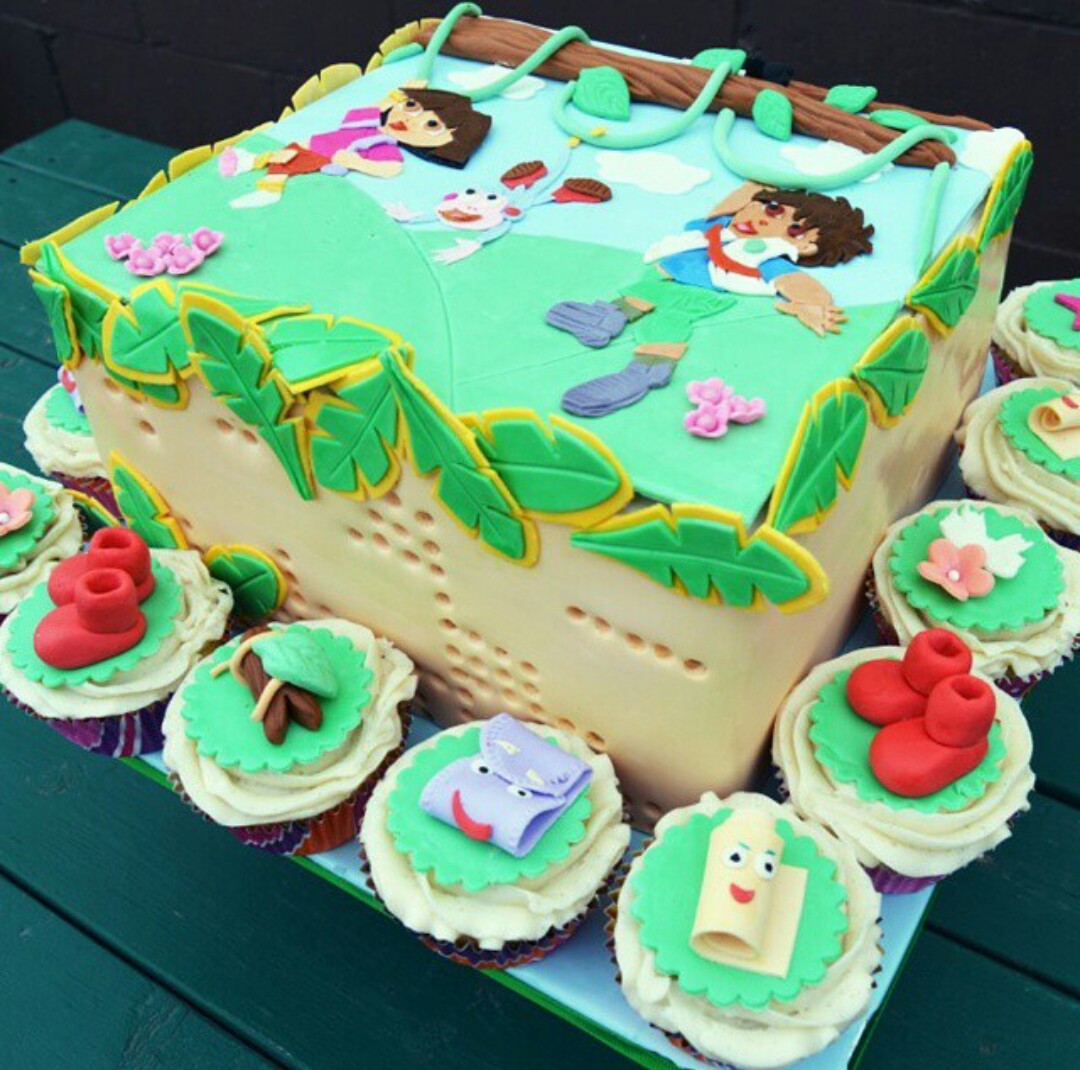
Dora and Diego Cake with 2D Topper
NOTES:
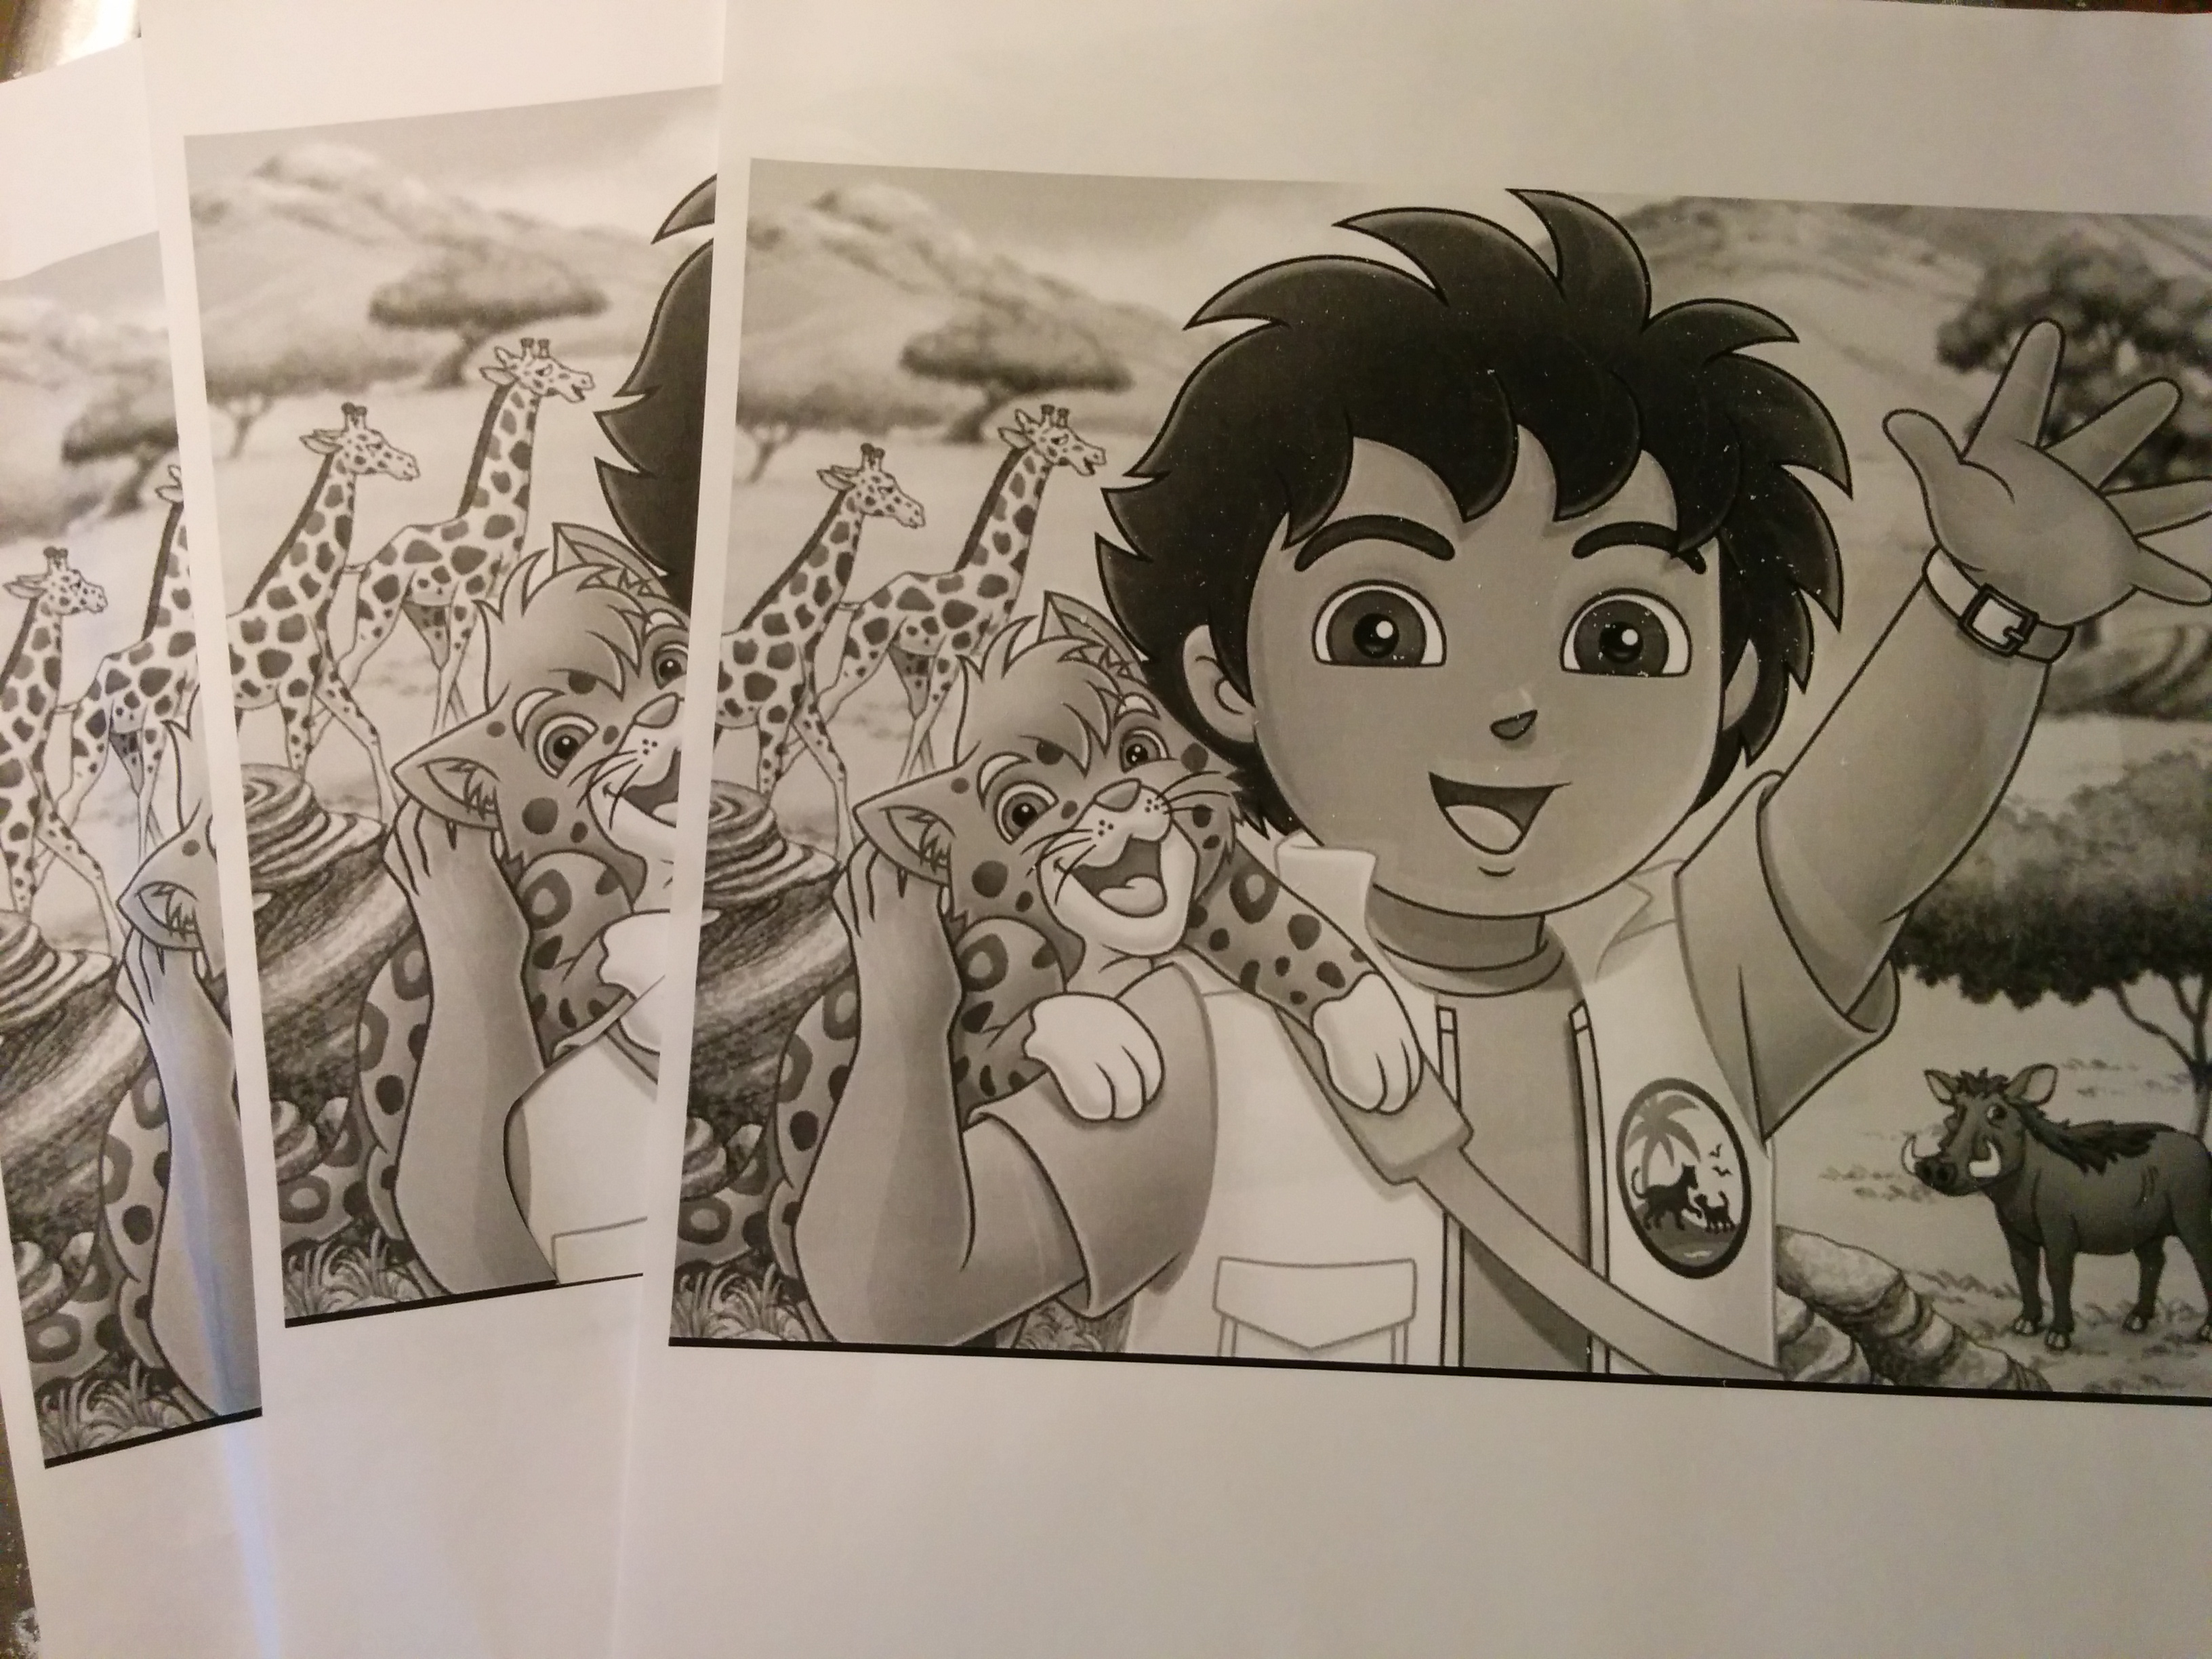
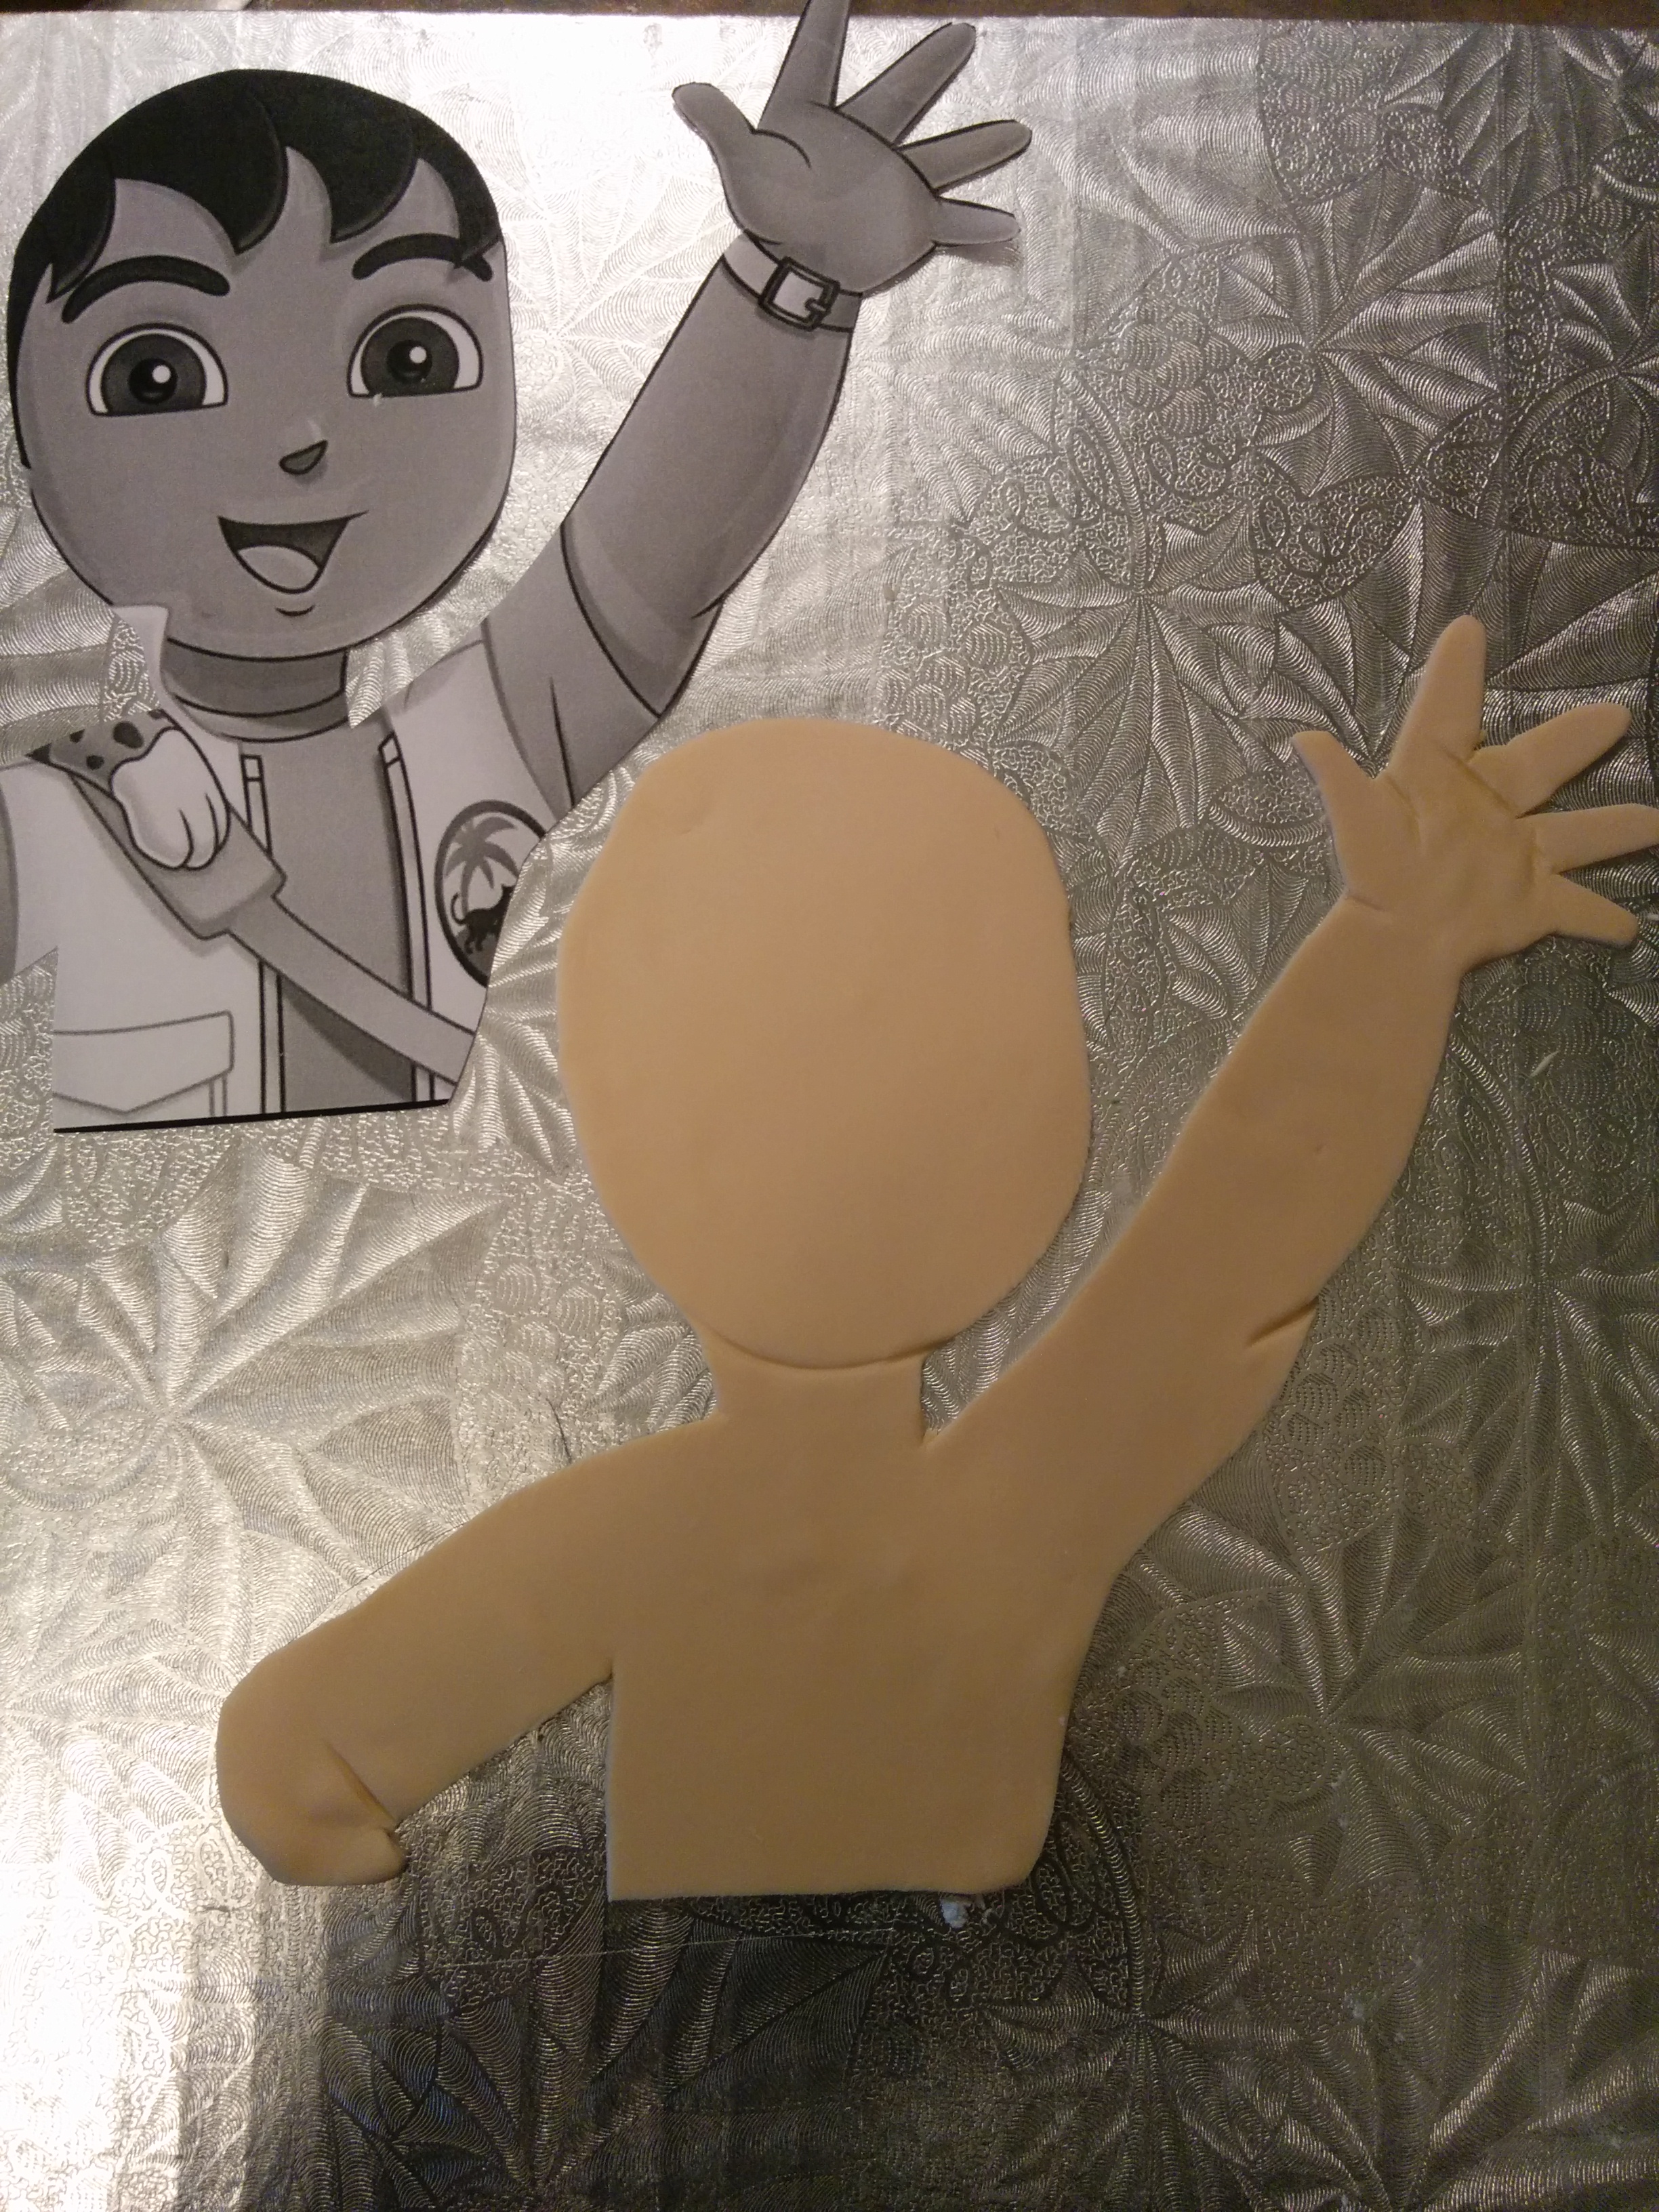
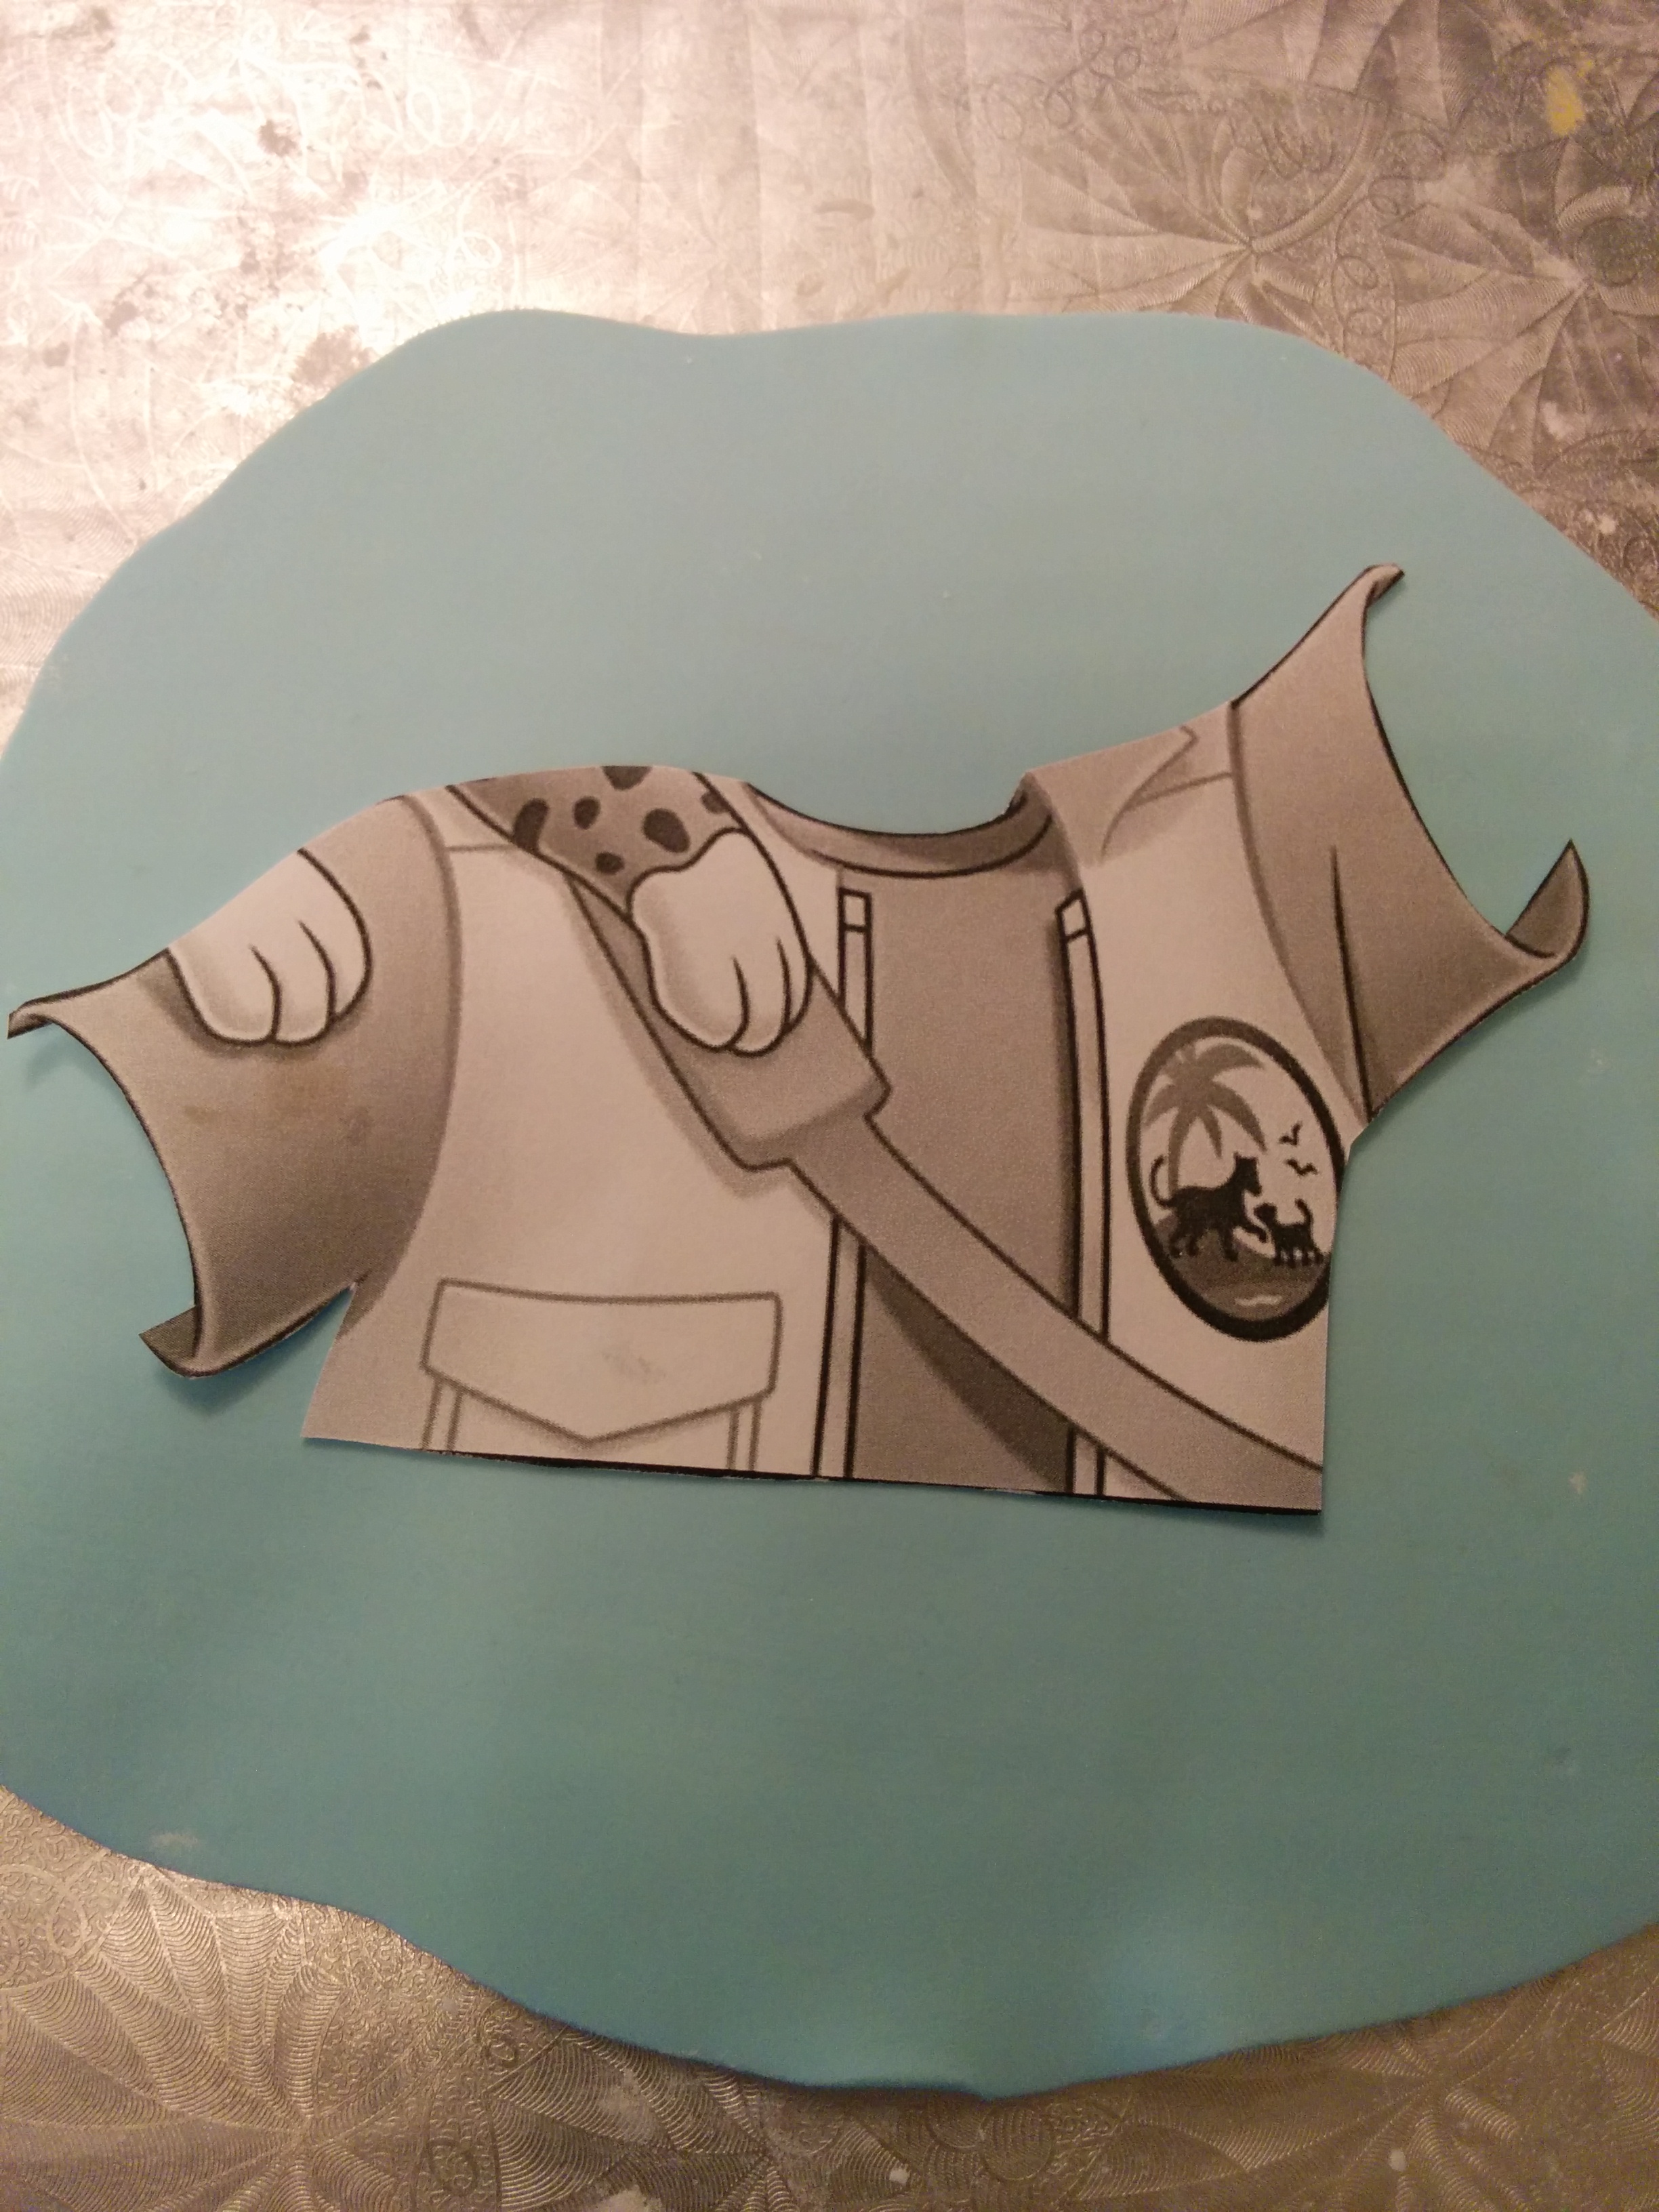
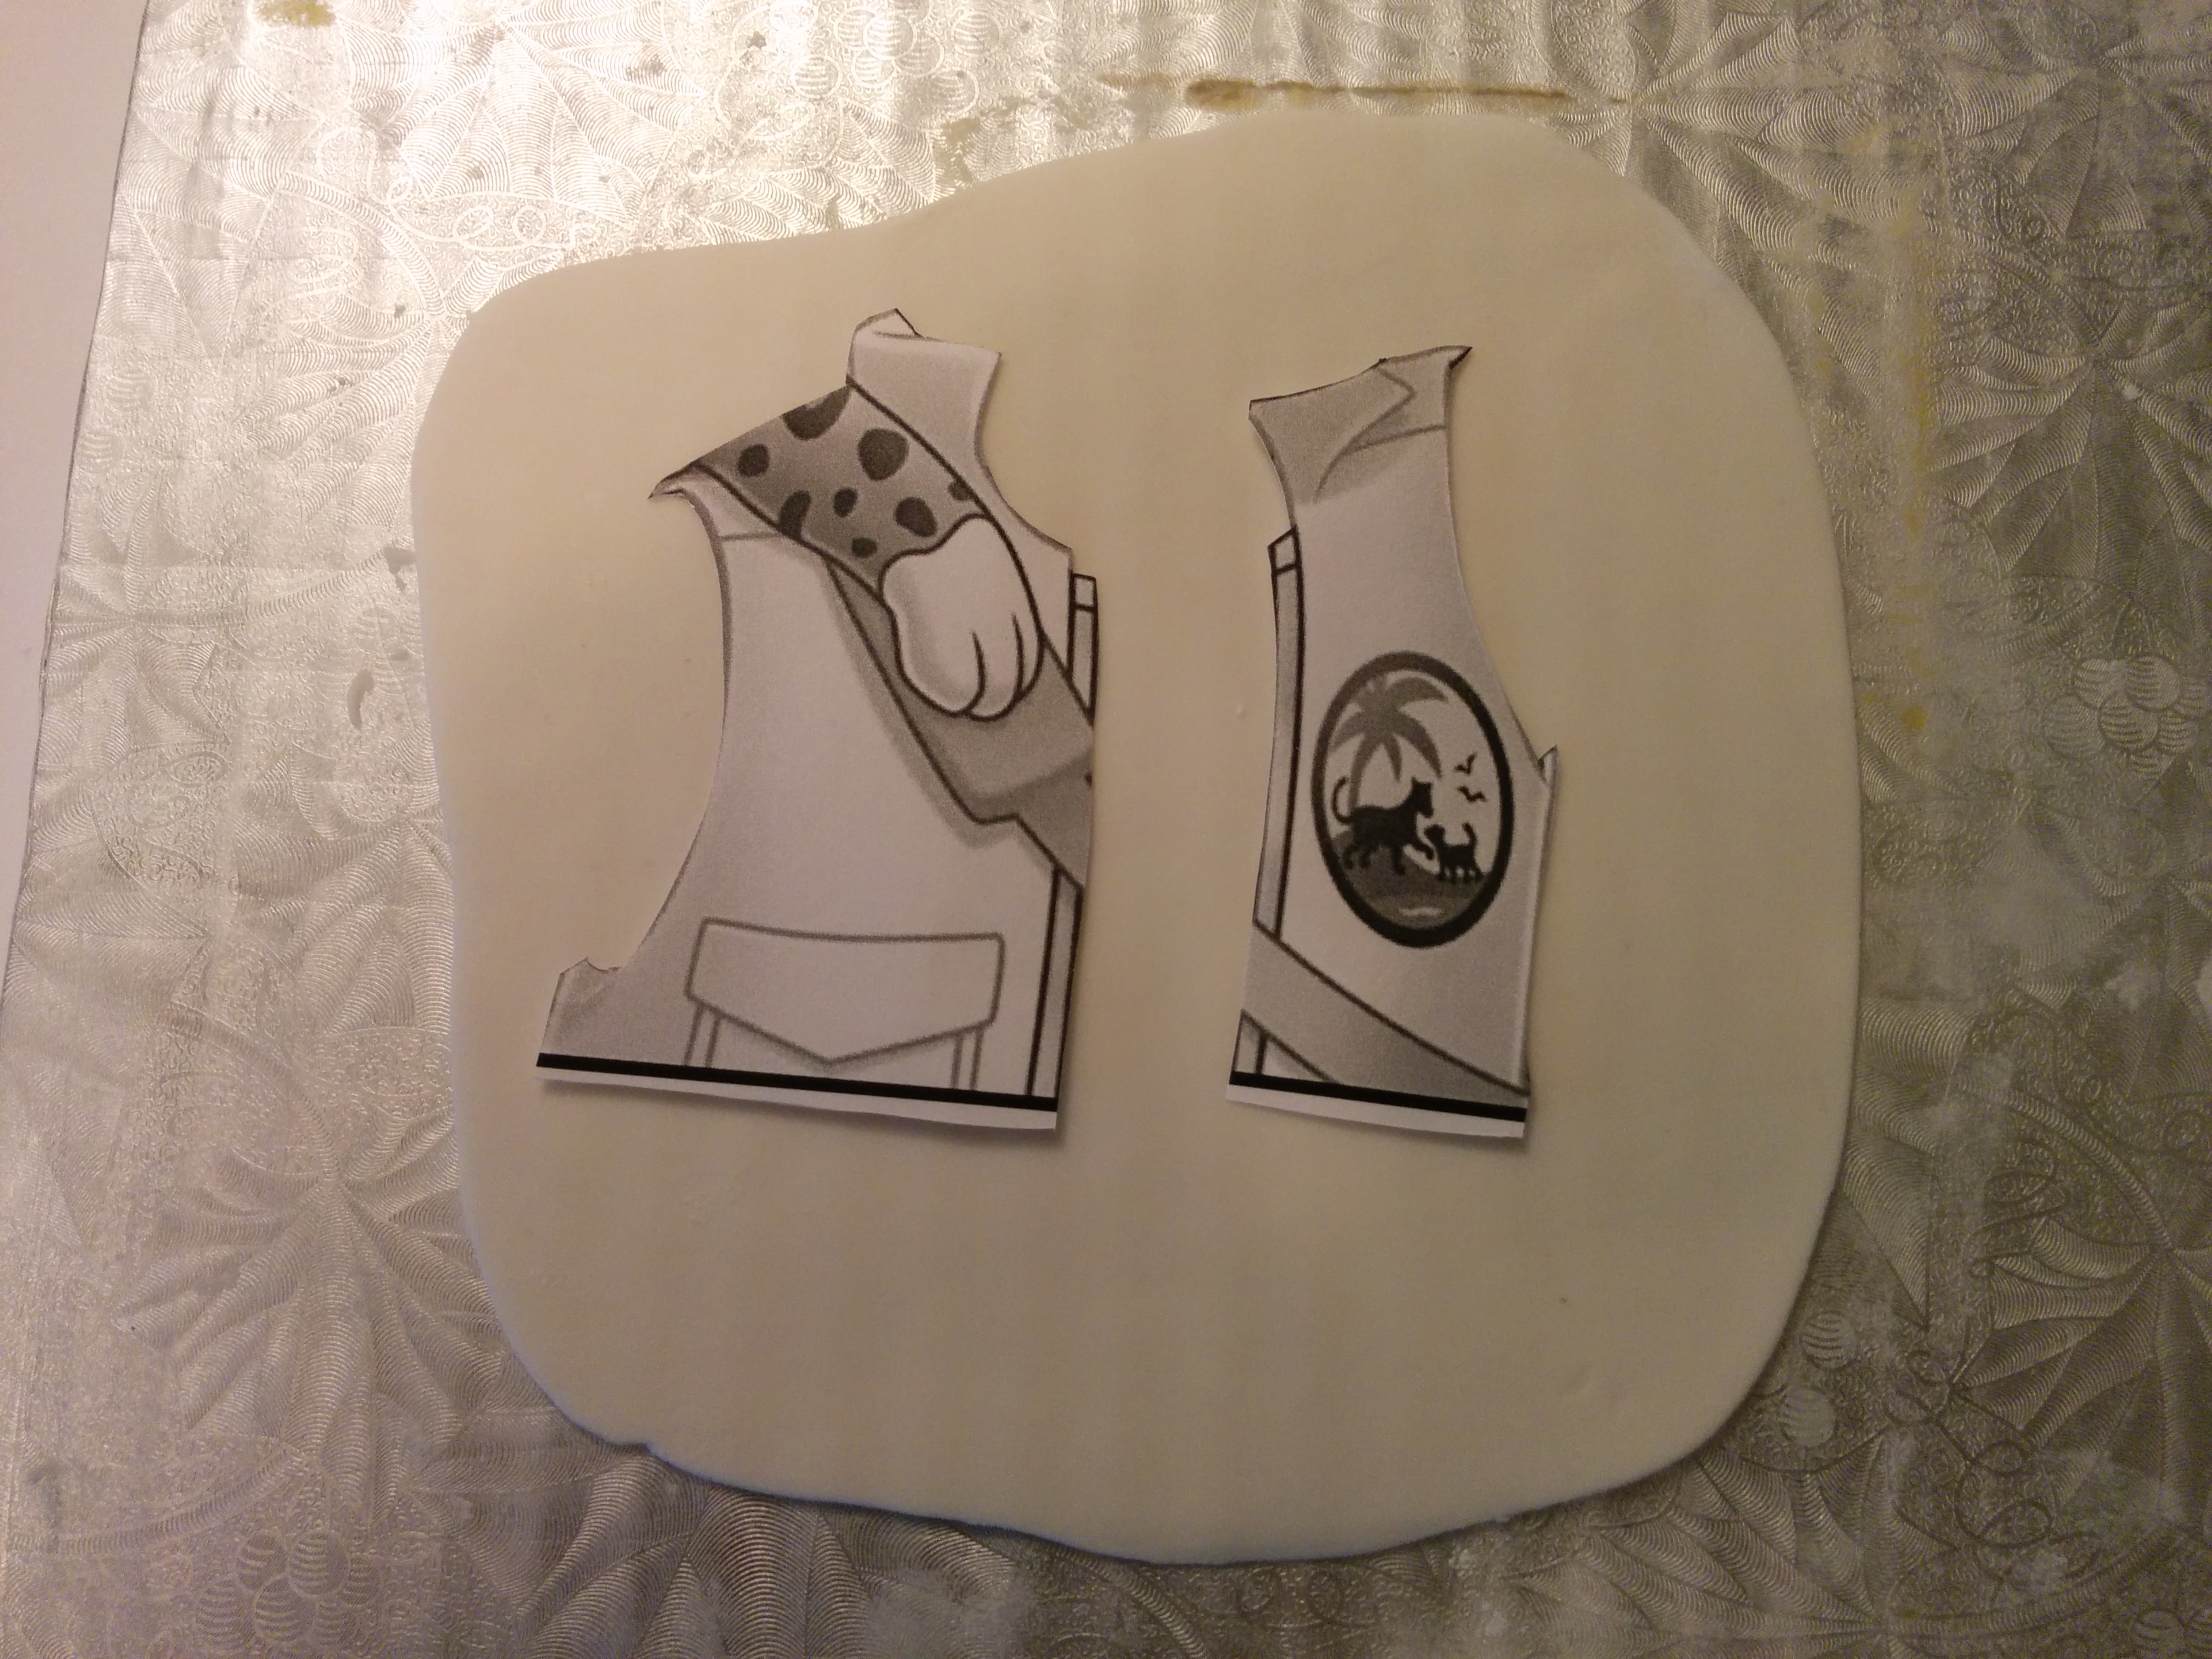
(1) The first step is to print out the character you want to recreate from the web. Make sure the printed character is as large as you want it to feature on the cake. A simple Google Image search using the name of the character will lead to various results. I do not have a colored printer so I print them in black and white. It does not really matter what color the print outs are in as you are going to keep using the picture online for reference. I always work with my laptop opened to that picture.
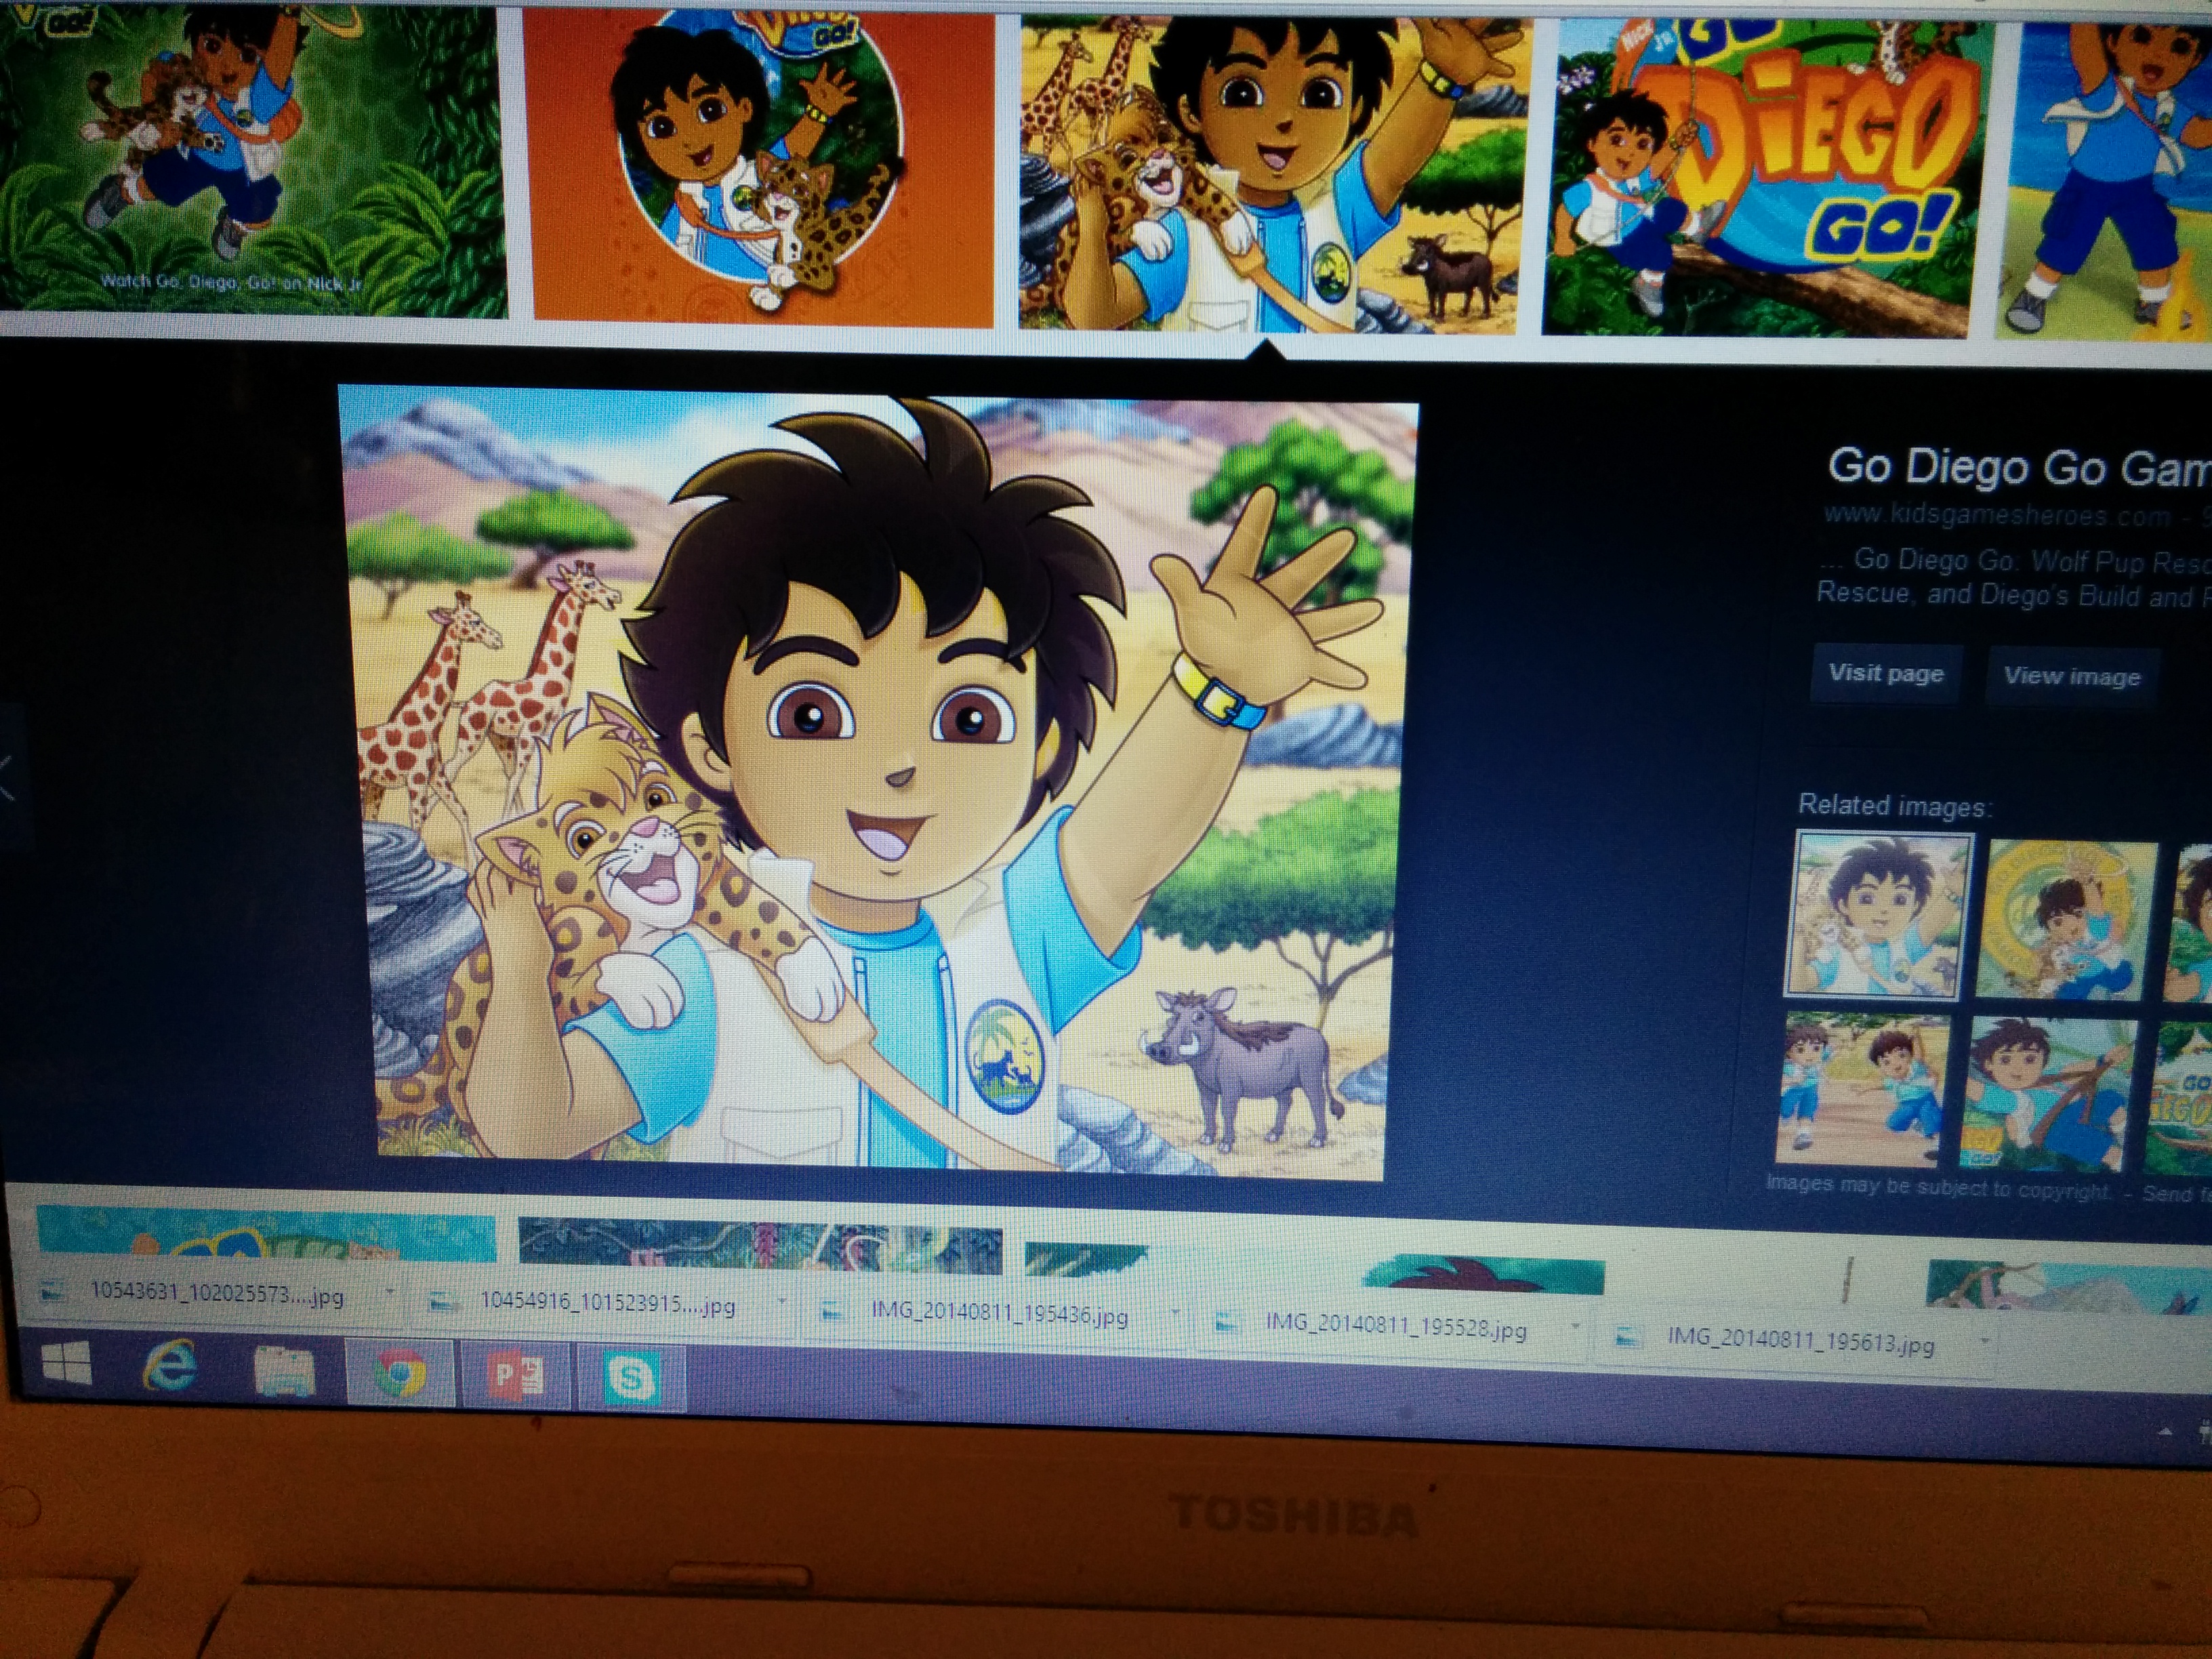
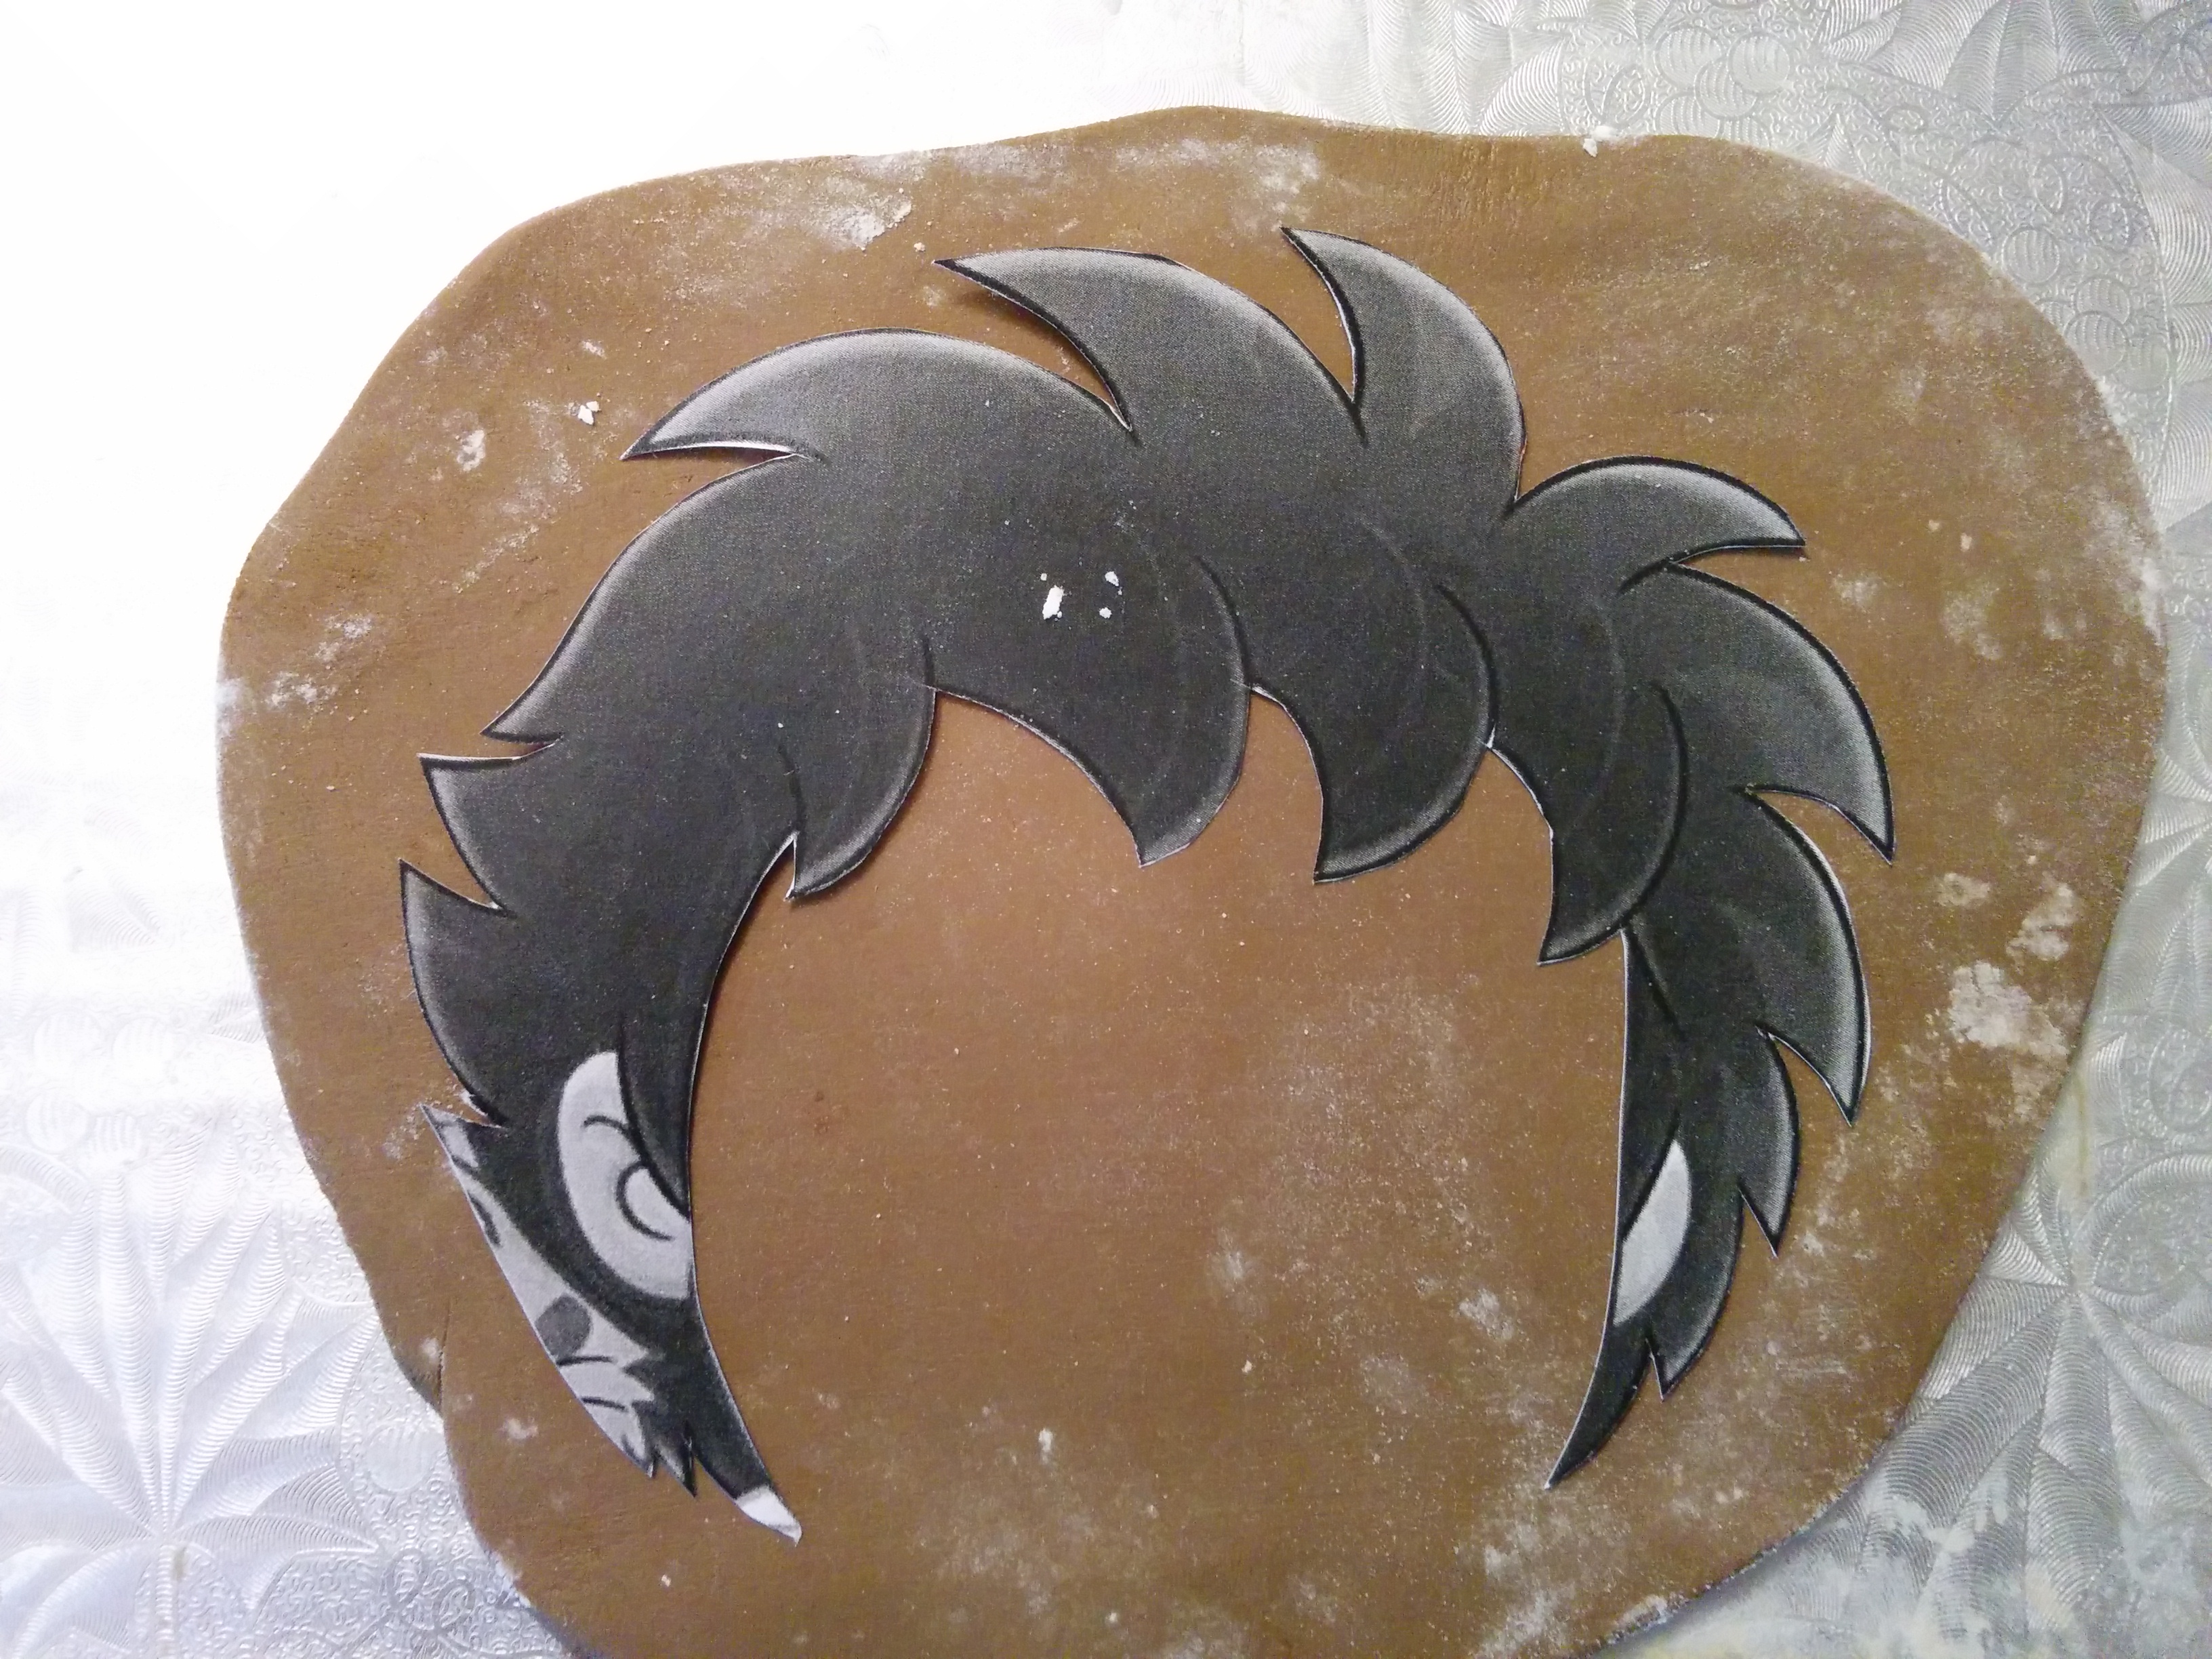
(2) Print out 3 to 4 copies of the image as you might need to cut the same portion of the picture more than once to achieve various parts of the picture. For instance, you will need to cut into the face for both the face and the hair of the characters.
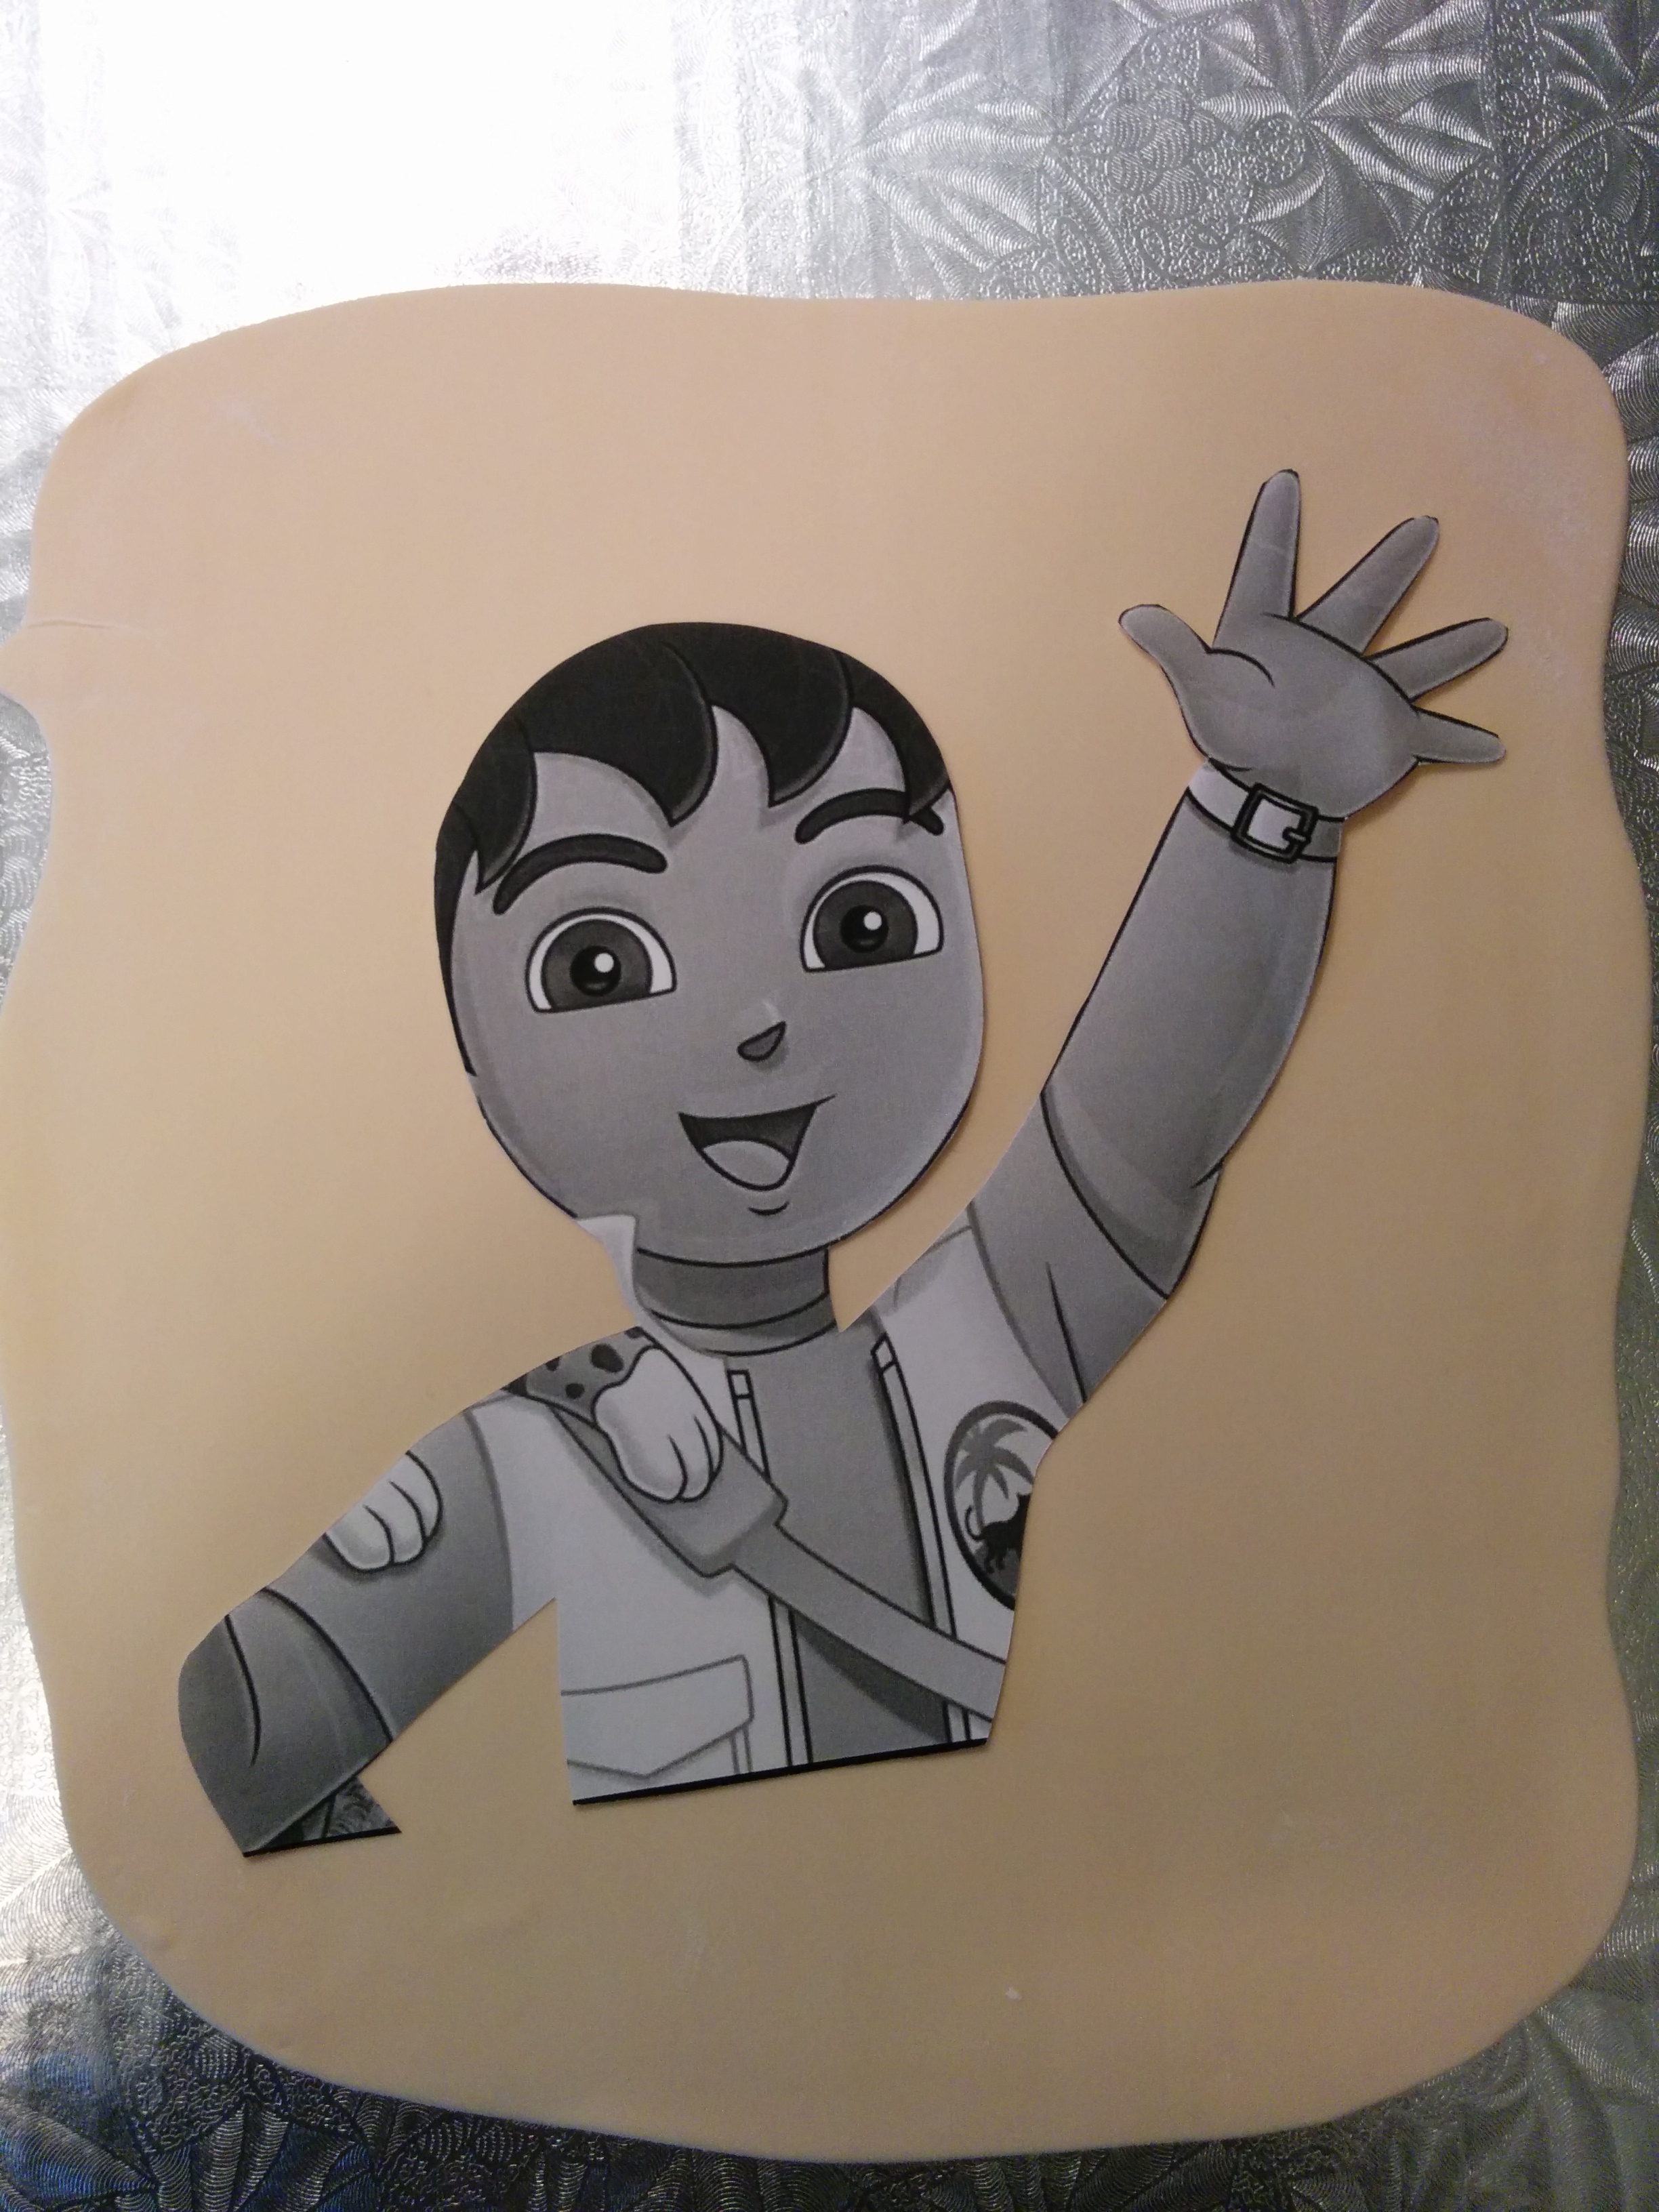
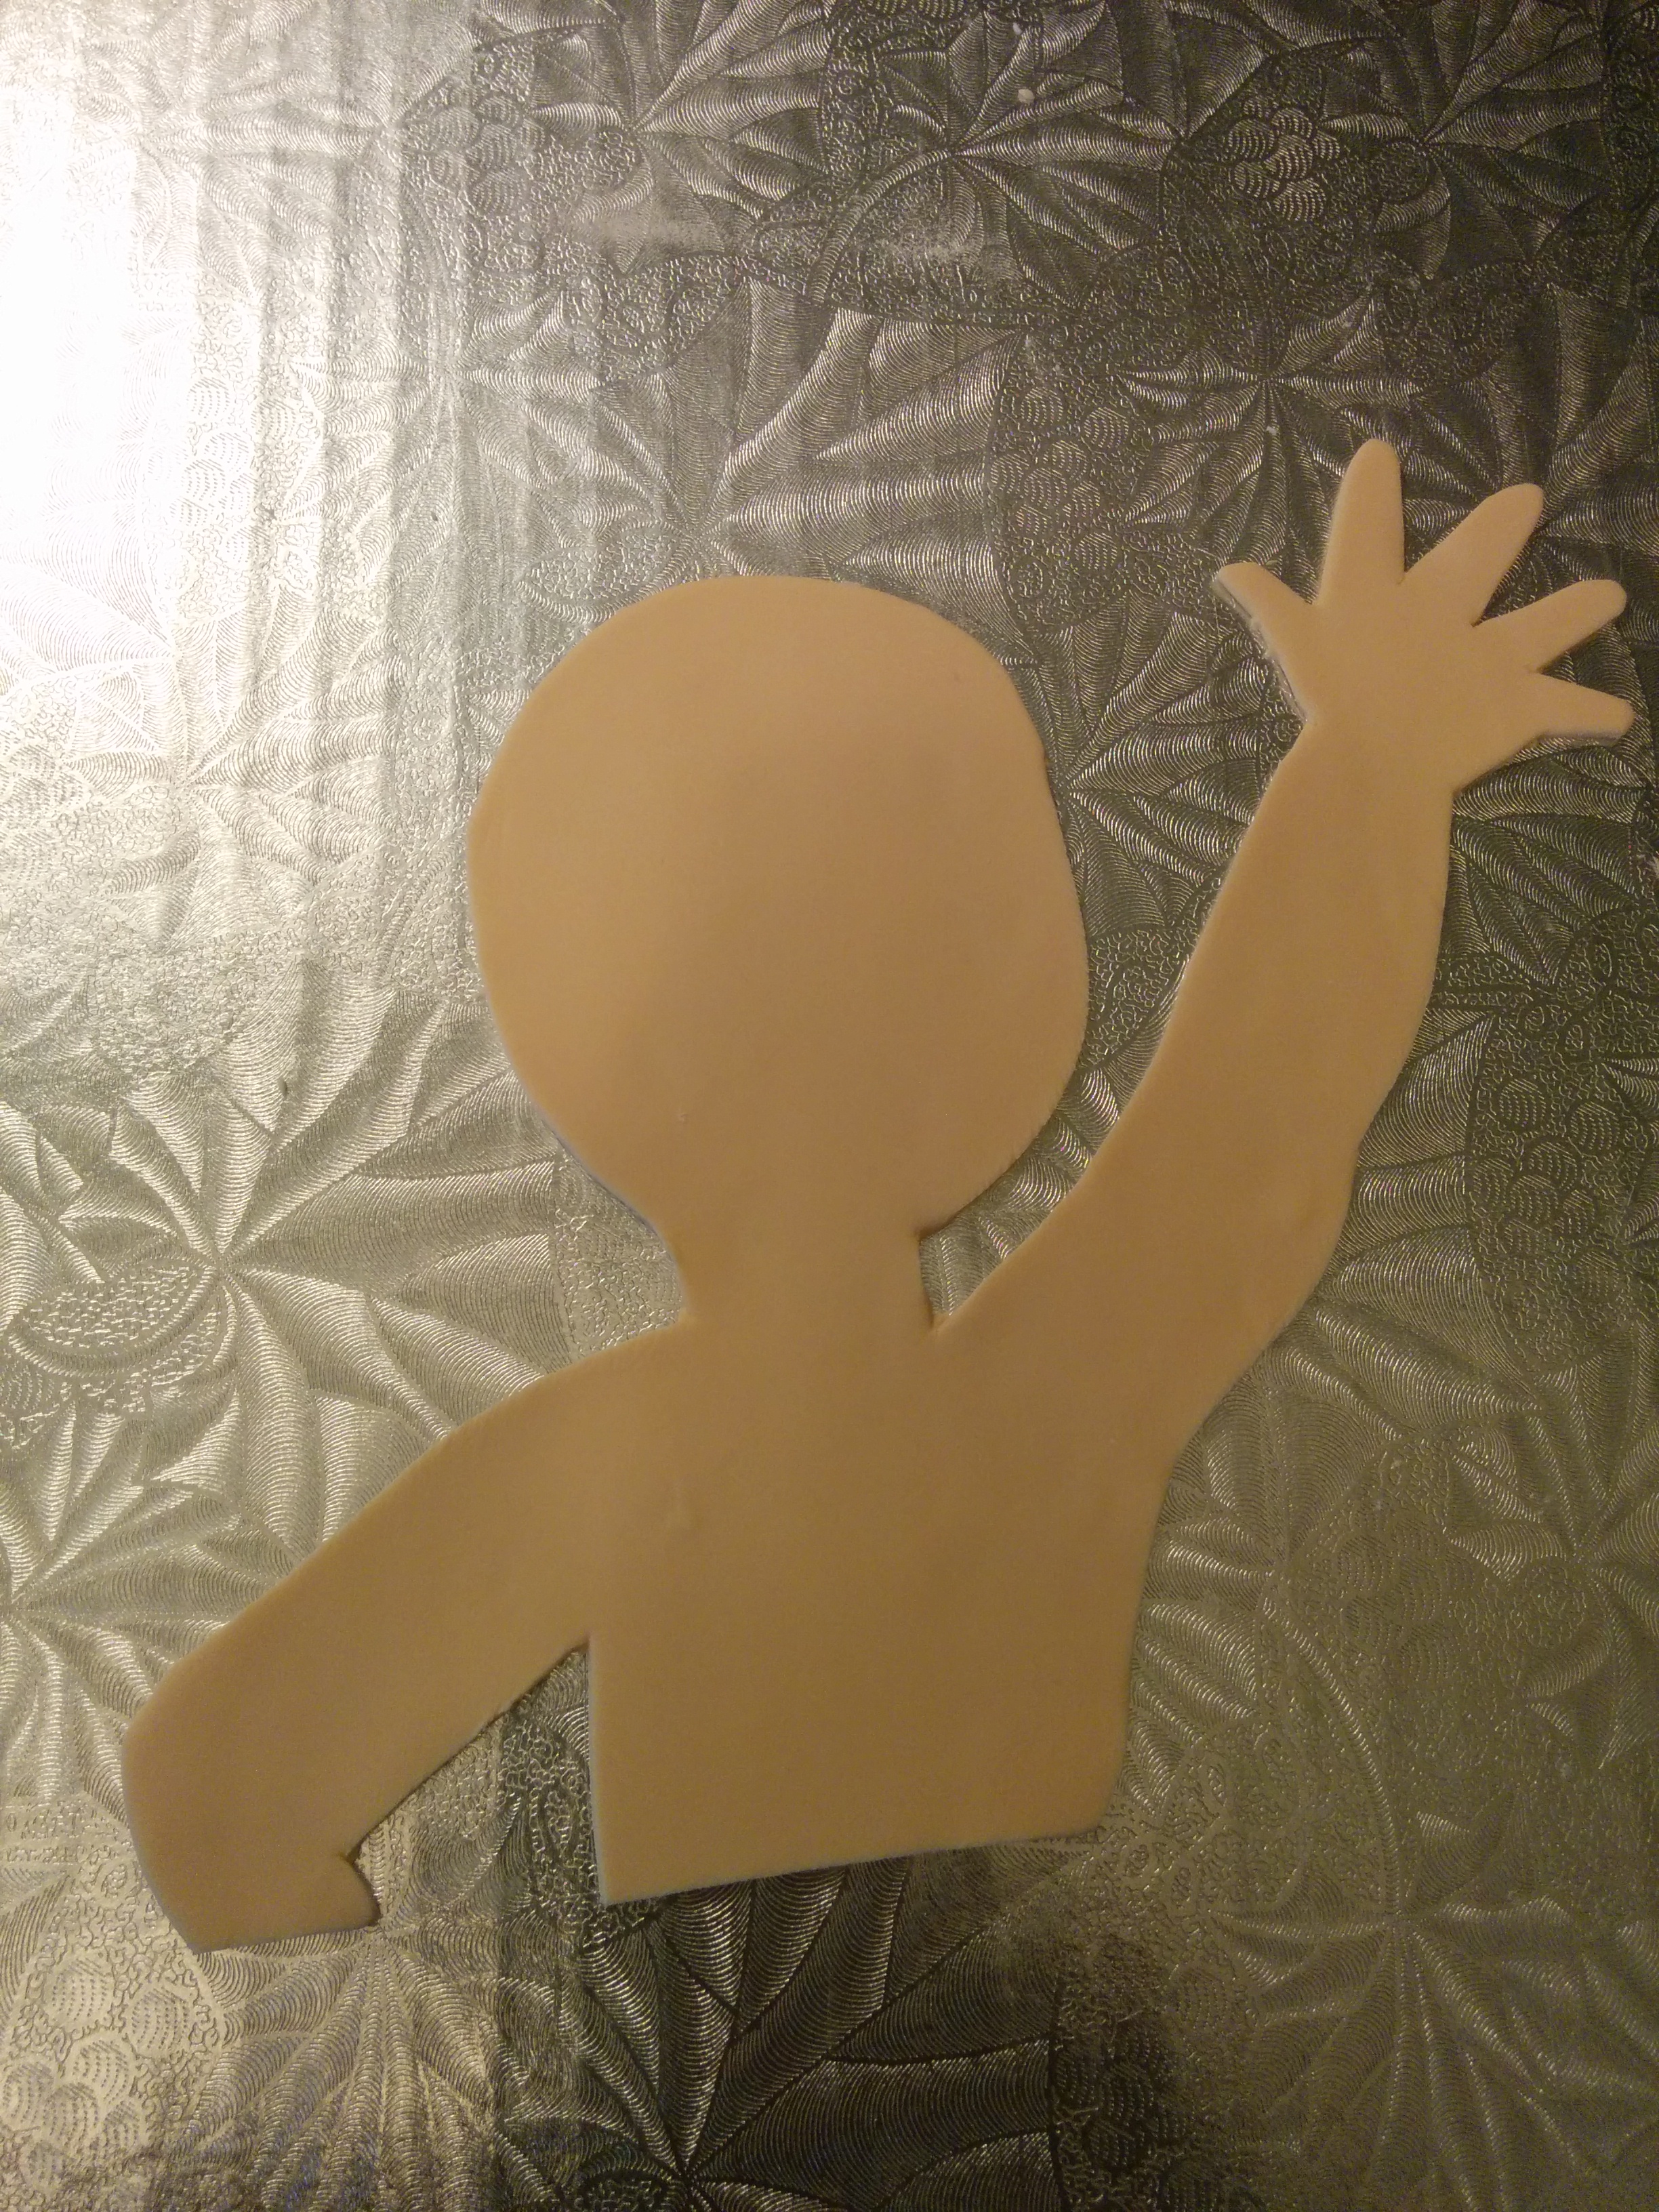
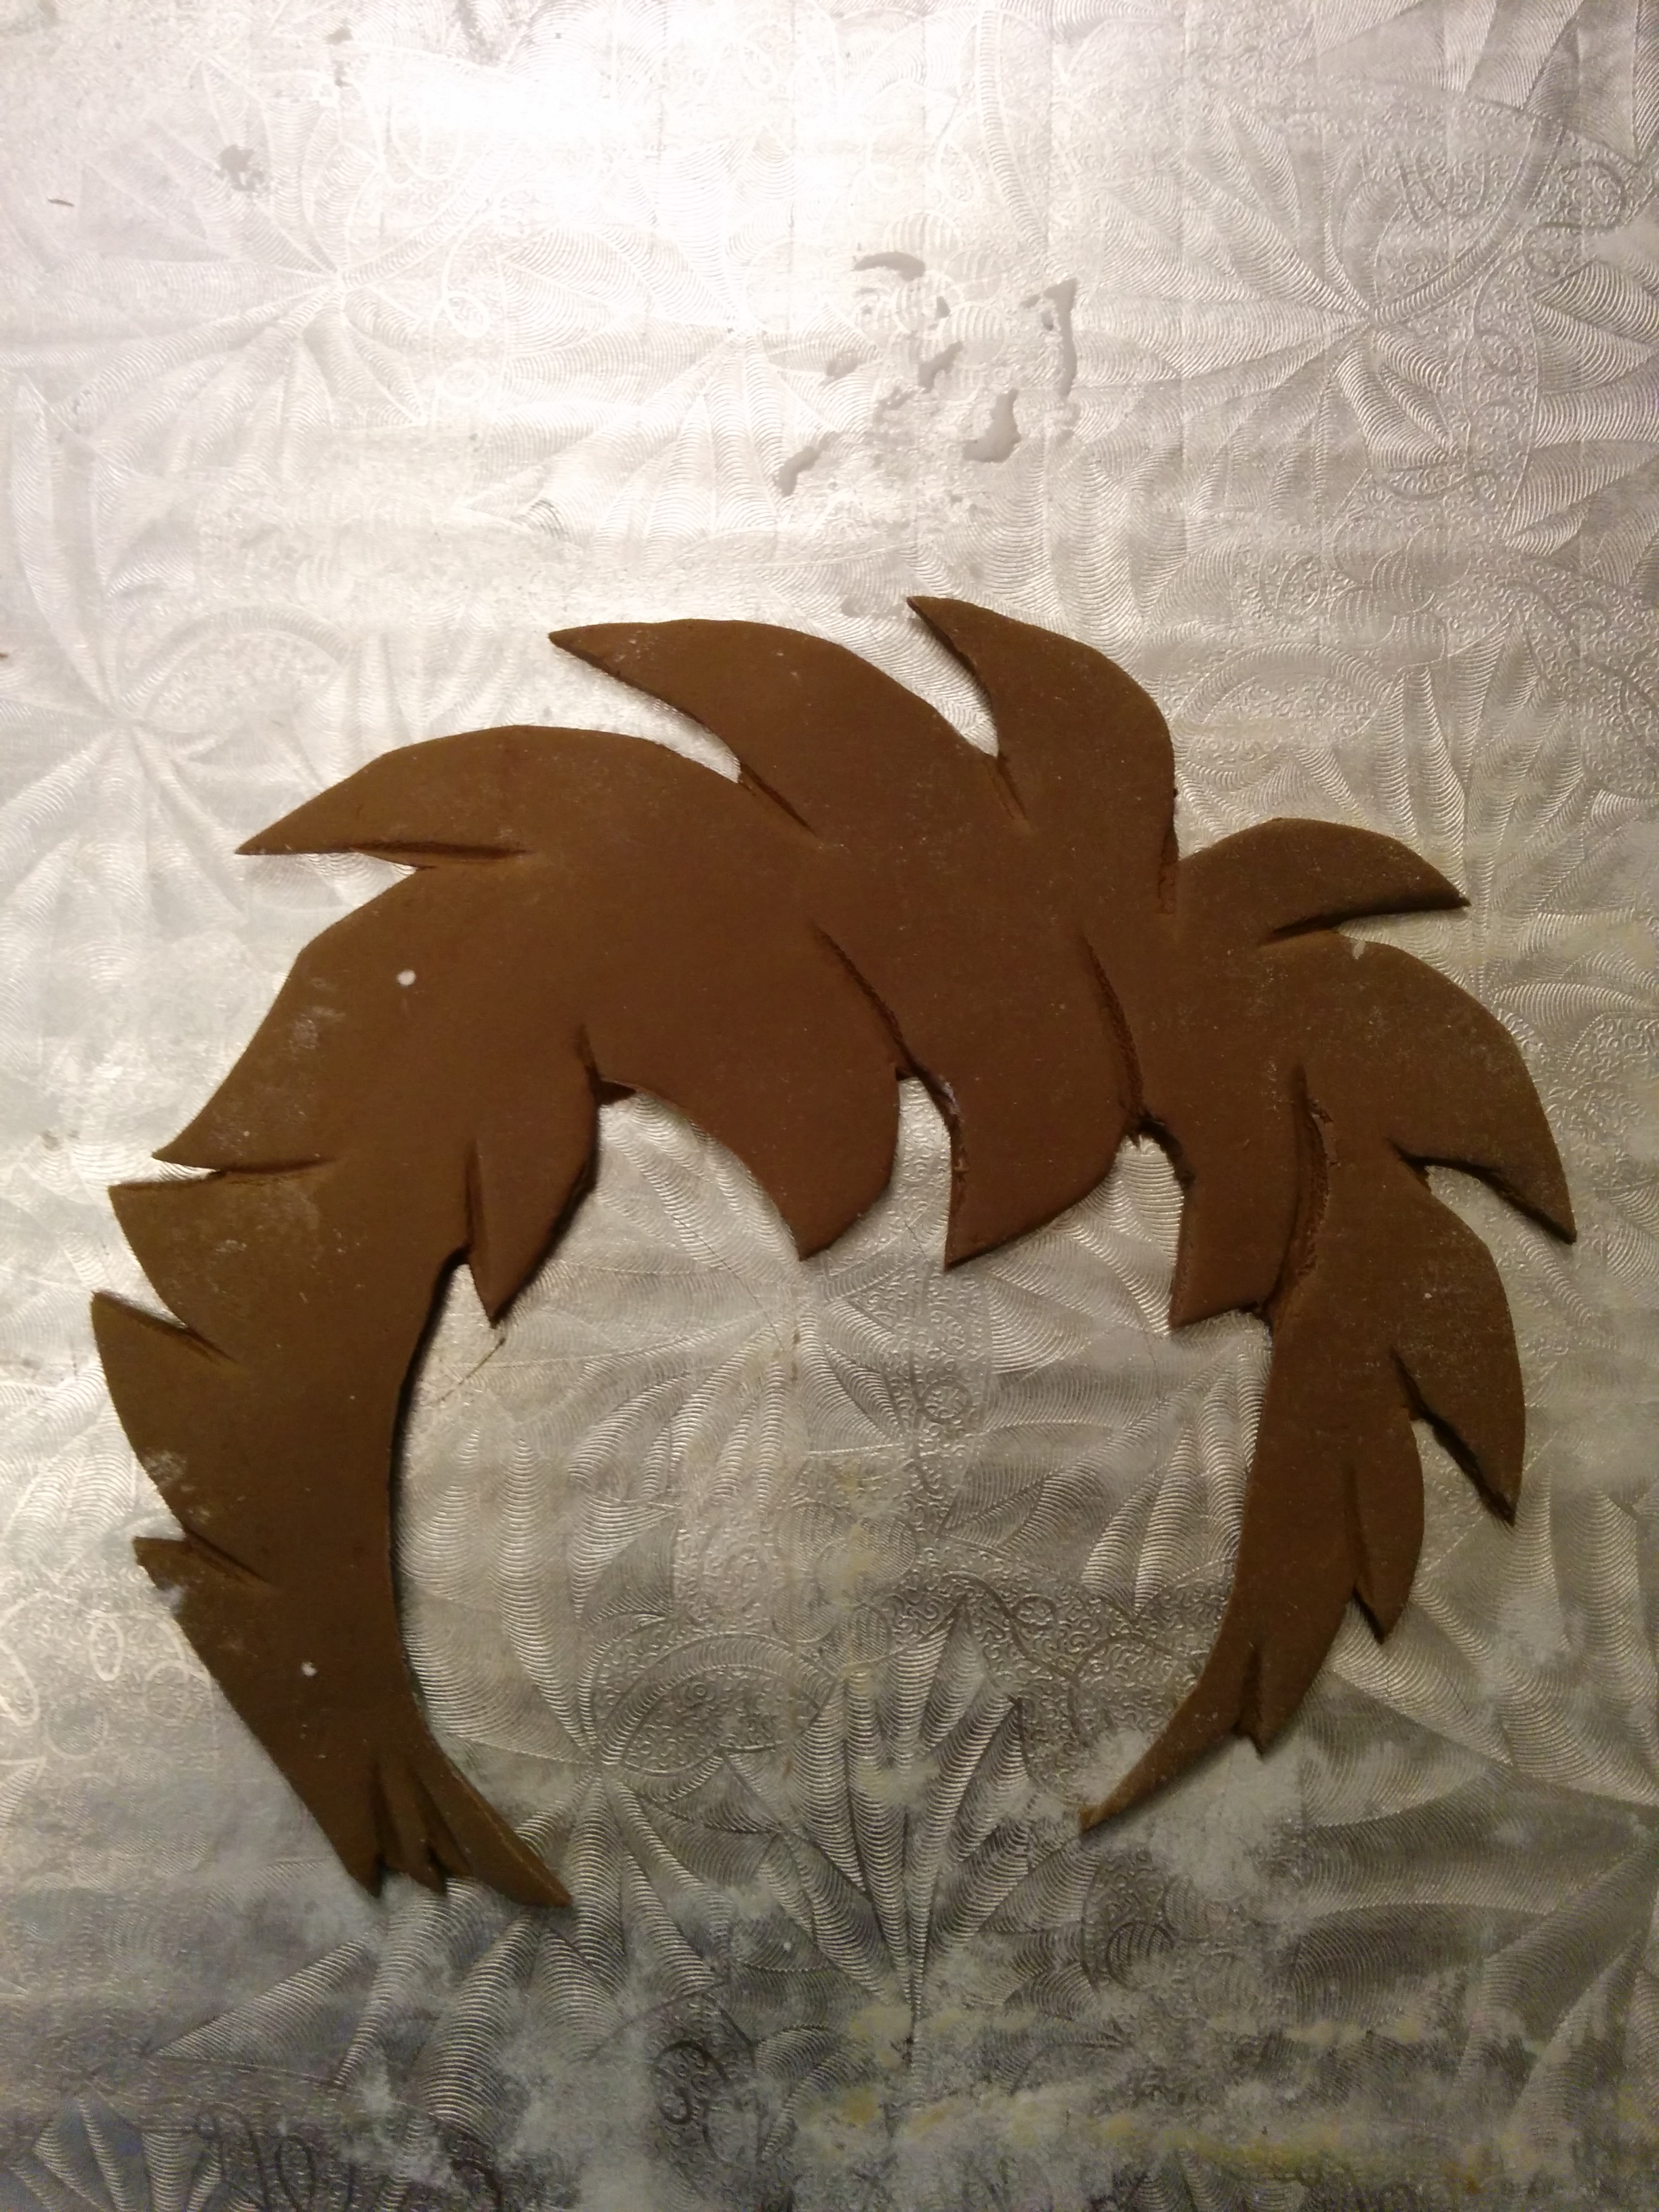
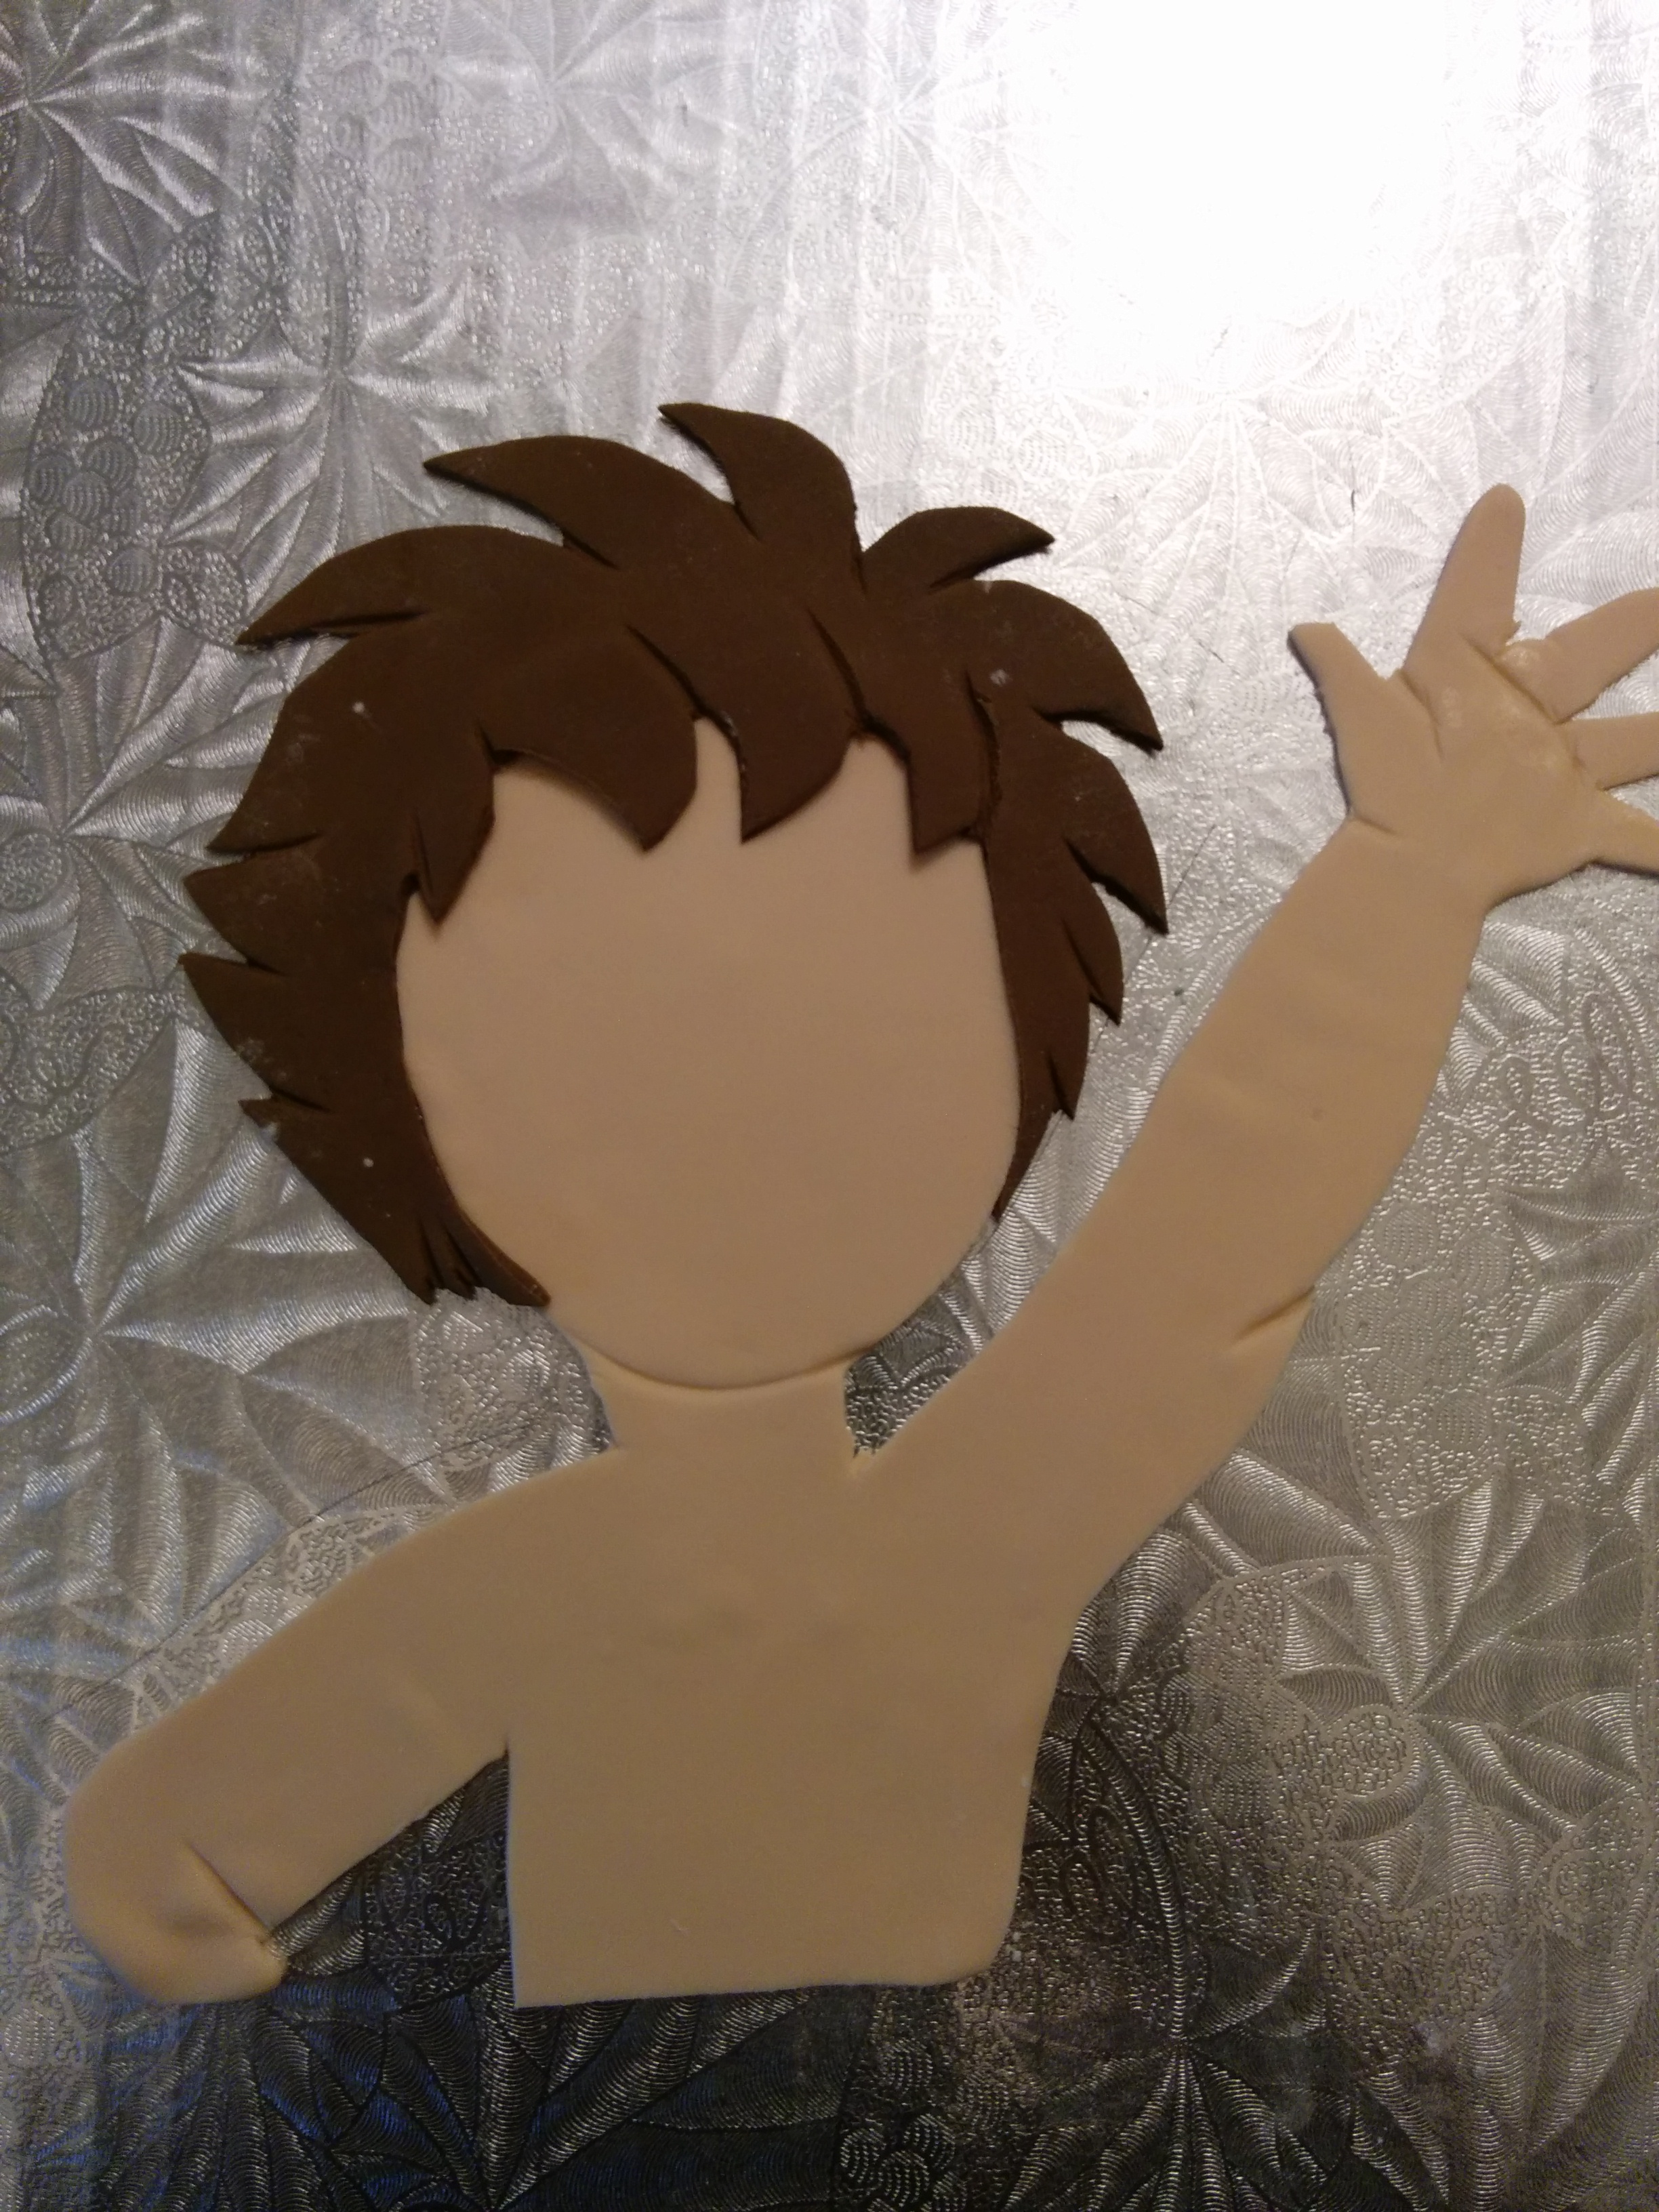
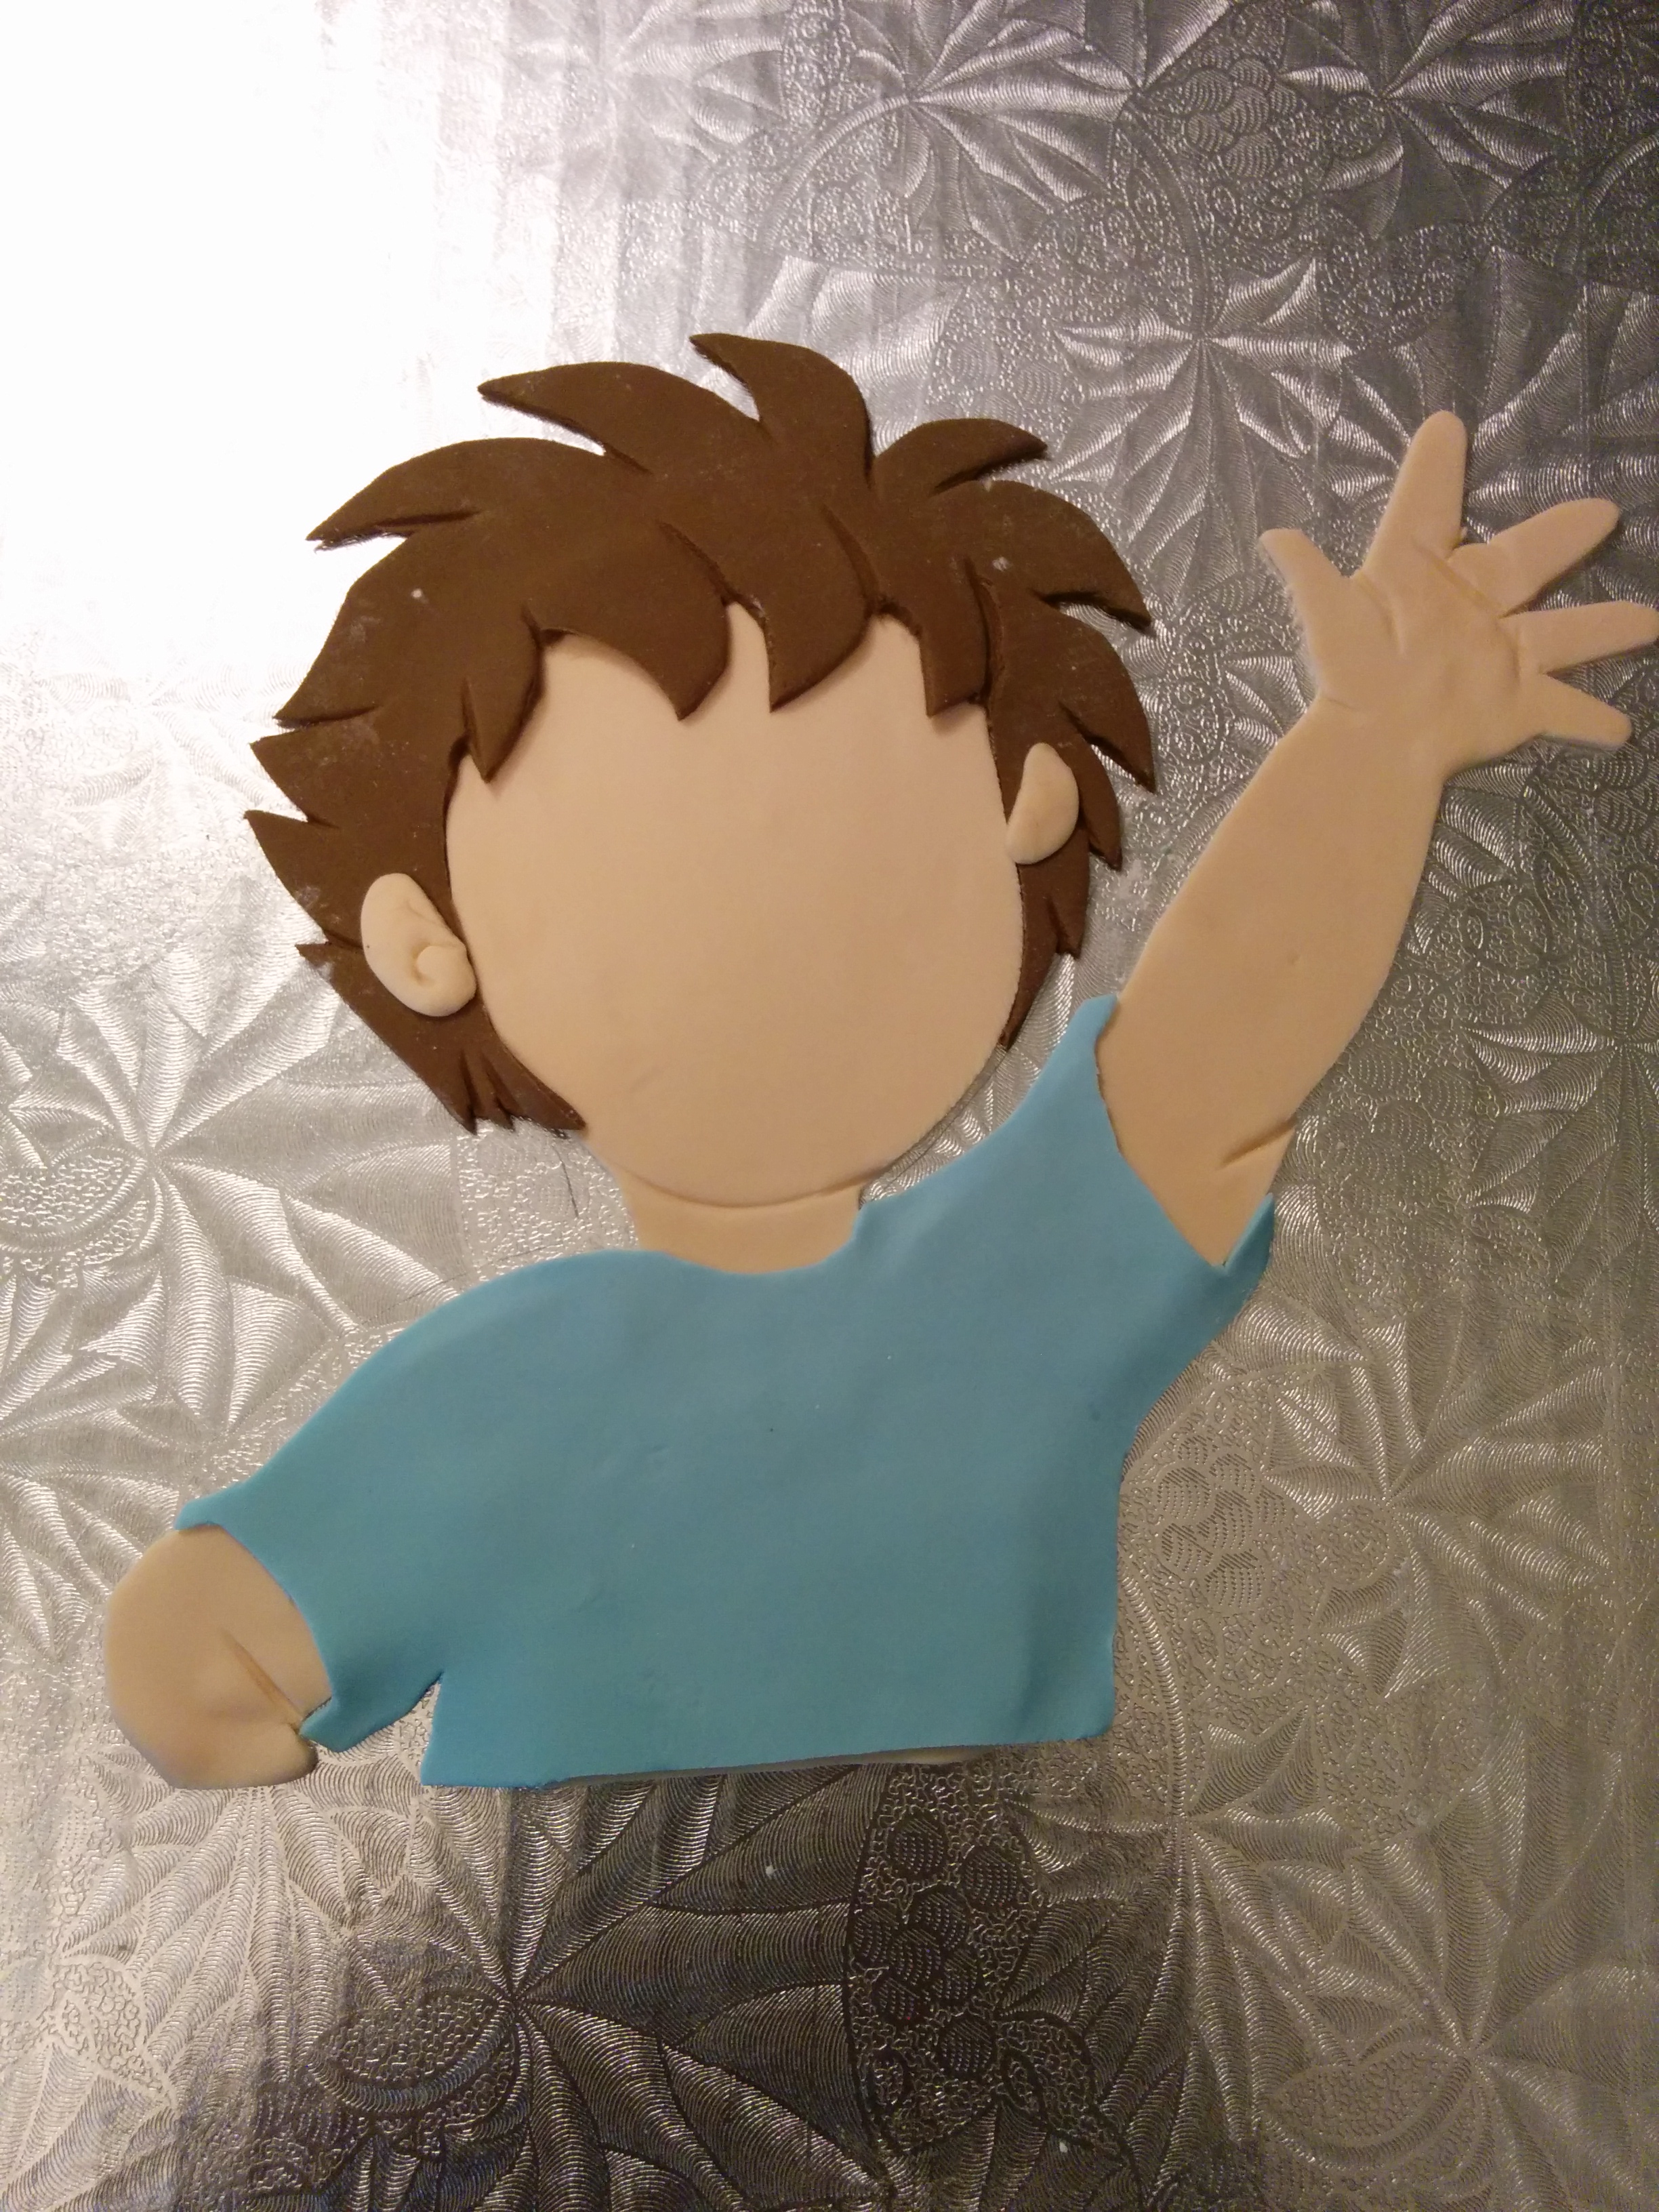
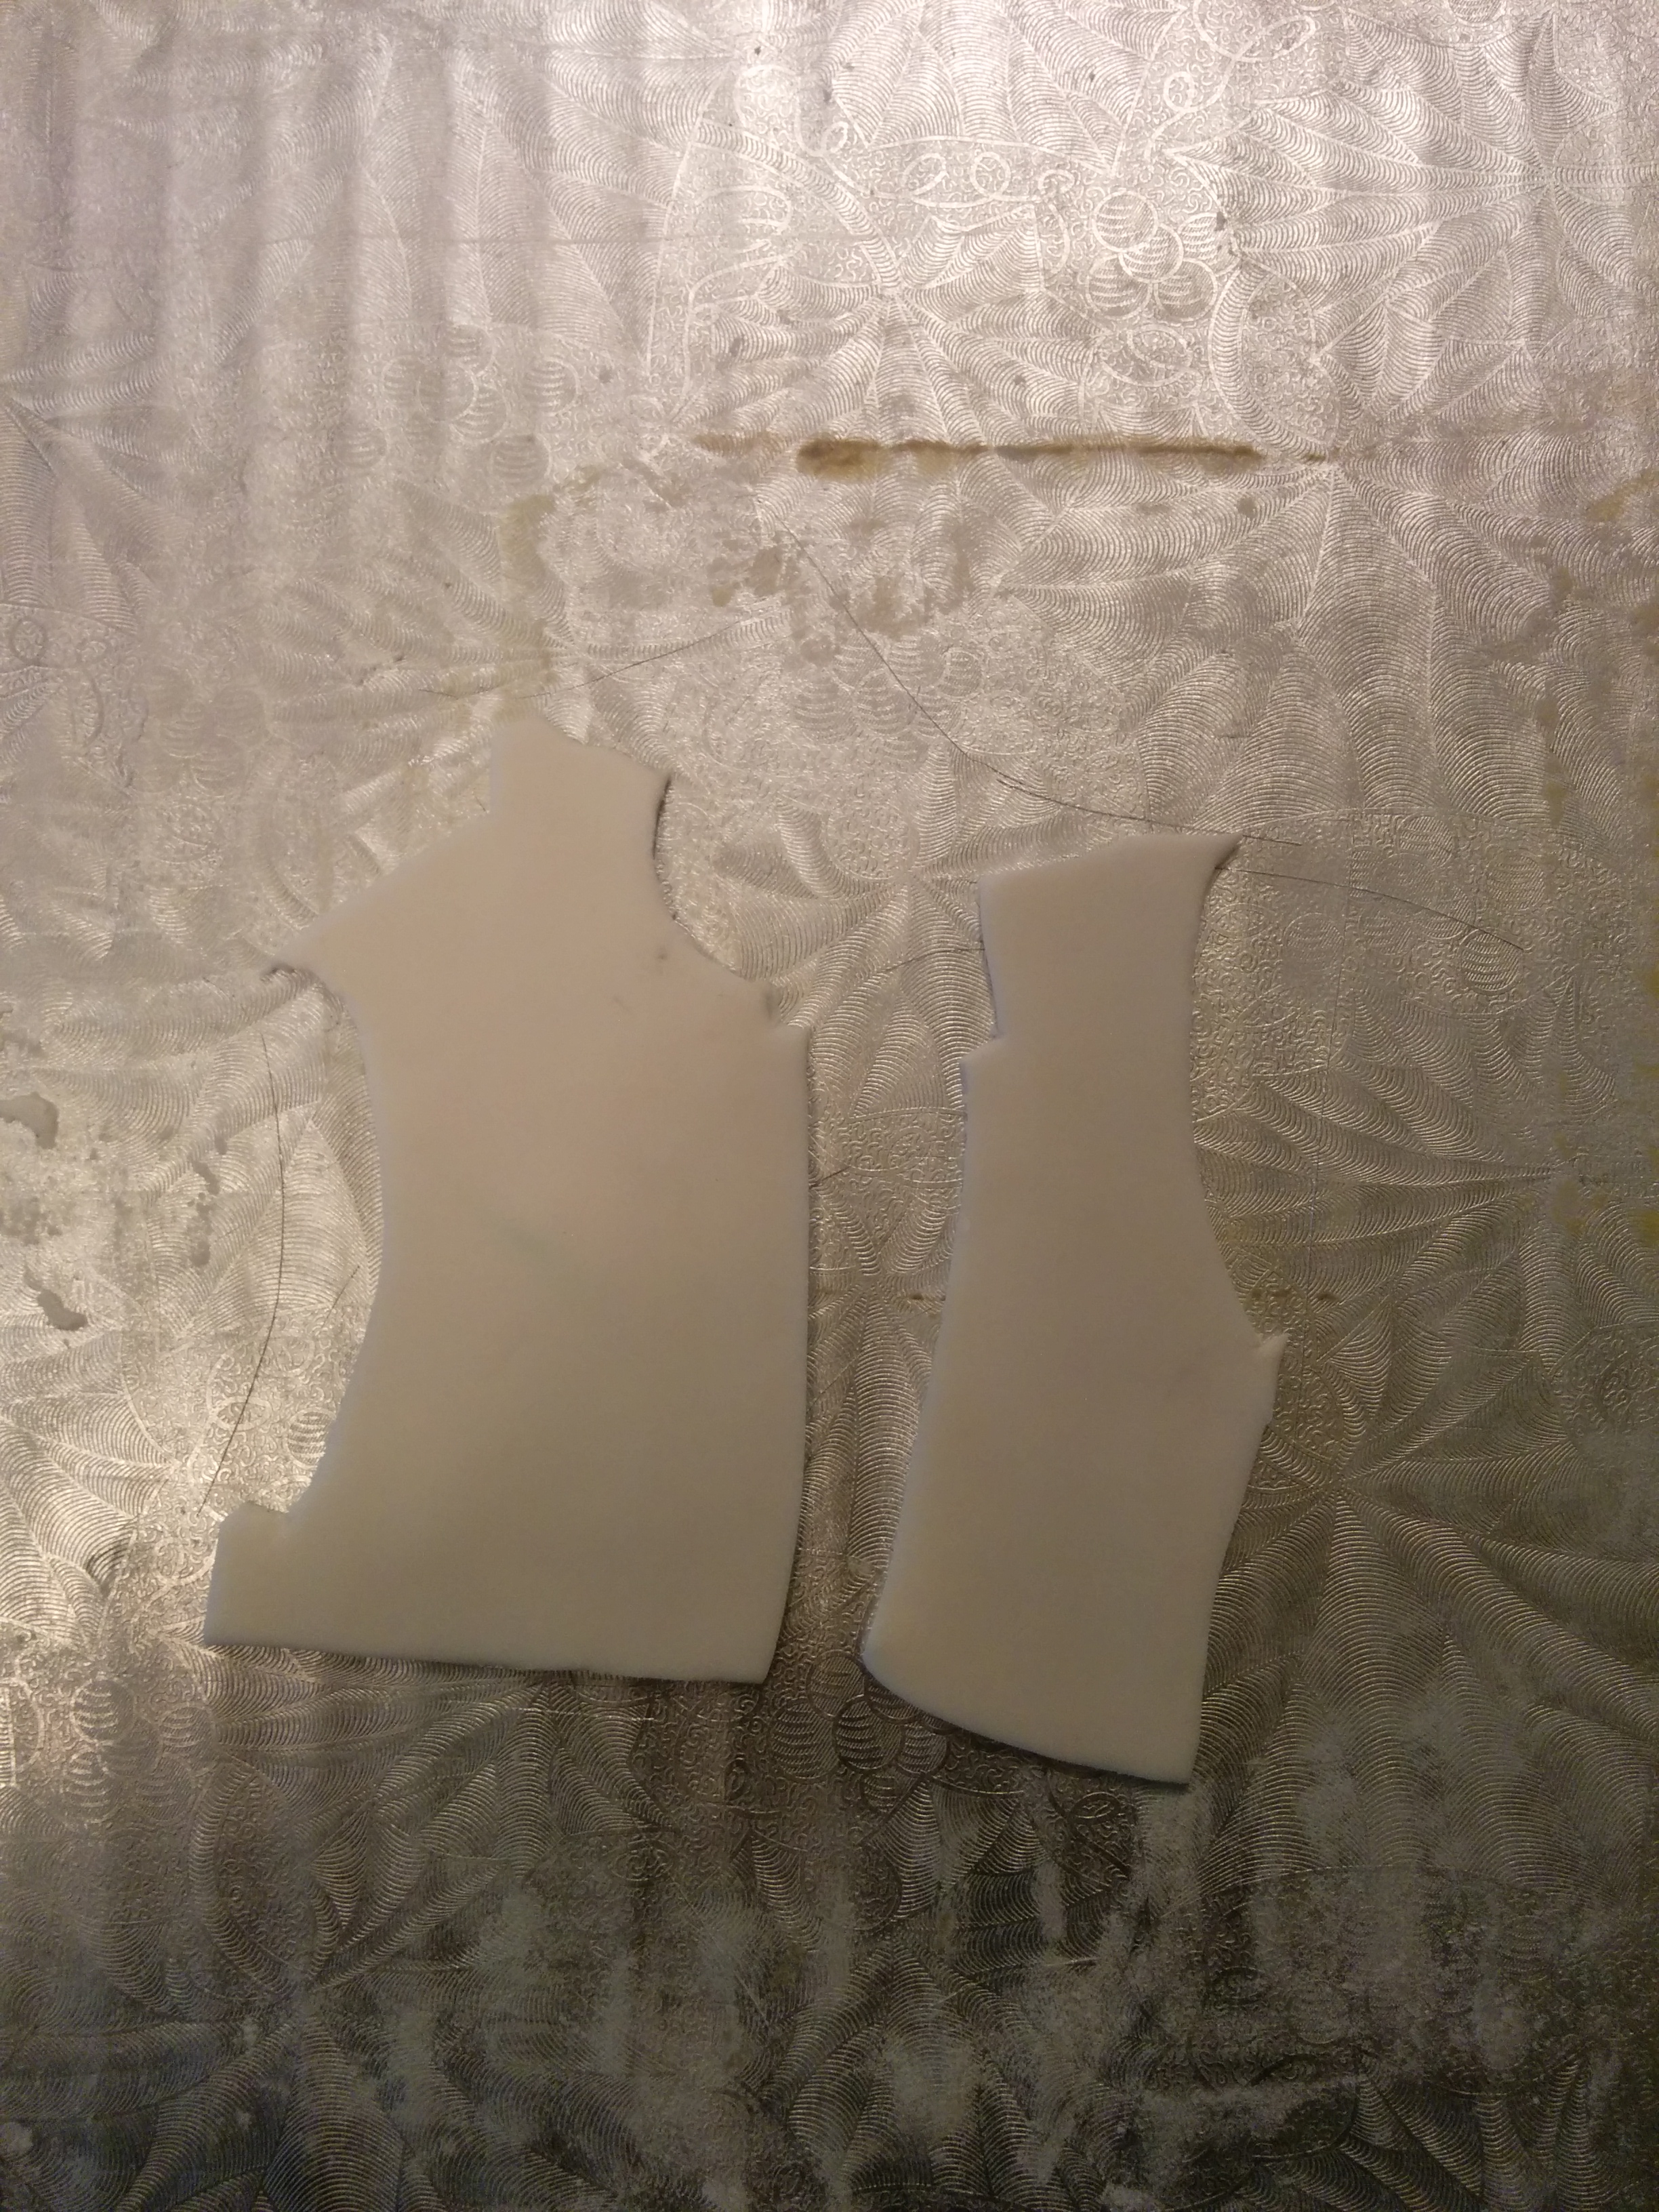
(3) The method of achieving these characters is by cutting out portions of the picture and using them as template to cut out fondant. Start by cutting out the large parts of the character such as the body silhouettee and the head. Smaller parts of the characters should be done last. It is also good practice to work in layers. For instance, start with the actual body, then make a shirt and finally make a jacket. Though parts of some layers will eventually be covered, working in layers will help ensure that everything is in place.
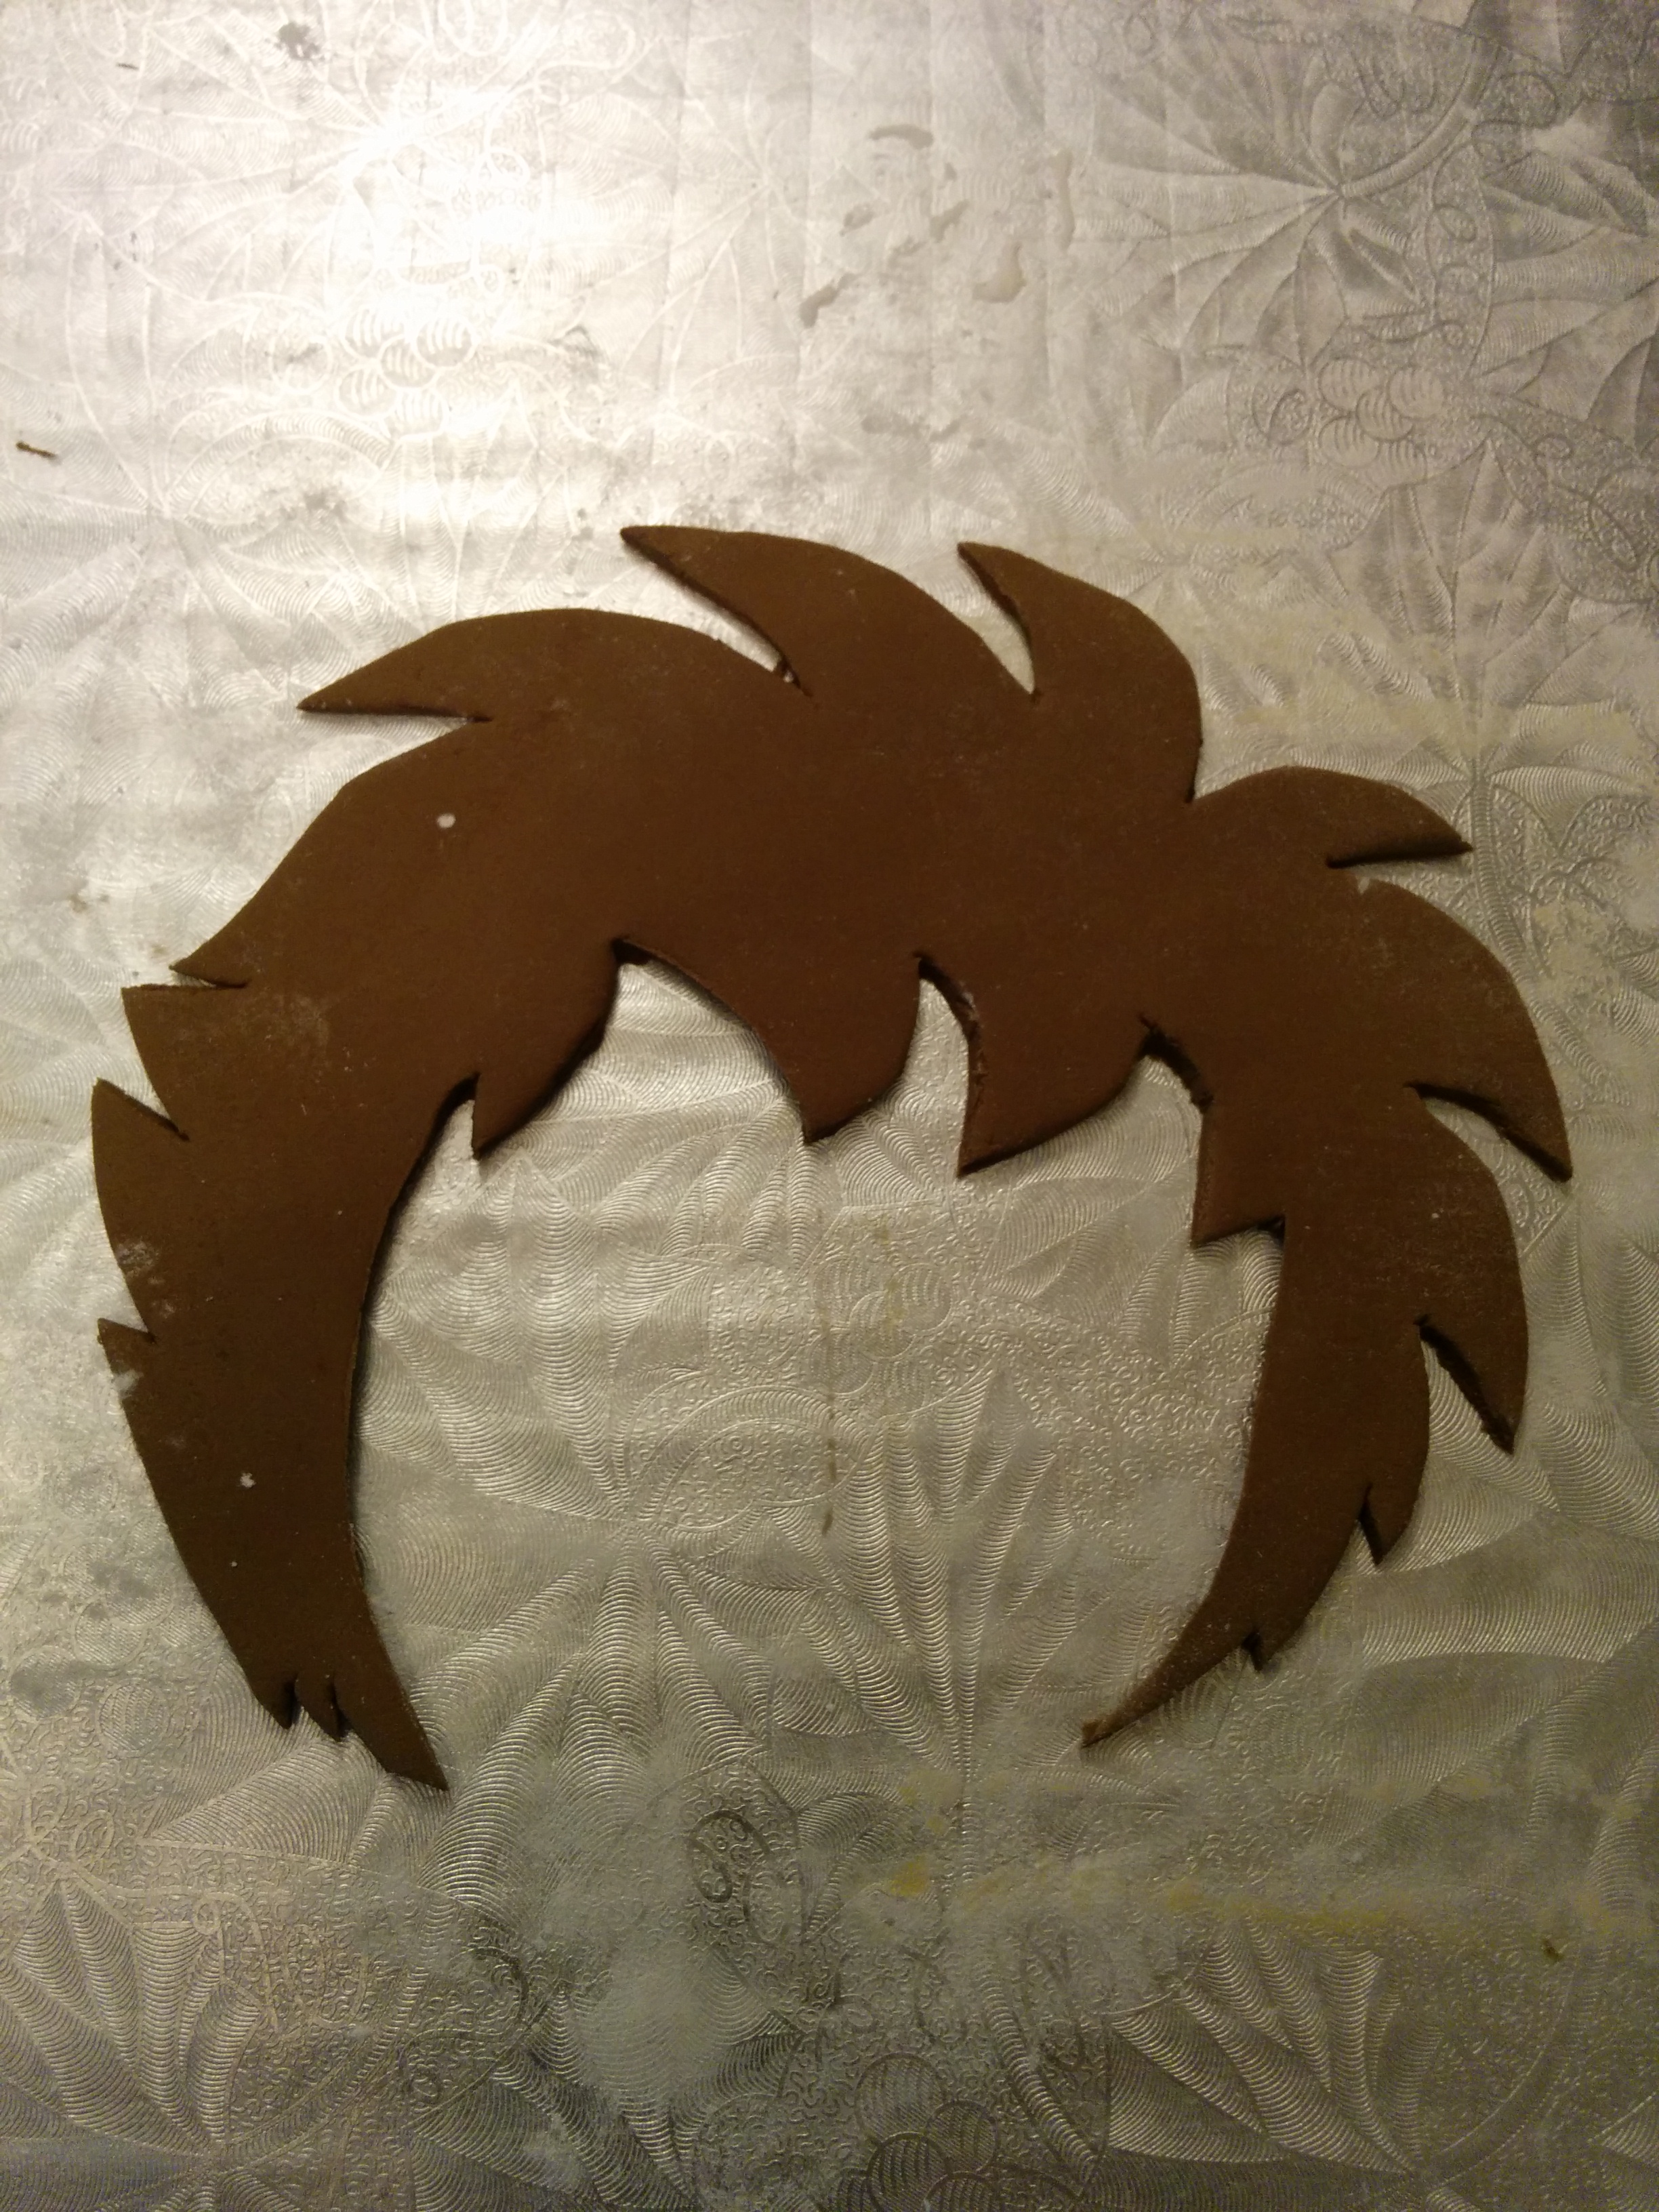
(4) Color your fondant as you work. I always try to get the colors to be as close to those of the original picture as possible. But don’t be too hard on yourself. Colors similar to the originals are fine. A tip is to make the body first which will almost always be white, cream or brown and make the hair thereafter by darkening leftover fondant from the body.
(5) Try to roll your fondant as thin as possible. Also make sure your fondant is not wet or sticky before placing paper cutouts on it. I usually dust the surface of the fondant with some icing sugar before cutting. Ensuring that your fondant is not wet will also lead to sharper cuts. I prefer to use fondant which is at least a day old for 2D cutouts as the dryer your fondant is, the easier it would be to cut and the least likely it would drag and lose shape during cutting.
(6) Something I usually do is roll out the fondant and leave it to air for about 30 minutes before cutting out the pattern. This also helps keep the cutouts in shape during transfer.
(7) Be sure to work with steady firm hands. Try not to allow the paper cutout to shift while cutting out the fondant. Always work on a movable platform such as a cake board so that the platform can be rotated while cutting around the cutout. Cutting on a platform on a turn table is best.
(8) Make indents using any indenting tool to show folds and overlap like in hair, dresses, etc
(9) As you cut, stick the layers on each other with some little water. When you are done making the character, you can brush it with some little water or preferably vodka. When brushing, make sure you brush by colors, starting with the lighter colors and graduating to darker colors. If you brush with sweeping strokes, you are most likely going to stain the lighter colors with the darker colors.
(10) Make the eyes and other facial features last. This is the hardest part of the job and takes the longest time. Nailing the eyes is always the hardest. I use various circular icing tips to get the several layers and colors of the eyes.
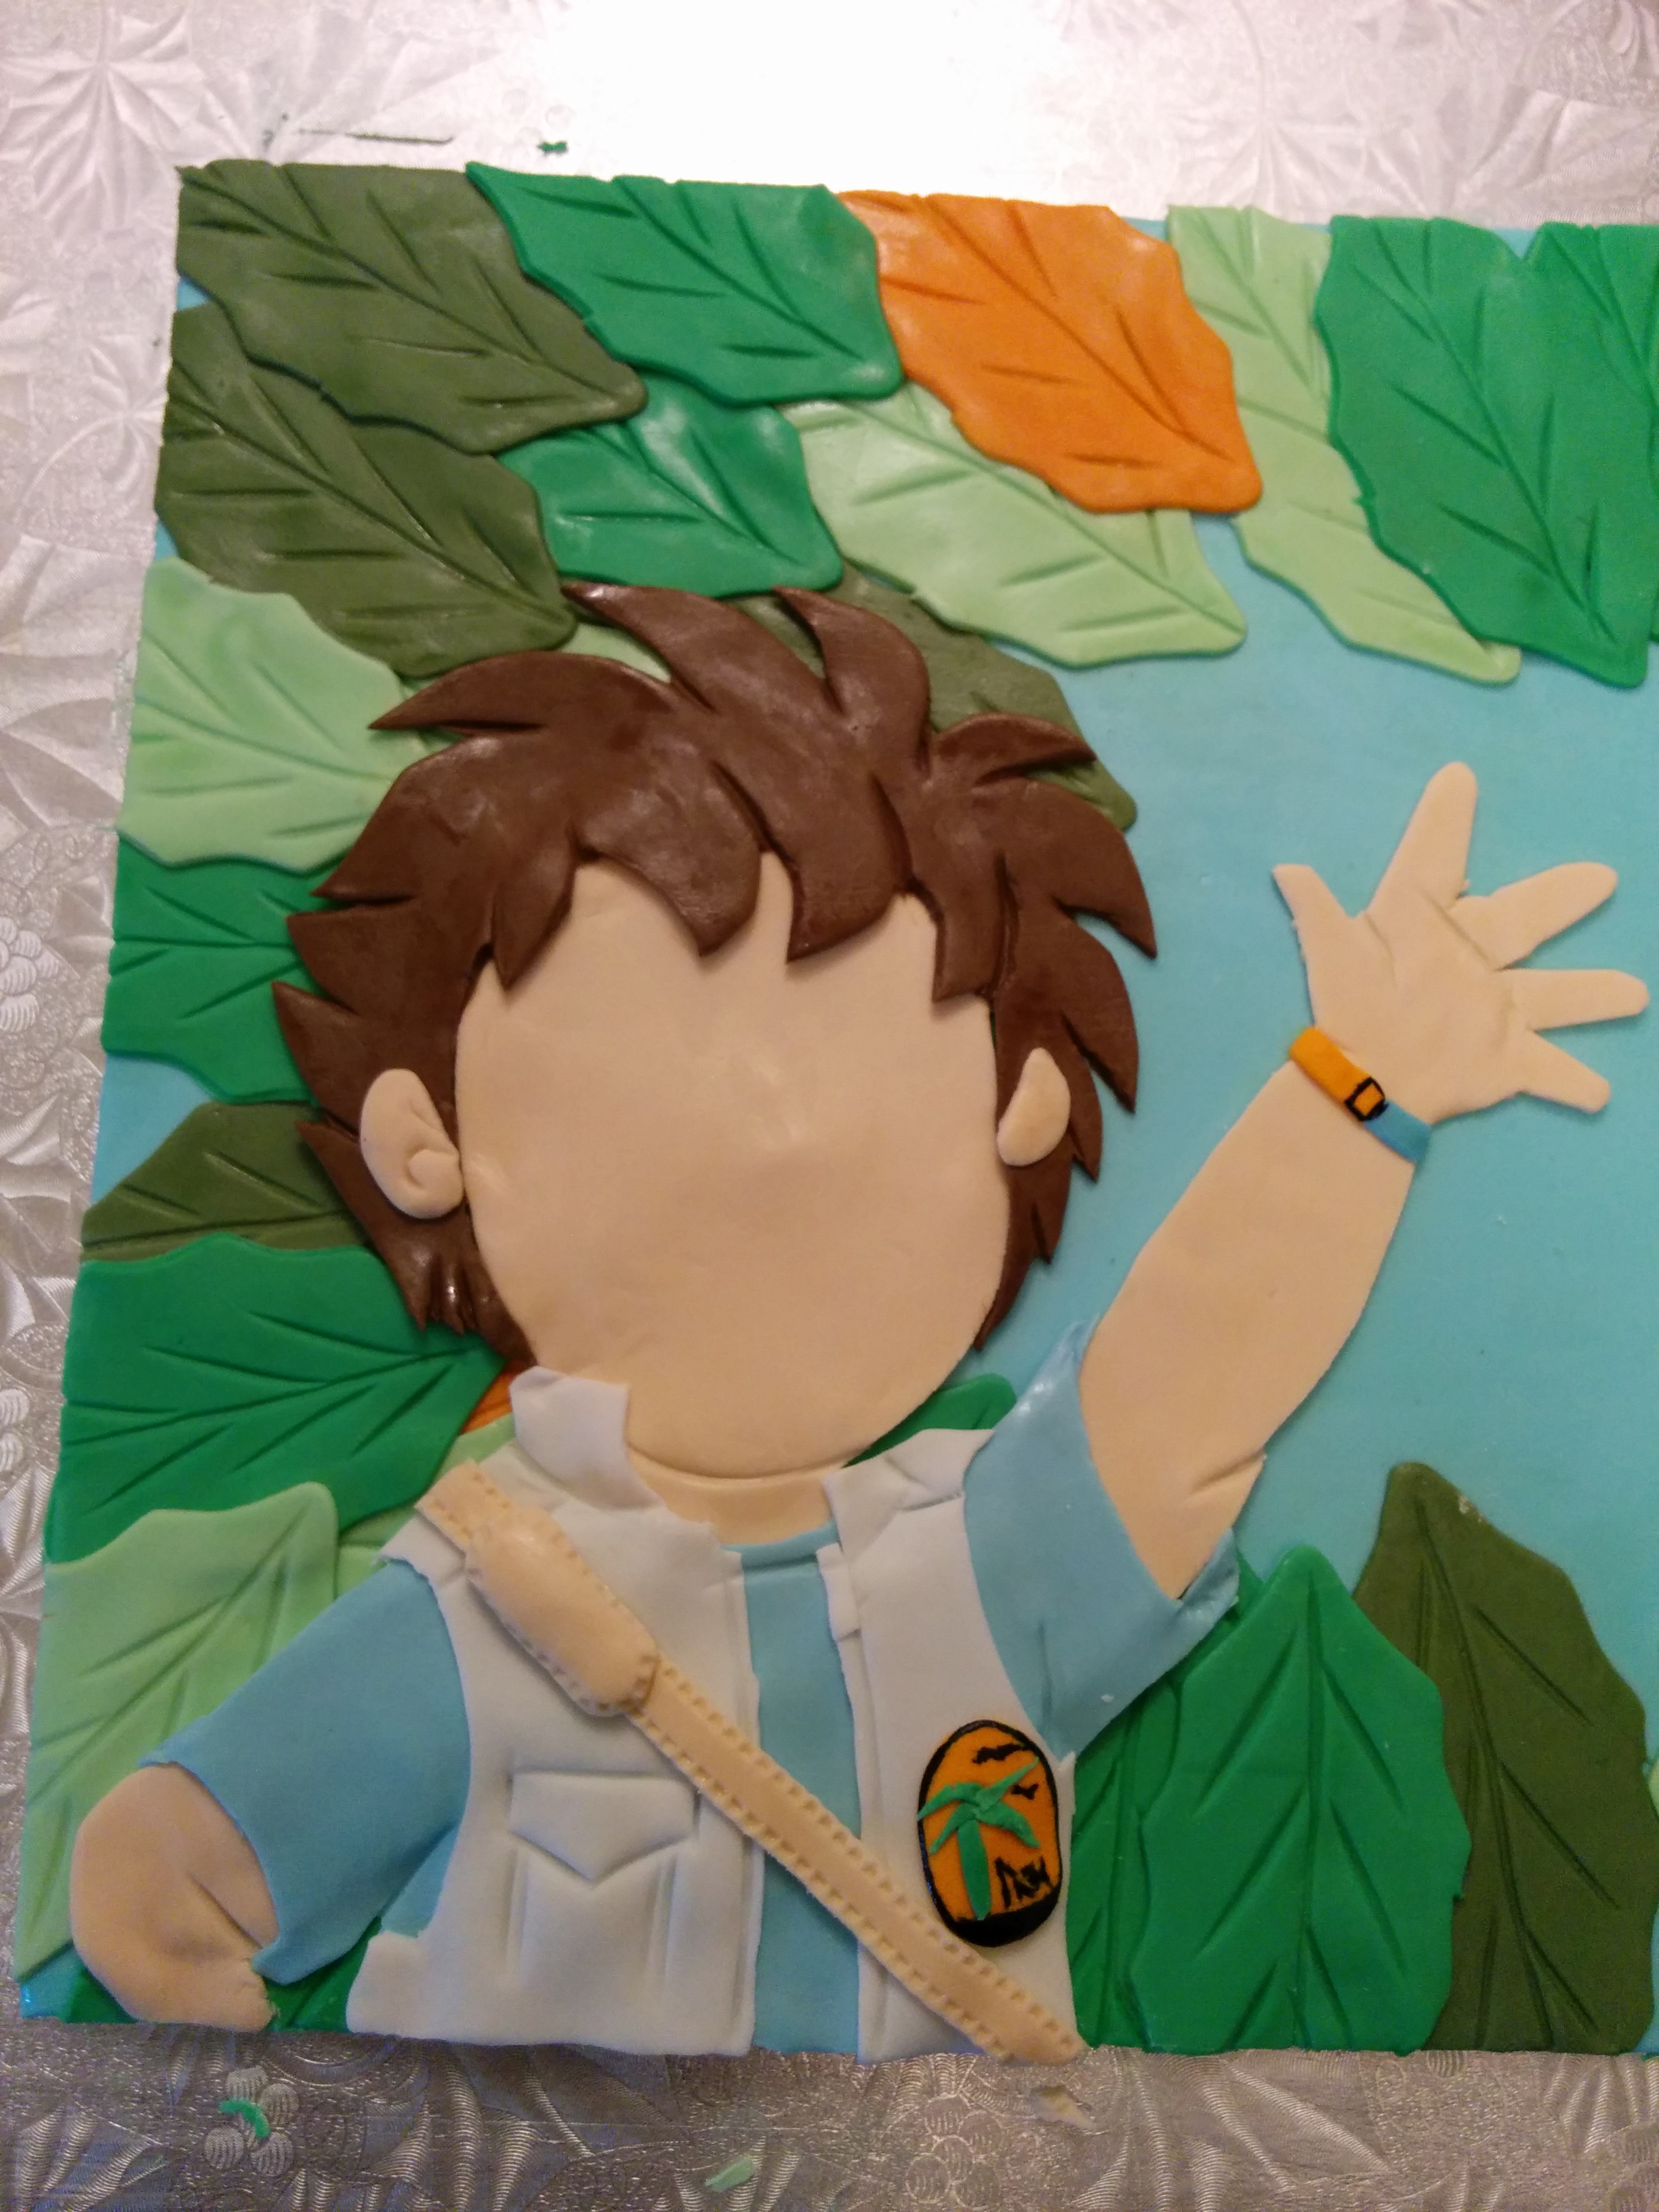
(11) The very small parts of the characters can be painted.
(12) Finally, for better definition, you might want to brush parts of the character with color dust to accentuate expressions, folds and movements like I did with the Goku character below.

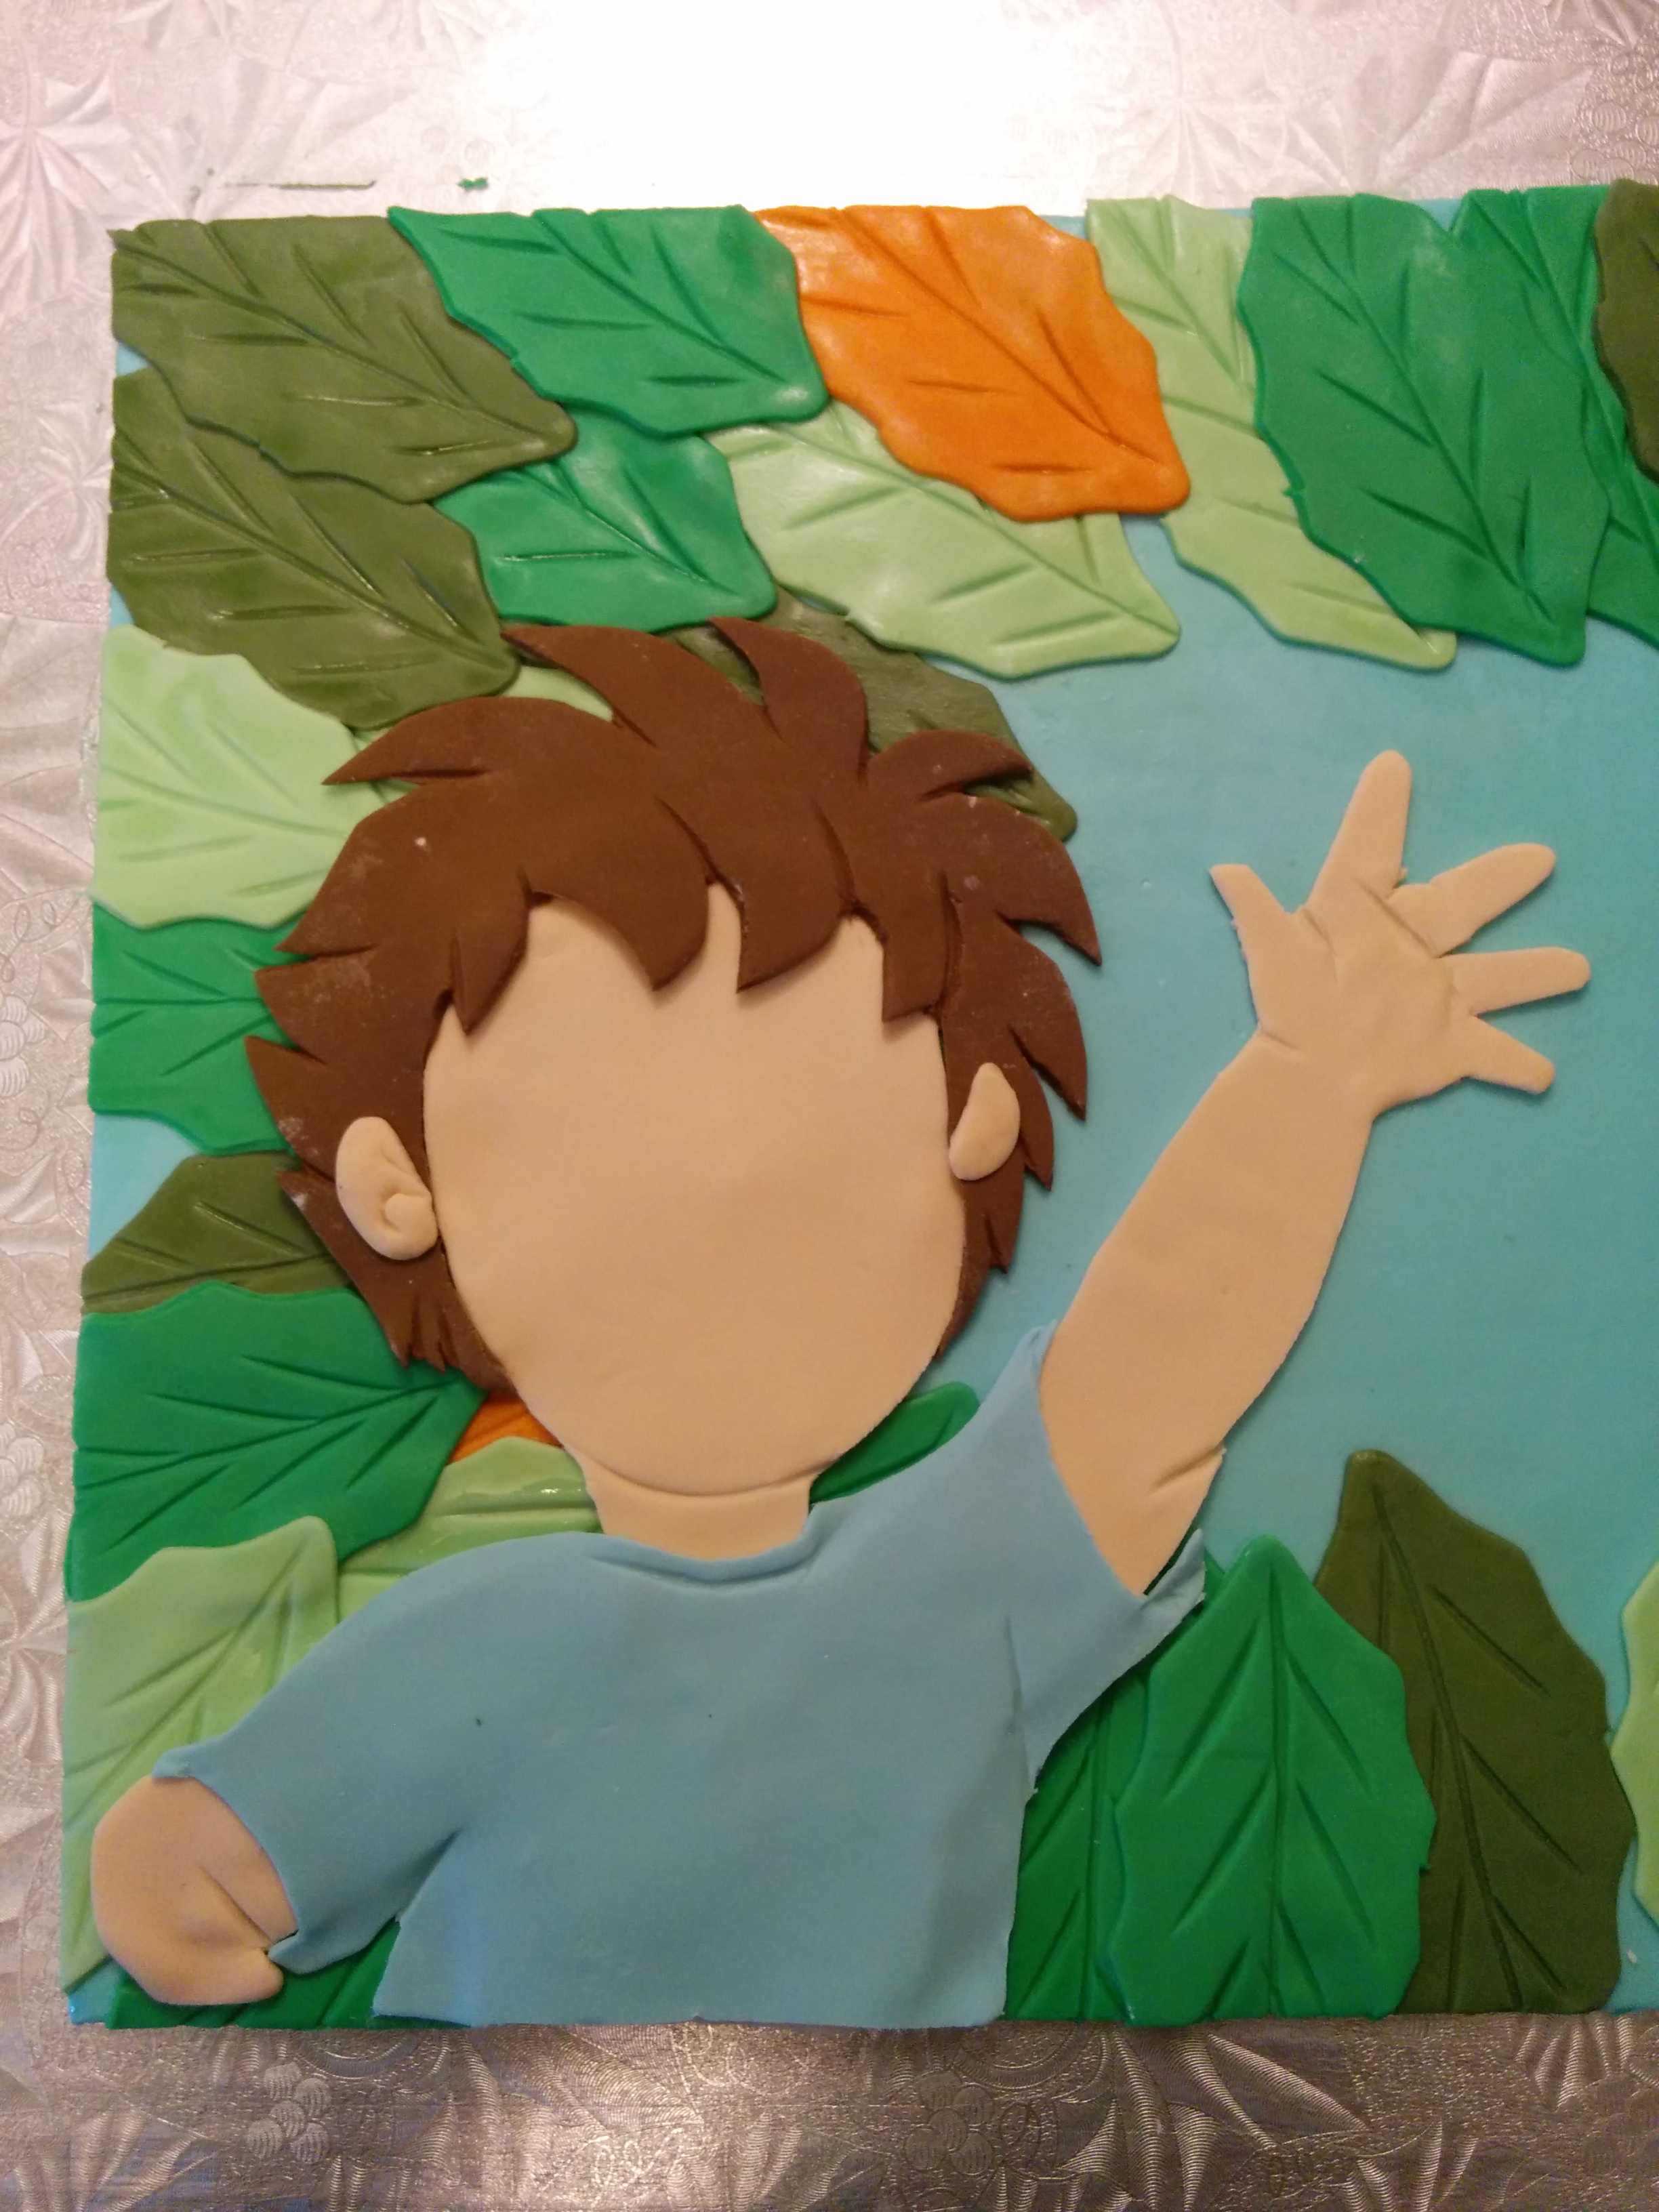
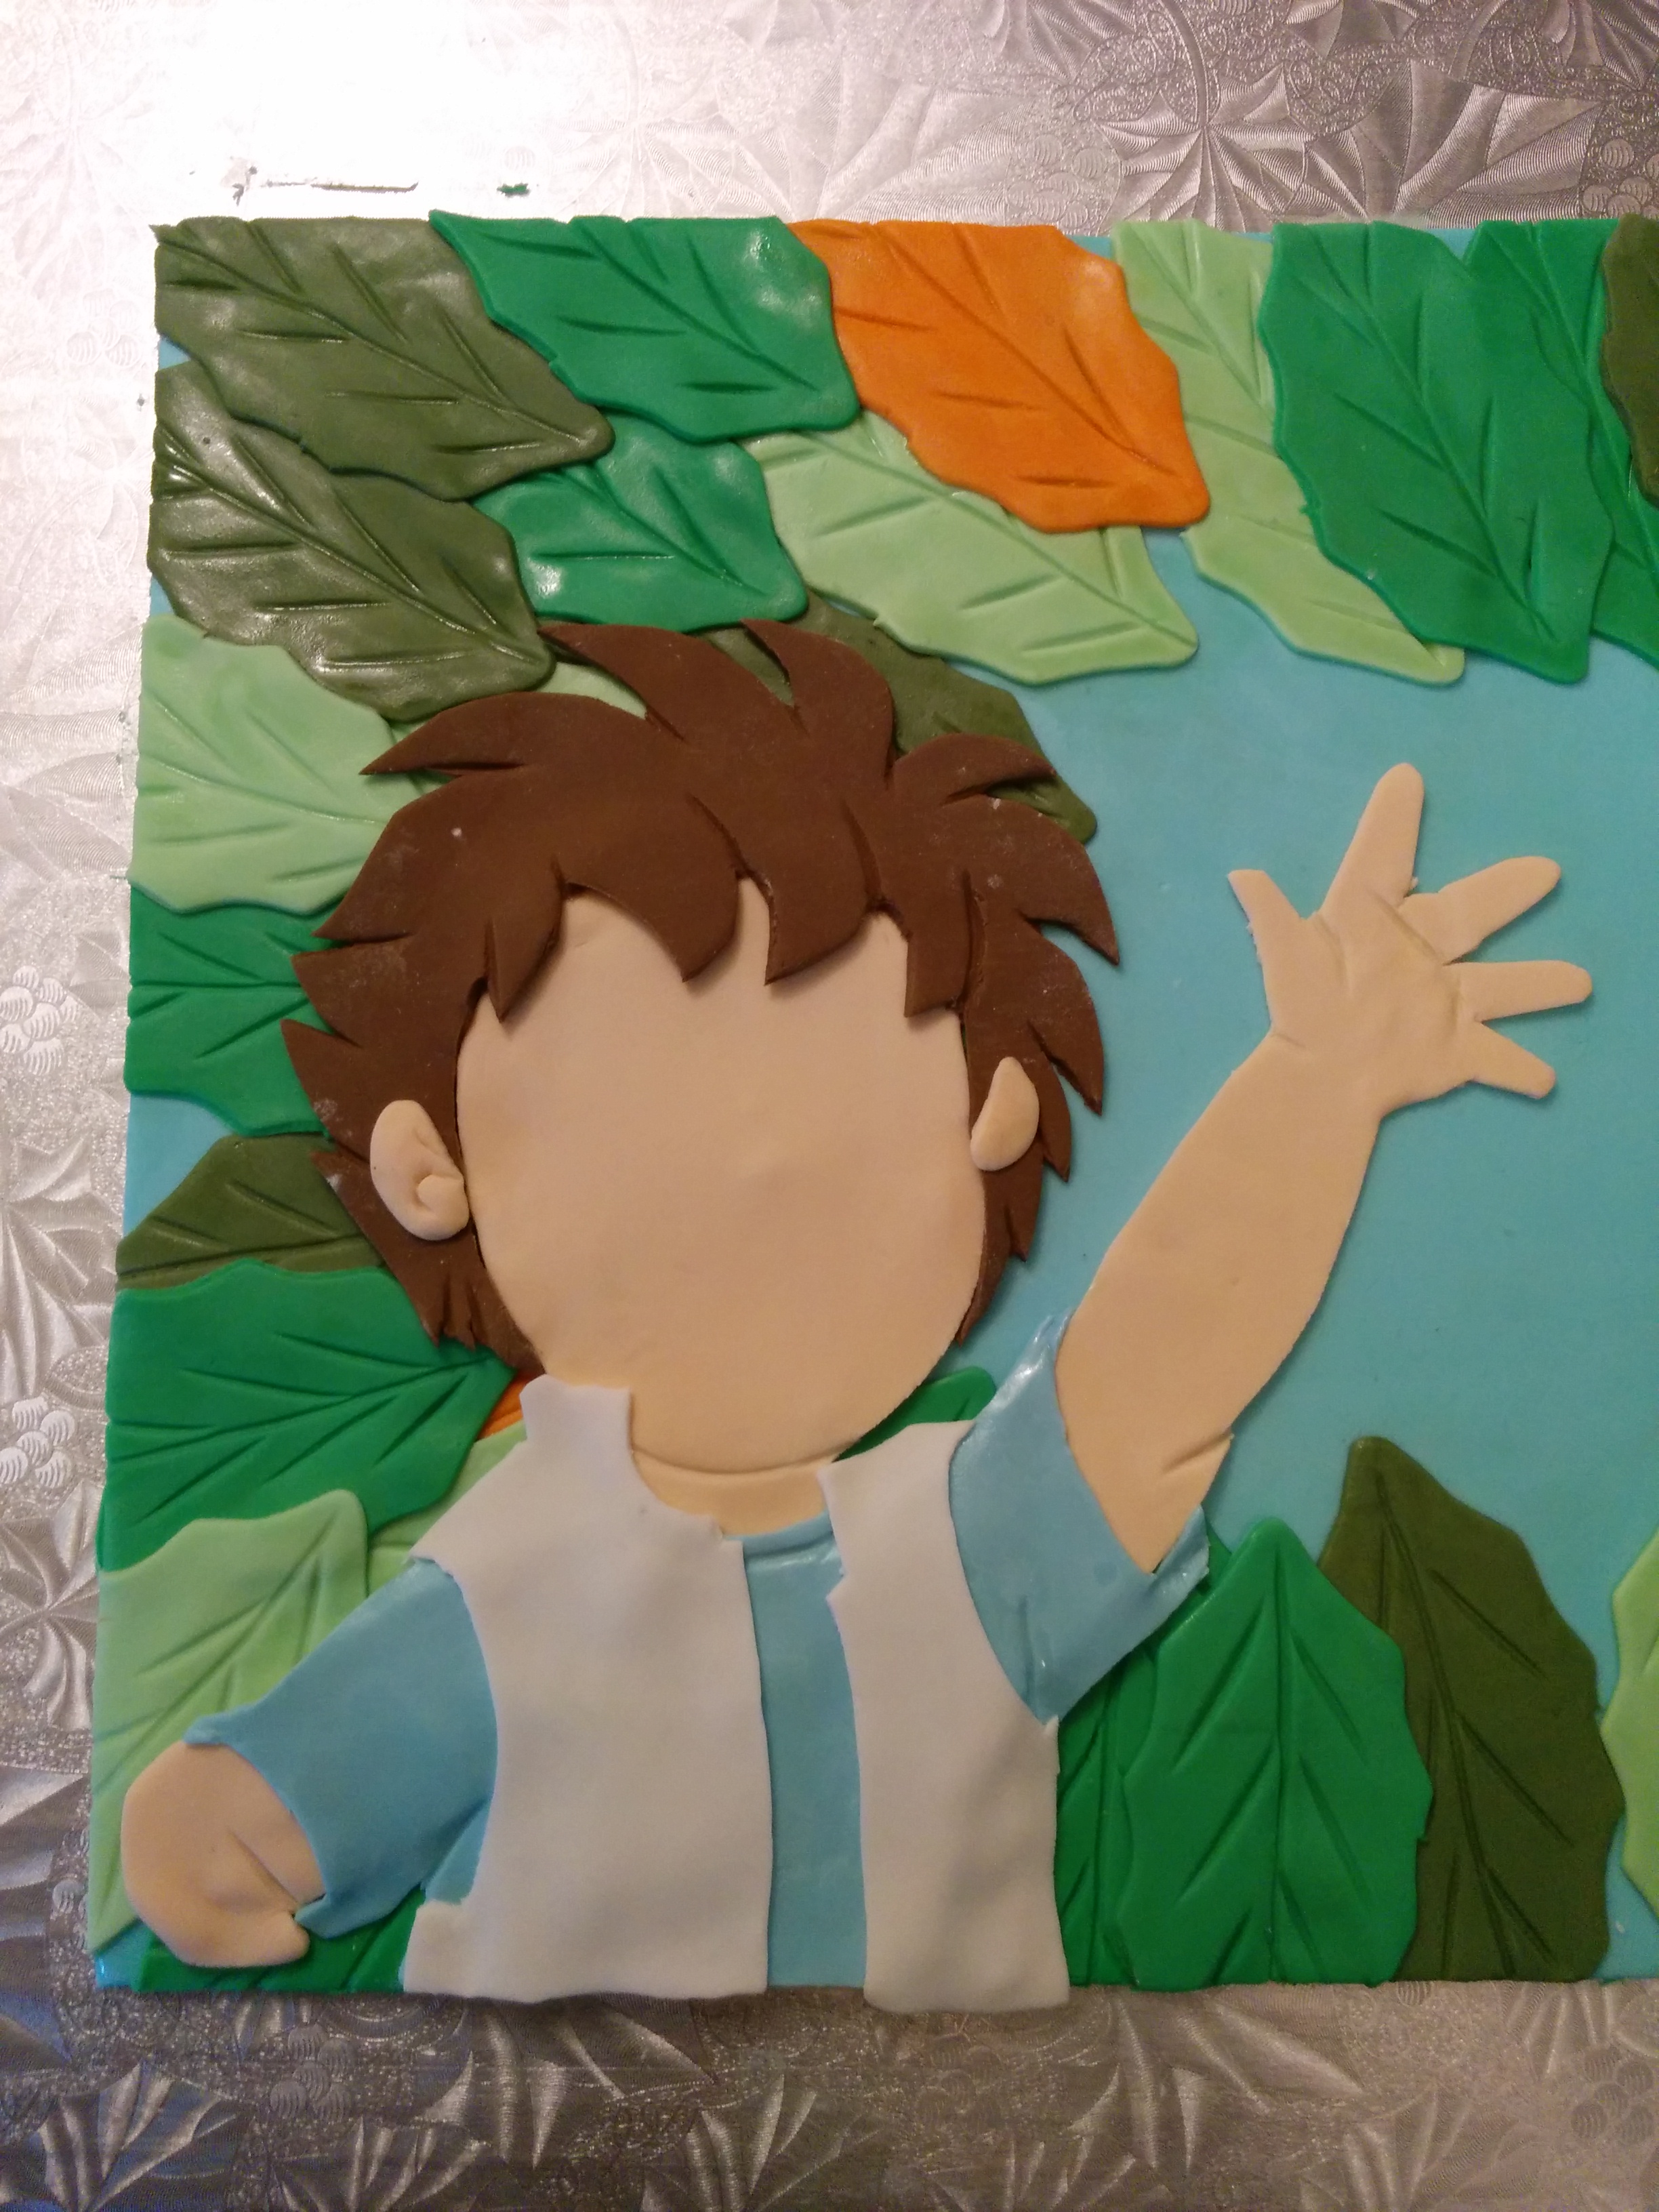
DIEGO PICTORIAL
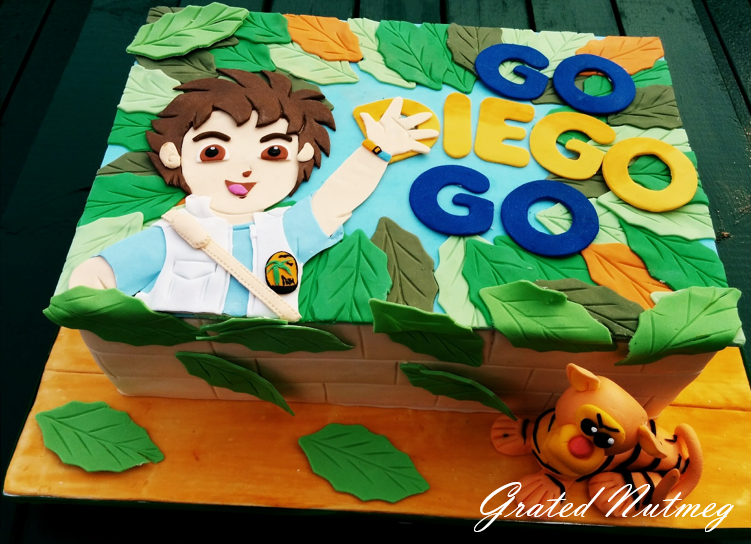
Go, Diego, Go Cake


Terry Adido is passionate about showing people how easy it is to recreate restaurant quality meals in the comfort of their kitchens. With a style of cooking he refers to as Afro-European Fusion, his meals are influenced greatly by French and Italian Cuisine with a West African twist. If you love good food, you are in for the ride of your life.
Bravo
Merci
Wow! Thanks Terry, well-done
Thanks
U r wow
Thanks
thanks very detailed and worth trying.
Thanks. Do try it out.
Terry welldone and thanks for this needed tutorial. ..really learnt from it.
You are welcome
Good one Terry
Thanks
Terry really nice picture tutorial.
Thanks sir.
Great work, Terry, well done. Still laughing real hard over the tiger razor blades. Haven’t seen them in a looooooong time
Thanks. Those were brought in specially for me from Nigeria.
See me looking for Xacto knife up and down when I can easily buy tiger. Thank you soooooo much terry, I have learnt a lot from your site, I honestly can’t thank you enough.
You are welcome Rukky. Yup, Tiger does the job.
Terry, i this done on the cake or outside the cake and later transferred to the cake
I usually do it on its own and later transfer it to the cake. This is because you want it to dry before transferring it on the cake. Also, you mgiht make a mistake and you do not want that mistake to be on your cake.
You just too much terry.
Thanks Alimat
Wow! So excited in all ur posts,am really having interest in dis wrk pls……. Kudos 2 u Mr Terry
Thanks
Thanks Terry. Pls can you teach me how u make d teenage room carpet?
I’d have to work on a tutorial in future.
Terry thanks…i sincerely appreciate your sense of originality…a hug from me.God increases u daily.
Thanks Mercy
Whao, blown away as usual. Thanks for the tutorials boss.
You are welcome Shade
you are just too much thanks a lot for d tutorial.
Thanks Ramatu
Thanks alot.
You are welcome
Thanks alot Terry,U are d best.
Thanks
This is really beautiful. You make this look really easy. You’re such a good teacher. Thanks so much for sharing your knowledge with us.
Thanks Angela.
Weldone Boss. God bless u for ds priceless tutorial. Ders alwys a lot to gain from ur tutorials
I’m glad to hear that.
Thanks a lot for this tutorial been seeing things like this on cakes and wondering how it was done. i hope to try it out with a mickey mouse cake am about to work on.
You are welcome.
Thanks for this. I usually do everything by just piping buttercream, but I have a Bubble Guppies cookie cake to make for a friend’s daughter…I was thinking the only way I could get the characters precise enough would be with fondant. Your tutorial helps a lot.
Thanks for sharing your wisdom!
You are welcome Jeanne. I’m glad I could help.
Terry you’re too much. Thanks for sharing the fantastic tutorial.
Thanks Roseline.
Thanks so much for this. The pictorial and detailed notes are going to make this process much easier for me!
I’m glad I could help.
Wow wow. Thx. U have a way of making decorating so easy. Thx again. God bless u
You are welcome Sarah.
Bravo!!!!. Great work. You always give me an assurance that am on track. Thanks a lot
Thanks Jumoke.
Wow, this is really explanatory. Will sure try it out soon and let you know how it goes.
Thanks. Do keep me posted.
Thanks a lot for this easy-to-use tutorial. Is it the same kind of fondant you use to cover the cake that is used for the 2D cutouts or do you use sugar paste?
Thanks. Same Marshmallow Fondant. Nothing added.
Gifted hands. thanks for the tutorials
You are welcome Charity.
God bless u real gud..
Thanks Ego.
Hi
This is a great tutorial…thank you.
I have to make a 2d motorbike and I love the method you have used here but if I assemble my bike on a board how do I then transfer my bike to the cake? Do the different components not fall apart?
Any help you can give would be greatly appreciated.
Many thanks
Carol
Hi. I do not see why the components will fall apart. I guess you will be using some water to stick them together. You might also try using cutting out some fondant the shape of the bike and building the remaining of the 2D images on that fondant. That way you have a base underneath the bike.
May u live long sir. Tnks for sharin dis idea
Thanks.
Thank you for the tutorial. Can I use pastillage instead of fondant?
I would think so Debbie. I have never worked with pastillage before.
You are great
Thanks Lady AVO.
Thanks terry 4 sharing ur knowledge,it shall b well with u,favour shall b ur portion
Thanks Susan.
Thank you so much Terry for this very comprehensive tutorial! After much time trying to find a 2D tutorial, I’d almost given up. You are the only one who goes into the detail I am searching for. Thank you for supplying just what I needed!! Blessings
You are welcome Mary. I’m glad you find this tutorial useful.
pls what shade of color is the skin of the go Diego go pls? is it ivory or light brown. I’m not too familiar with some shades og color. and also, I’m trying this cake next week for my clients son; so I’ll keep you posted. thanks
I used ivory. You could add a bit of brown to ivory fondant for a darker shade. Looking forward to your creation.
ur really amazing and blessed, God bless u the more
Thanks Pricilia.
plz can u give tutorial on how to make traditional husband and wife fundant. thanks
I will if ever I have the opportunity of making such a cake.
thanks for sharing. please what is the difference between marshmallows and other icing sugar
There is no similarity between MM and icing sugar.
wow! I have really been thinking on how to do this,am so very grateful sir Terry. God bless you really good,will definitely try this and send the pix across.
You are welcome Esther.
Thanks Terry , really appreciate you , sharing your knowledge with us.
My pleasure Sunethra.
Thank you so much for sharing. You make fondant art so easy. God bless you.
My pleasure Seyene.
Nyc one again…tnks for that
You are welcome Emily.
Beautiful! Thanks for sharing this Terry…you’ve made me feel I can do whatsoever designs I want to without fear! you made it look so easy!
You are welcome Ify. I’m glad you feel that way.
Thank you so much!! This is very very helpful
You are welcome Nad.
Terry Adido…aka Cake Genie!!!!!!!!
Thanks Joy.
JUST what I was looking for — THANKS!!!
You are welcome Rachael.
hey Terry, thanks so much for this, very much needed. I have been looking for a better way to do cartoon characters than the usual printed edible images..now I have..question though, can one do the 2D Cut outs but stick them onto buttercream?
Yes Kekilady.
Hi Terry. Thank you so much for this tutorial. I couldn’t find this technique anywhere. Your work is impressive! So kind of you to share. Thanks again. God bless.
My pleasure Polly.
Love this tutorial.. for the 2d designs you are putting on top of a cake, like your Dora the explorer cake.. how do you assemble that? Do you cut an incision in the cake itself and stick it in there or do you use an edible glue?
I stick a lollipop stick to the back of the dry character with melted white chocolate and insert the stick into the cake.
Wow! Terry, you inspire me every single time. I’m just blown away by your skills, and more so by your willingness to share freely with others. I haven’t met a more selfless individual yet, especially in this field.May God bless you, always, amen.
You are welcome.