
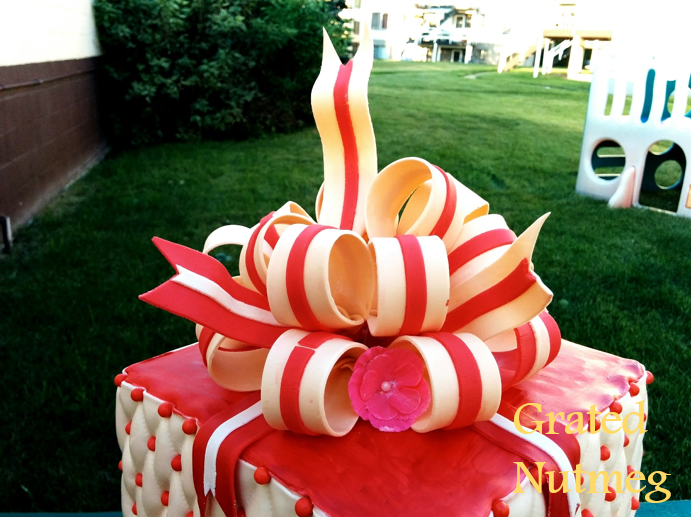
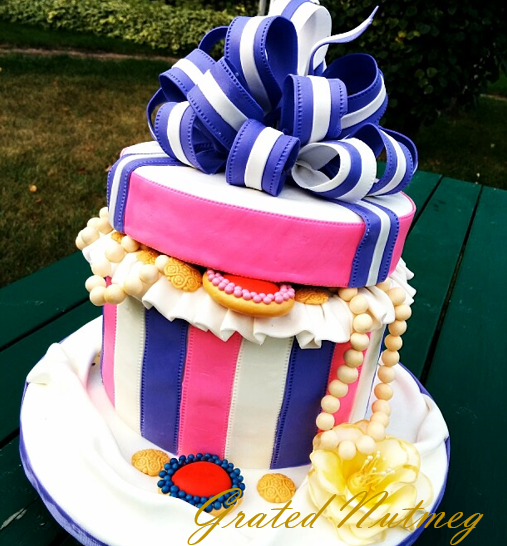
Fondant Loop Bow Tutorial

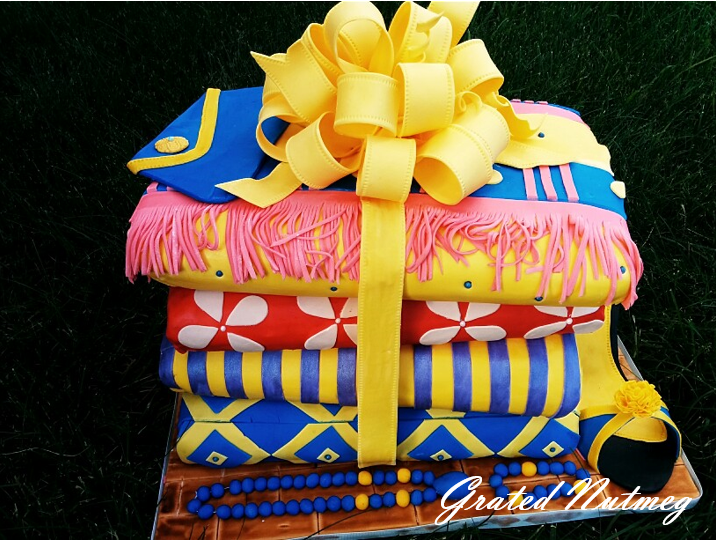
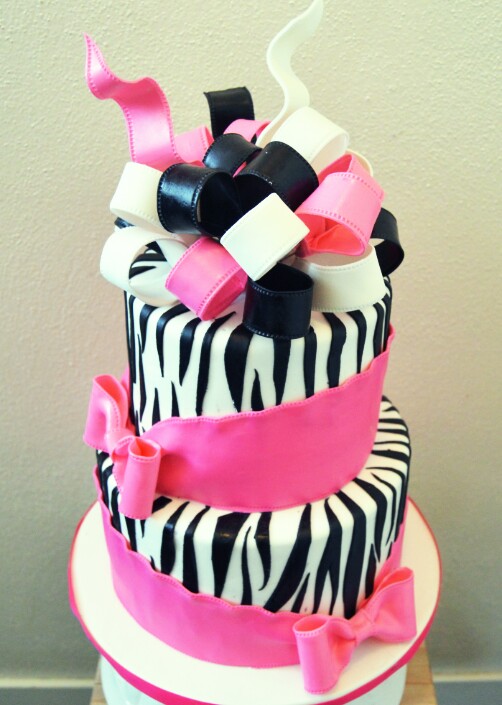
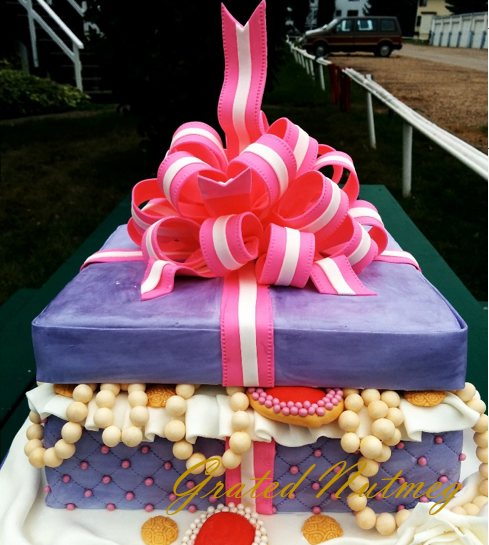
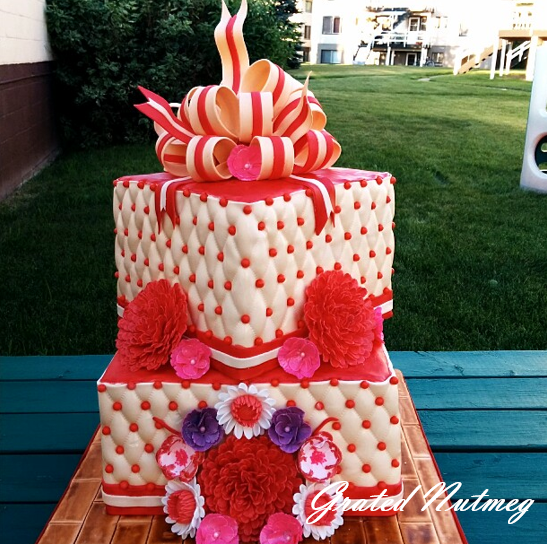
Looking for an impressive way of topping your cake? A Loop bow is the way to go. This is great on gift box cakes or any other cake of your choice. It is easy to make and can be done months in advance.

TOOLS:
(1) Rolling Pin
(2) Pizza Cutter of any other cutting tool
(3) Floral Wire or Toothpick
(4) Stitching Wheel (Optional)
(5) Paint Brush
(6) Ruler
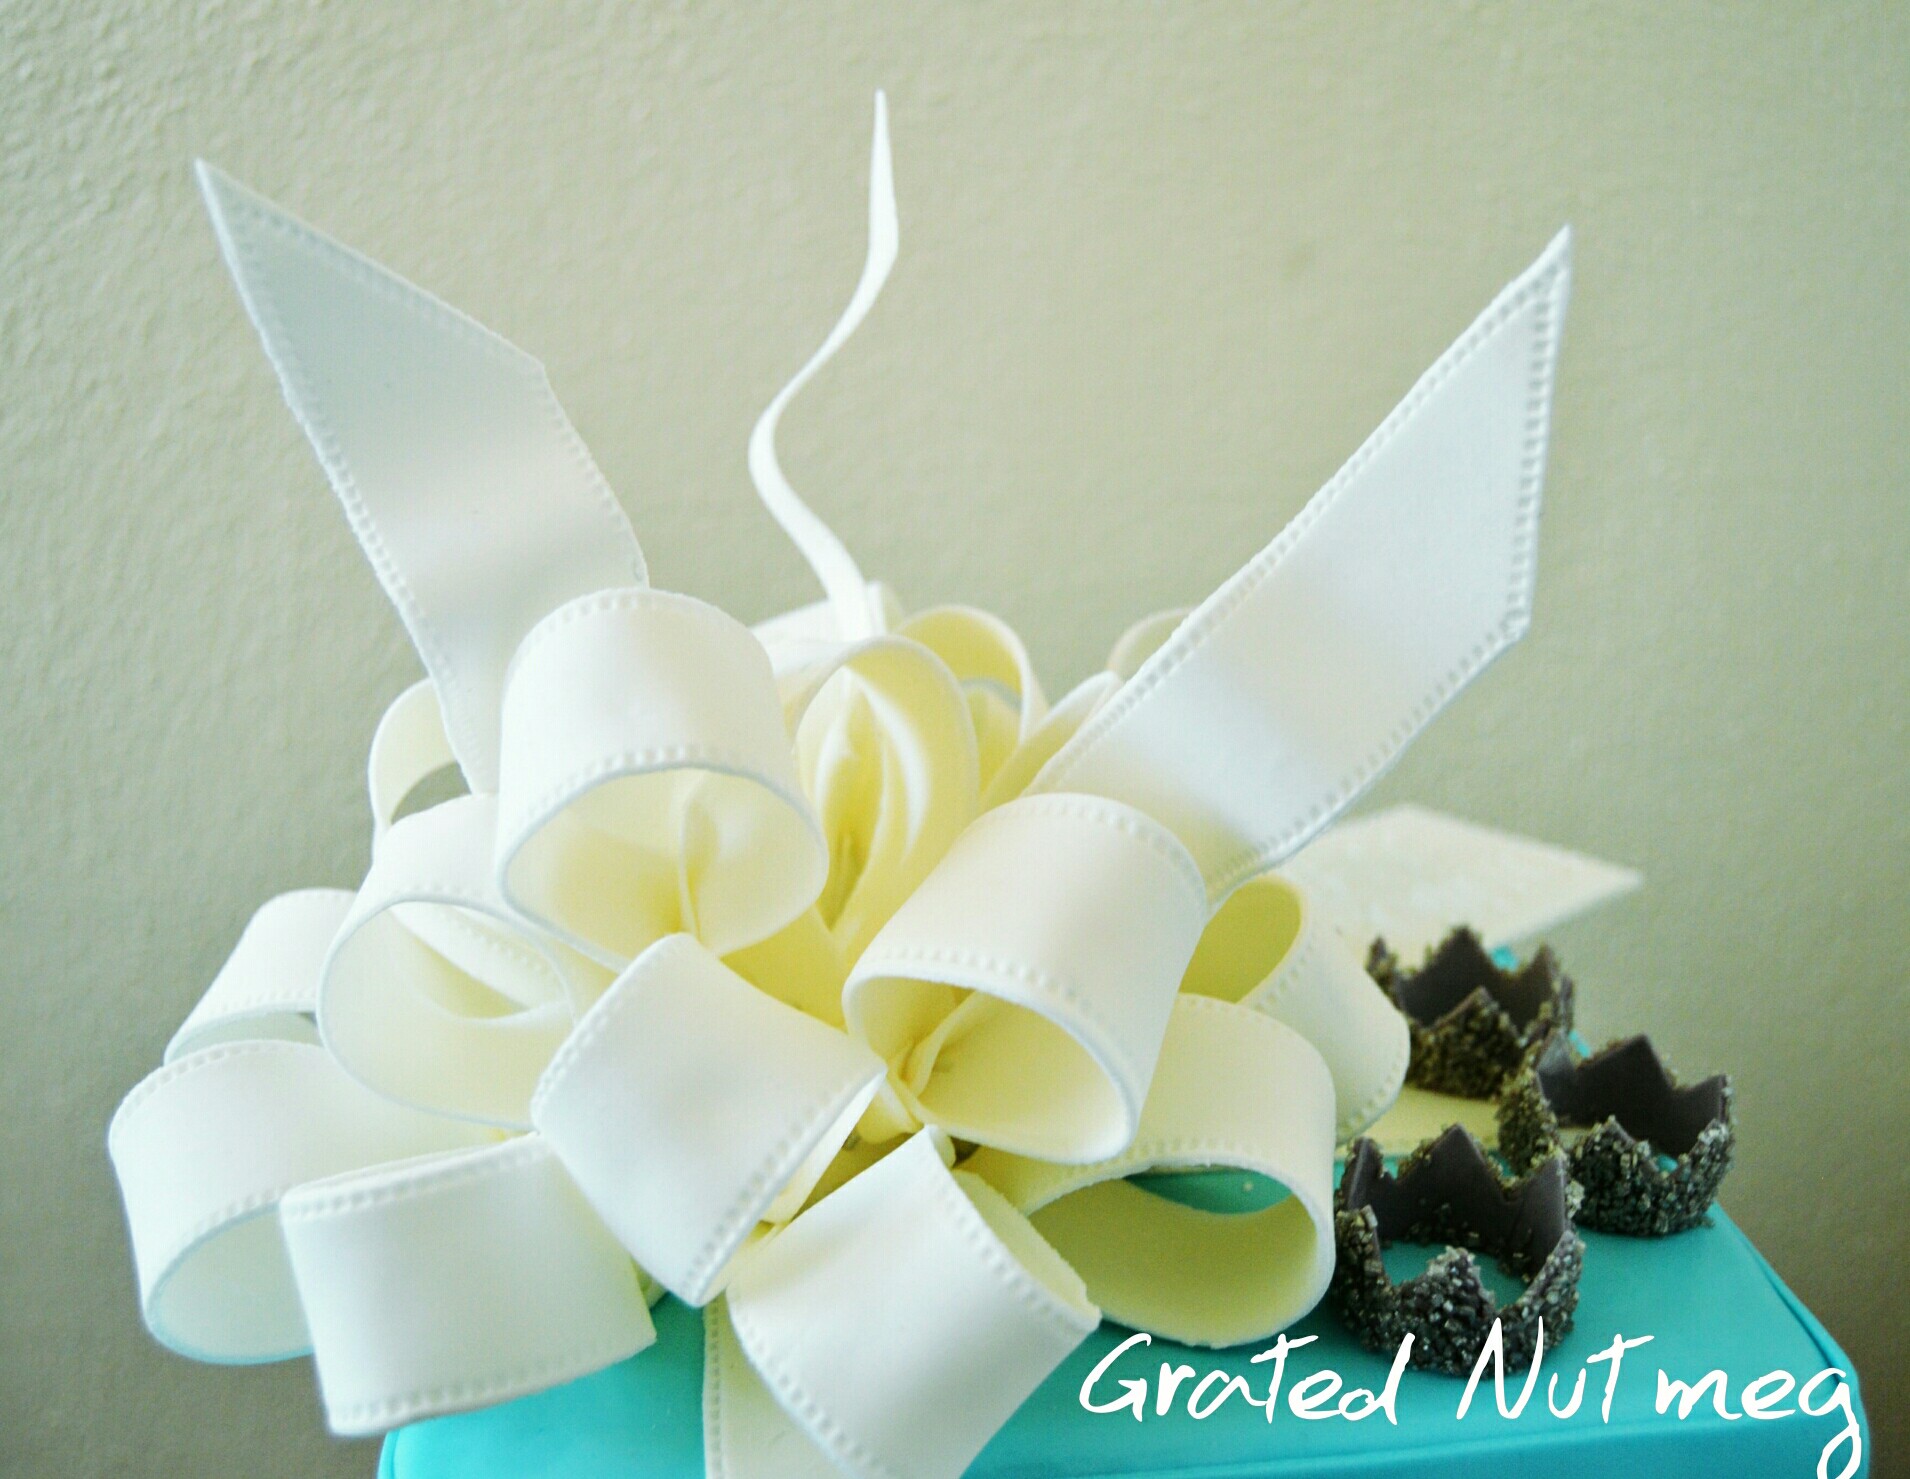
My first Loop Bow a few years ago. I smiled when I stumbled on this picture again.
INGREDIENTS:
(1) Fondant. I made use of marshmallow fondant. Recipe and procedure here.
(2) Water

PROCEDURE:
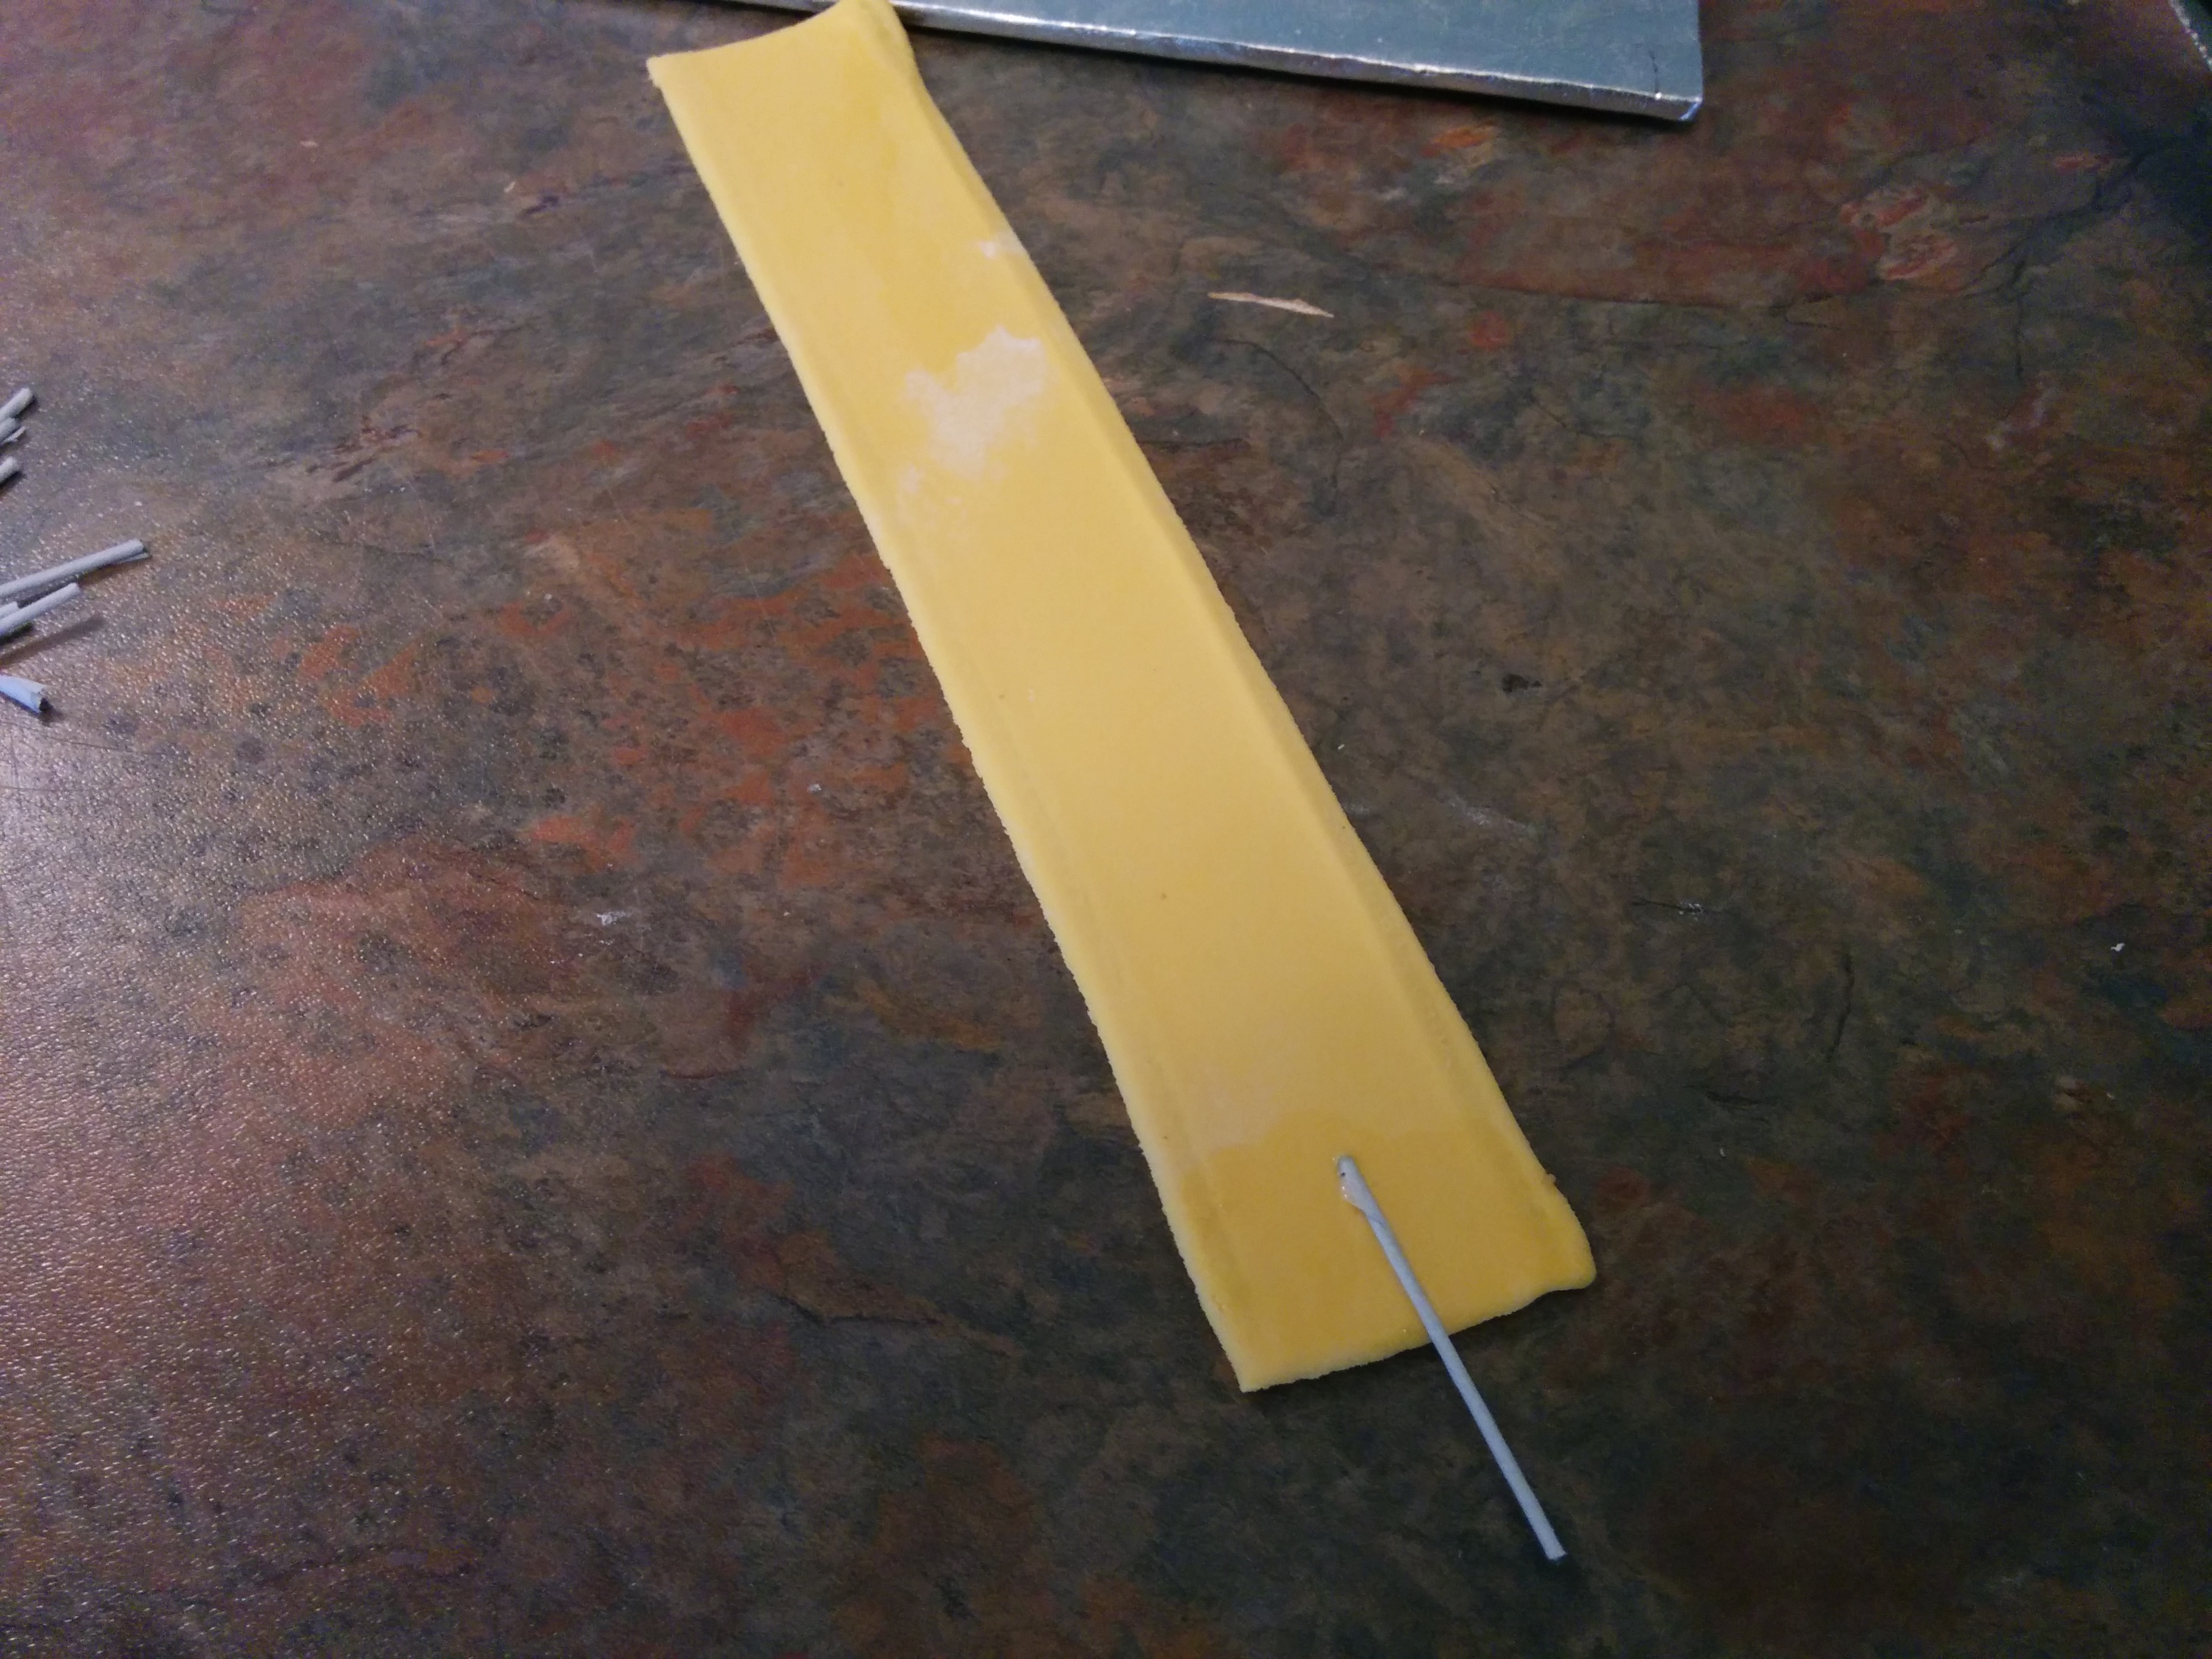
(1) Roll out your fondant until thin.
(2) Cut fondant into 1 inch strips. I use the width of my ruler as a guide as it is about an inch thick.
(3) Cut strips into lengths of 7 to 8 inches, depending on size of cake. They can be longer. The ones in this picture are 7 inches long.
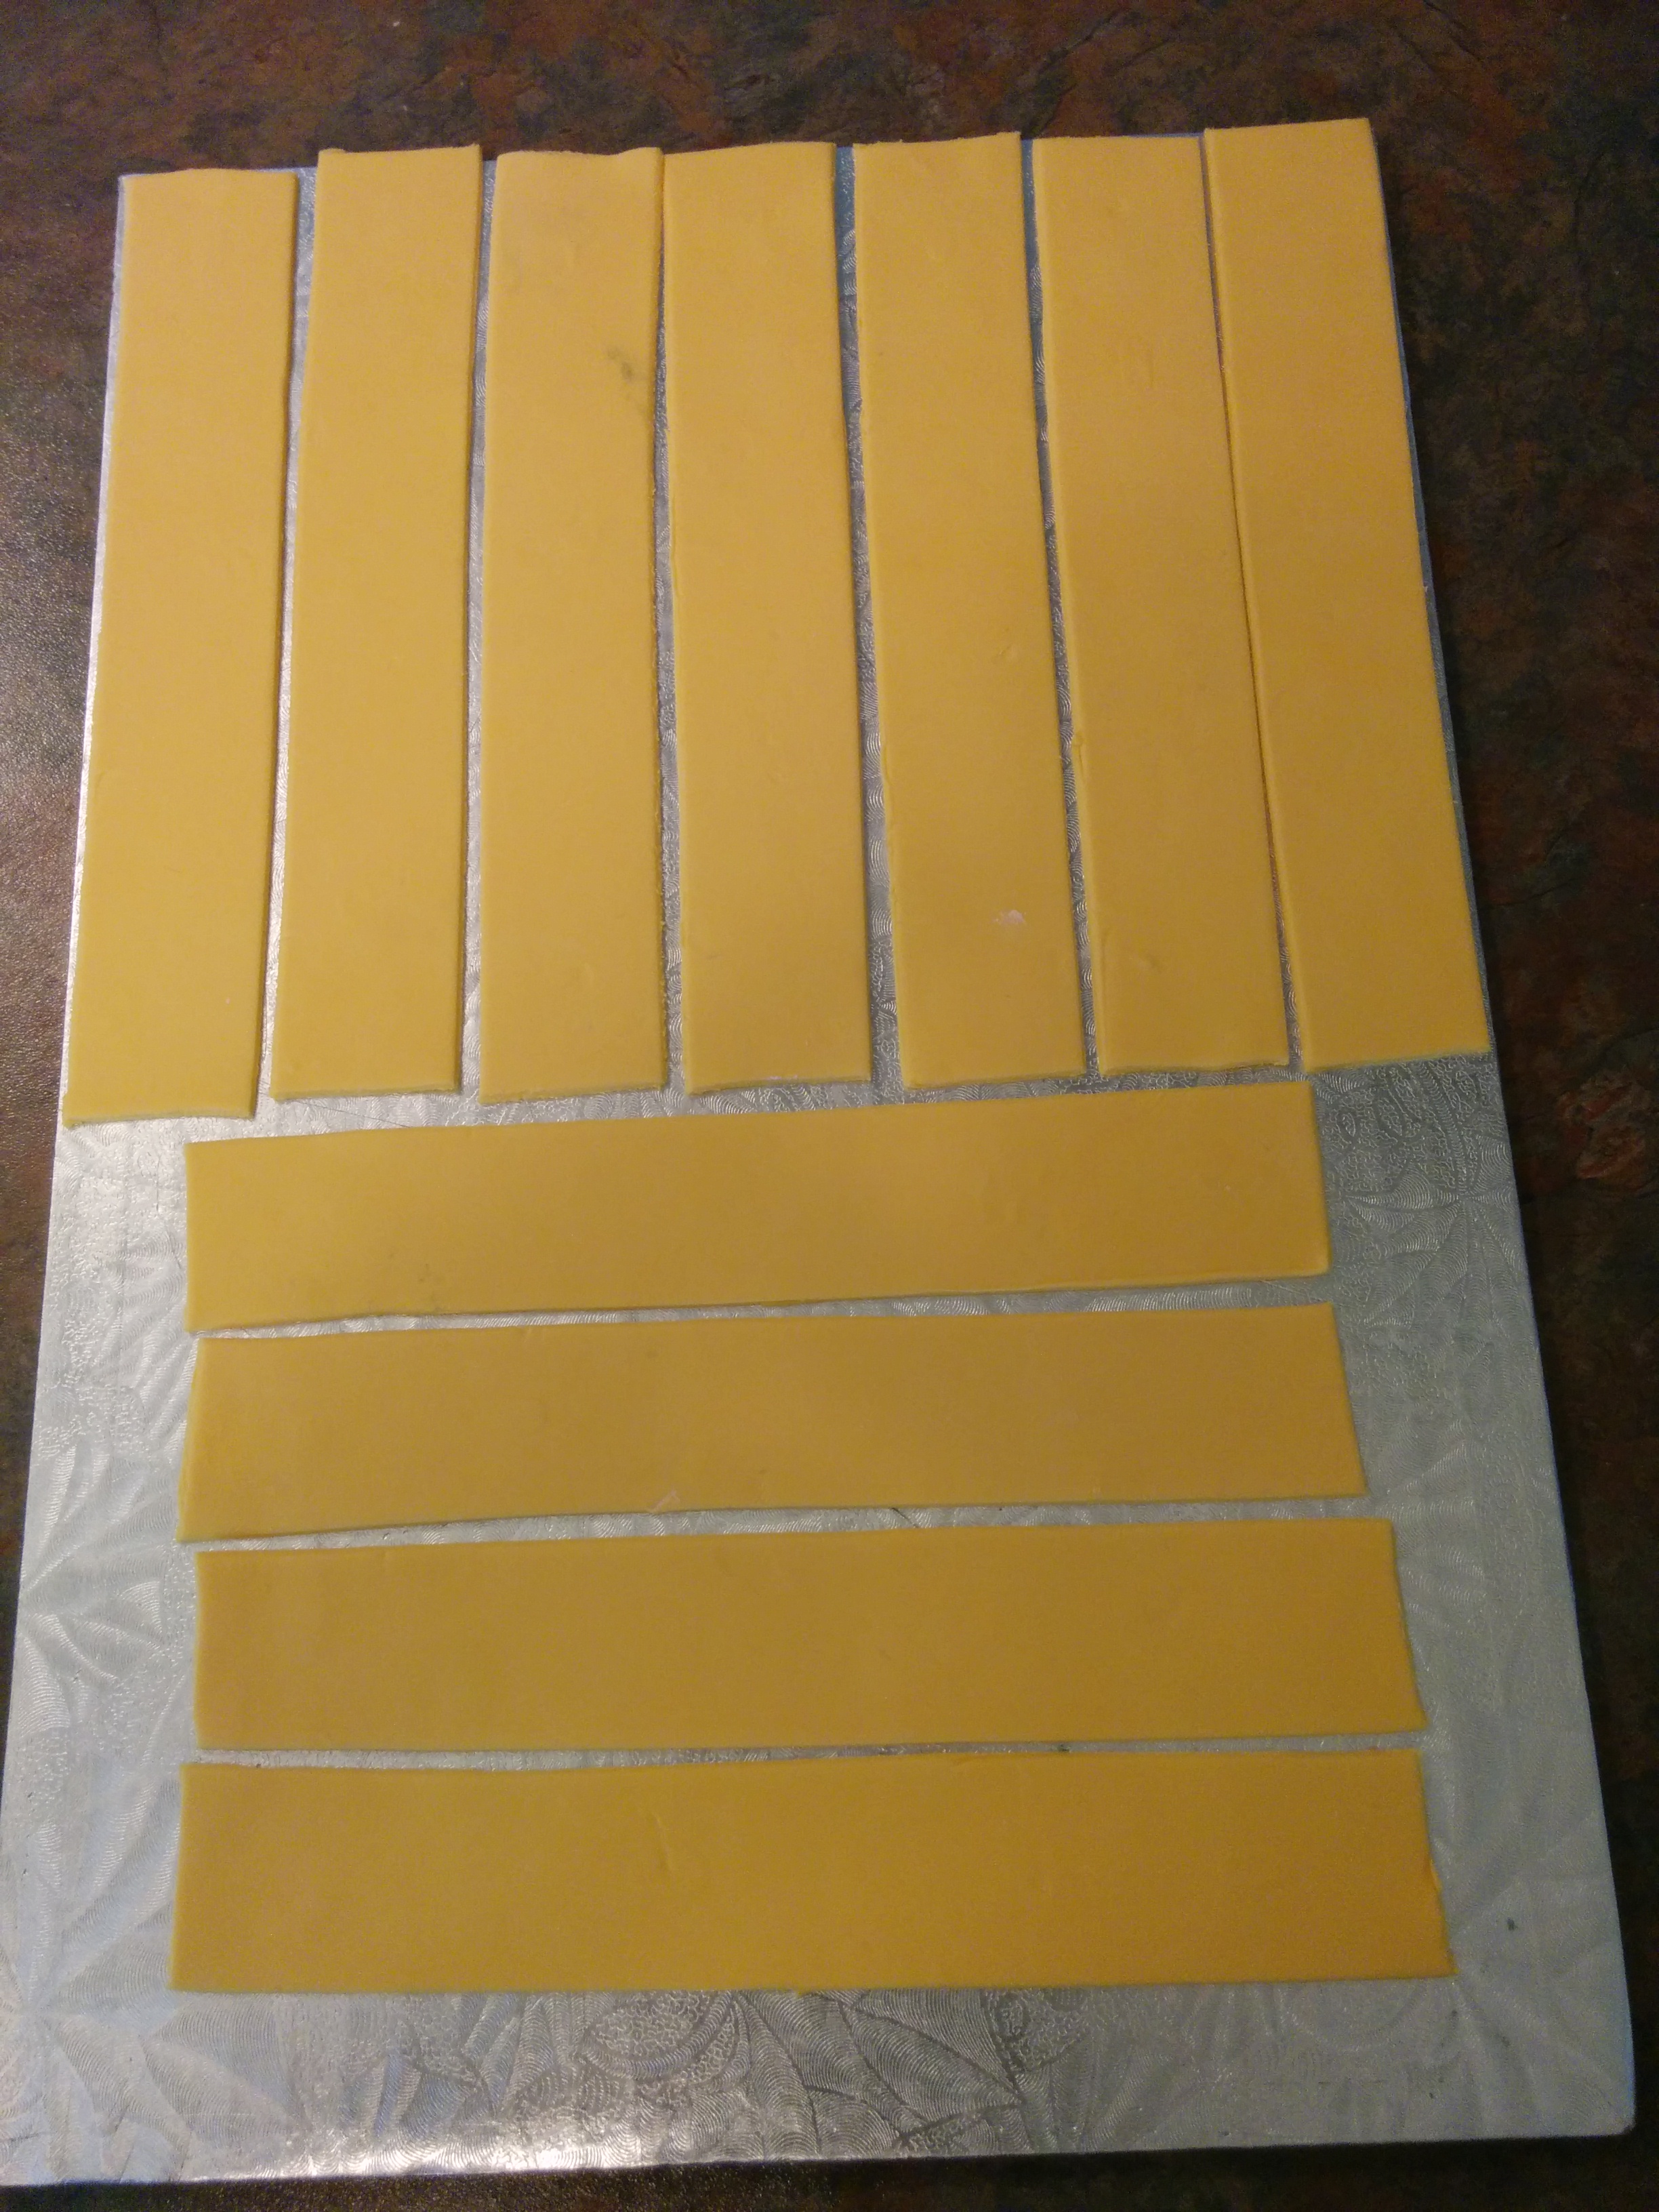
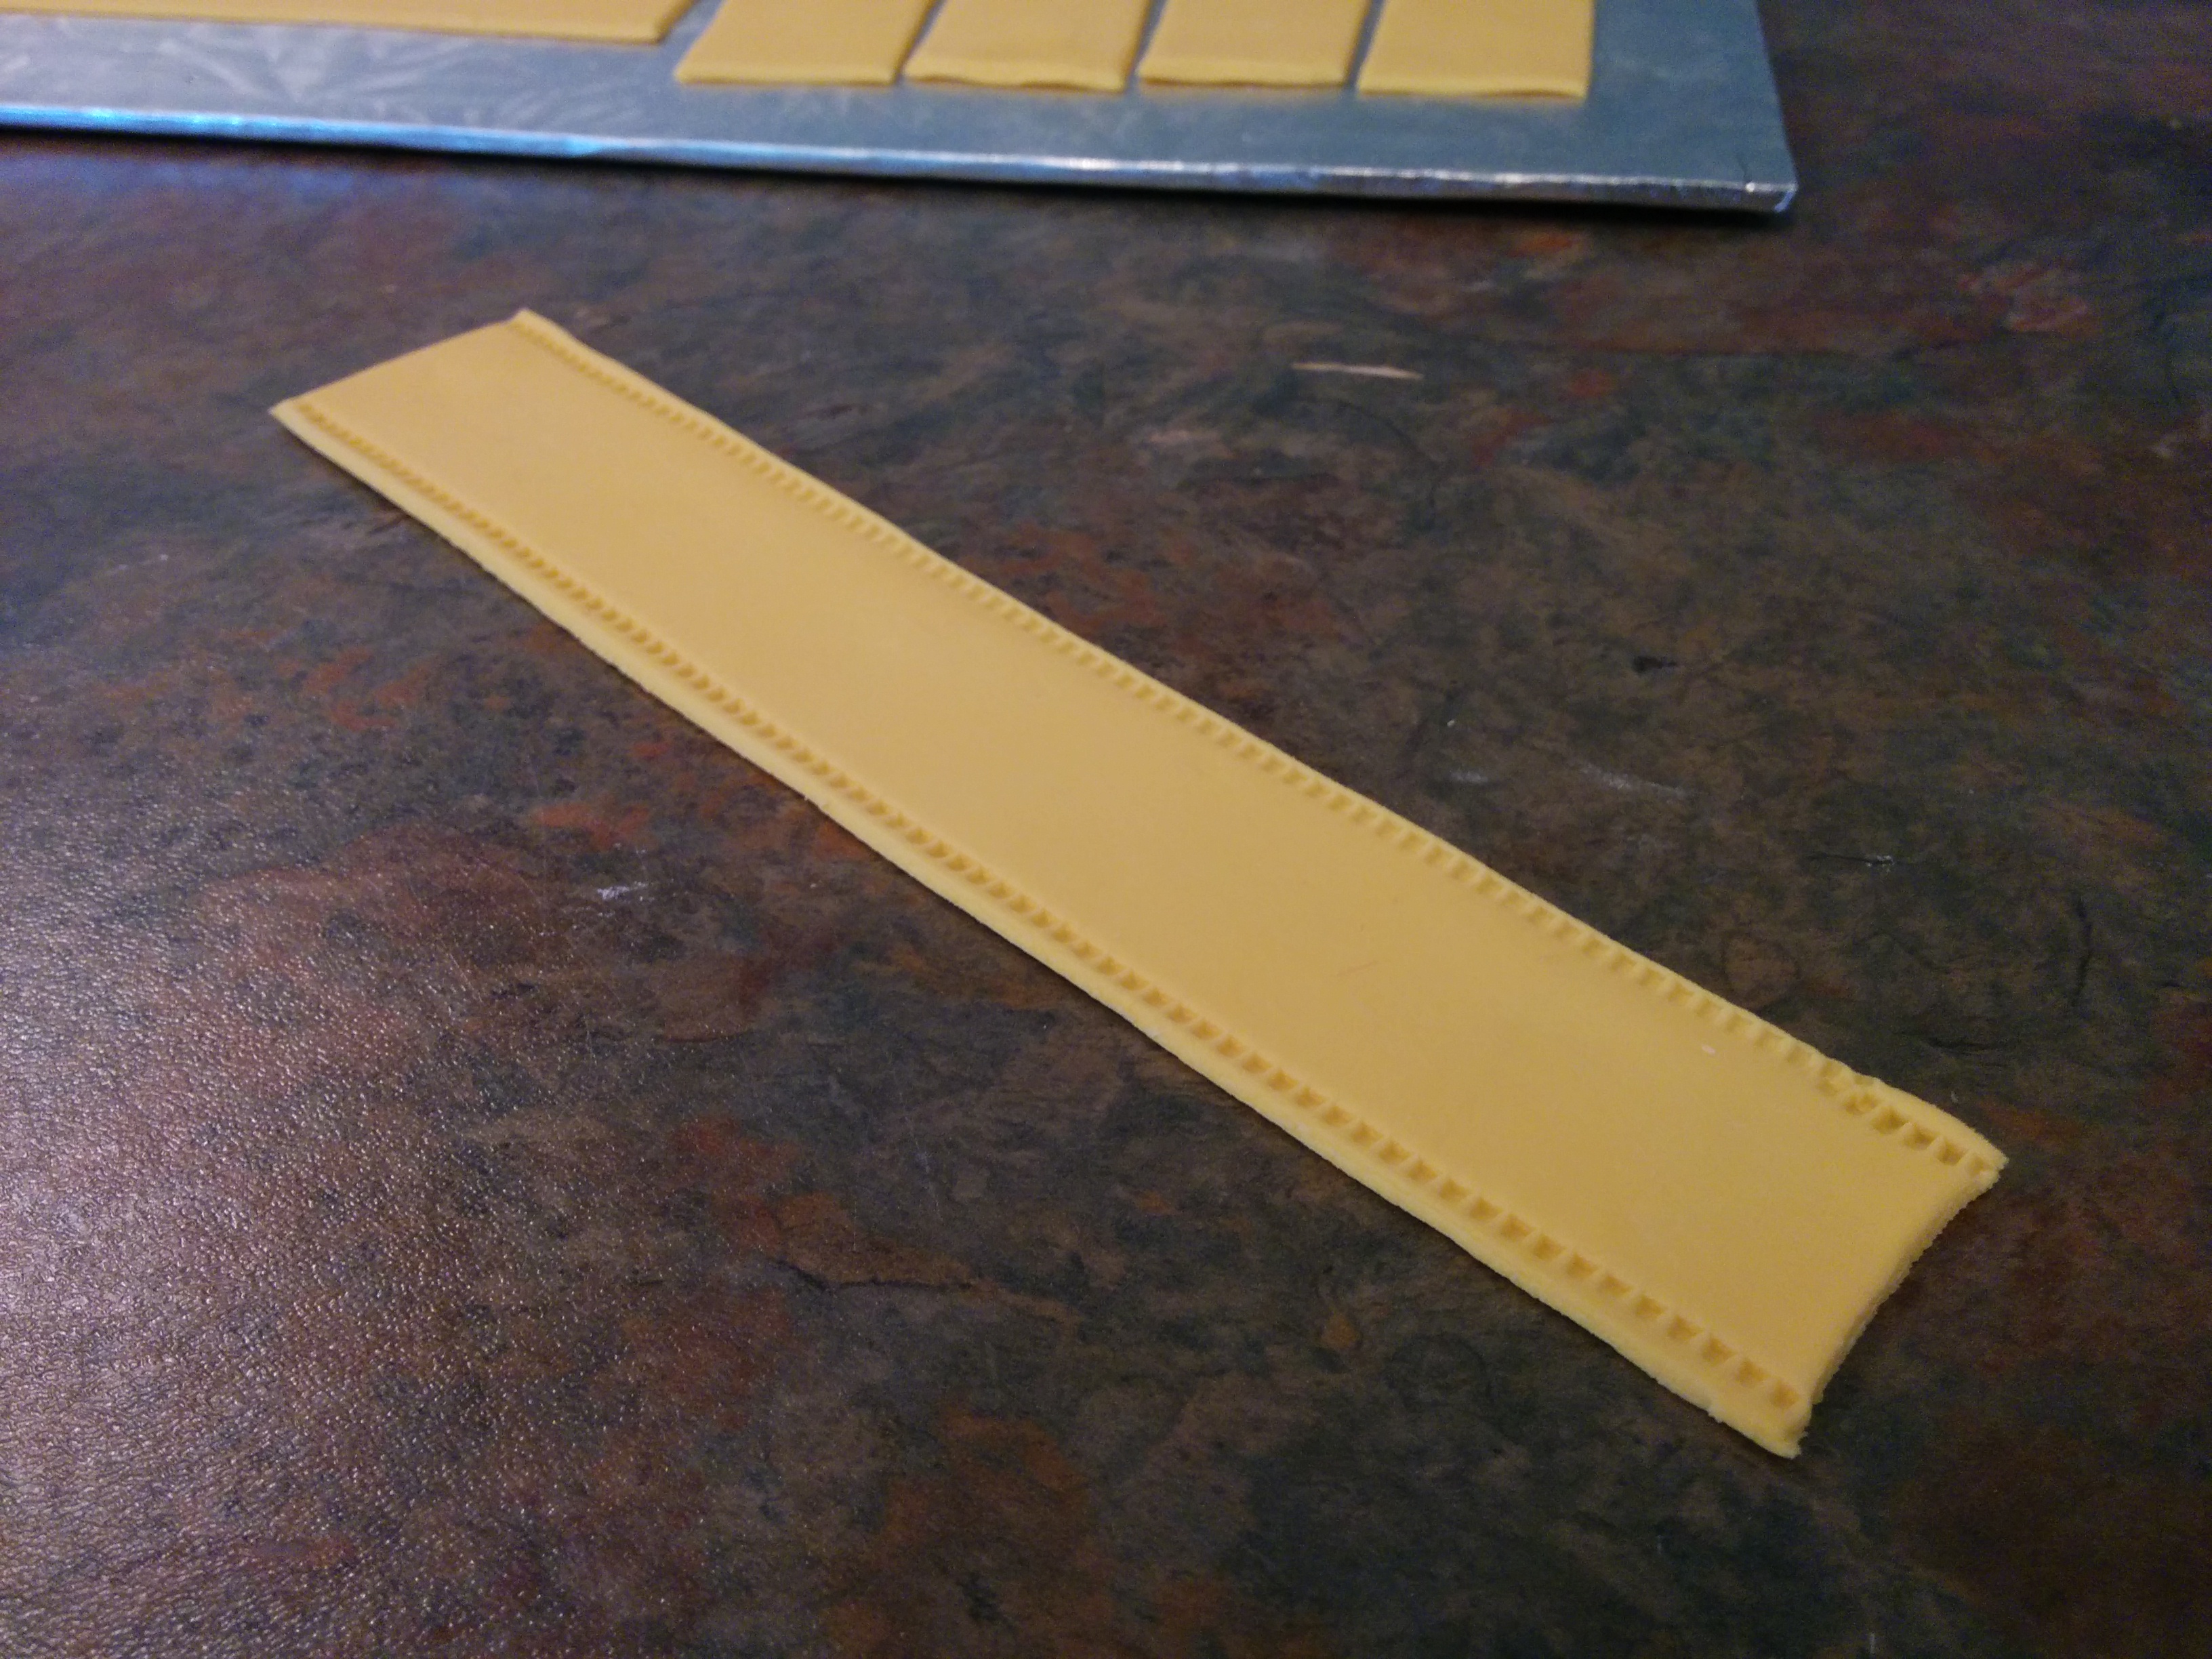
(4) If you want to, use the stitching wheel to stitch the edges of each strip.
(5) Cut your floral wires into lengths of about inches. You will need thick wires for this.
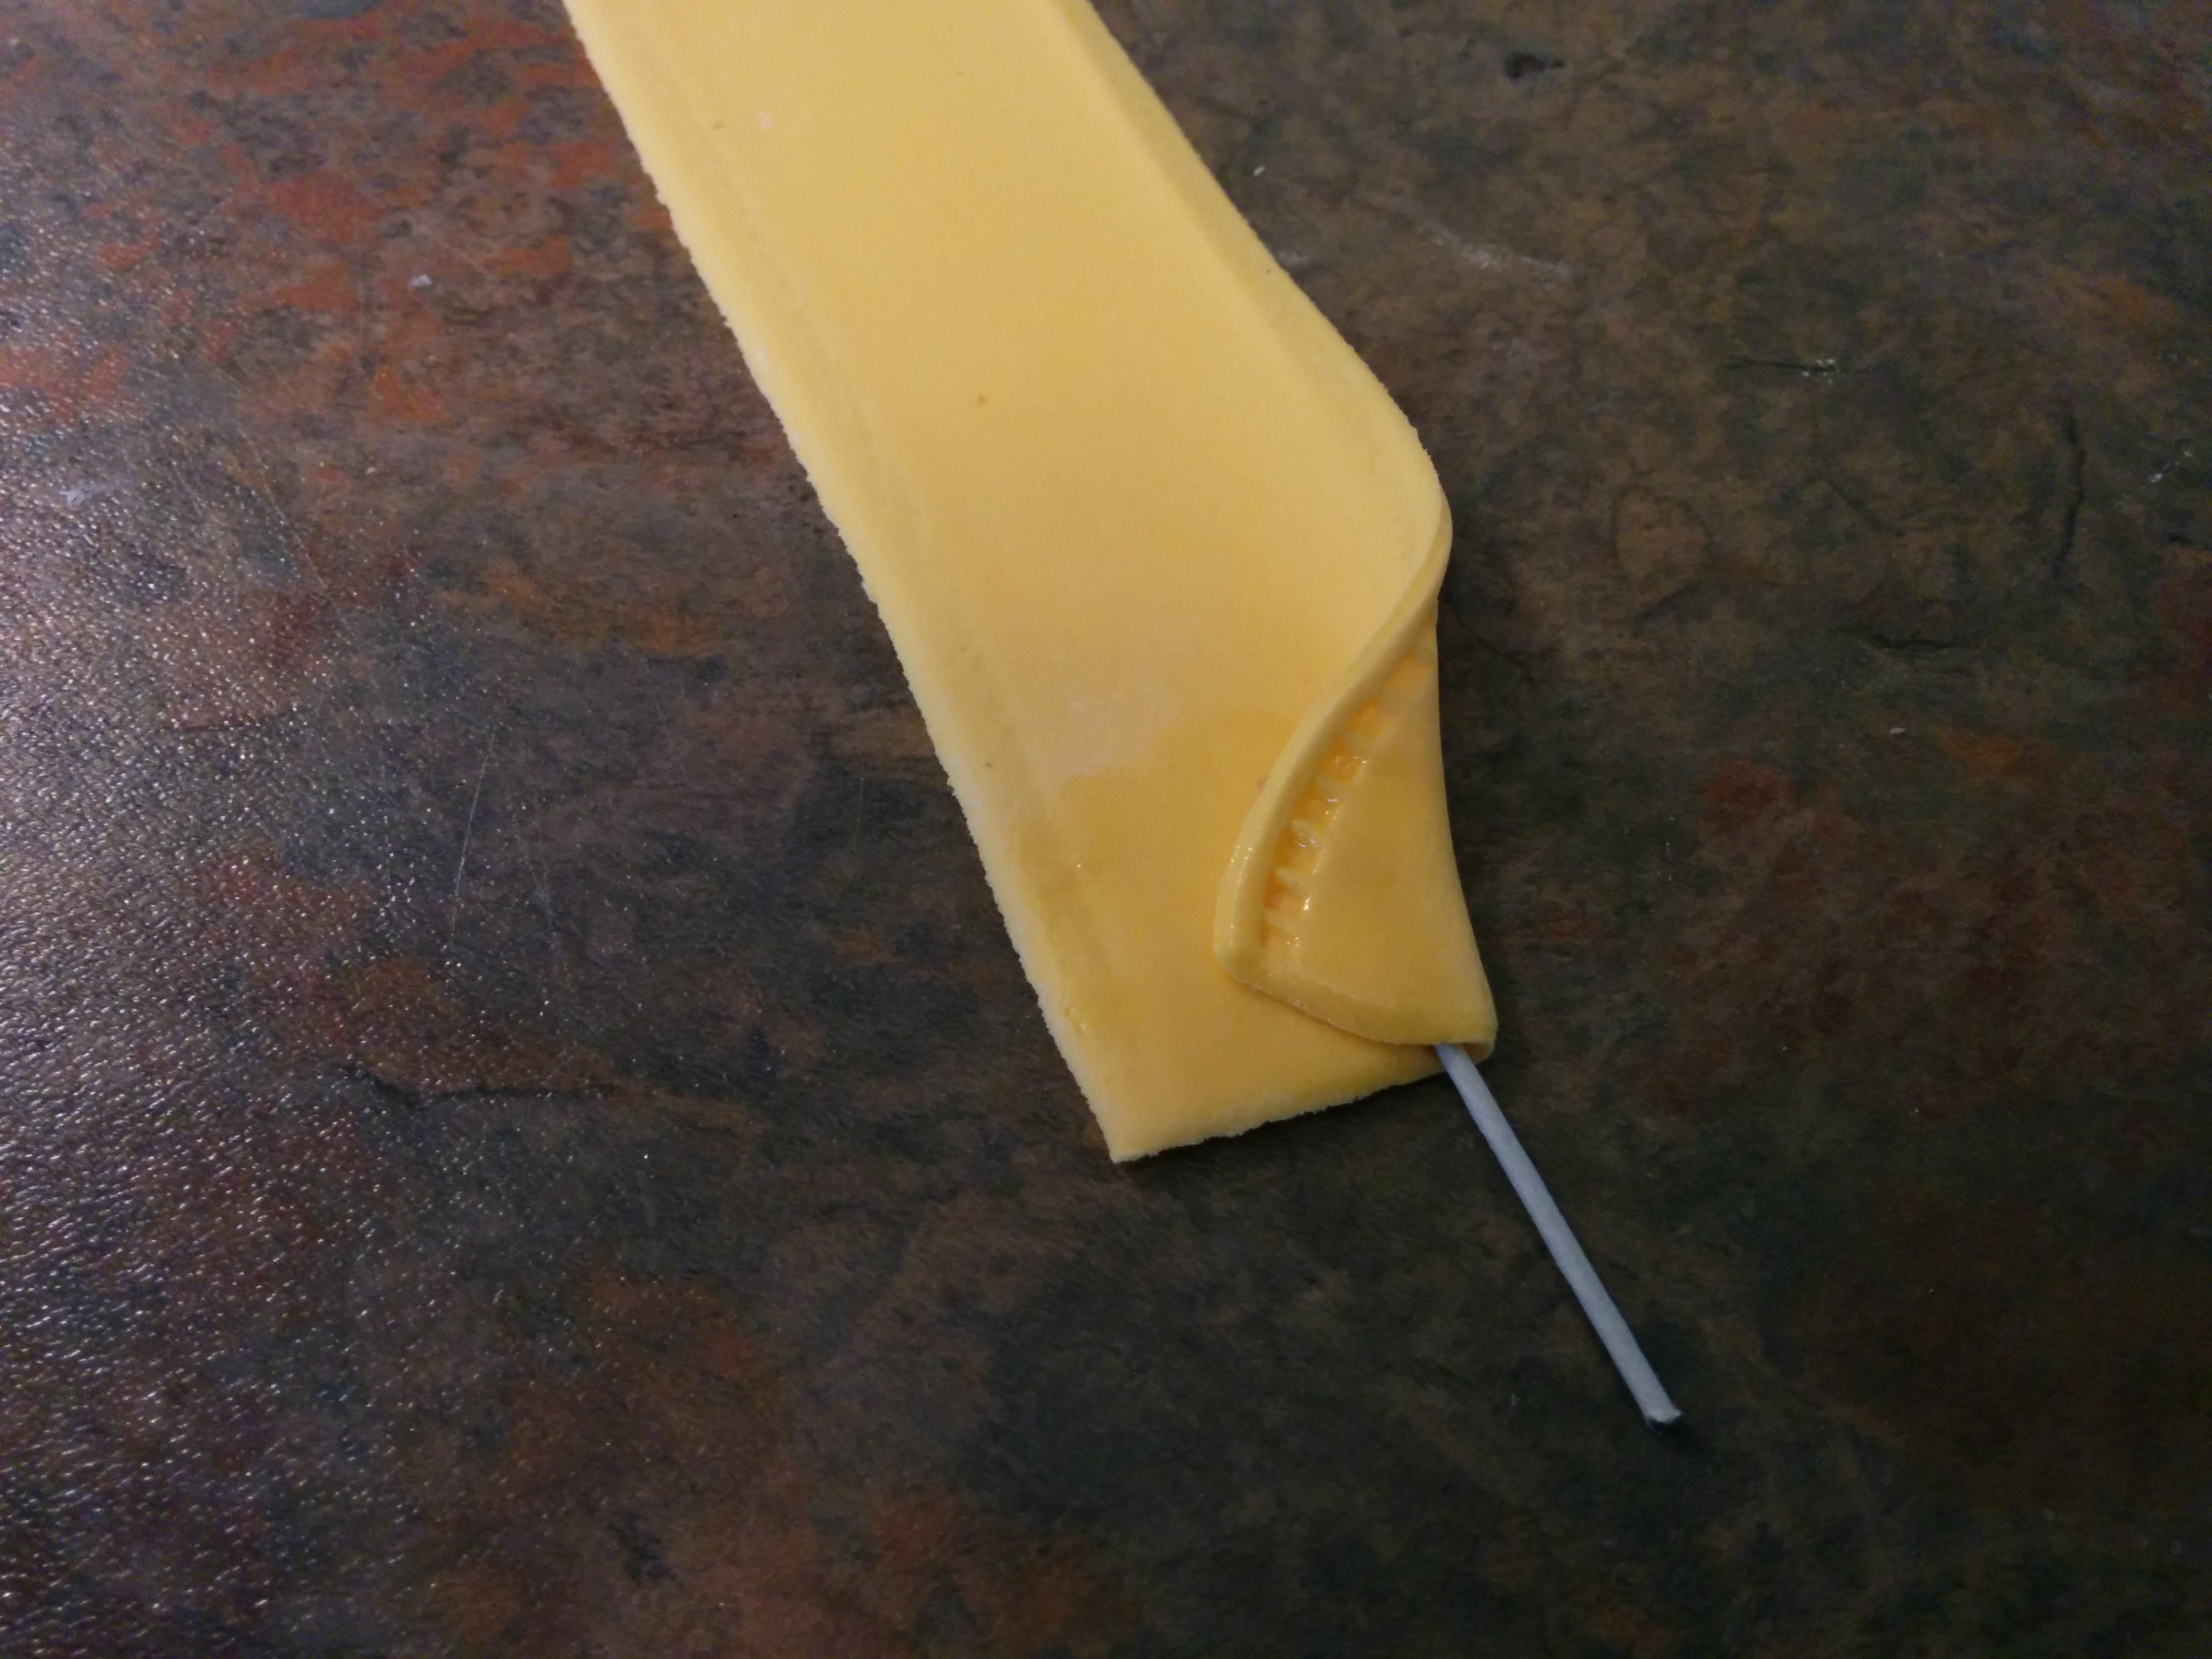
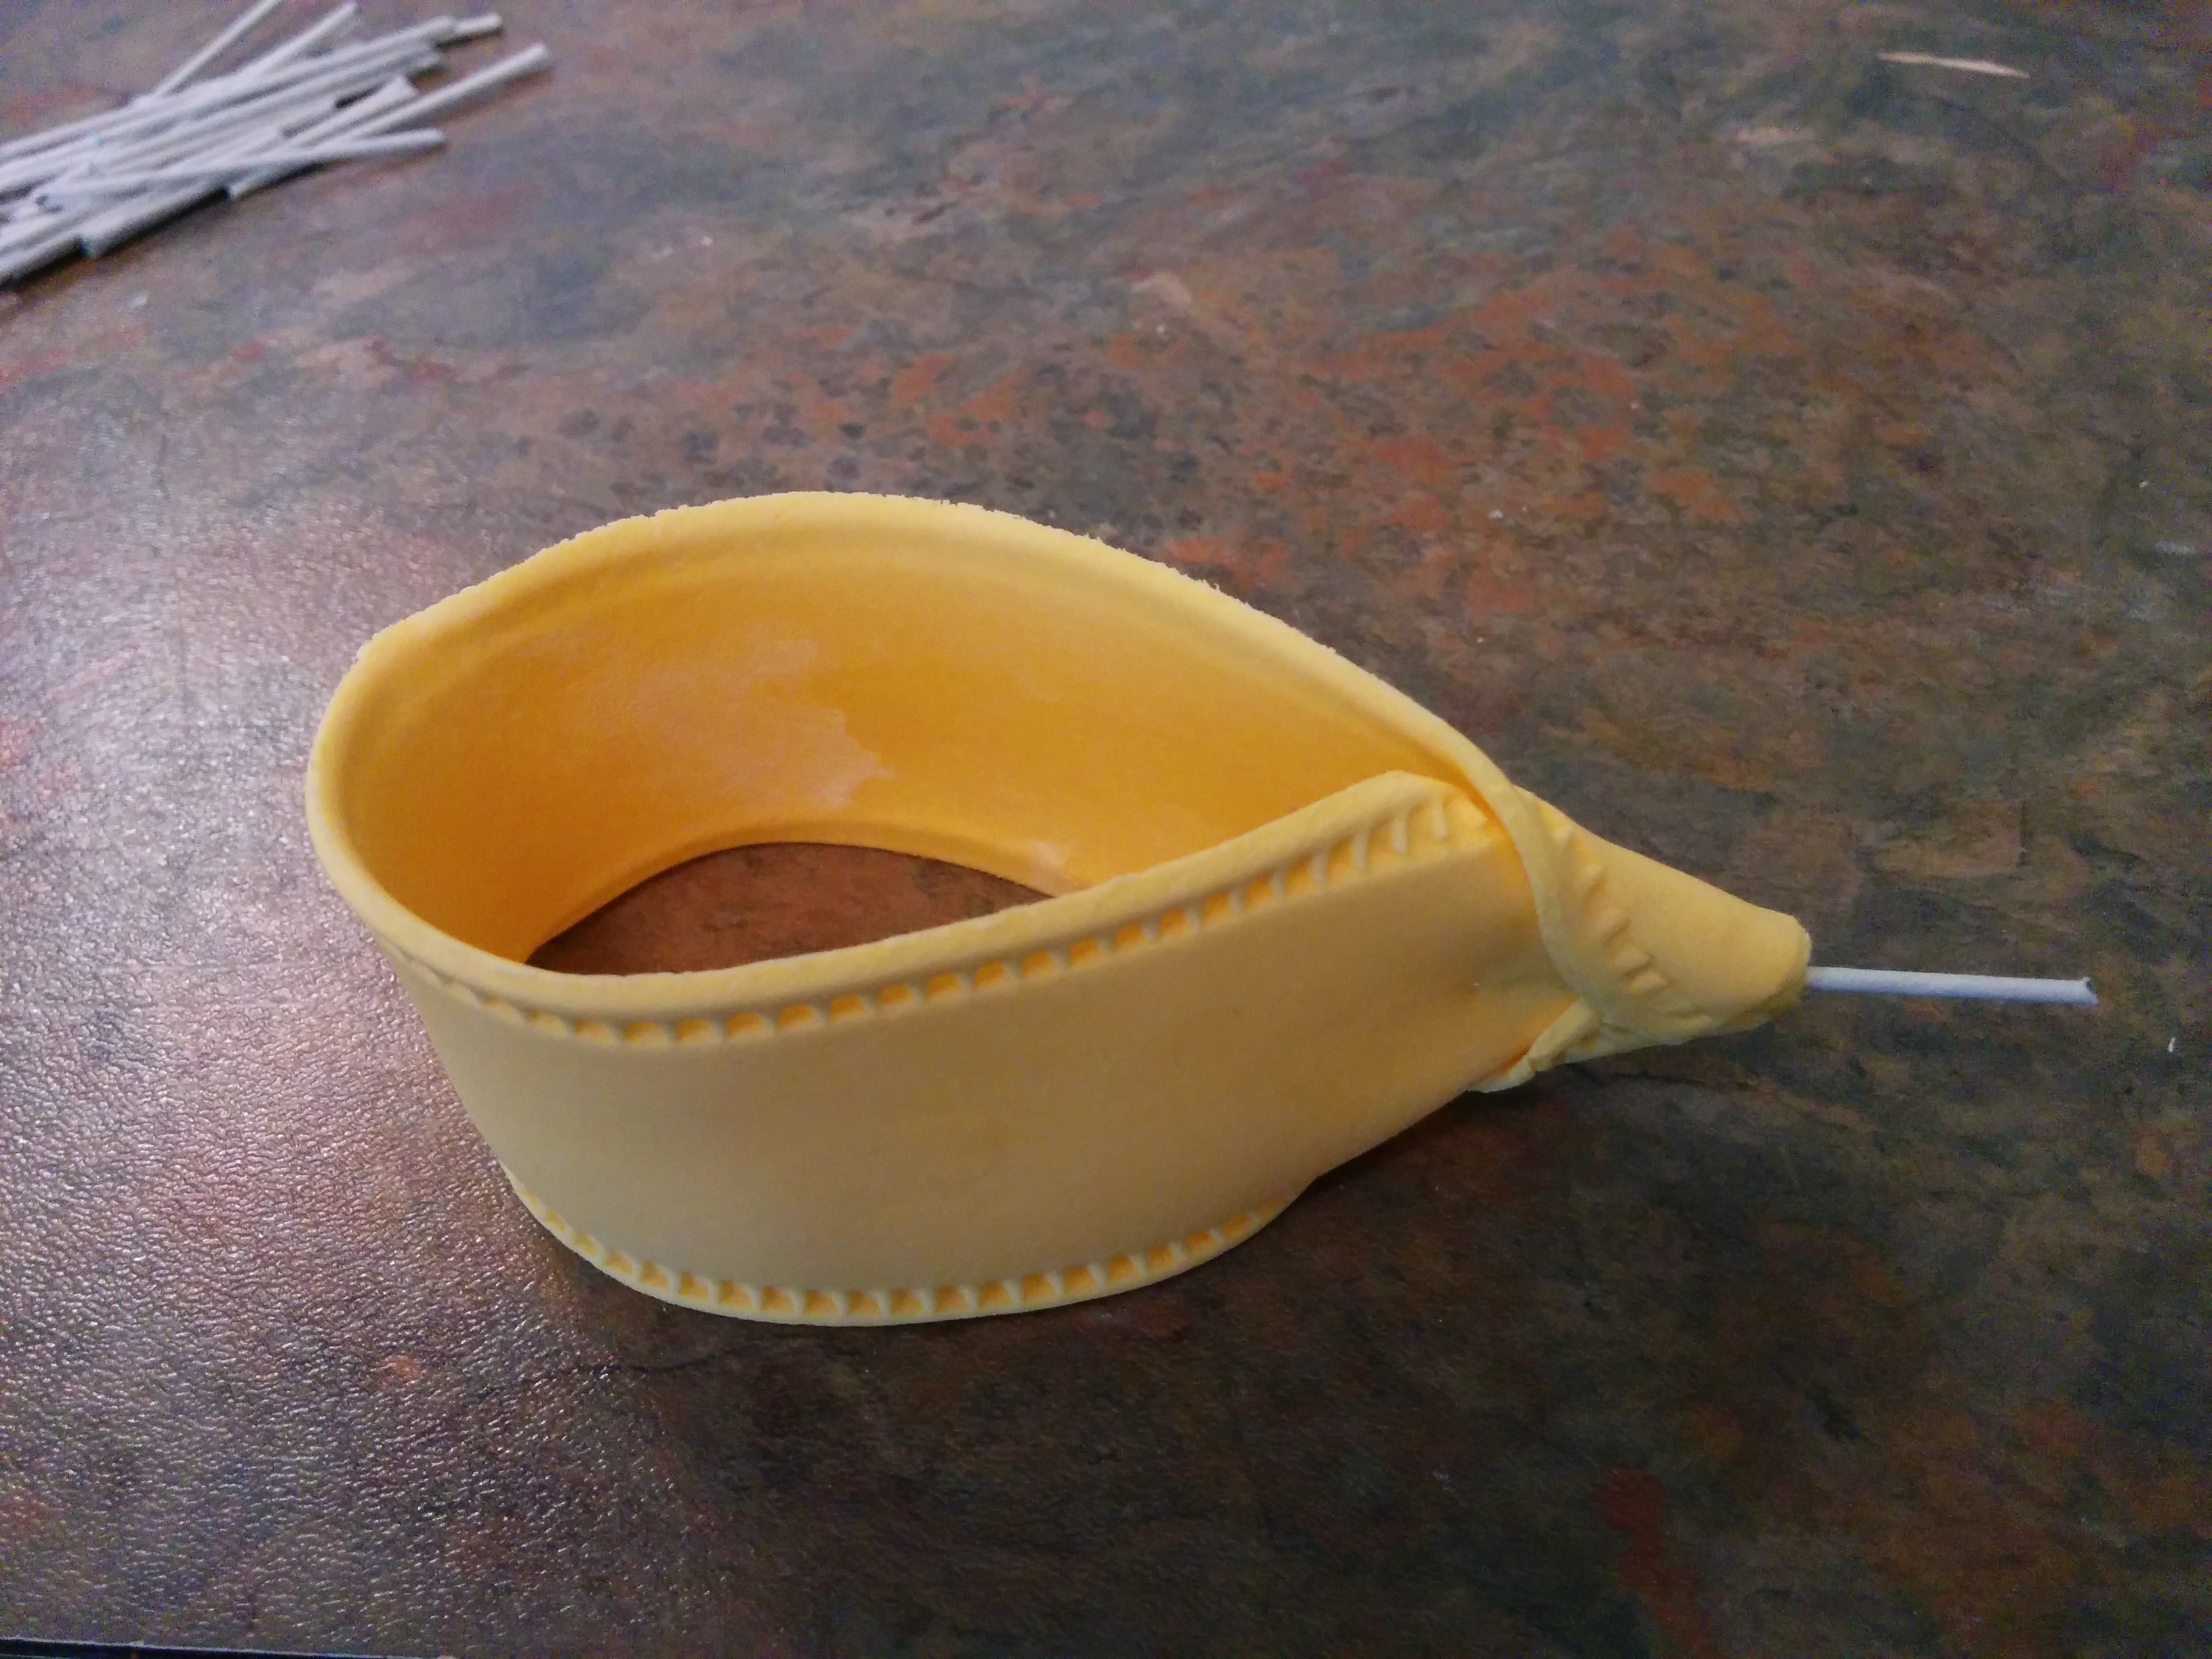
(6) Take a strip of fondant, flip it upside down, apply some water to one end and embed a floral wire into the fondant. There should be some wire sticking out.
(7) Fold in both edges of the fondant strip to cover wire and secure it in place. (Sorry, I lost the picture of the complete fold)
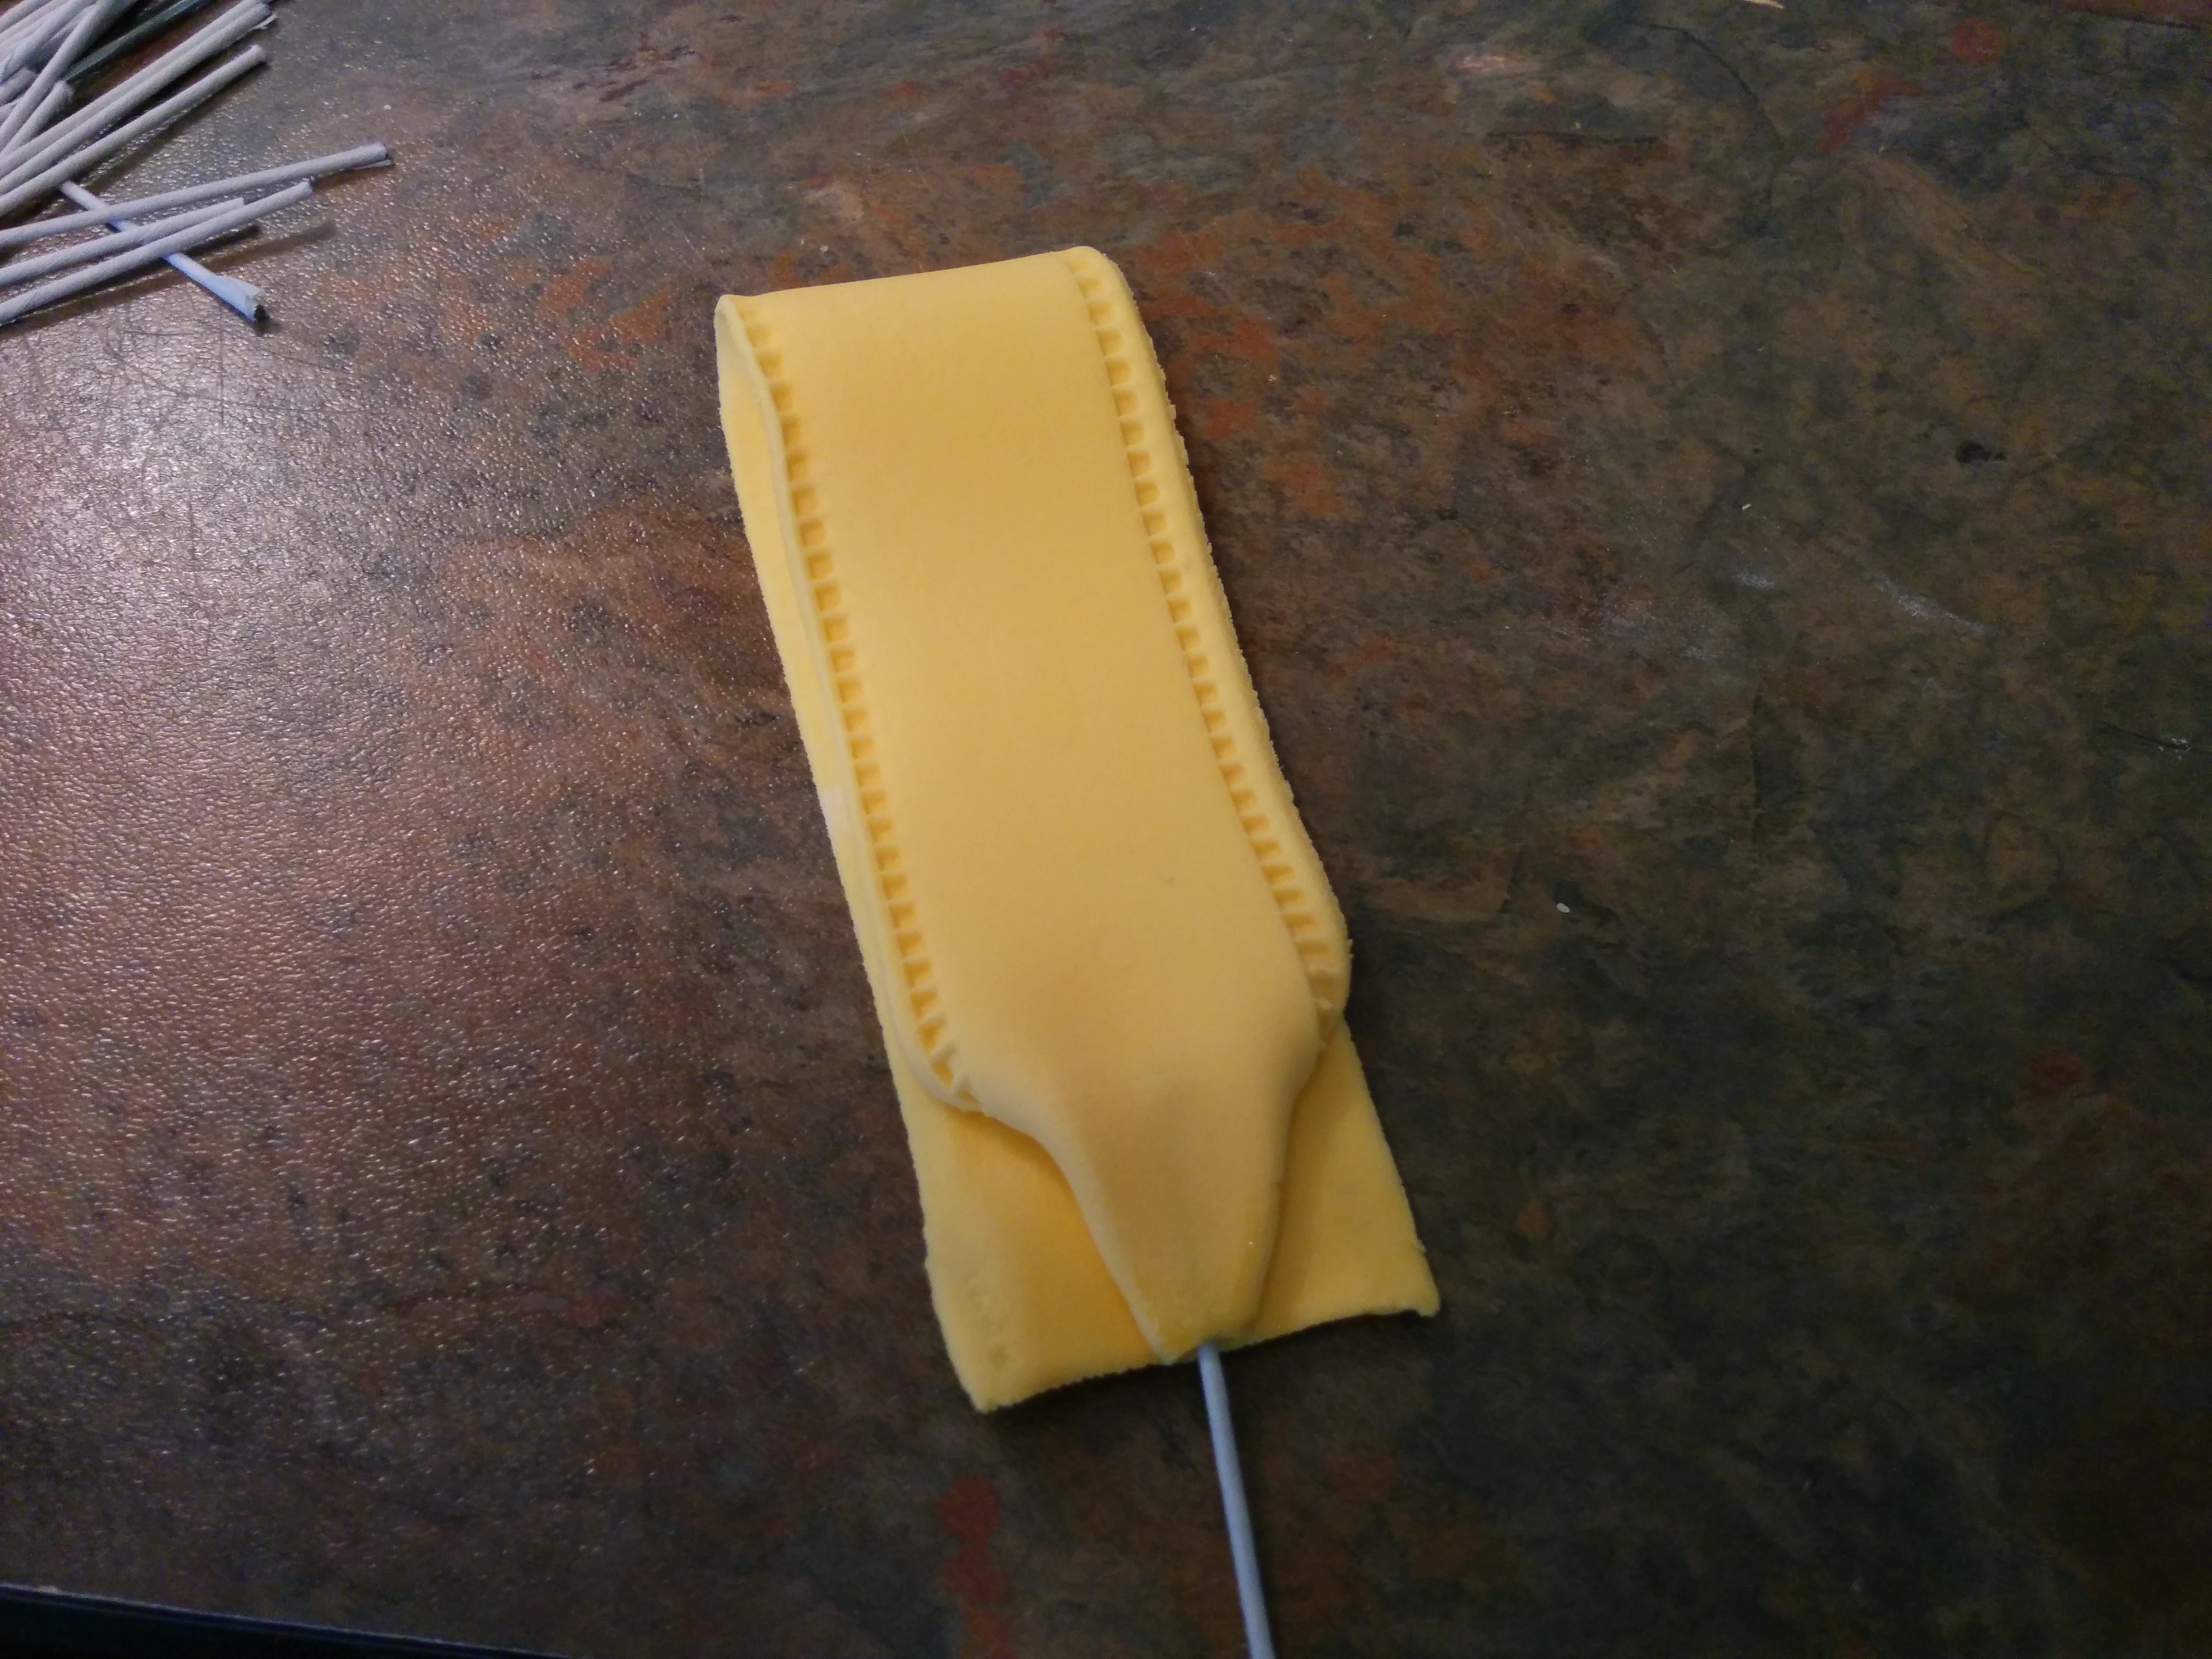
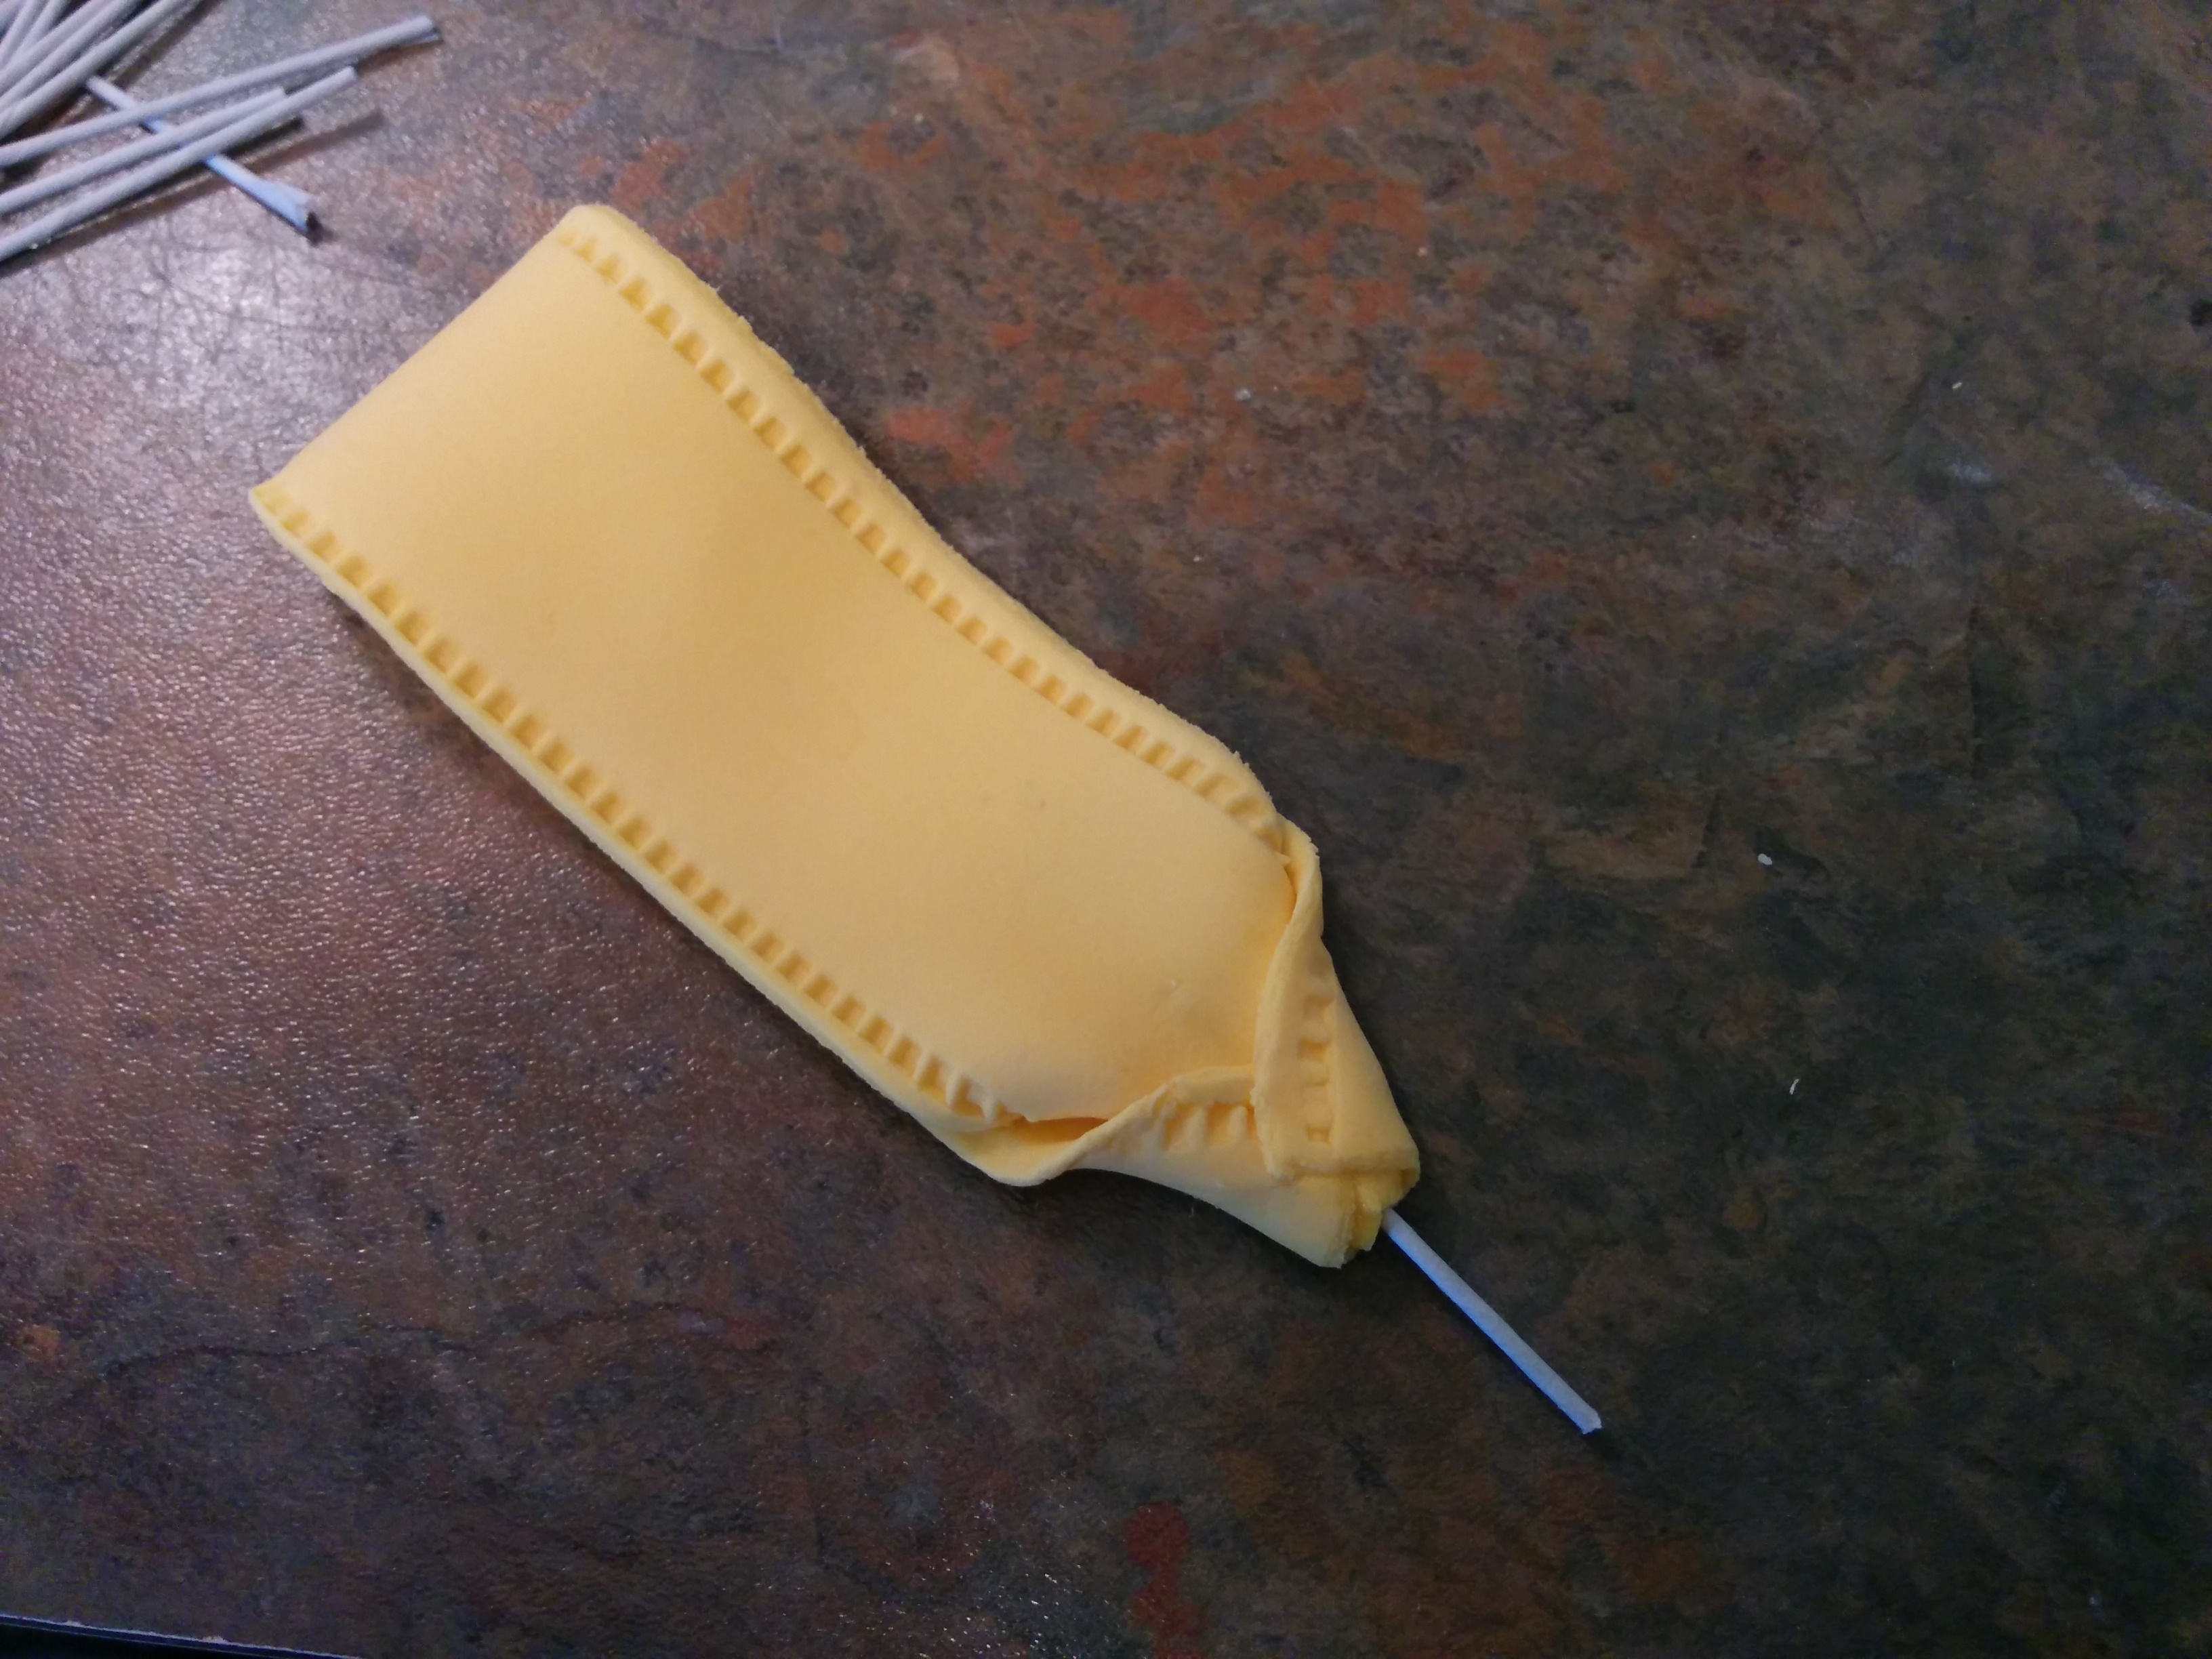
(8) Rotate fondant strip to work on opposite end. Apply some water on opposite end, fold strip so both ends meet and form a loop. Fold the edges of the opposite end to form a pointed tip.
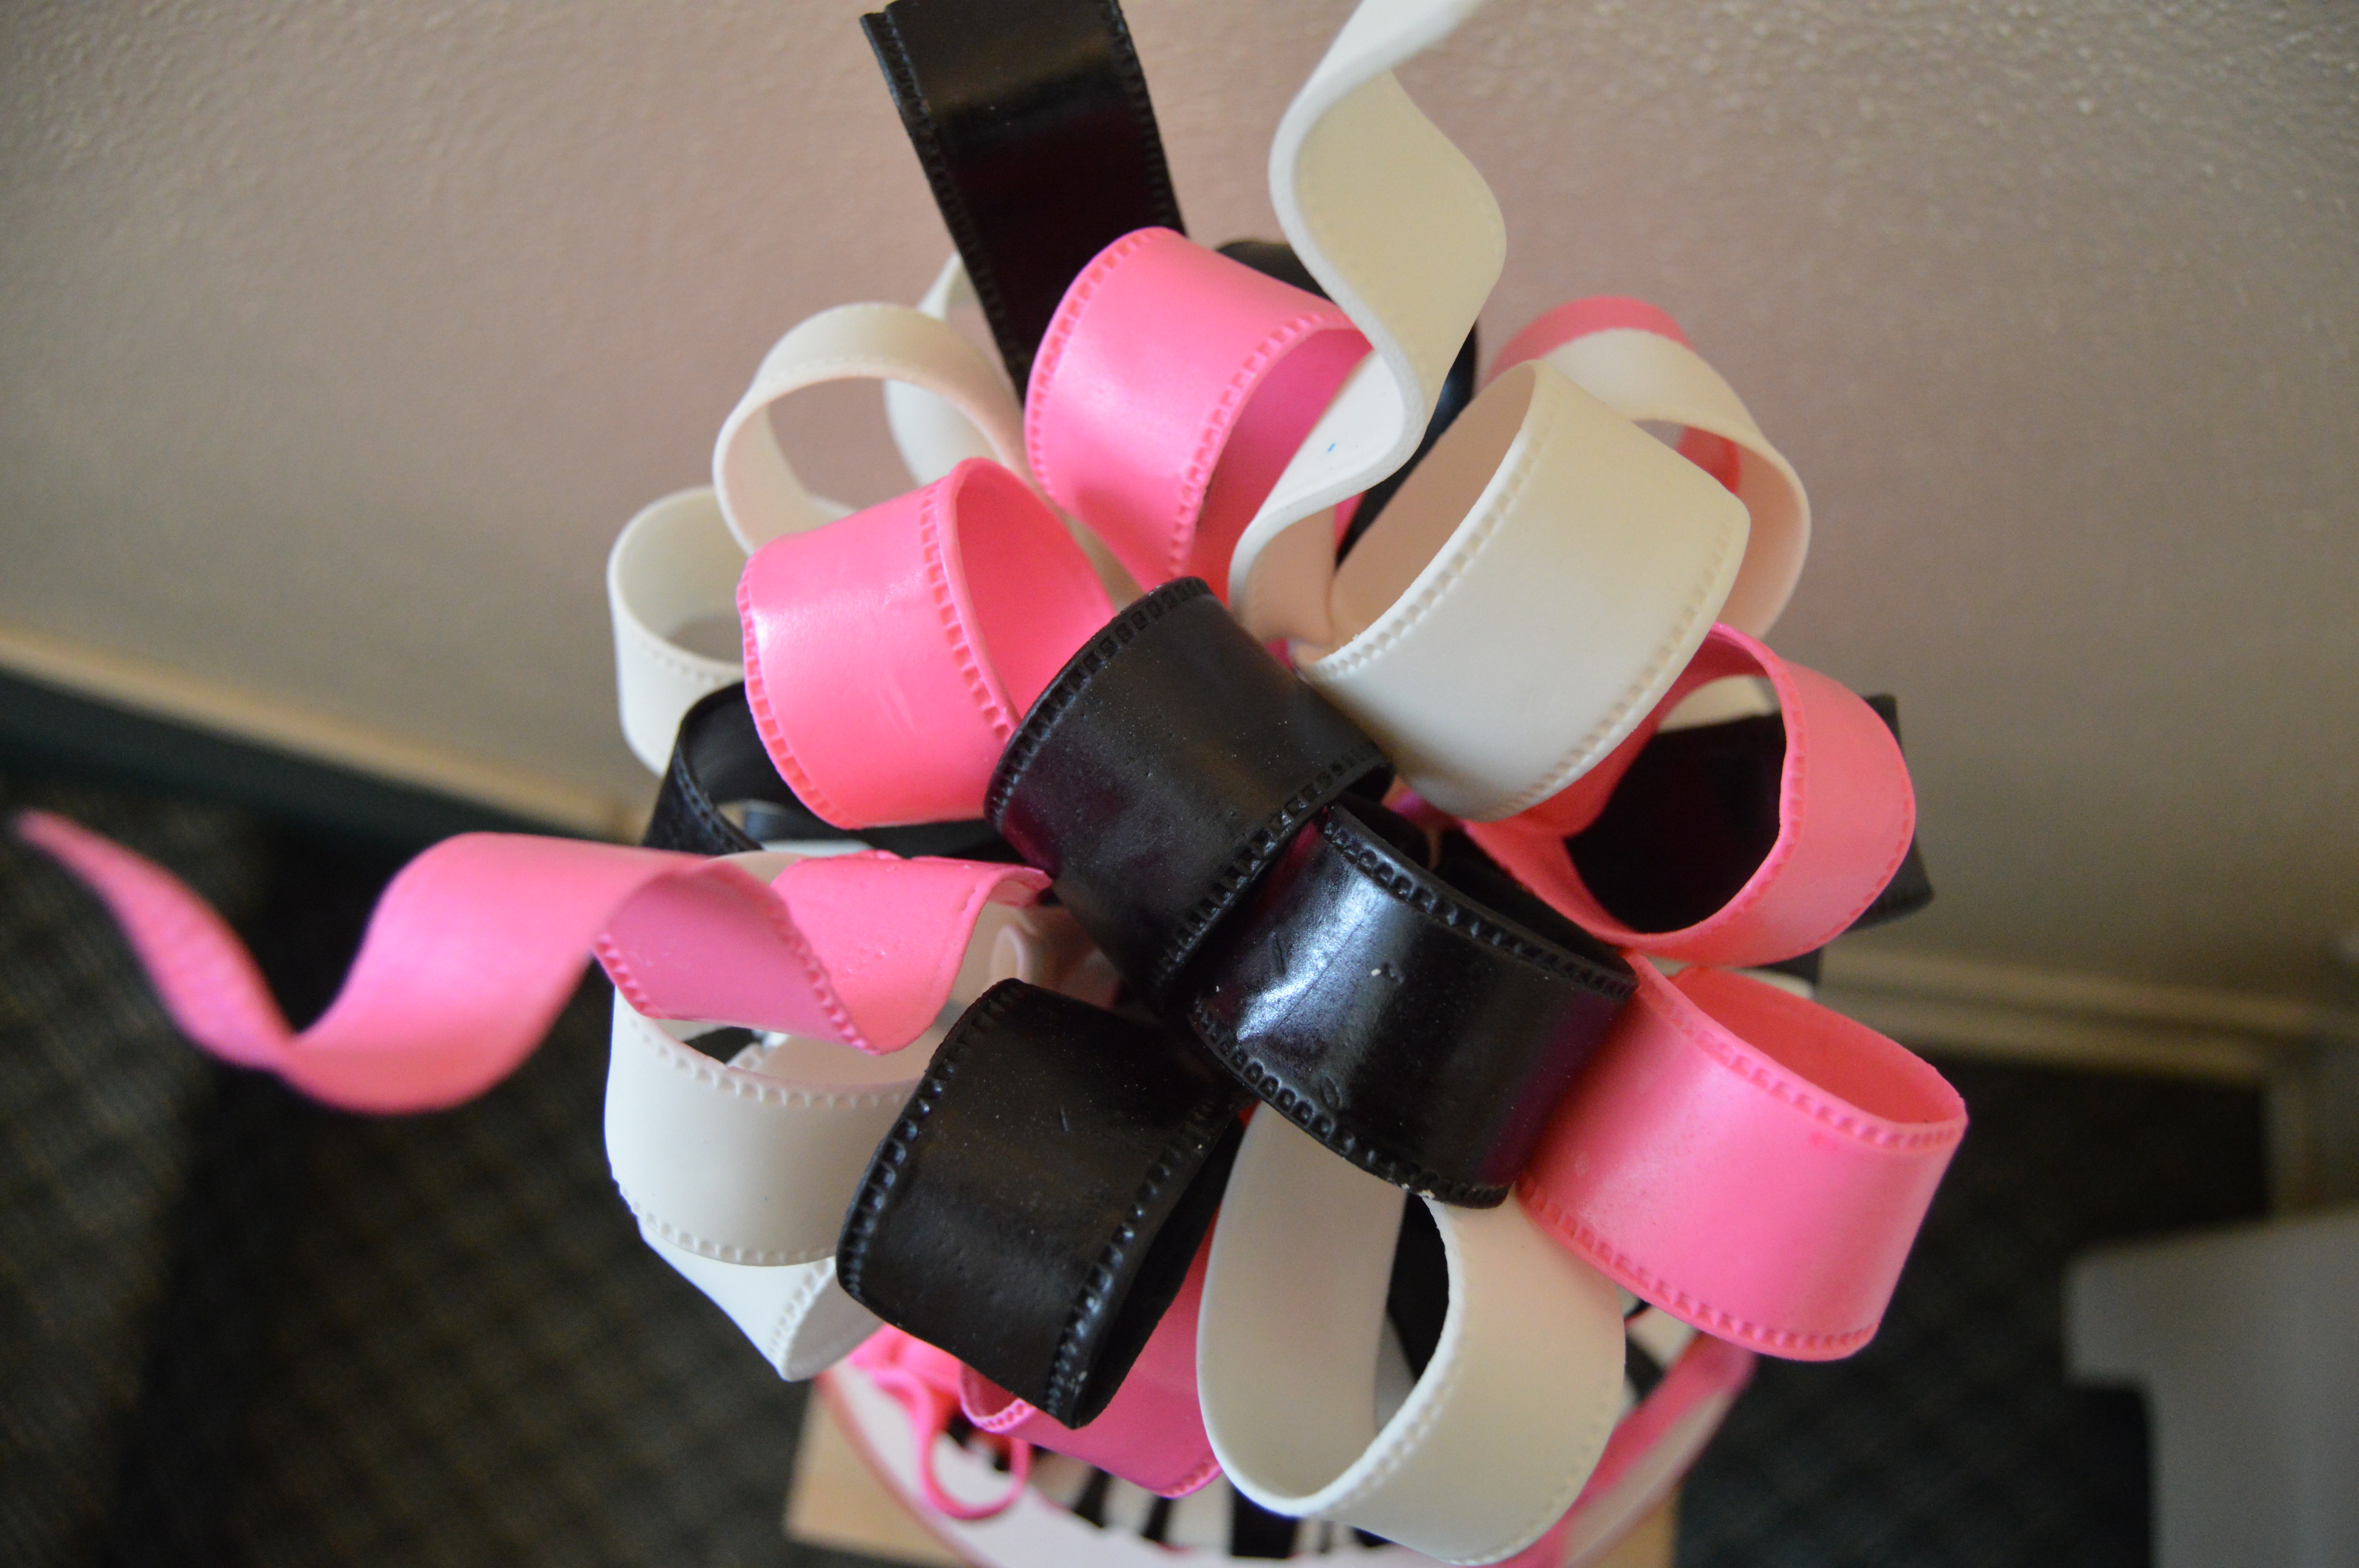
(9) Dry loops on their side. Use your hands to open them as wide as you like. You will need about 20 loops for each loop bow. Its better to have more than you need than to run out of them. They can remain this way until you need them. I make them in advance and store in a box when they are dry. You can also make some loop ends and twirls.
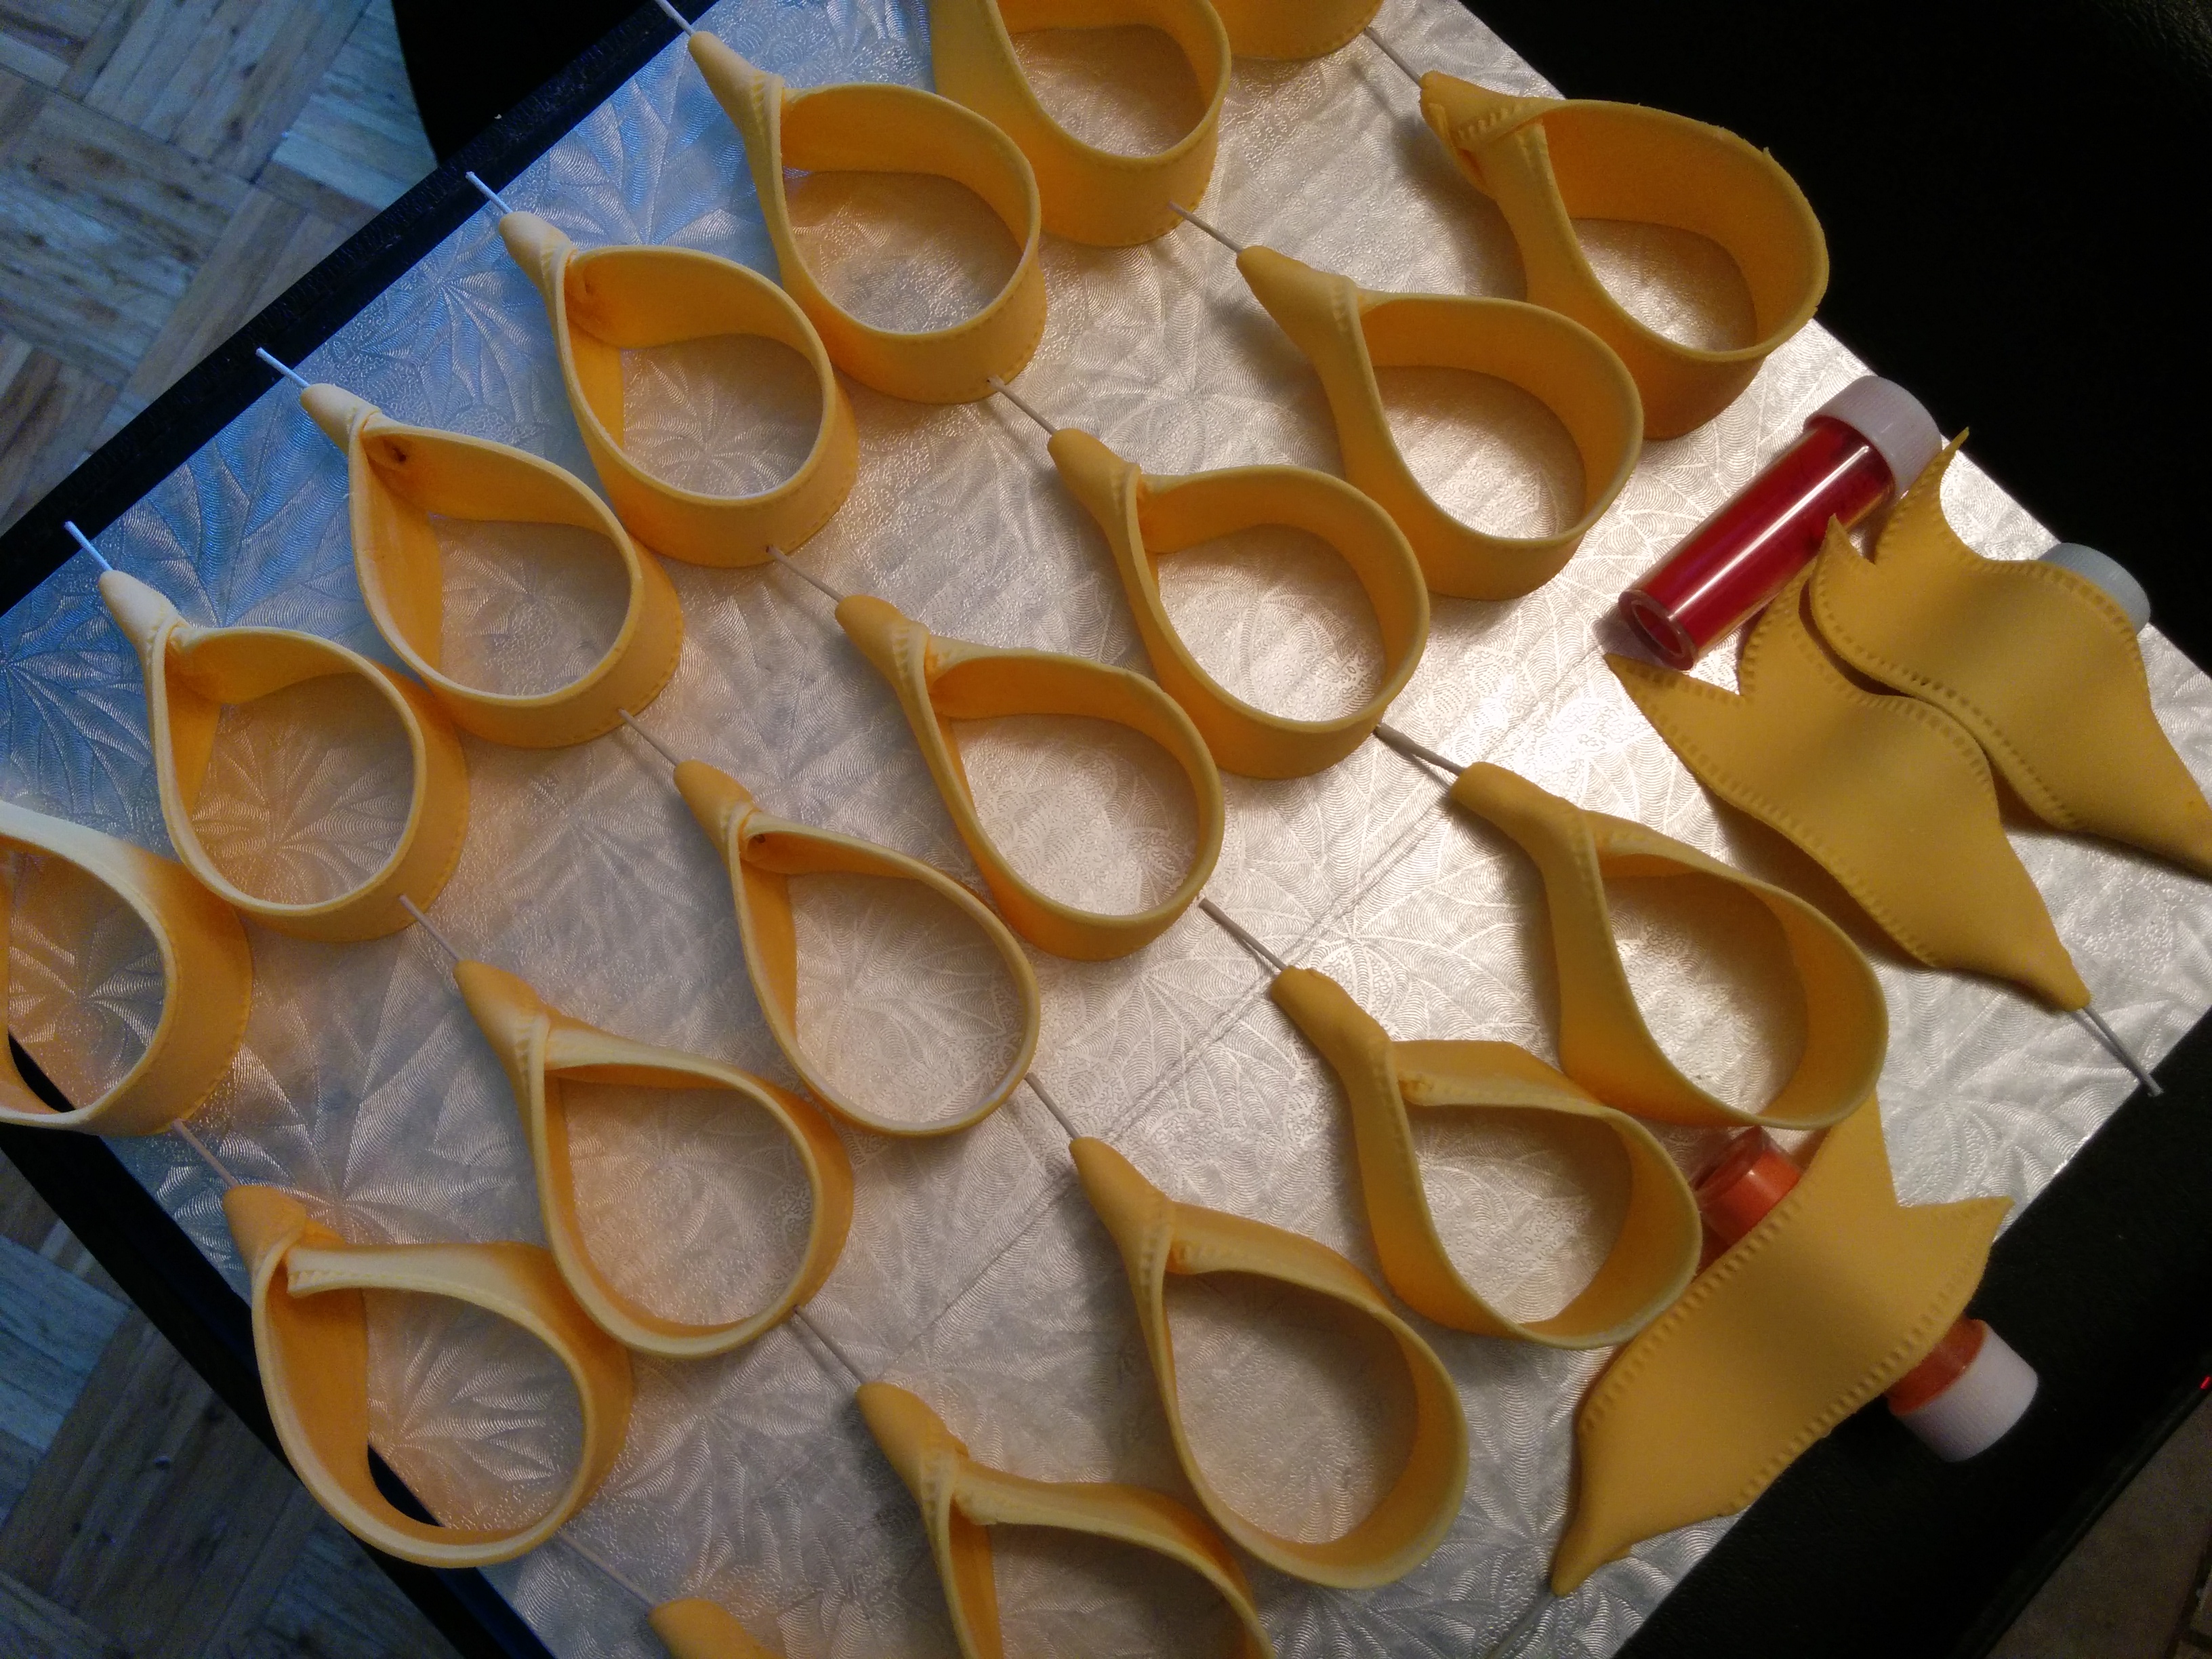
NOTE: To make loops with an inner color, stick two fondants of different colors together before cutting the strips for the loops.

(10) To assemble, place some loop ends on the top of your cake. Make sure you bend them to give movement. The loop ends and actual bow should be the same color as the loops.
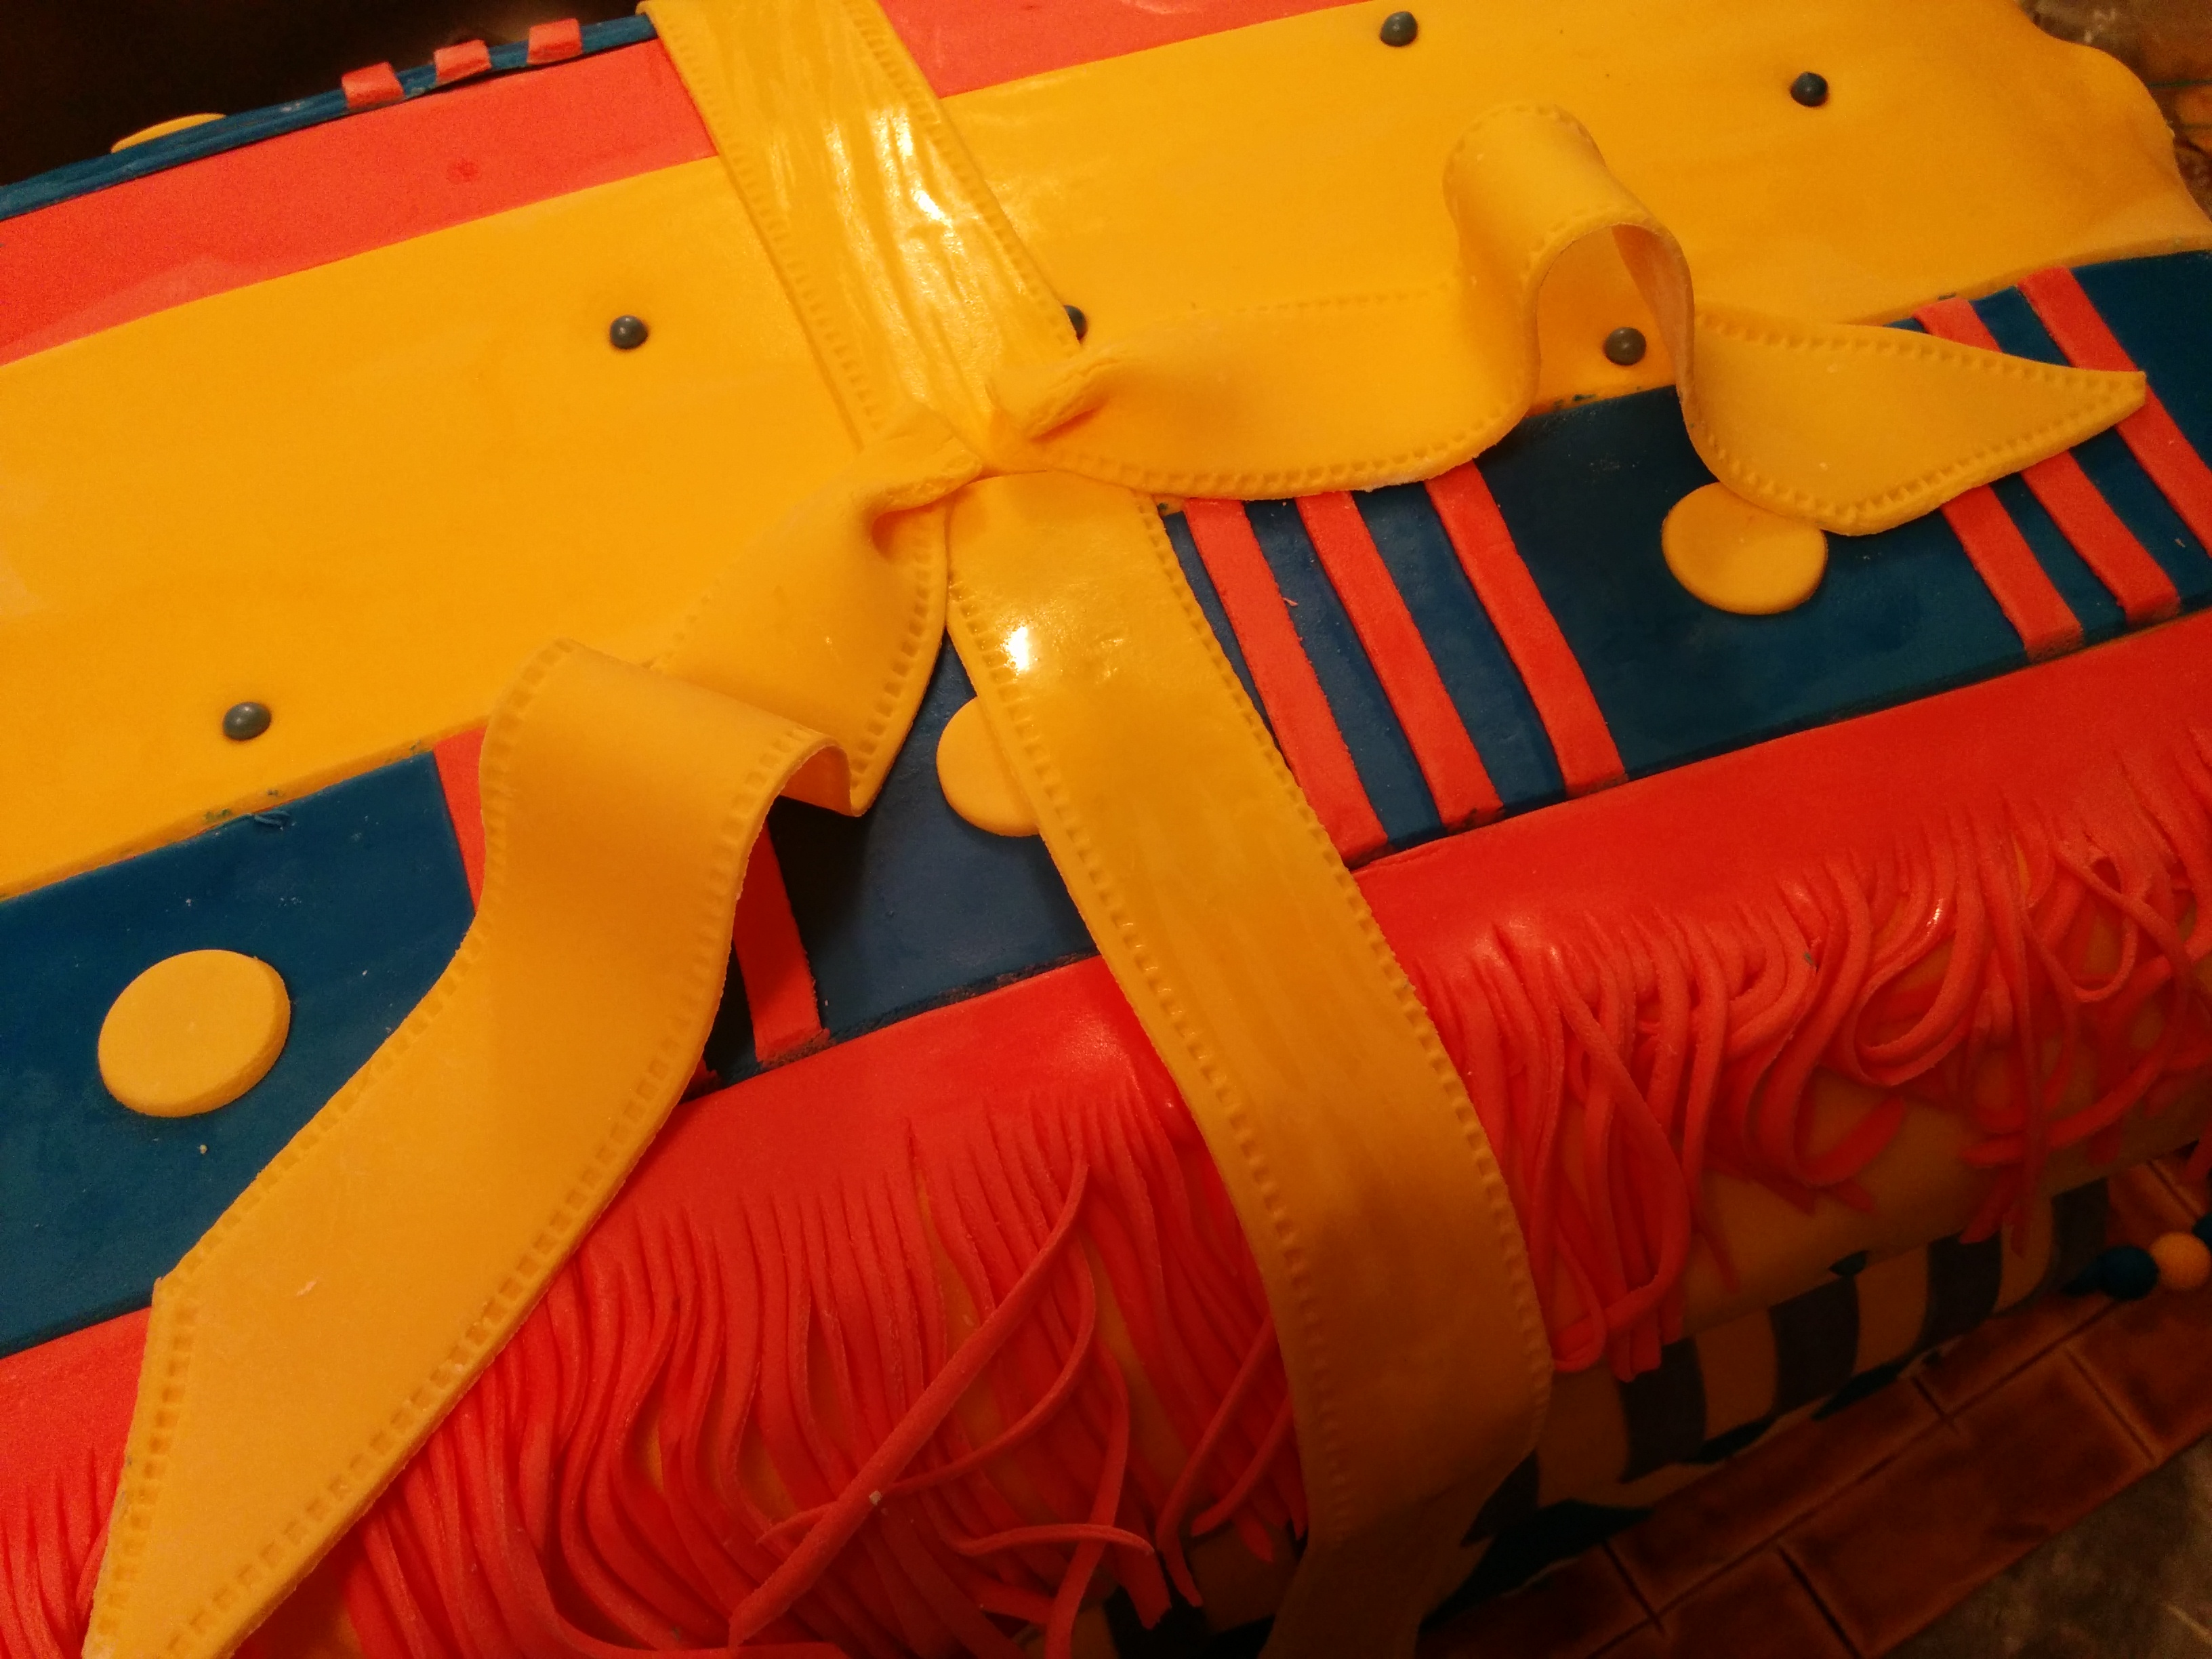
(11) Place a ball of fondant in the middle of the cake and on the tips of the loop ends. This is what would hold the loops together.
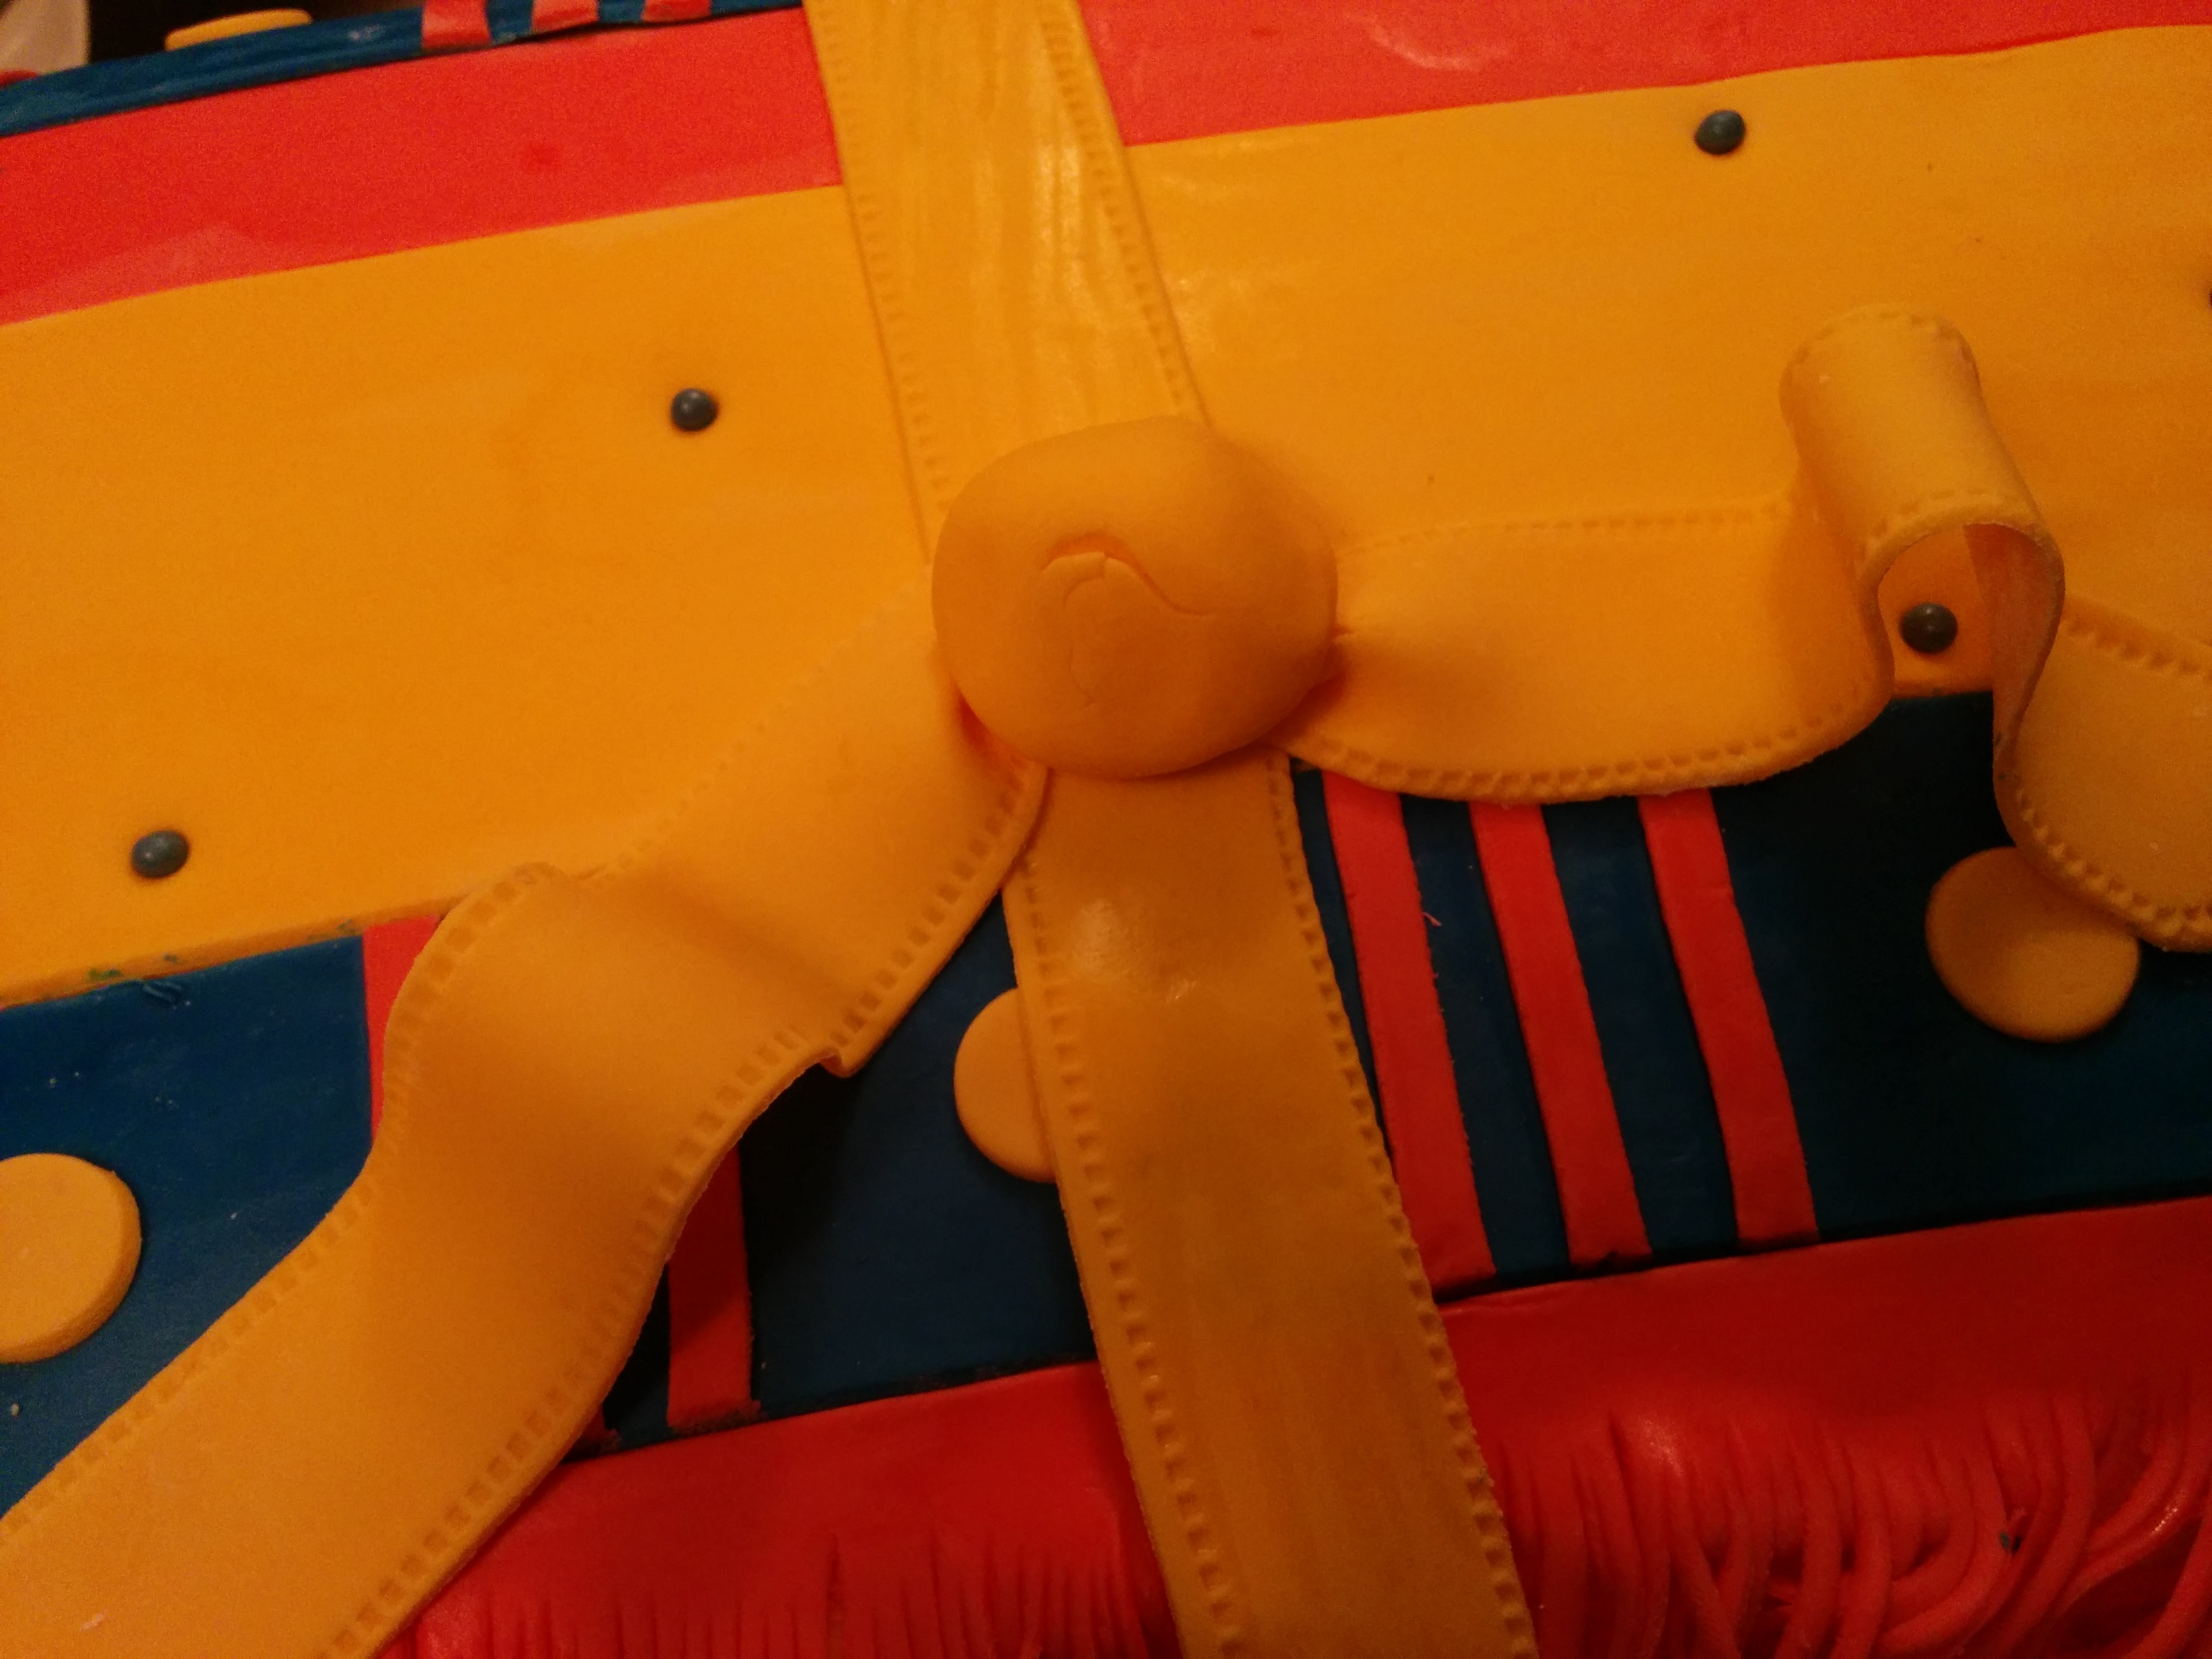
(12) Start arranging the loops around the ball of fondant, making sure you insert parts of the floral wire into the ball of fondant. Keep layering until you have a full loop bow.
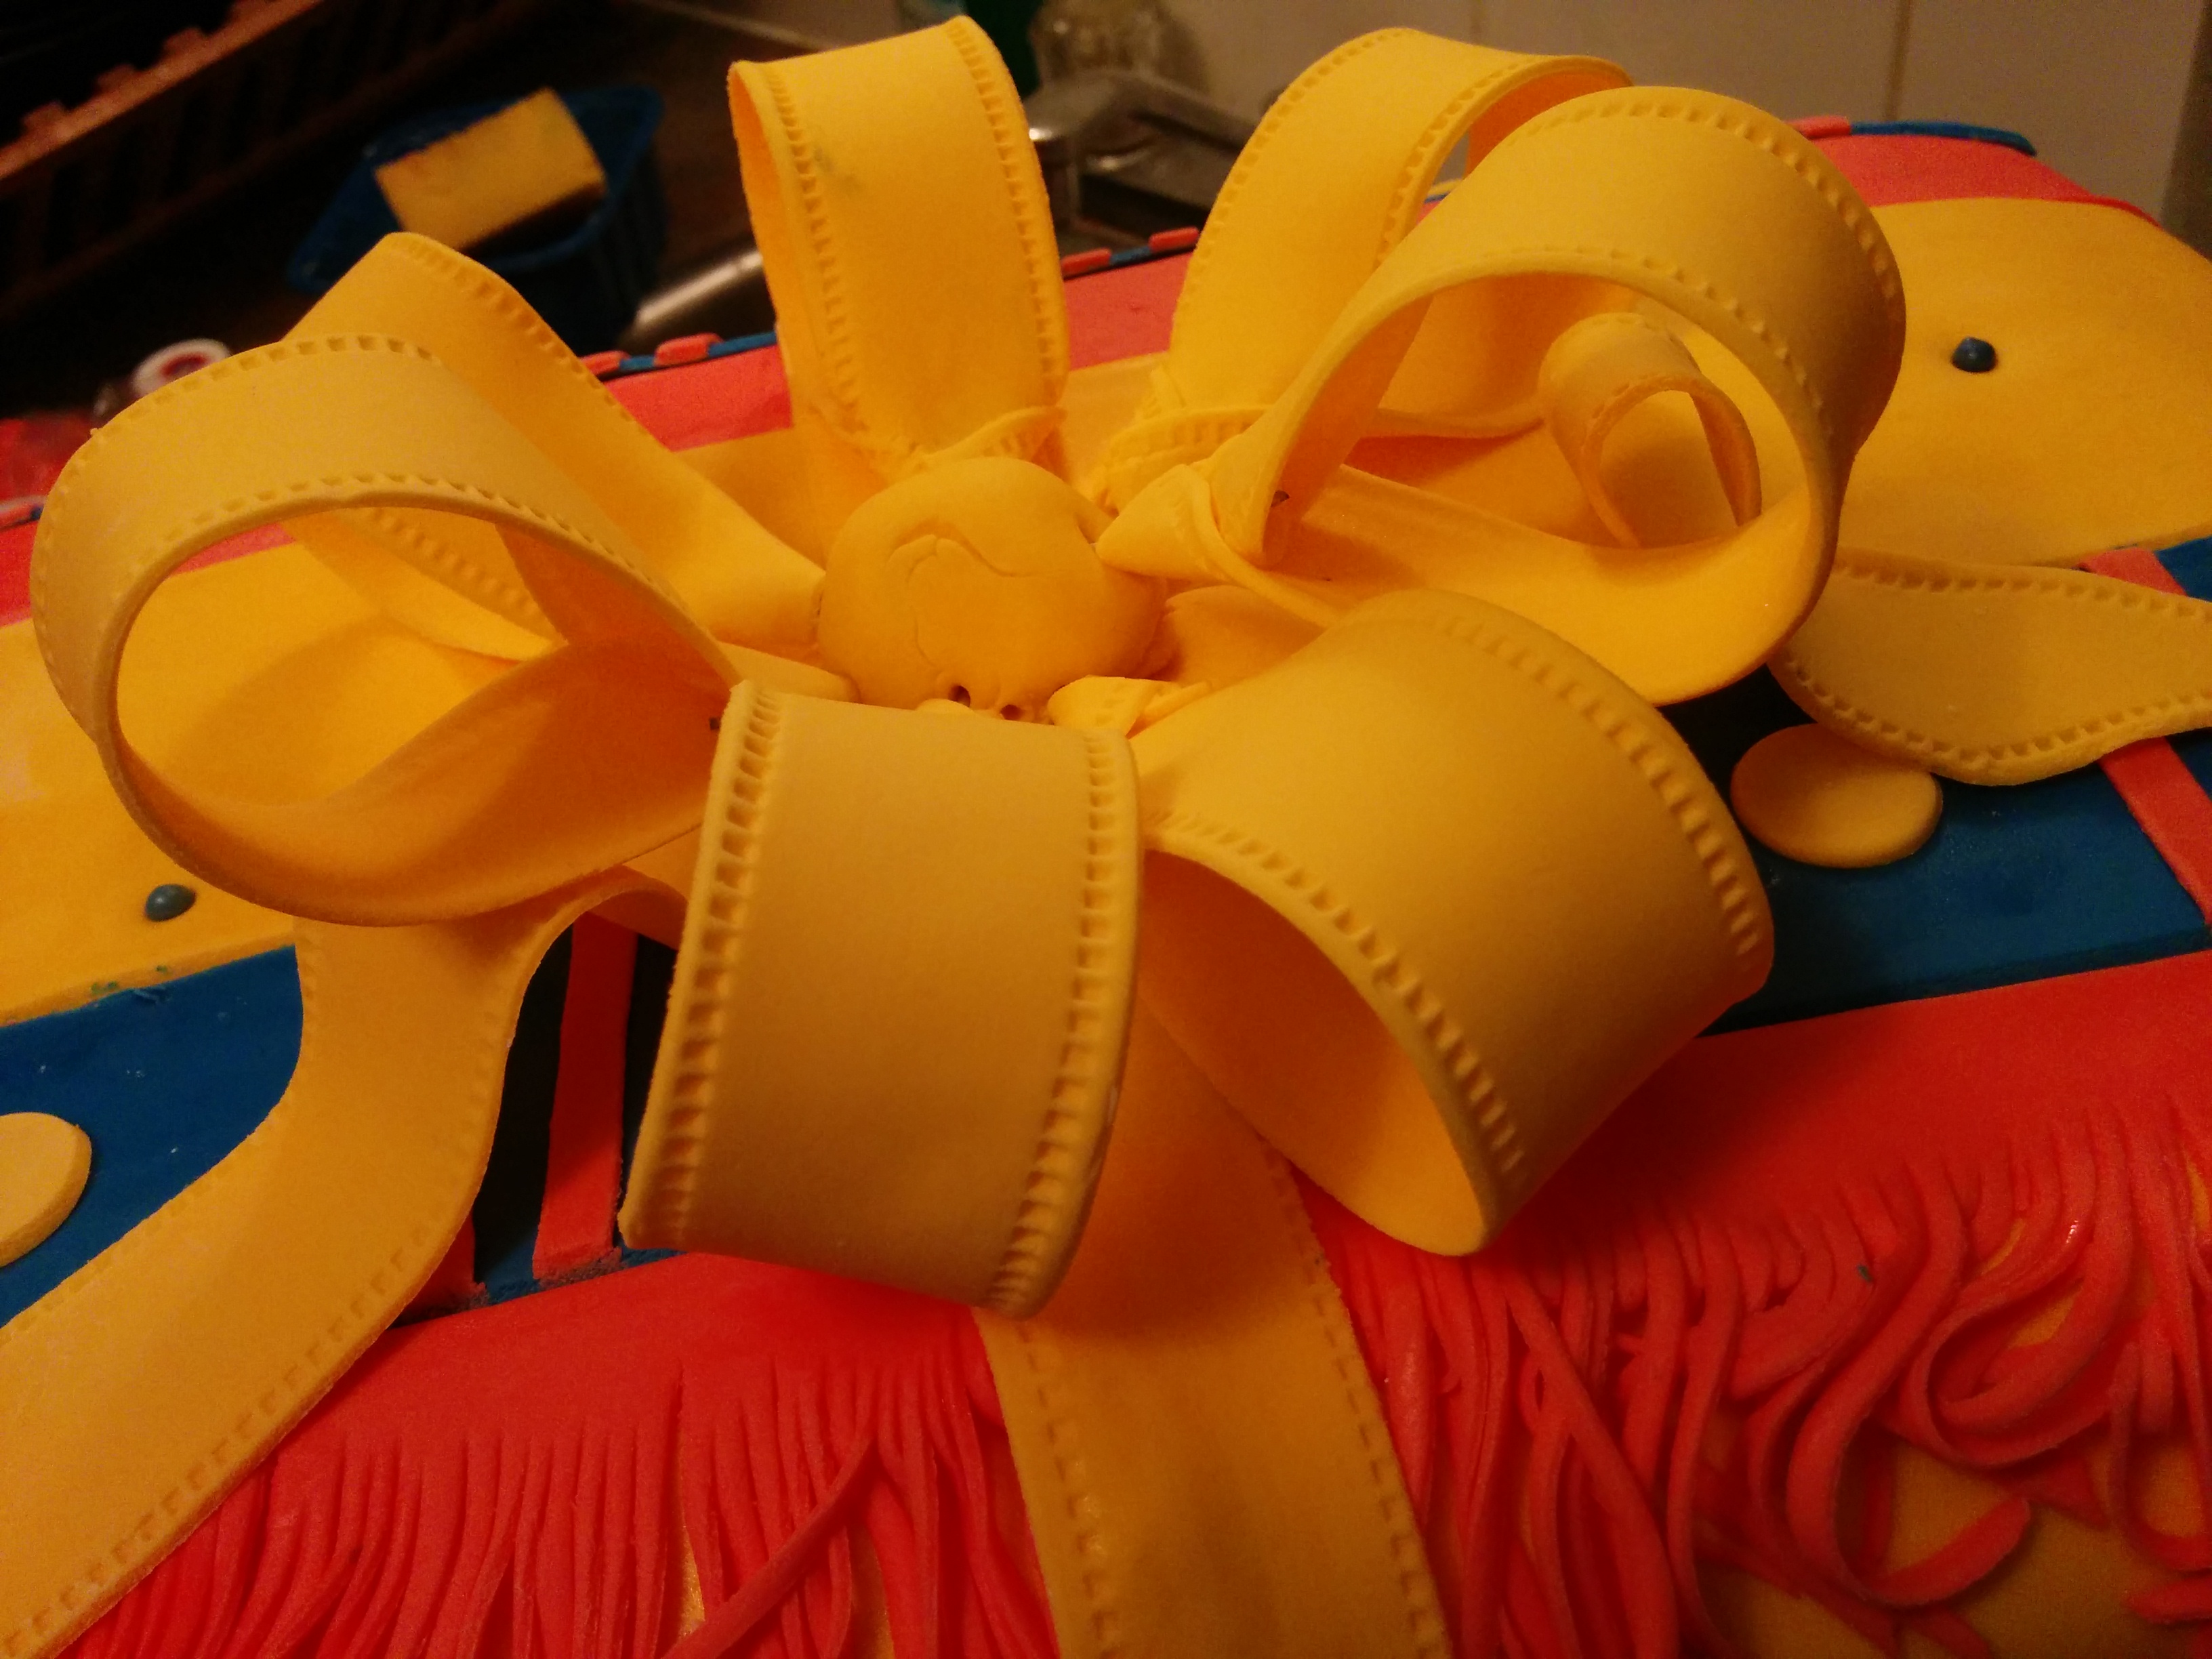
(13) Look for any open spaces and fill them up with your loop ends and twirls. Keep moving things around until you are satisfied with the look of the loop. That’s it.
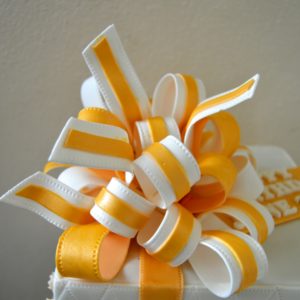
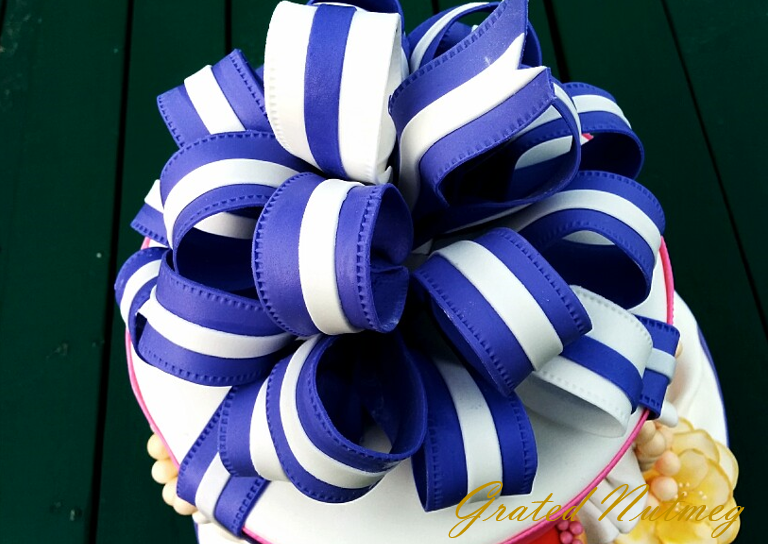
You can also make loop bows with two colors. All you need do is put a thinner strip of a different colored fondant in the middle of each fondant strip before forming it into a loop.
Terry Adido is passionate about showing people how easy it is to recreate restaurant quality meals in the comfort of their kitchens. With a style of cooking he refers to as Afro-European Fusion, his meals are influenced greatly by French and Italian Cuisine with a West African twist. If you love good food, you are in for the ride of your life.
wonderful
Thanks Sandy
Wow Terry Nice work well-done
Thanks Angela
Wow! Really nice! 🙂
Thanks Cynthia
Nice one Terry! Amazing work
Thanks Ify
Thumb up
Thanks Seni
Wow! Looked so complicated yet simple. Well done bro
Thanks Tomi. A lot of things are really not as complicated as they look. You just have to know how to do them.
Wow! creativity made simple.
Thanks Mercy
This tutorial came at the right time making a cake with loop bows tomorrow. .God bless you Terry!
Thanks. All the best with your cake Liz.
l like ur tutorial pls can u teach to make foudant step by step
I do not have a traditional fondant recipe yet. Hopefully soon.
Awesome terry nice job
Thanks Precious
Terry, you rock. Thumb up for you!
Thanks
Hmmmmmmn thanks a lot for this tutorial
You are welcome
This is beautiful,tanks Terry.
You are welcome.
Wow. Thanx for d tutorial. Graduation cap tutorial plsssss
You are welcome.
Wow! lovely am so dazed. how did u get ur cake to look like folded wapper? Where do I get that fondant?
Its a technique which is better shown than explained. I have a marshmallow fondant on this site which is what I used.
Terry ilove dis hmmmm Ȋ̝̊̅† lovely
Thanks Bola
Tanks so much Terry, may God bless you for your generousity.
Thanks Njideka
Nice job terry. apart frm online tutorials do u train interested student maybe at home or office
Thanks.No I do not train yet.
The tuorial really helped. Thanks.XX
You are welcome Shakirah
tanx for sharing,God bless u
You are welcome.
Terry, this ribbons are not easy to make o! I tried it using toothpicks and almost destroyed the cake. Perhaps the bows should be formed ahead of time so that the fondant where they will be pierced into will still be soft?
I am not sure I get your question. The bows are always made a head of time and left to dry before using on the cake.
Thanks, that’s what I was asking. I made my bows same time as i covered the cake with fondat and left them to dry so i guess that was why it was difficult to pierce the bows in.
Oh ok. In the tutorial I stated that you should make them in advance and dry them before using. I usually make mine at least 5 days before I need them.
Really really nice. Thanks for sharing
You are welcome Valentina.
Terry, Thank you, you are already blessed.
I am now baking and decorating, without attending any school, through your help and tutorials.
And things are getting better everyday.
Thank You.
Thanks Chinyere. Its great hearing from you.
Thanks a lot Terry, you share your wealth of knowledge freely and with such precision, been following your blog for over a year, and it’s been very helpful and insightful. But, today I summoned courage to thank you formally. You are a great inspiration. Thanks and thanks a great deal
Thanks Ayi. Its great hearing from you. I’m glad you find the blog useful.
I really love your tutorial. Pls do you do training for student, I really want to learn it.
Thanks. No I do not so personal training.
wow, i have tried making this severally but didnt turn out dis good,tank u so much .i think i love dis method soo easy. thanks and keep up d good work terry
You are welcome queen. Allowing them to dry properly before building helps a great deal.
Tanks terry i really appricate. pls i dont knw if u hv done tutorial on how you made the aso oke stacked facbric. i love that cake and all your jobs.tanks God bless you.
Thanks. No I have not.
Nice work. Pls what s d size of d wire? Cos am thinking maybe I ll insert d wire into d whole founding or half of t. Tanx!
I used 18 gauge wires here. Maybe use smth smaller like 22 gauge.
Thank you very much for the turorial it looks wonderful
You are welcome Ophelie. I’m glad it was helpful.
Thank you sir.
Not a problem.
Got to know about your site last Thursday. I must commend you for all the pictorials and tutorials. I really love you work… Nd I gonna refer friends. Thanks more grease to your elbow
Thanks Nike. Glad to have you around.
Yay! Thanks Terry, *dancing*. I appreciate this, God bless u.
You are welcome Yemi.
I think I am now stuck to your God sent tutorials. You are a blessing!
Thanks.
Thank U soooo much Terry.
May God continually make u an embodiment of more wisdom and creativity. I have learnt alot from this site I must confess…..Tried out your French Vanilla Spodge cake & kept asking myself If I actually baked it myself….unbelievable! My colleagues had a taste N said I was a Pro. I just smiled…..Your recipes are great.
Thank you soon much.
Much Love……
You are welcome Gracia. Thanks for the feedback.
Wonderful,Thank you.
You are welcome.
Hi Terry please what thickness will you suggest for the florist wire to be used for the loops?
I use floral wires of various thickness. So feel free to use any that you have as long as it can be bent to form a loop at the to.
Thank you so much!
You are welcome Liz.
WOW!!!! Amazing. Good job. God bless you!
Thanks Itiola.
Wonderful! I really enjoy reading your tutorial but the length of wire is not written in the post. can you tell me the length of wires you cut for this project.
Thanks. The length does not matter. What matters is that you have enough to insert into the fondant ball on the cake.
omg who are you , u a reamaaaazing
Thanks Lila.
Hi Terry happy new year and thank you for the good work and knowledge you are sharing.
I have always used this loop bow tutorial to make mine and they always come out perfect and add thr wow factor to the cakes I used them for.
During summer I don’t have any problem but the last 2 cakes I had made loop bows for in winter was a bit of a disaster.
The first one collapsed by morning and the second cake I added mexican paste to my flower paste so that it dries really hard. I noticed the same trend that happened the first time but the Mexican paste helped a bit this time as I noticed just a few had started to flatten out but the bow was still in shape.
Please what could have caused this? Could it be my arrangement or can it be down to the weather?
Thanks for your help always.
Hi. I would suggest making them a few days earlier so they have more time to dry. Winter months could be humid.
Thank you Terry for this tutorial, now I know how to do the bow much easier and more beautiful. God bless you.
You are welcome.
I applaud you Terry. This is great! Thank you
Thanks Seun.
Great work Terry. Thank you
You are welcome.