
Fondant Pearls Tutorial
This is a tutorial on how to make fondant pearls which can be used in three major ways on cakes. First, they can be used in place of sugar pearls where these are unavailable. Secondly, they can be used around cake boarders. Lastly, they can be stringed together to form pearl necklaces. Each of these uses will be examined below.
TOOLS:
(1) Round Wilton Frosting Tips
(2)A Threaded Needle
(3) A Paint Brush
(4) Rolling Pin
INGREDIENTS:
(1) Fondant. I used Marshmallow Fondant. Recipe here.
(2) Pearl/Luster/Color Dust of Various Colors
(3) Color Paste
(4) Shortening (Optional)
PROCEDURE:
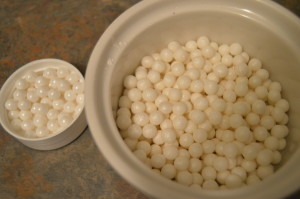
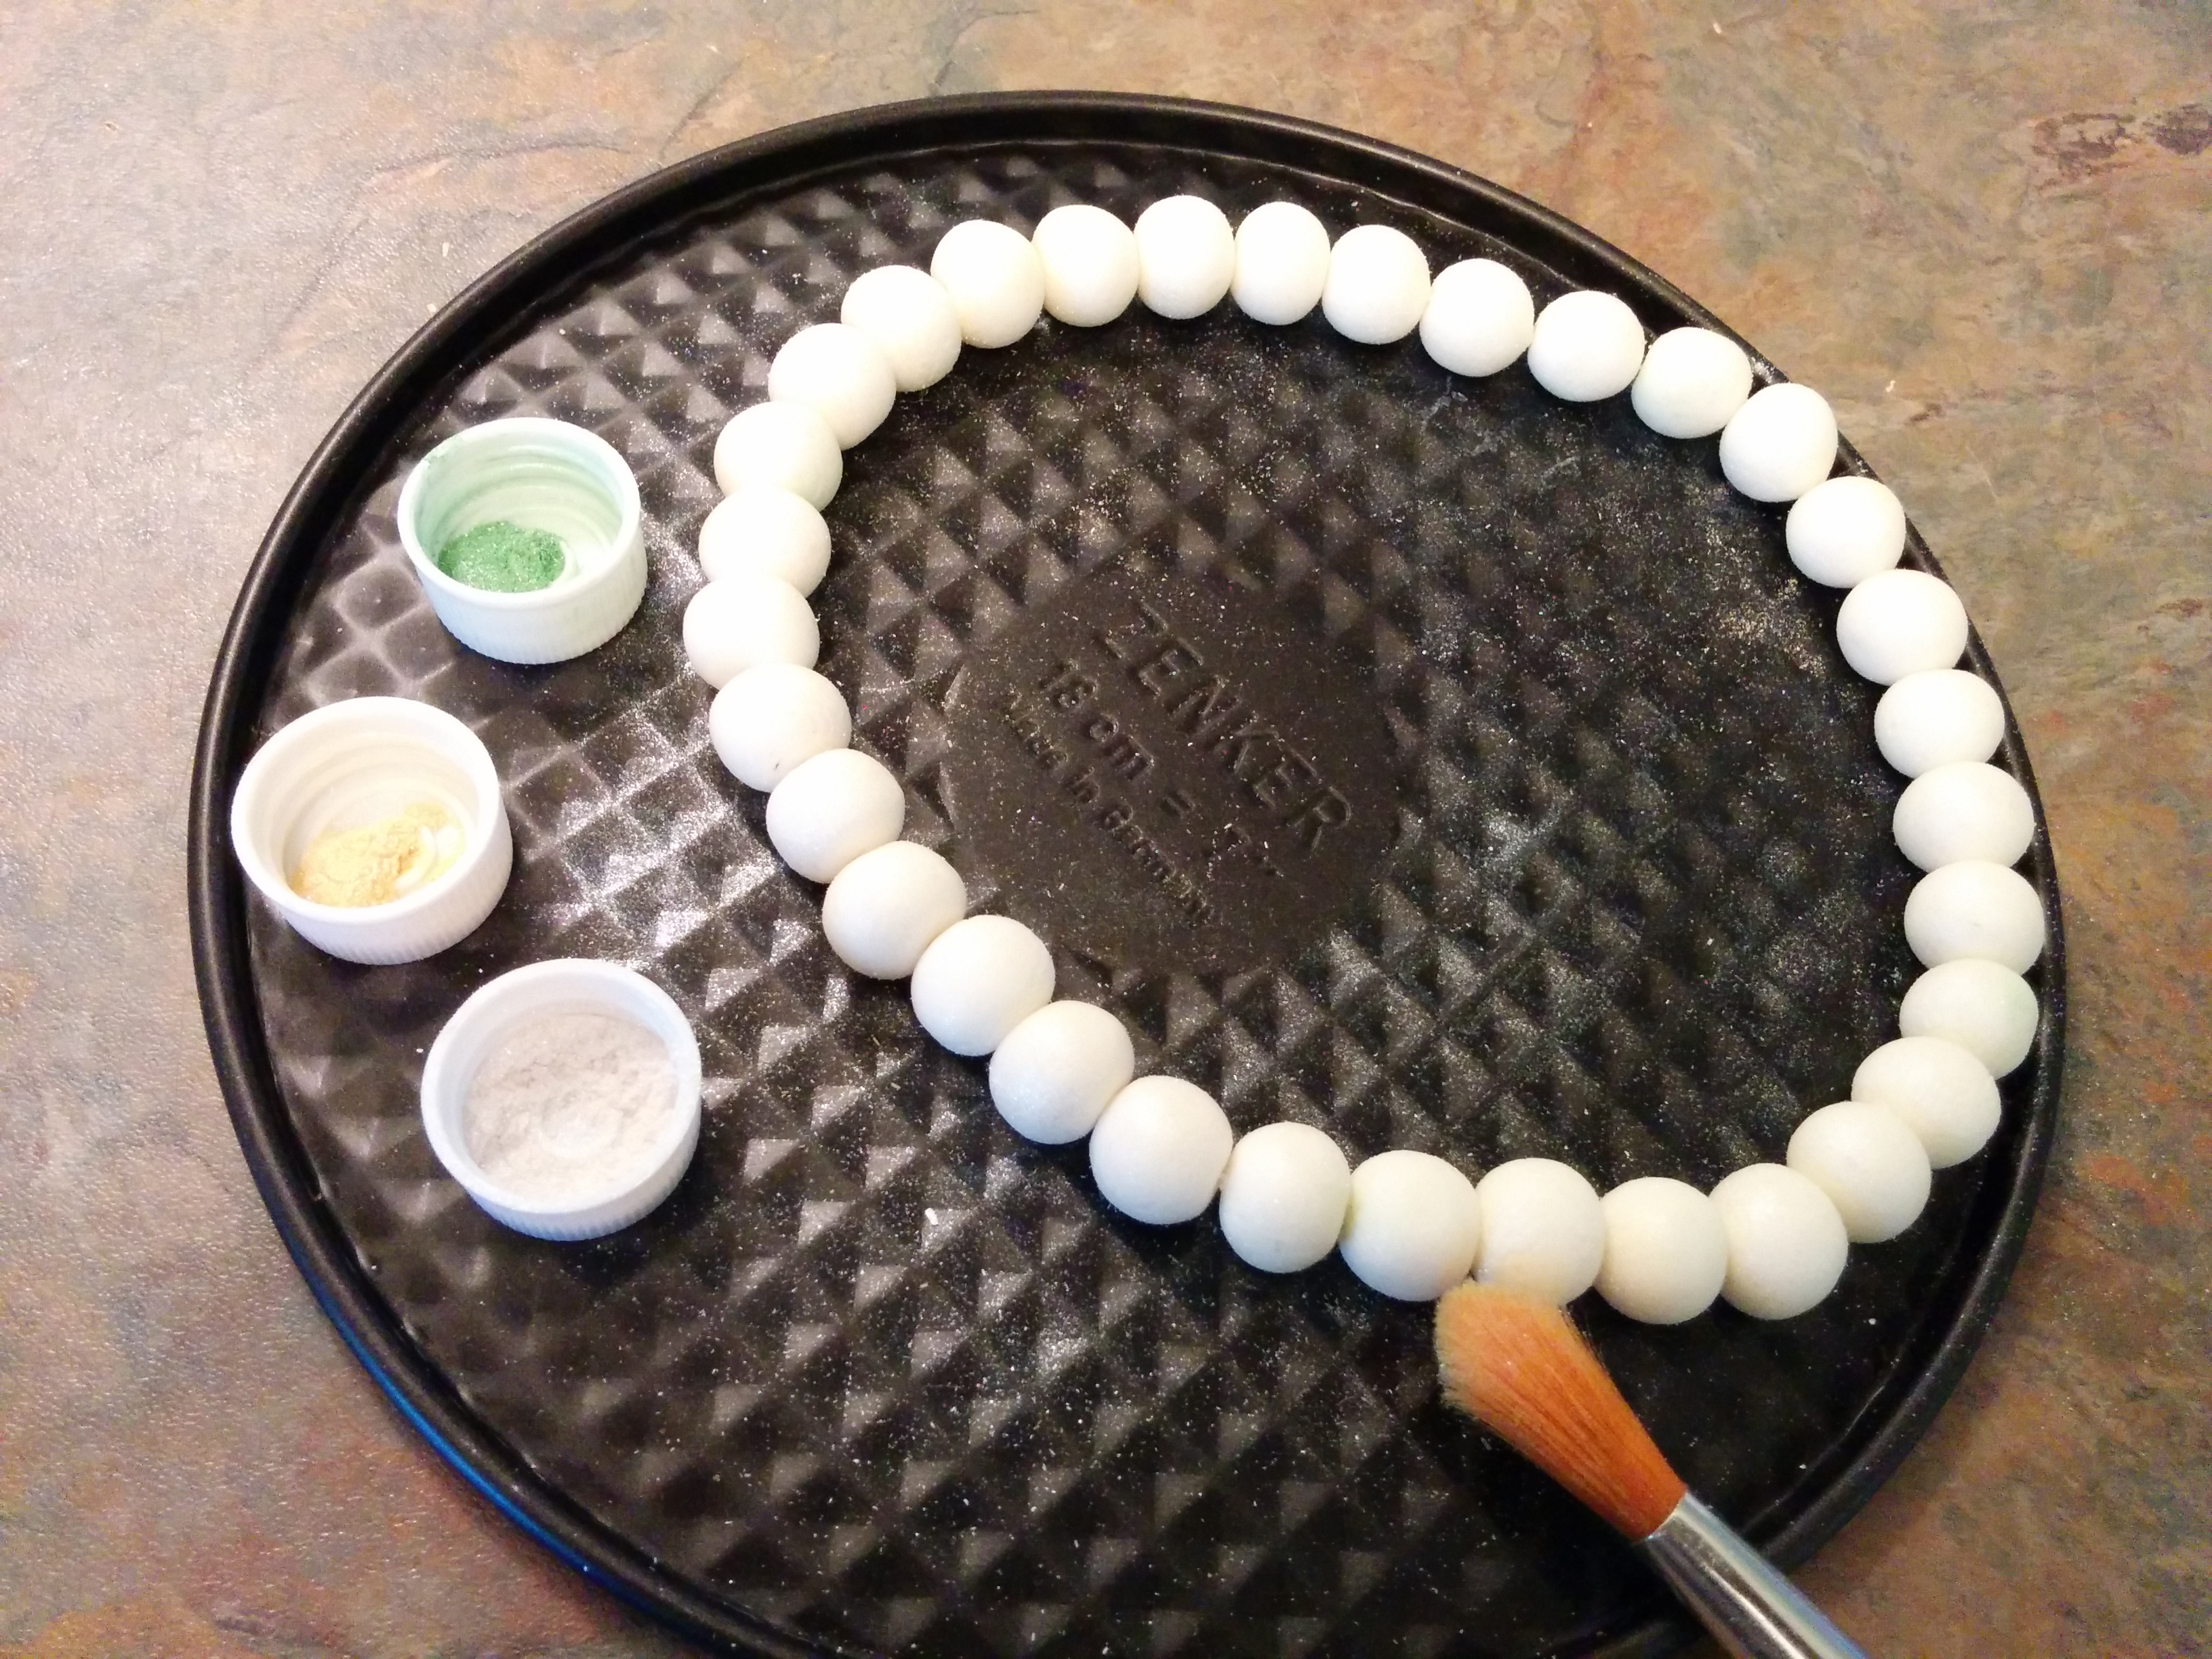
(1) Roll out your fondant with a rolling pin. Ensure that the fondant is of even thickness to guarantee uniform pearls. The thickness of the rolled out fondant would depend on how big you want the pearls to be. The size of the pearls is also determined by the size of the frosting tip you use. The color of the rolled out fondant would depend on the color of pearls you are making.
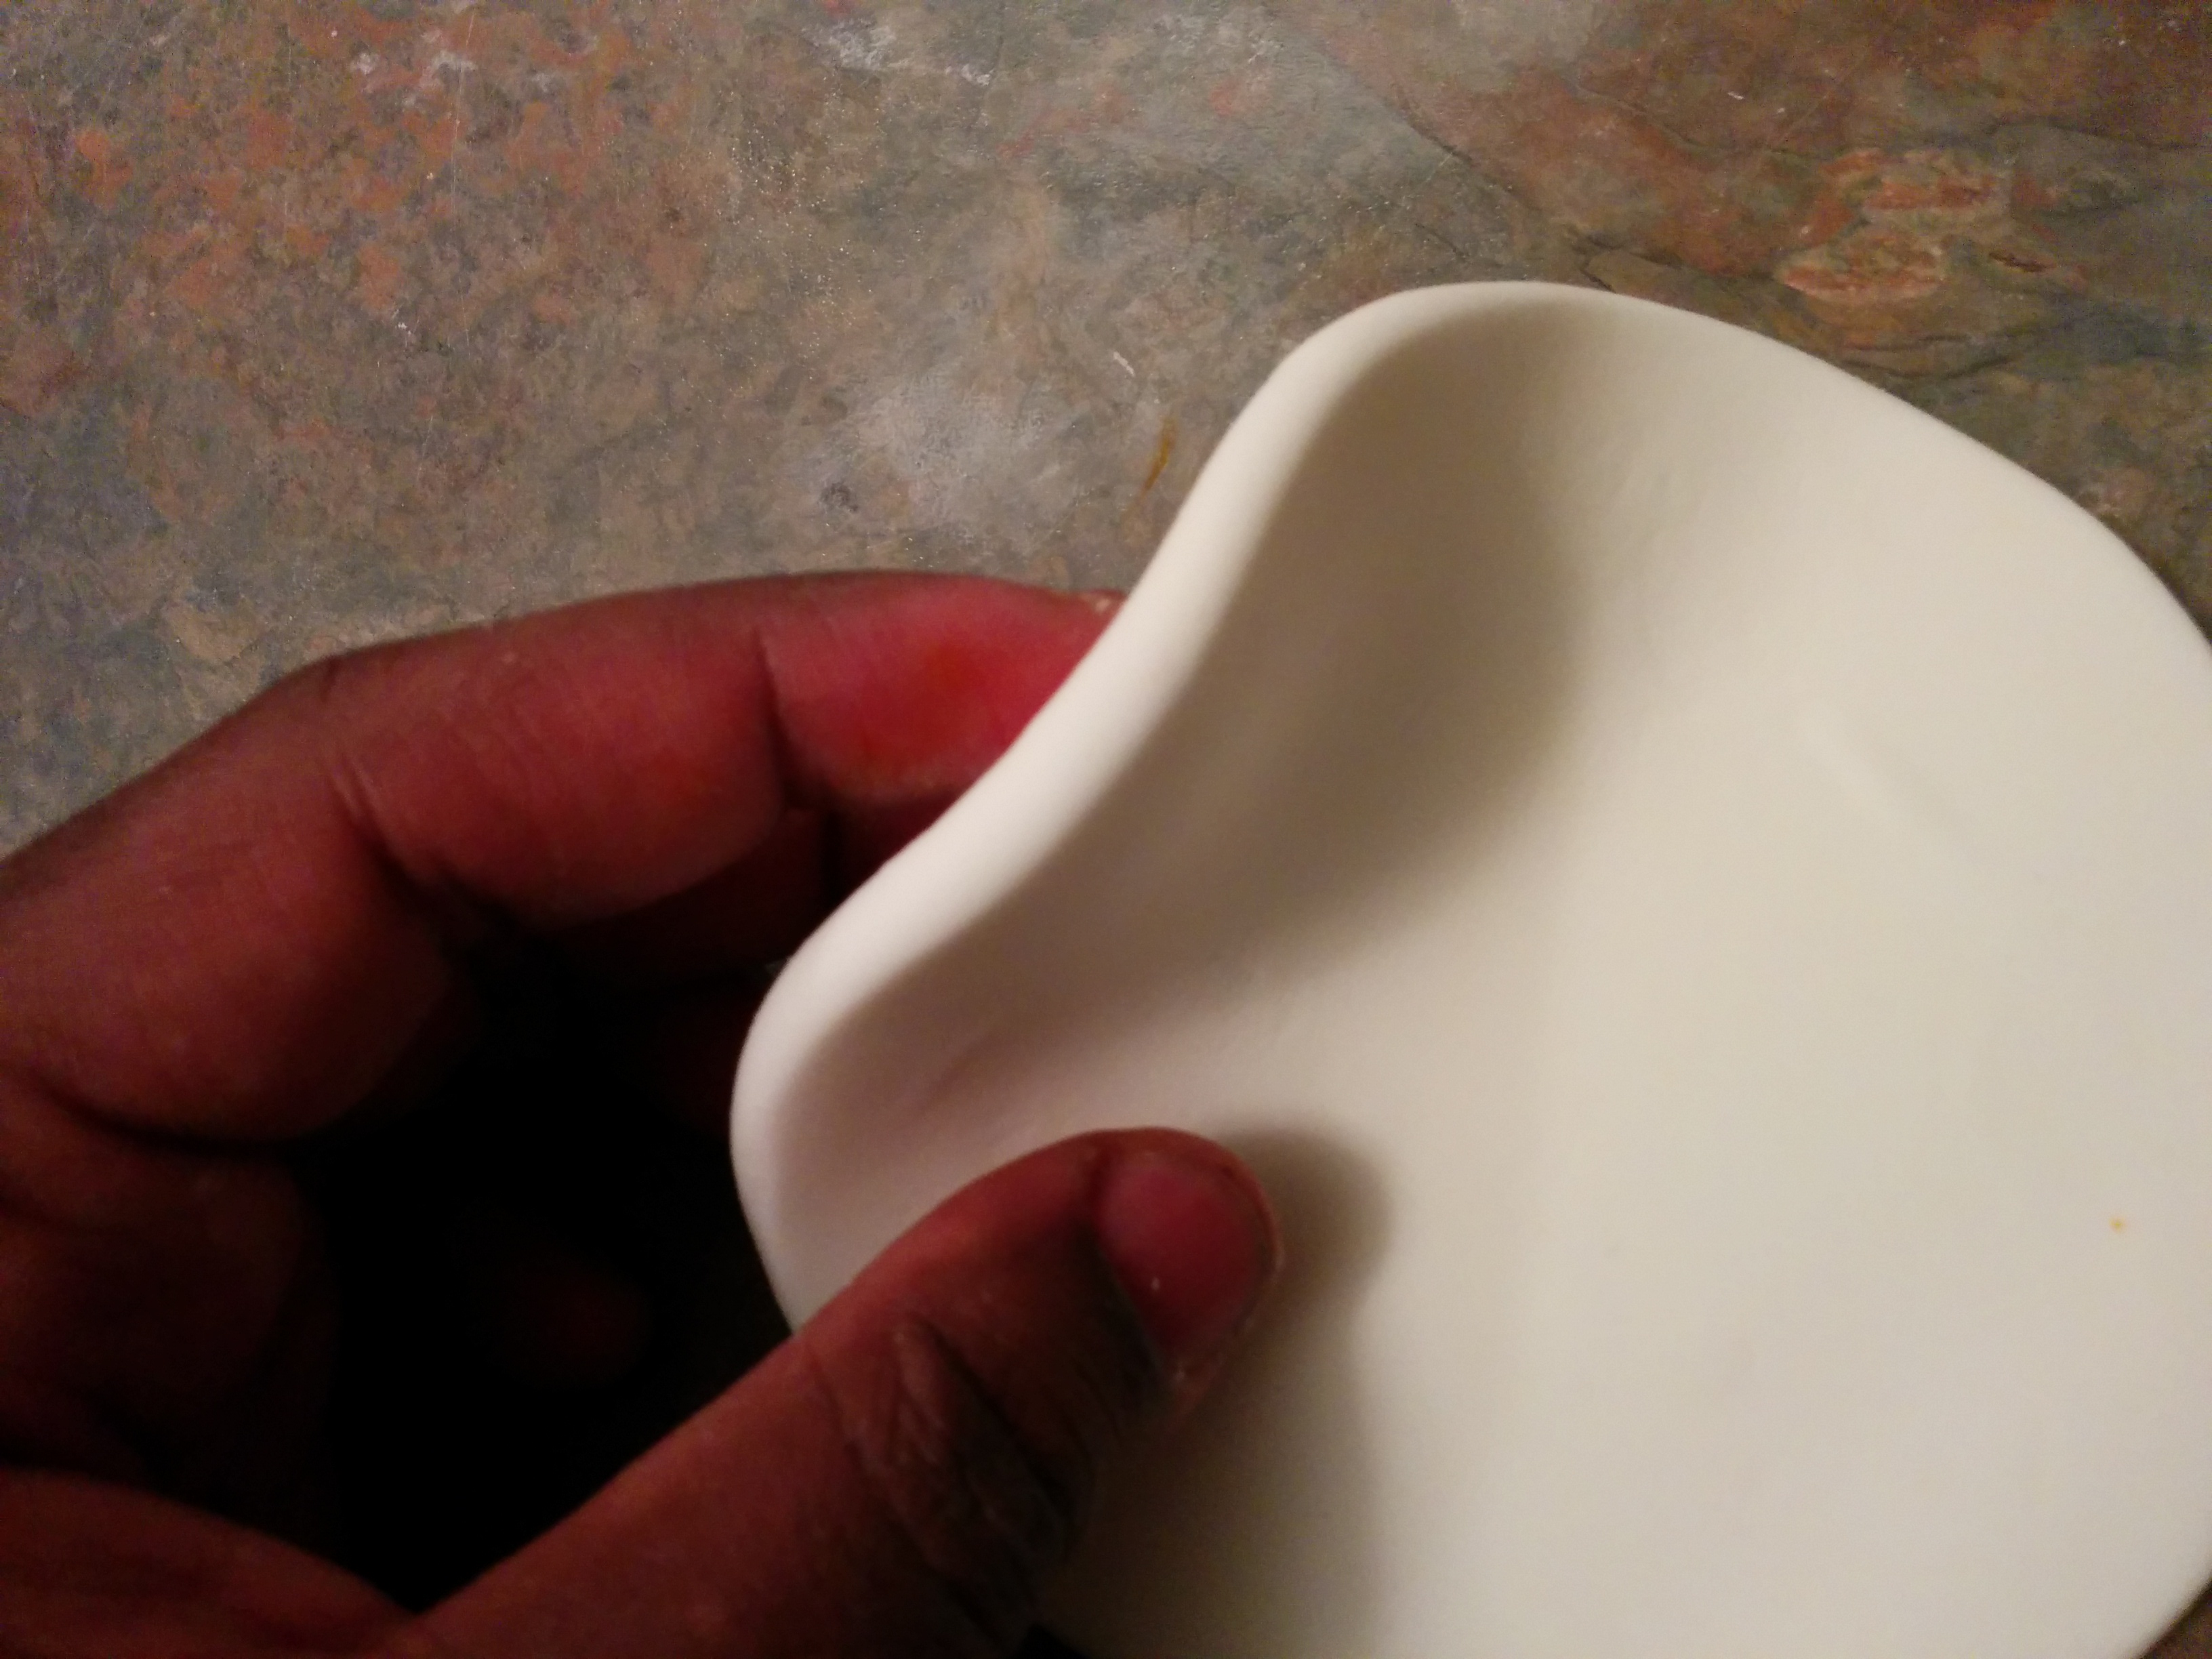
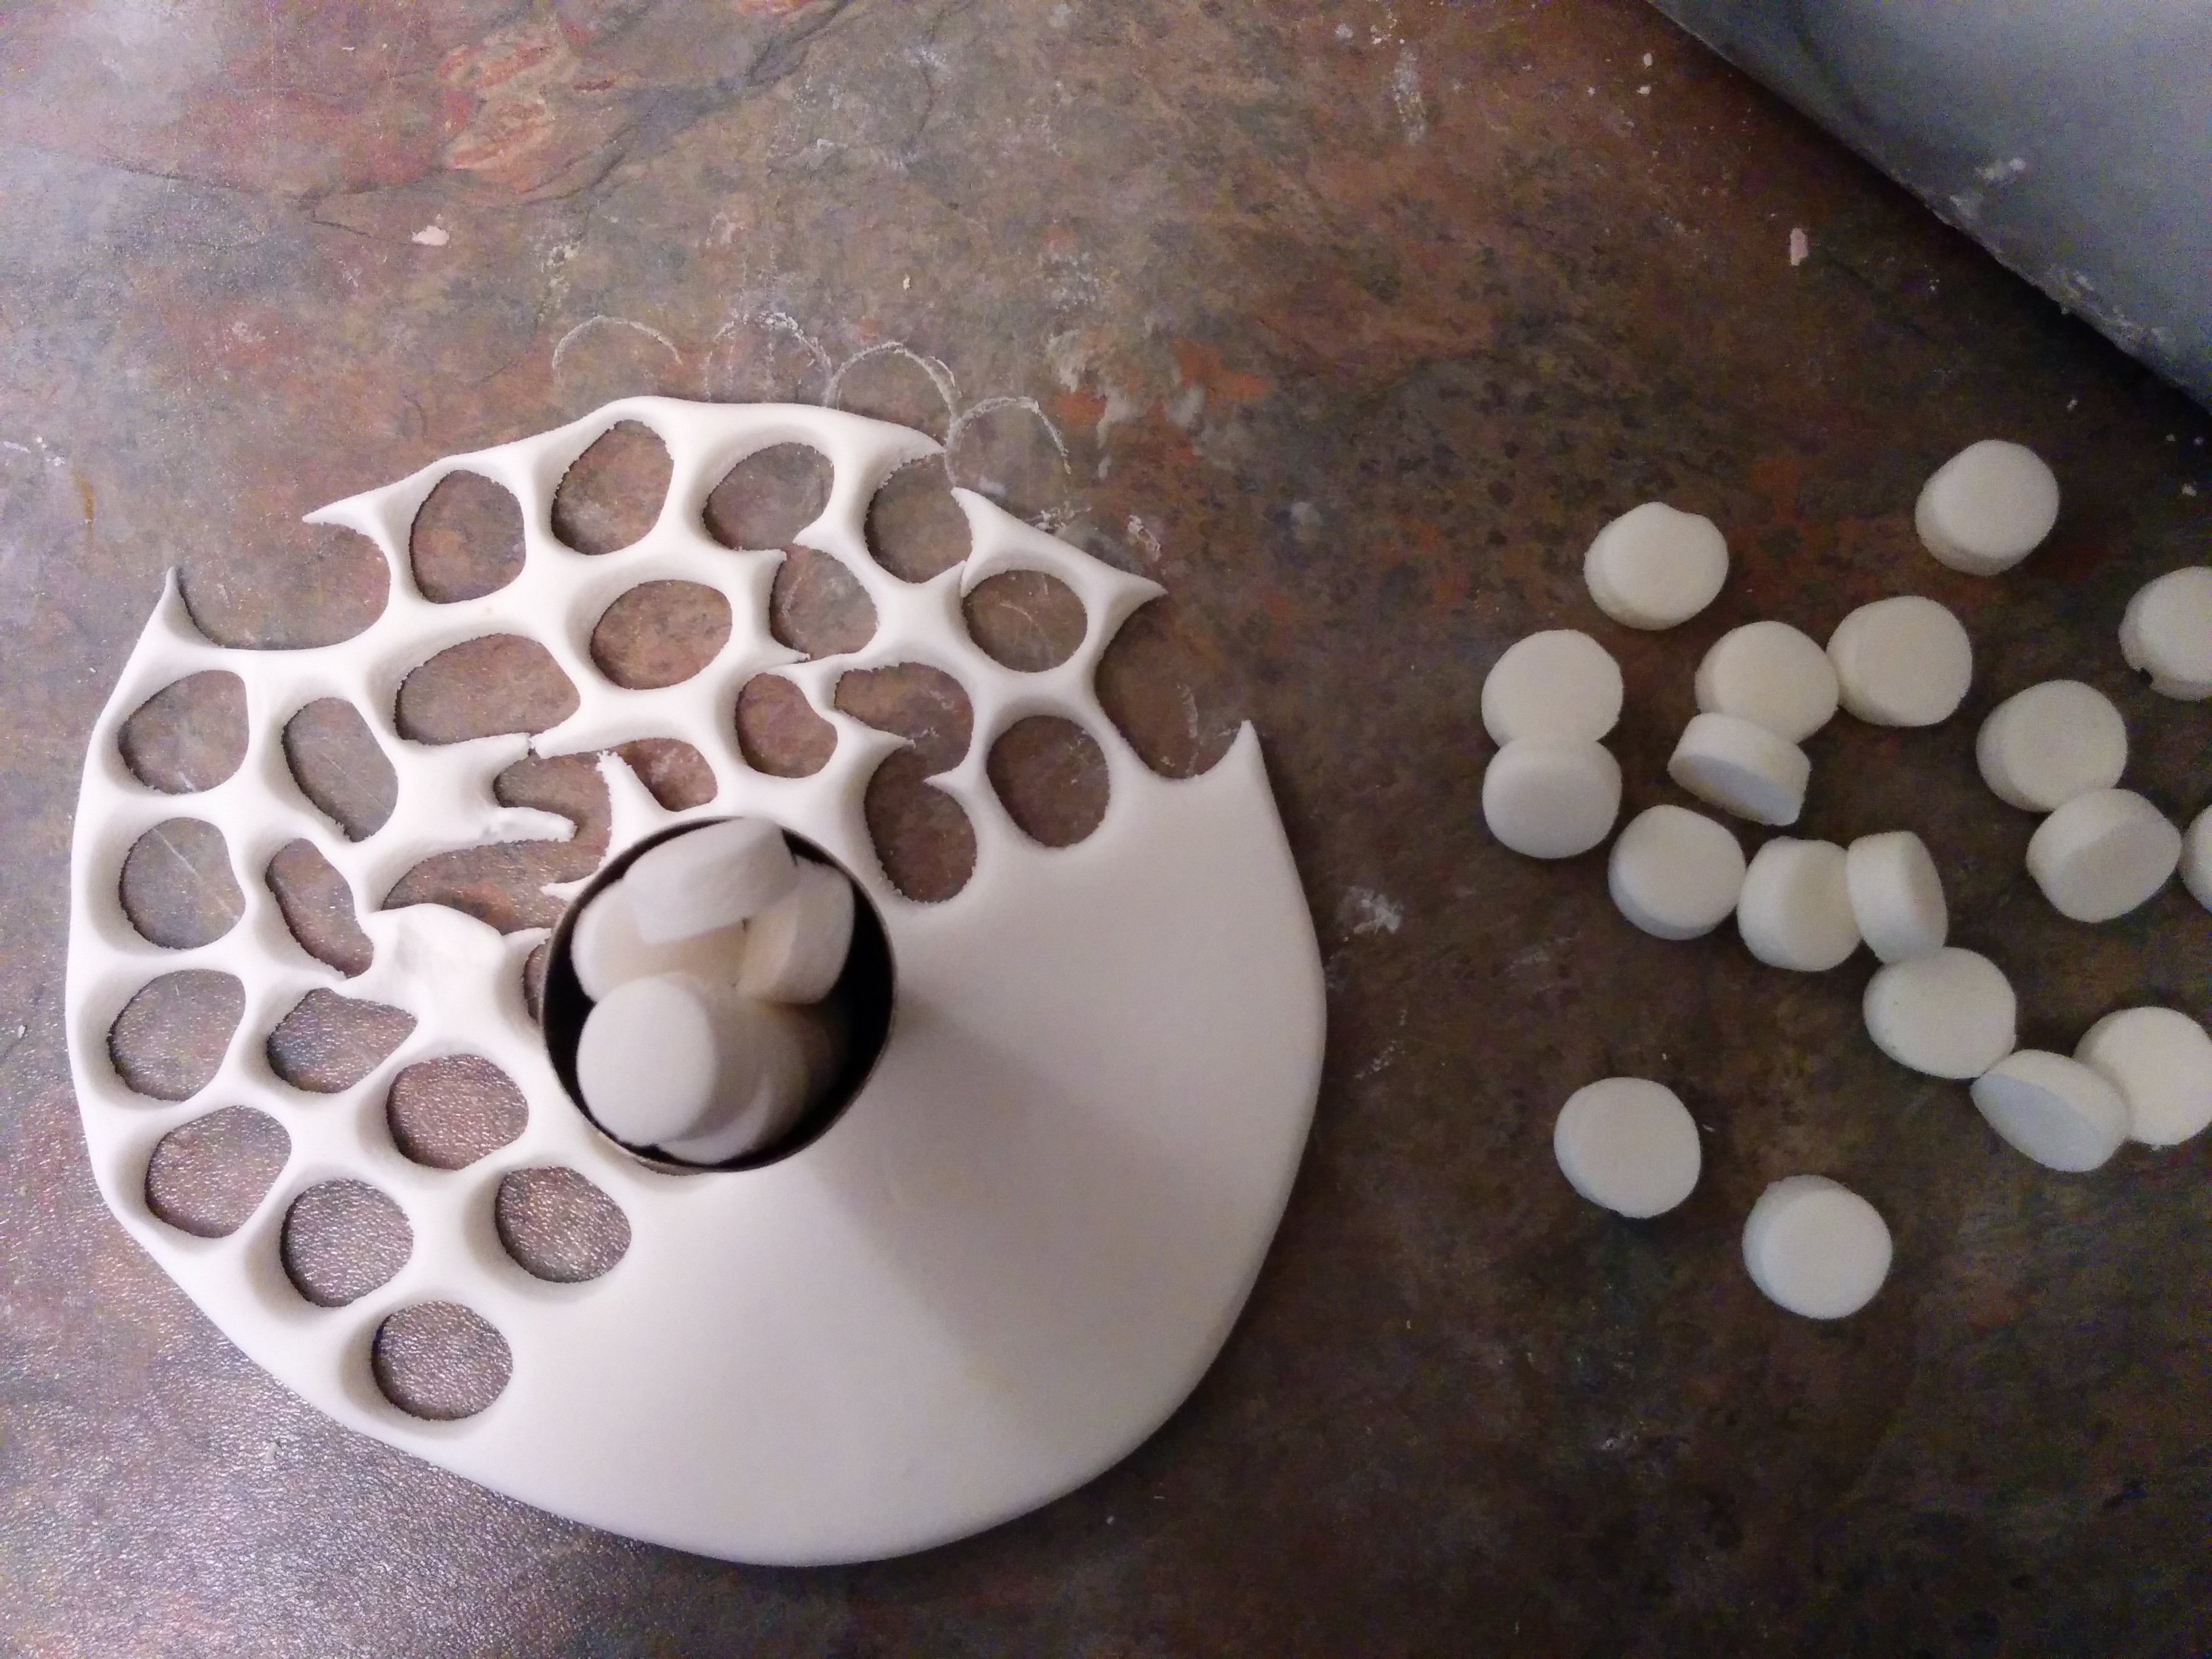
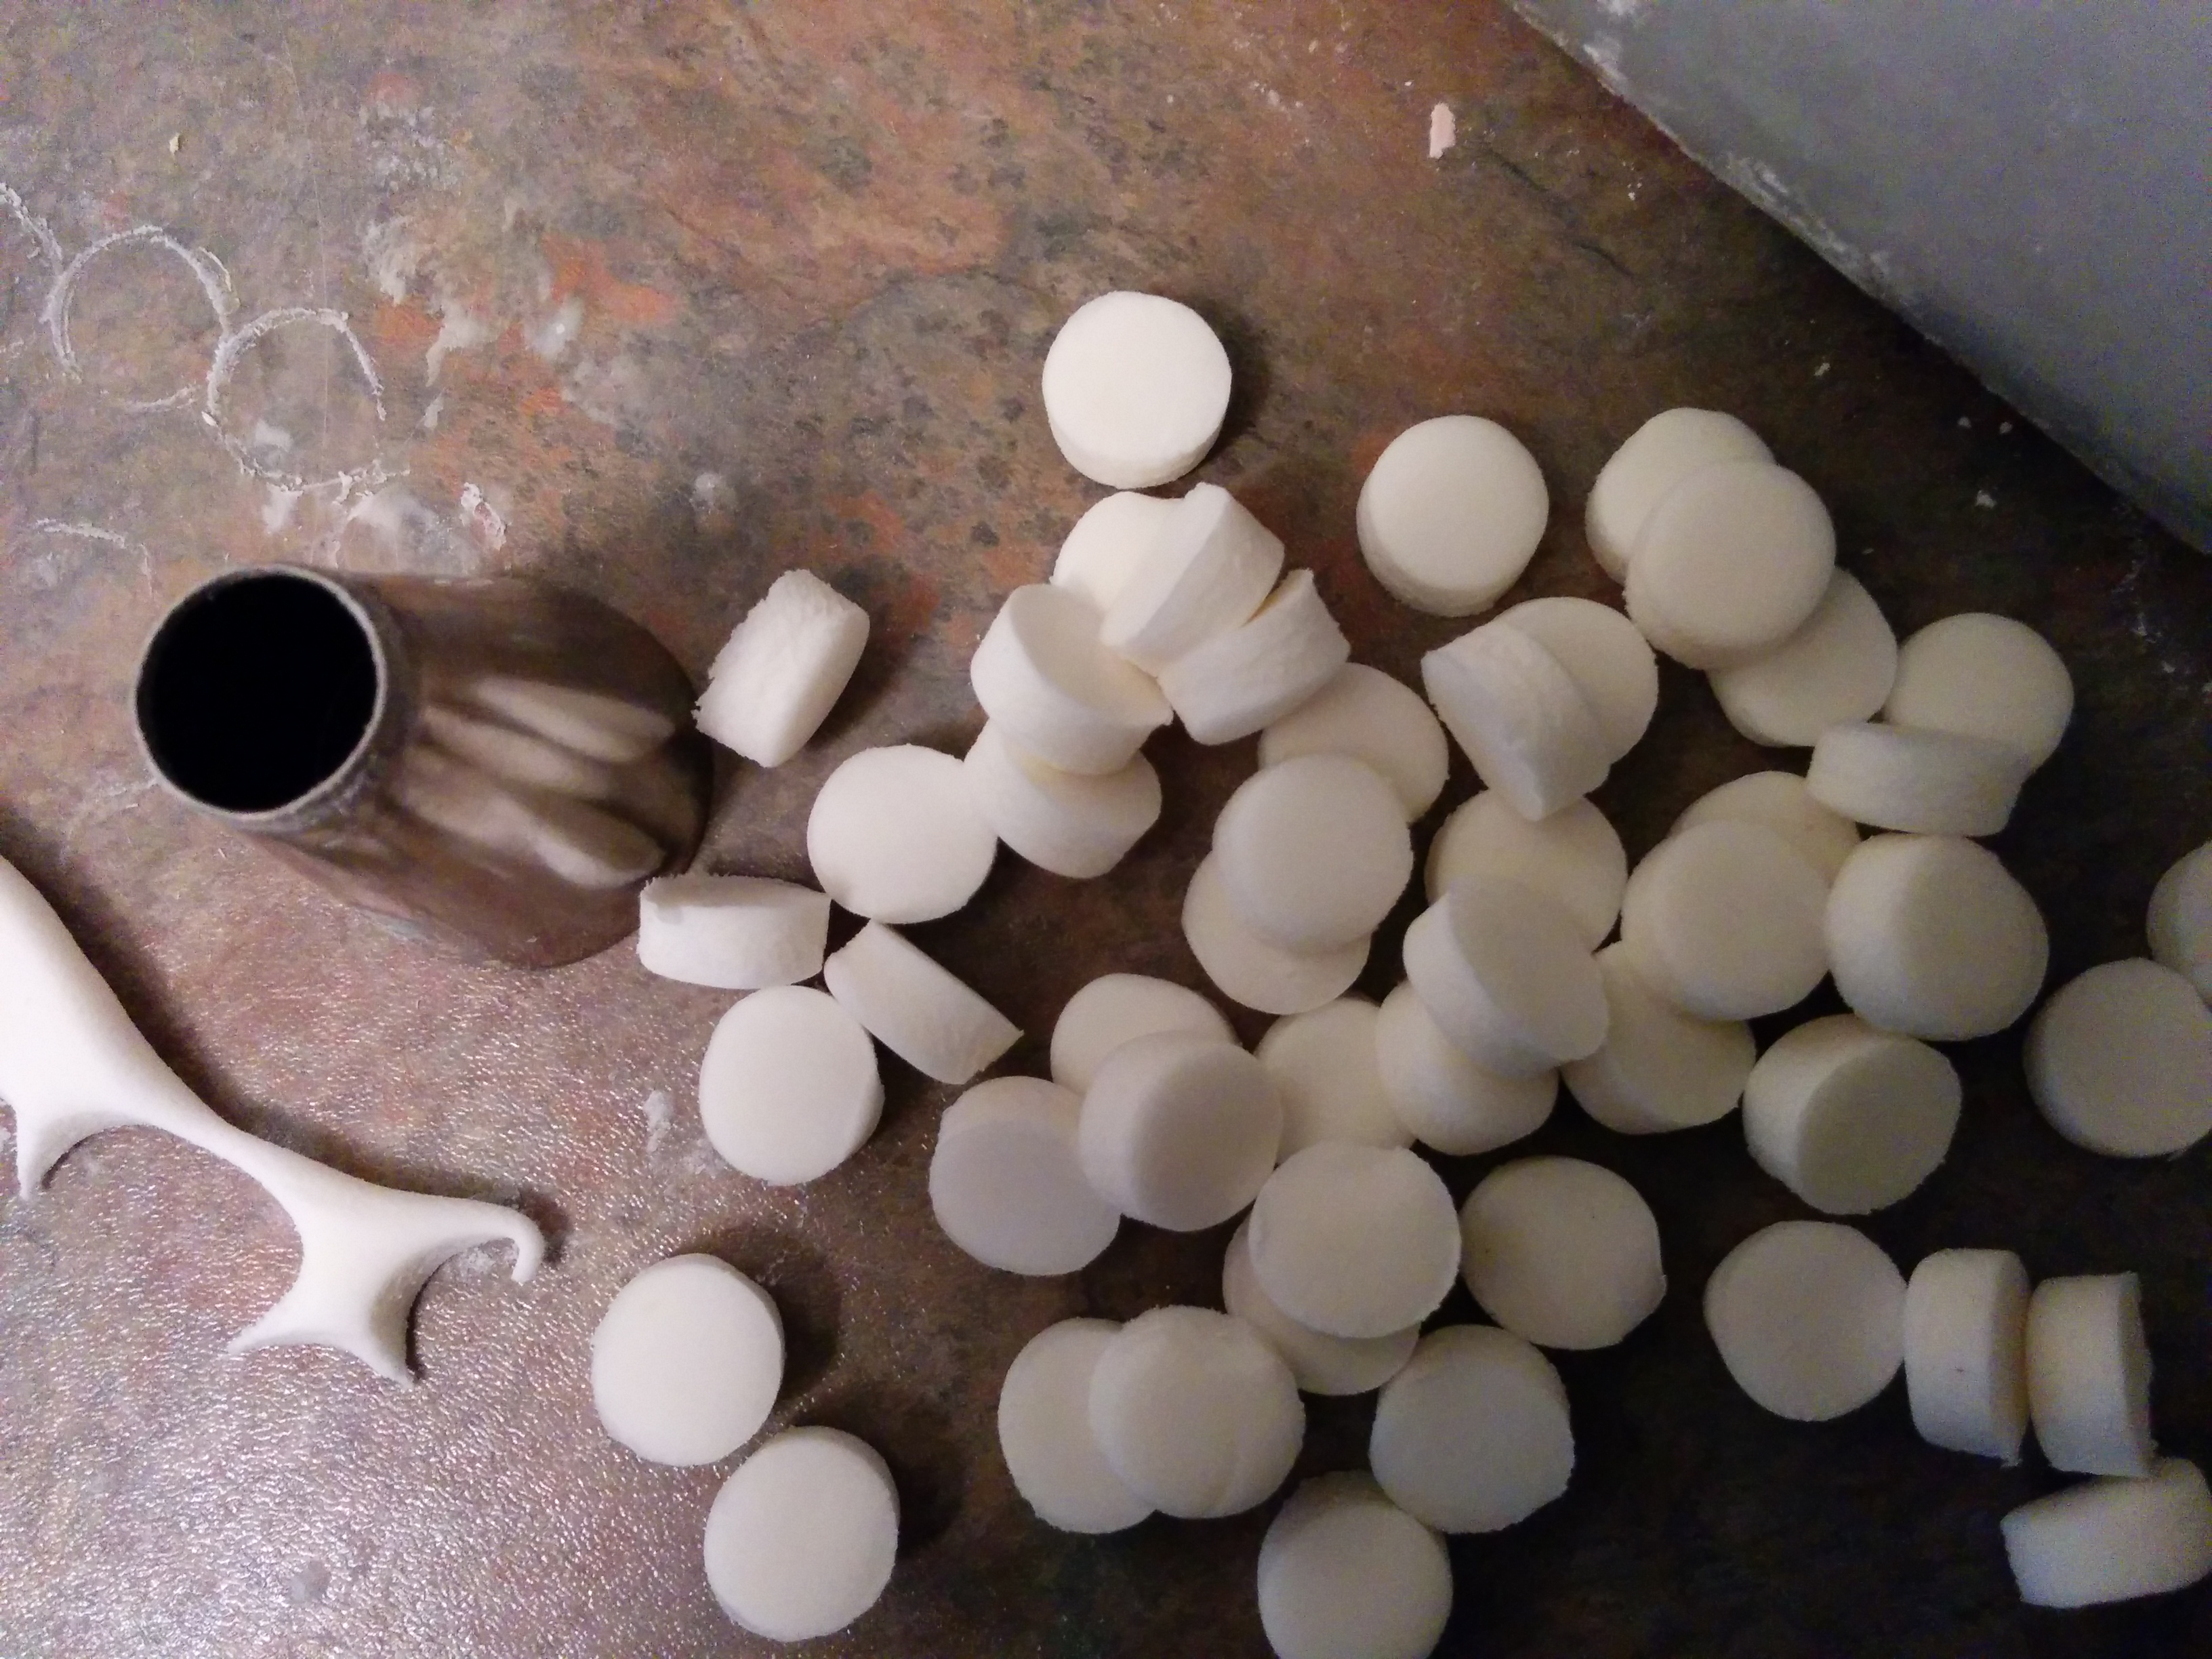
(2) Use the tip of the frosting tip to cut out circles in the fondant. While you can cut out many circles at the same time, I typically work with 20 circles at the most at any given time. This ensures that the circles do not dry before they are shaped into pearls.. Feel free to use different tip sizes for different sizes of pearls. After shaping all the pearls from the rolled out fondant, gather any leftover fondant, knead it into a smooth ball, roll it out again and make more circles if needed.
(3) Grease your palms with a bit of shortening and roll each circle into a pearl between your palms. Shortening helps to achieve smooth peals and makes them easier to roll.
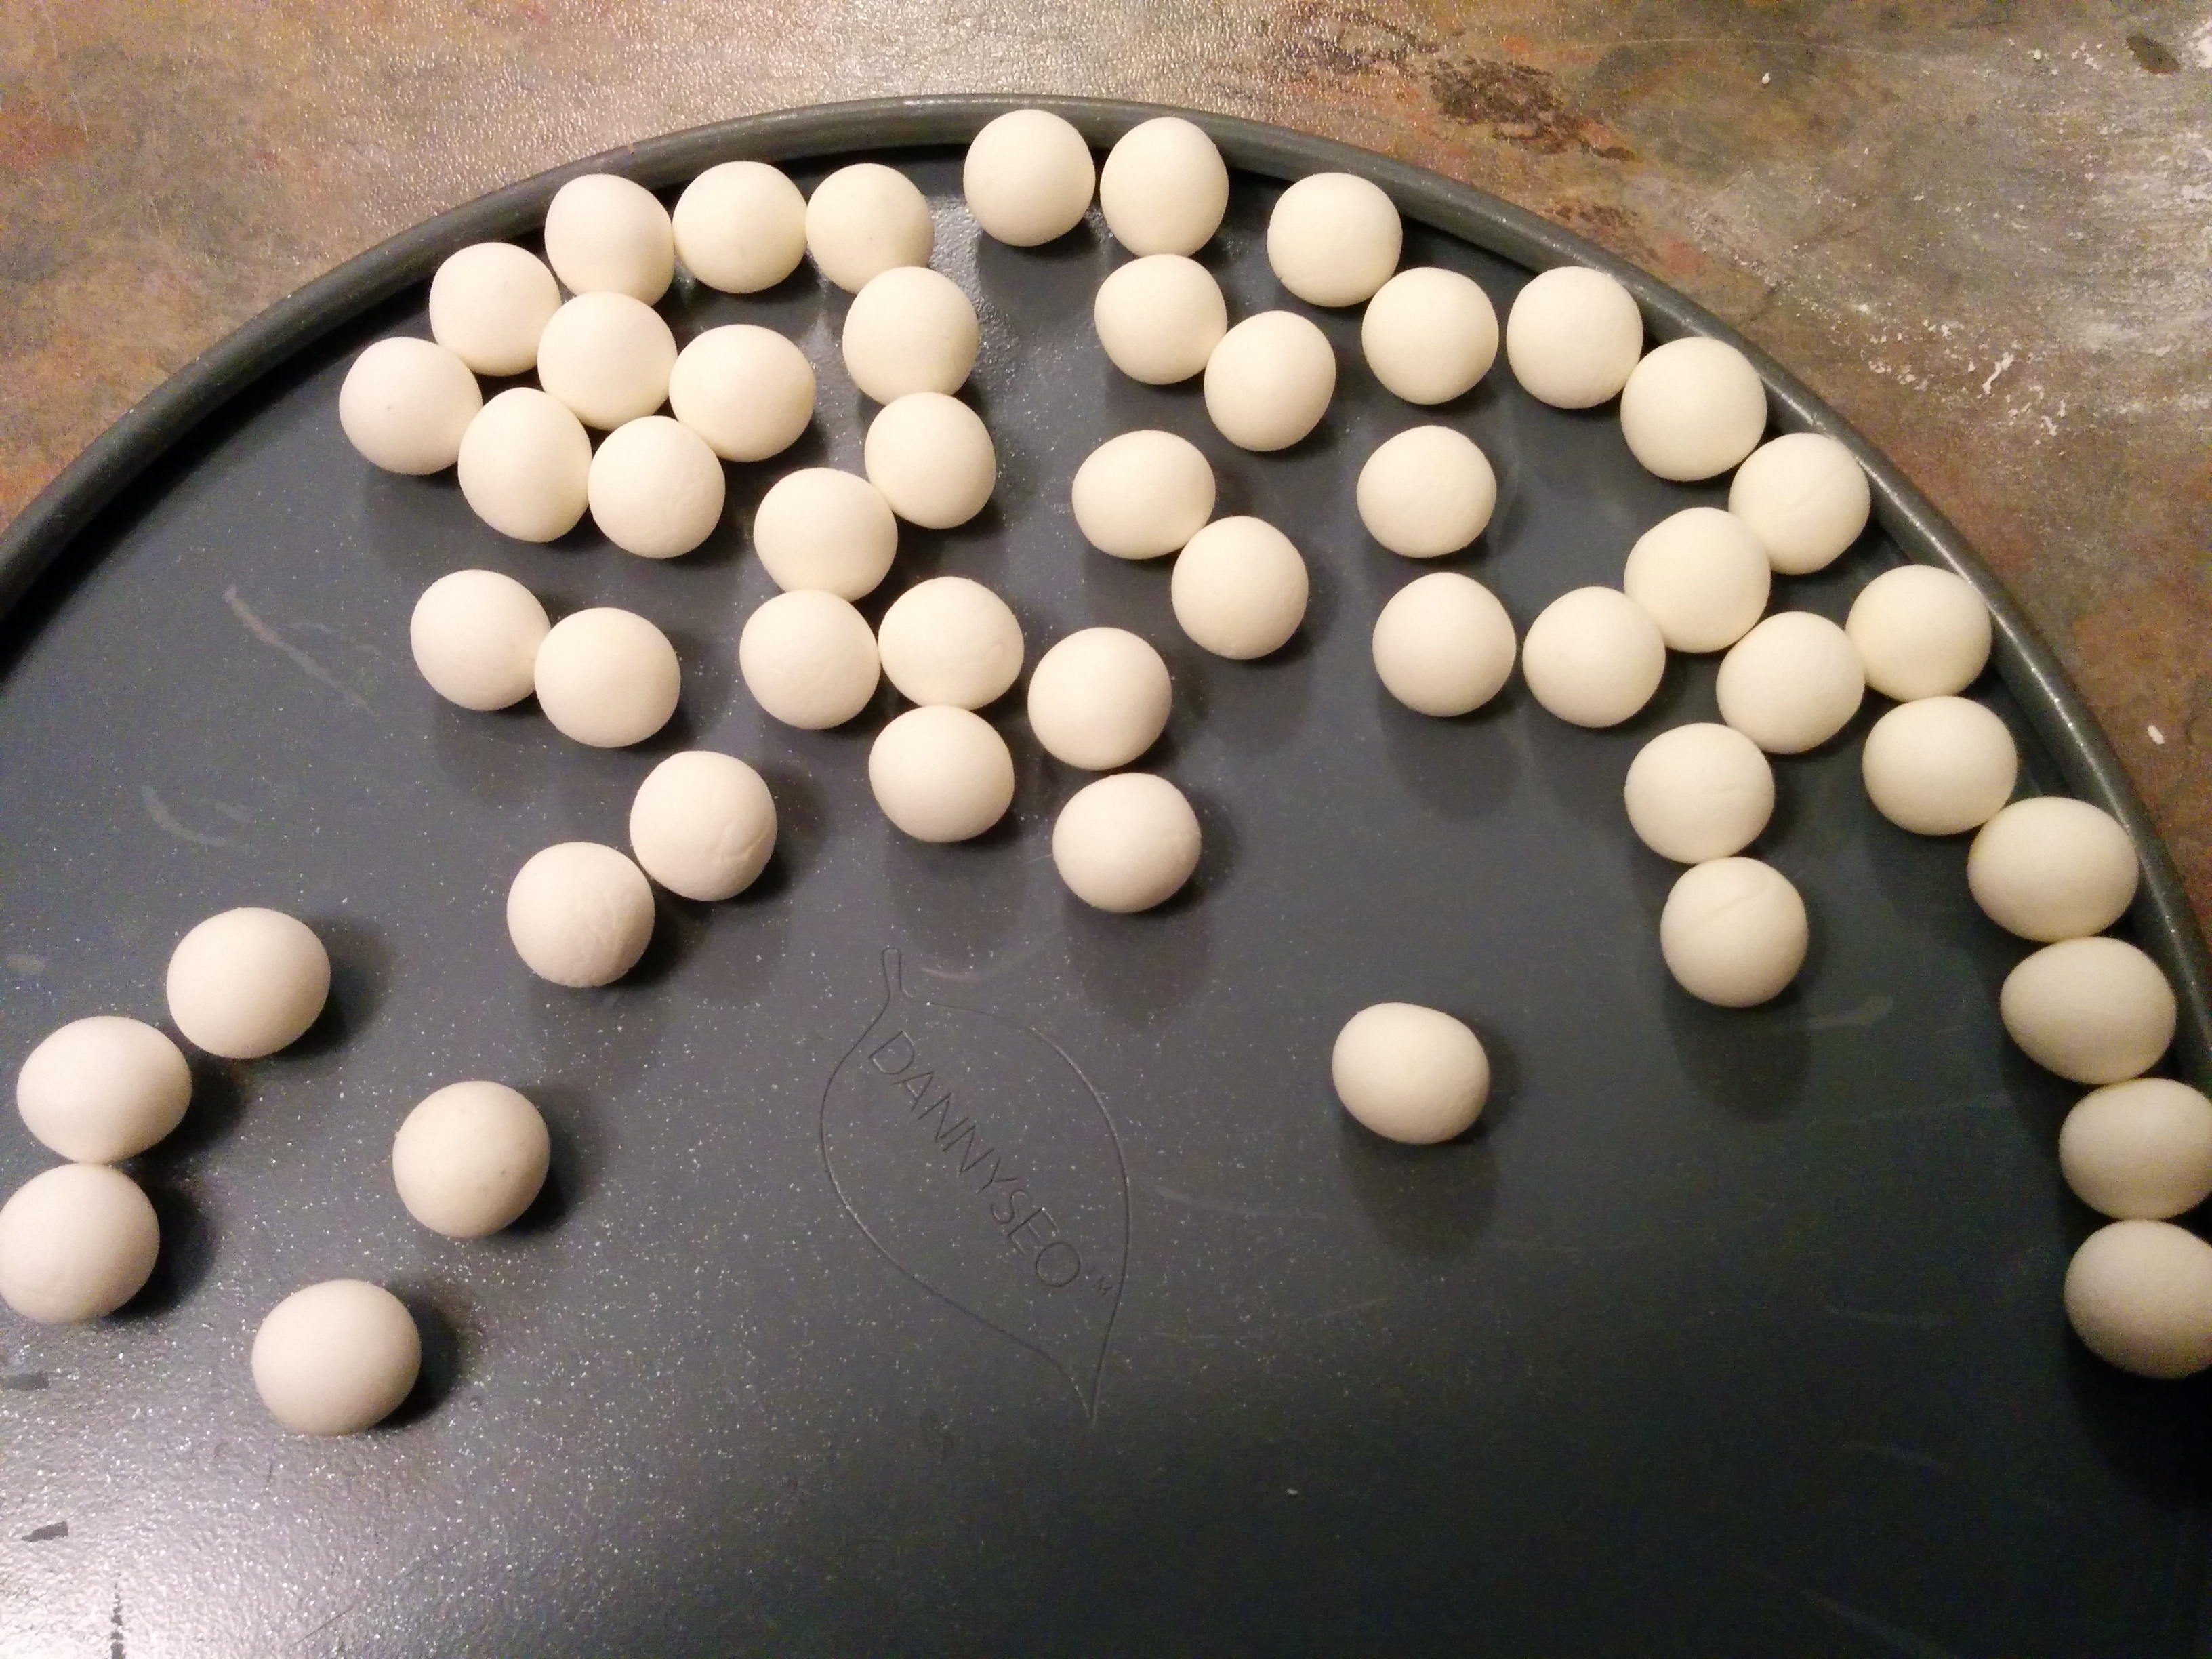
(4) Leave the pearls to dry a bit before proceeding. This can last up to 5 hours or until they are firm enough to the touch without losing shape. From here on, your next step would depend largely on what you want to use the pearls for.
(A) USED AS SUGAR PEARLS SUBSTITUTE
(1) Sugar pearls are needed by cake decorators to execute a lot of cake designs. Unfortunately, these pearls are not readily available globally. Making your own sugar pearls at home is a sure way to ensure that you have them available for your needs. It also saves you money and would guarantee that you have pearls of various colors and sizes.
(2) If using the fondant pearls as sugar pearls substitute, allow them to dry thoroughly before using.
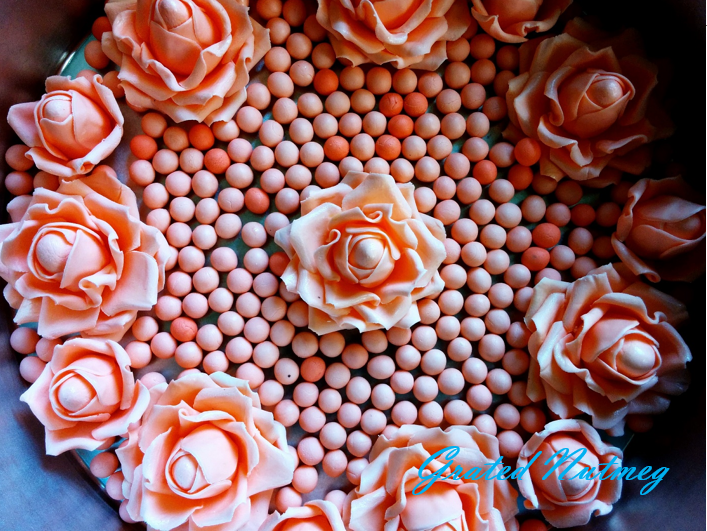
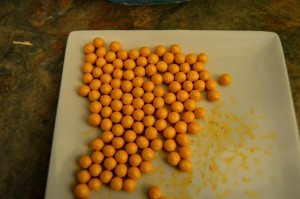
(3) After they have dried, they can be dusted with luster dust for glimmer or painted with a thick vodka & luster dust mixture to create shiny gold, silver, bronze or other pearls of like nature. If painting, mix the paste in a deep bowl or fluted glass cup. Place dried pearls in container containing color paste and swirl them around to coat evenly with the color paste. Place coated pearls on a flat container without any overlap and leave them to dry before using.
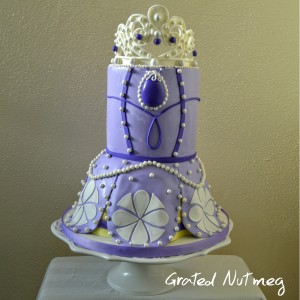
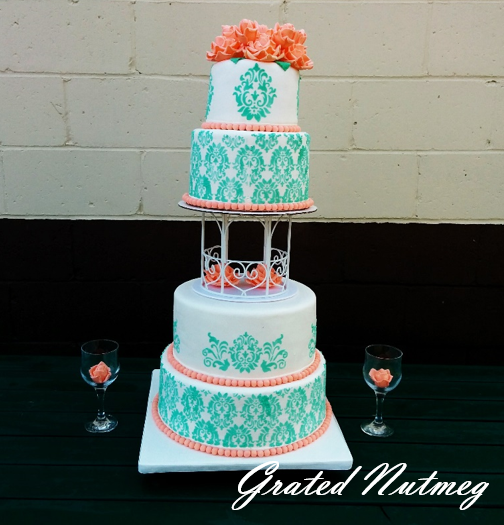
(4) Use water or any other gluing agent to stick pearls to cakes. The two cakes below were made using fondant pearls in place of sugar pearls. The first is a 20th wedding anniversary cake (Tutorial here) and the second is a Sofia the First Cake (Tutorial here).

(B) USED AROUND CAKE BORDERS
(1) Although there are molds which can be used to make pearl boarders for cakes, fondant pearls can also be used for this purpose. In my opinion, shaped fondant pearl borders look a lot better than those created with molds. They also have a more realistic 3 dimensional look.
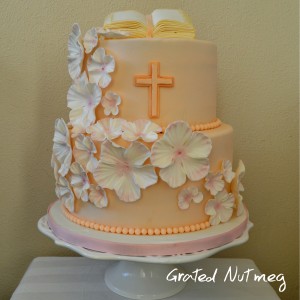
(2) To use around cakes as borders, allow the pearls to dry and stick around the boarders of finished cakes. They can also be painted or coated before use. The border around the ivory blossom cake below (Tutorial here) was made using sugar pearls.
(C) USED TO MAKE PEARL NECKLACE
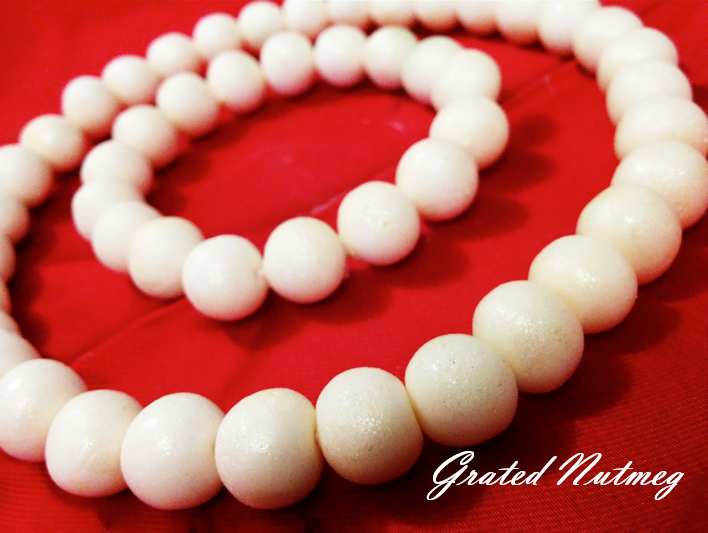
(1) To make a pearl necklace, leave the pearls to dry for about 5 hours or until they are firm enough to handle without losing shape but still soft enough to pass a threaded needle through them.
(2) Pass a threaded needle through each pearl. Be careful not to press too hard against them.
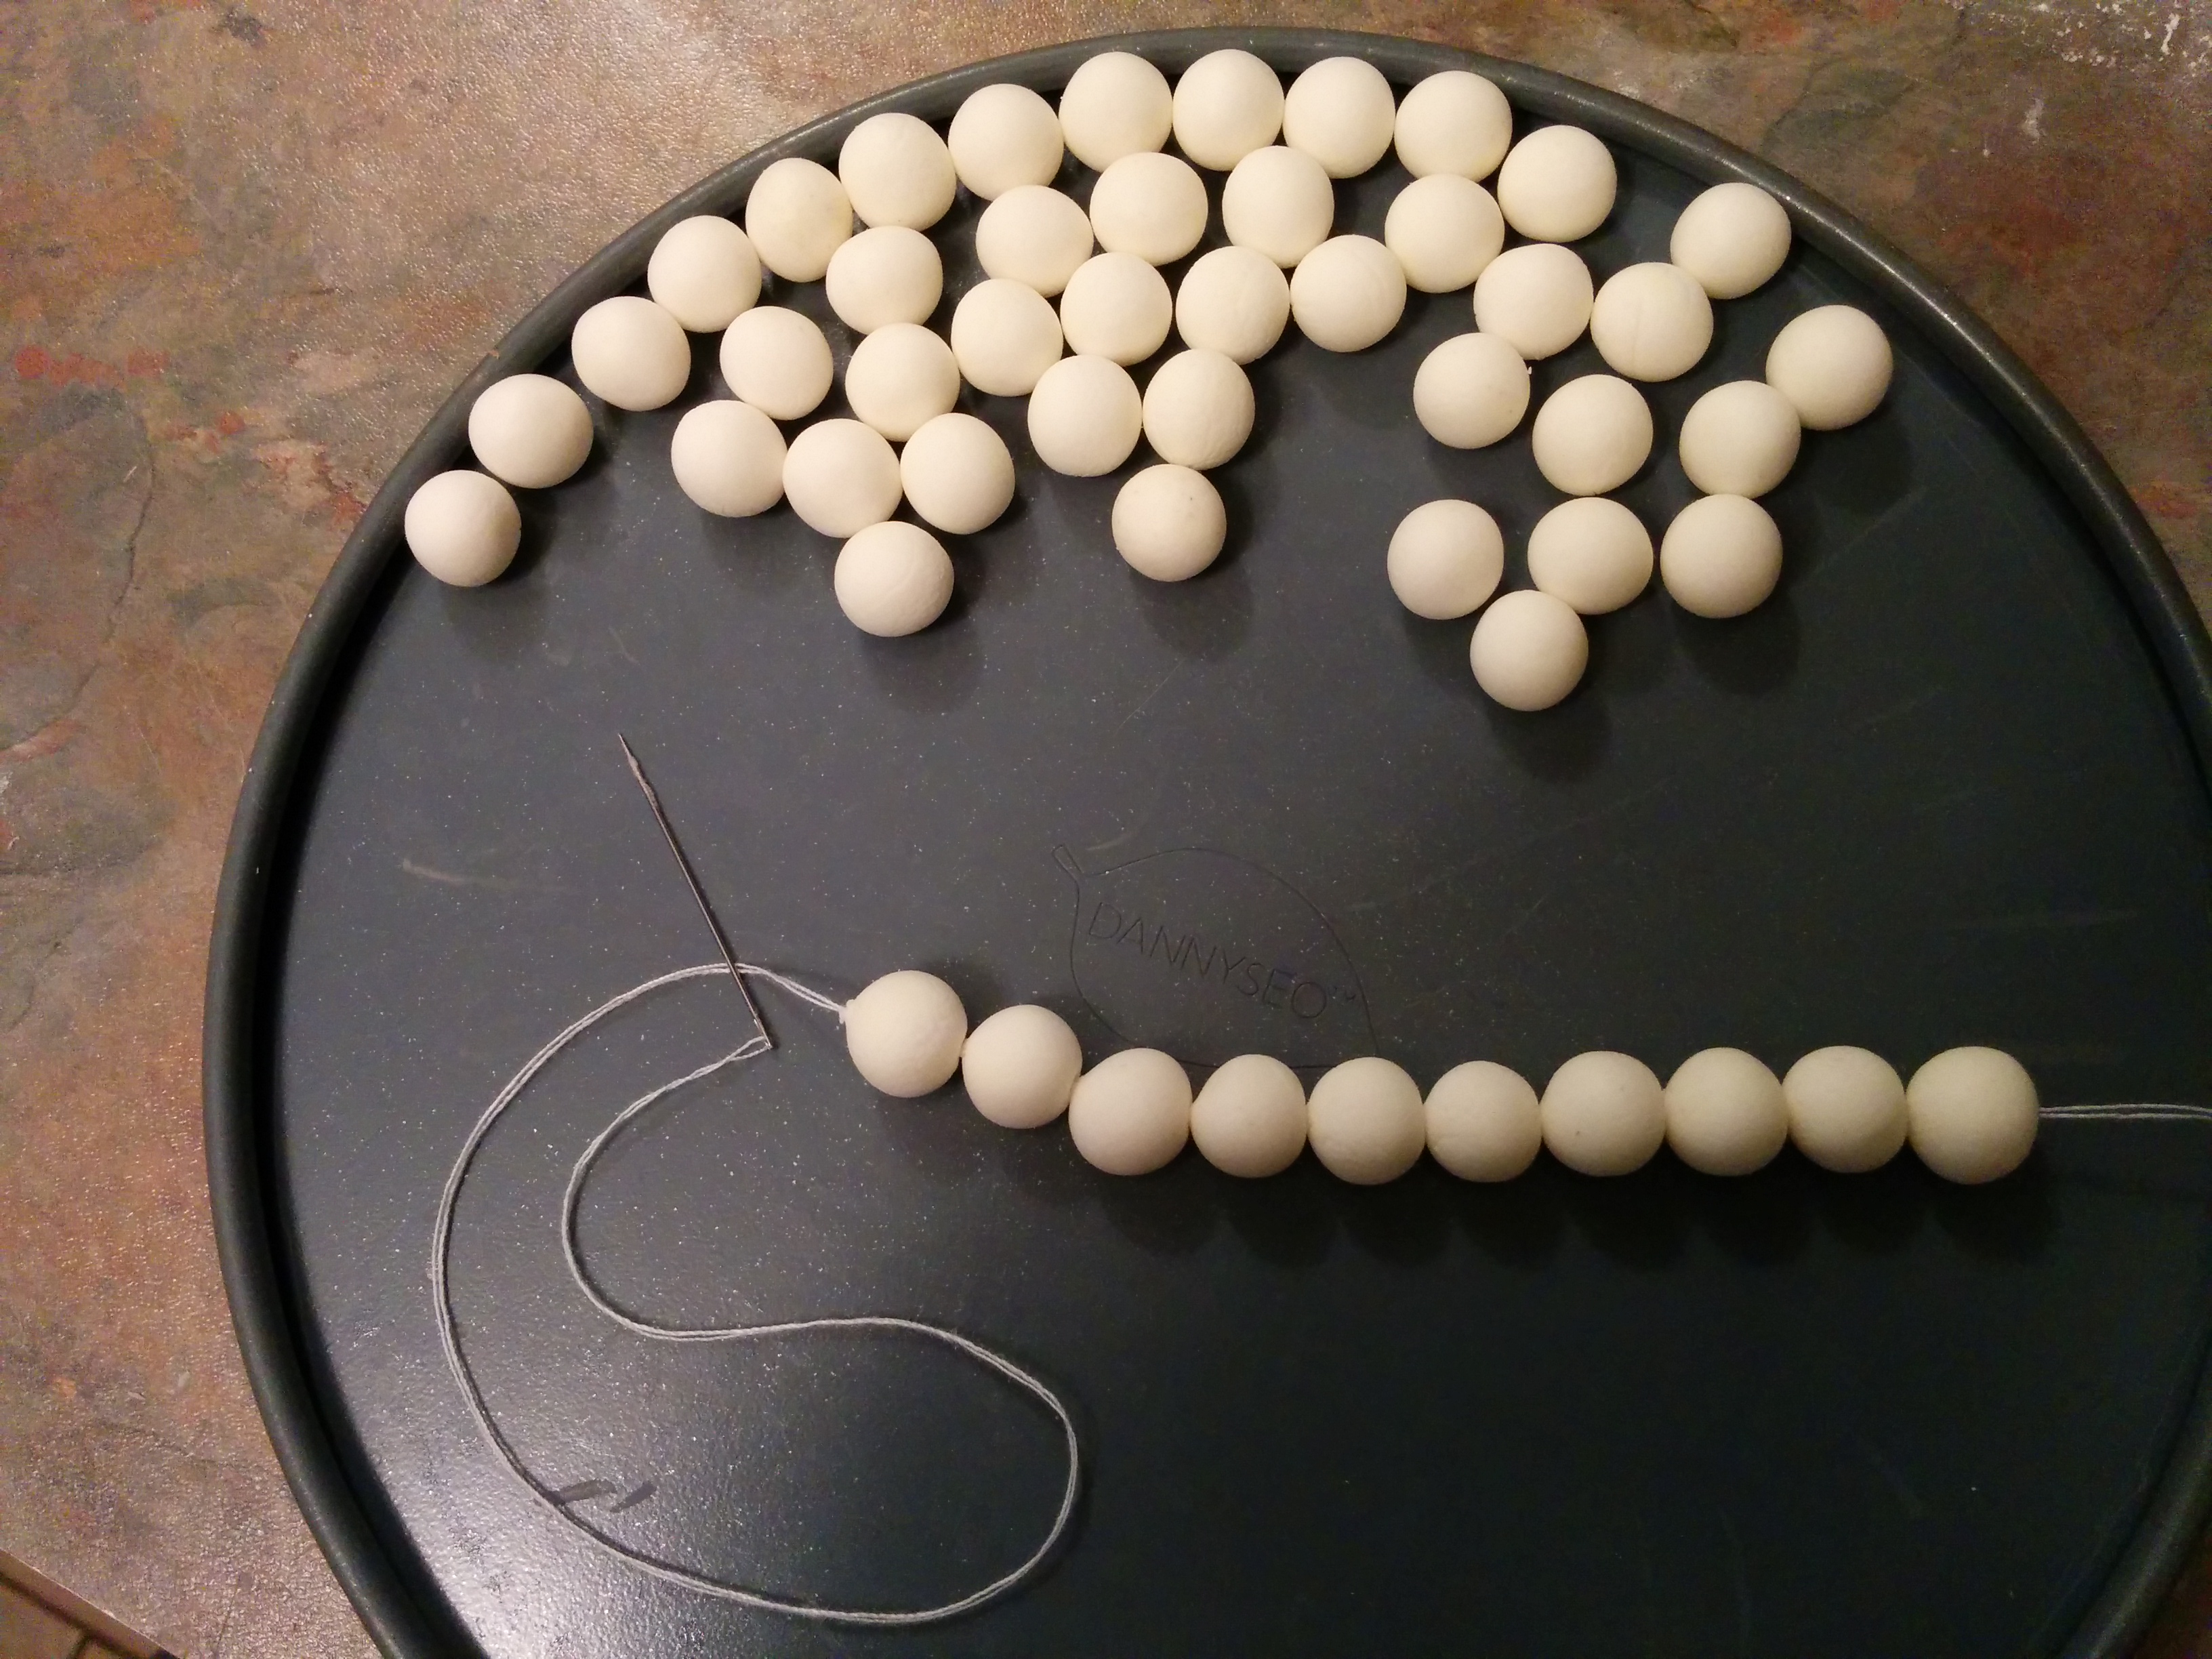

(3) Allow necklace to dry thoroughly.
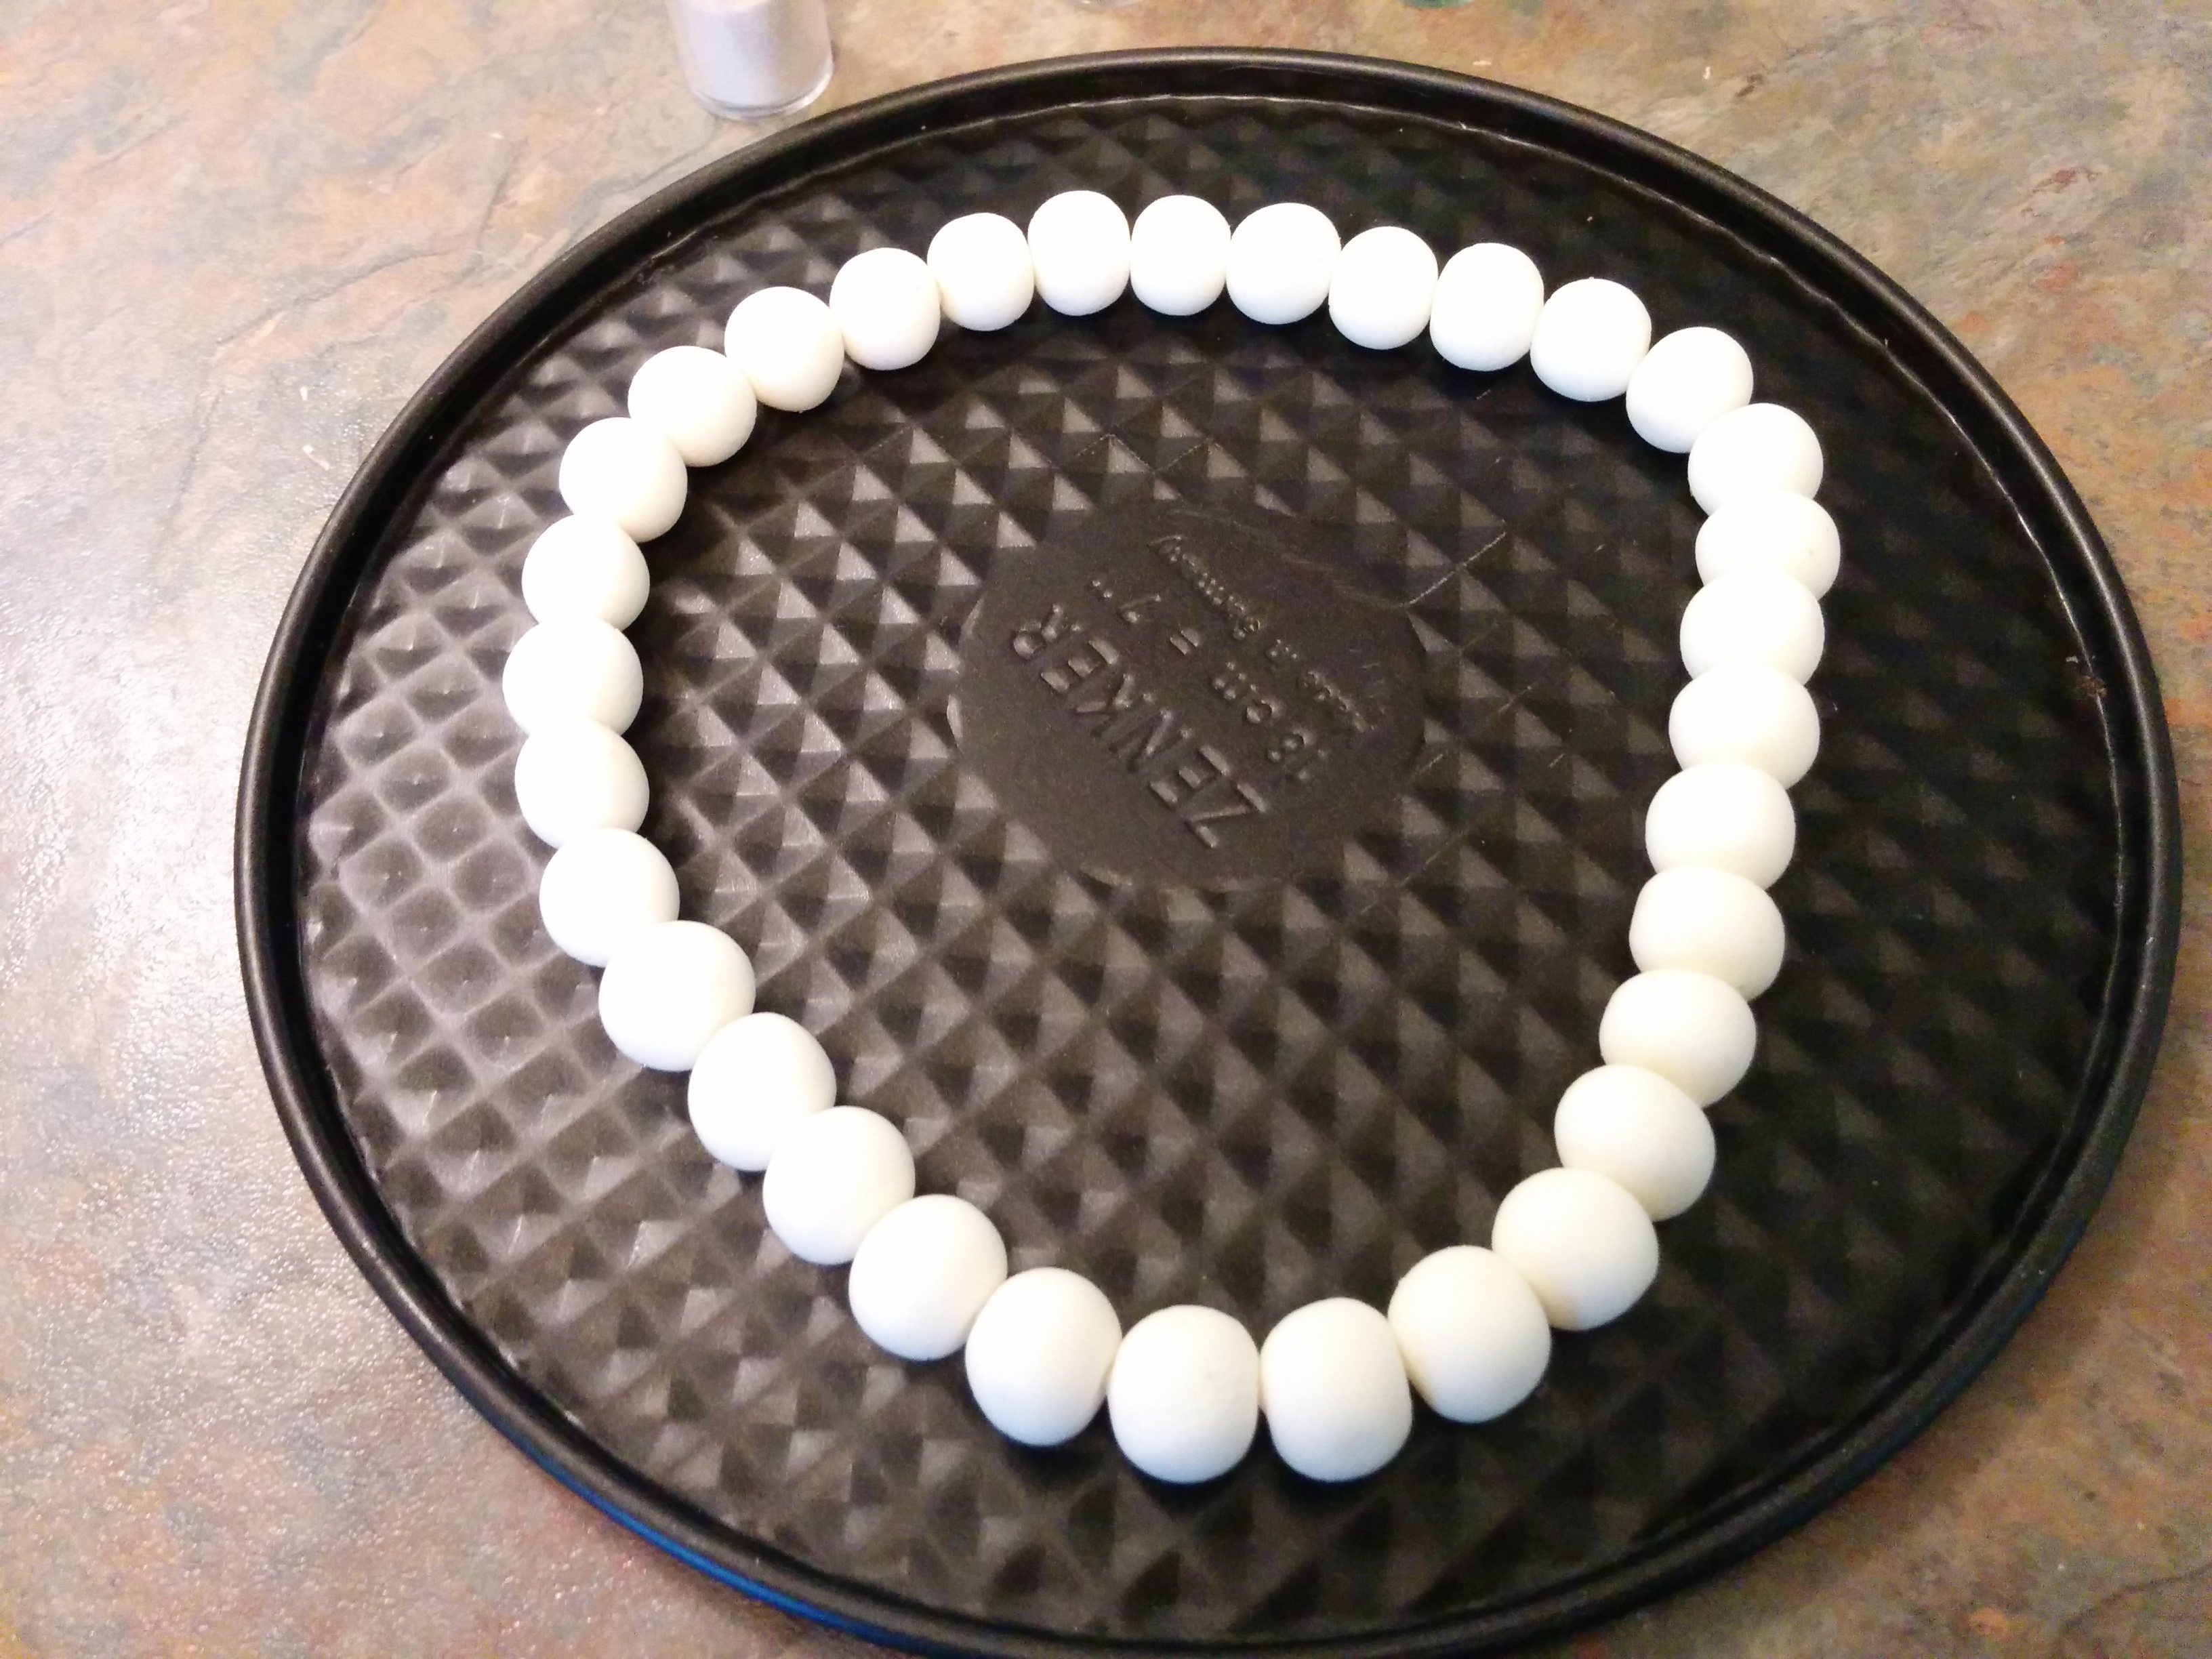
(4) Connect thread to make necklace and brush with some pearl dust for shimmer if needed.
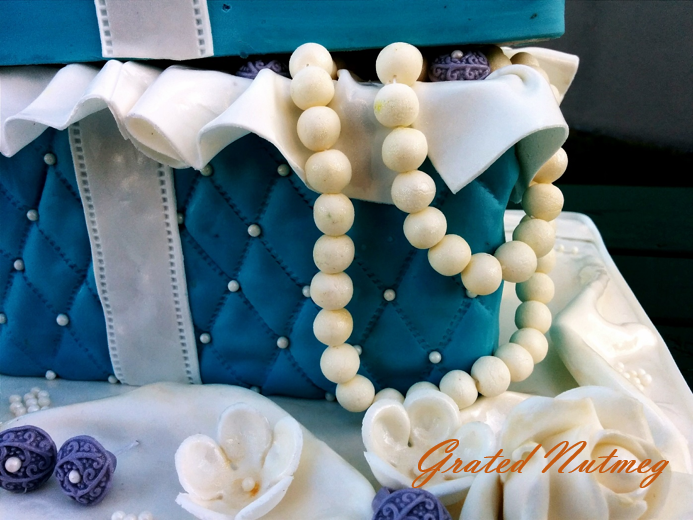
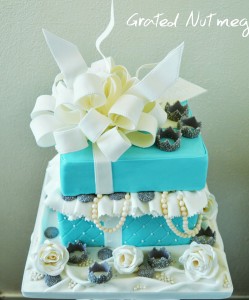
(5) These pearl necklaces can be used for various purposes. One of my favorite ways of using them is on Jewelry Gift Box Cakes like those in the picture below (Tutorial here)
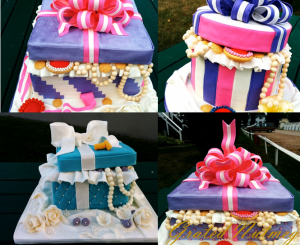
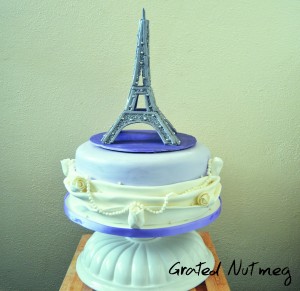
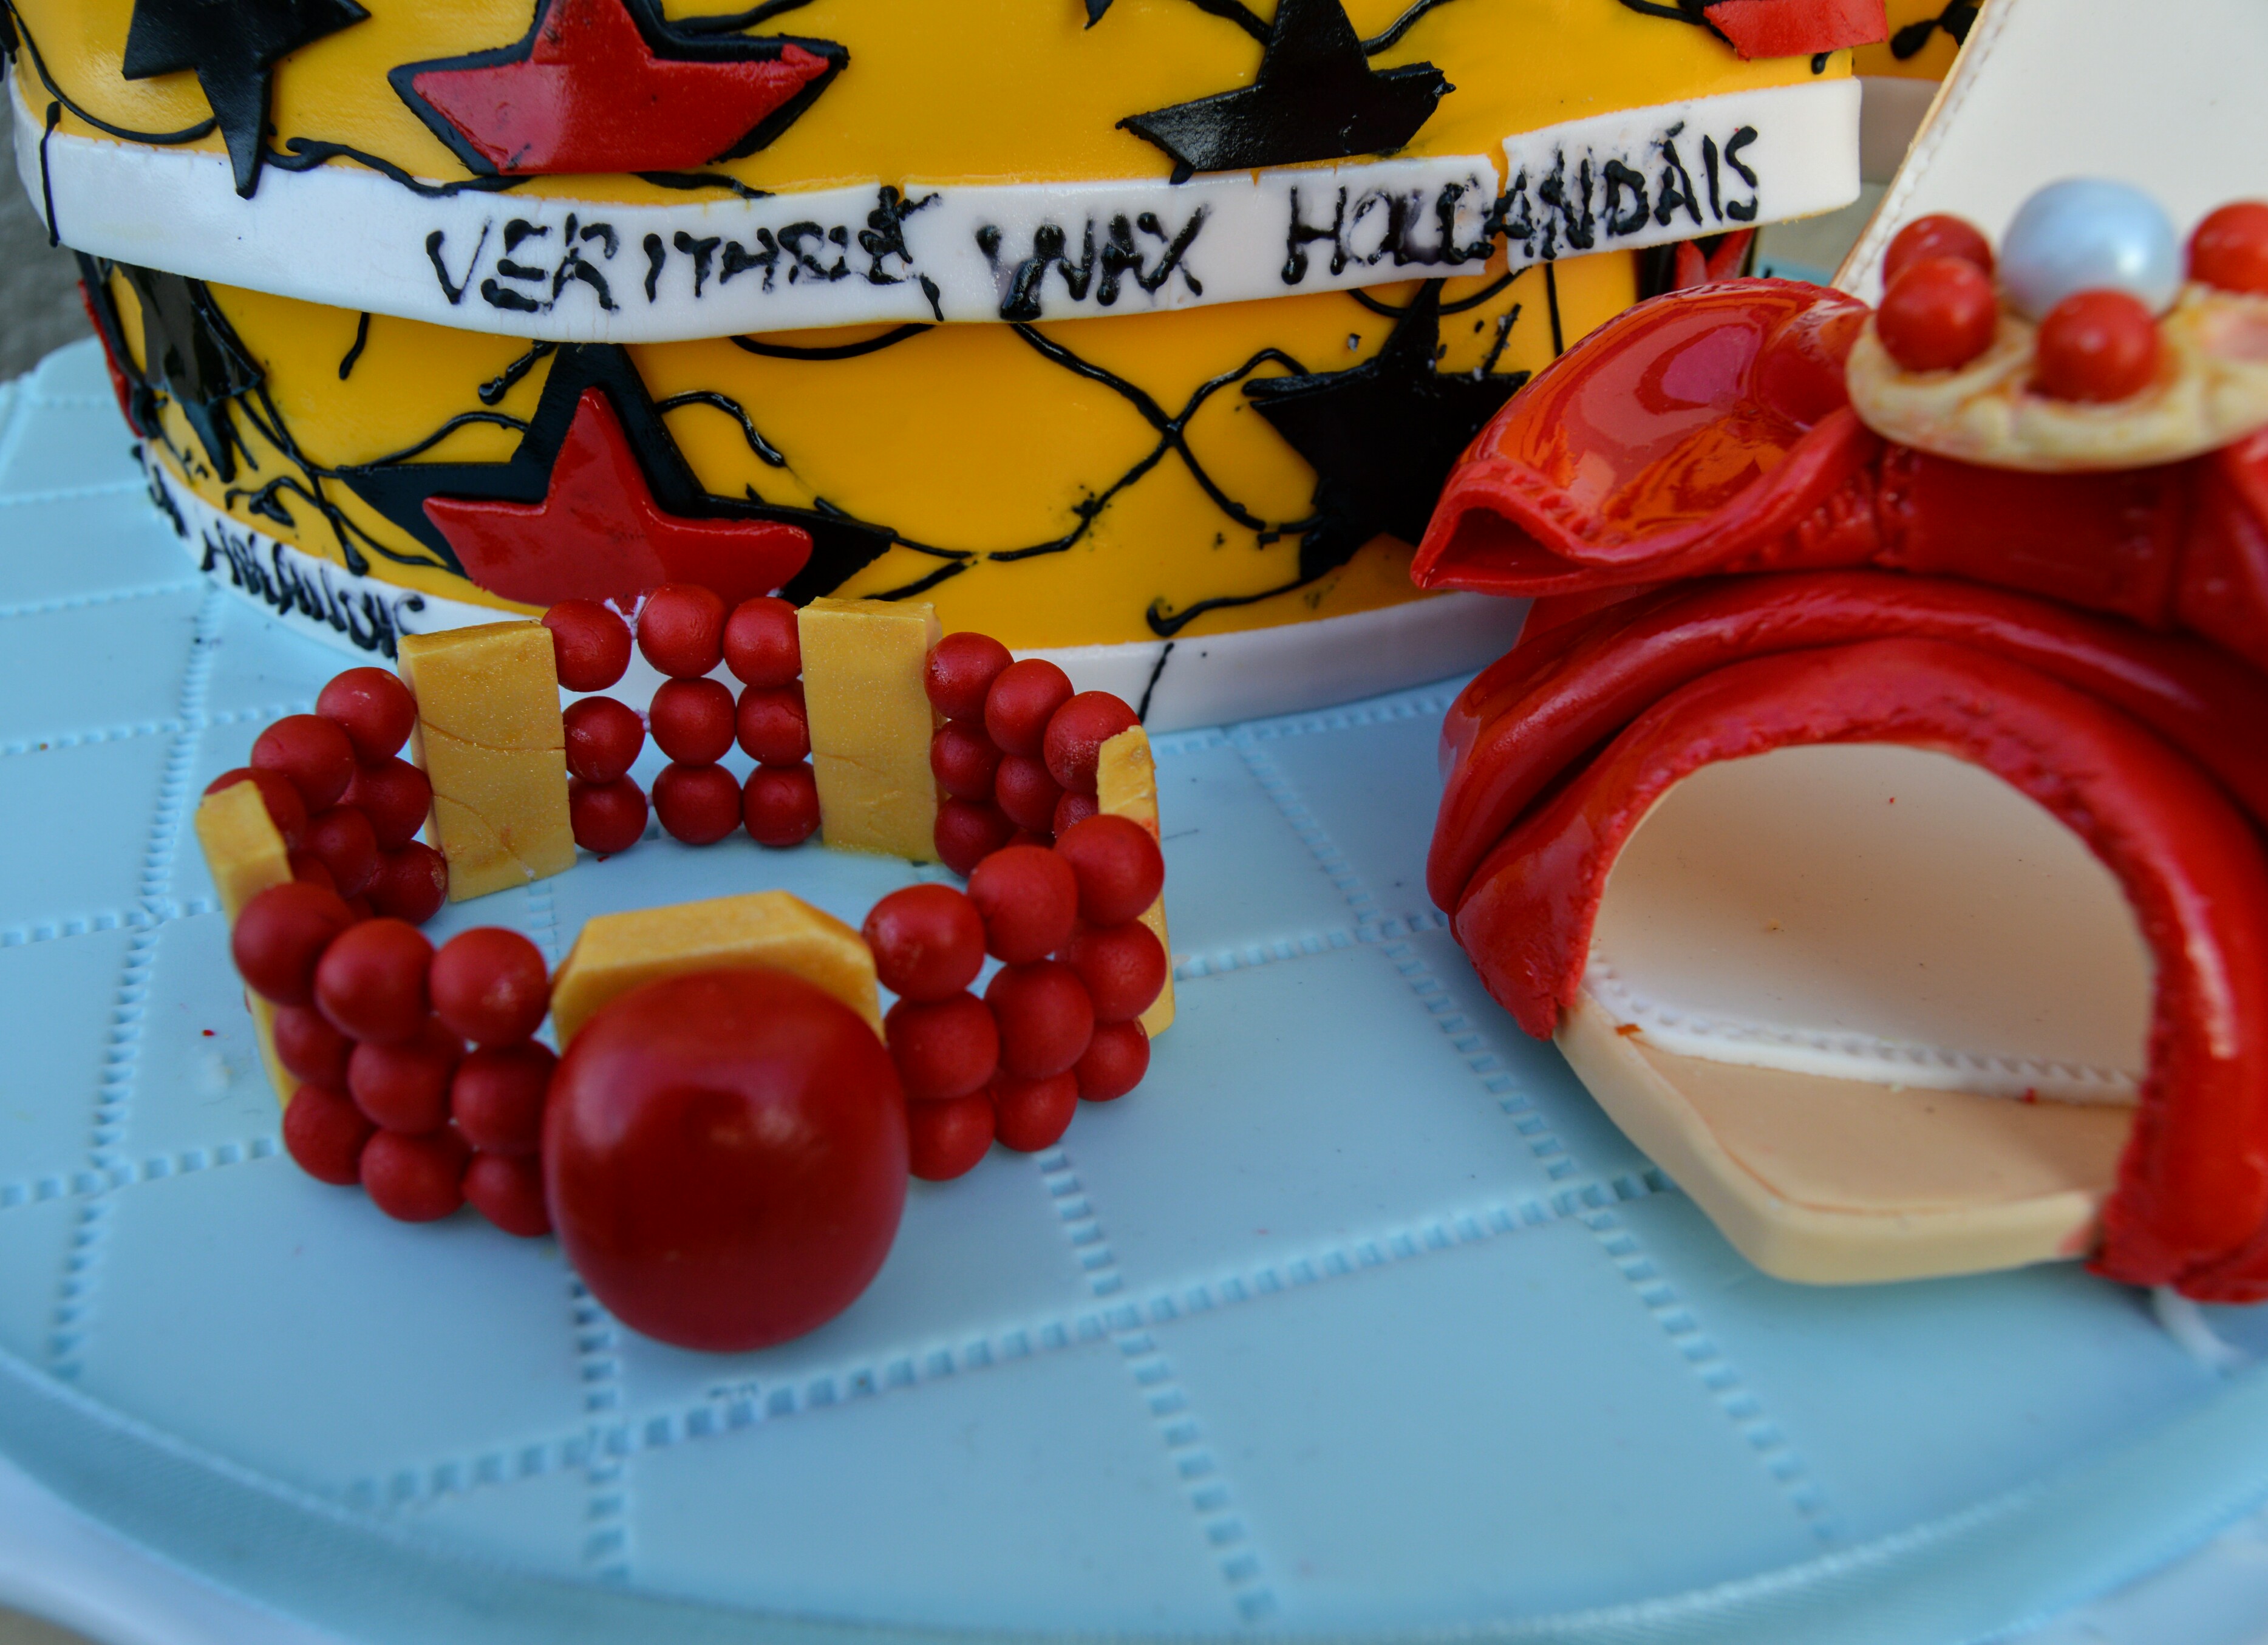
They can be used on other types of cakes like the Paris Cake (Tutorial here); Tufted Billow Weave Cake (Tutorial here) and Dressed Igbo Woman Cake (Tutorial here) below.


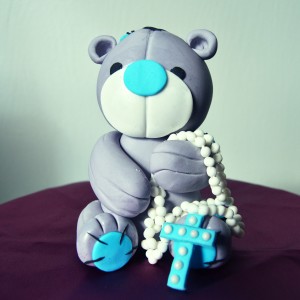
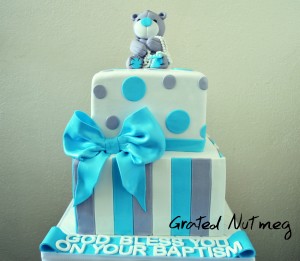
(6) Miniature necklaces can be made and used as accessories for cake toppers like the Fondant Teddy with Rosary Cake Topper below (Tutorial here).
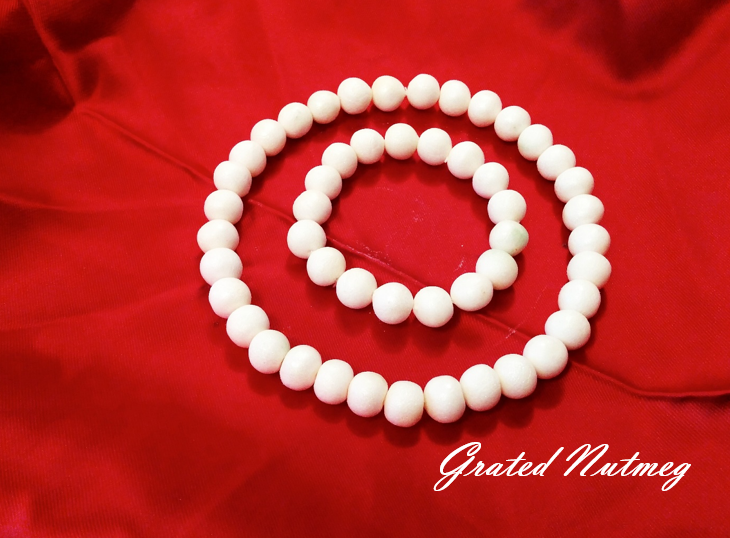
(7) The pearls can also be used to make bracelets like the one below (Tutorial here).
Terry Adido is passionate about showing people how easy it is to recreate restaurant quality meals in the comfort of their kitchens. With a style of cooking he refers to as Afro-European Fusion, his meals are influenced greatly by French and Italian Cuisine with a West African twist. If you love good food, you are in for the ride of your life.
please I will like to no more about cake coathing and how to prepare few African dishes
Hi. What do you mean by cake coating?
Ds is lovely.#thumbs up# well done. God bless
Thanks Bukky
Nice! thanks for sharing this knowledge with us
Thanks Adaeze
More grease to ur elbow………
Thanks Juliana
Well done Terry.
Thanks Motunde
Job well done. Thanks for sharing your Knowledge with us!!
Thanks Ginaclet
Wow!
Pretty nice!!
Thanks
Thanks terry, i wish i lived near you, i would have loved to be your apprentice. God bless you for sharing this knowledge.
Thanks Abodunde
This is nice,thank for being generous with your knowledge
Thanks Valentina
This is beautiful Terry! Very beautiful actually! Thanks for the tutorial…
You are welcome Felicia
I learn a lot from u.Thanks for ur recipes n ideas.
You are welcome Uche
Your cake is wonderful. Marshmallow foundant looks more pliable but no marshmallow in Nigeria
:-((
Oh yes. It is easy to work with.
Splendid idea Terry, thanks for the tutorial.
You are welcome Dorothy
Wow! i love this,thanks so much.
You are welcome Goodness
Thanks for sharing this, Terry. Kudos!
You are welcome Omolola.
That’s a nice job, I would want to get more help and pocedure on jersey and traditional wedding cakes. Thanks
You welcome. Click here for jersey cake.
Thanks uncle Terry to me, u re GODSENT.Thanks a million
You are welcome.
Doing what amuses απϑ encourages me as usual, God bless Y̶̲̥̅̊o̶̲̅и ƒ♥̸̨я̥ the this sir
Thanks
God bless u somuch.i have looked for tutorial on this so much.went on you tube,yet coudnt stil get wHat i waNTED.GOD BLESS D WORKS OF UR HANDS N AS U WATER OTHERS,GOD WILL ALWAYS WATER U.AMEN
Thanks
Oh Terry u re a life saver,ve been staring at d pearls wondering how to go about it since i didnt ve a pearl mould.making this right away for a jewelry box cake tomorrow.thanks.
I am glad I could help.
this is awesome sir terry
Thanks Sir Ebuka.
Thank you bros Terry for this wonderful tutorial. please I want to ask you for a favour. can you give me tutorial on how to make an upstair (ie one storey) building. Thank you.
Hi. I only do tutorials for cake orders I make. So, if an up stair cake is ordered in the future, I will consider doing a tutorial while I make it.
I really appreciate this tutorial.
Remain blessed
You are welcome Chinyere.
Tanks so much terry u re kindhearted.God bless you.
You are welcome Dorcas.
God bless you Terry for all these tutorials you give.
Thanks Borla.
Thank you so much. You make it look so easy!
You are welcome.
hello sir. pls when do i pass the needle through the fon
dant beads? when dry or wet? thanks
When they are not fully dry so somewhere in between.
thanks for sharing this skill. God bless you.
Thanks Ifeoma.
Terry am one of ur follower, I love u work
Thanks Mosunmola. I appreciate you.
Thanks for the post…its so nice of u
You are welcome.
Thanks for sharing
You are welcome Oby.
Well done Terry, God bless you real good. Thanks for sharing your Knowledge with us.
My pleasure Ada.
This tutorial is EXACTLY what I have been looking everywhere for! Ive been wanting to do a pearl cake border but hoped to make it in advance and later attach it to the cake on the day of. Ive never seen anyone actually string the fondant pearls…genius! Thank you so much!
I am glad I could help Lynsey.
Thanks for sharing. May God richly favor you. I have learnt a lot from you
You are welcome Emelda.
Can vodka be replaced with edible spirit to give the sugar pearls a glossy look?
Yes.
Please how do I get antique gold color on the pearls?
With gold color dust or gold spray.
Love this idea! Would like to create pearl swags on the top layer of a wedding cake – what kind of thread should I use please and how would I stop beads falling off at the ends without tying a knot??
Hi. I use regular threads for my beads. As for the swags, if they will lie against the body of the cake, then you might not need to thread. Simply use a semi-circle shape to mark the cake where the swags will lie, brush that area with water/vodka/cake glue and stick the pearls on it. If using thread, use melted white chocolate at the back of both end beads and stick to the cake. It helps if the cake is cold so the chocolate hardens immediately.
Thank u so much for the idea.I am a beginner and had been looking for ideas for making pearl necklace. This looks the best.
Thanks again for sharing 🙂
My pleasure Neha.
Hi Terry. I want to make rosary beads. What can of thread will l use to hold the beads together?Thanks.
Regular thread.
This will surely saves me money. Thank you Terry. God bless you.
You are welcome Kehinde
God bless you for educating us on this
Thanks Gift.
Thanks Terry….love your cakes.
Thanks Chioma.
Thx for d tutorial, pls wat color can I use to gget kola fondant design apart frm purple
Kolanut comes in various colors: purple, yellow, orange, ivory, peach, pale red, light brown, et cetera. Your color choices are thus plenty. The best thing is to look at a kola nut and allow it inspire you.
You are awesome👌🏾👌🏾👌🏾👌🏾👌🏾👌🏾
Thanks Linda.