
Fondant Bunny Tutorial
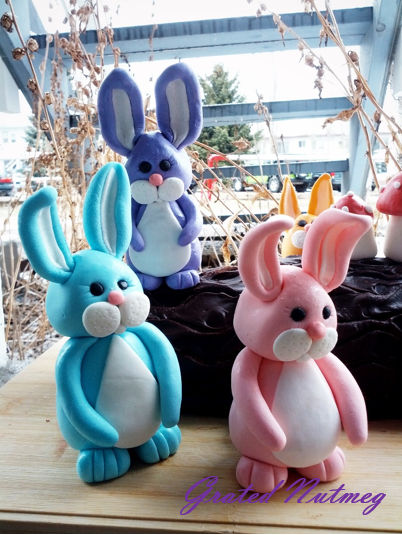
Easter is around the corner. What better way to decorate your cake than with chubby cute bunnies? This is an easy tutorial on how to make fondant bunnies.
INGREDIENTS:
(1) Fondant. I make use of Marshmallow Fondant. The recipe for this can be found here.
TIP: Ensure that the fondant is firm and not soft. Add more confectioners sugar to the fondant to achieve a stiff dough.
PROCEDURE:
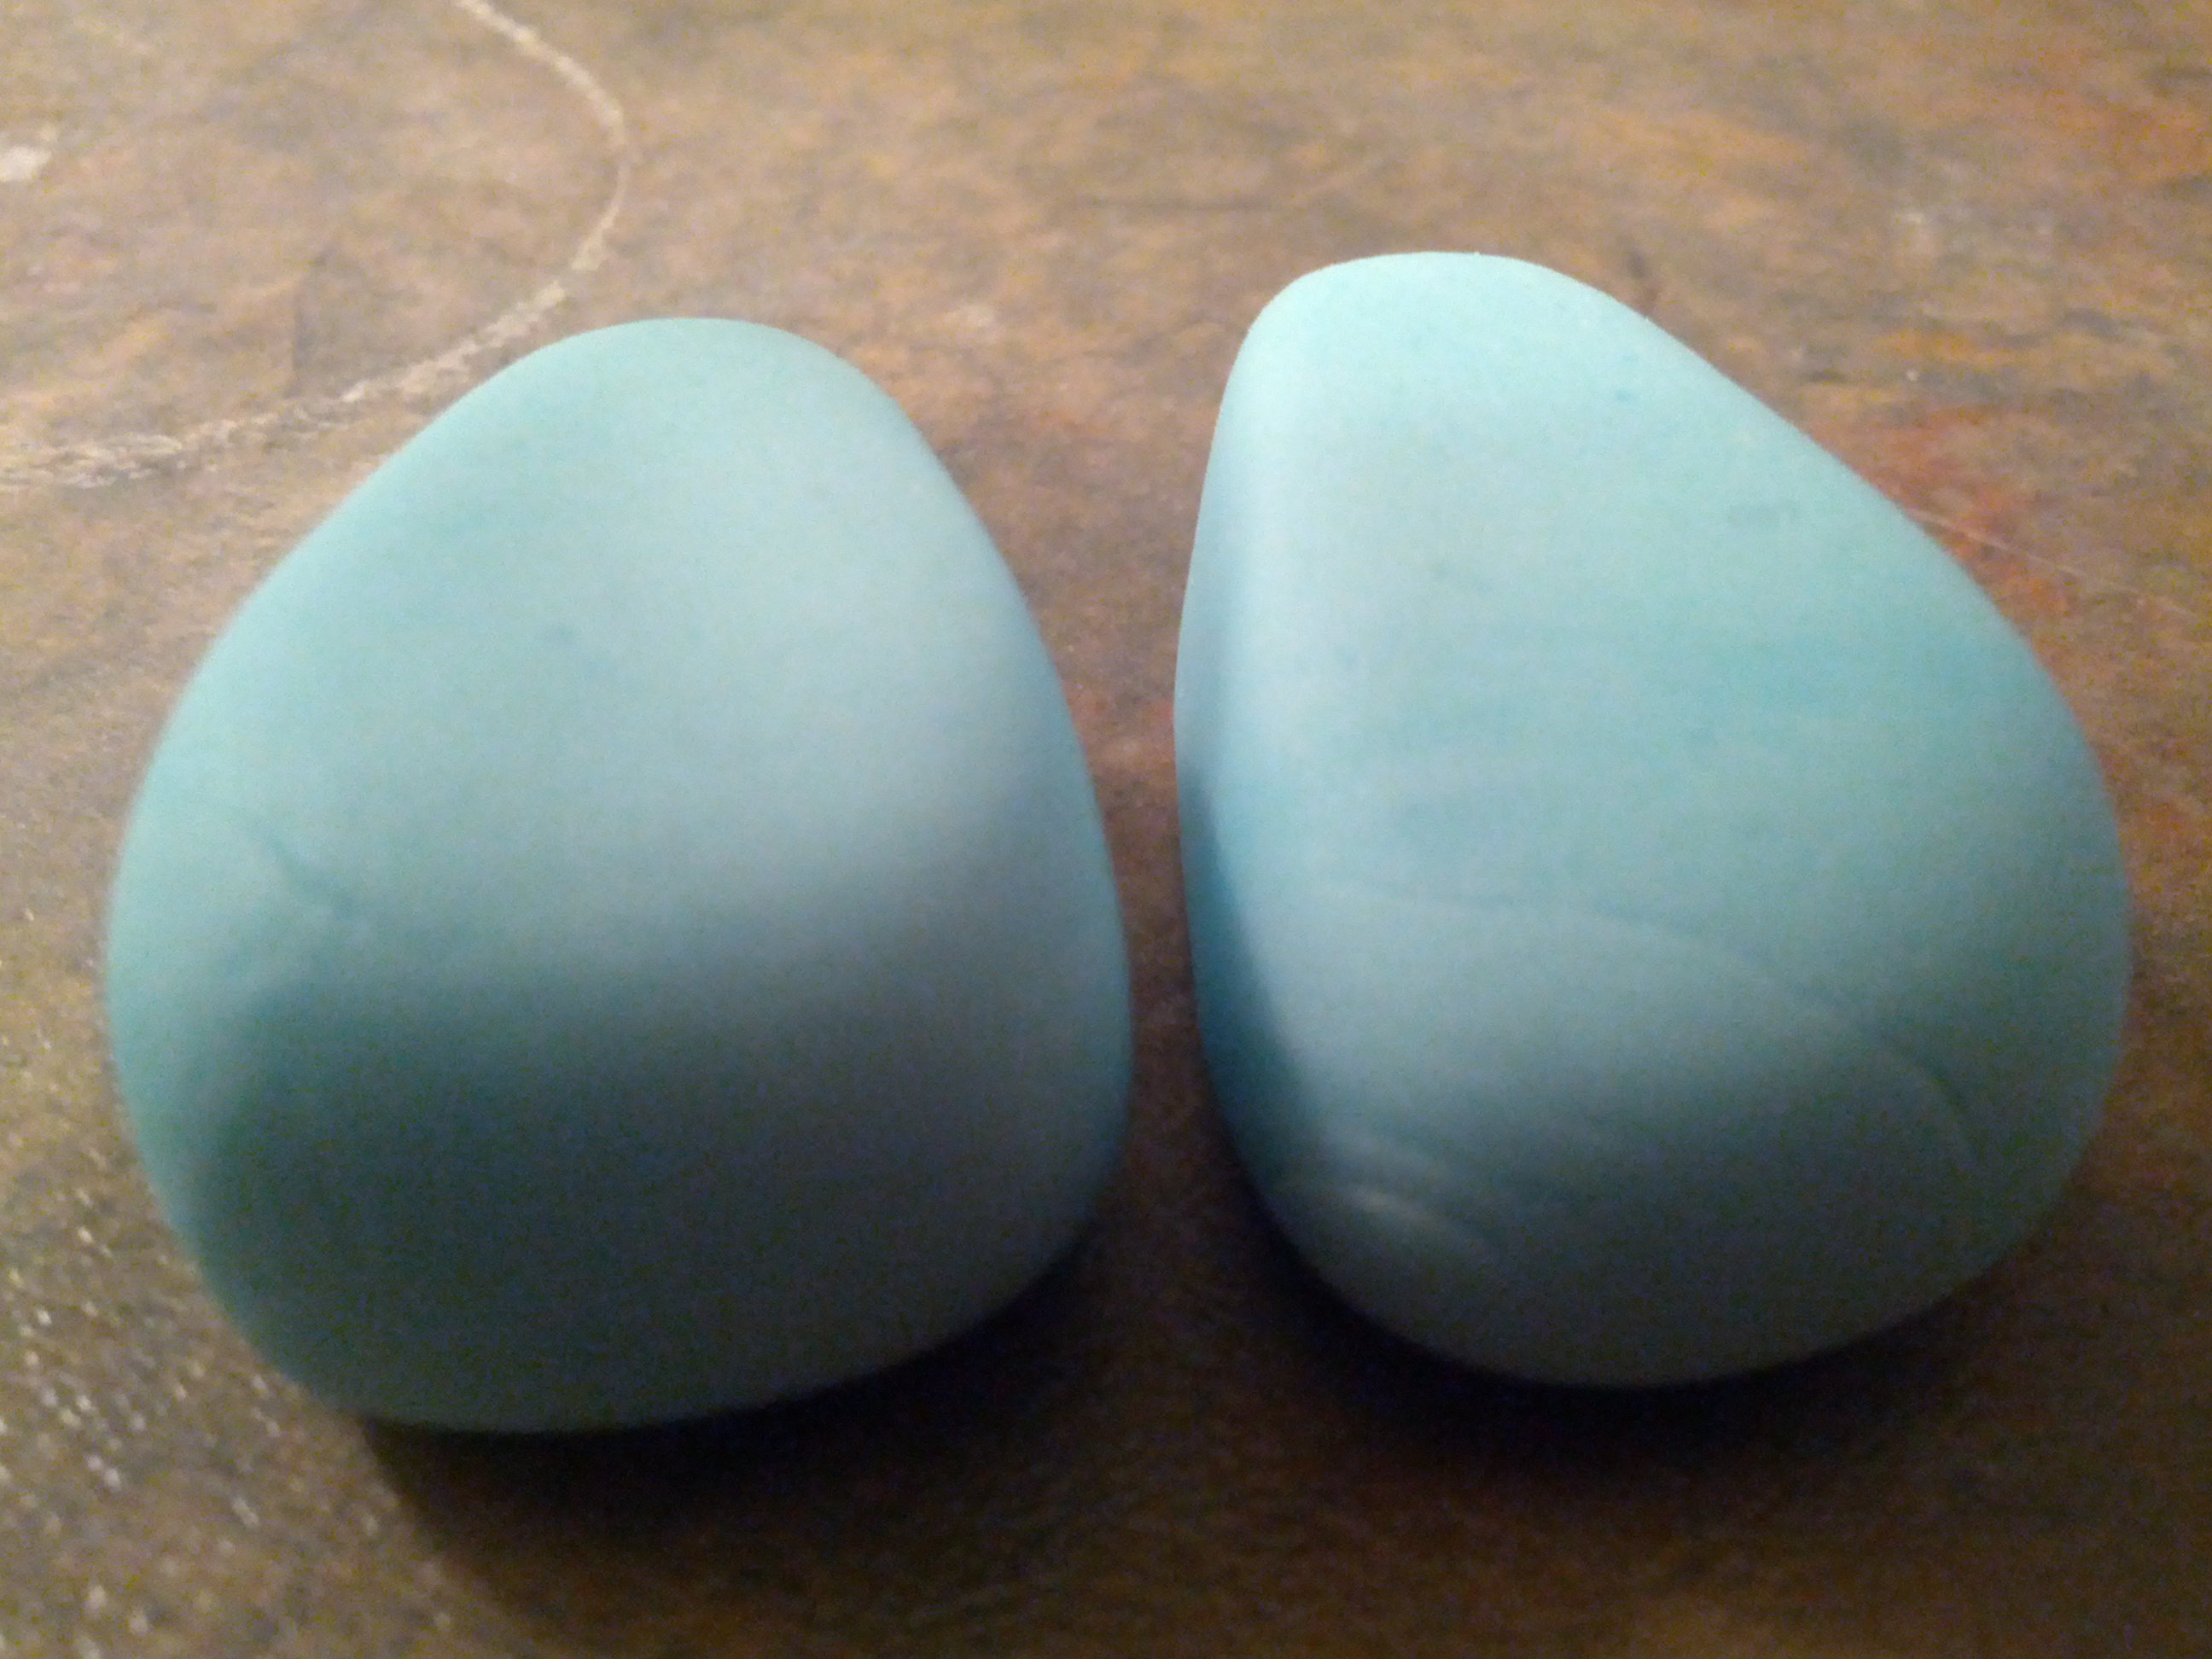
(1) Divide fondant into 8 pieces: 1 large round piece for the bunny head, 1 large oval piece for the body and 6 smaller round pieces for the ears and limbs. You will need some little black fondant for the eyes. You will also need some extra different colored fondant for the tail, tummy and face. I usually use white
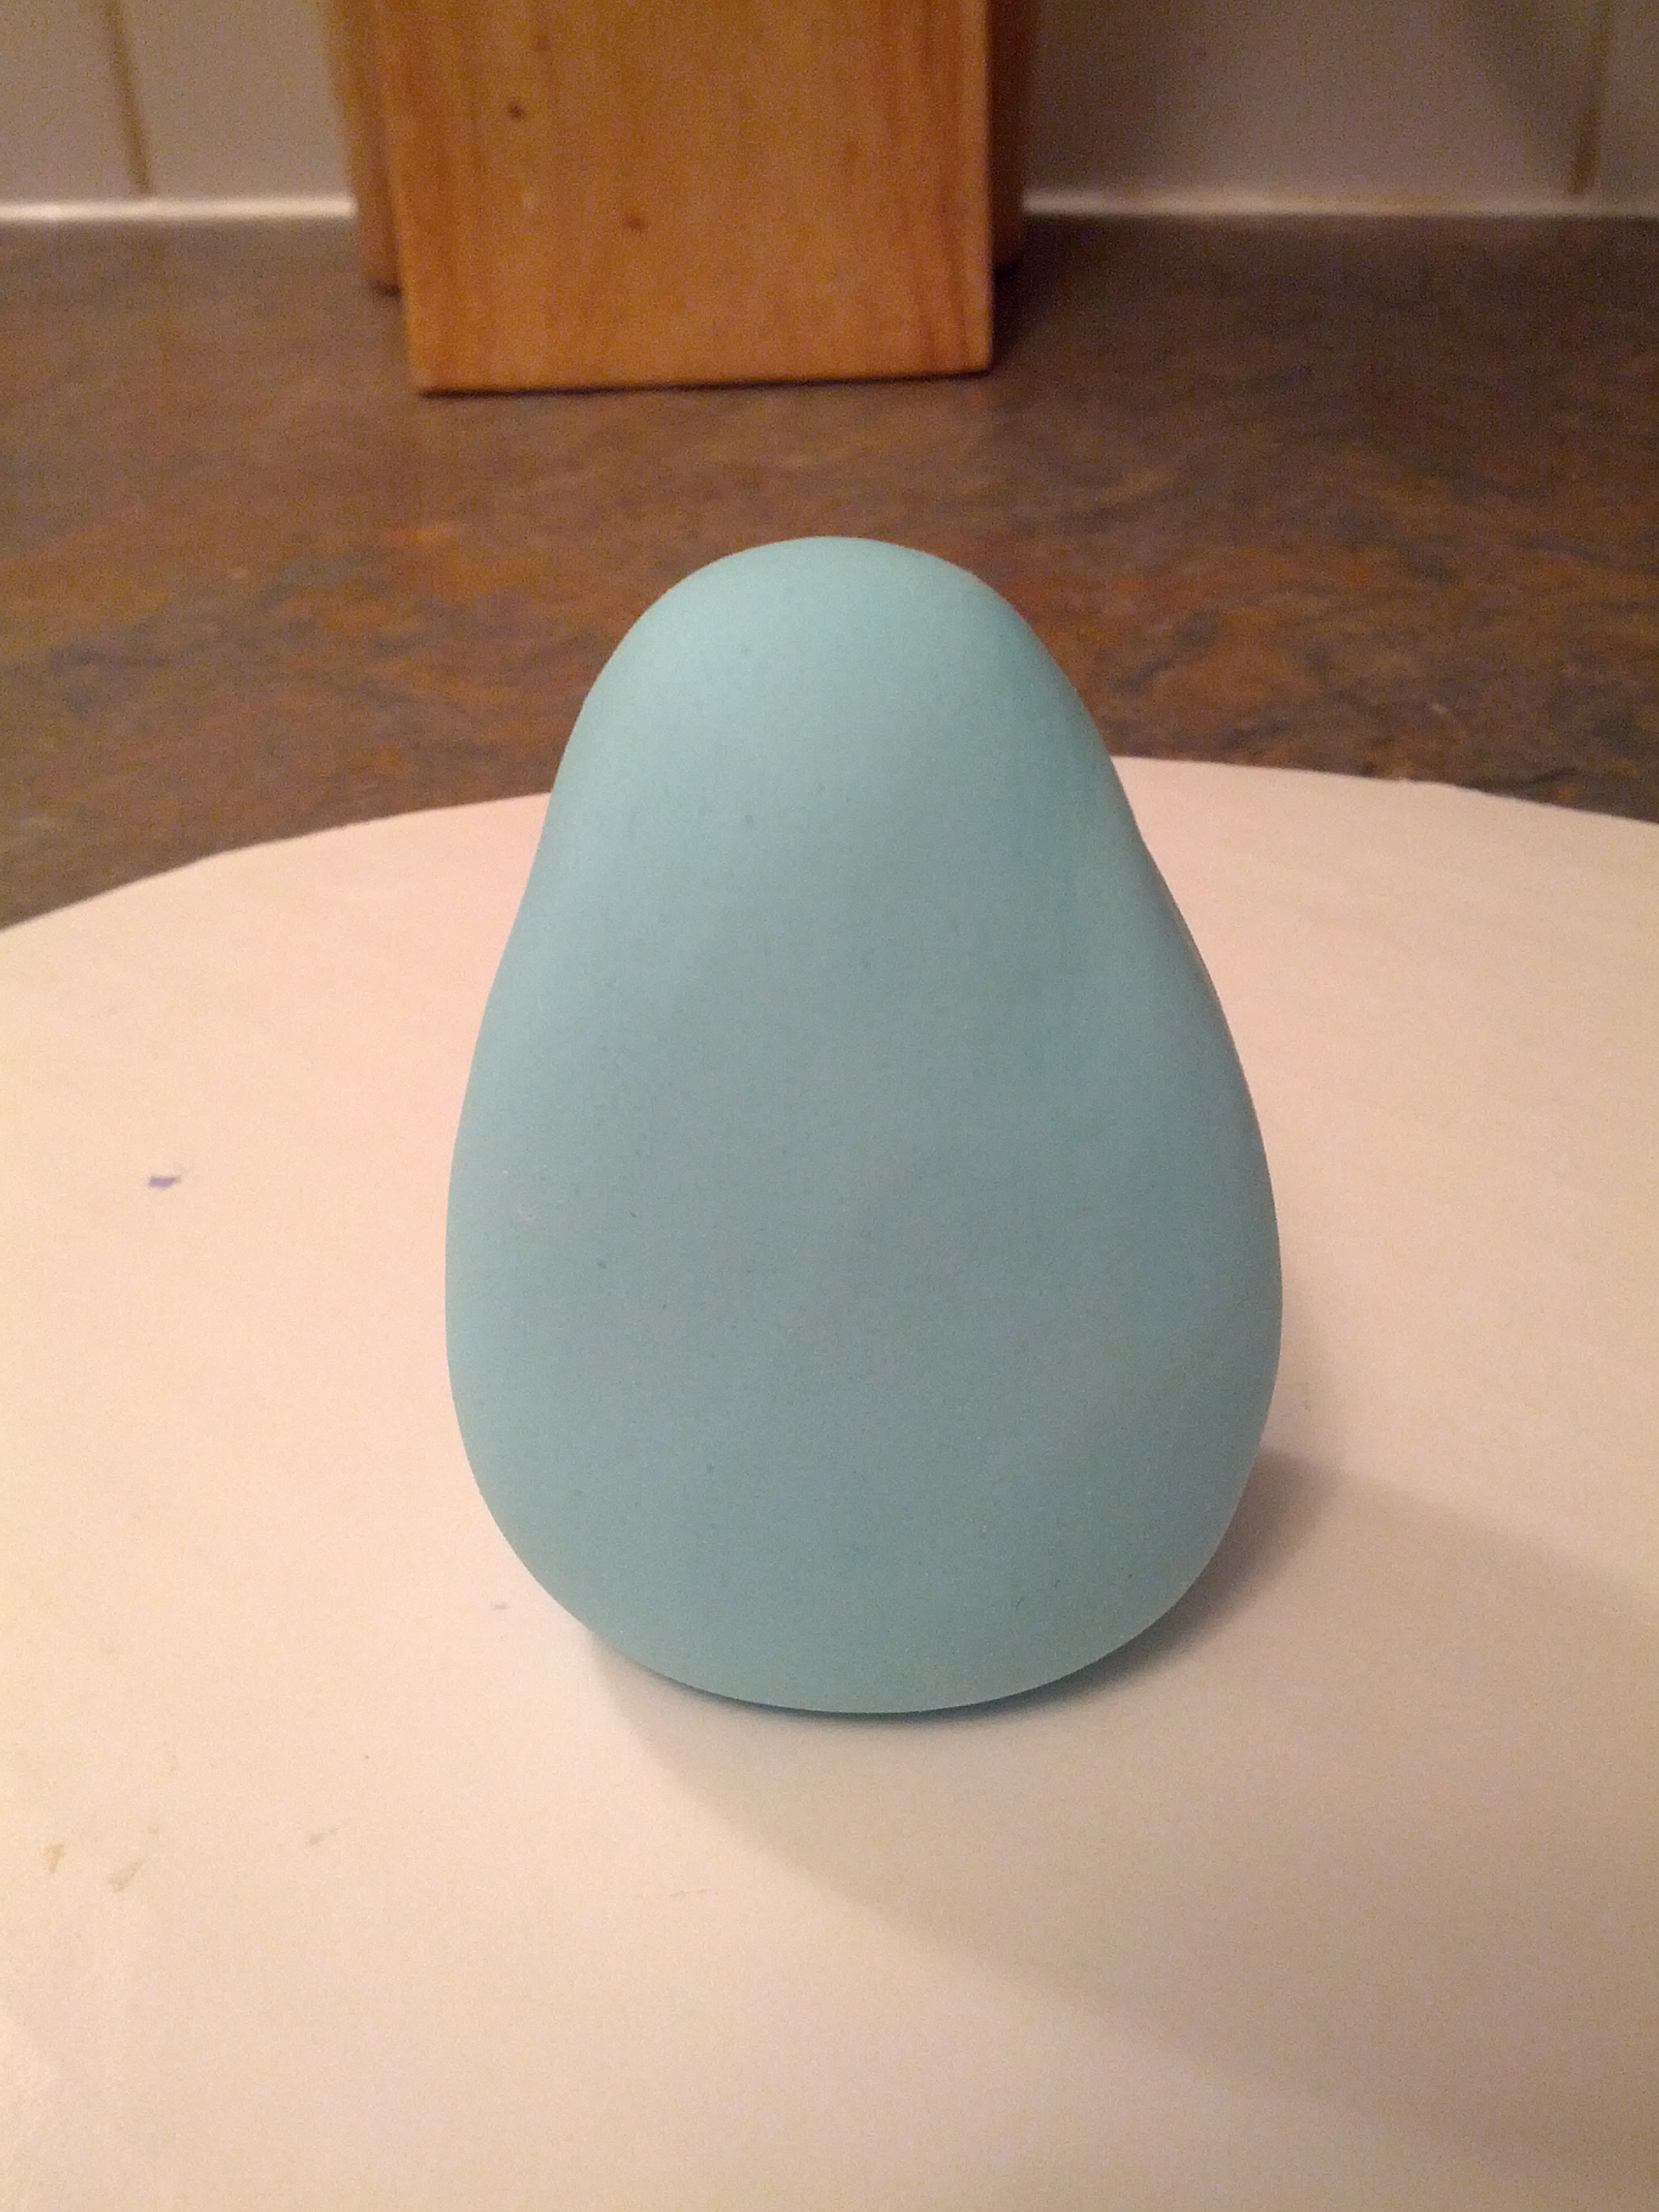
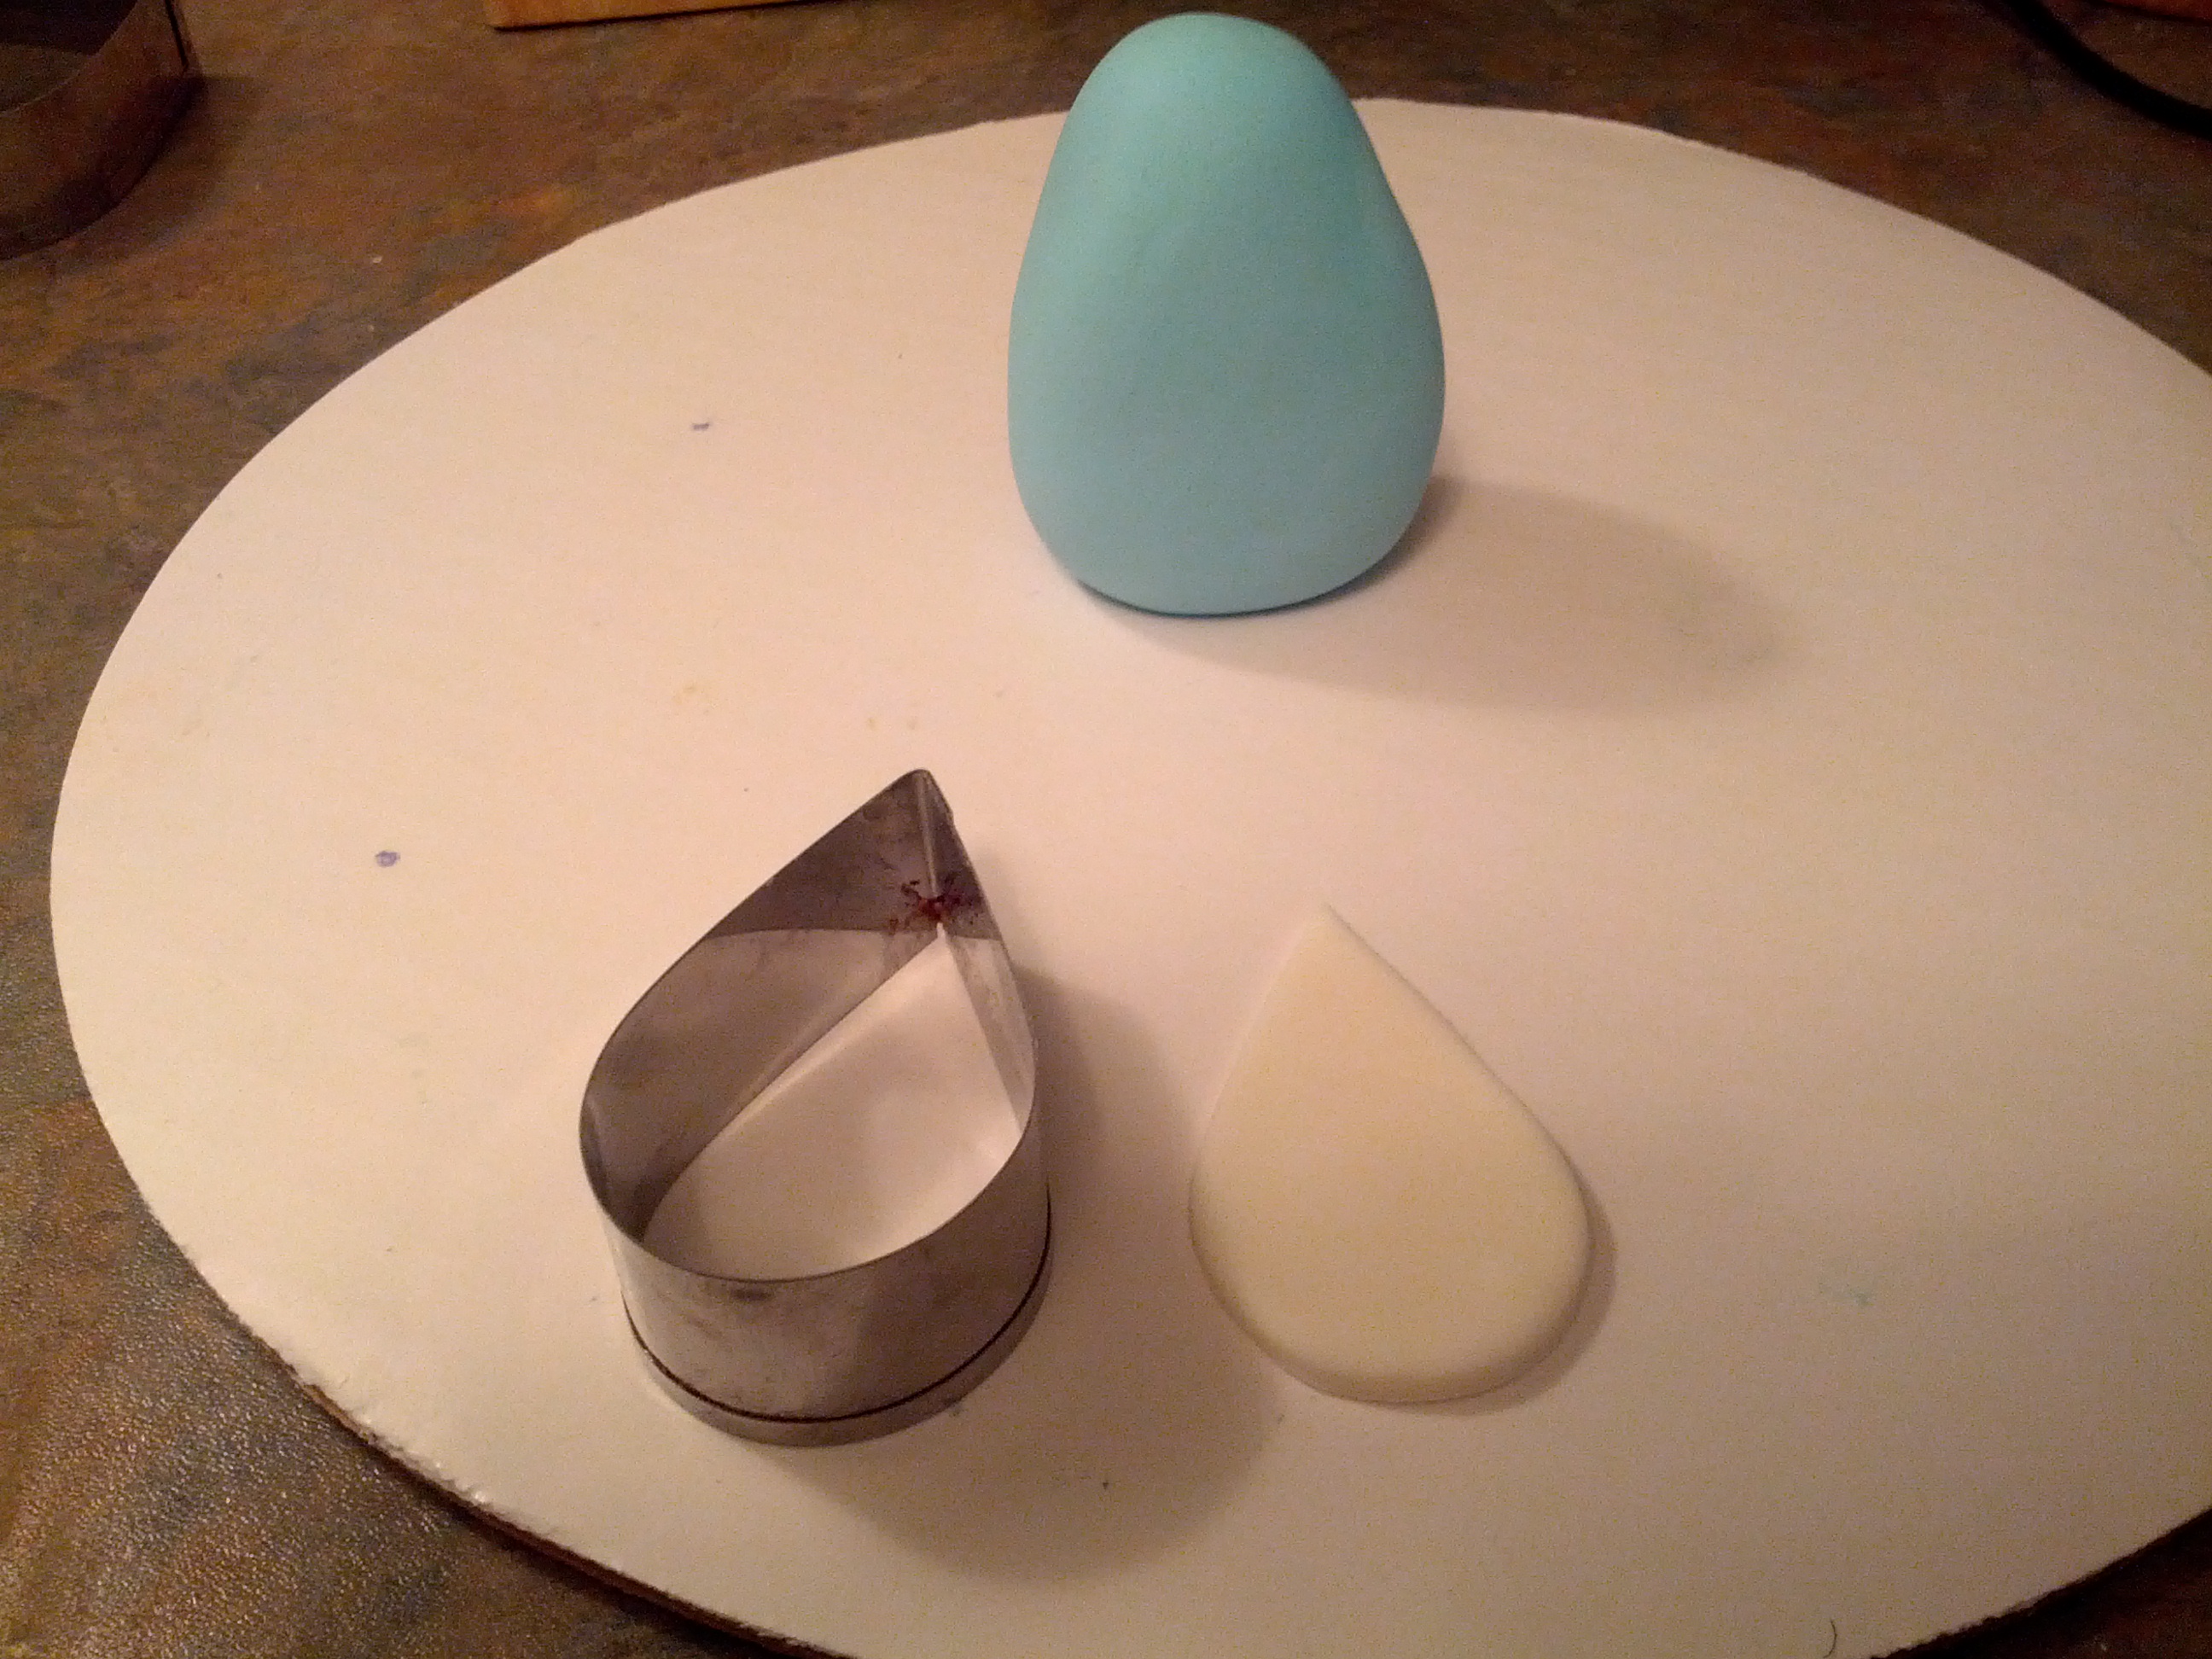
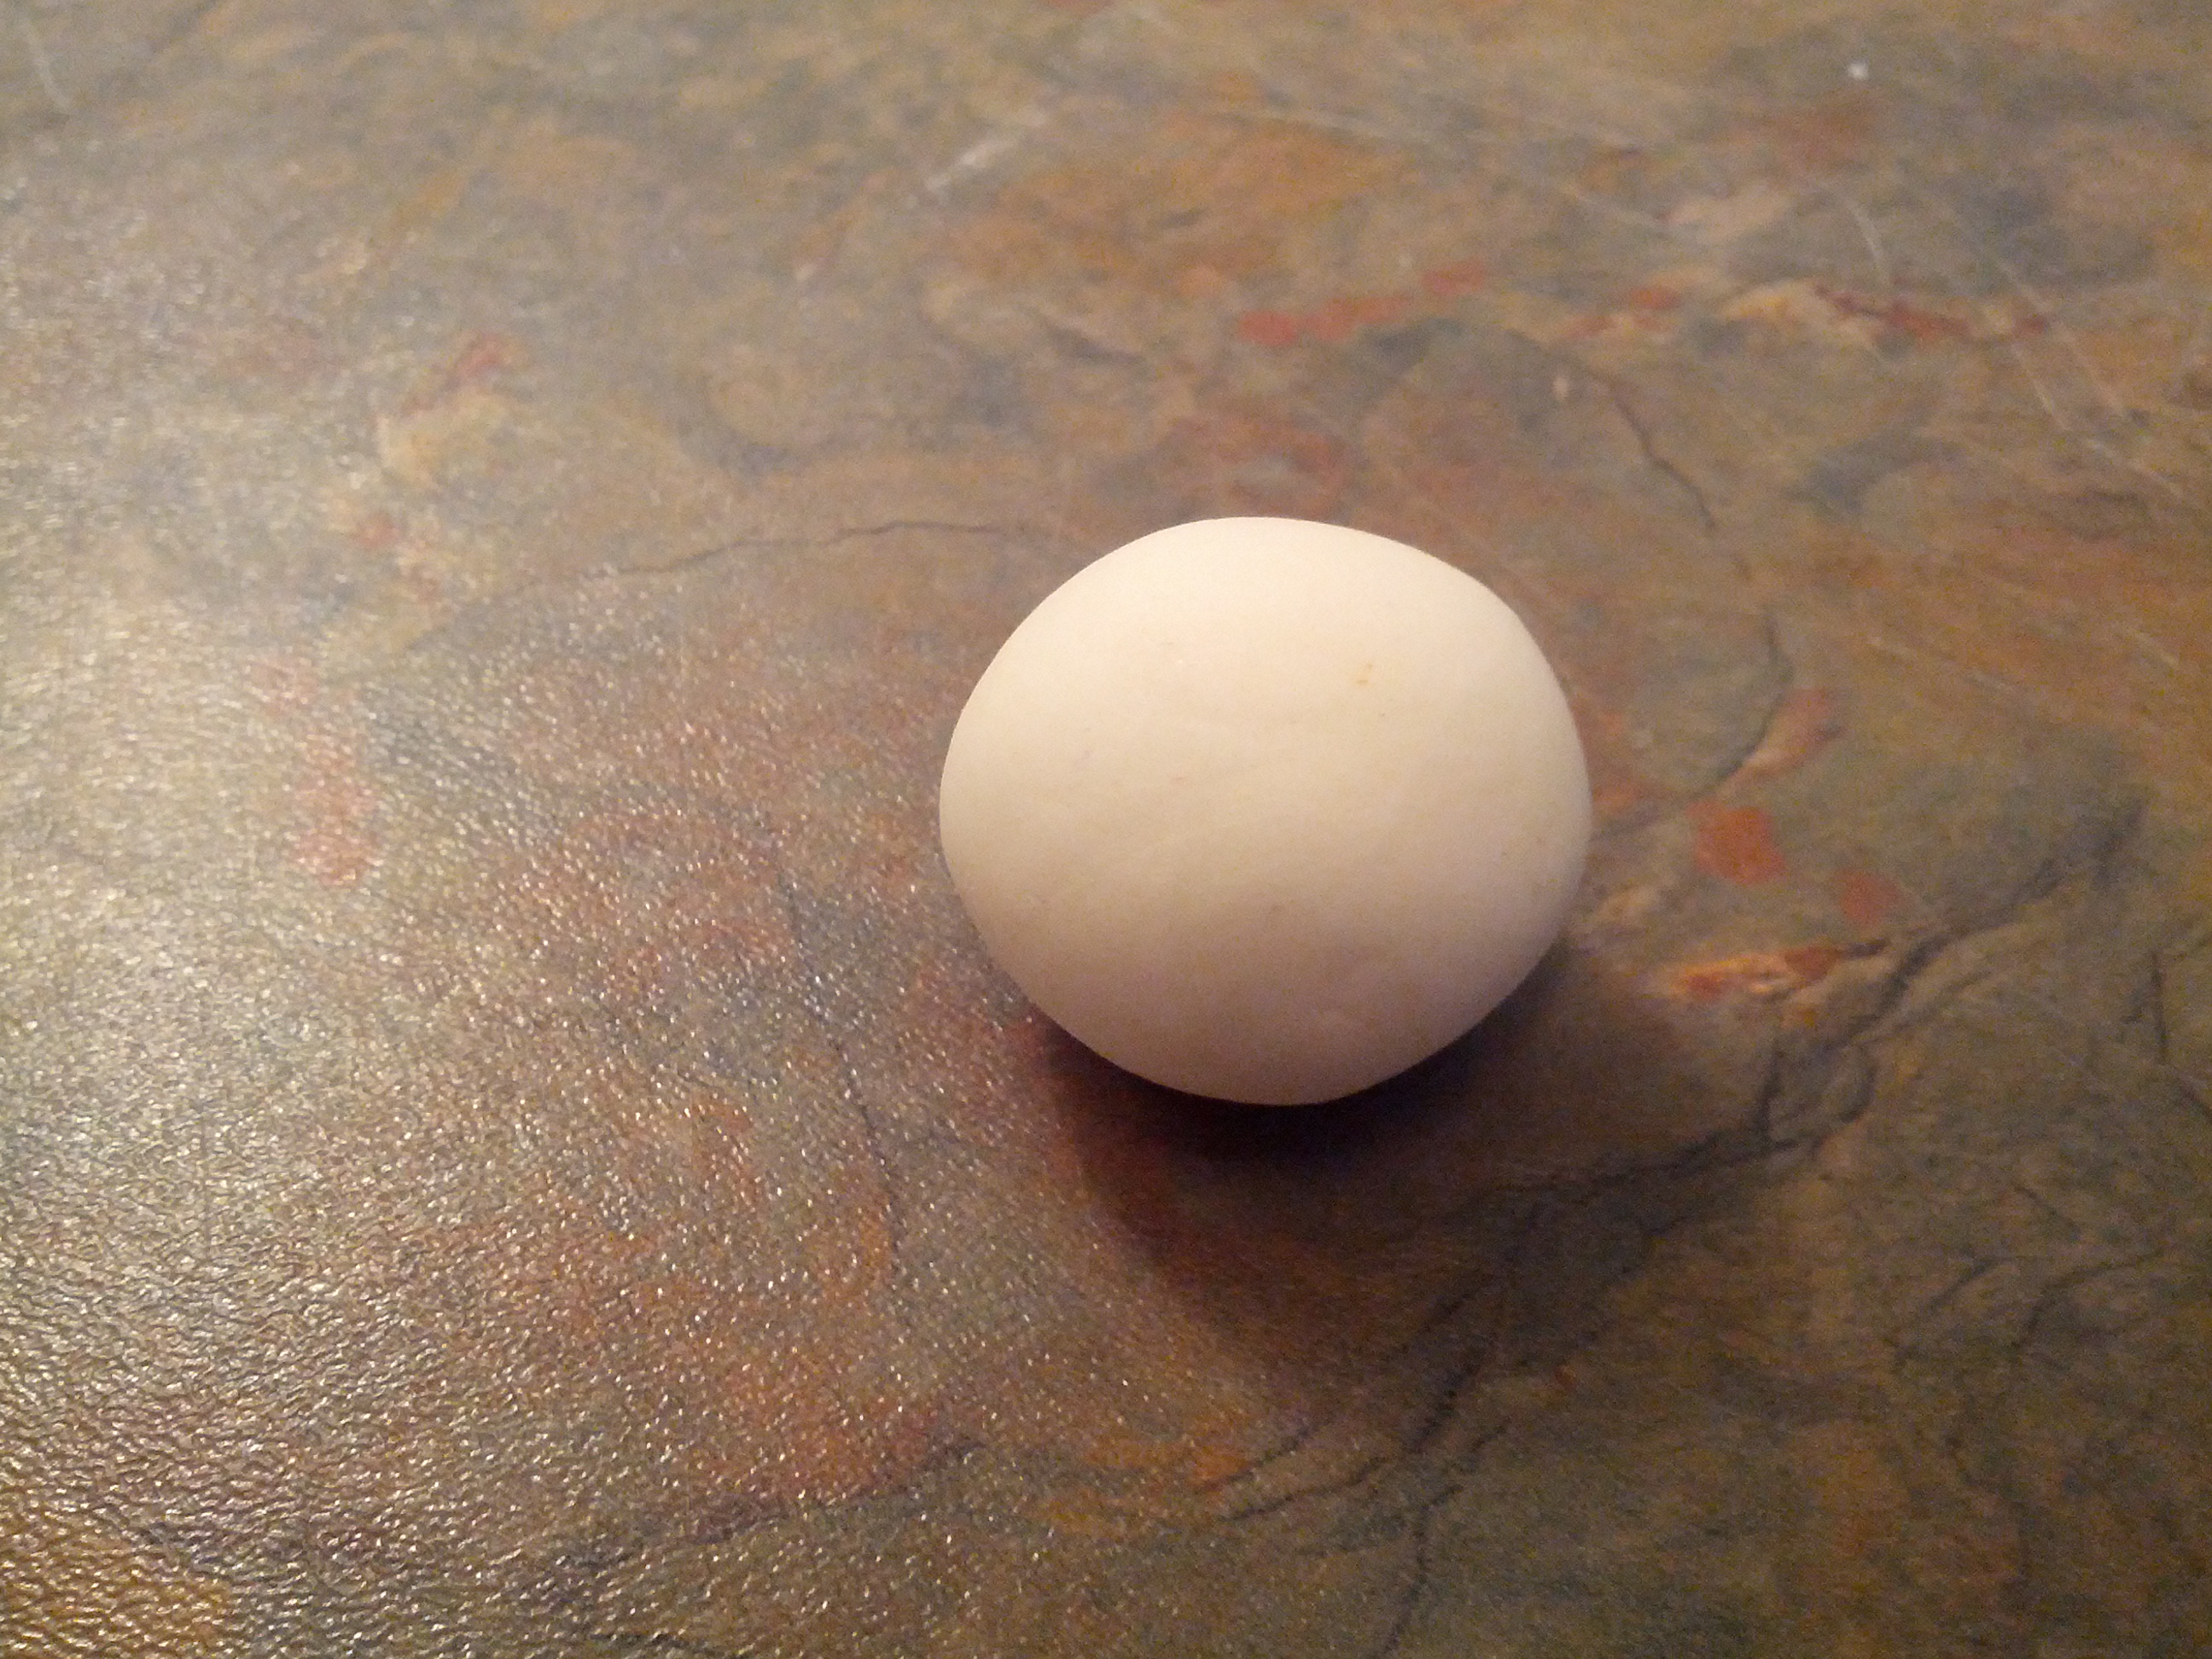
(2) First, make the body. Shape the largest fondant piece into an oval shape. This will be the body.
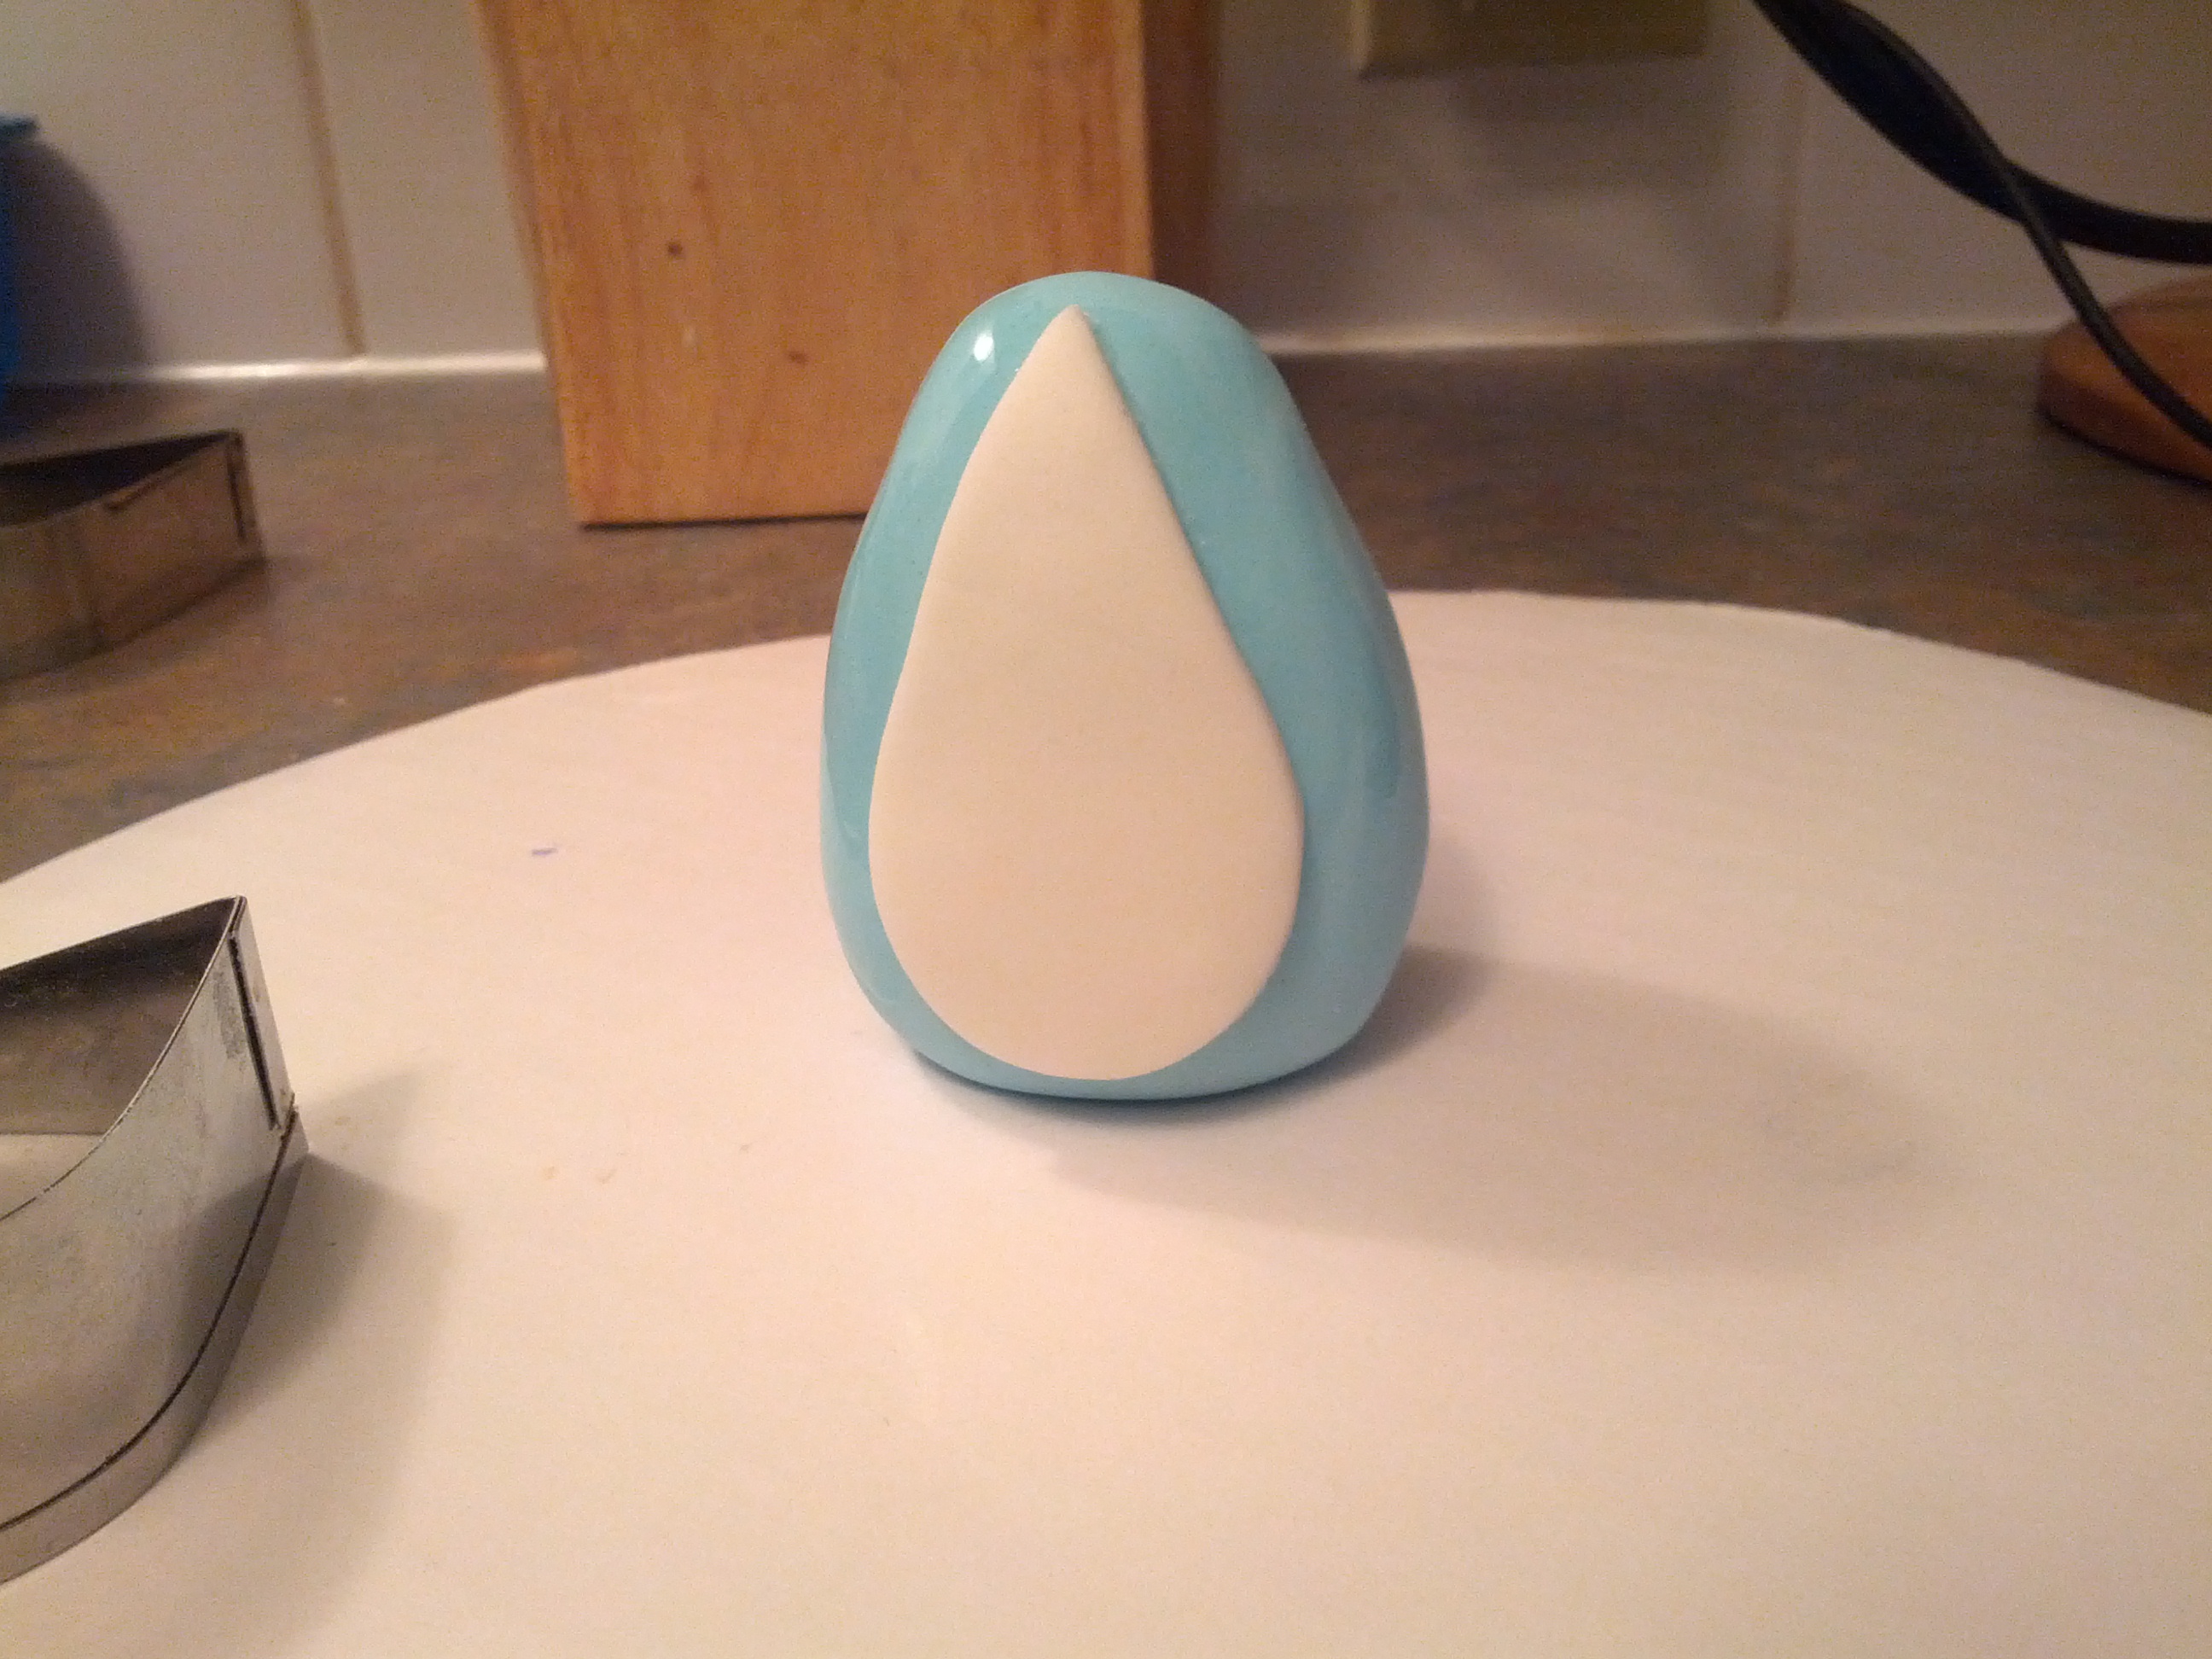
(3) Roll out the white fondant and cut out an oval shape with a fondant or cookie cutter. Stick this to the body to form the belly of the bunny. Use water as your gluing agent.
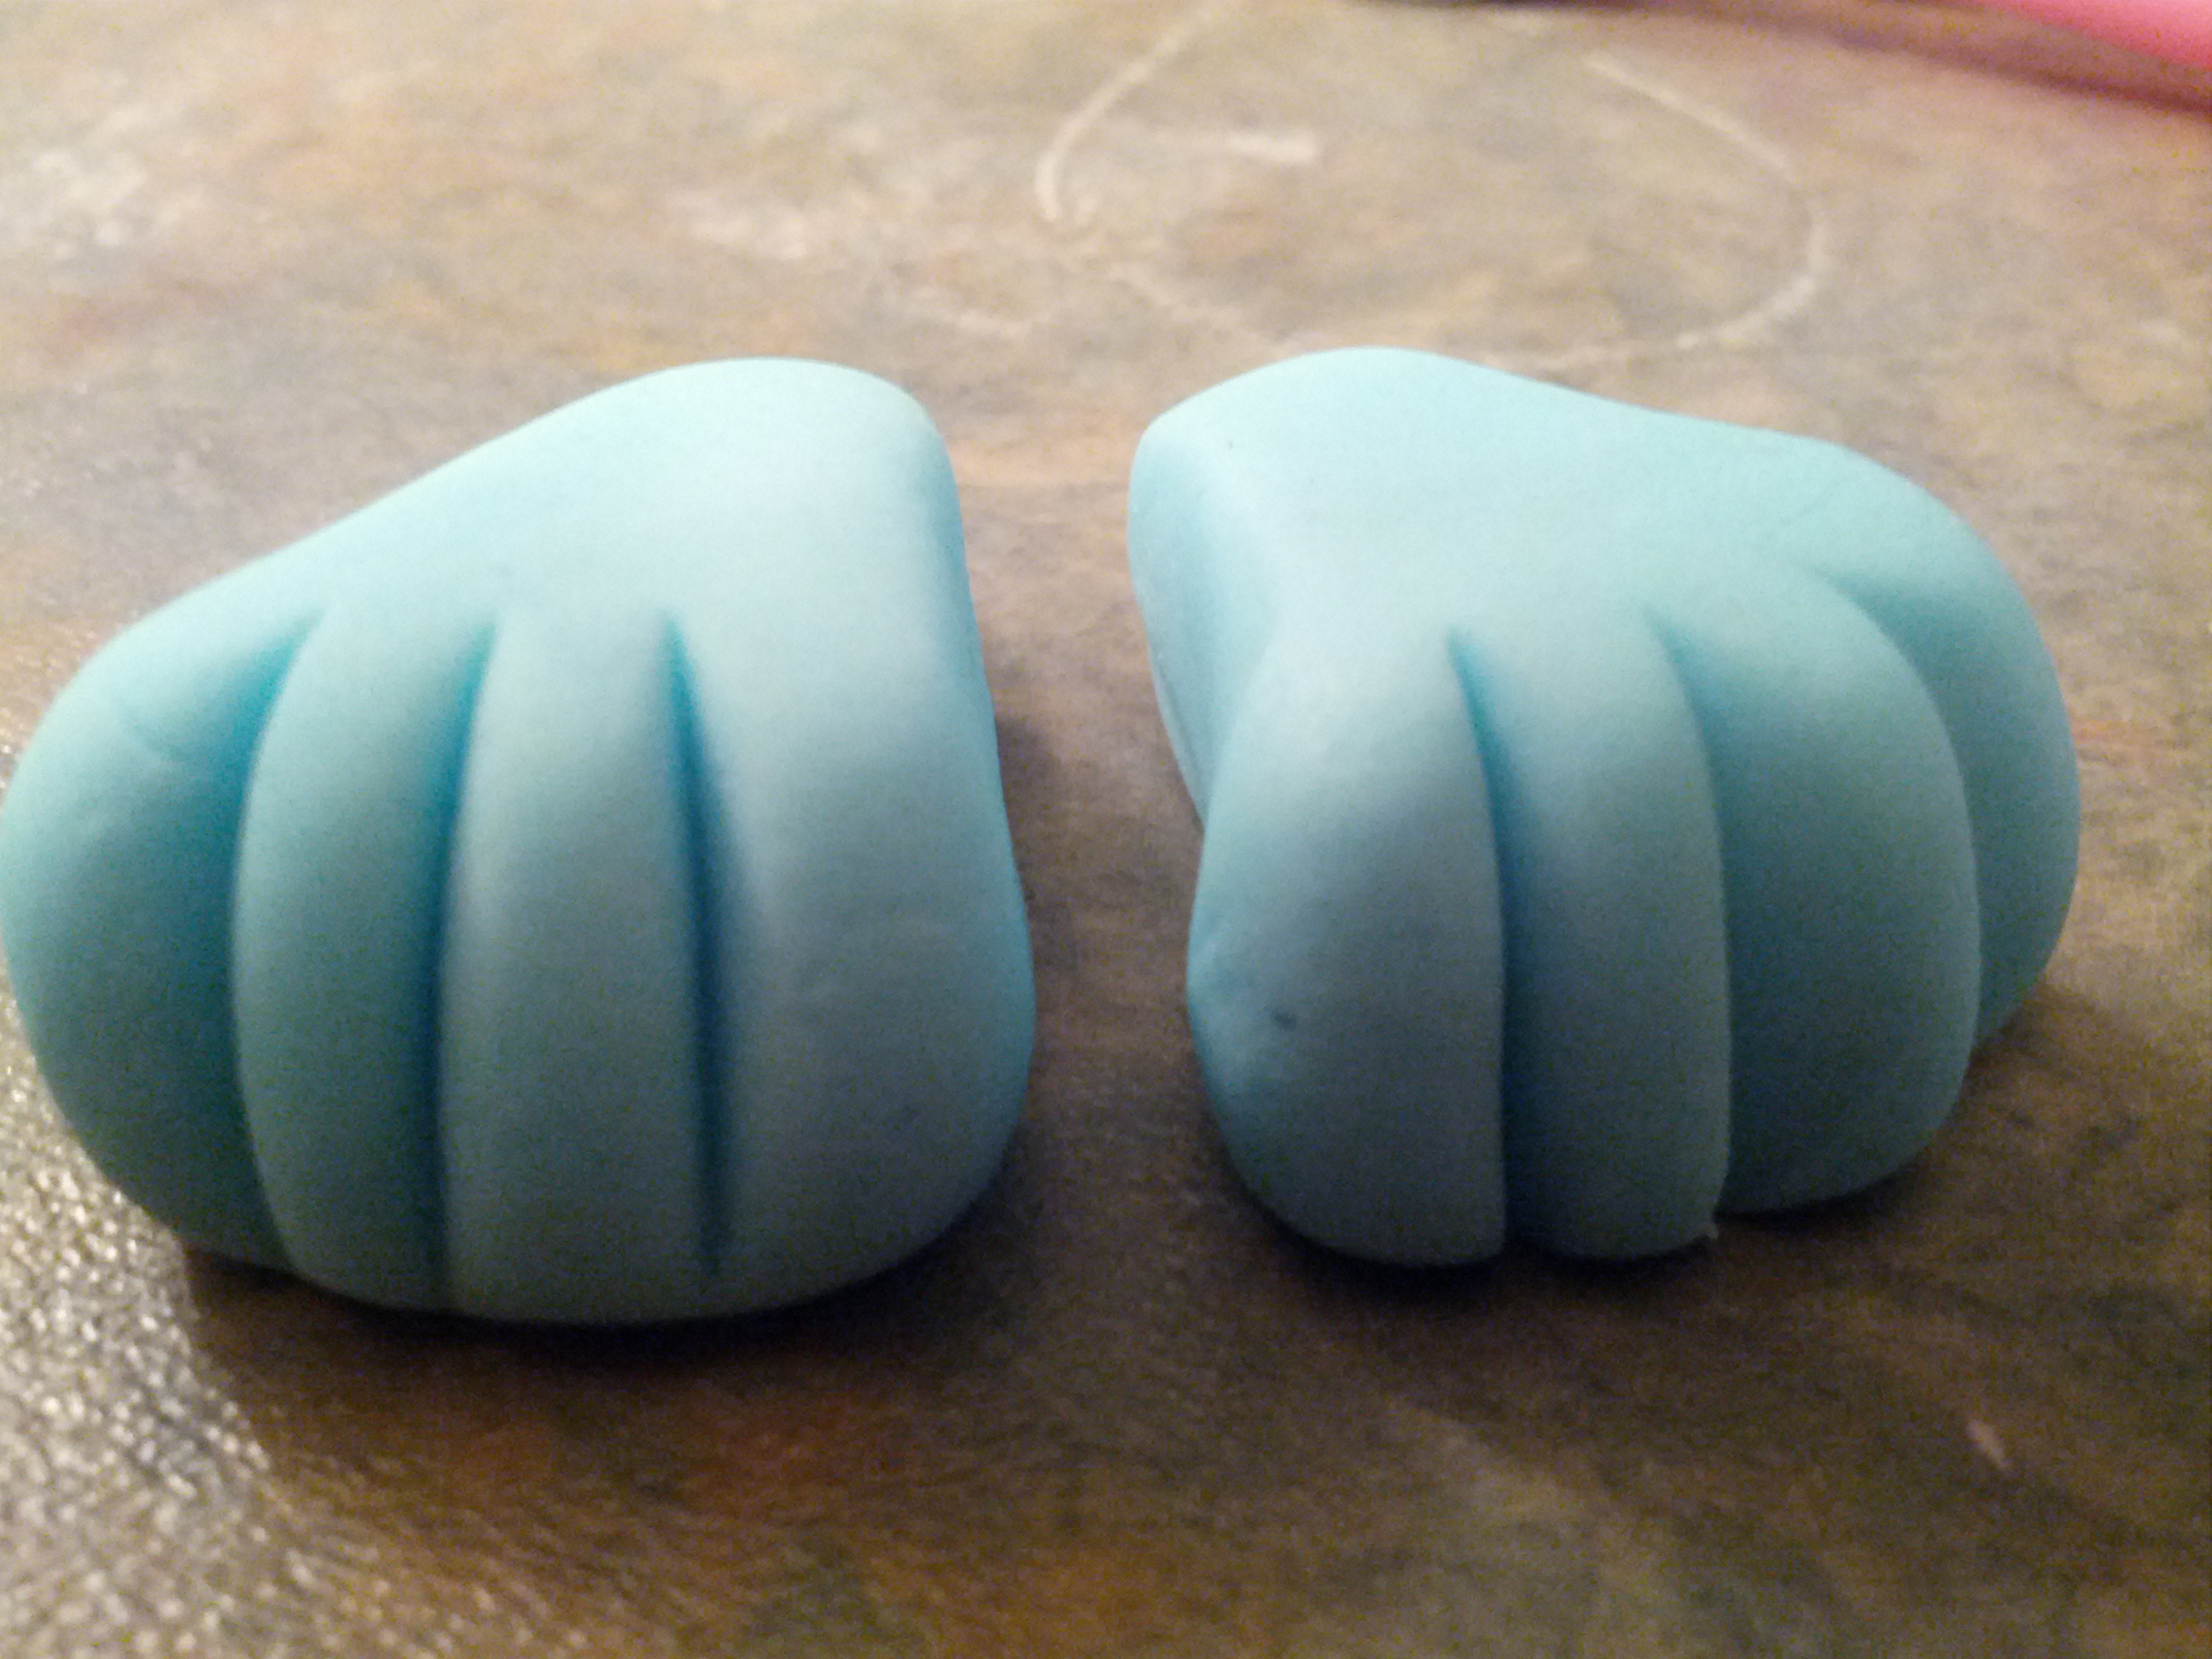
(4) Next, make the hind limbs. Take 2 of the smaller fondant pieces and mold into the shape of a corn kernel. Next, use a knife or any other tool to make indents on the feet to form toes. Stick these under the body of the bonny
(5) Next, Make the hands. Take 2 of the smaller fondant pieces and roll into logs. Flatten the top part of each piece and stick to the top part of the body.


(6) The final part of the body is the fluffy tail. Take a portion of white fondant and roll into a ball. Use a pair of scissors to make it rough and stick to the back of the bonny. The tail will also serve as support for the bunny.
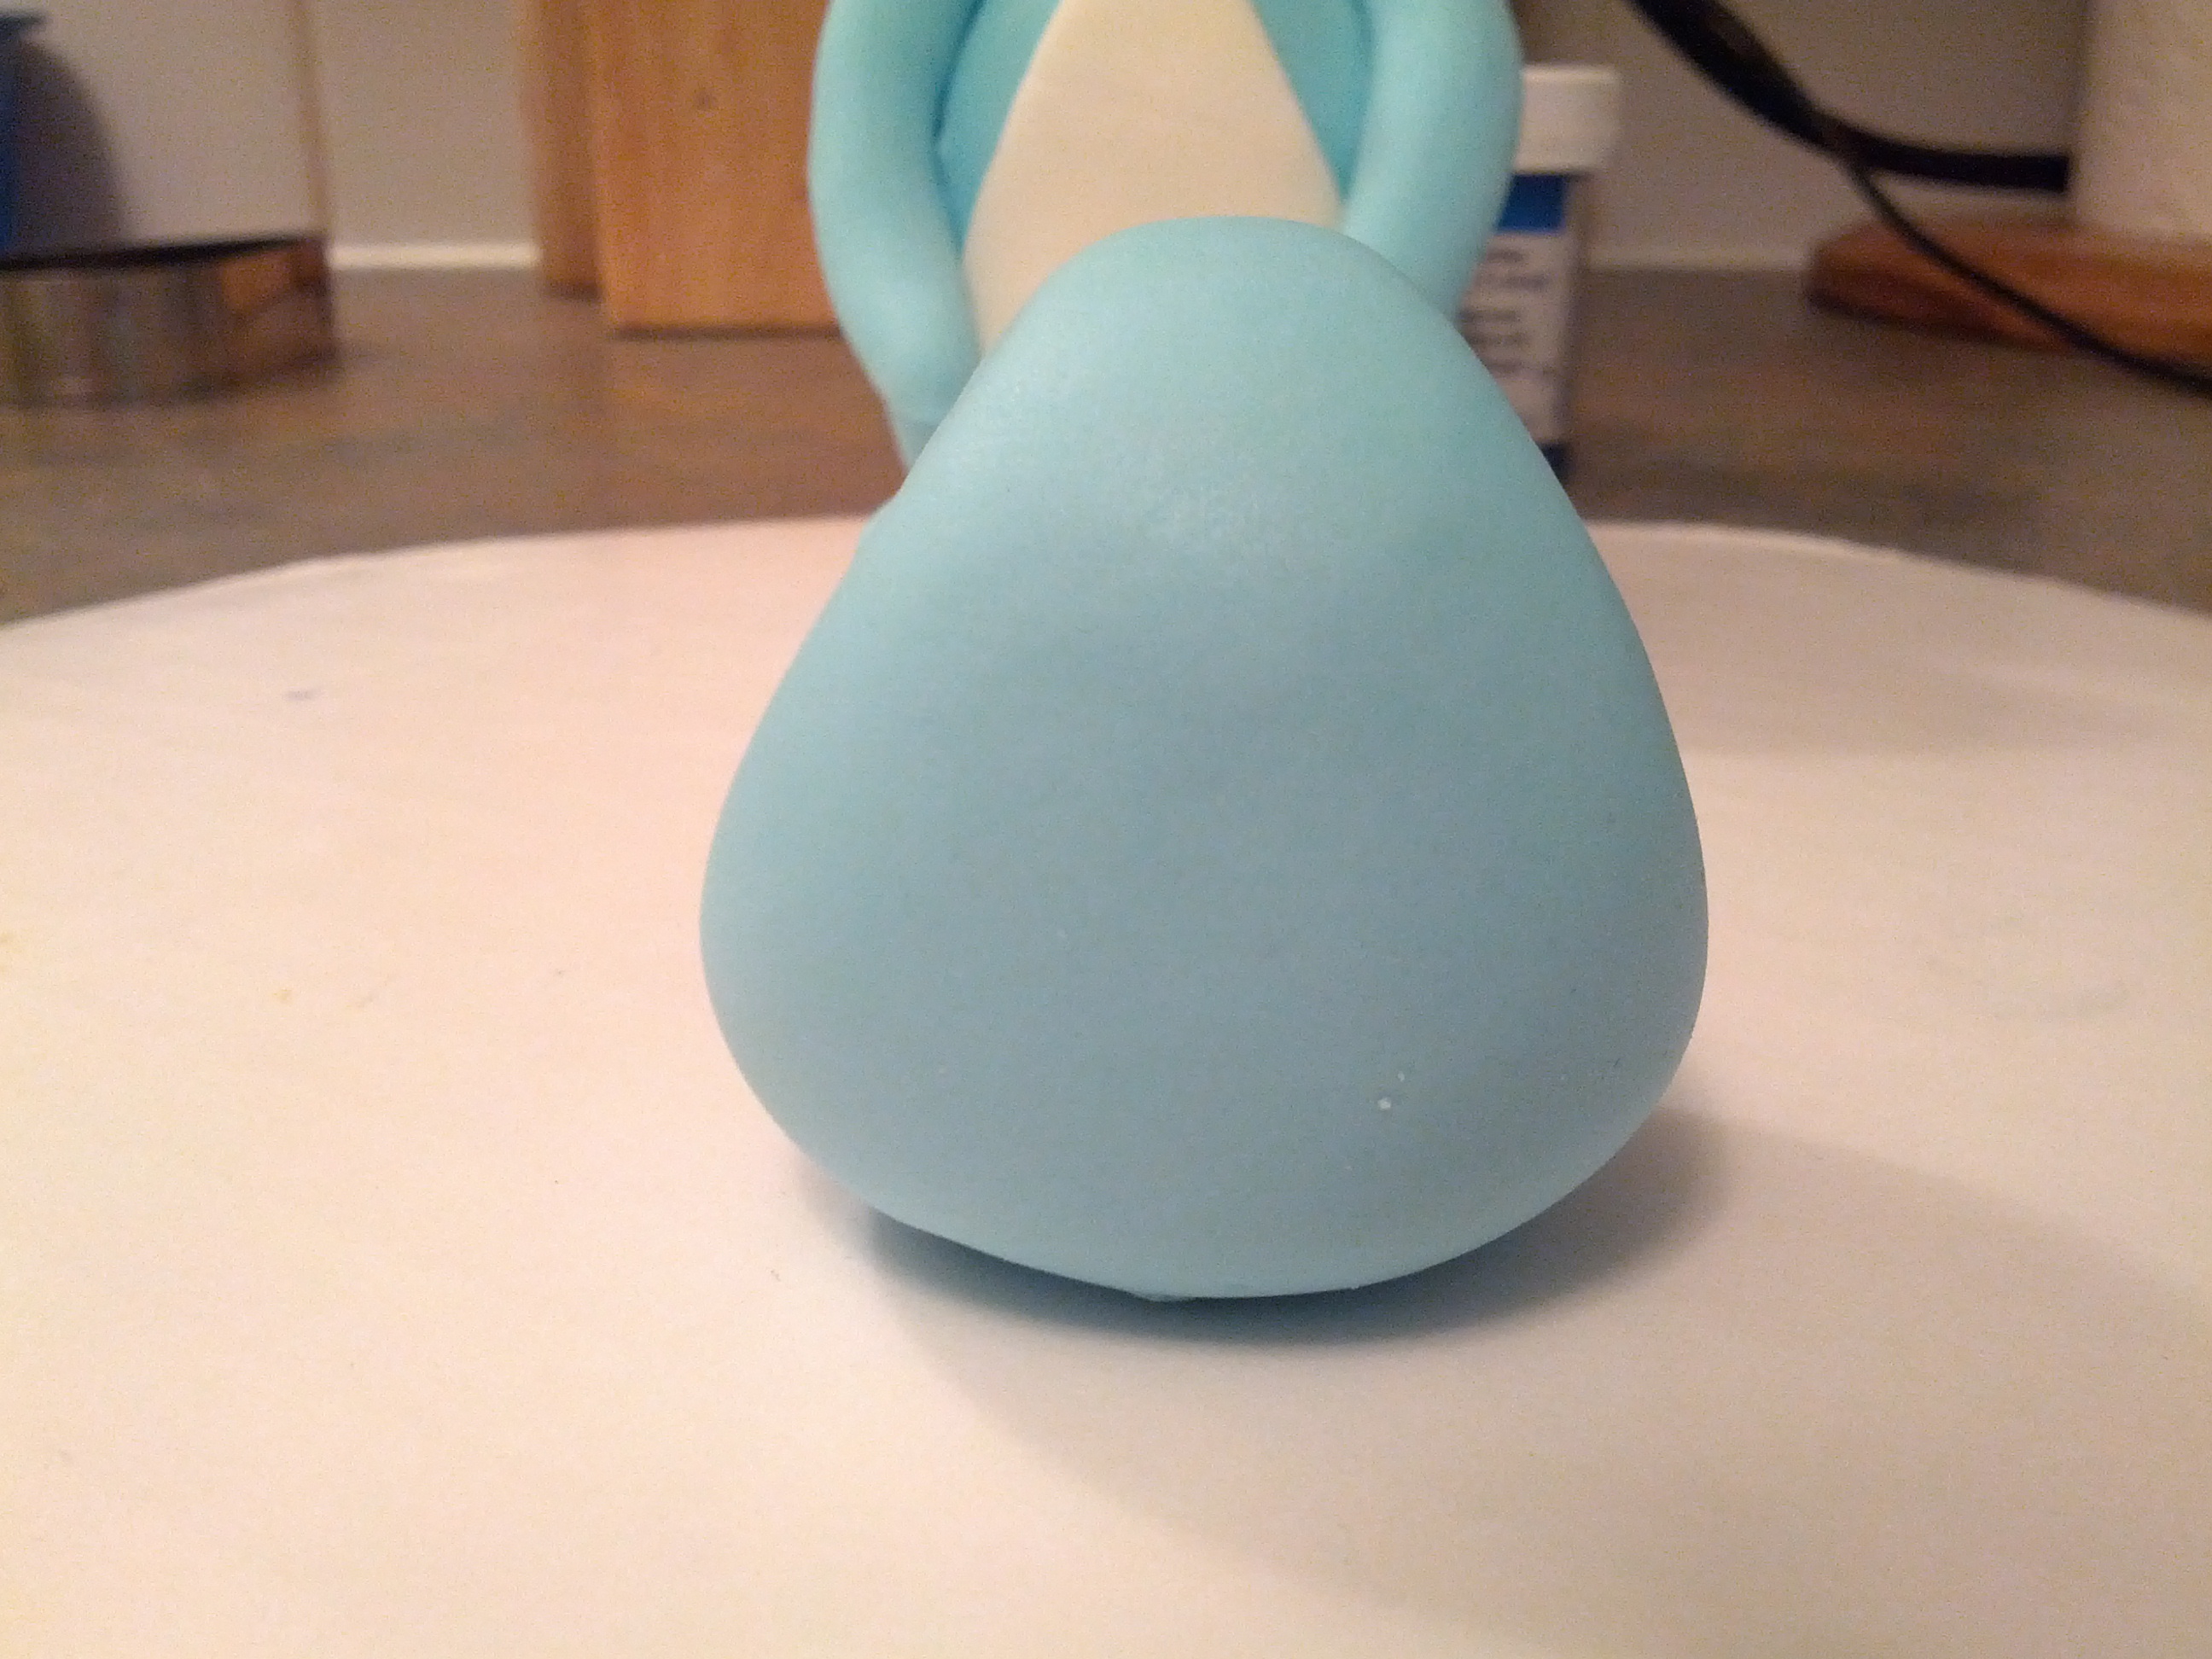
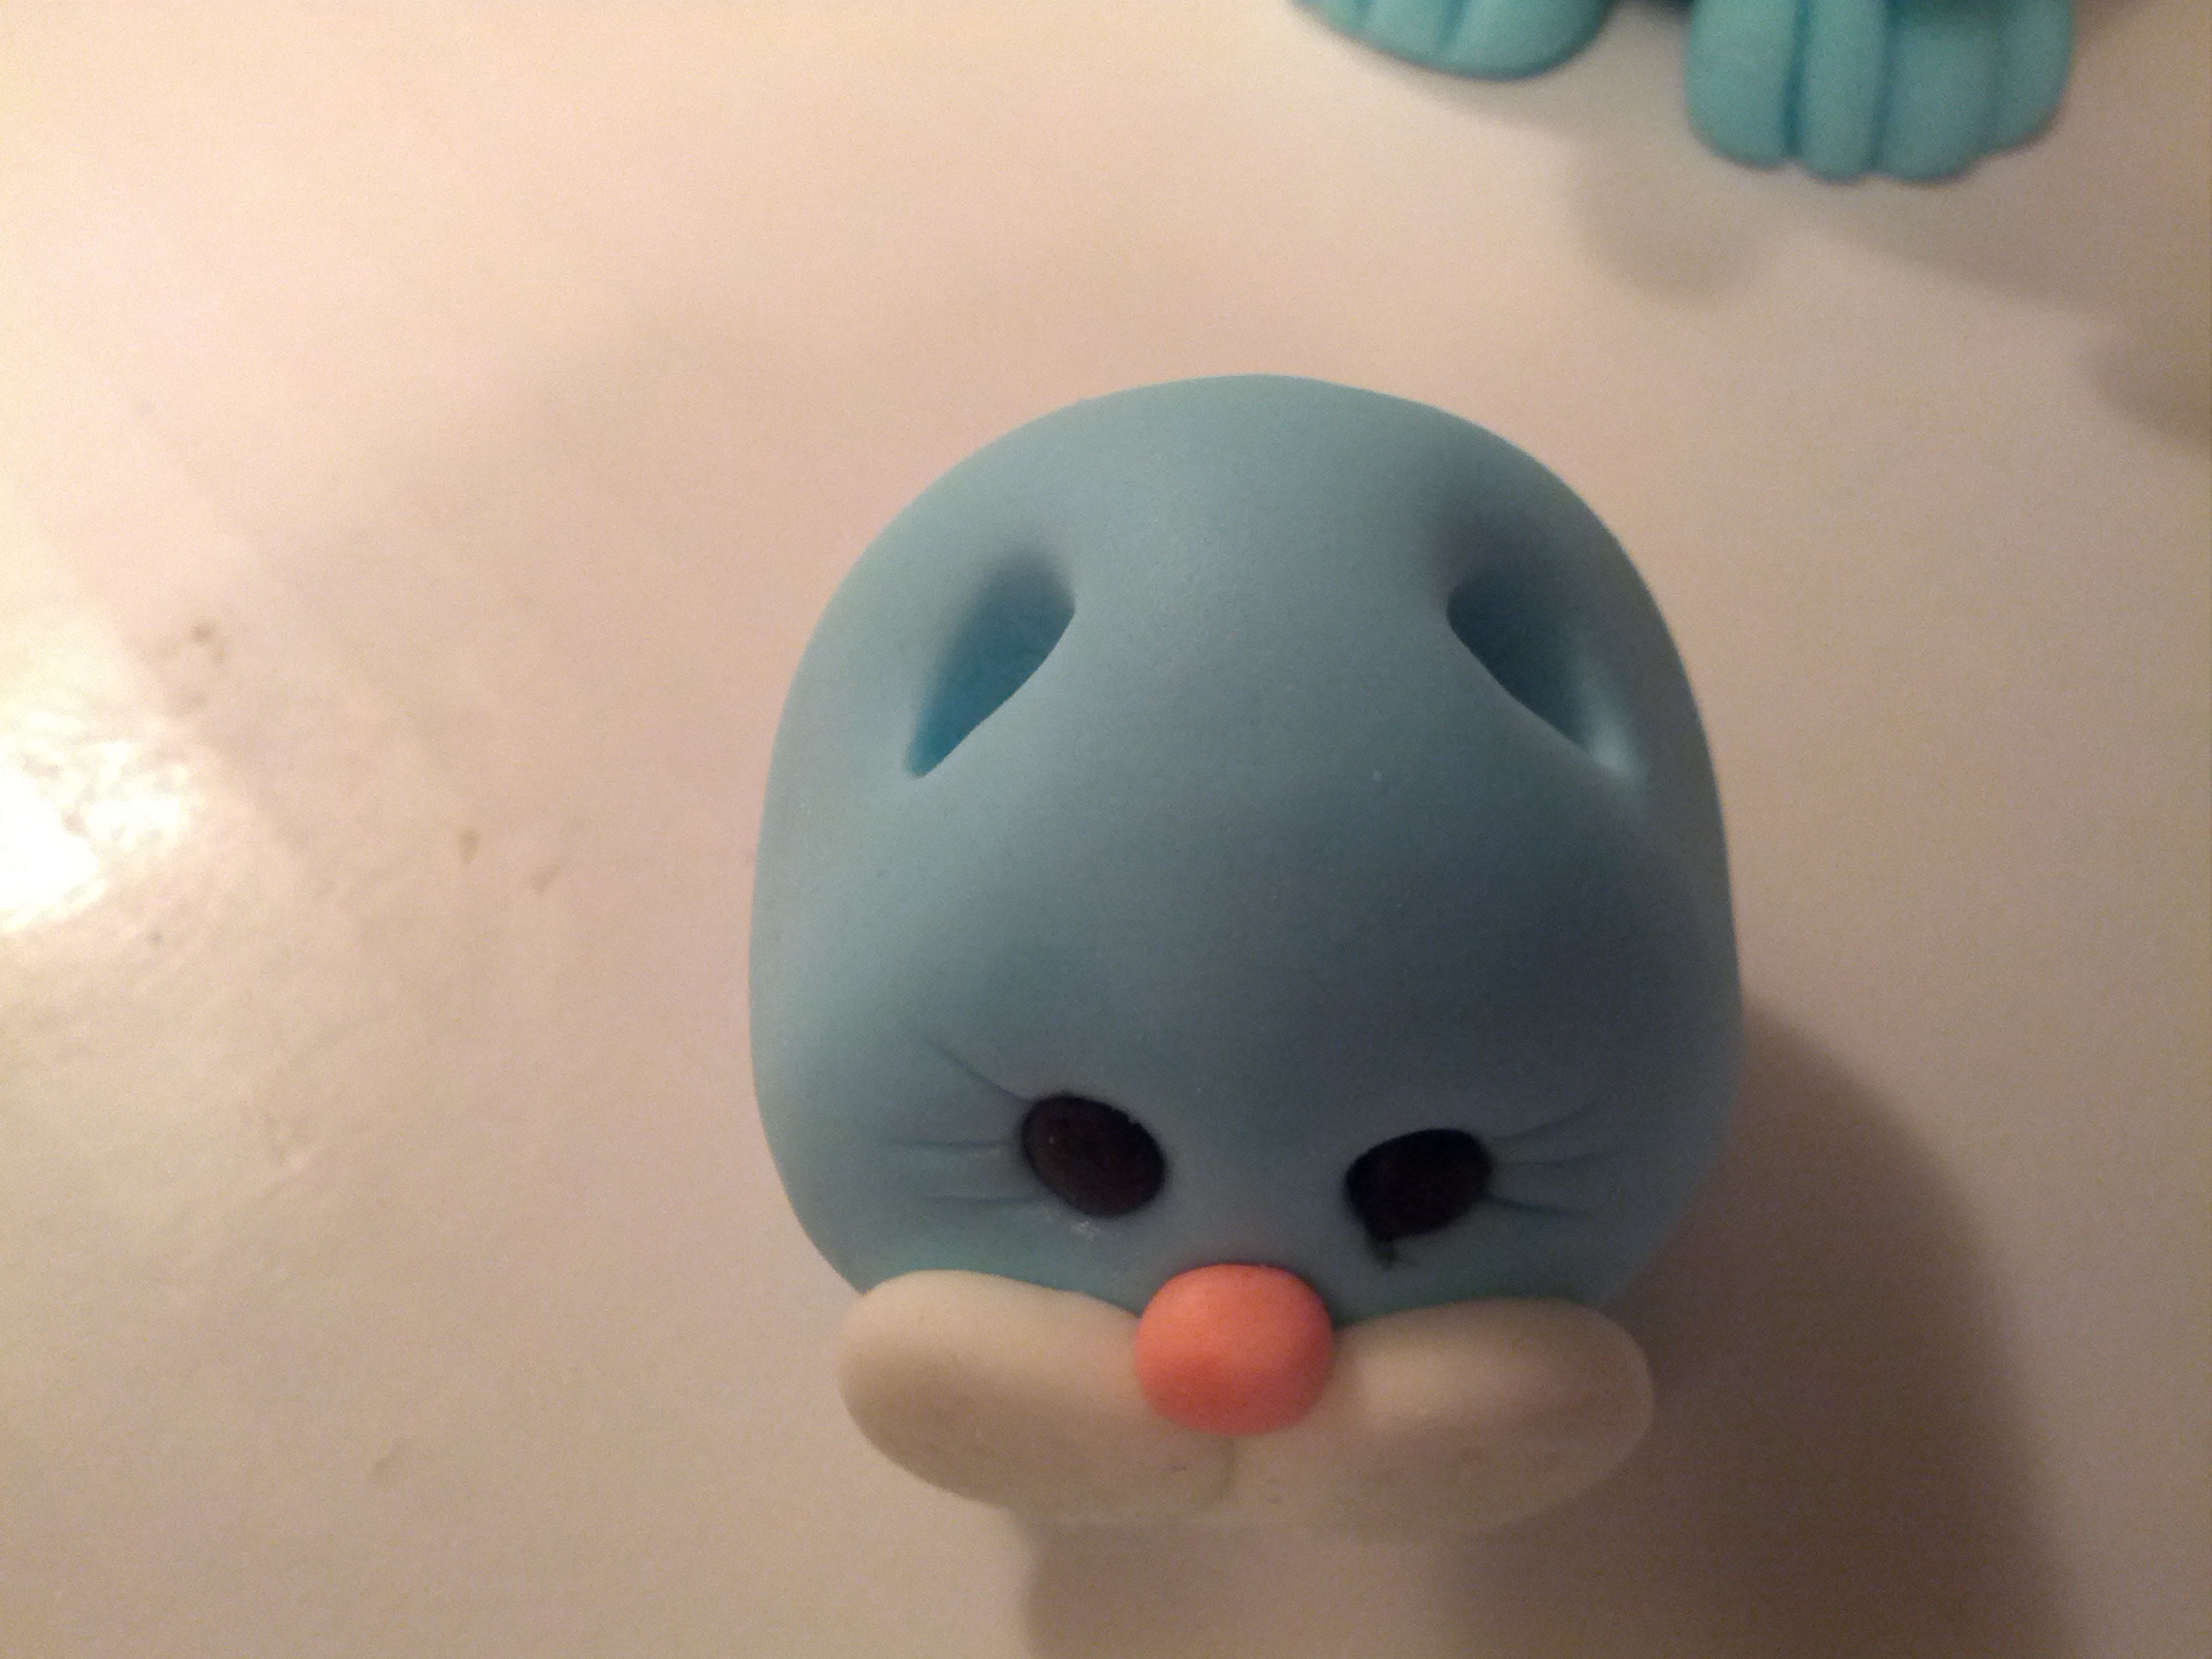
(7) Now that the body is complete, its time to make the head. Take the other large piece of fondant and shape into a triangle.
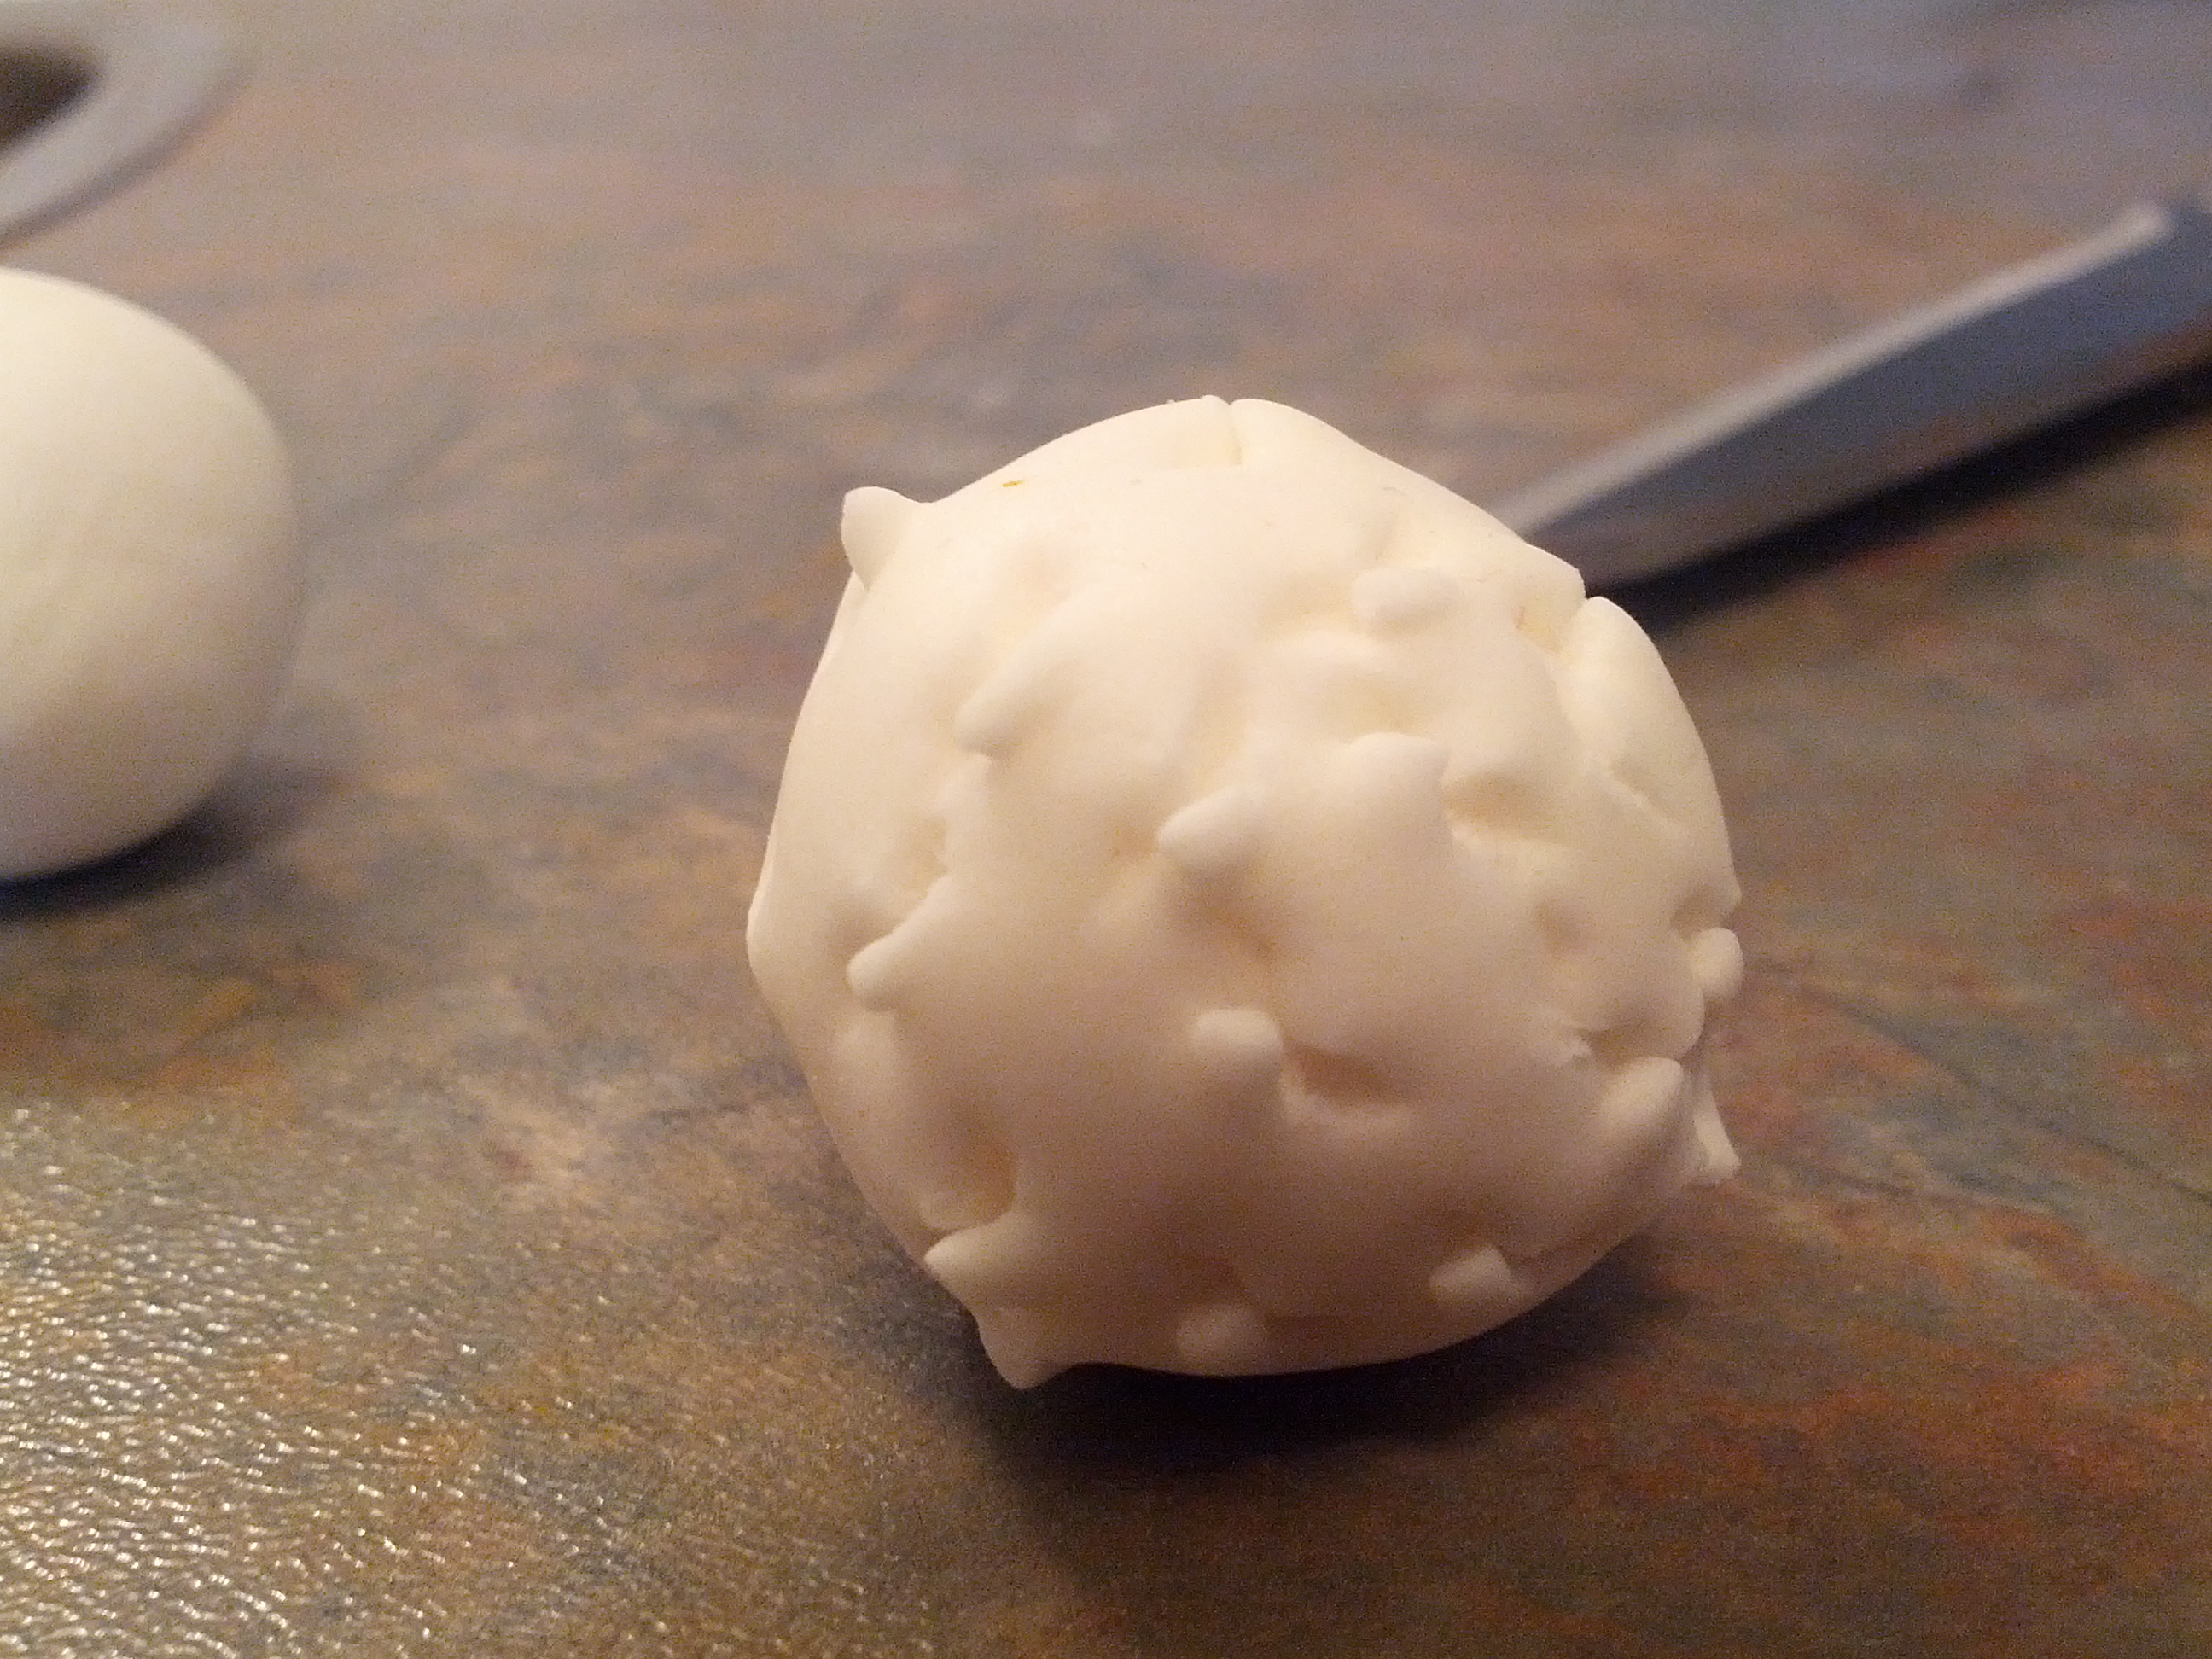
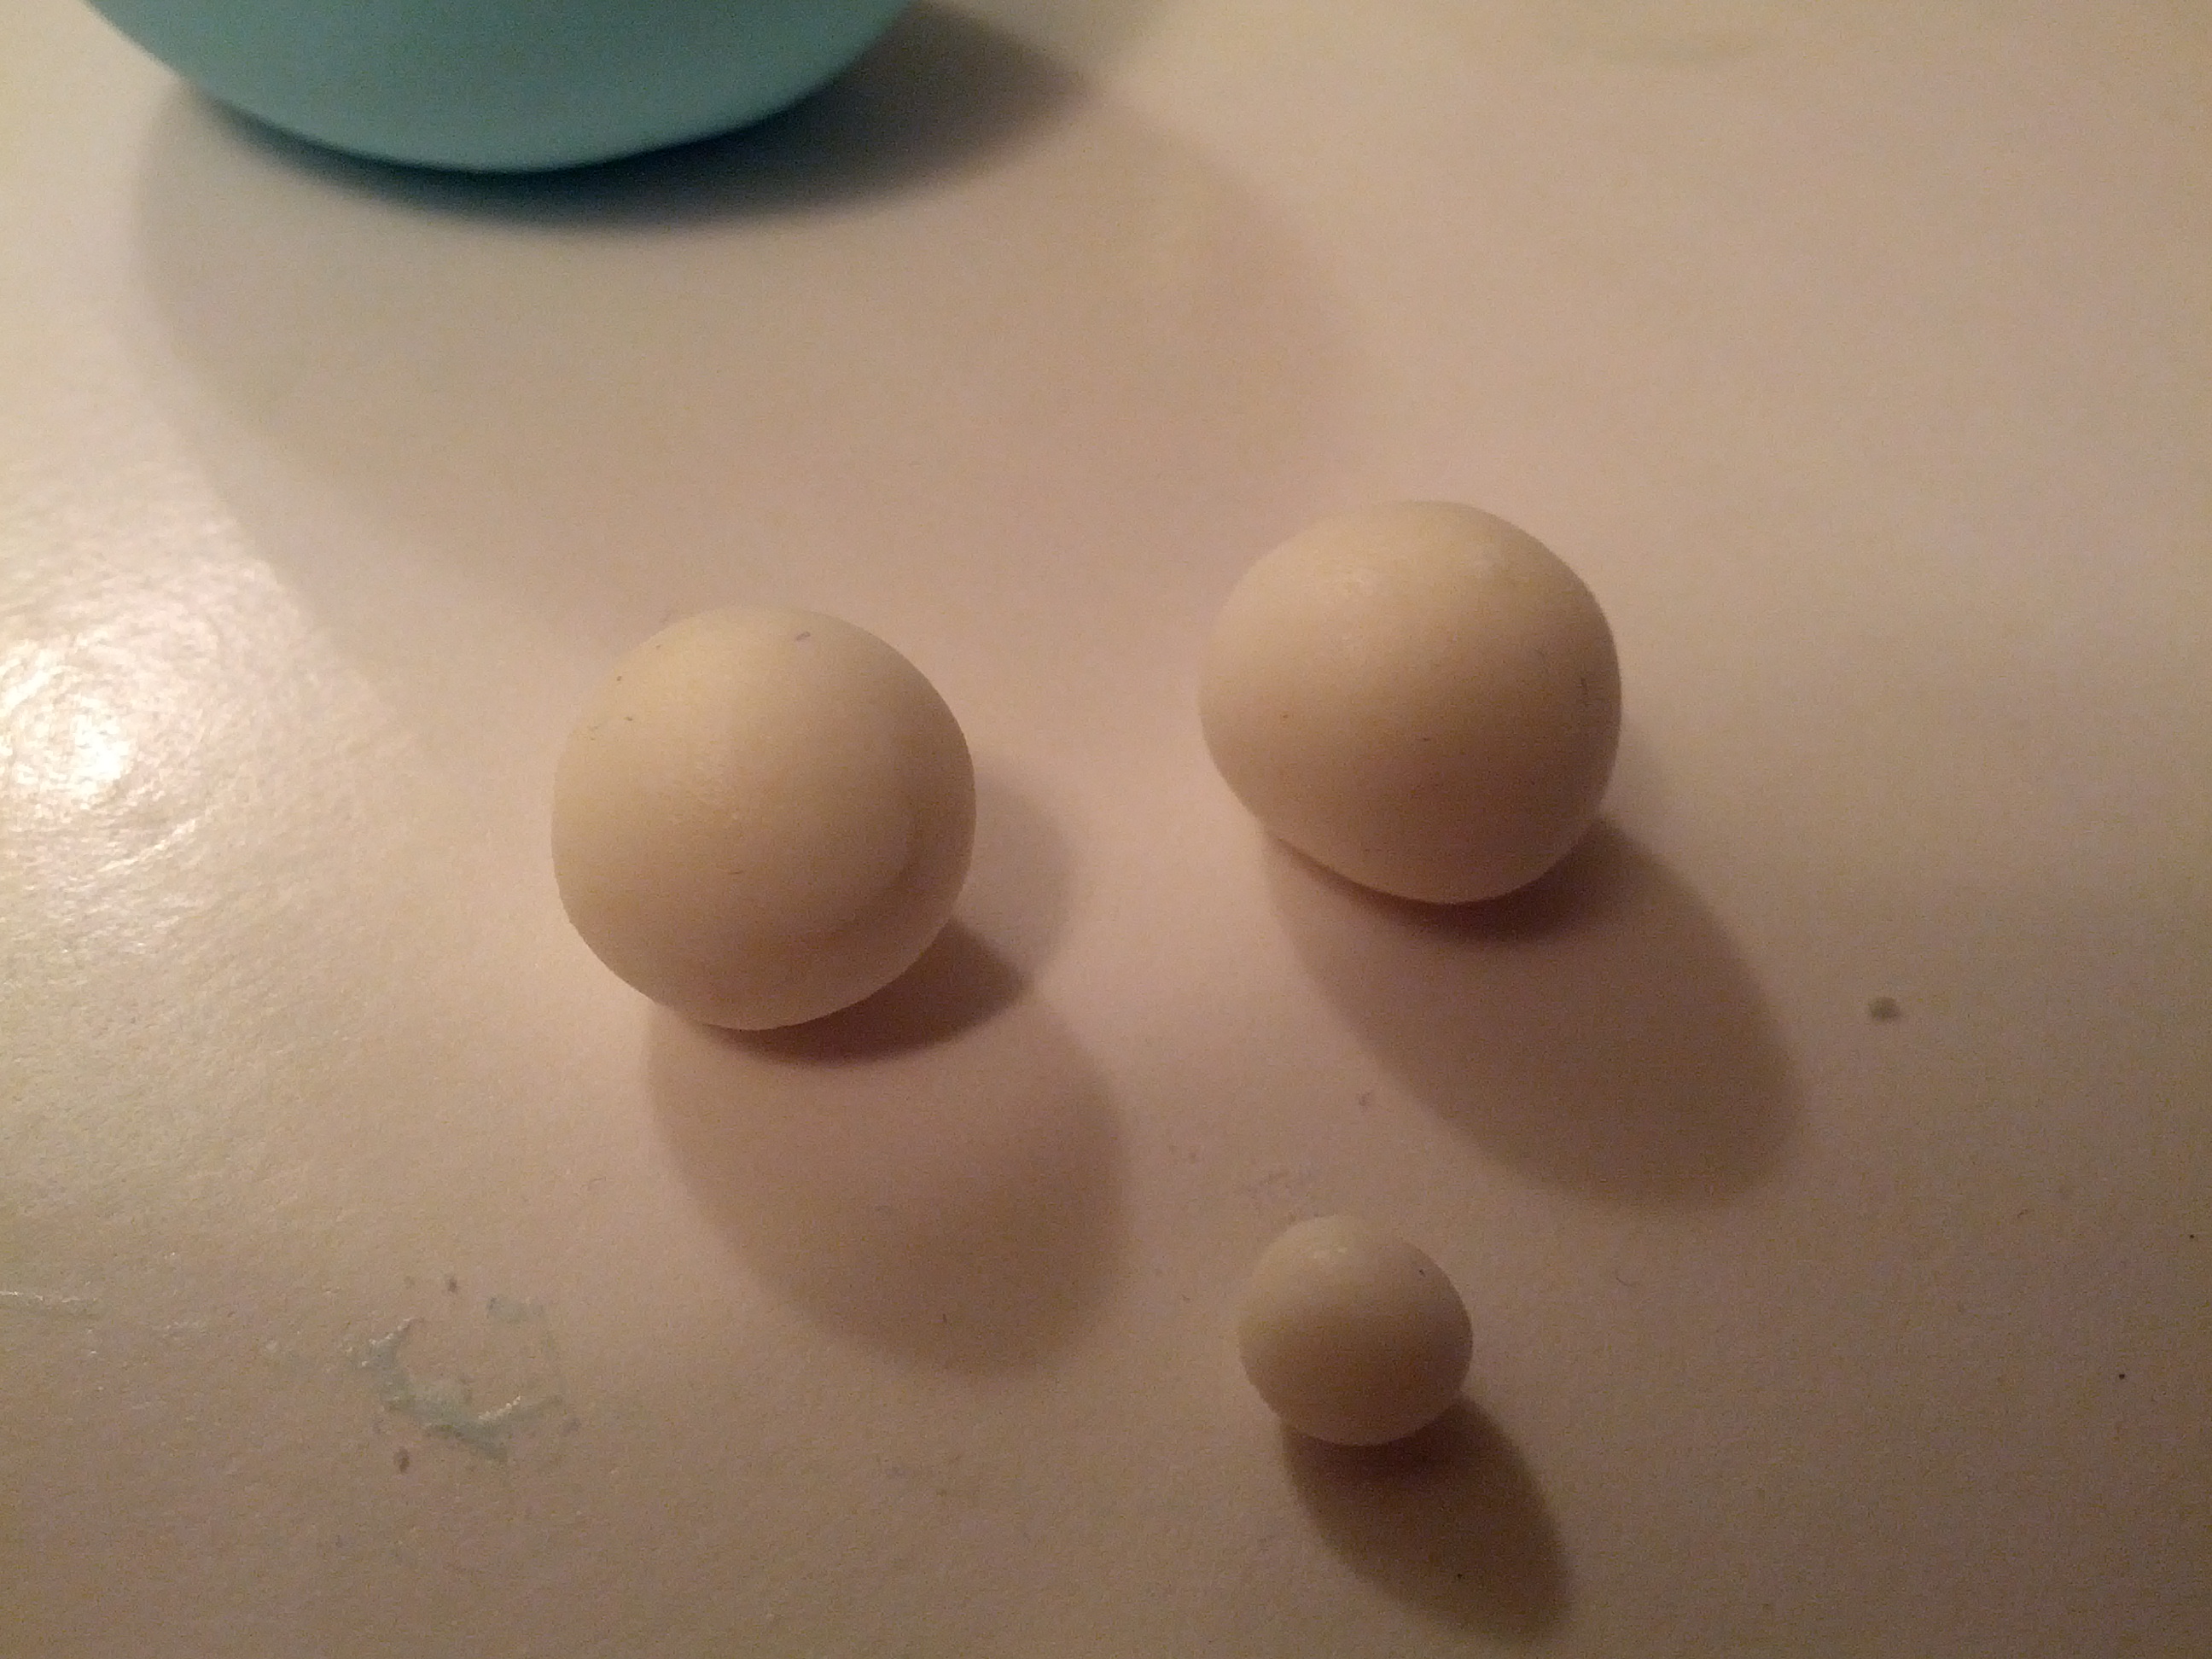
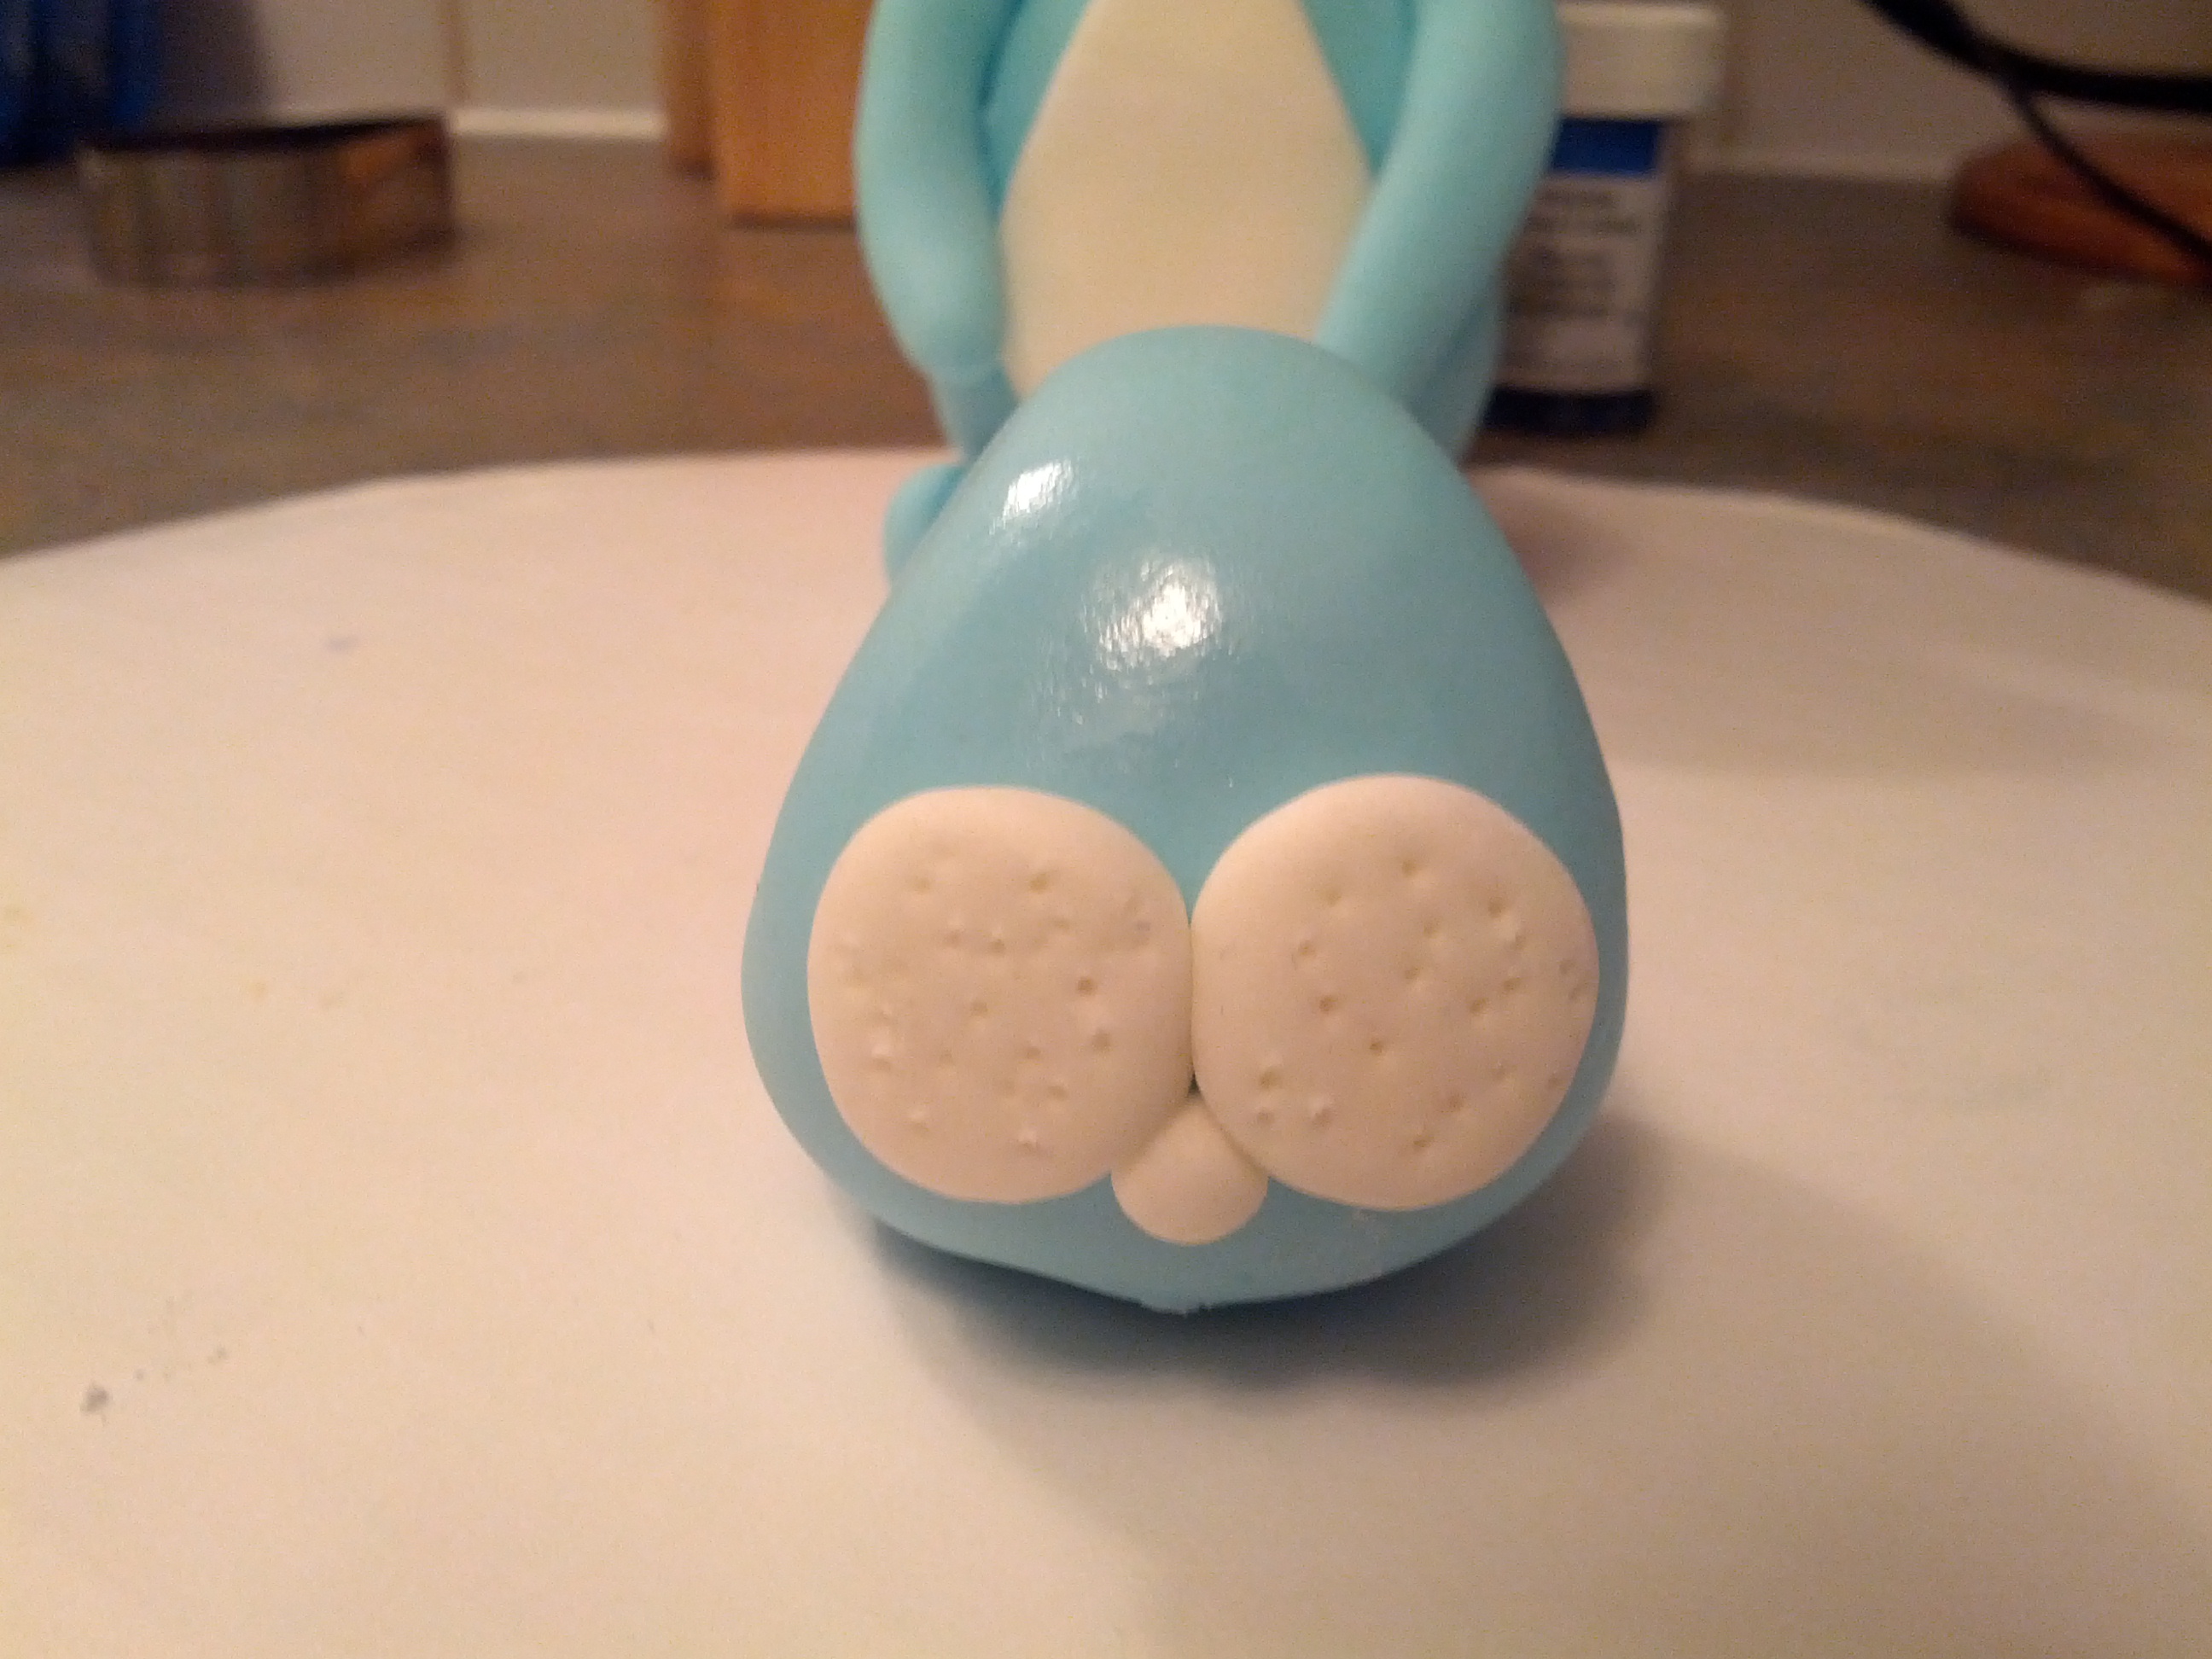
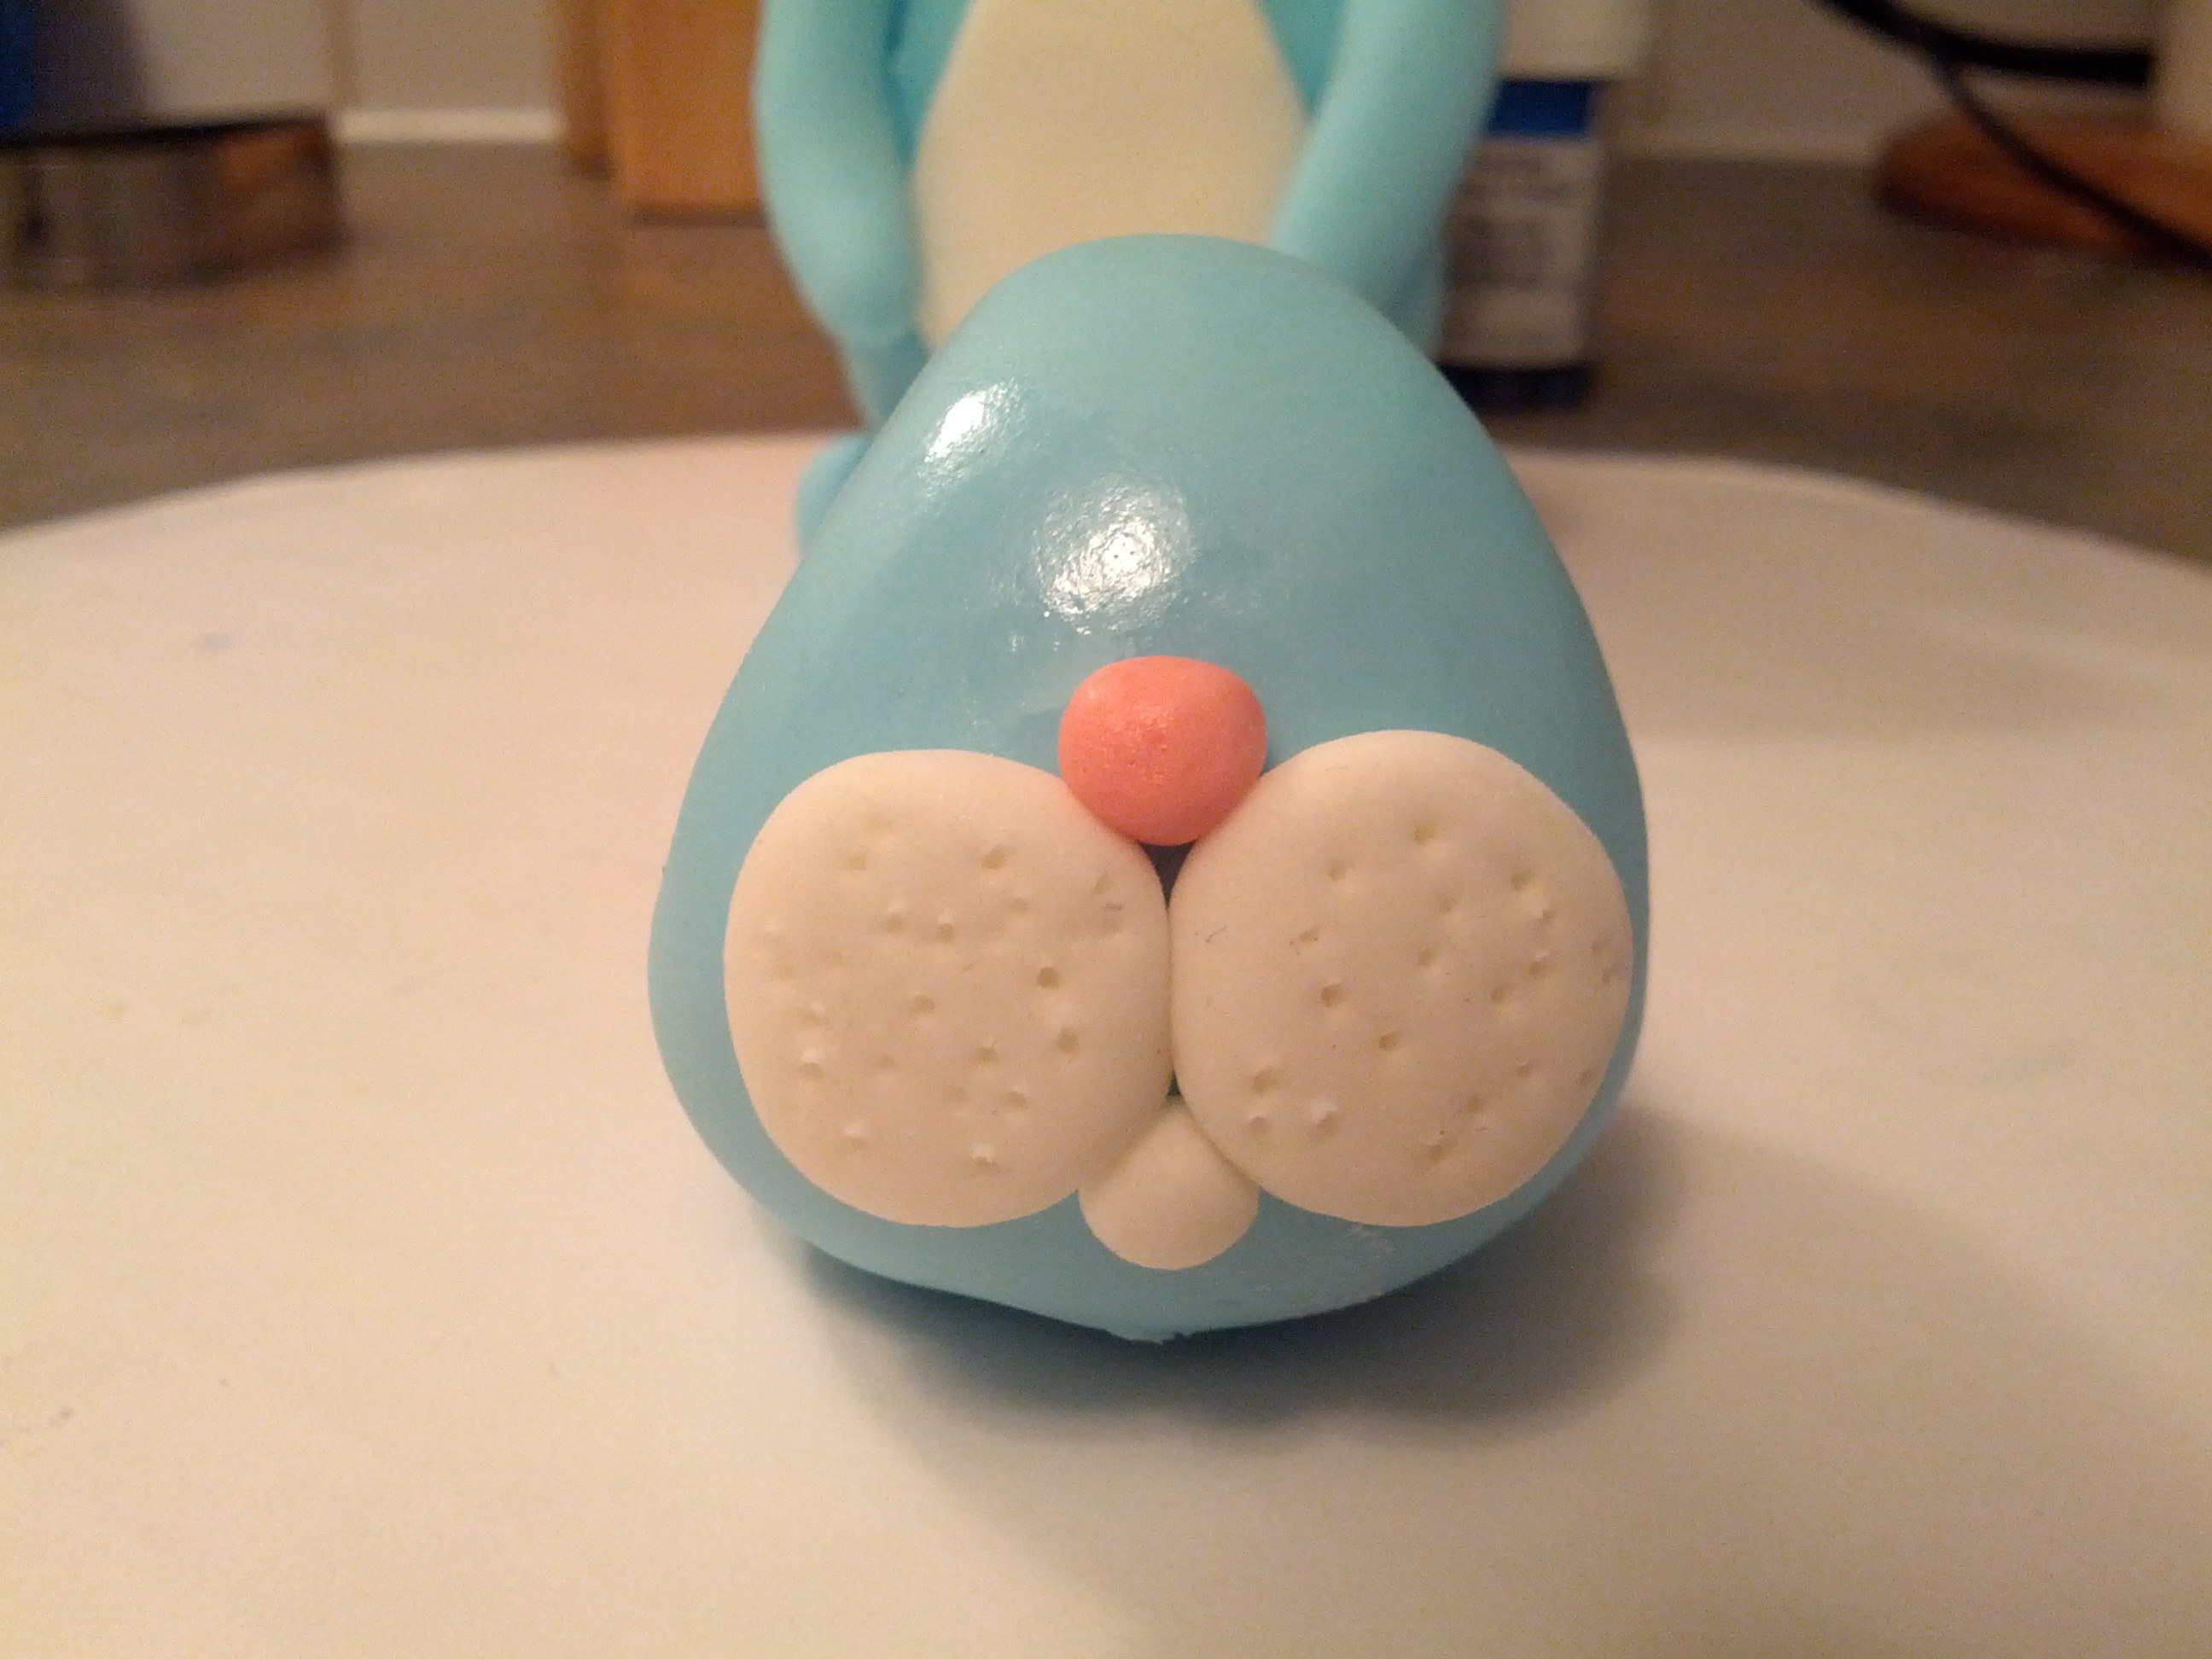
(8) Next, make 3 balls out of the white fondant, 2 bigger and one smaller. Flatten the bigger balls and stick to the bottom of the face. This will form the cheeks. Shape the smaller ball into a small triangle and stick in the space between the cheeks to form the lower lip. Make some holes on both cheeks using a toothpick.
(9) Next, take a tiny piece of pink colored fondant, roll into a ball and make the nose.
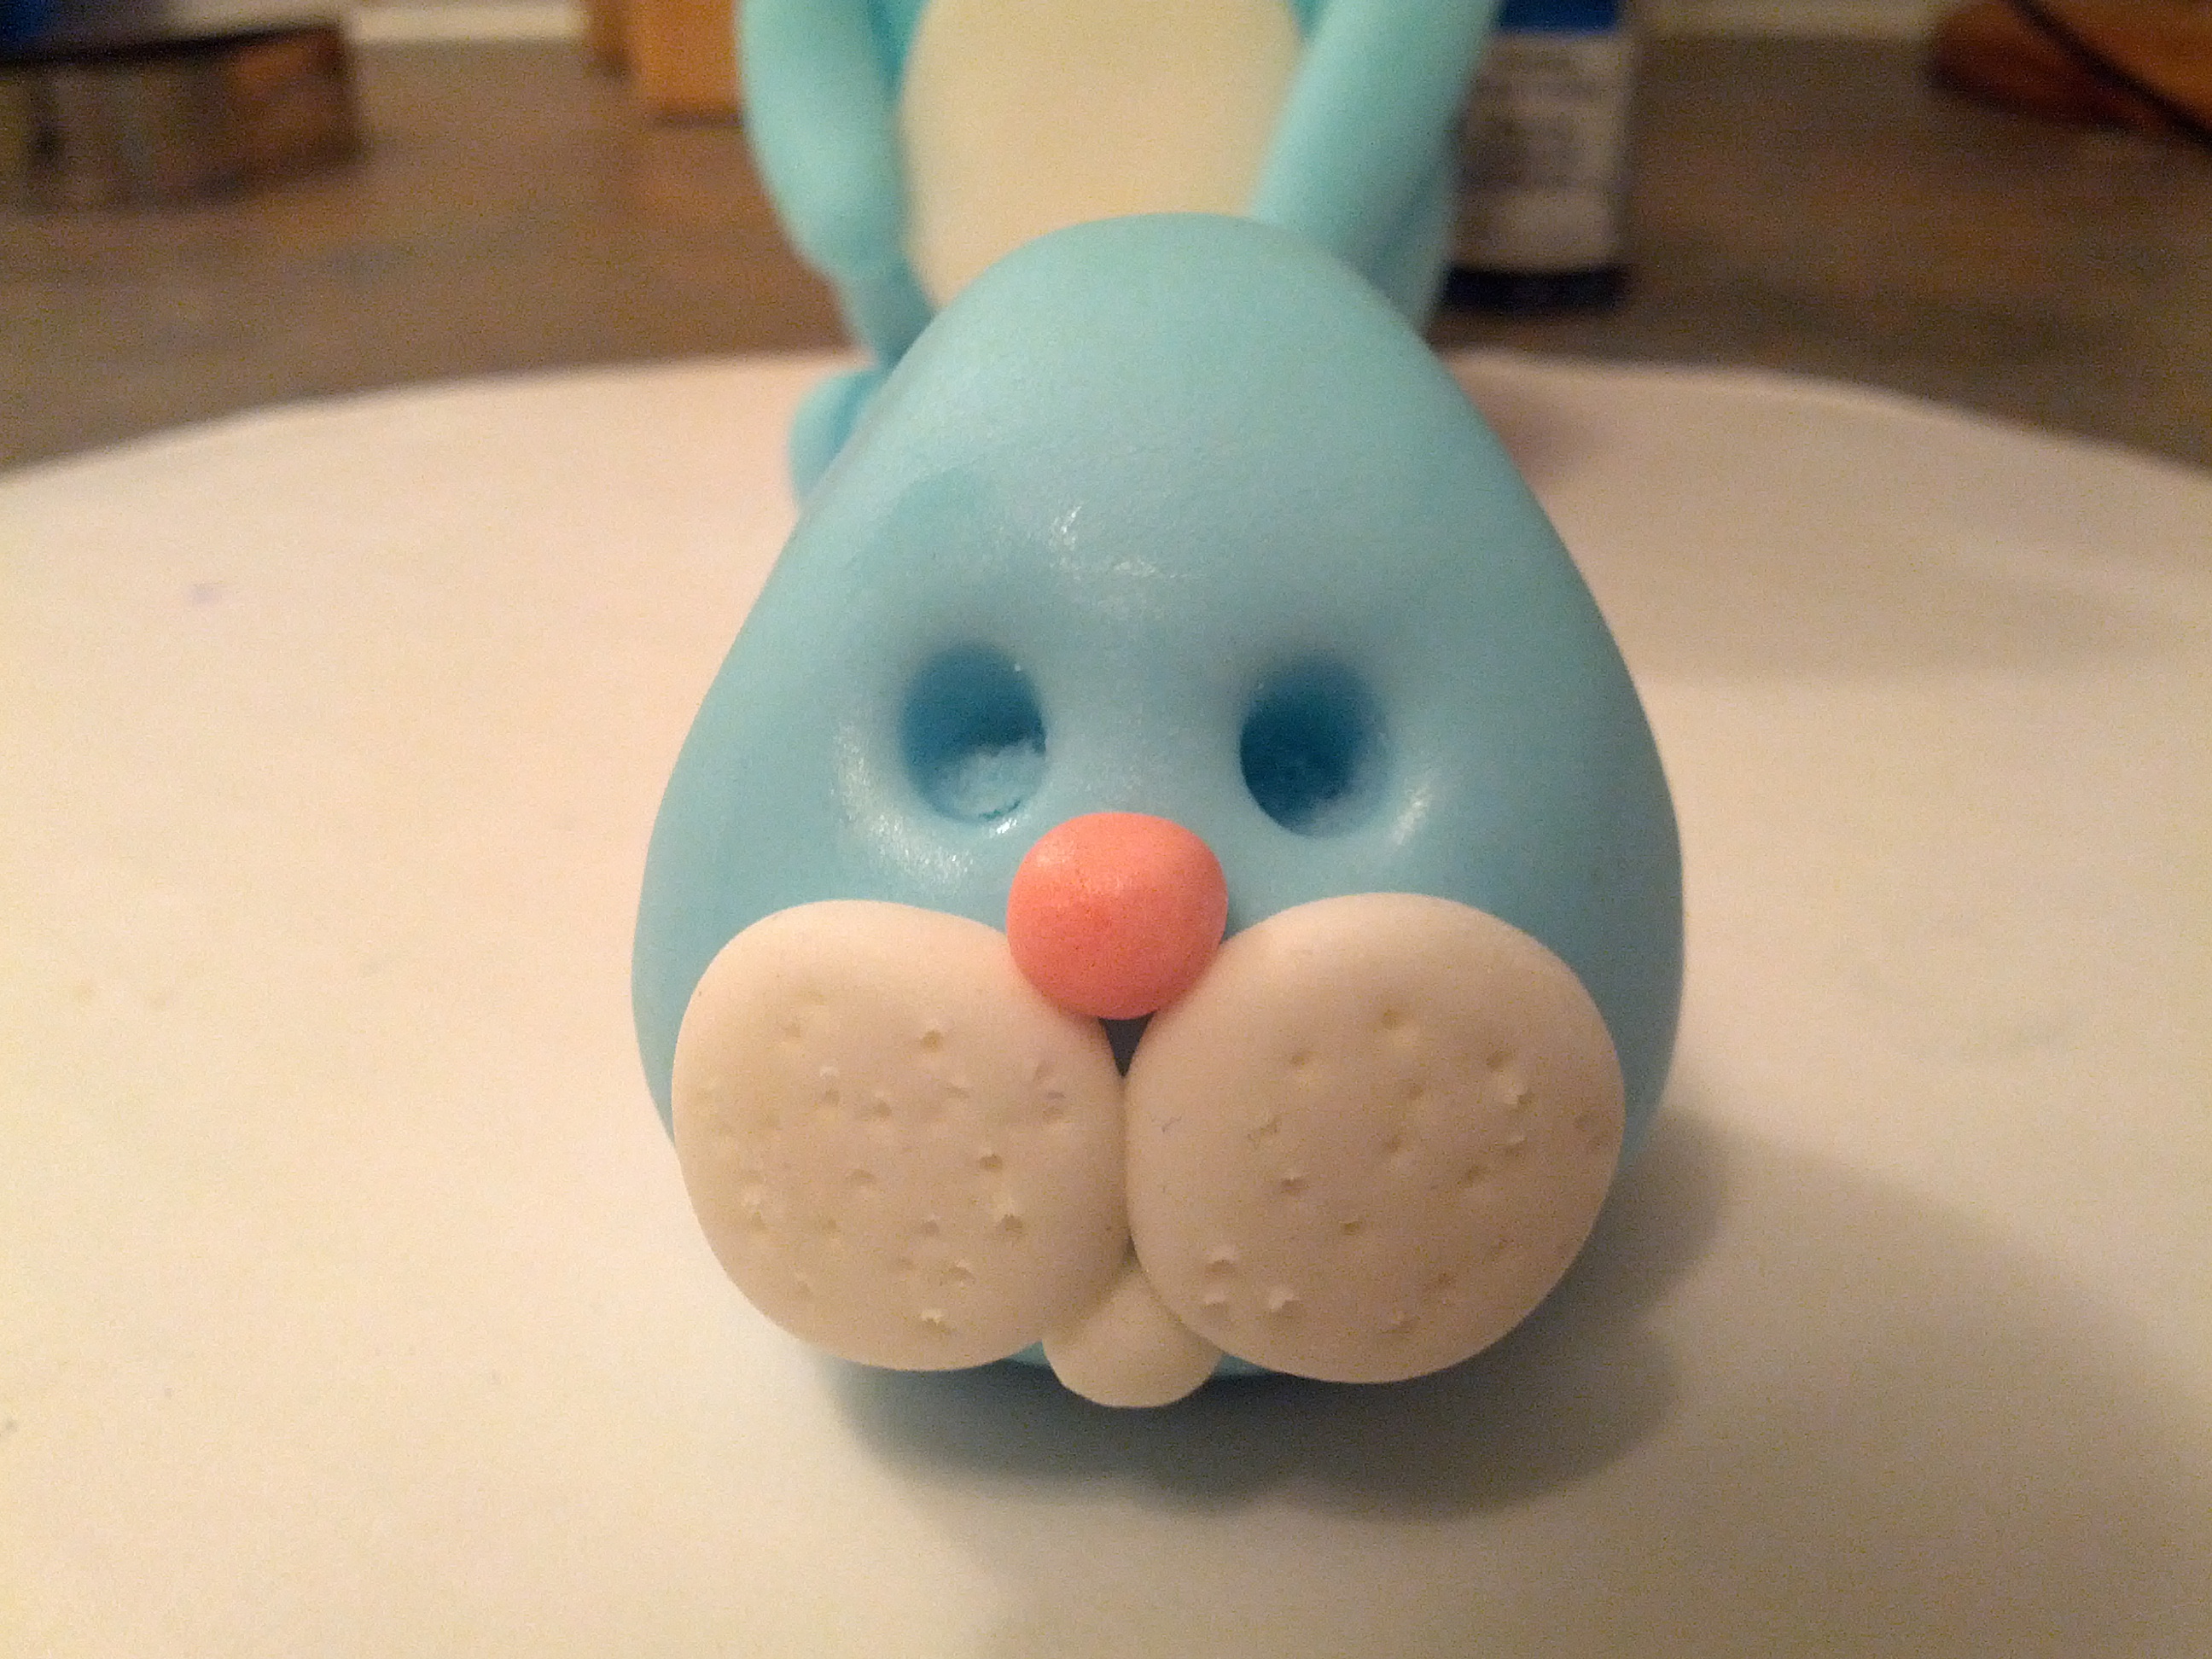
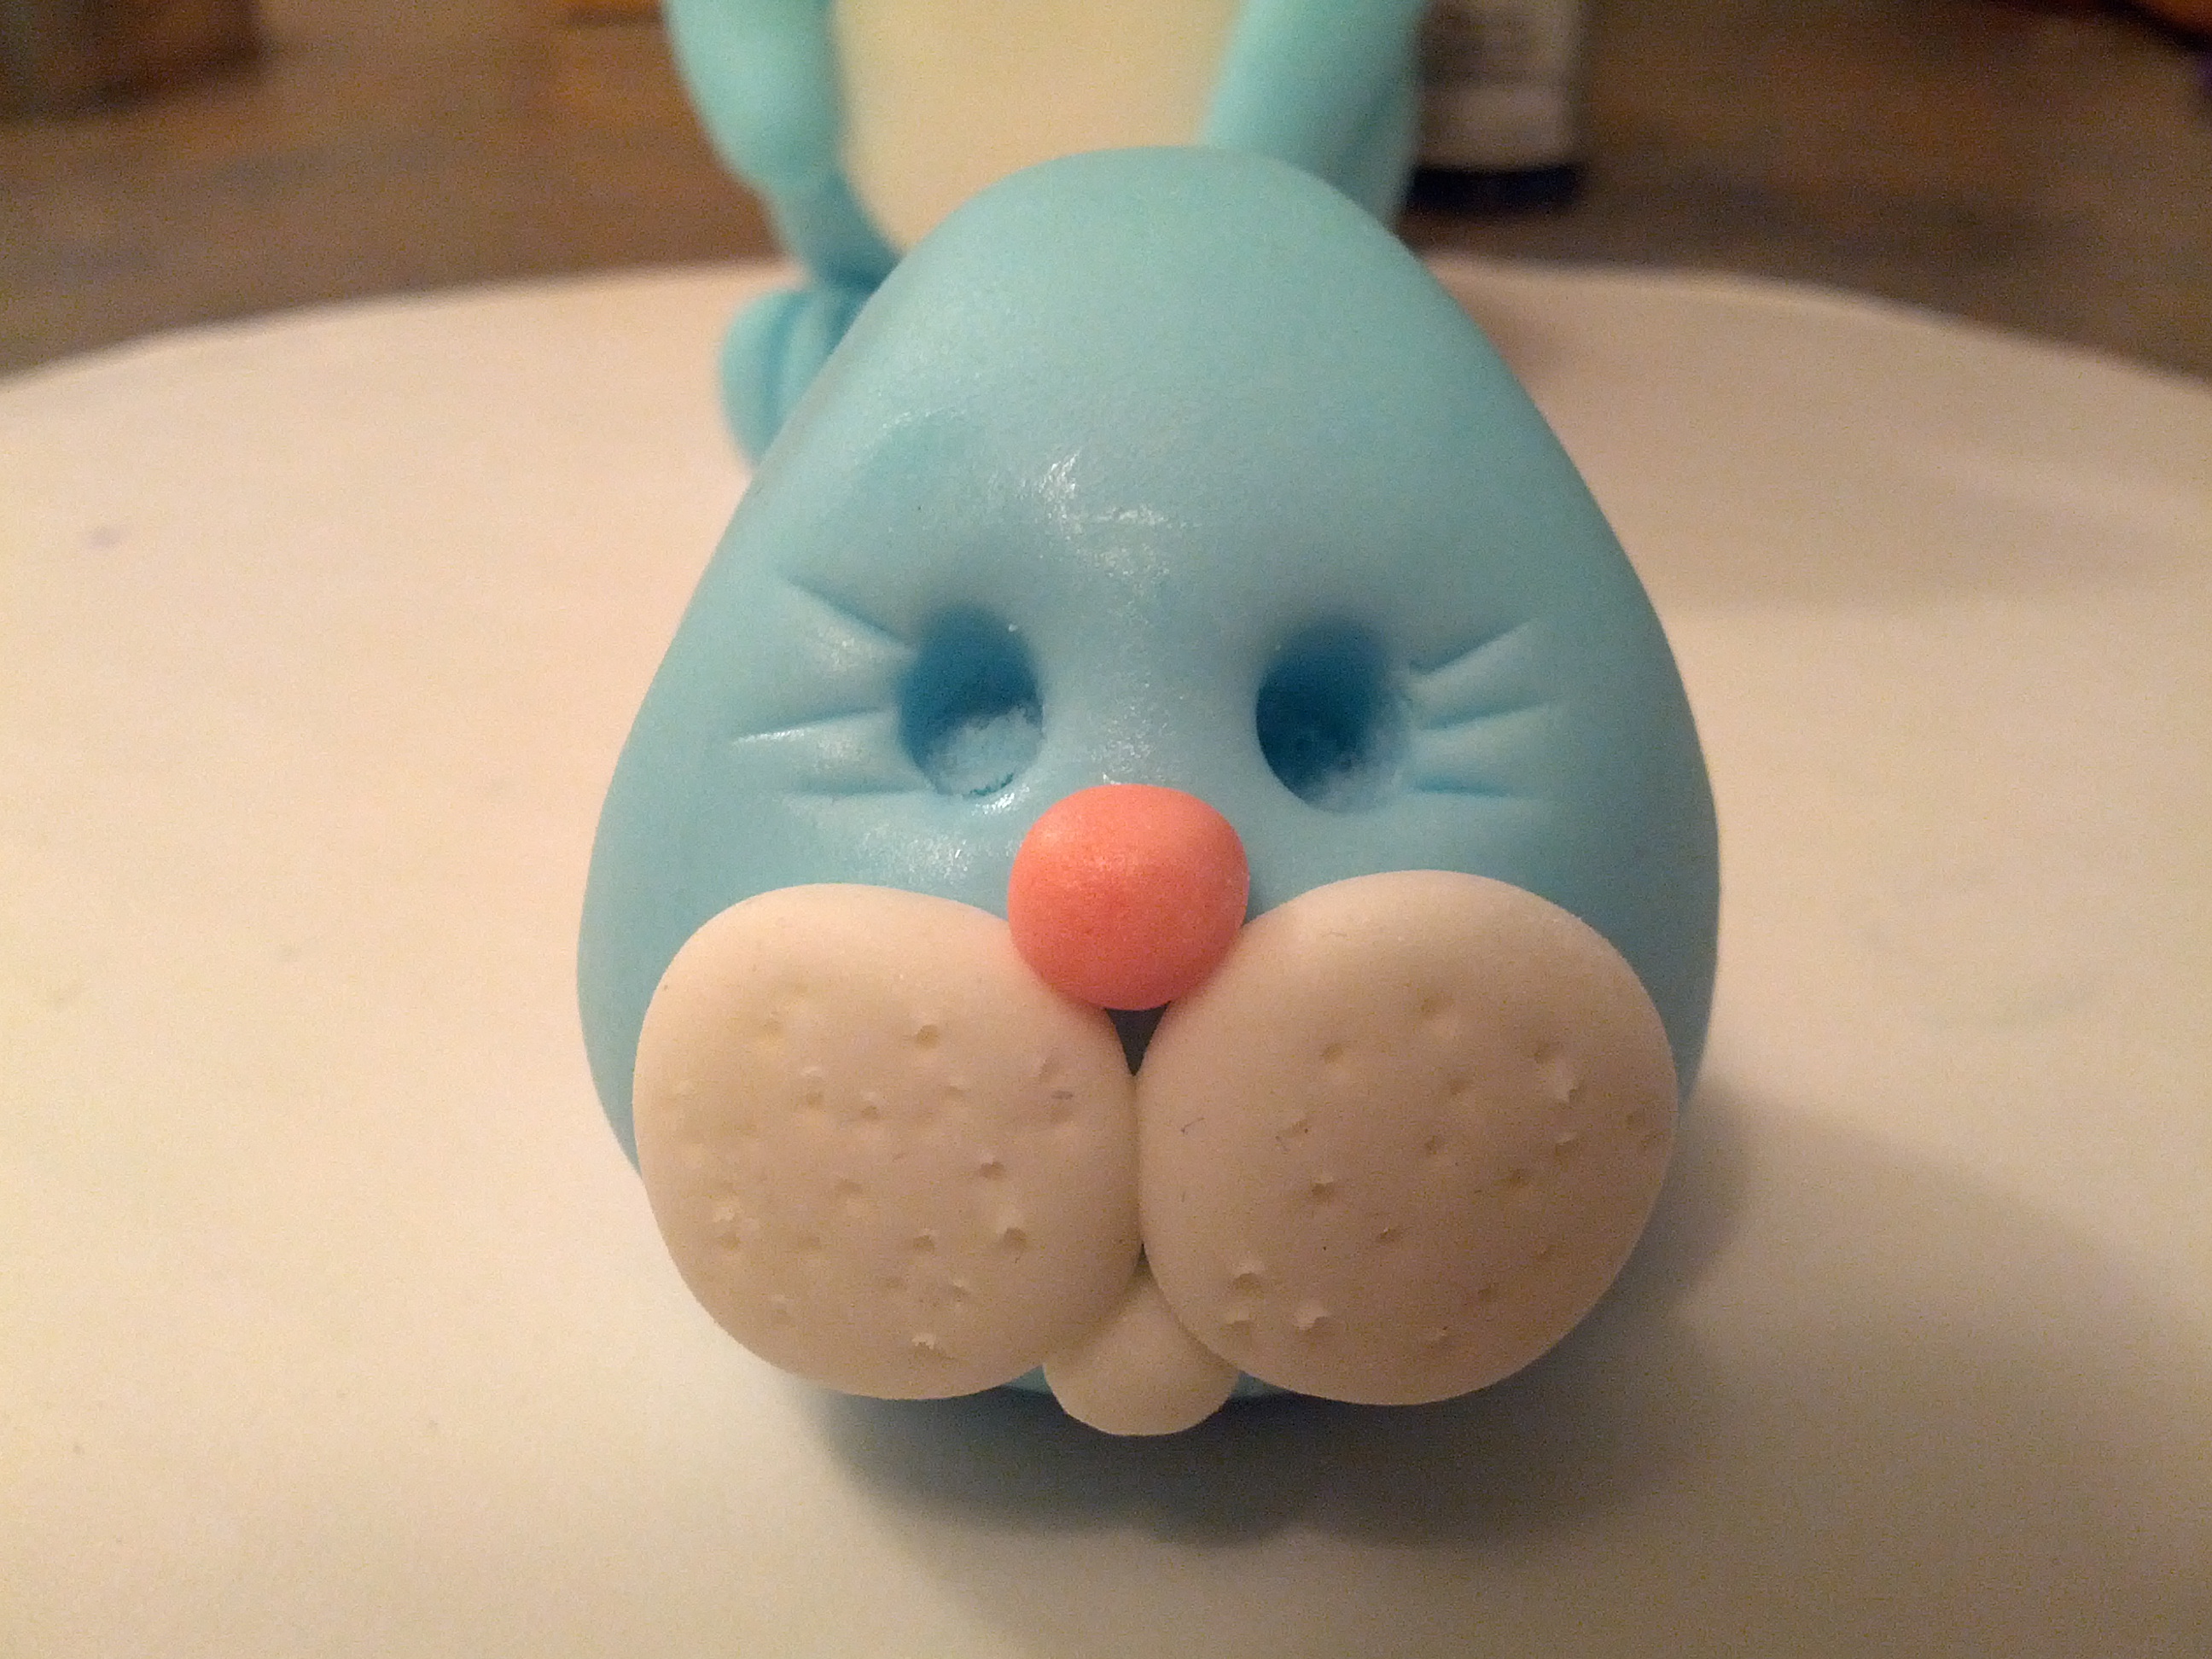
(10) Next, make the eyes. Using the end of a paint brush, make 2 holes in the head where the eyes would be. Use a knife or any tool to make dents on the sides of the eye sockets. Roll out 2 small black pieces of fondant into balls. Brush the holes with a little water and poke the eyes into the sockets.

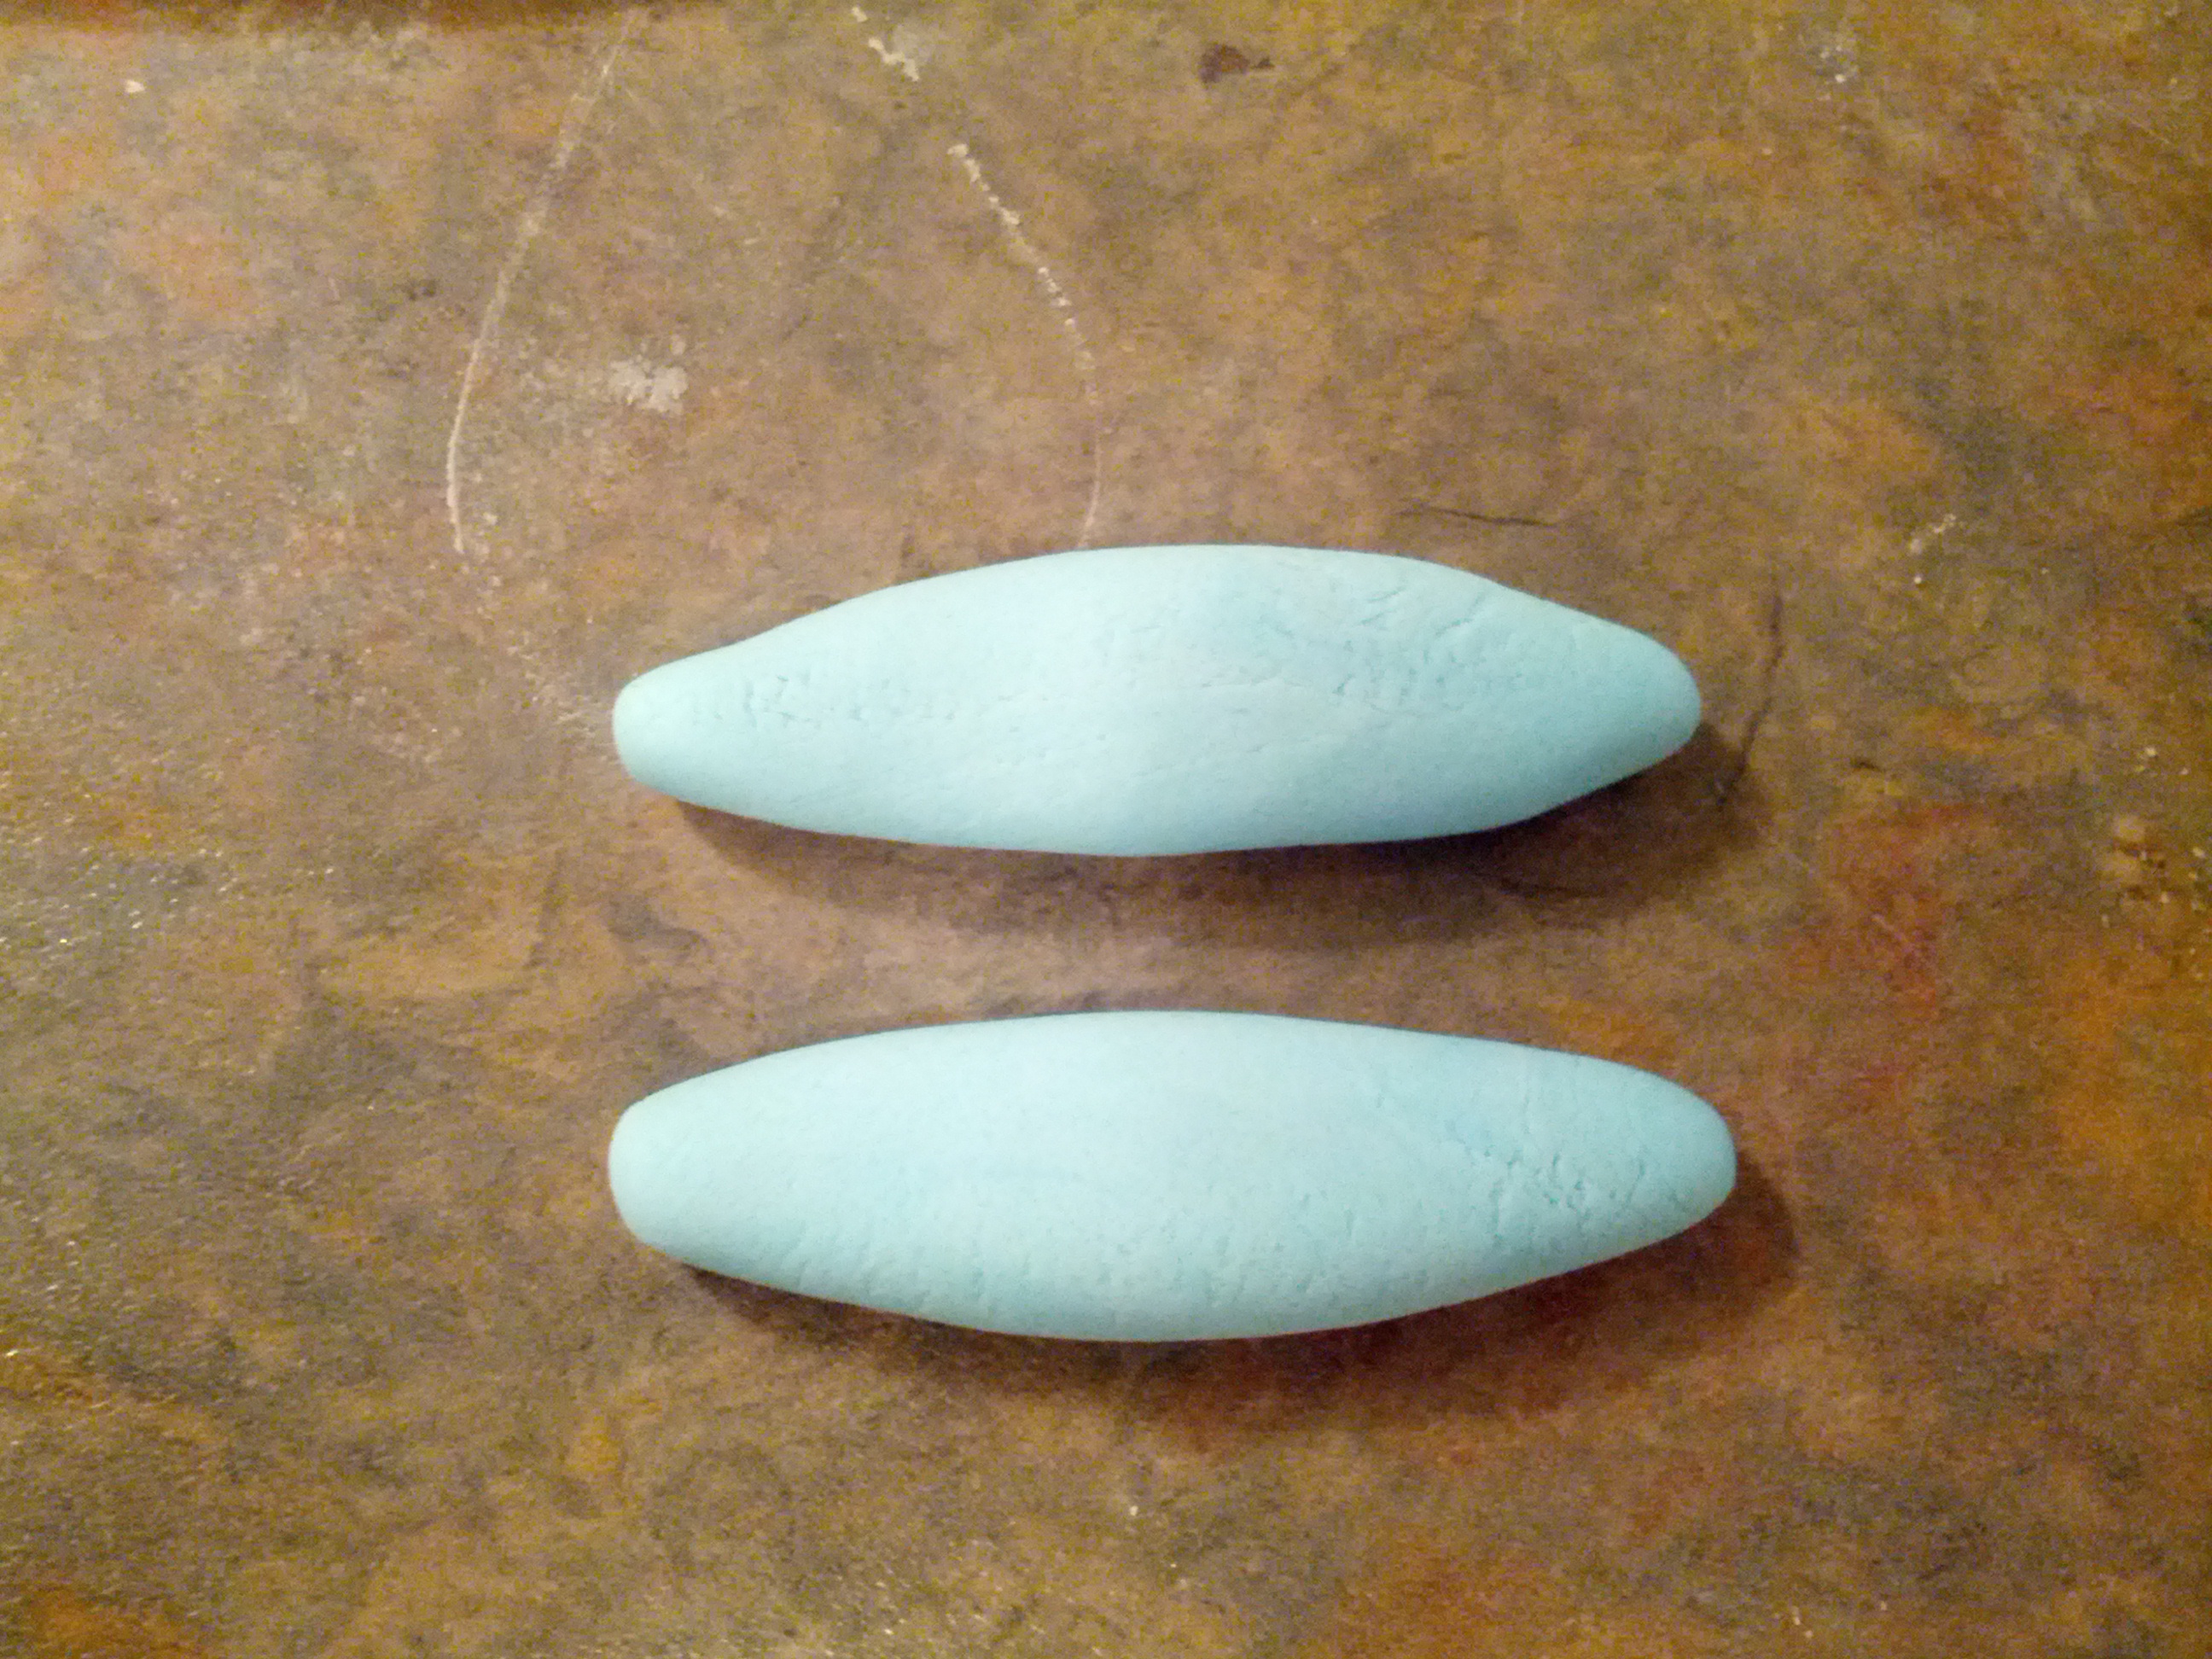
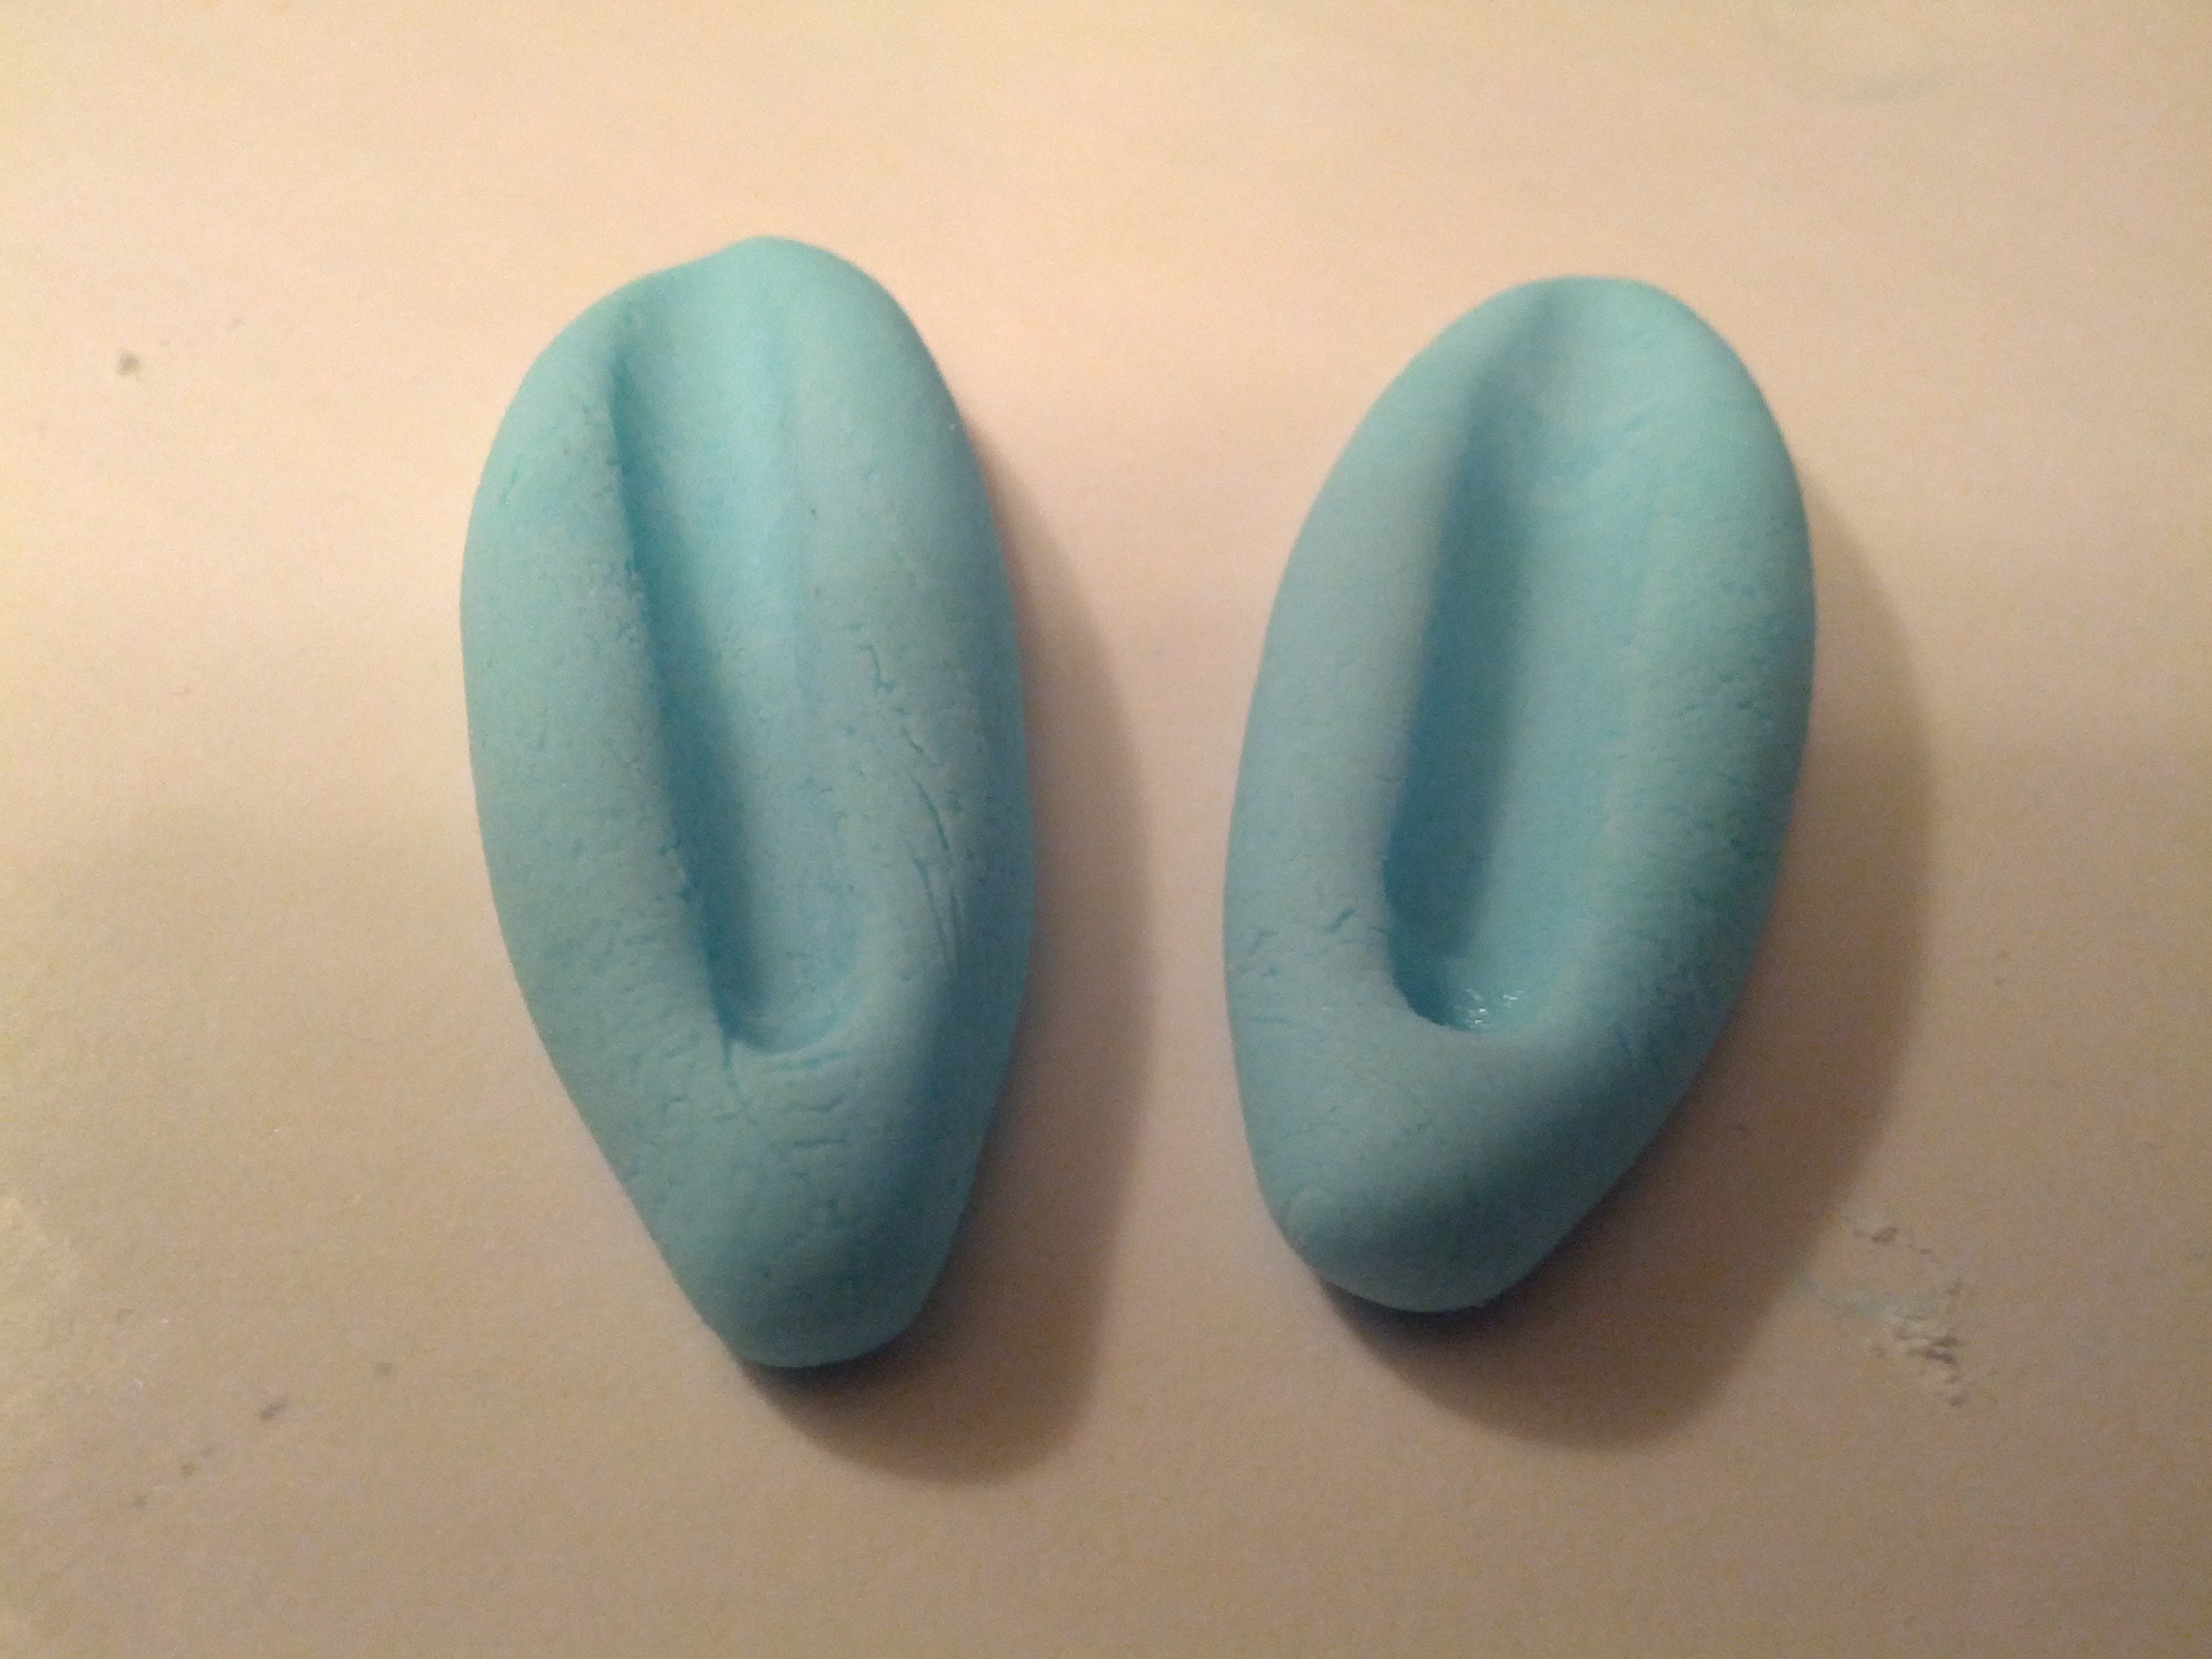
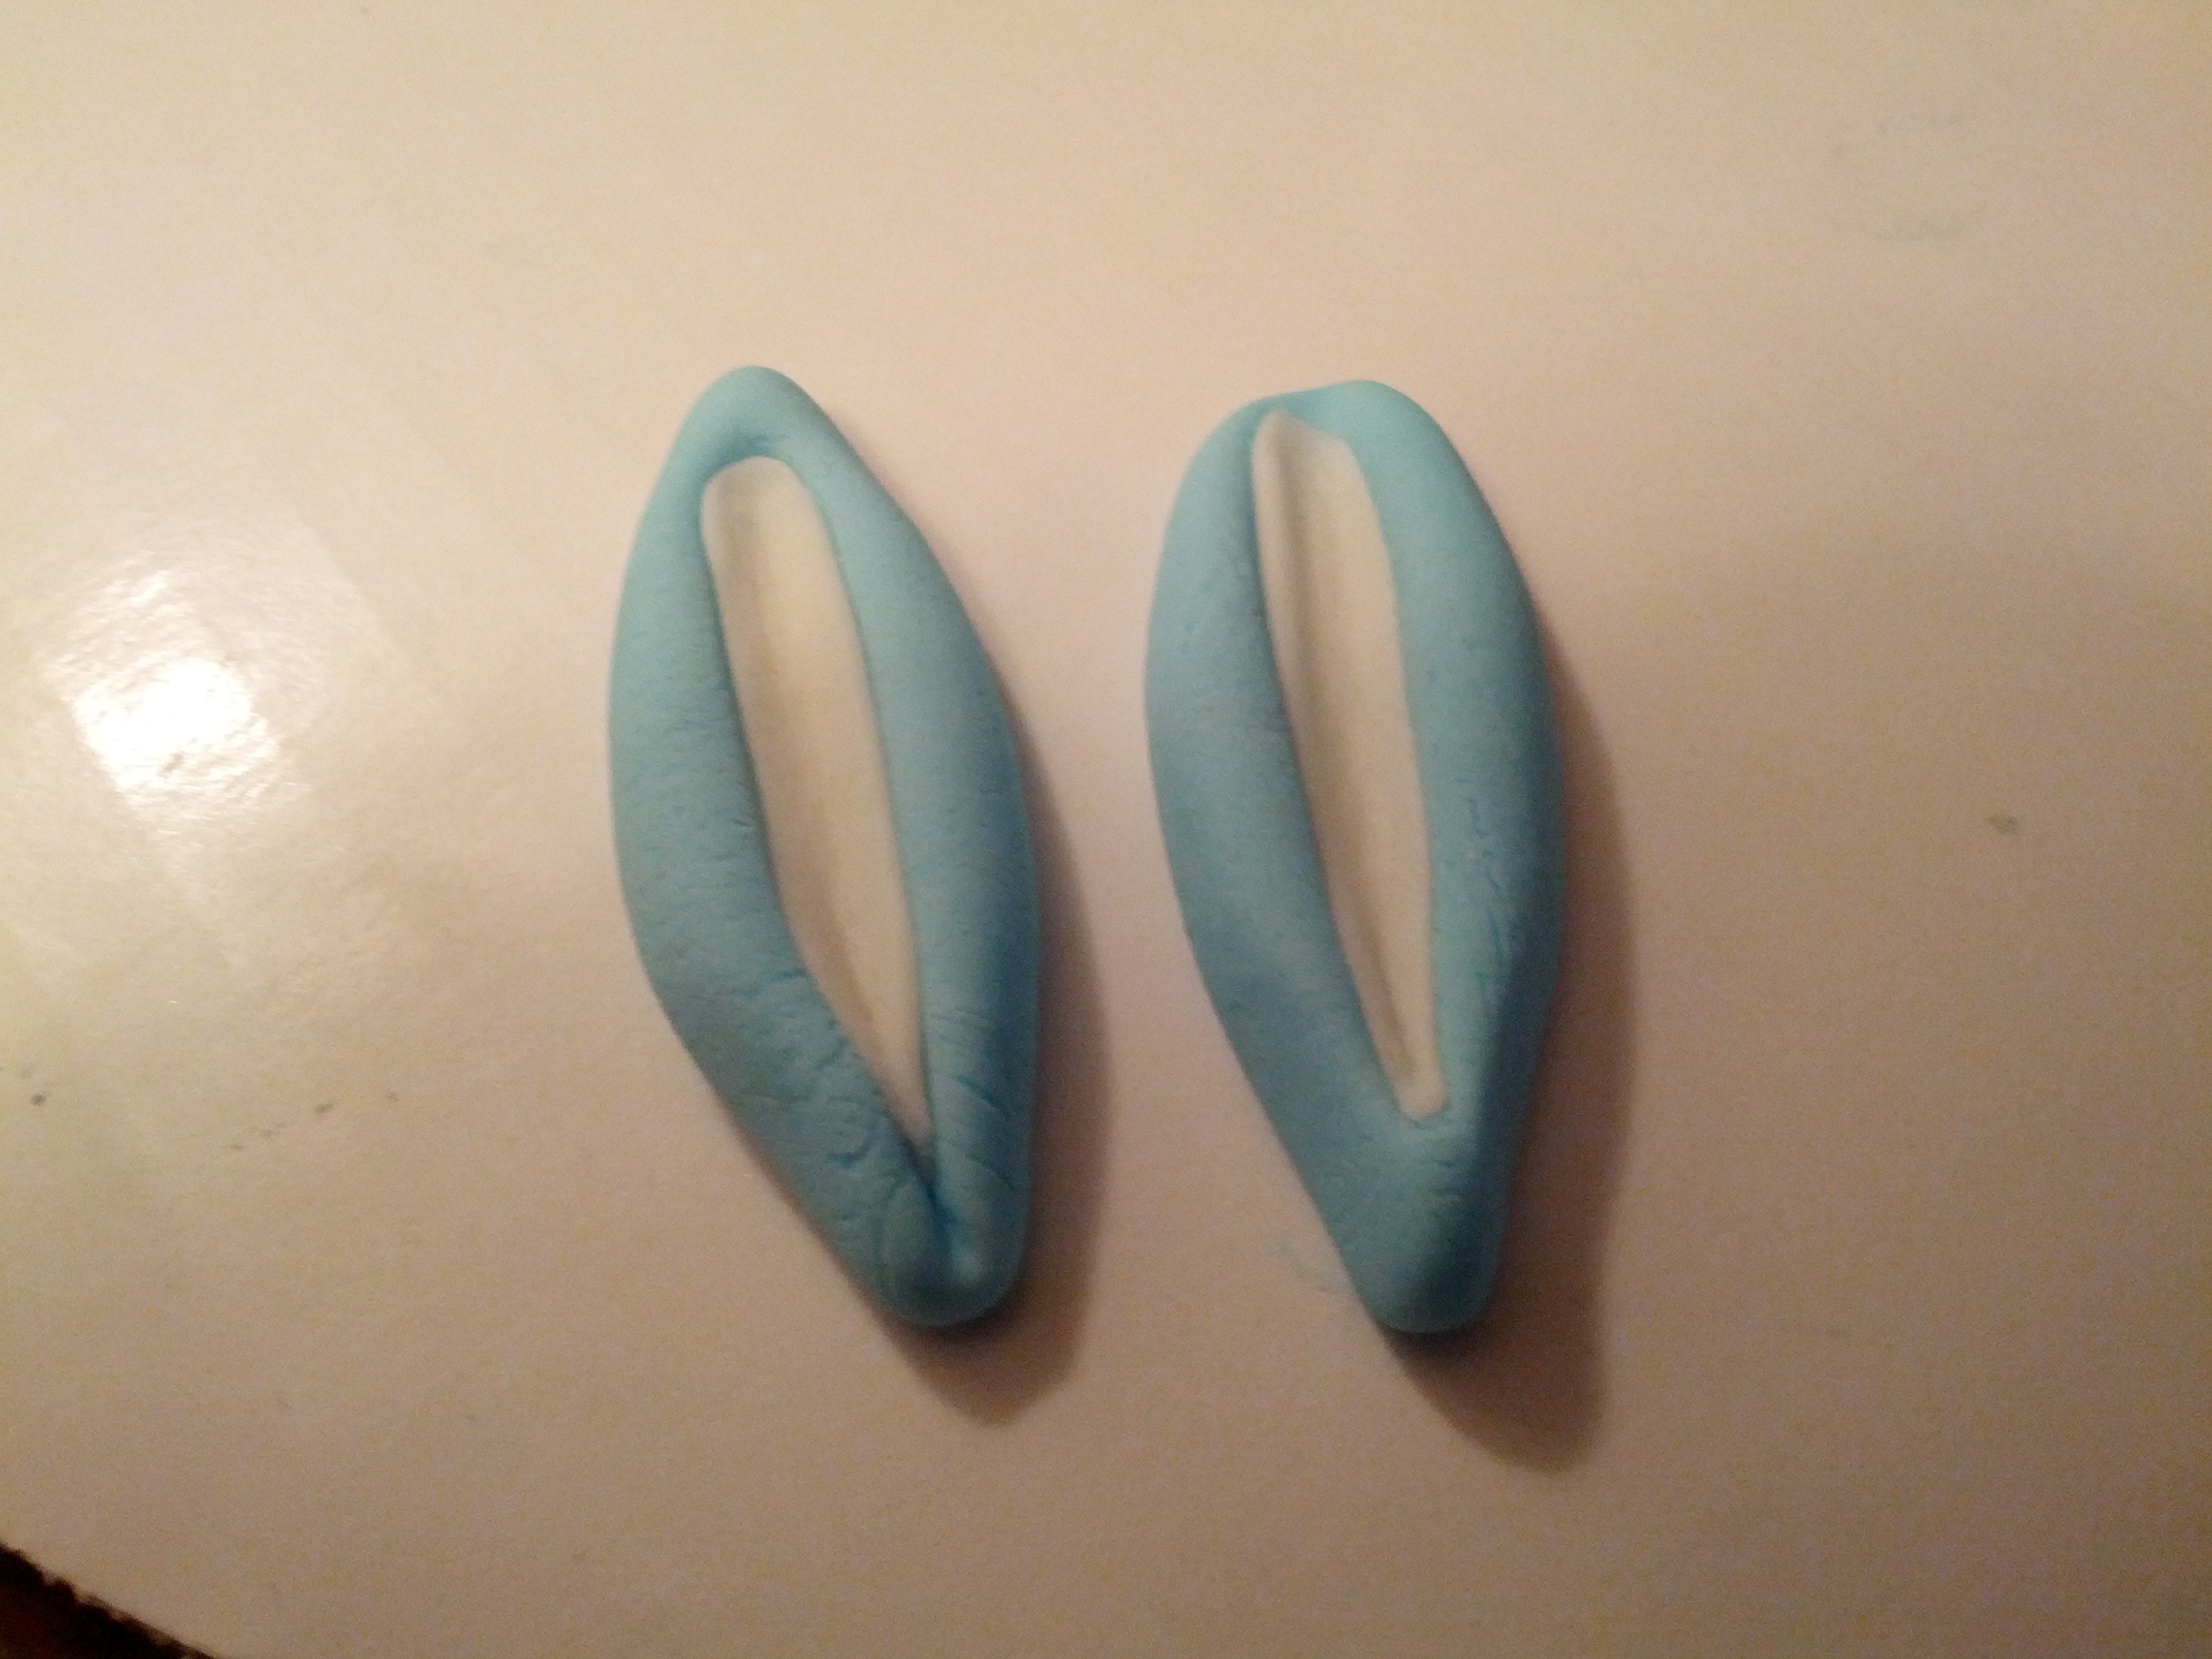
(11) Finally make the ears. Take the last 2 pieces of fondant and roll into fat logs with pointed ends. Use the body of a paint brush to make indentations on each ear. Roll out the other colored fondant into thin strings. Place these strings in the ears and flatten with the body of a paint brush. Make holes by the sides of the head and inset the end the ears inside the holes. You can fold the ears to give the bonny character. Use some tools to support the ears for some minutes if need be.


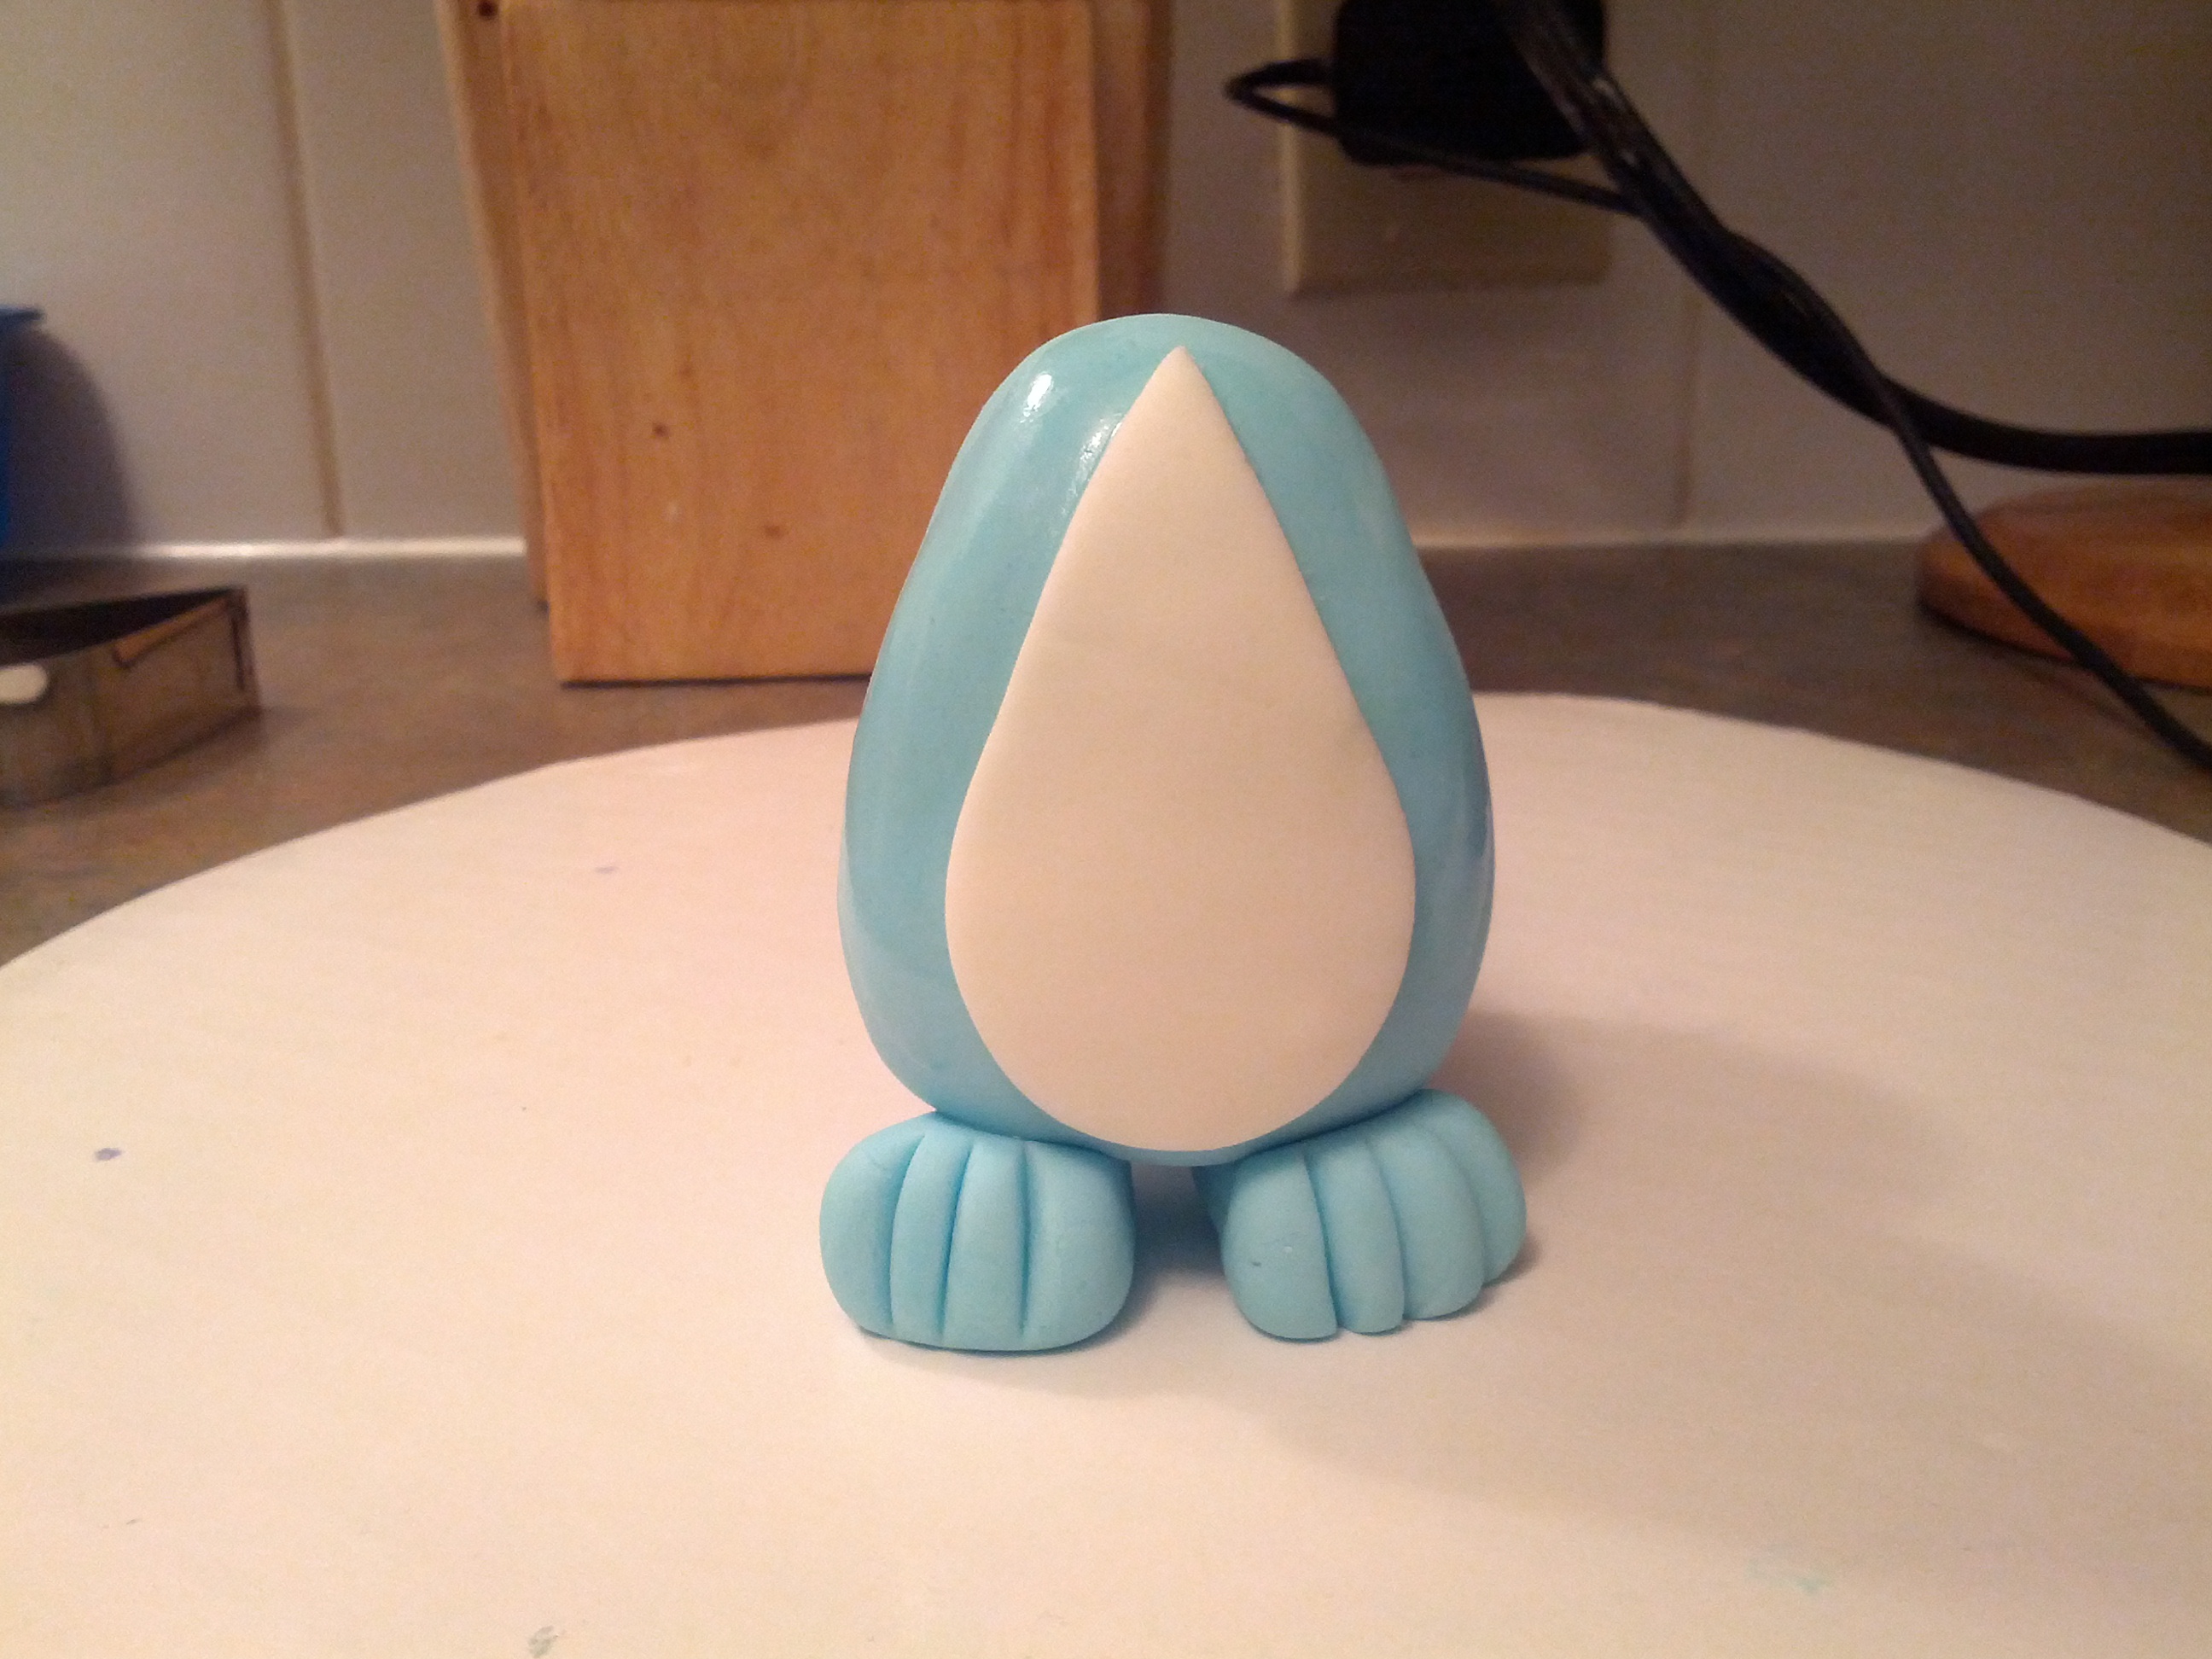
(12) Finally attach the head to the body.
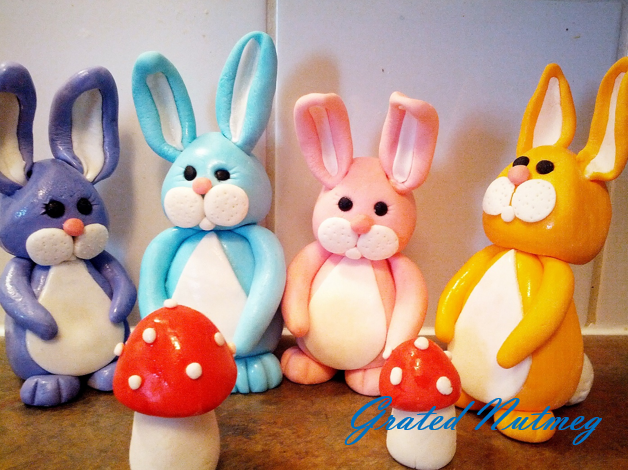
Use this bonny to top a lovely Easter cake.
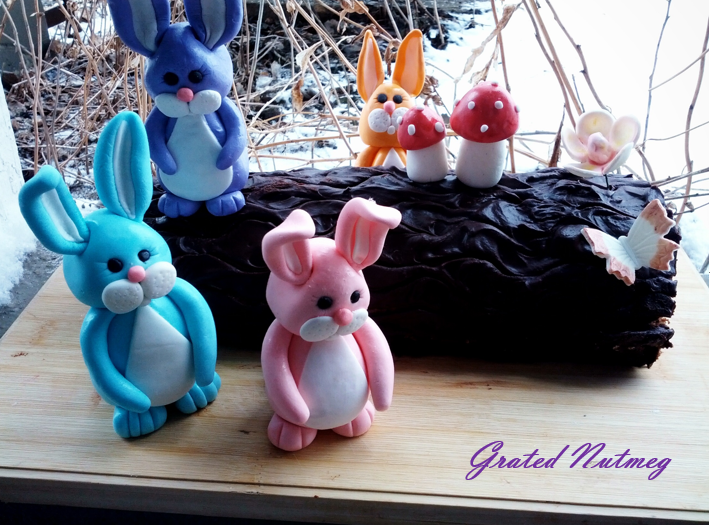
Chocolate Log Cake with Bunnies
Terry Adido is passionate about showing people how easy it is to recreate restaurant quality meals in the comfort of their kitchens. With a style of cooking he refers to as Afro-European Fusion, his meals are influenced greatly by French and Italian Cuisine with a West African twist. If you love good food, you are in for the ride of your life.
Hi Terry, thanks again for the marshmellow fondant recipe. Loking forward to the end of shop bought already made ones.
The bunnies are cute by the way.
Thank you.
They’re so cute! I’d love to try it out…thanks or sharing.
Thanks Teejay.
Hey Terry, ur rily good. Am always inspired each time u post various cake decoration. Thanks for sharing your knowledge.
You are welcome.
Tnks so much!
You are welcome
Love all your works.I hope to b like you one day, But sorry to ask are you chef?
Thanks.No I am not a chef.
Thanks so so much Terry.You are a bundle of talent!
Thank you.
Hey! Terry love your work, they inspire me, God bless, will definitely try this. one question Pls Ow do u add colour to fondant icing.
Thanks. I use color paste. Just add it to the fondant and knead to blend.
Am fagged our,but I reall enjoyed the workings becos I luv your teachings and the follow ups which show your being a good teacher,an inspirator,patient and humble perfectionist.Thank you so much.
Thanks a lot Fola.
Thank you Terry, If you are not a chef then how on earth are you able to come up with all these precious tutorials and recipies, Im truly A-M-A-Z-E-D!
Thanks Stella.
Thank you Terry, you are a bundle of talent. Will try this by weekend. God bless you real good.
Thanks Jessy
You are just good! Your tutorials are easy. Thanks for sharing.
You are welcome Gloria.