
Fondant Iron Throne Tutorial (Game of Thrones)
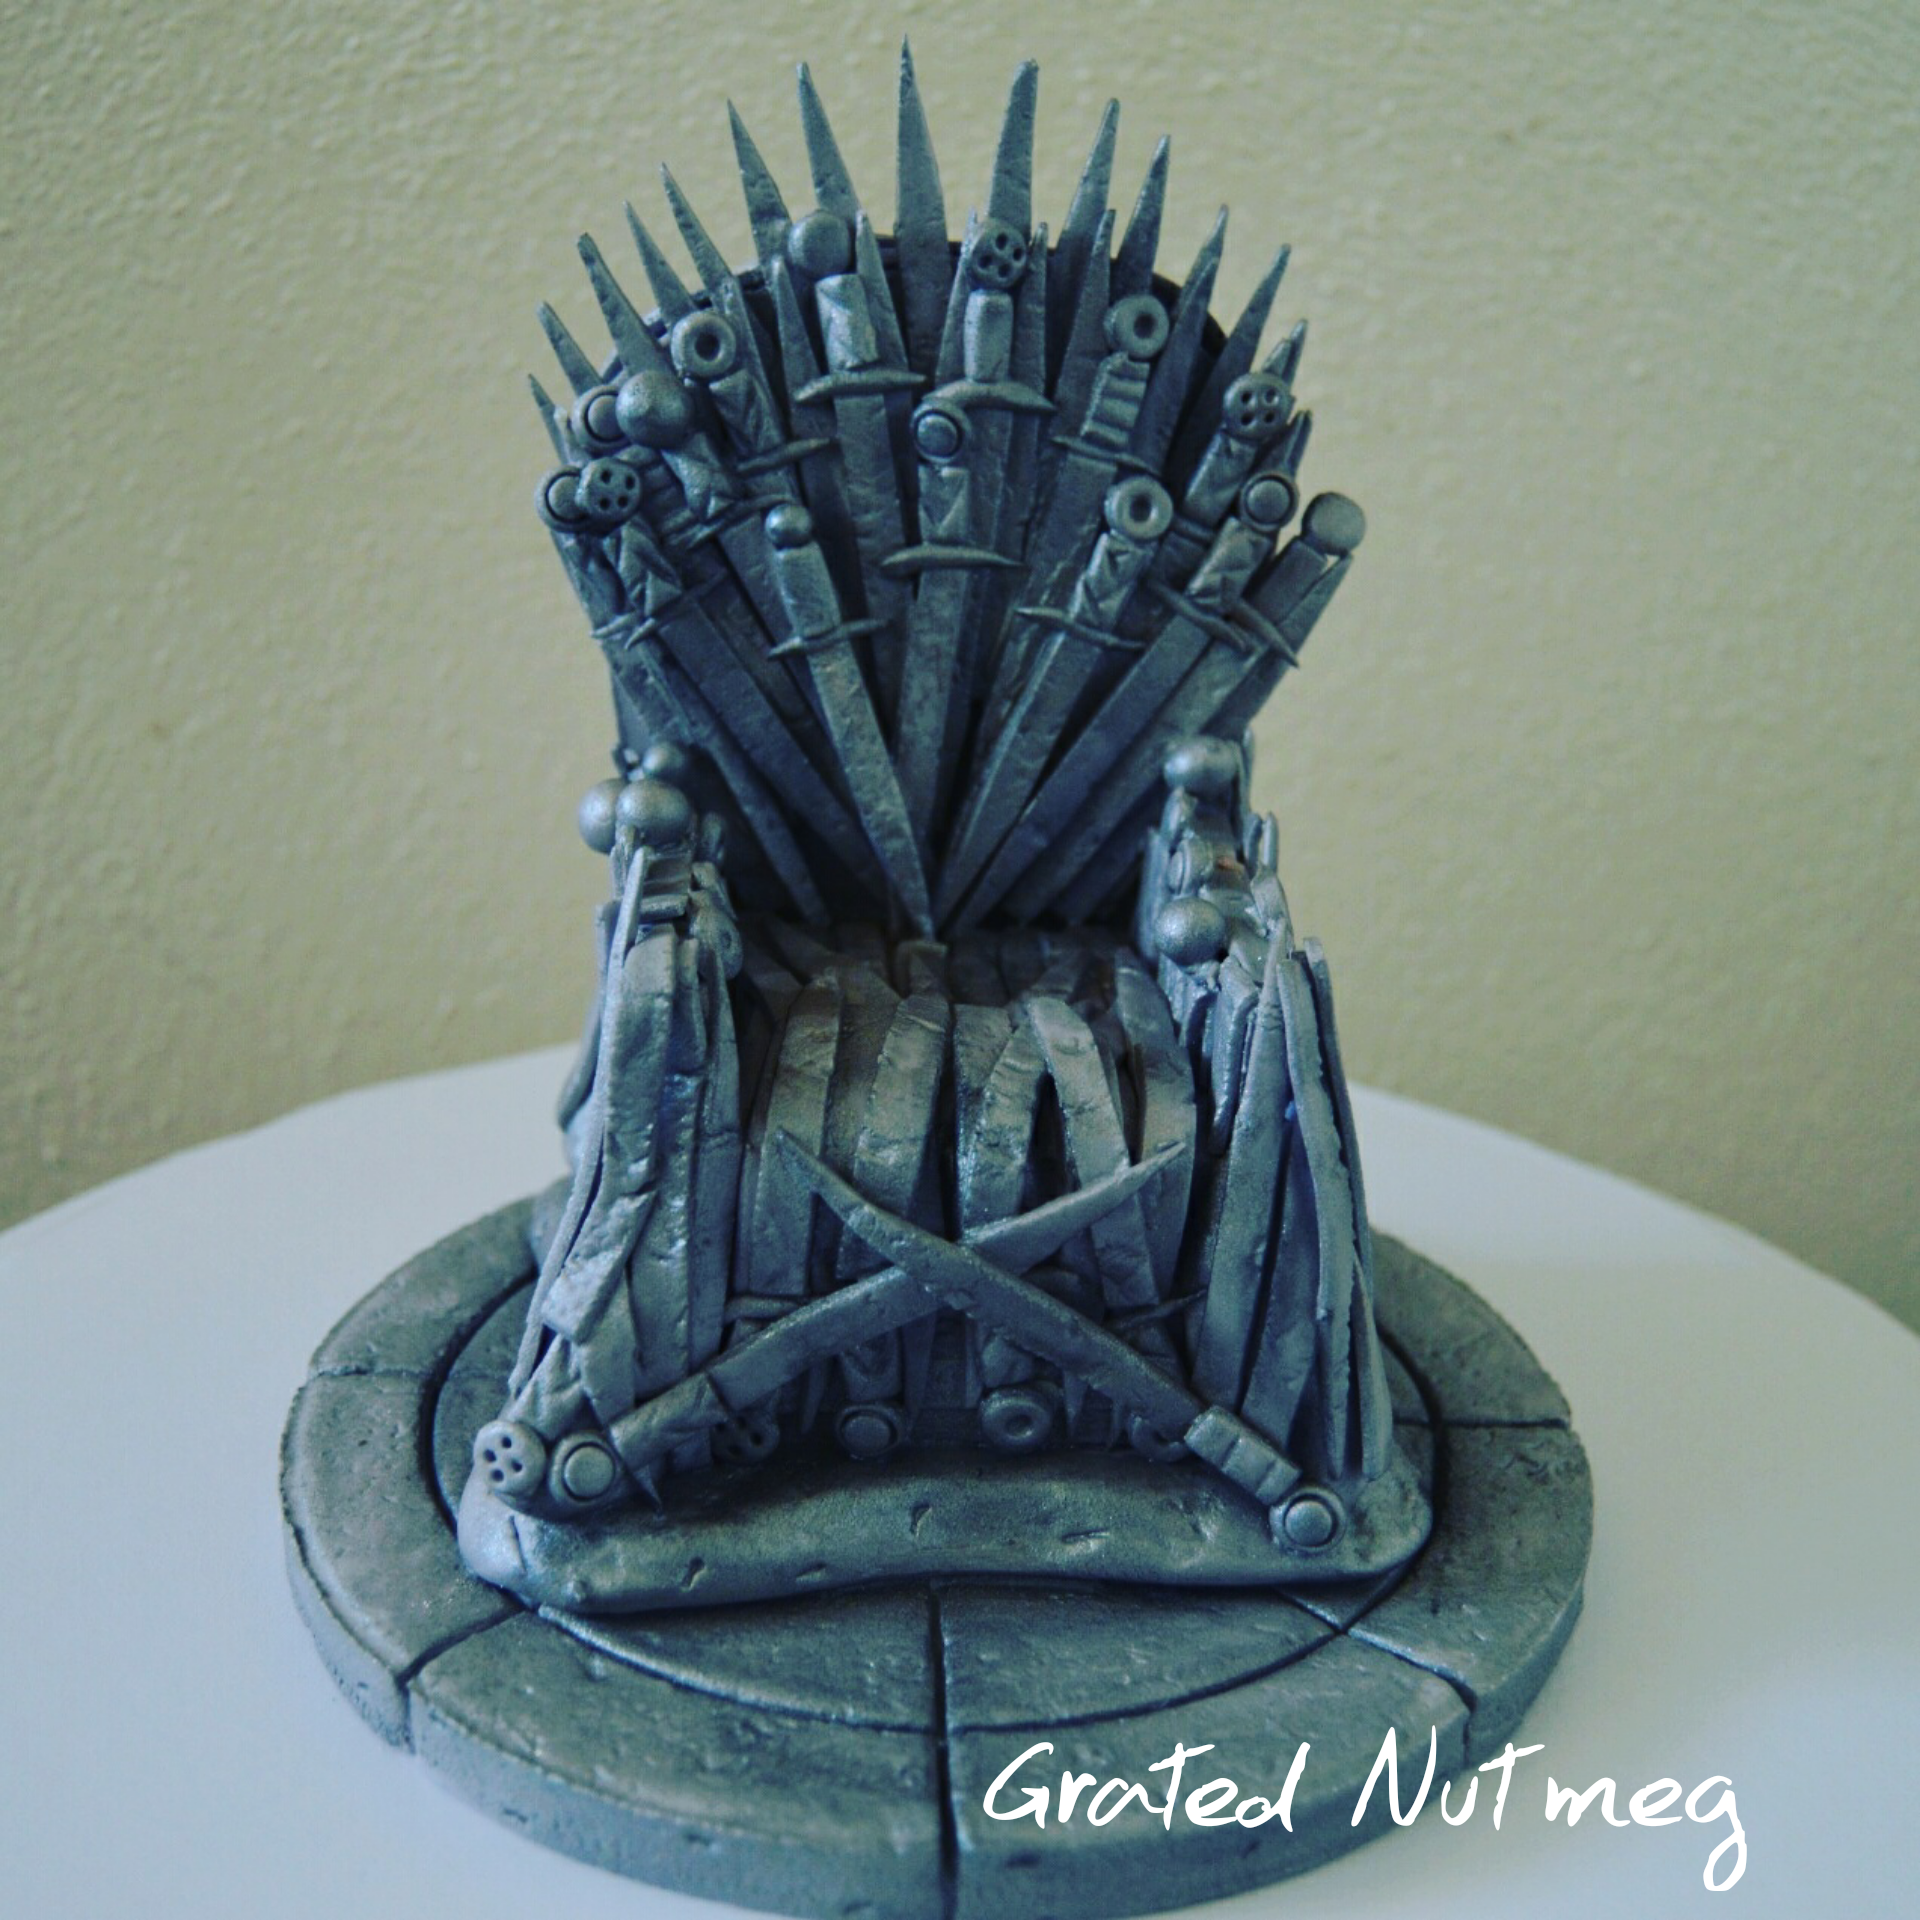

In this post, I will be showing you how to make the Iron Throne Fondant Topper above. This topper was used on a Game of Thrones themed Cake I made for a friend. I will end this post with tips on how to make the entire cake. While this topper might look complicated, it is actually quite easy to make. It however involves a lot of steps. When making the fondant iron throne (or any fondant topper for that matter), it helps to have a picture of the item you are trying to recreate and make constant reference to that picture during the creation process.
TOOLS:
(1) Rolling Pin
(2) Sharp Blade/Cutter
(3) Ruler
(4) Paint Brush
(5) Foil Paper
EDIBLE COMPONENTS:
(1) Fondant
(2) Grey Color Paste
(3) Water
(4) Vodka
(5) Silver, Copper and Black Luster Dusts
(6) Melted White Chocolate
THE PROCESS
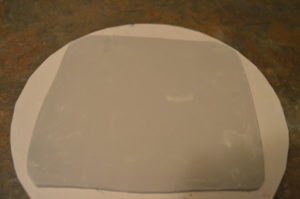
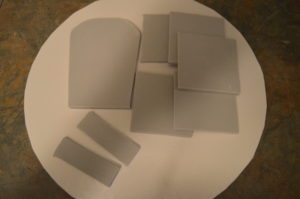
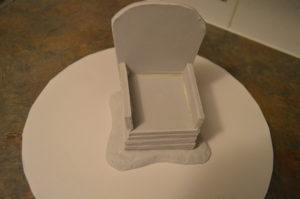
(1) Roll grey fondant into a quarter inch slab and leave to air dry until it is firm enough to cut without losing shape. When it is firm, cut the fondant into 3 inch square slabs for the sit of the throne and a taller 5.5 x 3 inch arched slab for the back rest of the throne. Also cut smaller rectangles for the arm rests.
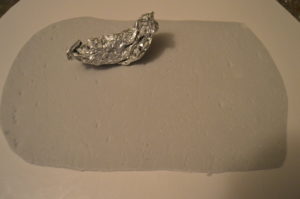
(2) While the fondant in (1) above is drying, make the base of the throne. Roll grey fondant into a thick square slab with sides measuring 4 inches. Shape the slab by indenting the sides. Scrunch foil paper and use it to add texture to the base of the throne. Leave to firm up.

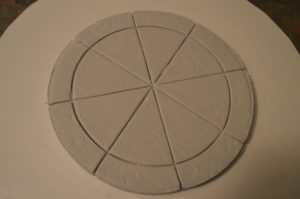
(3) Next, make the platform for the throne. Roll grey fondant into a thick slab of about half an inch thick. Use scrunched foil paper to add texture to the fondant slab. Cut the slap into a circle with a diameter of 5 inches. Divide the top of the circle into 8 segments and mark another concentric circle with a diameter of 4 inches in the large circle. Leave to dry.
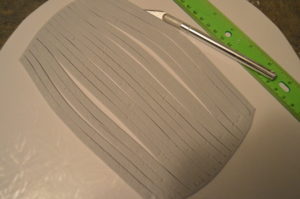
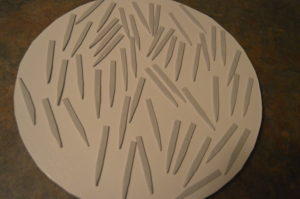
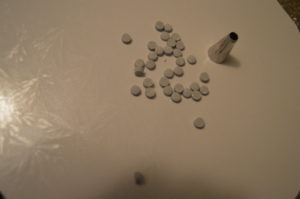
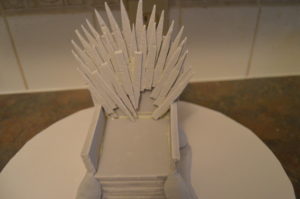
(4) Next, make arrows for the back rest of the throne. Roll grey fondant into a thin sheet. Use scrunched foil paper to add texture to the fondant. Leave the fondant to air dry until firm enough to cut without losing shape. Cut the fondant into 1/8 inch by 3 inch strips. Use a sharp blade to make one end of the strips pointed. Leave to dry.
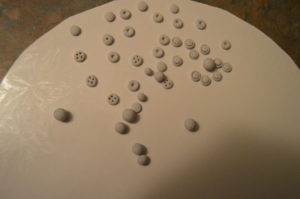
(5) Next, make the top parts of the handle of the arrows. Use your discretion here and create different interesting round and spherical shapes.
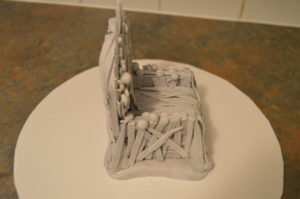
(6) With most of the prep work done, its now time to bring it all together. Using melted white chocolate as a binding agent, stack and stick the square slabs together. Stick the back rest to the back of the square slabs. Also stick the arm rests to the throne to complete the structure of the throne.
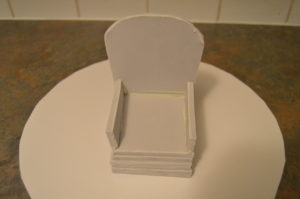
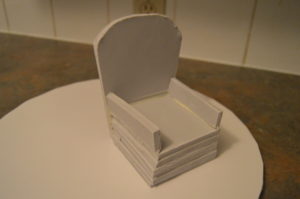
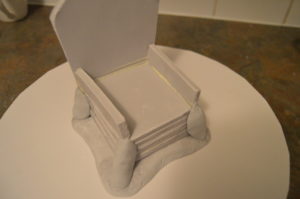
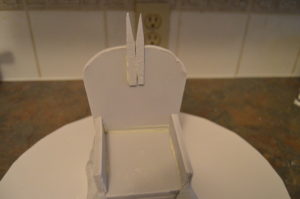
(7) Stick the throne to its base. Use soft grey fondant to add details to the 4 corners of the throne to complete its structure.
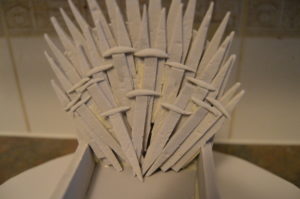
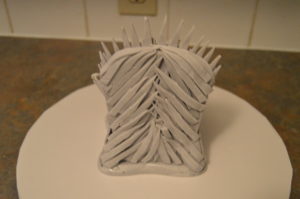
(8) Using melted white chocolate, begin sticking the dry arrows the back rest of the throne, forming a arch. This needs to be done in 3 rows. The first 2 rows of arrows should have their pointed tips facing up. The third row should be staggered and have the pointed tips facing down.
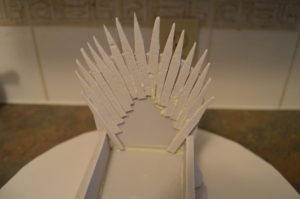
(9) Make the handle of the arrows and add them to the third row of arrows.

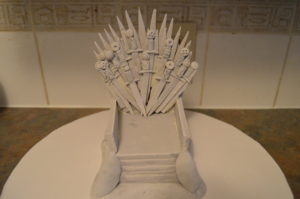
(10) Now, make more soft fondant arrows and cover the entire throne with them adding arrow heads where needed.
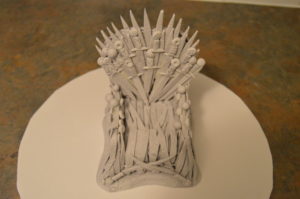
(11) With the throne completed, mix vodka with silver luster dust and paint the entire throne and platform with the mixture. Leave to dry.
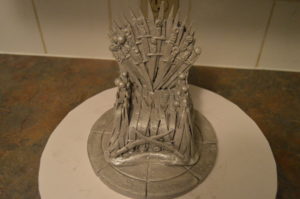
(12) When dry, use silver, black and copper luster dust to brush parts of the throne to add dimension and color to it. With that, the throne is completed.
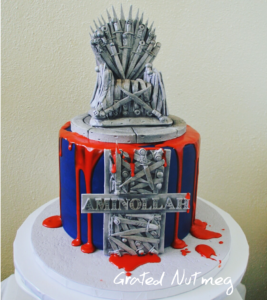
Making the Cake
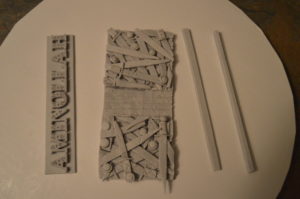
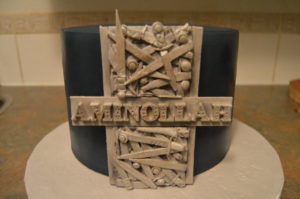
(1) To make the cake, make the front silver slab by sticking arrows to a thin slab of fondant. Also make a name slab and color both as you did with the throne.
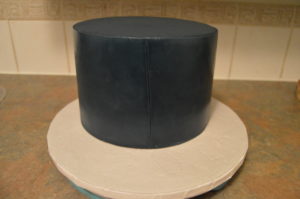
(2) Cover the cake with dark blue fondant and stick the silver slab to the front of it.
(3) Place dowels in the cake to support the heavy topper.

(4) Mix icing sugar with water to form a thick paste (you can also use royal icing, candy melts or melted chocolate). Add red food color to the paste to replicate blood and pour it over the top edge of the cake. Stick the throne to the top of the cake.
That’s all there is to it. Happy caking!
Terry Adido is passionate about showing people how easy it is to recreate restaurant quality meals in the comfort of their kitchens. With a style of cooking he refers to as Afro-European Fusion, his meals are influenced greatly by French and Italian Cuisine with a West African twist. If you love good food, you are in for the ride of your life.
WOW, this is amazing and innovative. Great work Terry. Thumbs up.
Thanks Ivie.
Great tutorial. Great art work and kind hearted you, giving all without reservations. But, please, I don’t get it. Who would want a cake of bloody throne, bent swords and all? Looks cold-blooded. Haahaahaa. I admire the art work though, but it looks grim. Lol.
Thanks. Thats the theme. If you watch the show you will get it.
The Iron Throne!!! Boss!!! i hail thee oooo! This is creativityyyyy!! Damn!!
Thanks Nelly
thumb up, this is great
Thanks Funsho.
Thanks, Very creative and educating.
You are welcome Precious.
How much vodka do you mix with the color?
It varies. A little goes a long way.
Do you use silver, black and copper luster dust combined to brush parts of the throne?? Love the method. Gonna try this for my hubby’s birthday this weekend.
Yes I did.
Wow! Thank you for posting your step by step guide! I made this yesterday! It’s not as perfect as your throne but I am quite impressed with the result!
It’s a surprise cake for my Husband and I can’t wait to see his face!!
Awesome. I’m sure he will love it.
hi dear, really love your works. please do you also post videos?
or probably have a youtube channel… thanks
No I dont. Thanks.
Approximately how much fondant is needed to recreate this? I would love to try it but don’t want to be too short or have too much left over
Sorry I cant offer advice on that.
Great tutorial 😁
I will be using this this week 👍🏻 I’m not so scared about tackling it now thankyouuuuuu 😘
Thank you.