
How to Make Vertical Fondant Stripes on Cakes

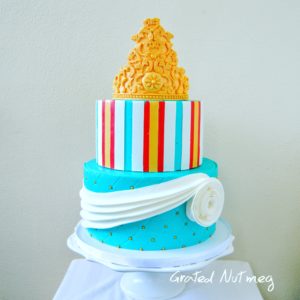
In this tutorial, I will be sharing my method of making vertical fondant stripes on cakes. As a cake decorator, getting straight even upright stripes on your cakes might be a challenge. If you incorporate some of the tricks I share below, you are sure to record more success with your next cake.

I have a tutorial on how to make horizontal stripes on cakes. That tutorial can be found here.

TOOLS:
(1) Rolling Pin
(2) Ruler
(3) Sharp Blade/X-Acto Knife
(4) Paint Brush
(5) Card Board Panels (Explained in Tutorial)

EDIBLE COMPONENTS:
(1) Fondant
(2) Water/Vodka
(3) Shortening

TUTORIAL:
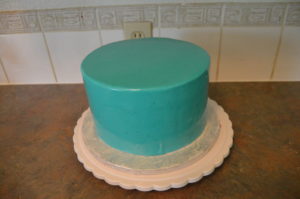
(1) First, cover your cake with fondant. Keep in fridge to set.
(2) Roll out the various colors of fondant you intend to use making sure they are all the same thickness. Now, this is the most important part of this process, leave them to air dry for about a couple of hours. Your goal here is for the fondant to be firm enough to handle without losing shape or stretching but soft enough to cut without breaking. The more you work with fondant, the more you begin to appreciate the benefits of drying fondant before using for certain designs.
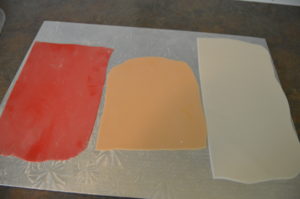
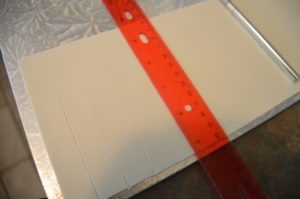
(3) When the fondant is dry enough to work with, use a ruler and x-acto knife to cut them into rectangles. Each rectangle should be higher than the tier you intend to cover by about half an inch.
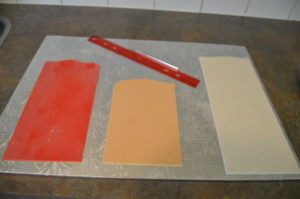
TIP: To get straight and sharp lines, grease the blade of your knife with shortening before each cut. As can be seen in the picture, I dried and cut my fondant on a rectangular cake board. The angles and sides of the board were used as a guide when cutting the fondant rectangles. Align your ruler with the sides of the cake board when cutting out the fondant rectangle.
(4) After making the rectangle, cut them into stripes as needed. For even stripes, use a ruler to mark the horizontal sides of the rectangle before cutting out the stripes. I am often asked what cake decorating tool I use the most. The answer is my ruler. You simply cannot decorate cakes without a ruler.
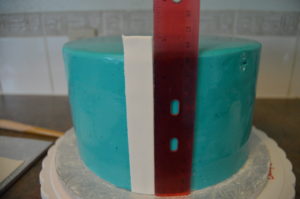
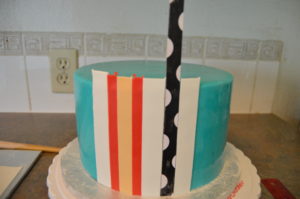
(5) Brush the sides of the cake with a bit of water (preferably vodka) and place your first stripe on it. Use a ruler to align the stripe to make sure it is standing at 90 degrees. This first stripe will affect all the other stripes on the cake so it is very important that it is properly placed.
TIP: Got a tear, crack, hole, dent on your covered cake, place the first stripe over that defect to hide it.
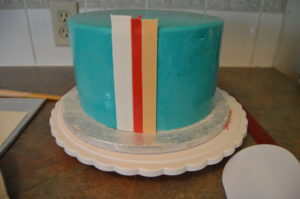
(6) Start sticking the other stripes to the cake making sure each stripe touches the stripe just before it.
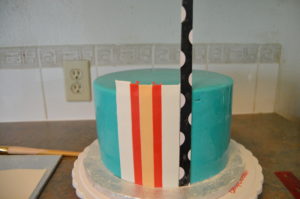
(7) If you intend to leave gaps on the cake, cut out thick card board panels as wide as the gaps you intend to leave, place them where the gaps will be, touching the last stripe. Place the next stripe after the panel making sure it touches the panel. Remove the panel and continue decorating until you have covered the entire cake with the stripes.
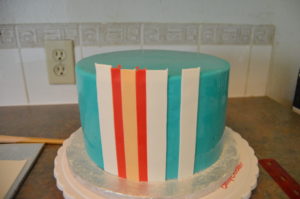

(8) Using a sharp blade, cut off the excess fondant on top of the cake. The reason why the stripes were cut higher than the cake tier in the first place was to make sure they were high enough to cover the cake. Sometimes, when stripes are cut the exact height of the cake, they might end up being too short for several reasons. Better to err on the side of caution.

That’s all there is to it. Happy caking!
Terry Adido is passionate about showing people how easy it is to recreate restaurant quality meals in the comfort of their kitchens. With a style of cooking he refers to as Afro-European Fusion, his meals are influenced greatly by French and Italian Cuisine with a West African twist. If you love good food, you are in for the ride of your life.
Wow!interesting Your Creativity is on point.
Thanks Aina.
Your works inspired us the young bakers.May God bless you real good.
Thanks Chinwe.
Wow, nice tip Terry, and so easy.
You are welcome. Yes, it is easy. Nothing really is hard when it comes to cake decorating. You just need to know the tricks behind the design.
Weldone sir,i think we majorly miss d aspect of allowing the fondant to dry before use…thank you so much. Pls my question is how do u make sharp edges on ur cakes especially on square cakes…. Yours alwaz
You are welcome Benita. As per your question, there is a lot involved in it. Do not use a lot of frosting around your cake as this will give a cushion effect. Only cover cakes after the frosting has become hard through chilling. Use fondant smoothers to create sharp edges. In all, I will advice that you watch youtube videos for clarity.
Kudos… I love all your tutorials
Thanks Portia.
You are good! Pls, terry how best can i store a fondant covered cake on shelf for sale? Thanks and God bless.
Honestly, I do not know as my cakes stay in the fridge.
Can’t thank you enough! God bless you
Please start a vlog already😆😆😆
Thanks Binta.
Hello Terry, my fondant cakes sweat after being taken out of the fridge. Anything I’m doing wrong? thanks!
You are doing nothing wrong. It’s call condensation. Fondant cakes sweat when brought out of the fridge if the weather is hot like during Summer or in hot climates like in Nigeria. I will advice that you leave the cake to dry by itself. If you have a fan, you can switch it on facing the cake. This will help dry it faster. DO NOT TOUCH the cake as it will leave finger prints and lead to color bleeding.
thanks I appreciate everything .pls can u help me out for the measurement for 12cm4″cake pan square.I use 4cups of flour,4cups of butter,3 1\4cups sugar but did not full the pan after baking.
Hi. Sorry I have no such measurement. My Nigerian cake recipe uses similar quantity of ingredients as you listed out. Do check it out.
Hi Terry,thank you for the tutorial.
You are welcome Juliet.
Thank you Terry.
You are welcome.