
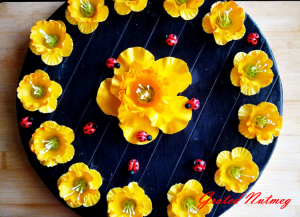
Fantasy Hibiscus Flower Tutorial


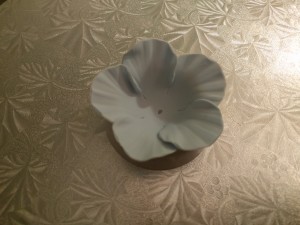
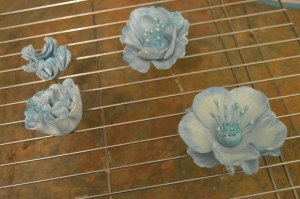
This is a tutorial on how to make a fantasy hibiscus flower like the one in the picture above. I refer to it as a fantasy flower as it is not modeled after a real hibiscus flower. It however has characteristics of hibiscus flowers.
TOOLS:
(1) Rolling Pin
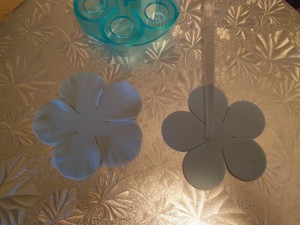
(2) Rose Petal Cutter
(3) Fluted Round Cutter
(4) Flower Drying Cups
(5) Floral Wires
(6) Elevated Cooling/Drying Rack
(7) Paint Brush
(8) Floral Stamens
(9) Steamer or Pot with Boiling Water
EDIBLE COMPONENTS:
(1) Fondant
(2) Color Paste
(3) Color Dust
(4) Melted White Chocolate or any other gluing agent of your choice.
PROCEDURE:
(1) Color and roll out fondant.
(2) Using the petal cutter and fluted cutter, cut out fondant shapes. Both cutters should be roughly the same size. You will need one of each cutout per flower. As you would notice, I love making flowers at various stages of bloom. Thus use smaller cutters for flower buds and blooming flowers.
(2) Using the sides of your paint brush, make veins on the flower petals and fluted edges of the circles.

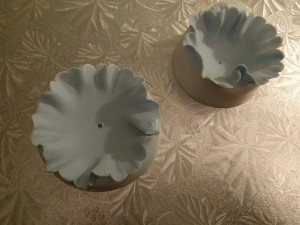
(3) Place the petals and fluted circles in flower cups to dry. Make small holes in the middle of each petal and fluted circle. The floral wires would pass through these holes later. The petals should be in deeper cups than the fluted circles. This is so the circles spread out more than the petals. Again, if you are making flowers at various stages of bloom, use deeper cups for smaller flowers and buds.
(4) Mold fondant into balls. Insert floral wires into them and insert stamens into the balls to create the heart of the flower. Leave to dry.
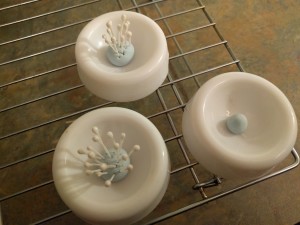
(5) When the flowers are dry enough to handle. Brush the stamens, edges of the petals and the circles with color dust to provide color contrast.
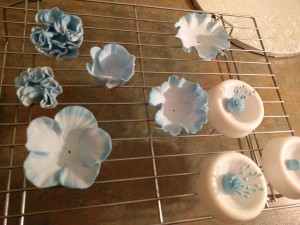
(6) Stick the petals and circles together using melted white chocolate. Pass the floral wire with the stamens through the middle of the flowers and stick it to the base of the flowers using melted white chocolate. Place the flowers on an elevated cooling rack and leave to set.
(7) Steam the flowers to set the color and add gloss to them.
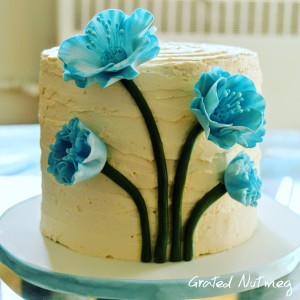
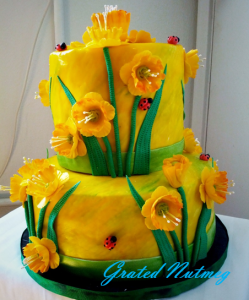
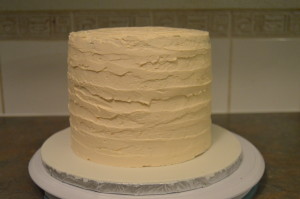
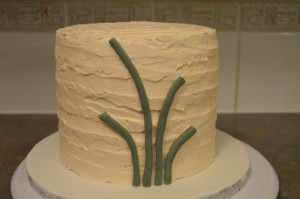
(8) To place flowers on cake, make fondant stems and stick to the body of frosted or fondant covered cake. Insert floral wires into cake at the tip of the stems. You can use some melted white chocolate to hold the flowers in place.
Terry Adido is passionate about showing people how easy it is to recreate restaurant quality meals in the comfort of their kitchens. With a style of cooking he refers to as Afro-European Fusion, his meals are influenced greatly by French and Italian Cuisine with a West African twist. If you love good food, you are in for the ride of your life.
Thanks Oga Terry. You are more than a blessing to me. I am improving very fast and seriously. God will reward your kind heart fr not holding back any piece
I am glad to hear that. Thanks for reaching out.
Please what materials are the floral stamens made of? Also, the fondant you use for your roses, flowers and modeling, are they made the same day, or a day or so old? Thank you always, Terry.
(1) I’m not sure. They are made by Wilton. Def not edible (2) Same day.