
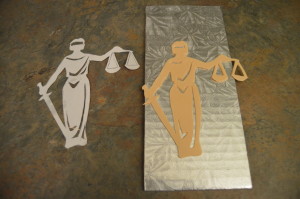
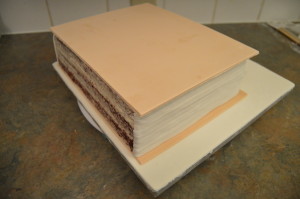
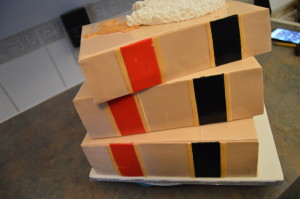
The Making of a Law Review Cake

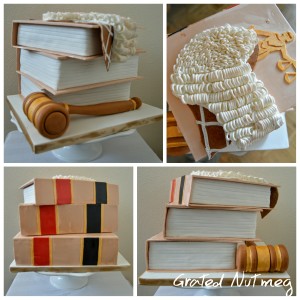
In this post, I will be showing you how I made the law review cake shown above. There are various elements to this cake and tutorials would be provided for each element. To have access to the cake, frosting and fondant recipes used for this cake, click here.
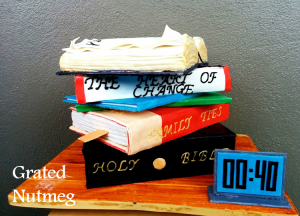
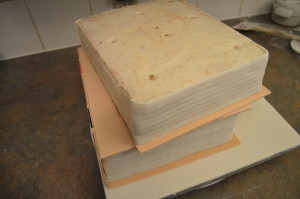
This tutorial can also be applied to other types of cakes like the Books Cake below.
THE PROCESS:
(1) First, make the gavel. A tutorial for this can be found here.

(2) Make the covers for the law reviews. You will need 2 covers per law review. I thus made 6 in total. Each cover measured 8 x 10 inches. To make them:
- color fondant ivory and roll it out. Roll several fondant pieces out at the same time, each large enough to contain a cover.
- Transfer the rolled out fondant to cake boards and leave them to air dry for about 5 hours.
- Using a sharp blade or pizza cutter, cut each piece of fondant into rectangles measuring 8 x 10 inches.
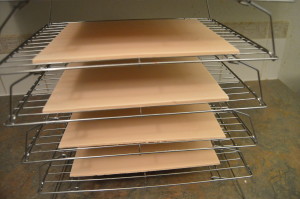
- Remove the excess fondant and leave the rectangles to dry on the cake boards for 24 hours. Keep the excess fondant as it would be used for other parts of the cake like the spines of the law reviews. By allowing the fondant to dry before cutting and not moving them after they have been cut, you are sure to get sharp sides and perfect cover shapes.
- After 24 hours, transfer the covers to drying racks so they dry properly from both sides. These should be made at least 3 days before they are to be used.
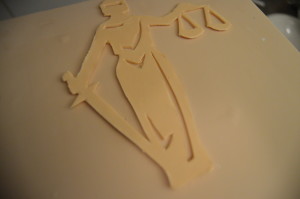
(3) Make a silhouette of lady justice out of leftover ivory fondant. A tutorial on how to make silhouettes can be found here.
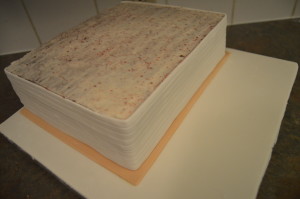
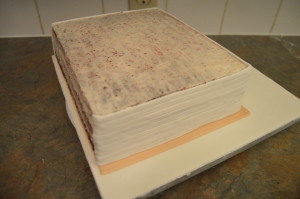
(4) Bake and frost each cake tier. The tiers should measure 7.5 x 9 inches each. Very important: each tier should have a cake board/card underneath it.
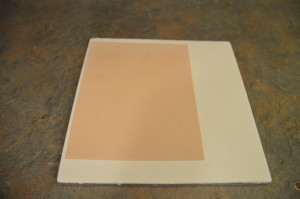
(5) Cover a square cake board with white fondant. Stick one of the law review covers to the card board.
(6) Stick one of the cake tiers to the cover. Roll out and cut white fondant long and high enough to cover the front and sides of the tier. Use a fondant wheel/embosser to make horizontal lines on the white fondant and wrap the front and sides of the cake with it.
(7) Place about 6 dowels into the bottom tier and stick the top cover on it. The dowels would provide support.
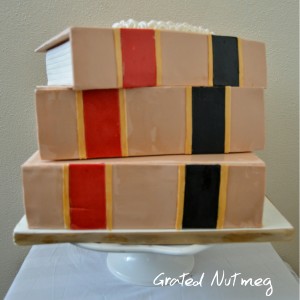
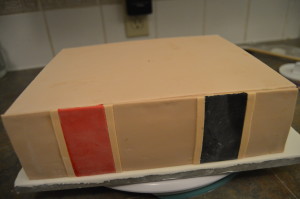
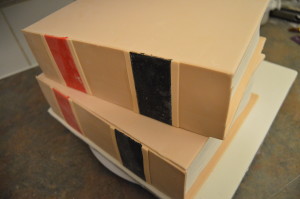
(8) Using the leftover ivory fondant which you saved from making the covers, roll and cut out a spine for the back of the law review and stick it to the cake. You can make any design you want to make on the spine before sticking it to the cake. I used red, black and ivory fondant here to make vertical patterns like those found on law reviews. The ivory would later be colored gold.
(9) With the first law review completed, make the other two law reviews following all the steps listed in paragraphs 5 – 8 above:
- Start by sticking a cover to the tier beneath. The cover can be stuck at any angle;
- Stick a cake tier on the new cover;
- Wrap the sides of the cake tier with white fondant;
- Place dowels into that tier;
- Place the top cover and spine on it.
(10) When you are done with all 3 tiers, sharpen an end of about 2 to 3 dowels and pass them through the entire cake twisting as you get to each cake board until they get to the bottom of the cake. Mark the dowels where they come out of the top of the cake, take them out, cut off the excess dowel and return the dowels to the cake. This would provide extra support and structure for the cake especially if the law reviews were placed at several angles. Read more about cake stacking and doweling here.
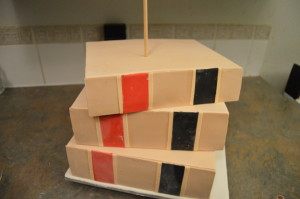
(11) Stick the lady justice silhouette to the top of the top tier.
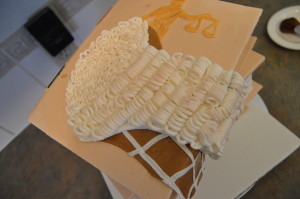
(12) Make the wig (Tutorial here) and place on top of the cake.
(13) Stick the gavel to the cake board. Mix vodka with gold luster dust and color the ivory parts of the gavel, ivory portions of the book spine and lady justice with it.
(14) Place a ribbon on the sides of the cake board. That’s all there is to it. Happy caking!
Terry Adido is passionate about showing people how easy it is to recreate restaurant quality meals in the comfort of their kitchens. With a style of cooking he refers to as Afro-European Fusion, his meals are influenced greatly by French and Italian Cuisine with a West African twist. If you love good food, you are in for the ride of your life.
Thank you Terry for always sharing and educating people like me. I know how much I would’ve had to pay here to learn this and other free tutorials you have shared. May the blessings be.
You are welcome Toks.
Wow! Thanks for sharing,this method will give your textbook cake a neat finishing.
Yes it would. You are welcome.
wow Terry God bless you
Thanks Stacey.
are you tiv from benue? I’m so inspired by your works. my husband insists you are tiv. i am tiv by the way
Thanks. No I am not.
Thanks for sharing your work and providing tutorials. Love your work,
You are welcome Elle.
Hi Terry..I’m in Nigeria and i don’t make marshmallow.
Which would you advise i use for the book cover, pastillage or gumpaste (fondant plus CMC)
I want to make a tier for my sister’s graduation and i will transport it on a 2hrs journey? Any precautions for safe delivery?
Thanks
Hi Debs. Fondant + CMC or Fondant + Tylose Powder should work. To transport, make sure you put a couple of dowels through the entire cake.
Thanks for the wonderful tutorial!
You are welcome Debs.
Applauding you Terry! Wow!You bring the complex-looking to the realm of possibility. Thank you
Thanks Seun.
Did you stick the cakeboard/card you mentioned in the tutorial under each layer for this end result please?
Yes Seun.