
The Making of Elsa’s Castle Cake

This is a tutorial on how I made this Elsa’s Castle Cake. It is a cake that uses mostly dry fondant panels. Though it might look intimidating, this is one of the easiest cakes to make. All the hard work is done ahead of time and all you need to do is assemble the pieces together to make the cake. To see more views of this cake click here.
THE PROCESS:
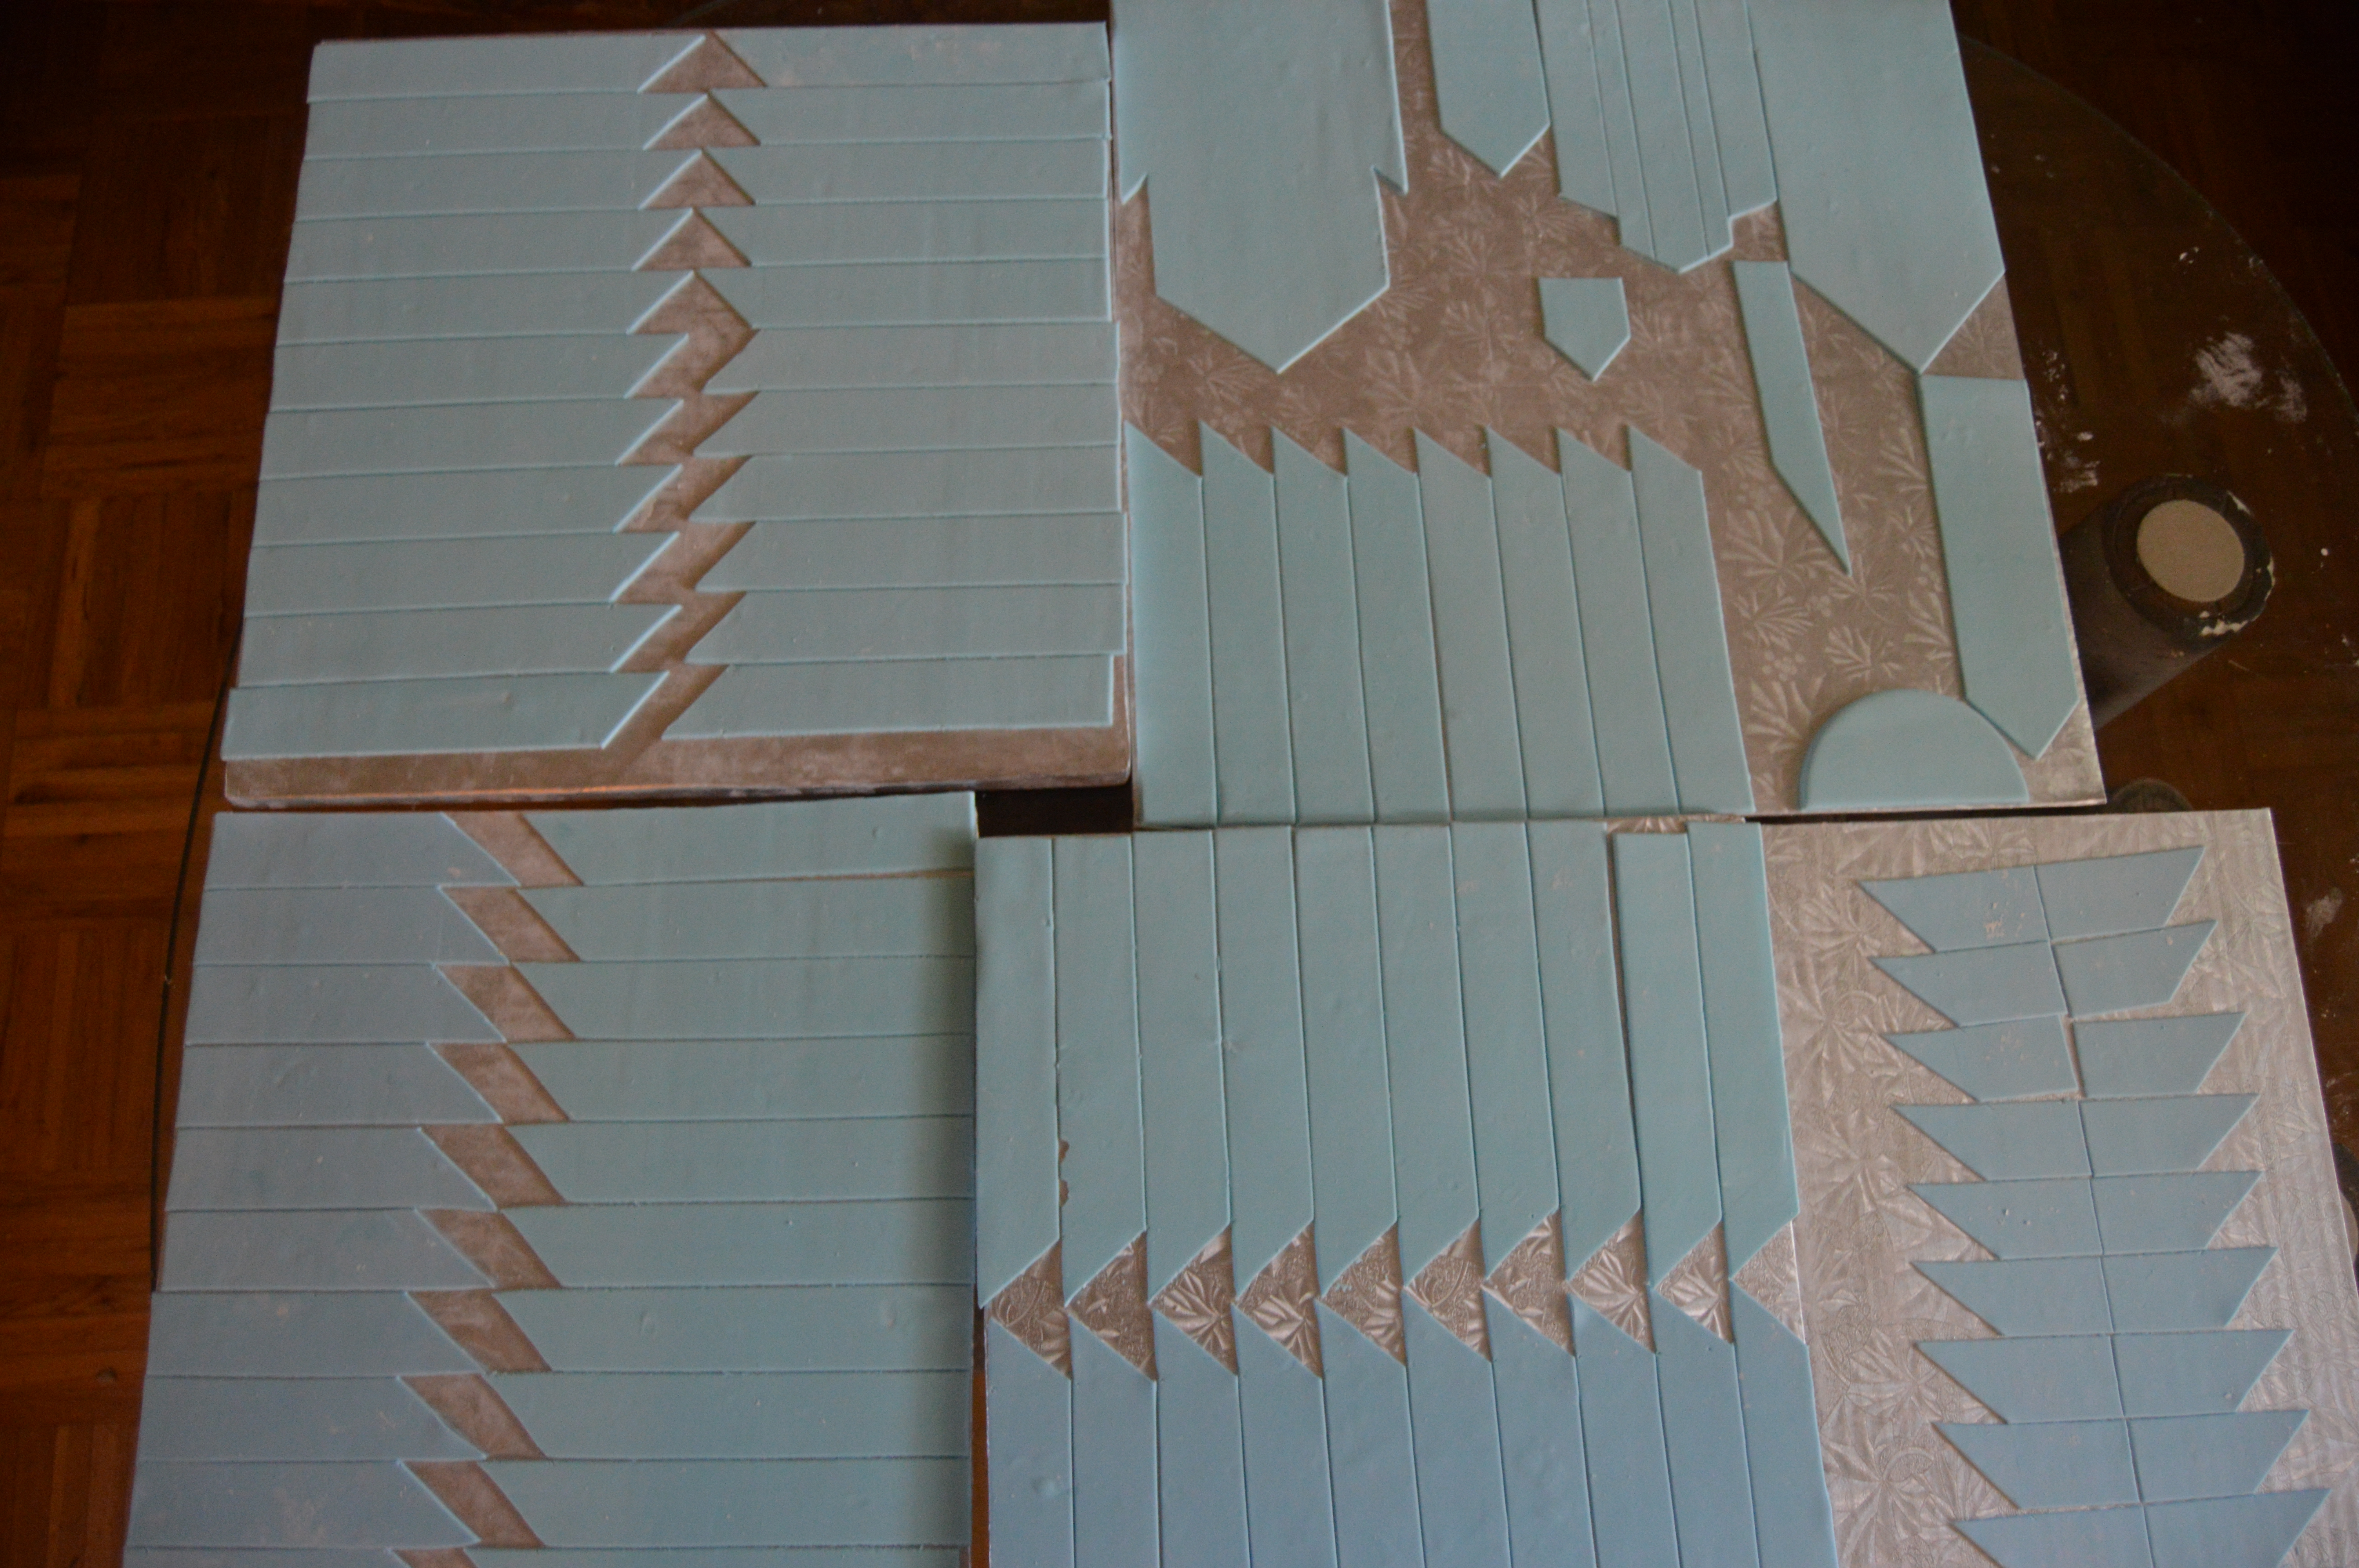
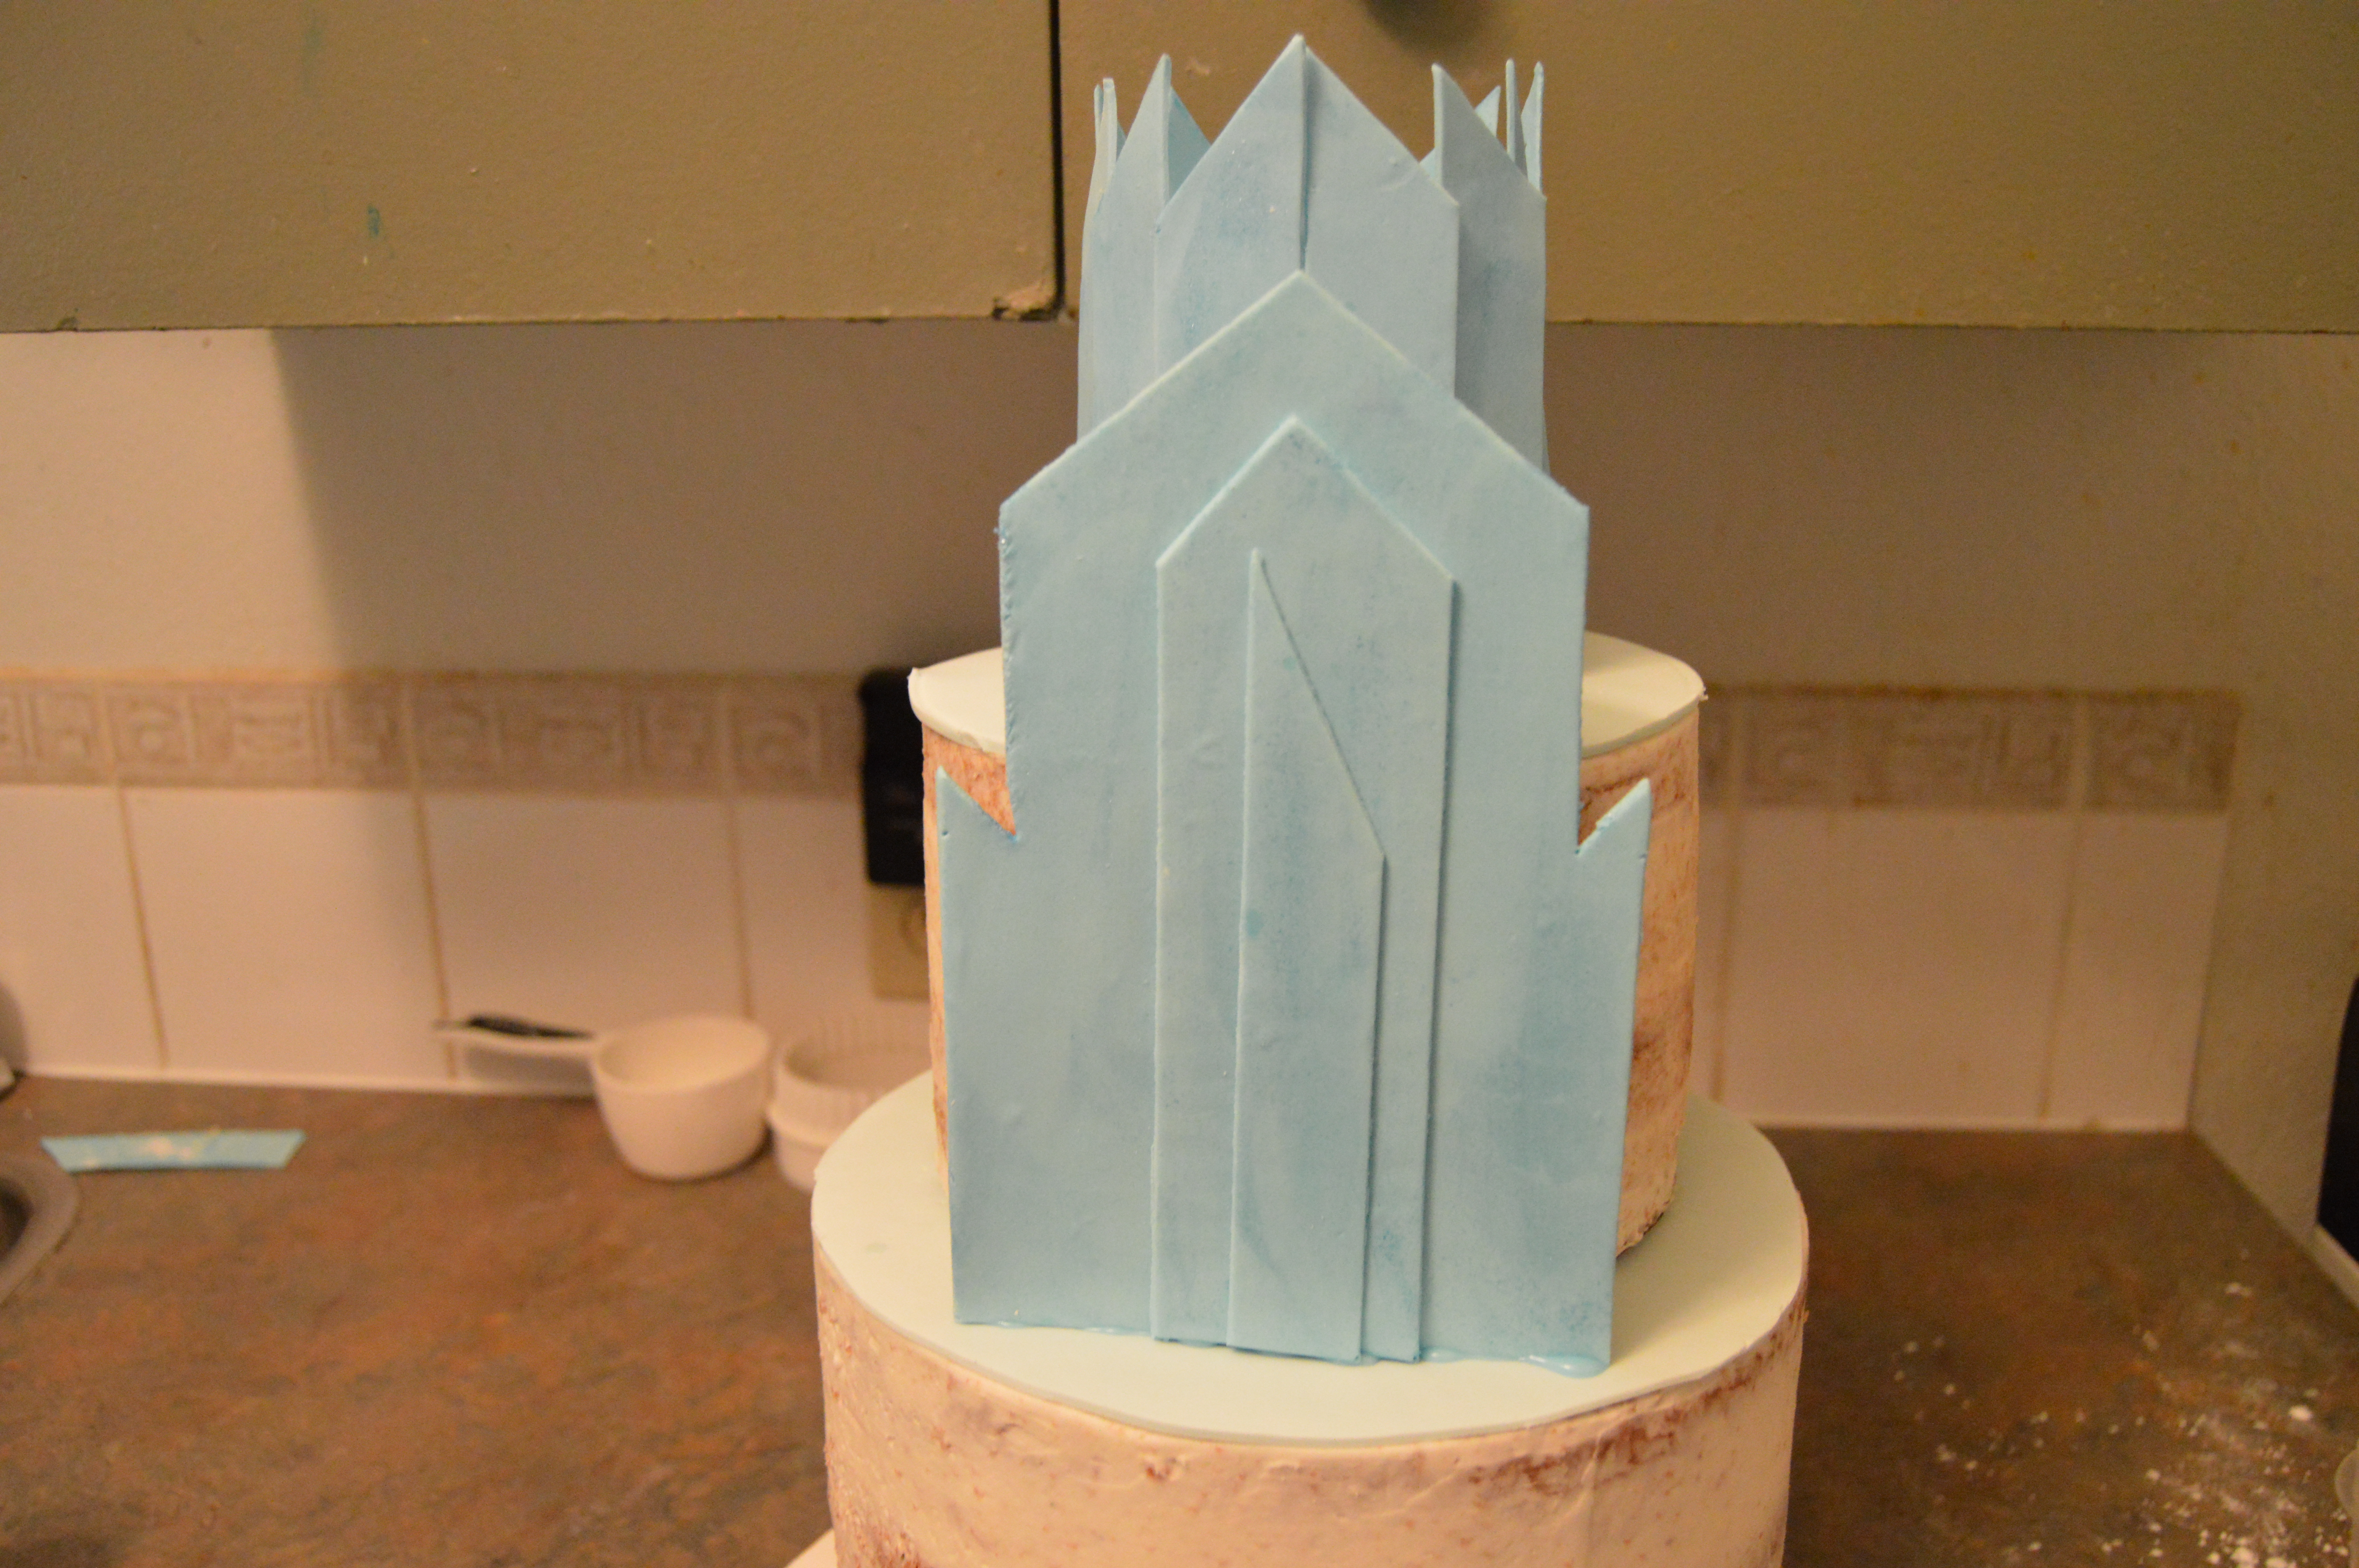
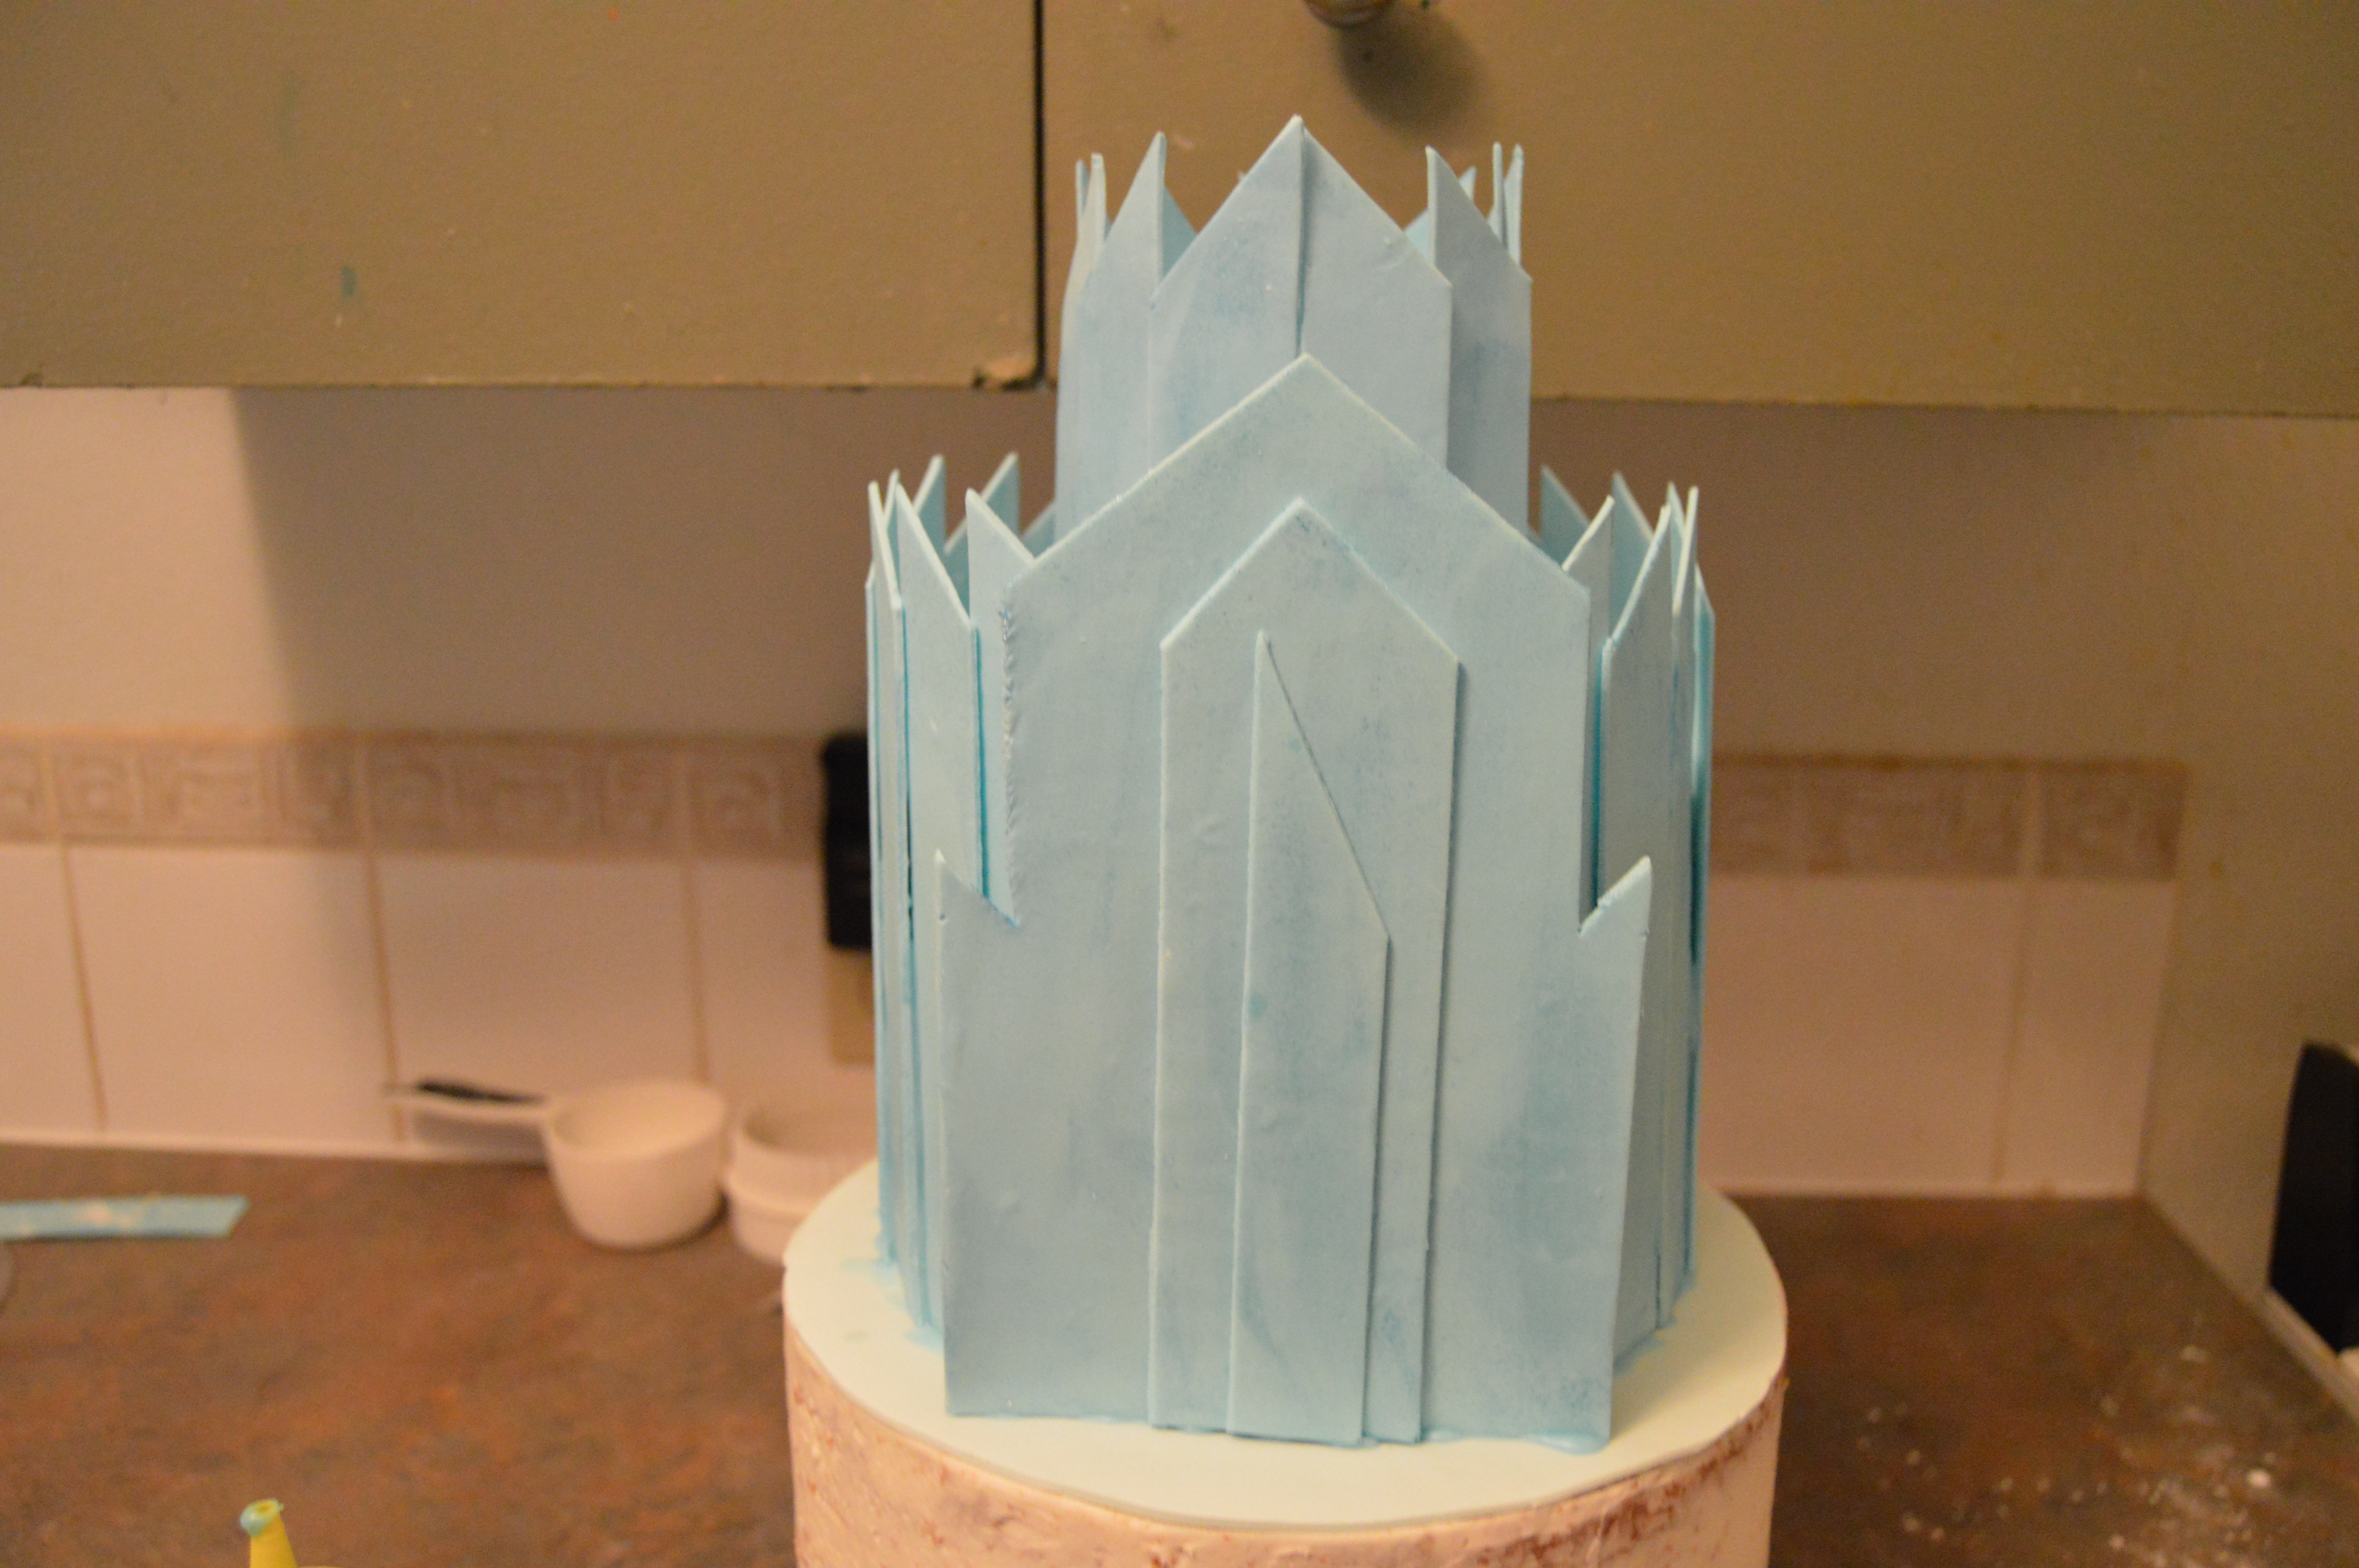
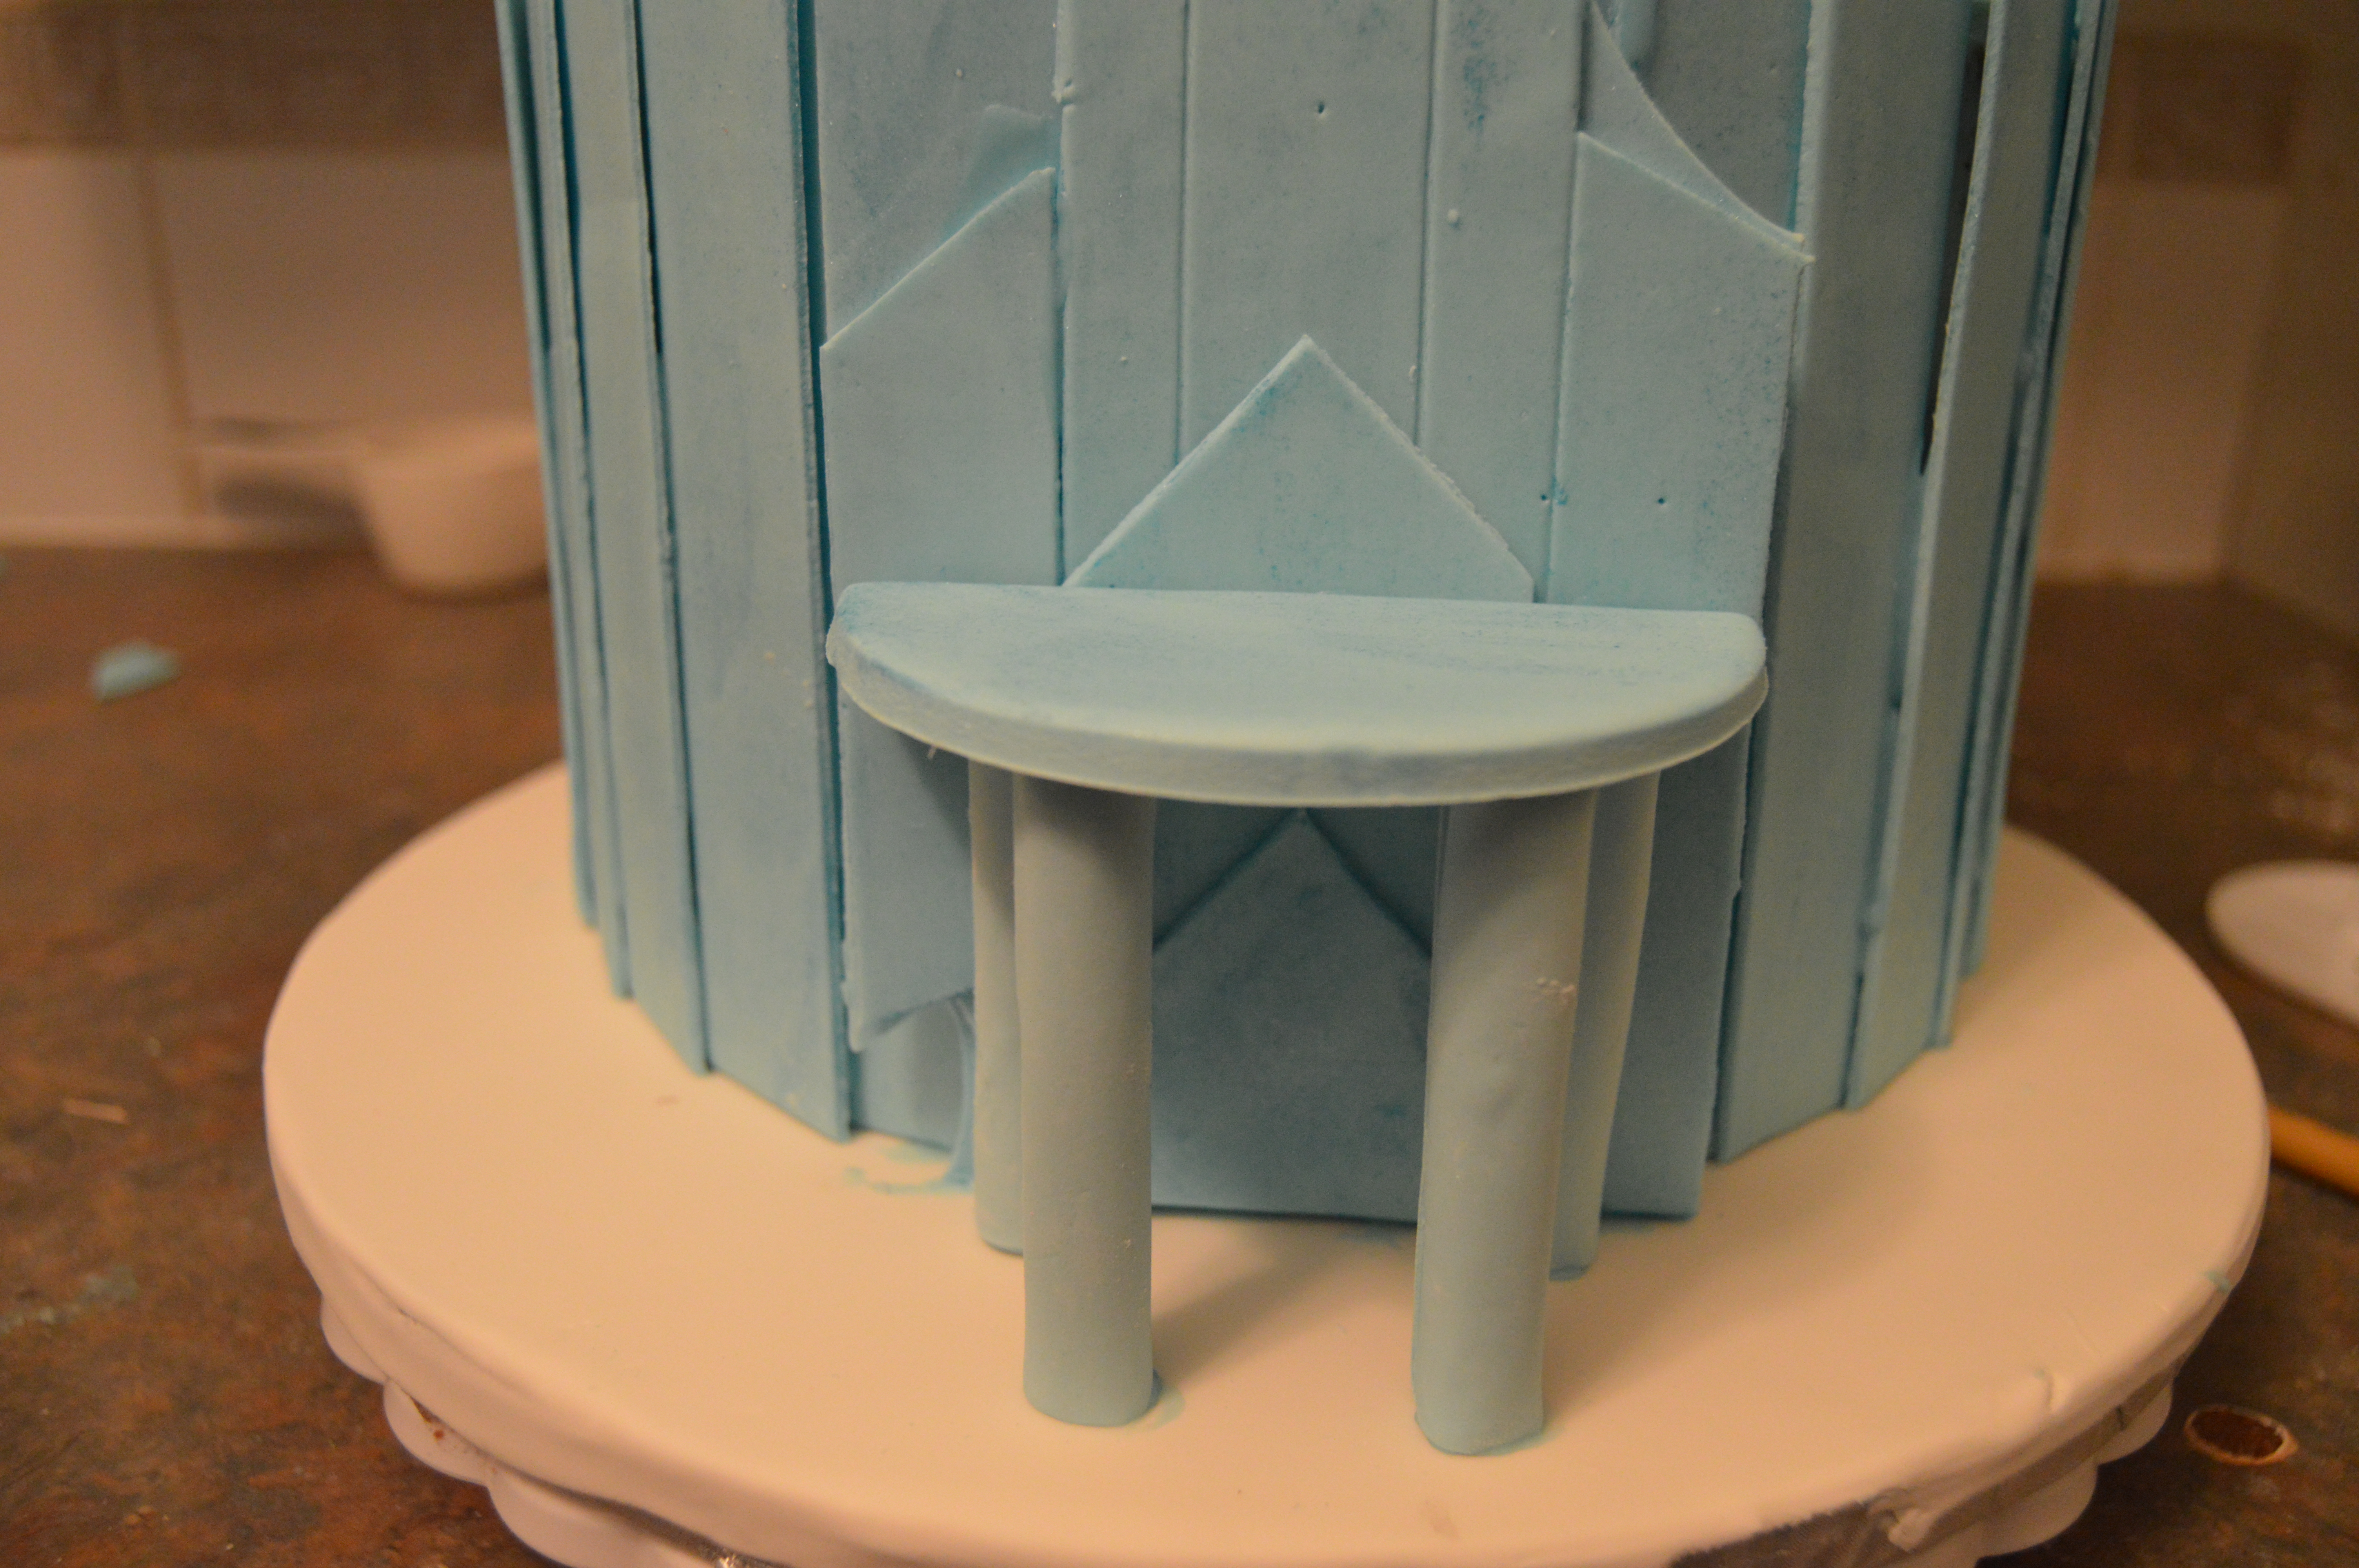
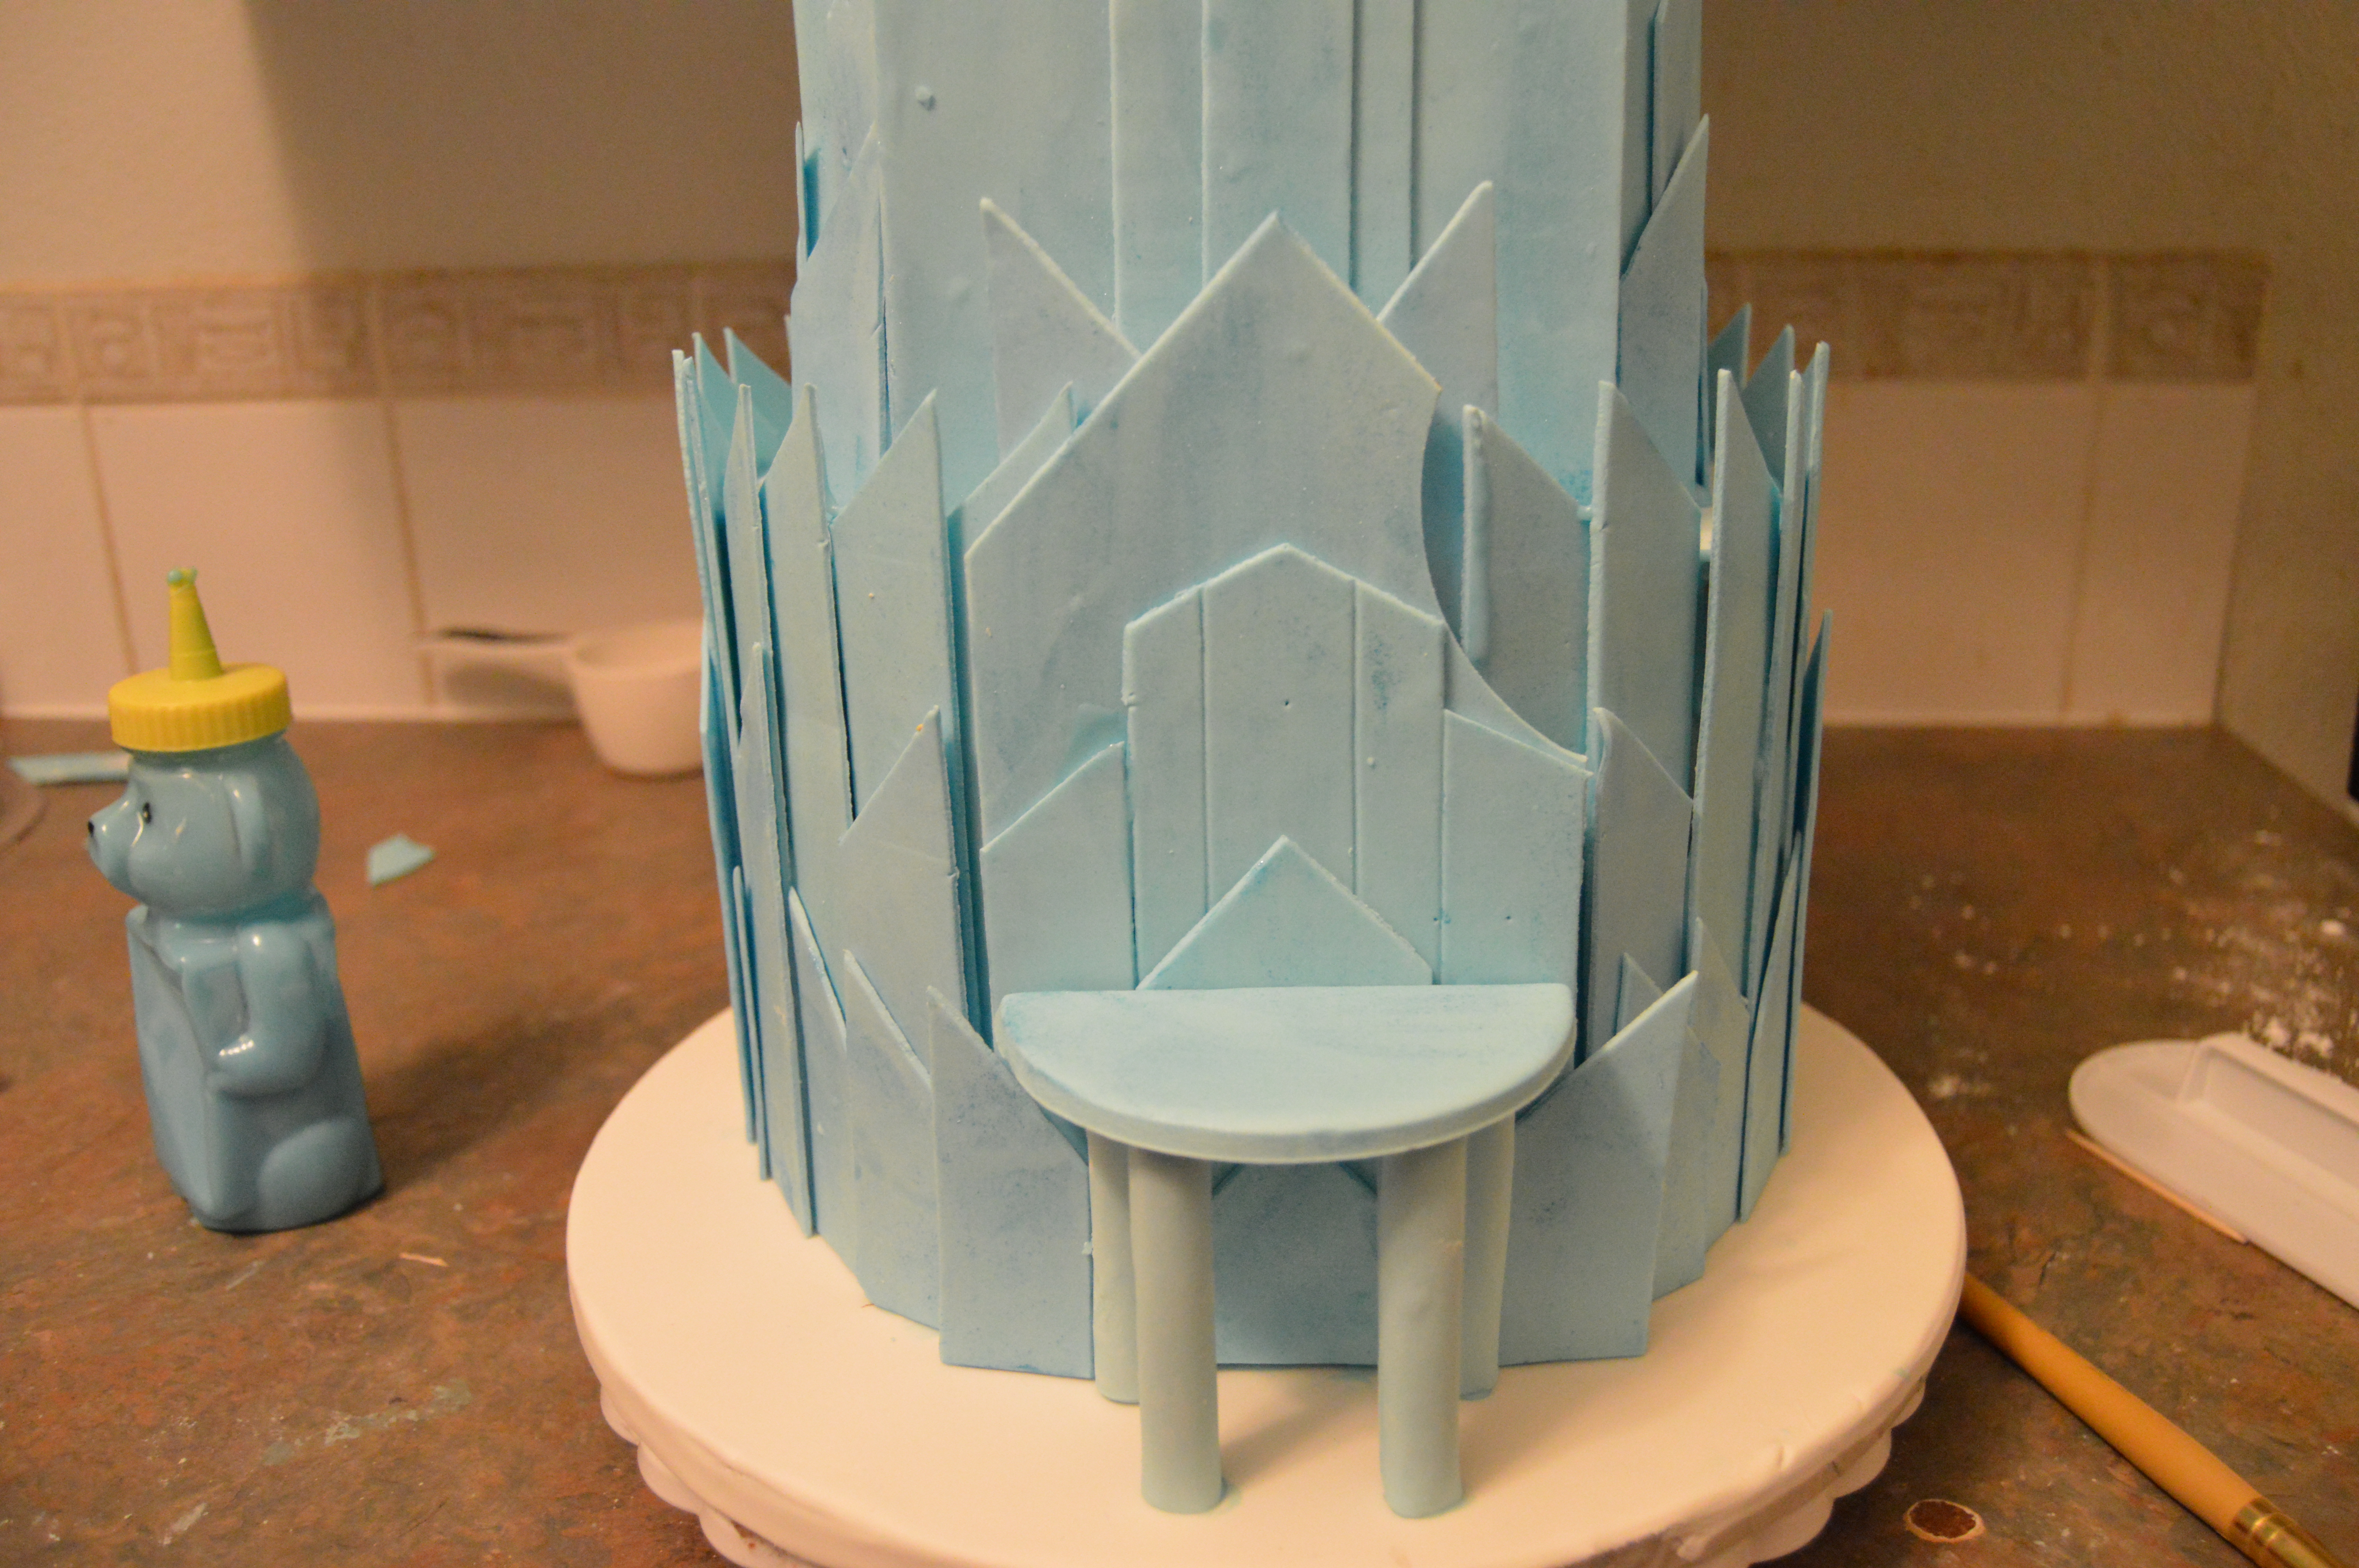
(1) Like I mentioned earlier, this cake uses dry fondant panels. Read more about how to make and use dry fondant panels here. To make the panels, color your fondant sky blue. Roll it out, leave it to dry a bit and cut out the panels…lots of them. I cut out 3 different sizes of panels for the sides and back of the cake. All the panels were about an inch wide (my ruler is about an inch wide so I used its width as a guide). The tallest ones were 7 inches high. Others were 5 and 3 inches high respectively. I cut out 50 (yes 50) of each height thus making a total of 150 panels for the sides and back. For the front of the cake, I cut out several layers of panels which were eventually layered on each other. You can use your discretion here and cut out shapes of your choice. I also made pillars and a semicircle for the balcony of the castle. I left all these to dry, then crushed them with blue luster dust, steamed each individual piece and left them to dry again. You can make them far ahead of time, leave them to dry and pack them into boxes awaiting when they would be used. The rest of the cake is a walk in the park.

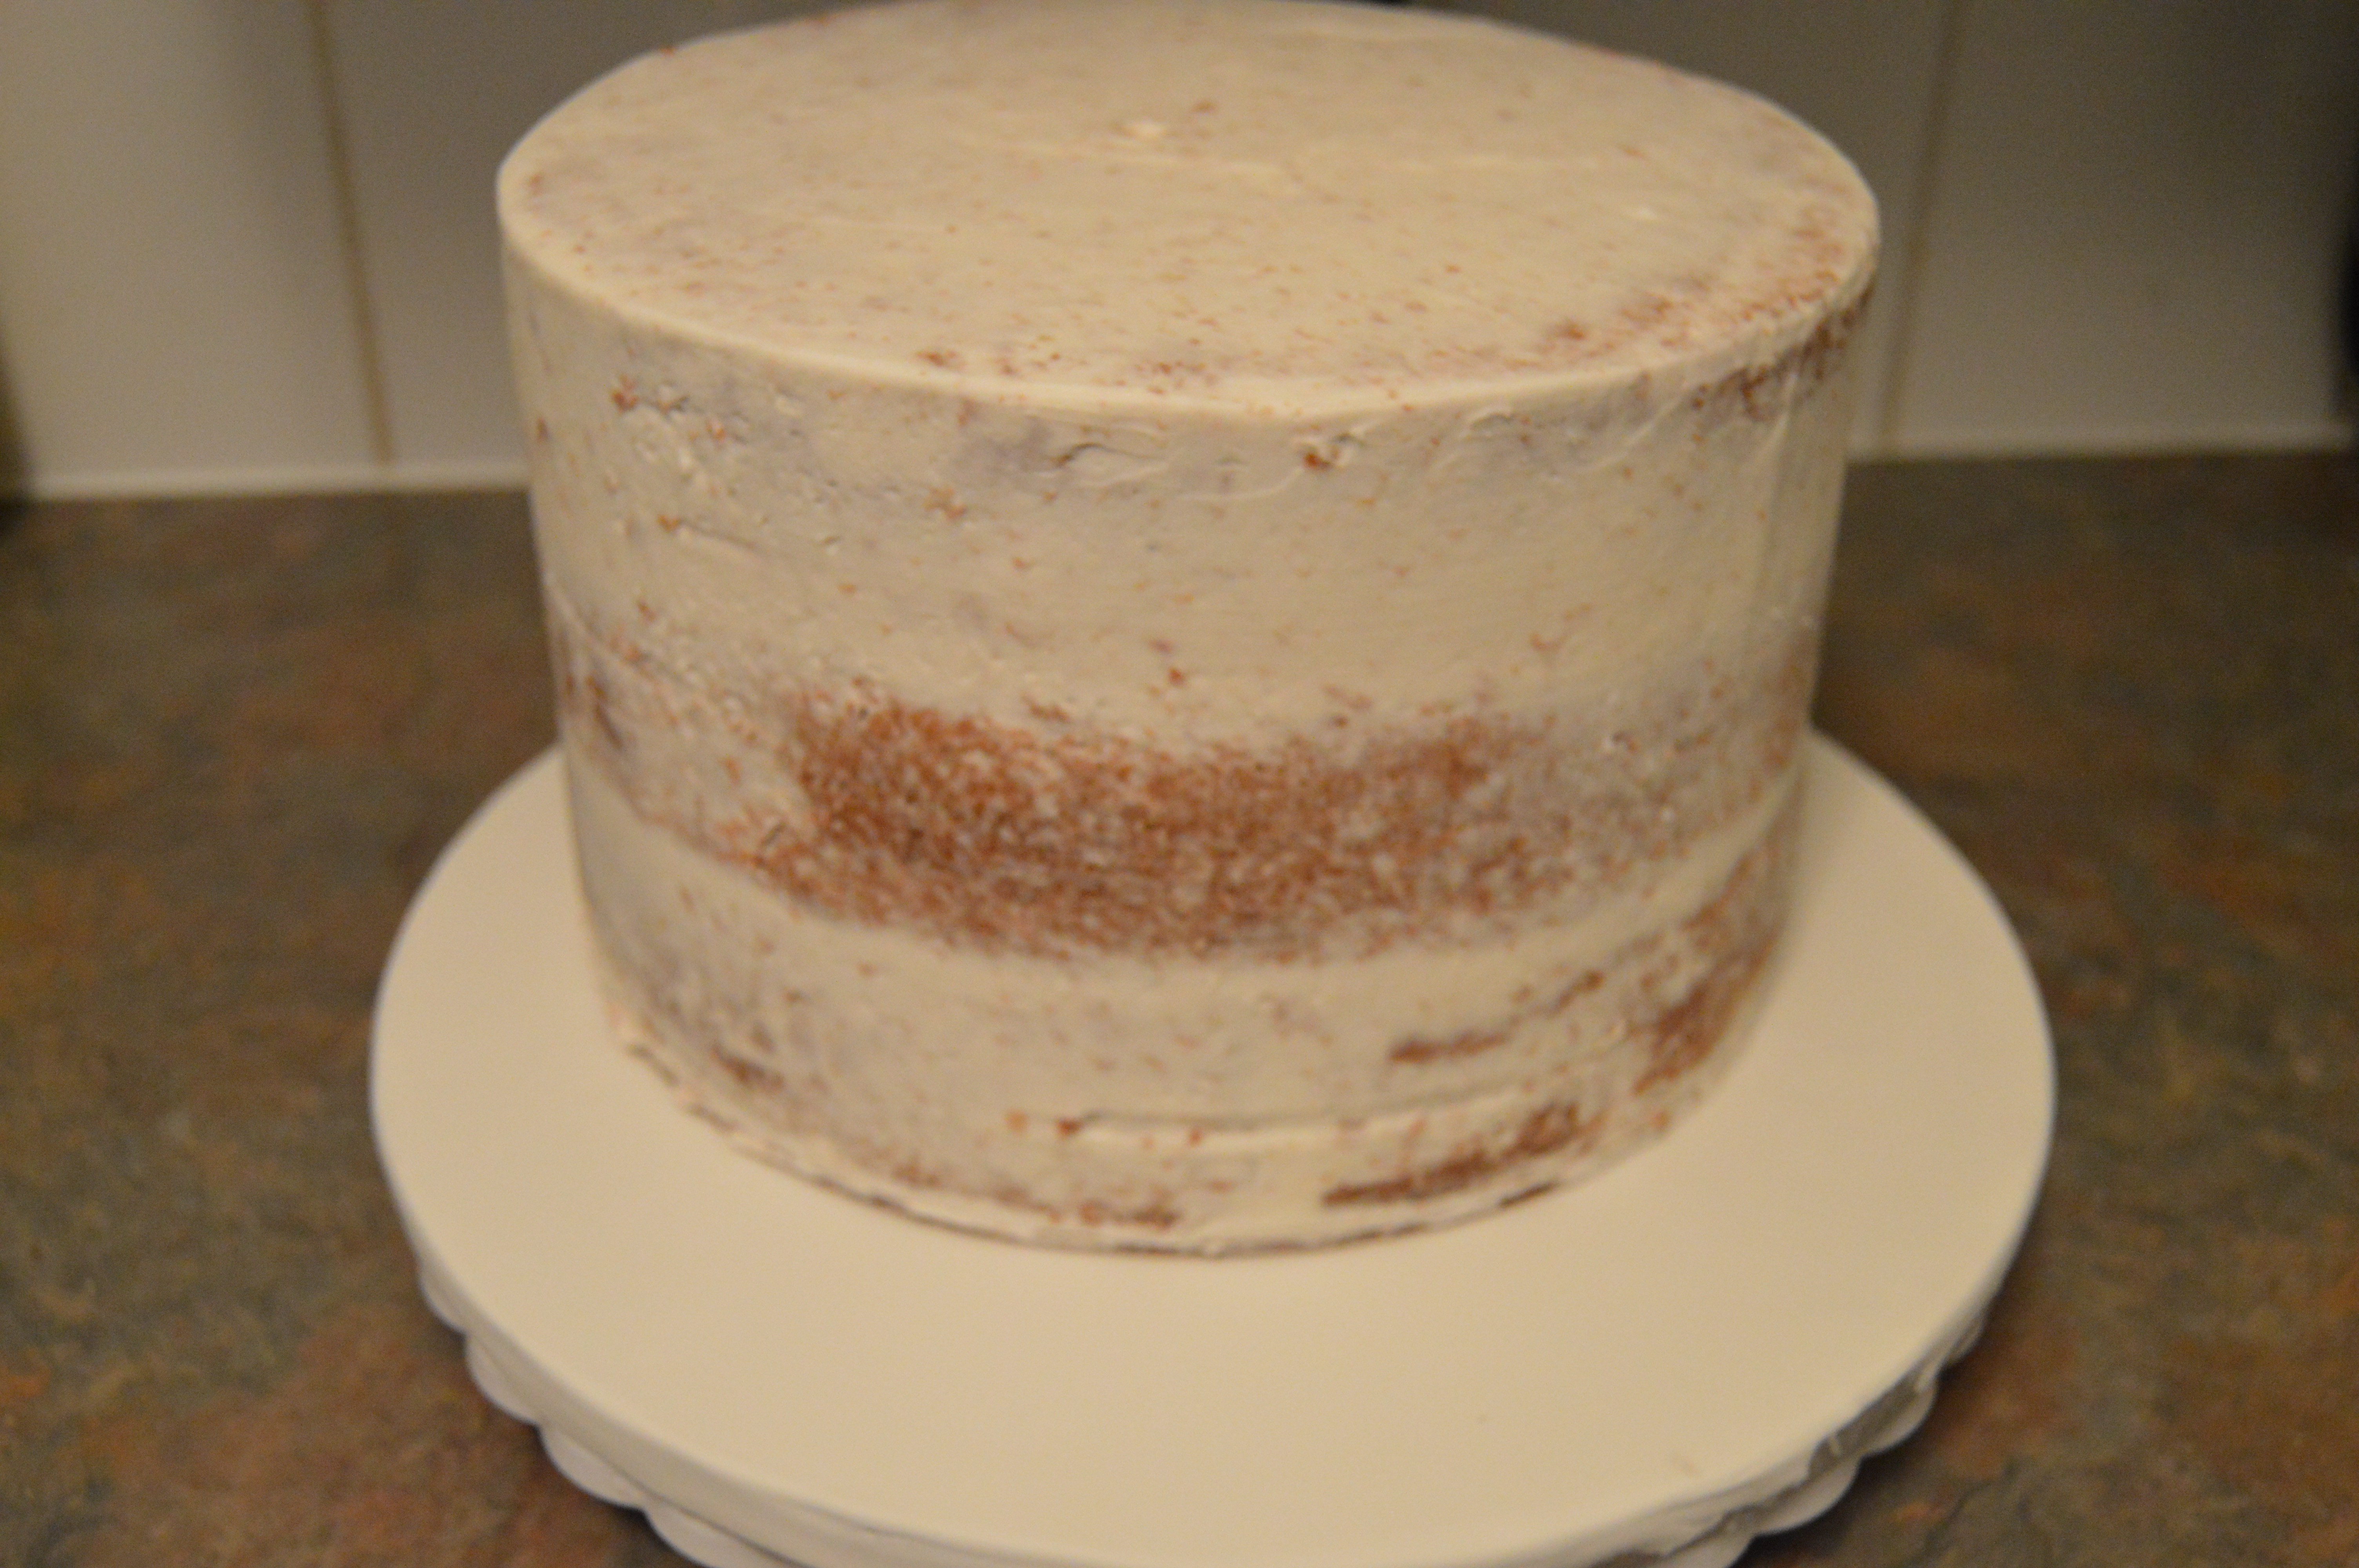
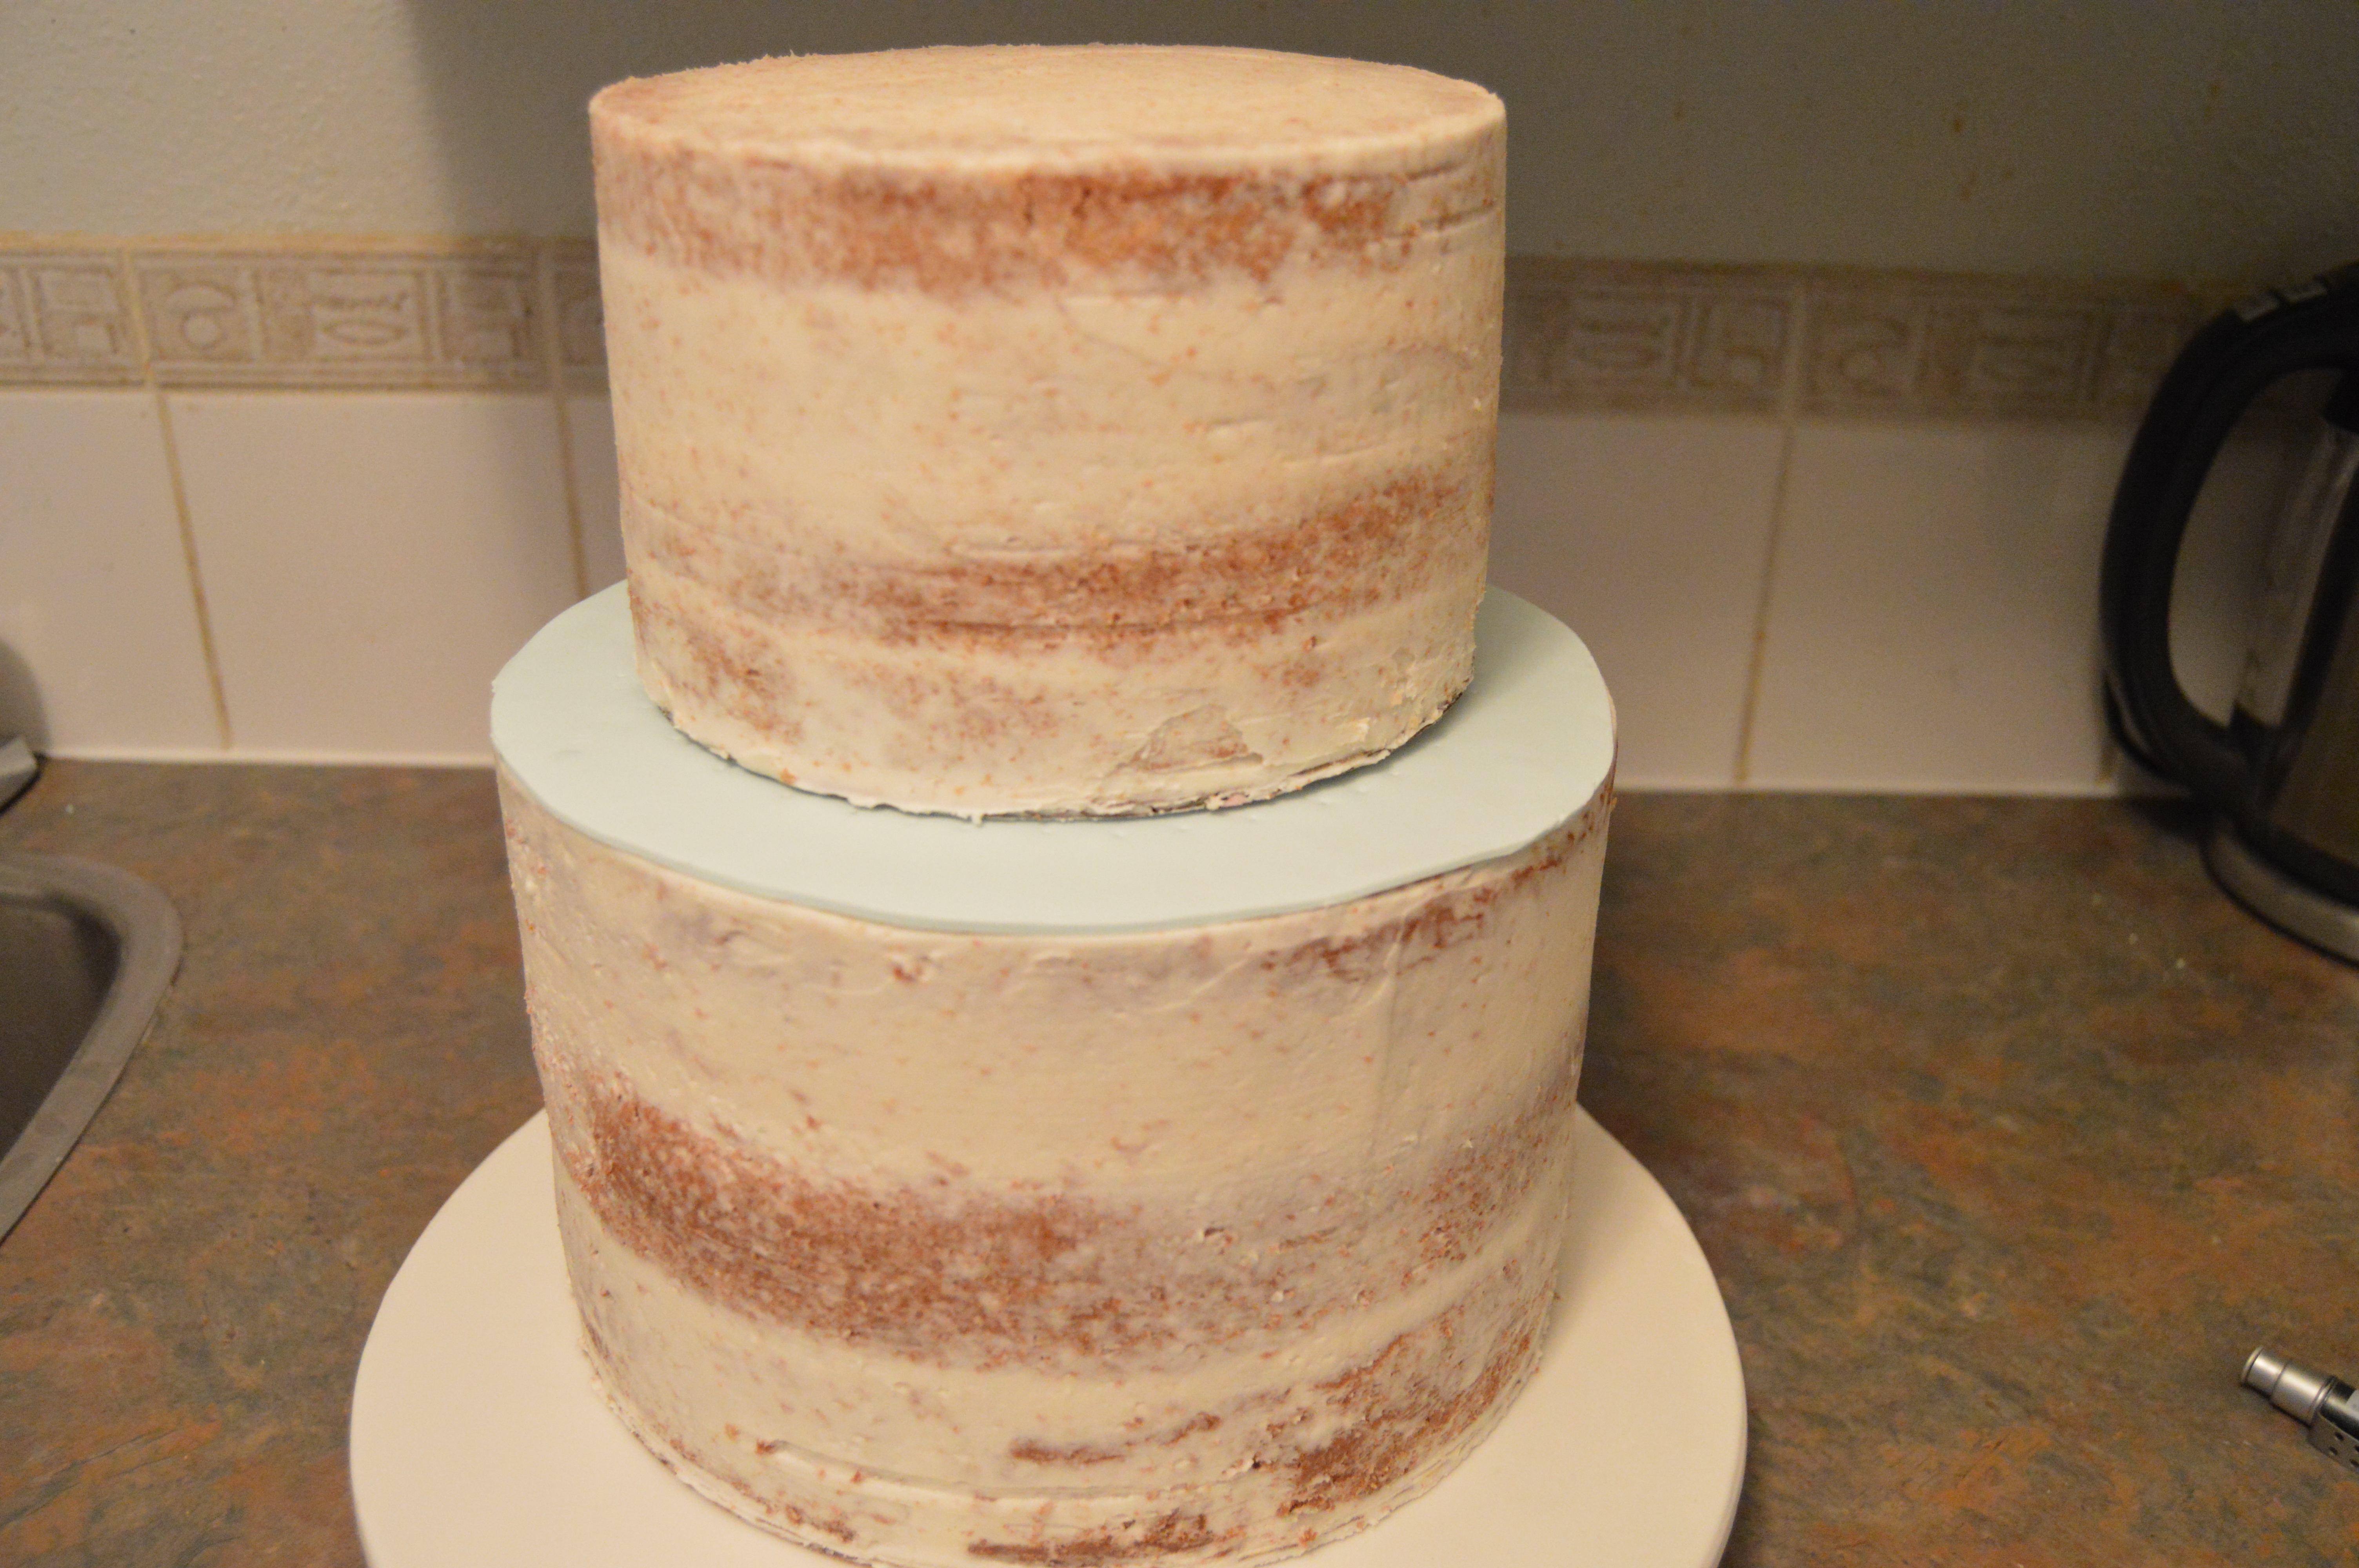
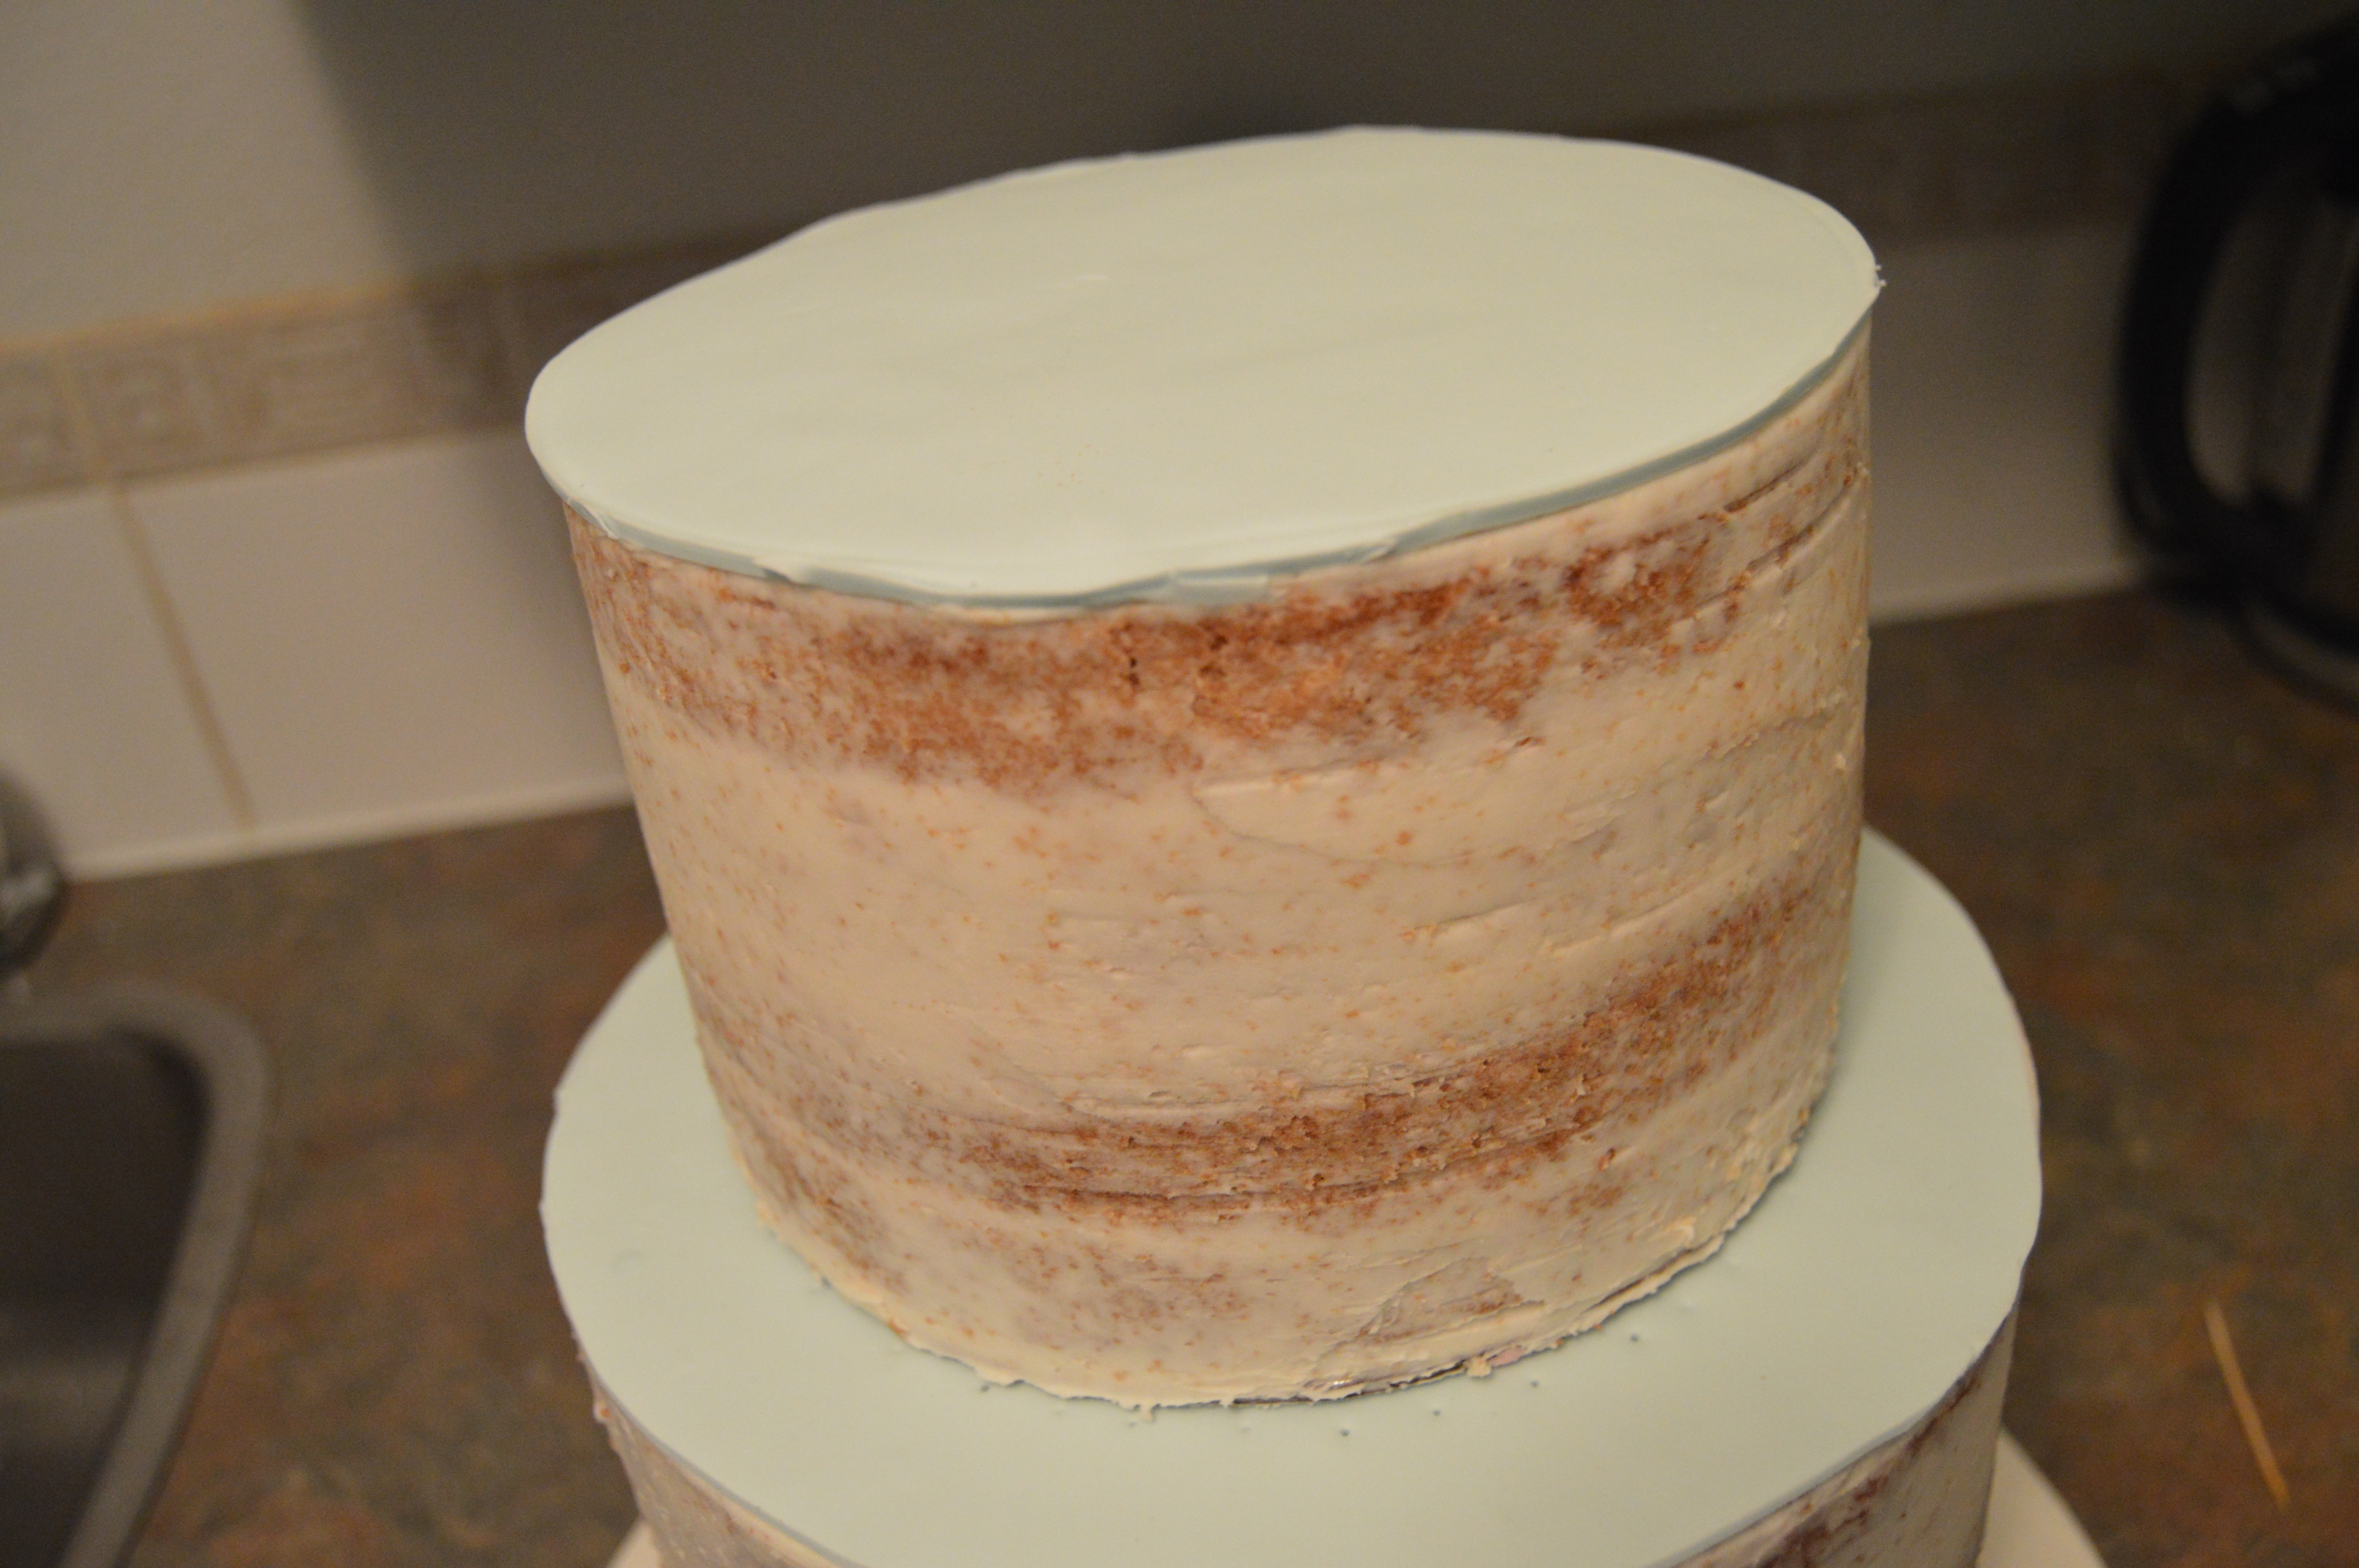
(2) To assemble the cake, cover your cake board with white fondant. Fill and crumb coat both tiers. Also crumb coat a smaller “tier” which will be on top. I used the cake cut offs to make this tier. Stick the bottom tier to the cake board. Cut out a circular piece of blue fondant the size of the bottom tier and place this on it.

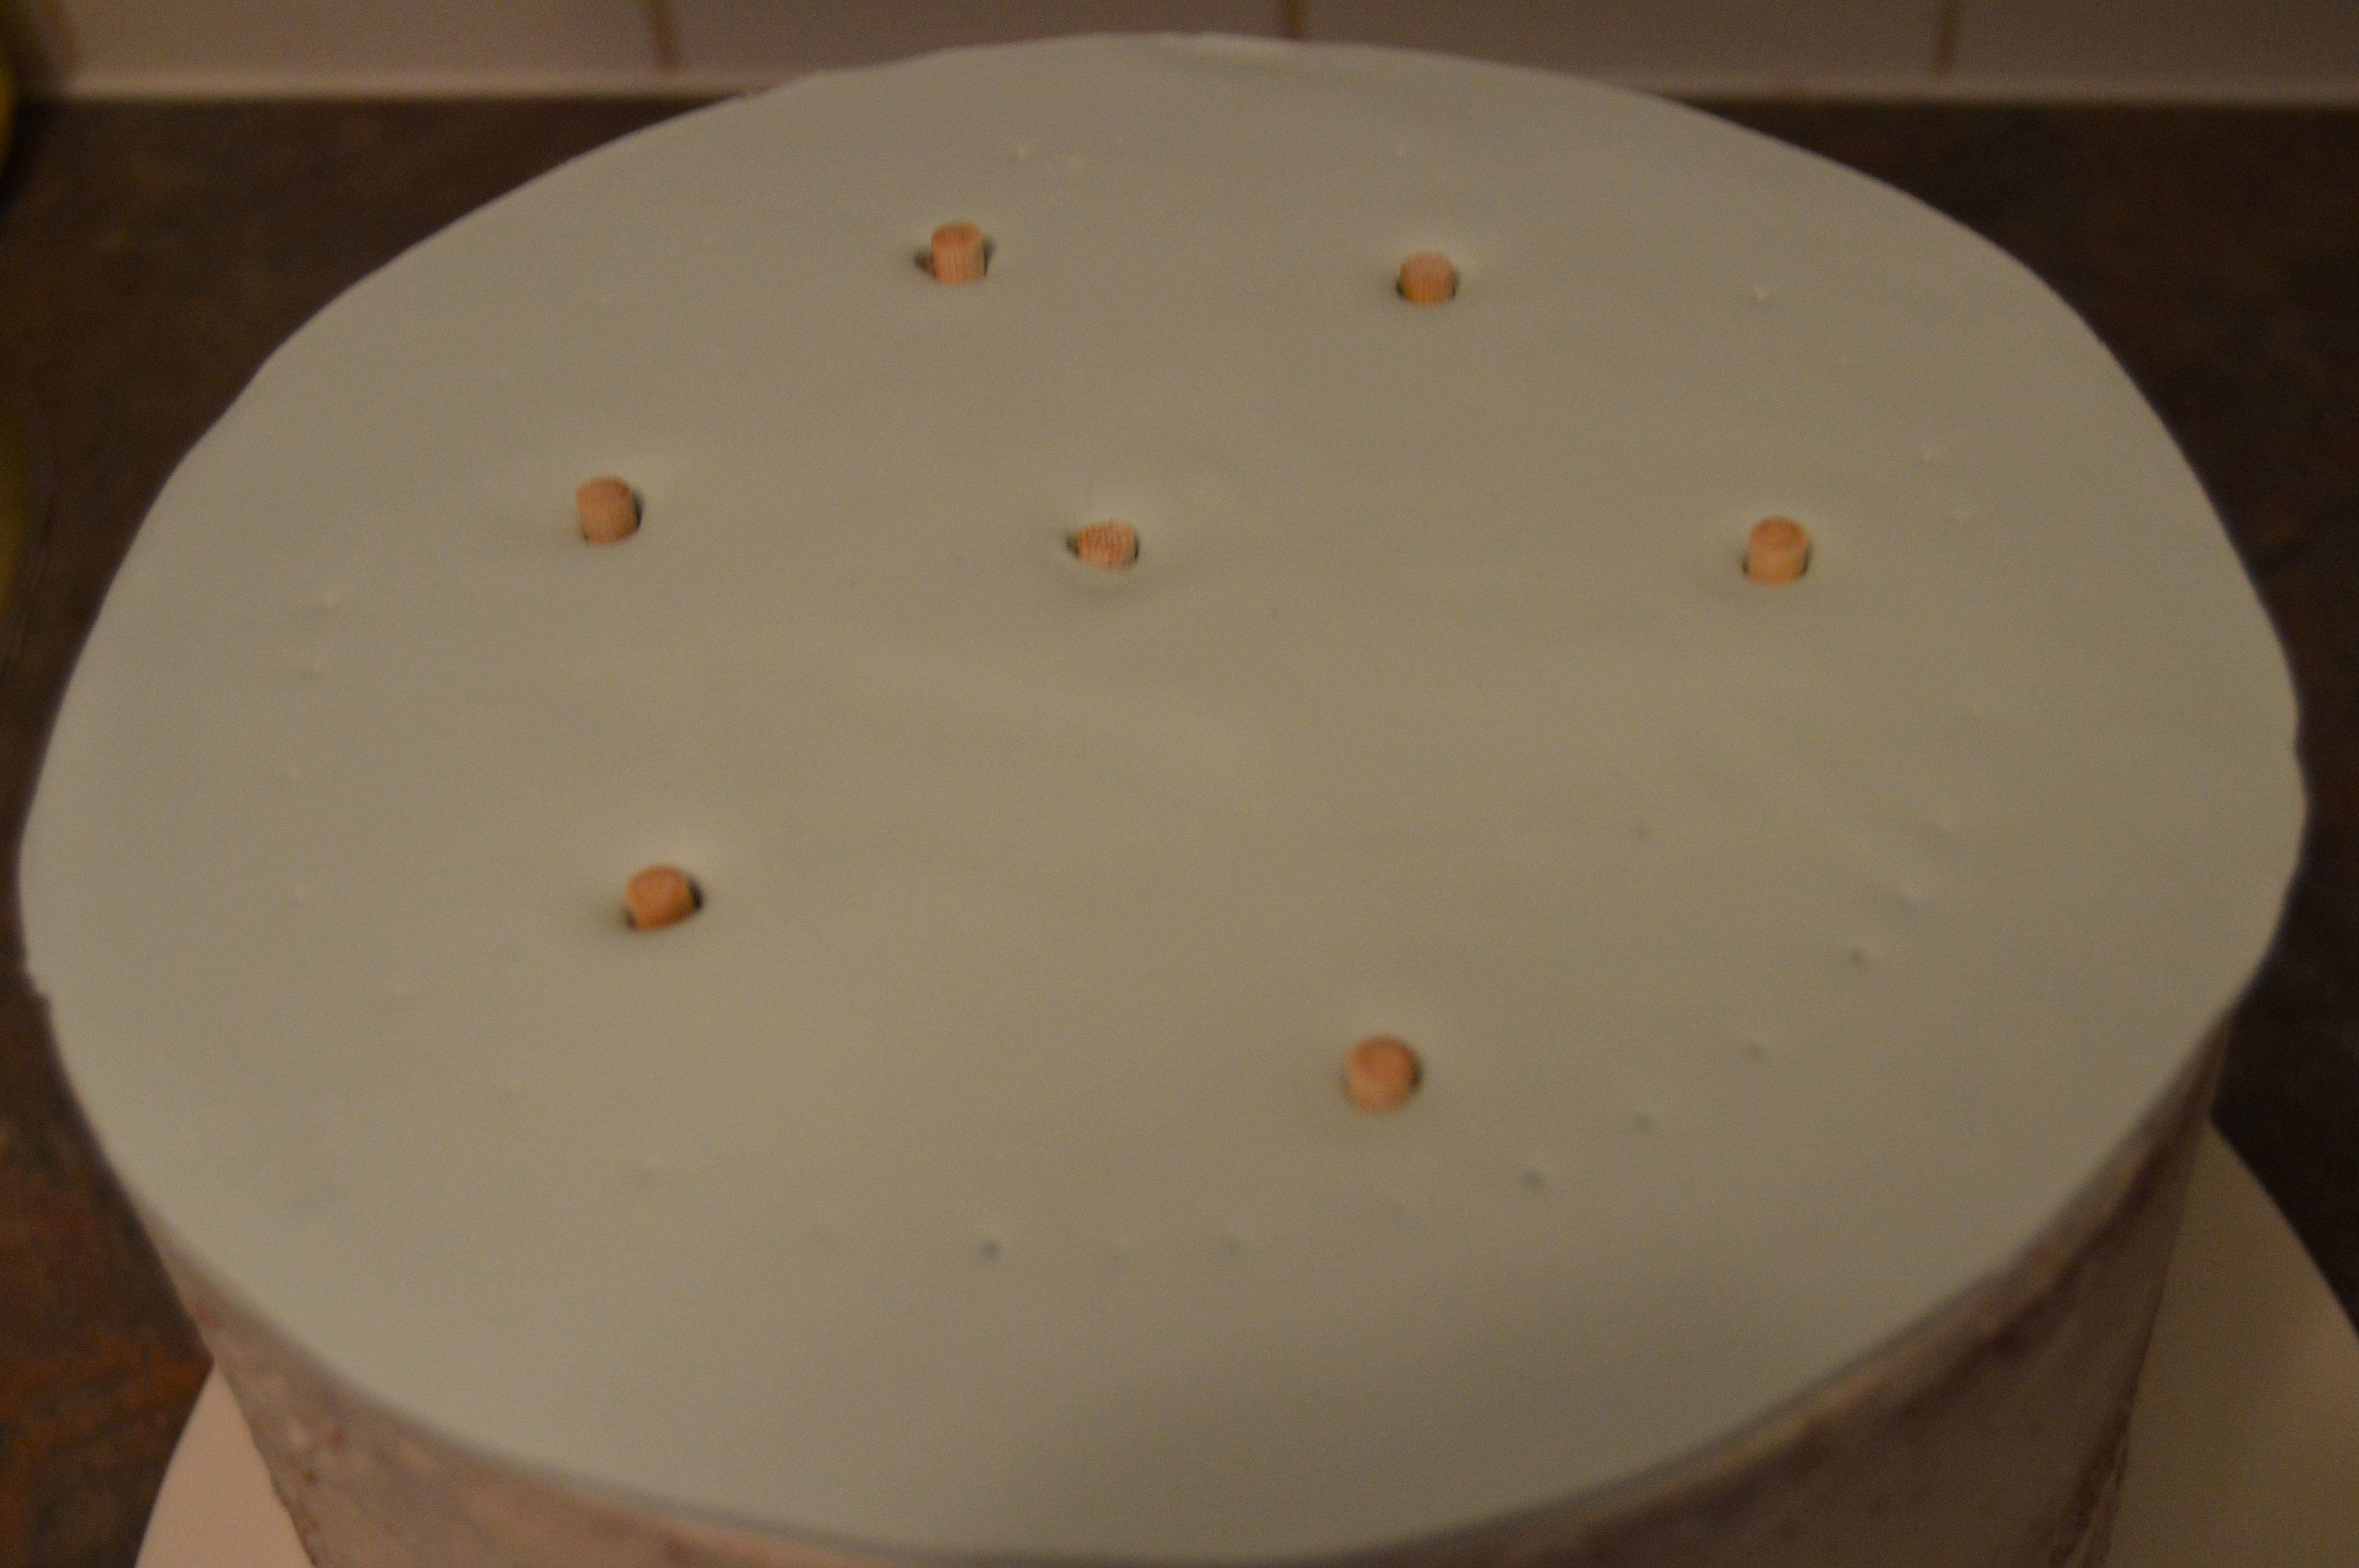
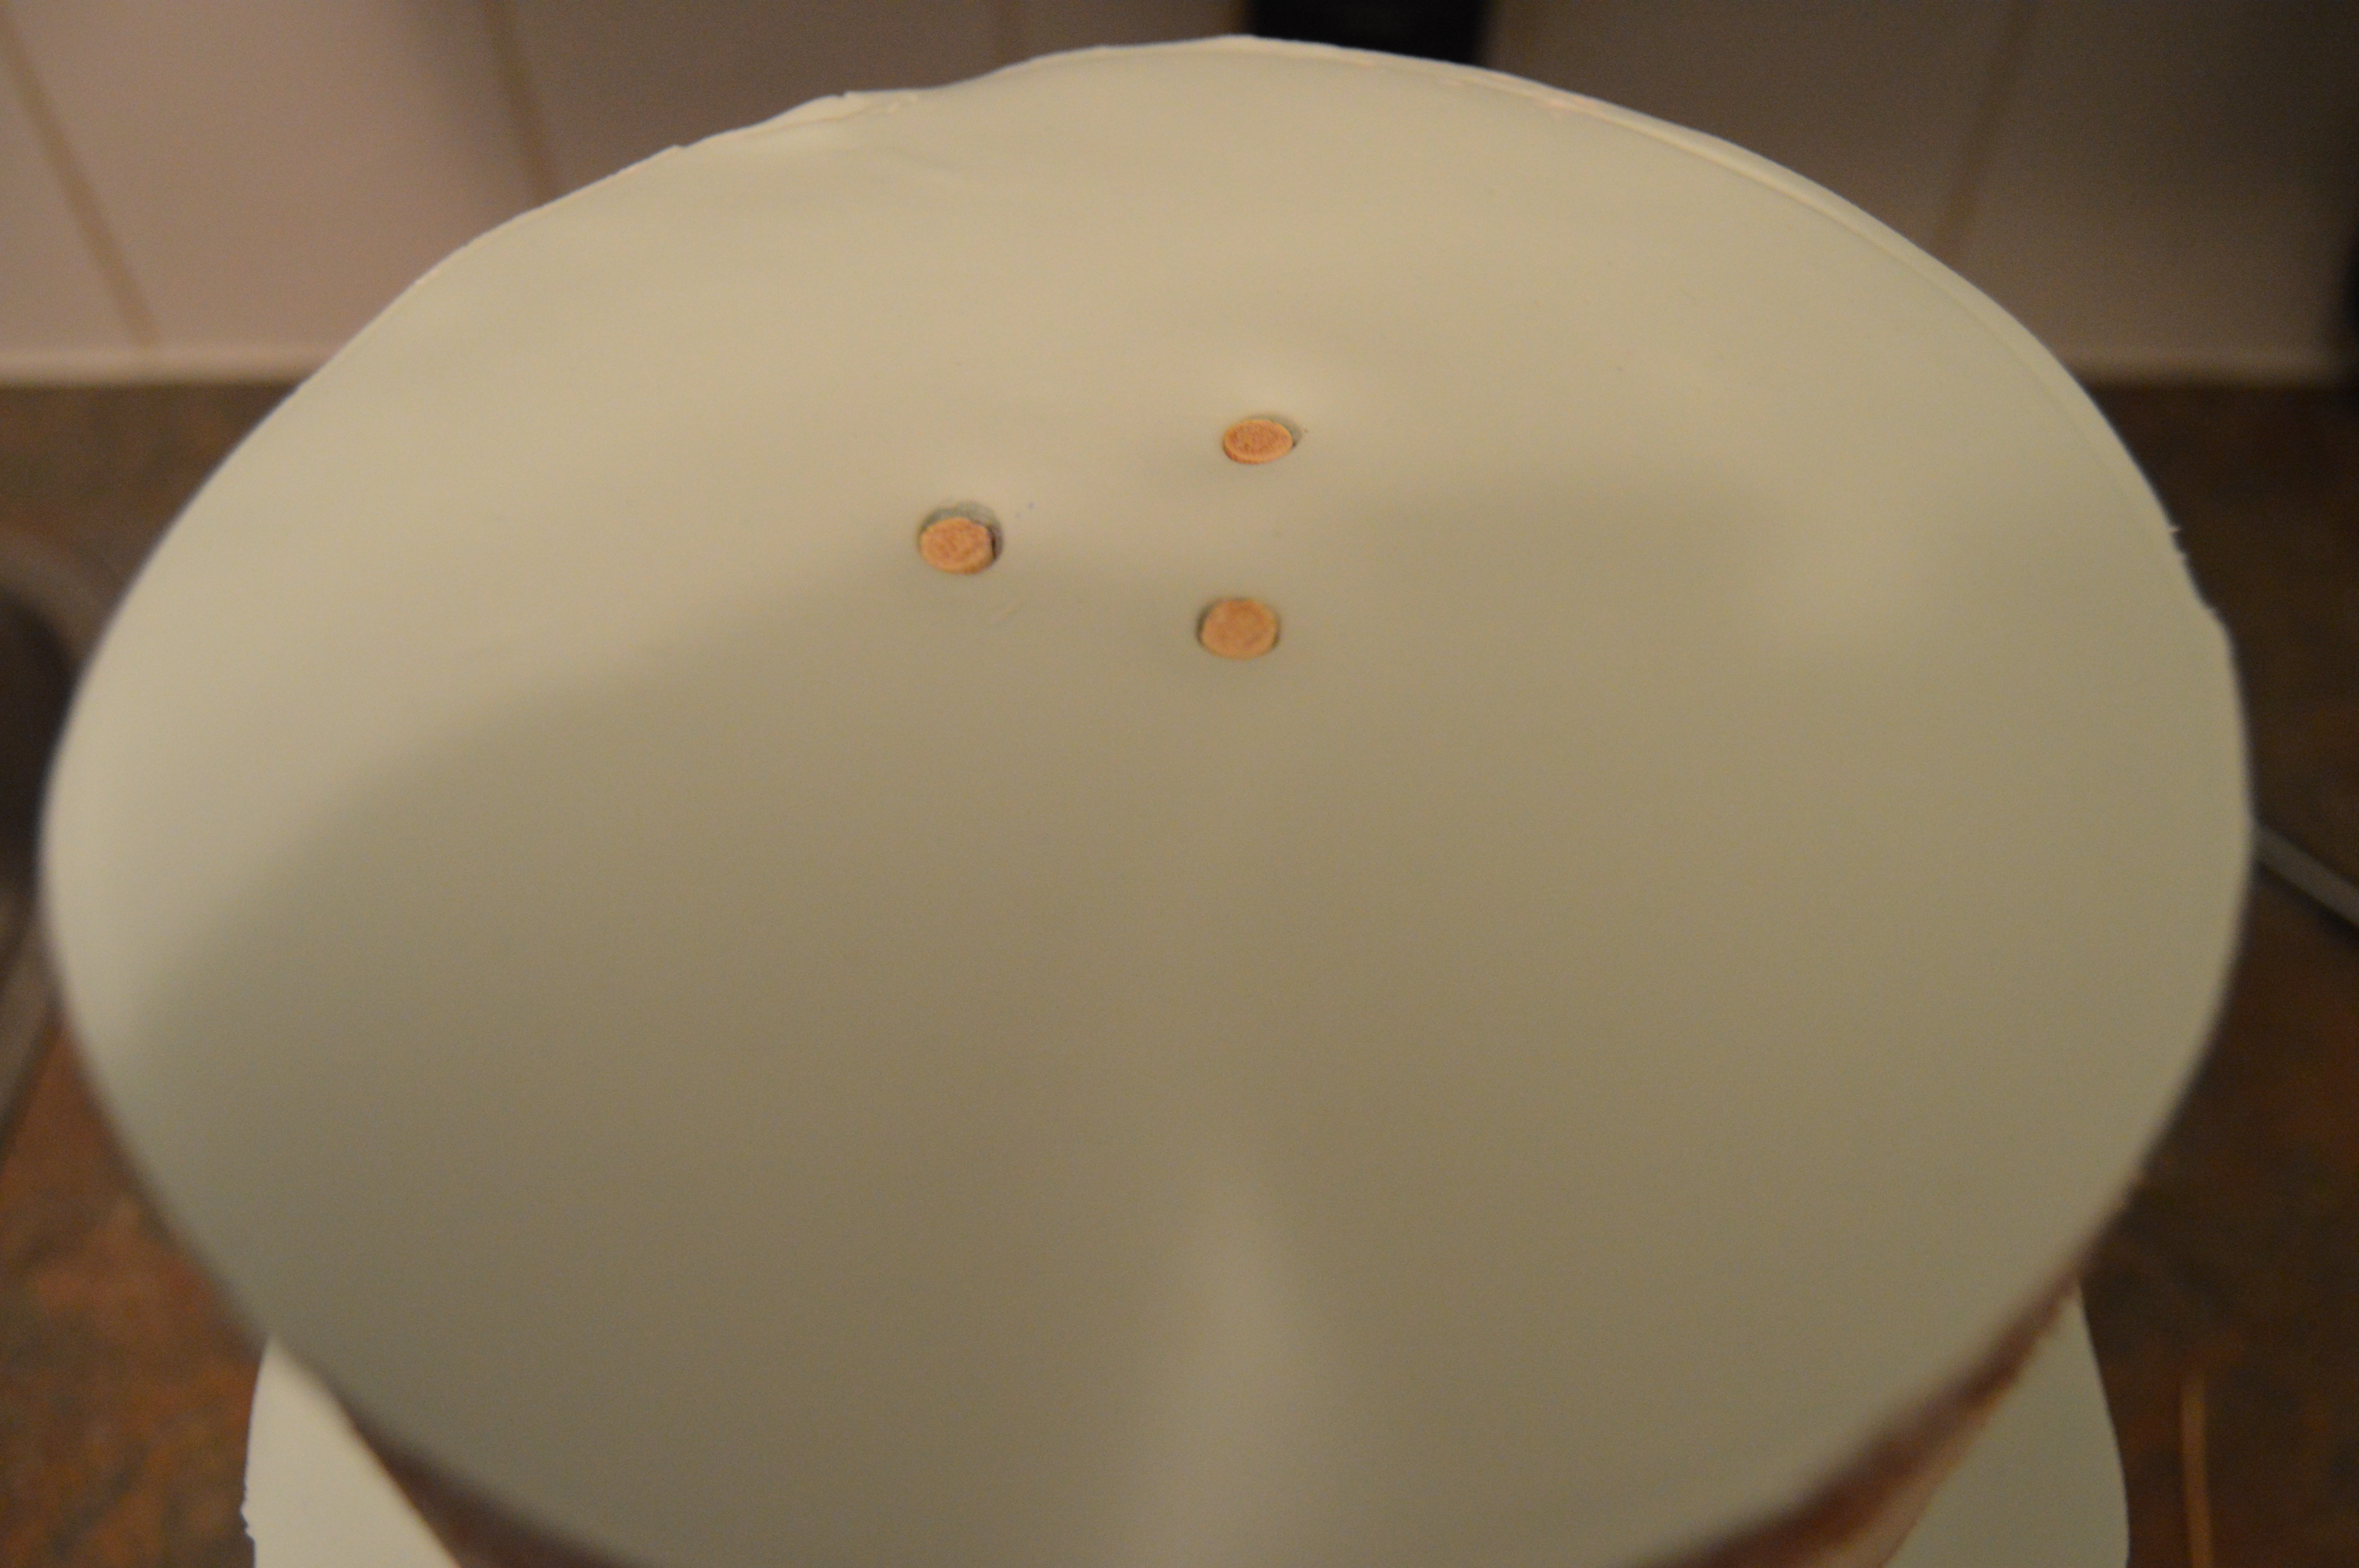
(3) Place dowels in the bottom tier and stack the top tier on it. Cover the top of this tier with blue fondant, place a few dowels in it and stack the last small tier on it. Cover the top of that tier with fondant too. What you have now is the cake structure.

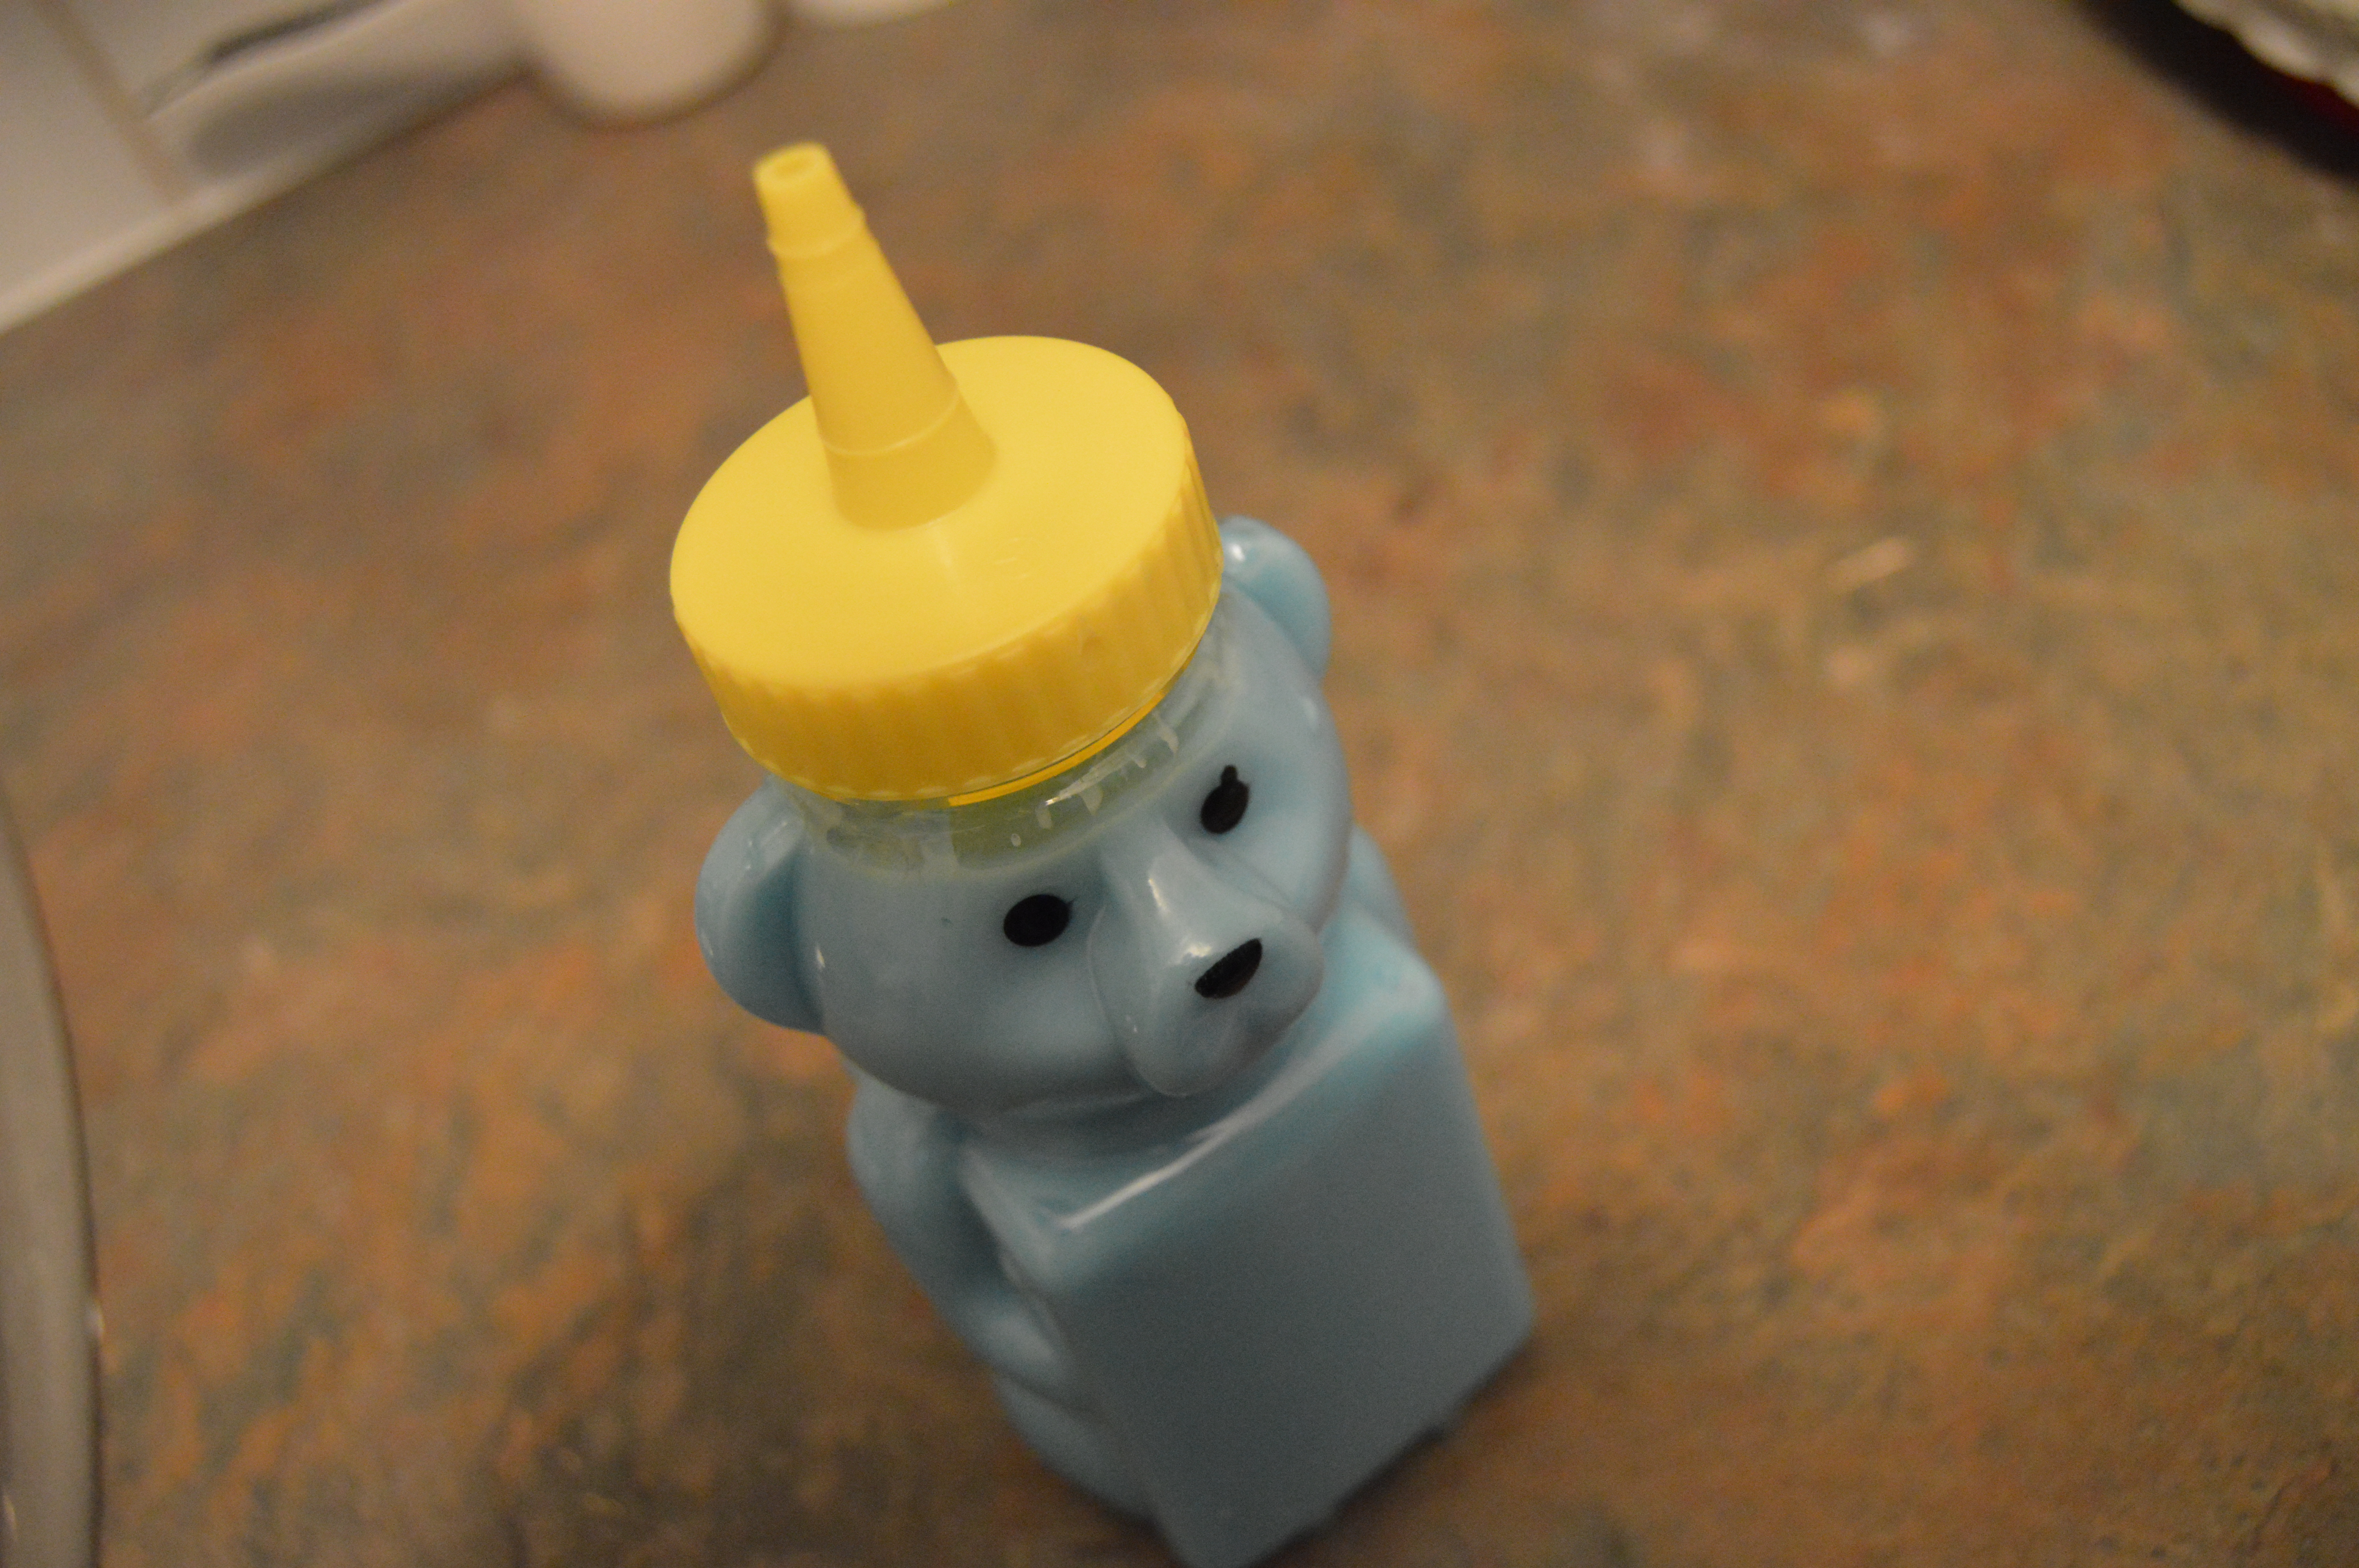
(4) Next, make your gluing agent, lots of it. I chose to use “royal icing.” Actually, its just icing sugar mixed with water to form a thick paste. This was colored blue to match with the cake. I placed this in a squeeze bottle for easier application.
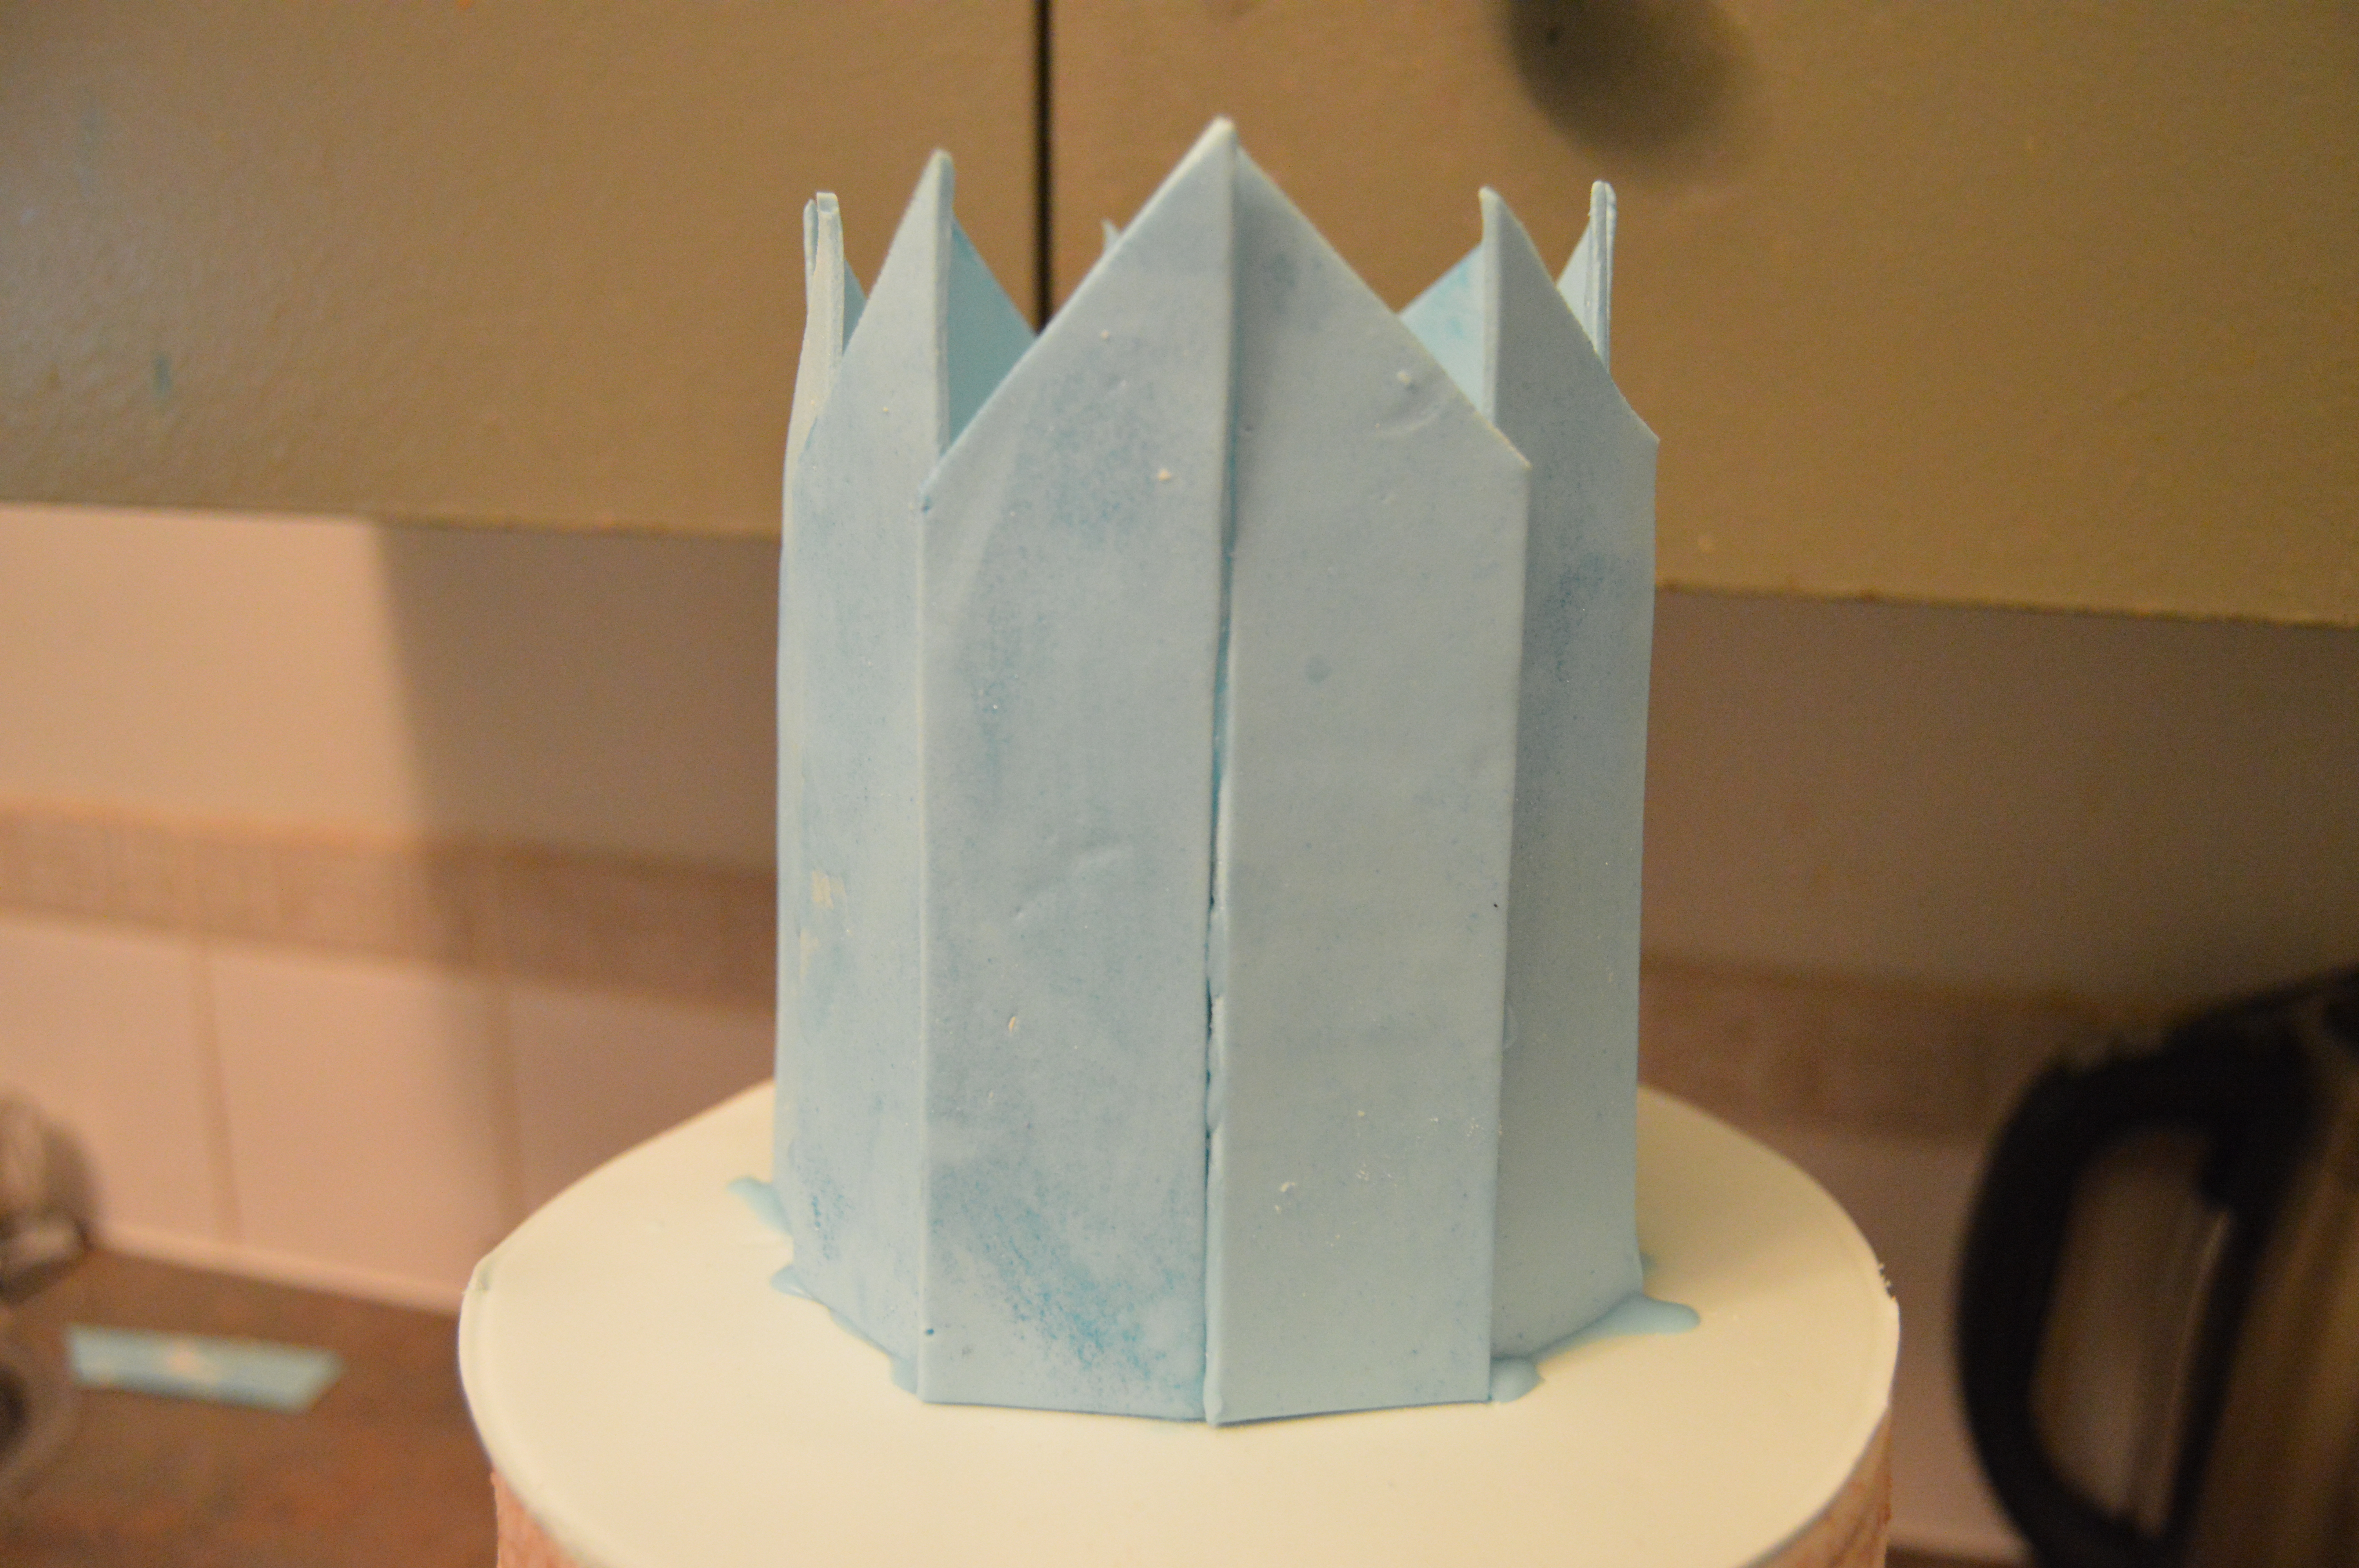
(5) Next, start sticking the panels to the cake starting from the topmost tier. Starting from the top ensures that there is no obstruction as you work your way down. Brush each tier with some water. This will help the panels touching the cake itself to stick to the cake. Before placing each panel, pipe some of the royal icing around its inner edges and place them on the cake. Each subsequent panel must overlap the one before it so they stick to each other. I would advice you start from the front of each tier and work your way to the back. Start with the tallest panels around each tier. Then stick the next height of panels on the taller panels around the cake. Do the same thing for the shortest panels. This is what would create the layered look.
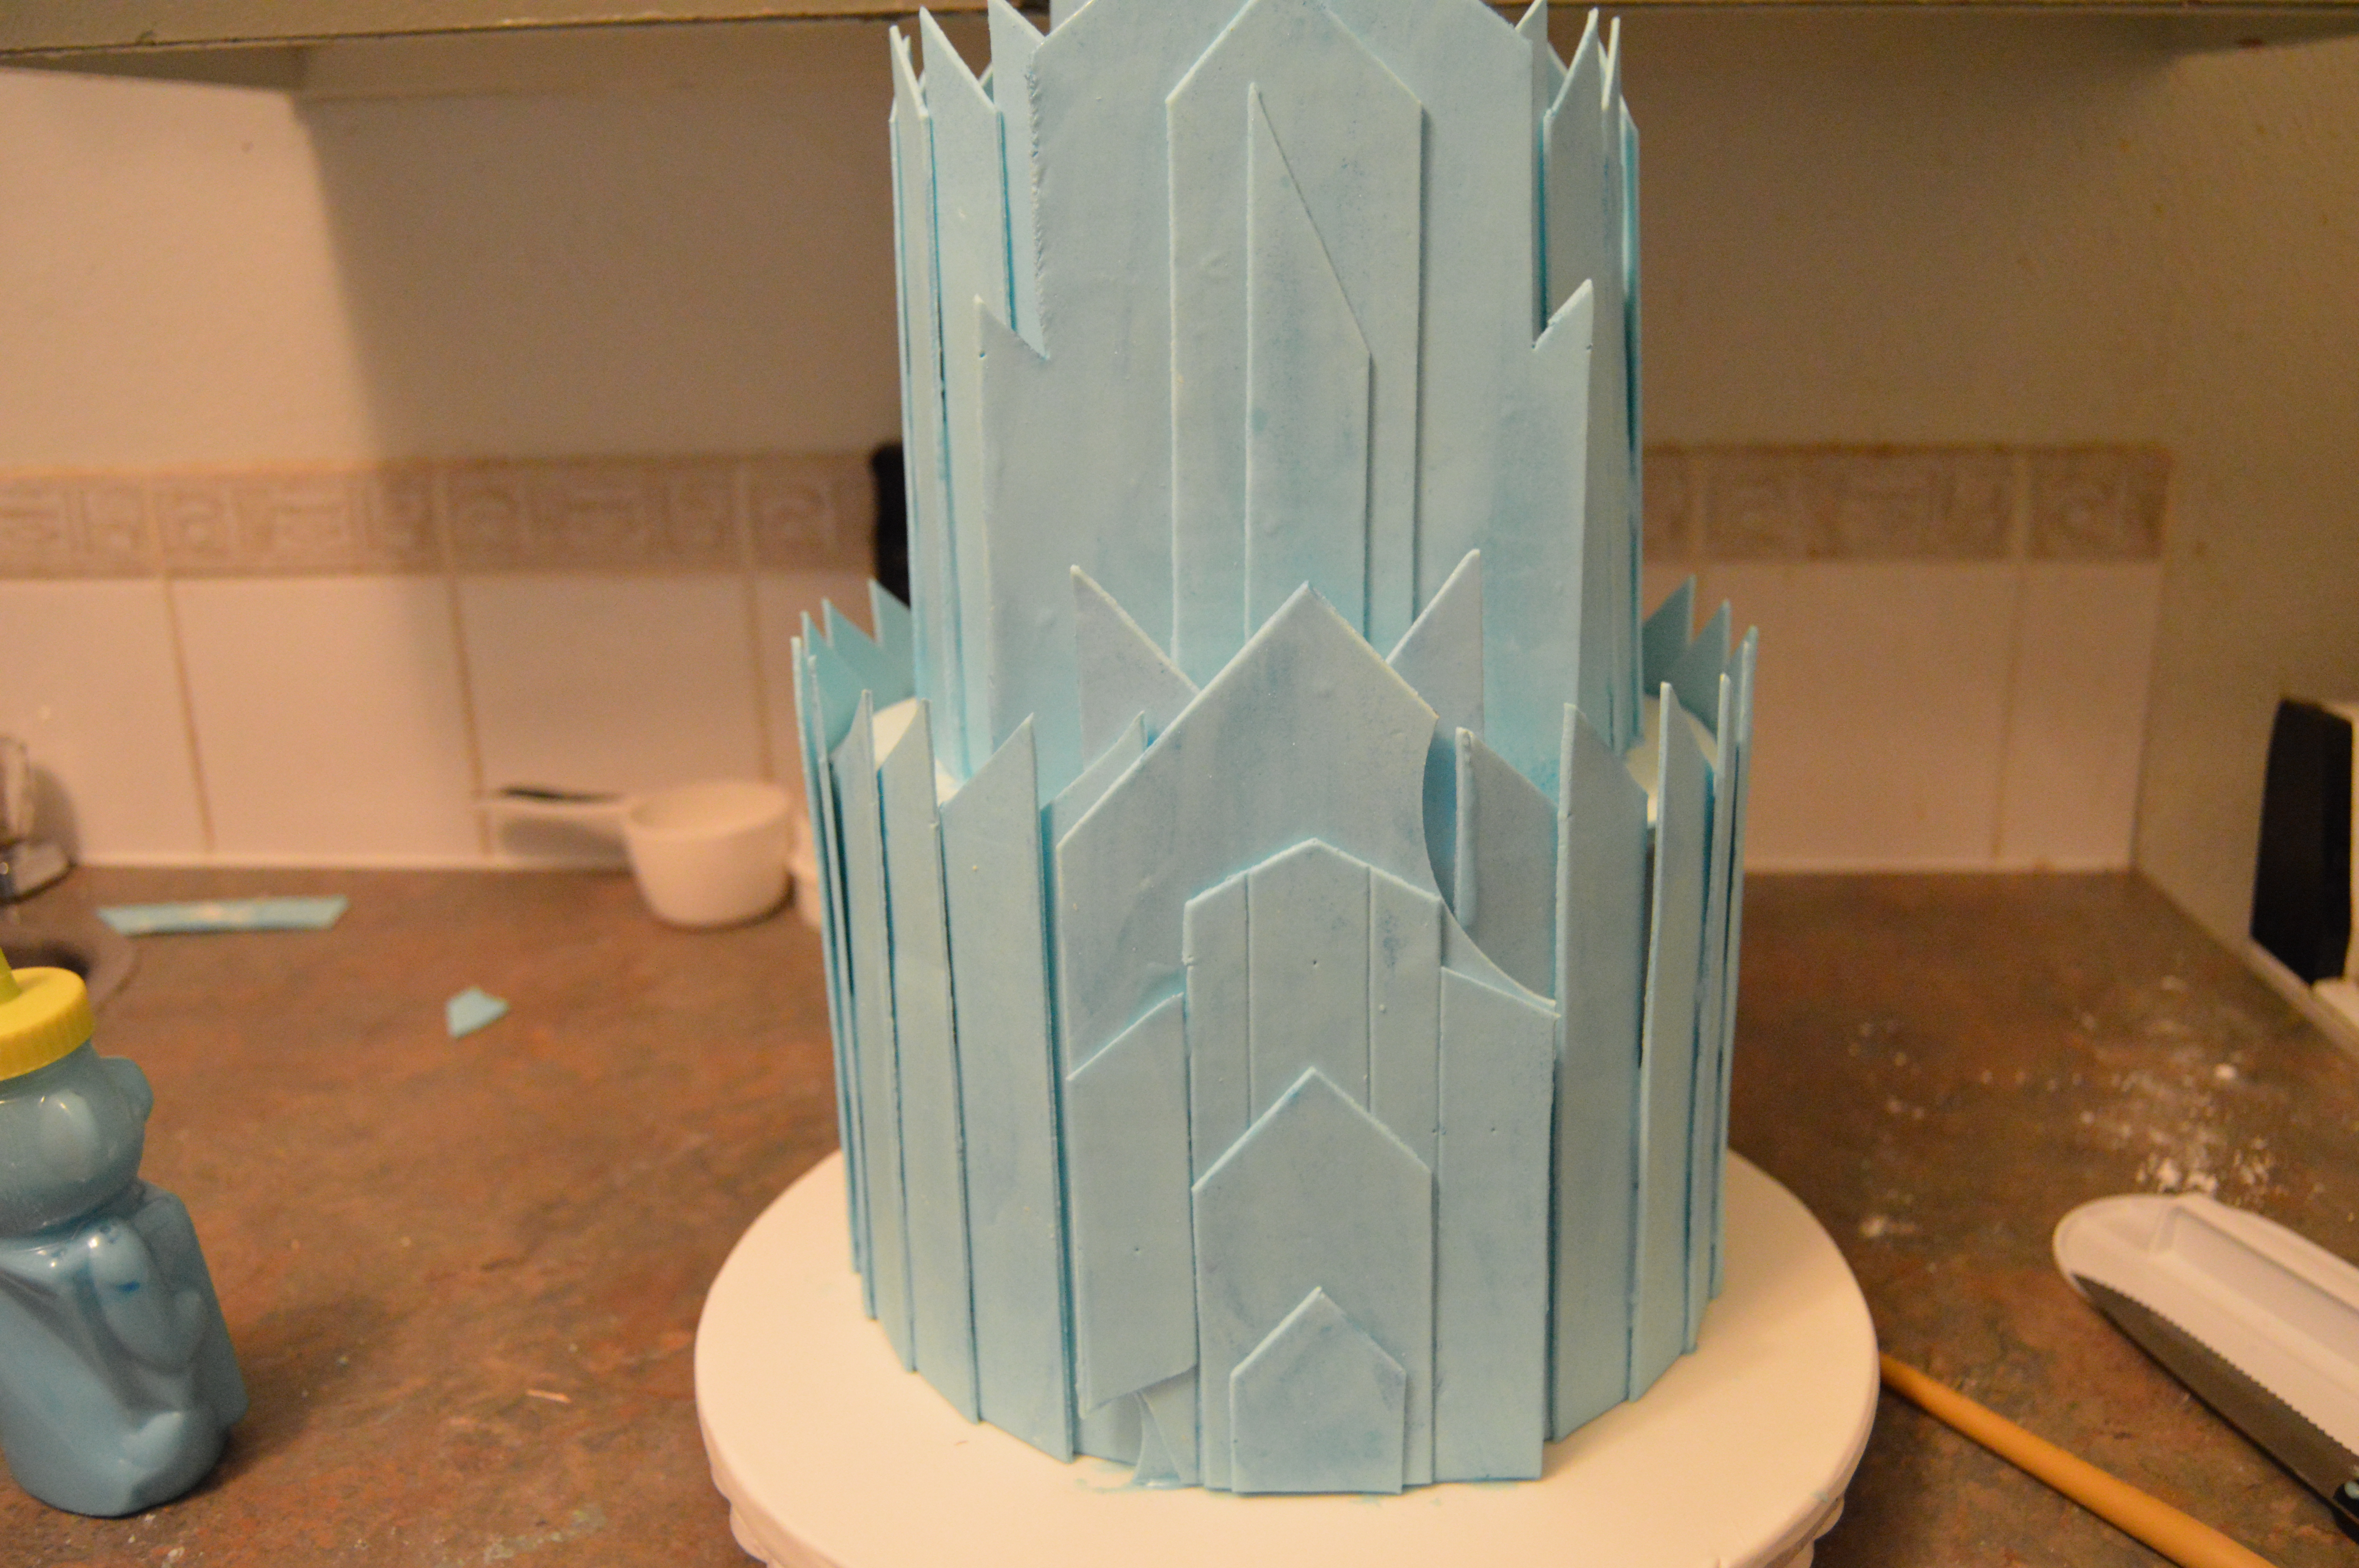
(6) When you are done applying the panels, use the royal icing to stick the pillars and balcony to the front of the cake.

(7) Really, that’s all there is to it. Go around the cake and pour some more royal icing into the inner structure of the cake just to secure the panels properly. I also used a snowflake cutter to cut out a few white snowflakes which I stuck to the cake. Apply a ribbon to the cake board and you are done! Happy caking!
Terry Adido is passionate about showing people how easy it is to recreate restaurant quality meals in the comfort of their kitchens. With a style of cooking he refers to as Afro-European Fusion, his meals are influenced greatly by French and Italian Cuisine with a West African twist. If you love good food, you are in for the ride of your life.
Wow its seems so easy with your directions. I’m trying it out for my daughters birthday next month. Thanks for sharing.
You are welcome. All the best with the cake.
Very nice and thank u so much for this.
You are welcome.