
Fondant Gele (Head-Tie) Tutorial
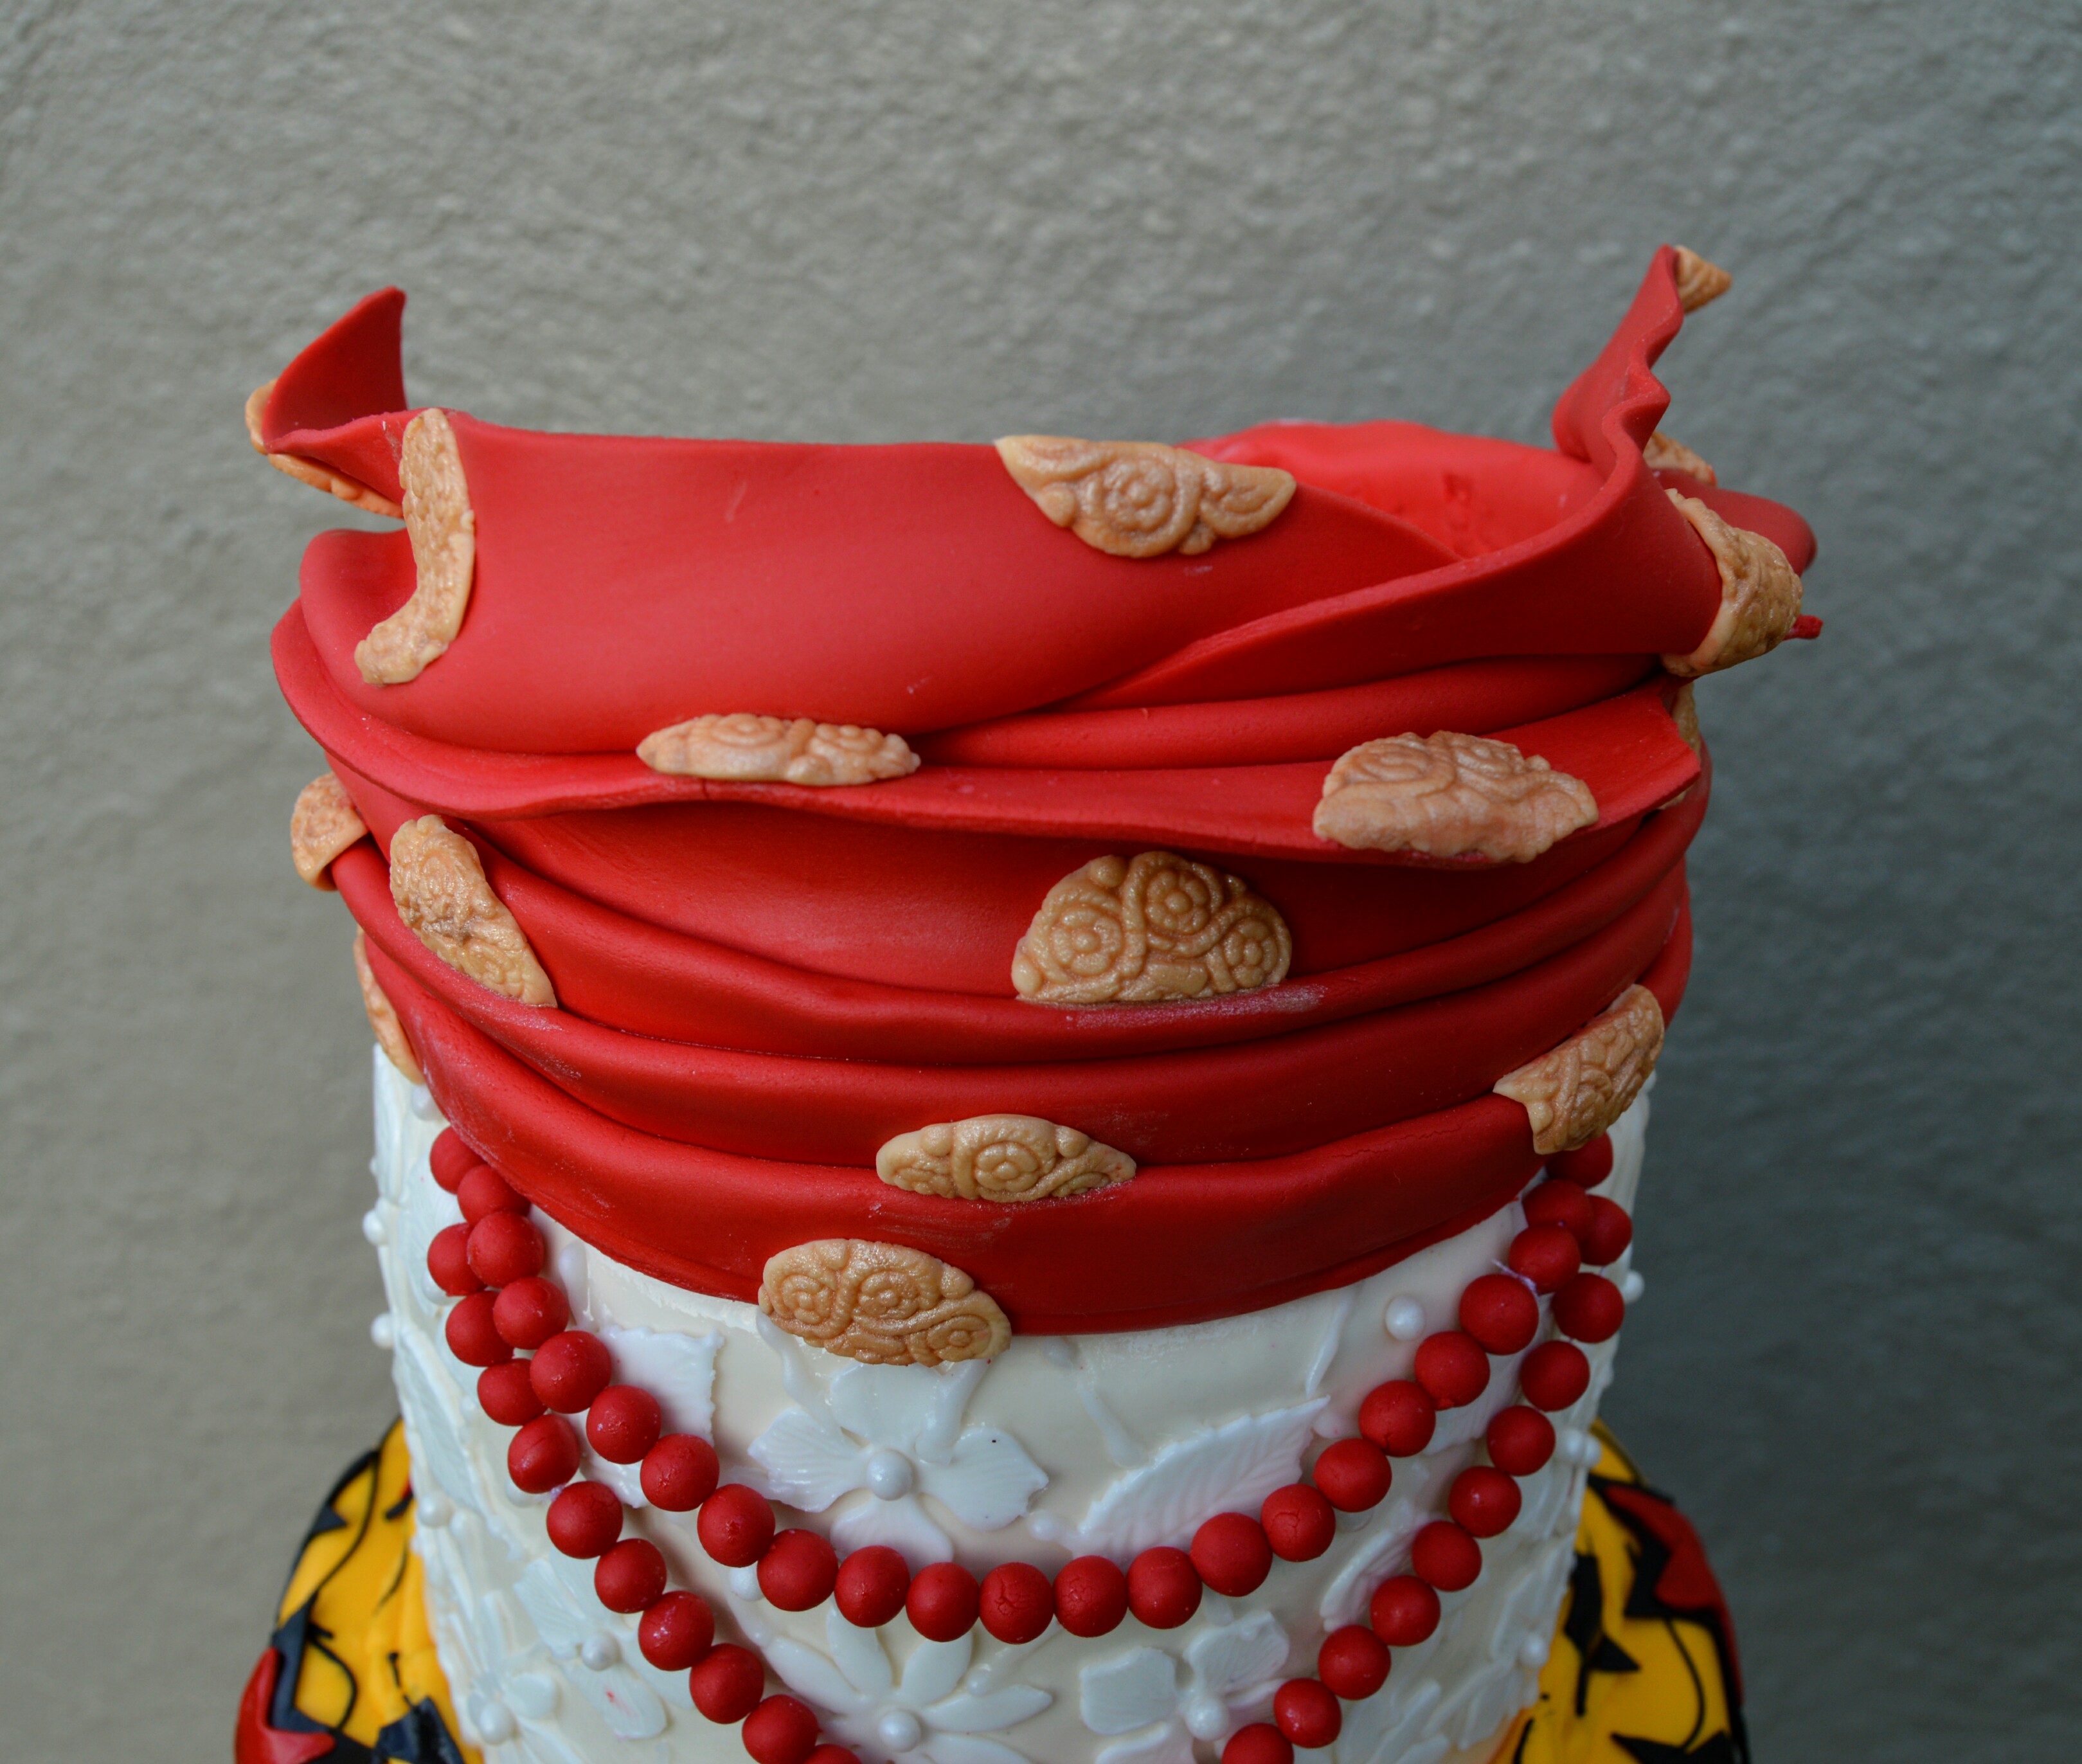
This is a tutorial on how I made this fondant gele for a Dressed Igo Woman Cake. Gele is a type of head tie worn by women in Nigeria. As you will see below, the process involves layering rolled fondant together until the desired shape is achieved.

TOOLS:
(1) Rolling Pin
(2) Wheel Cutter
(3) Button Mold for Design
(4) Paint Brush
(5) Cylindrical Object
EDIBLE COMPONENTS:
(1) Marshmallow Fondant
(2) Gold Luster Dust
(3) Vodka
(4) Food Color
PROCEDURE:
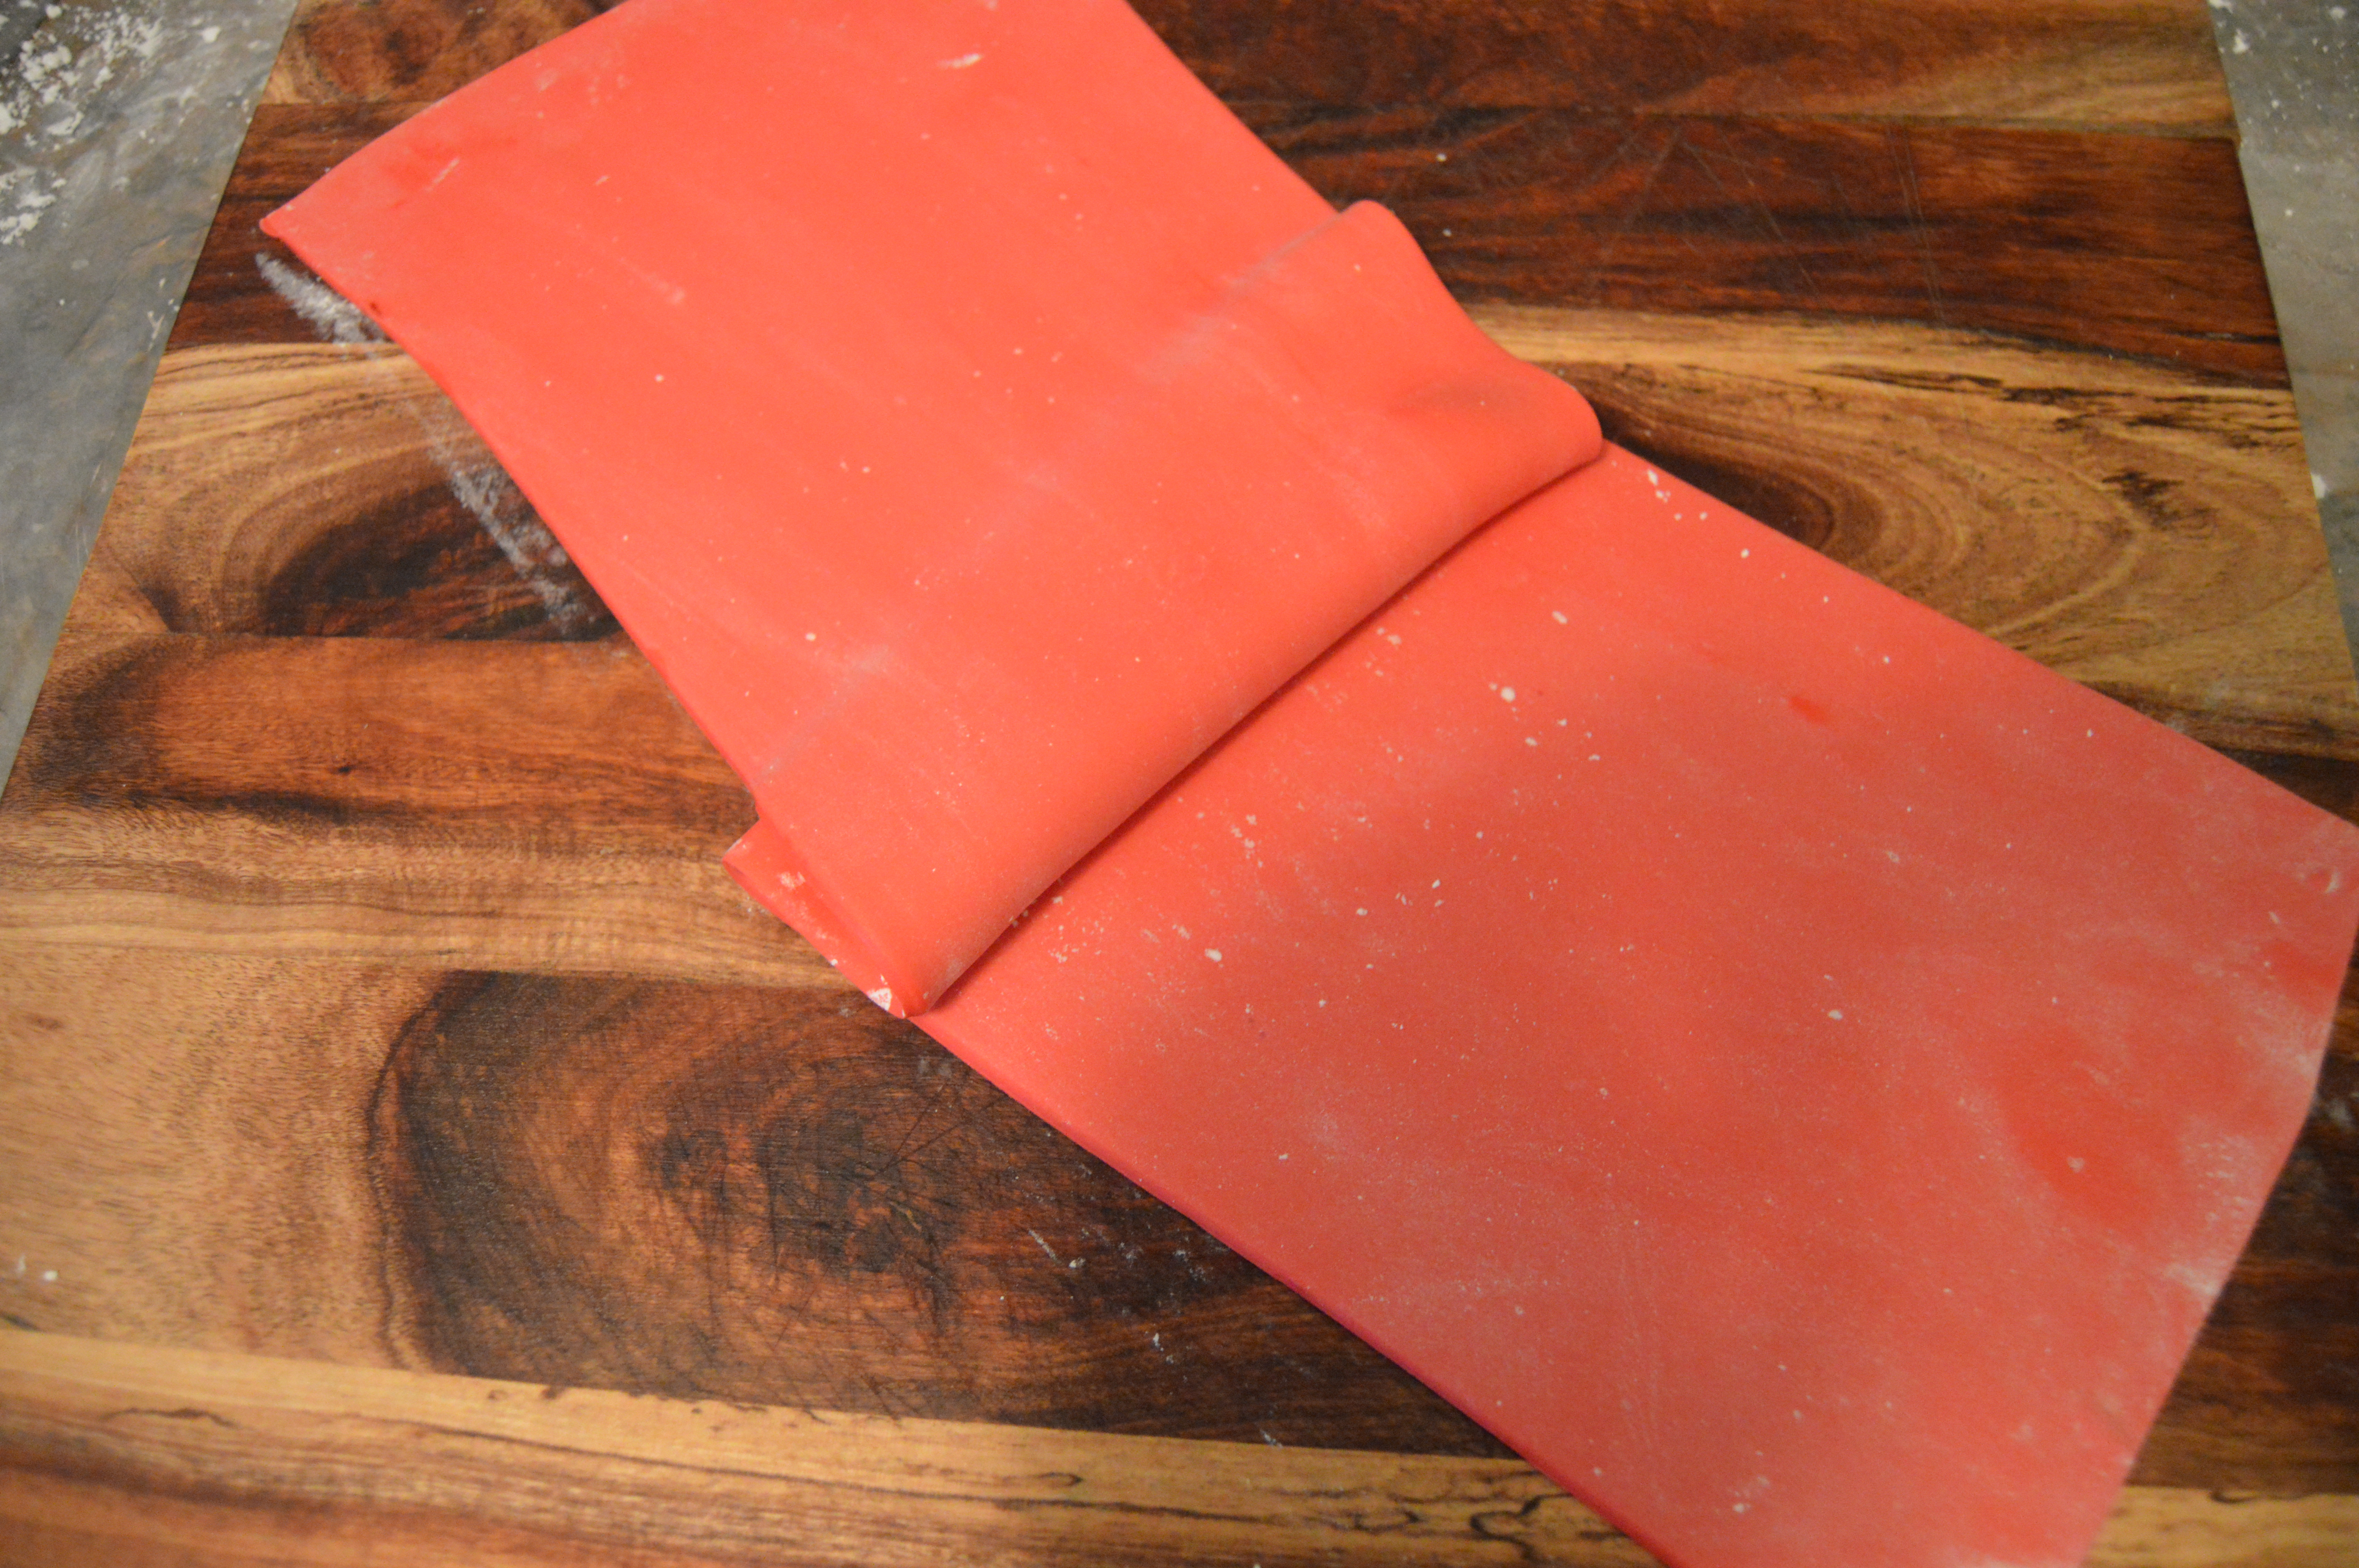
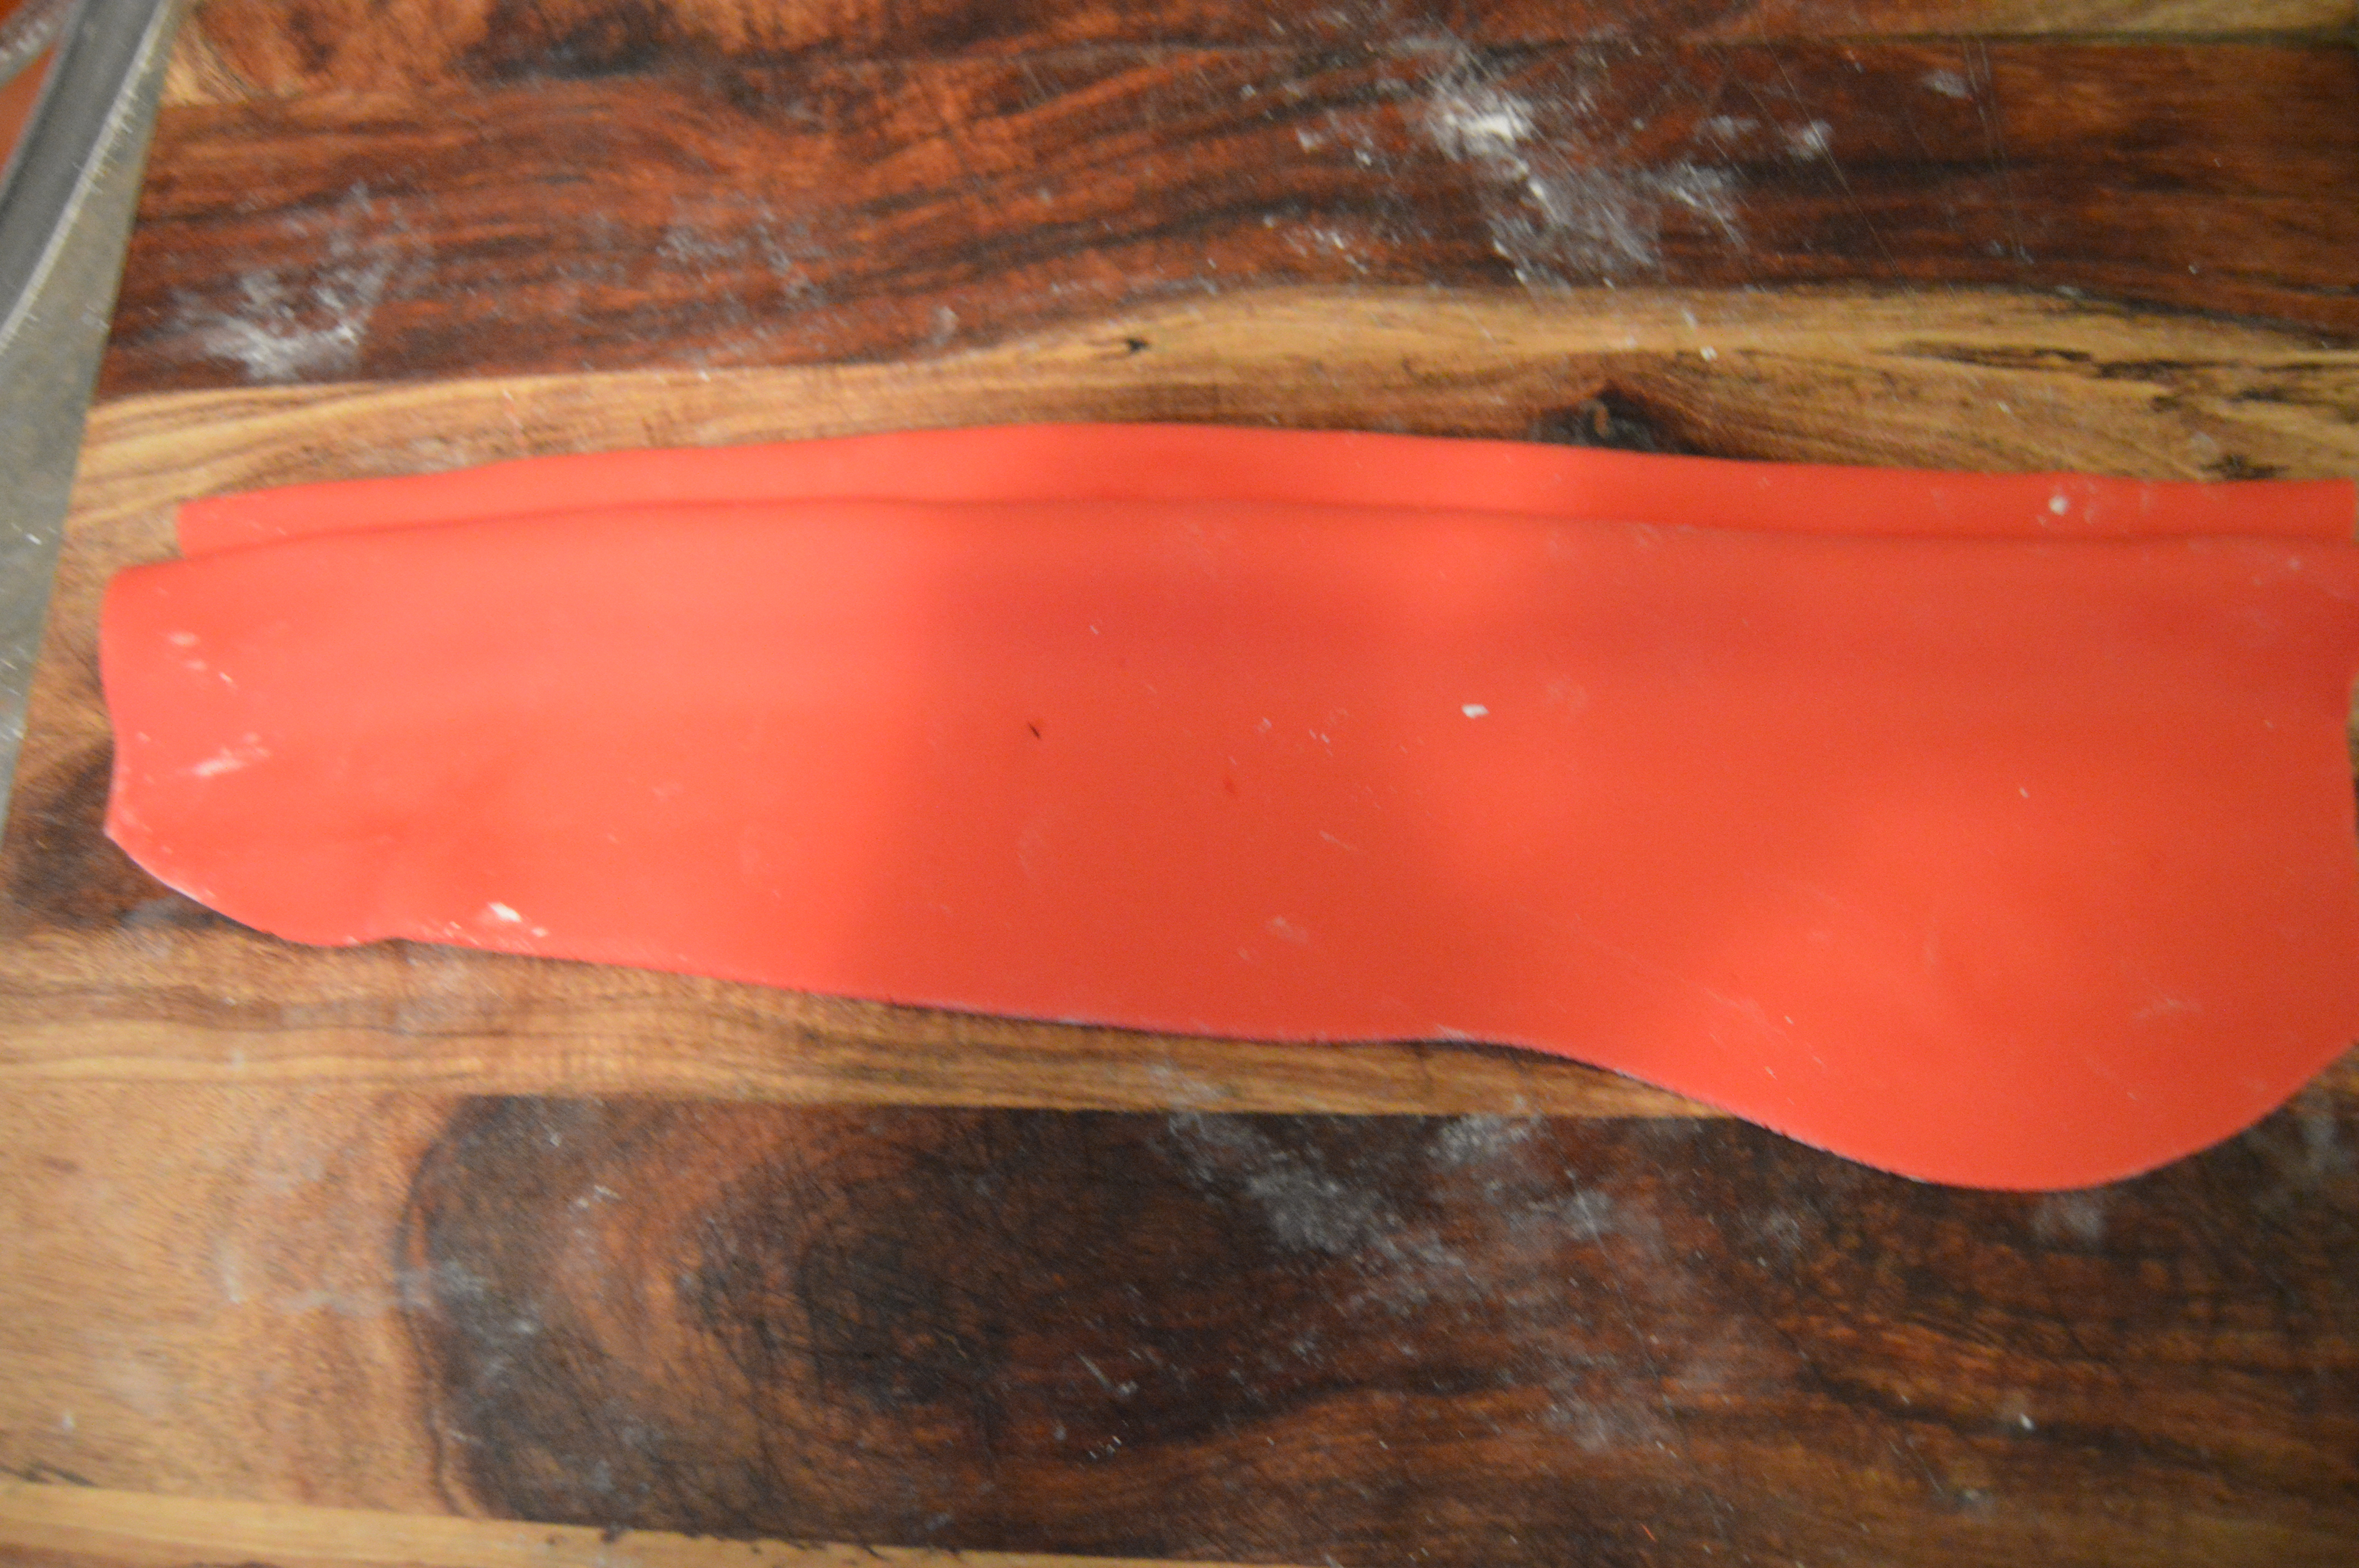
(1) Roll out a thin sheet of fondant enough to wrap around the cylindrical object you are using. I am using a tin which is about 6 inches in diameter. The height of the rolled fondant is also 6 inches.
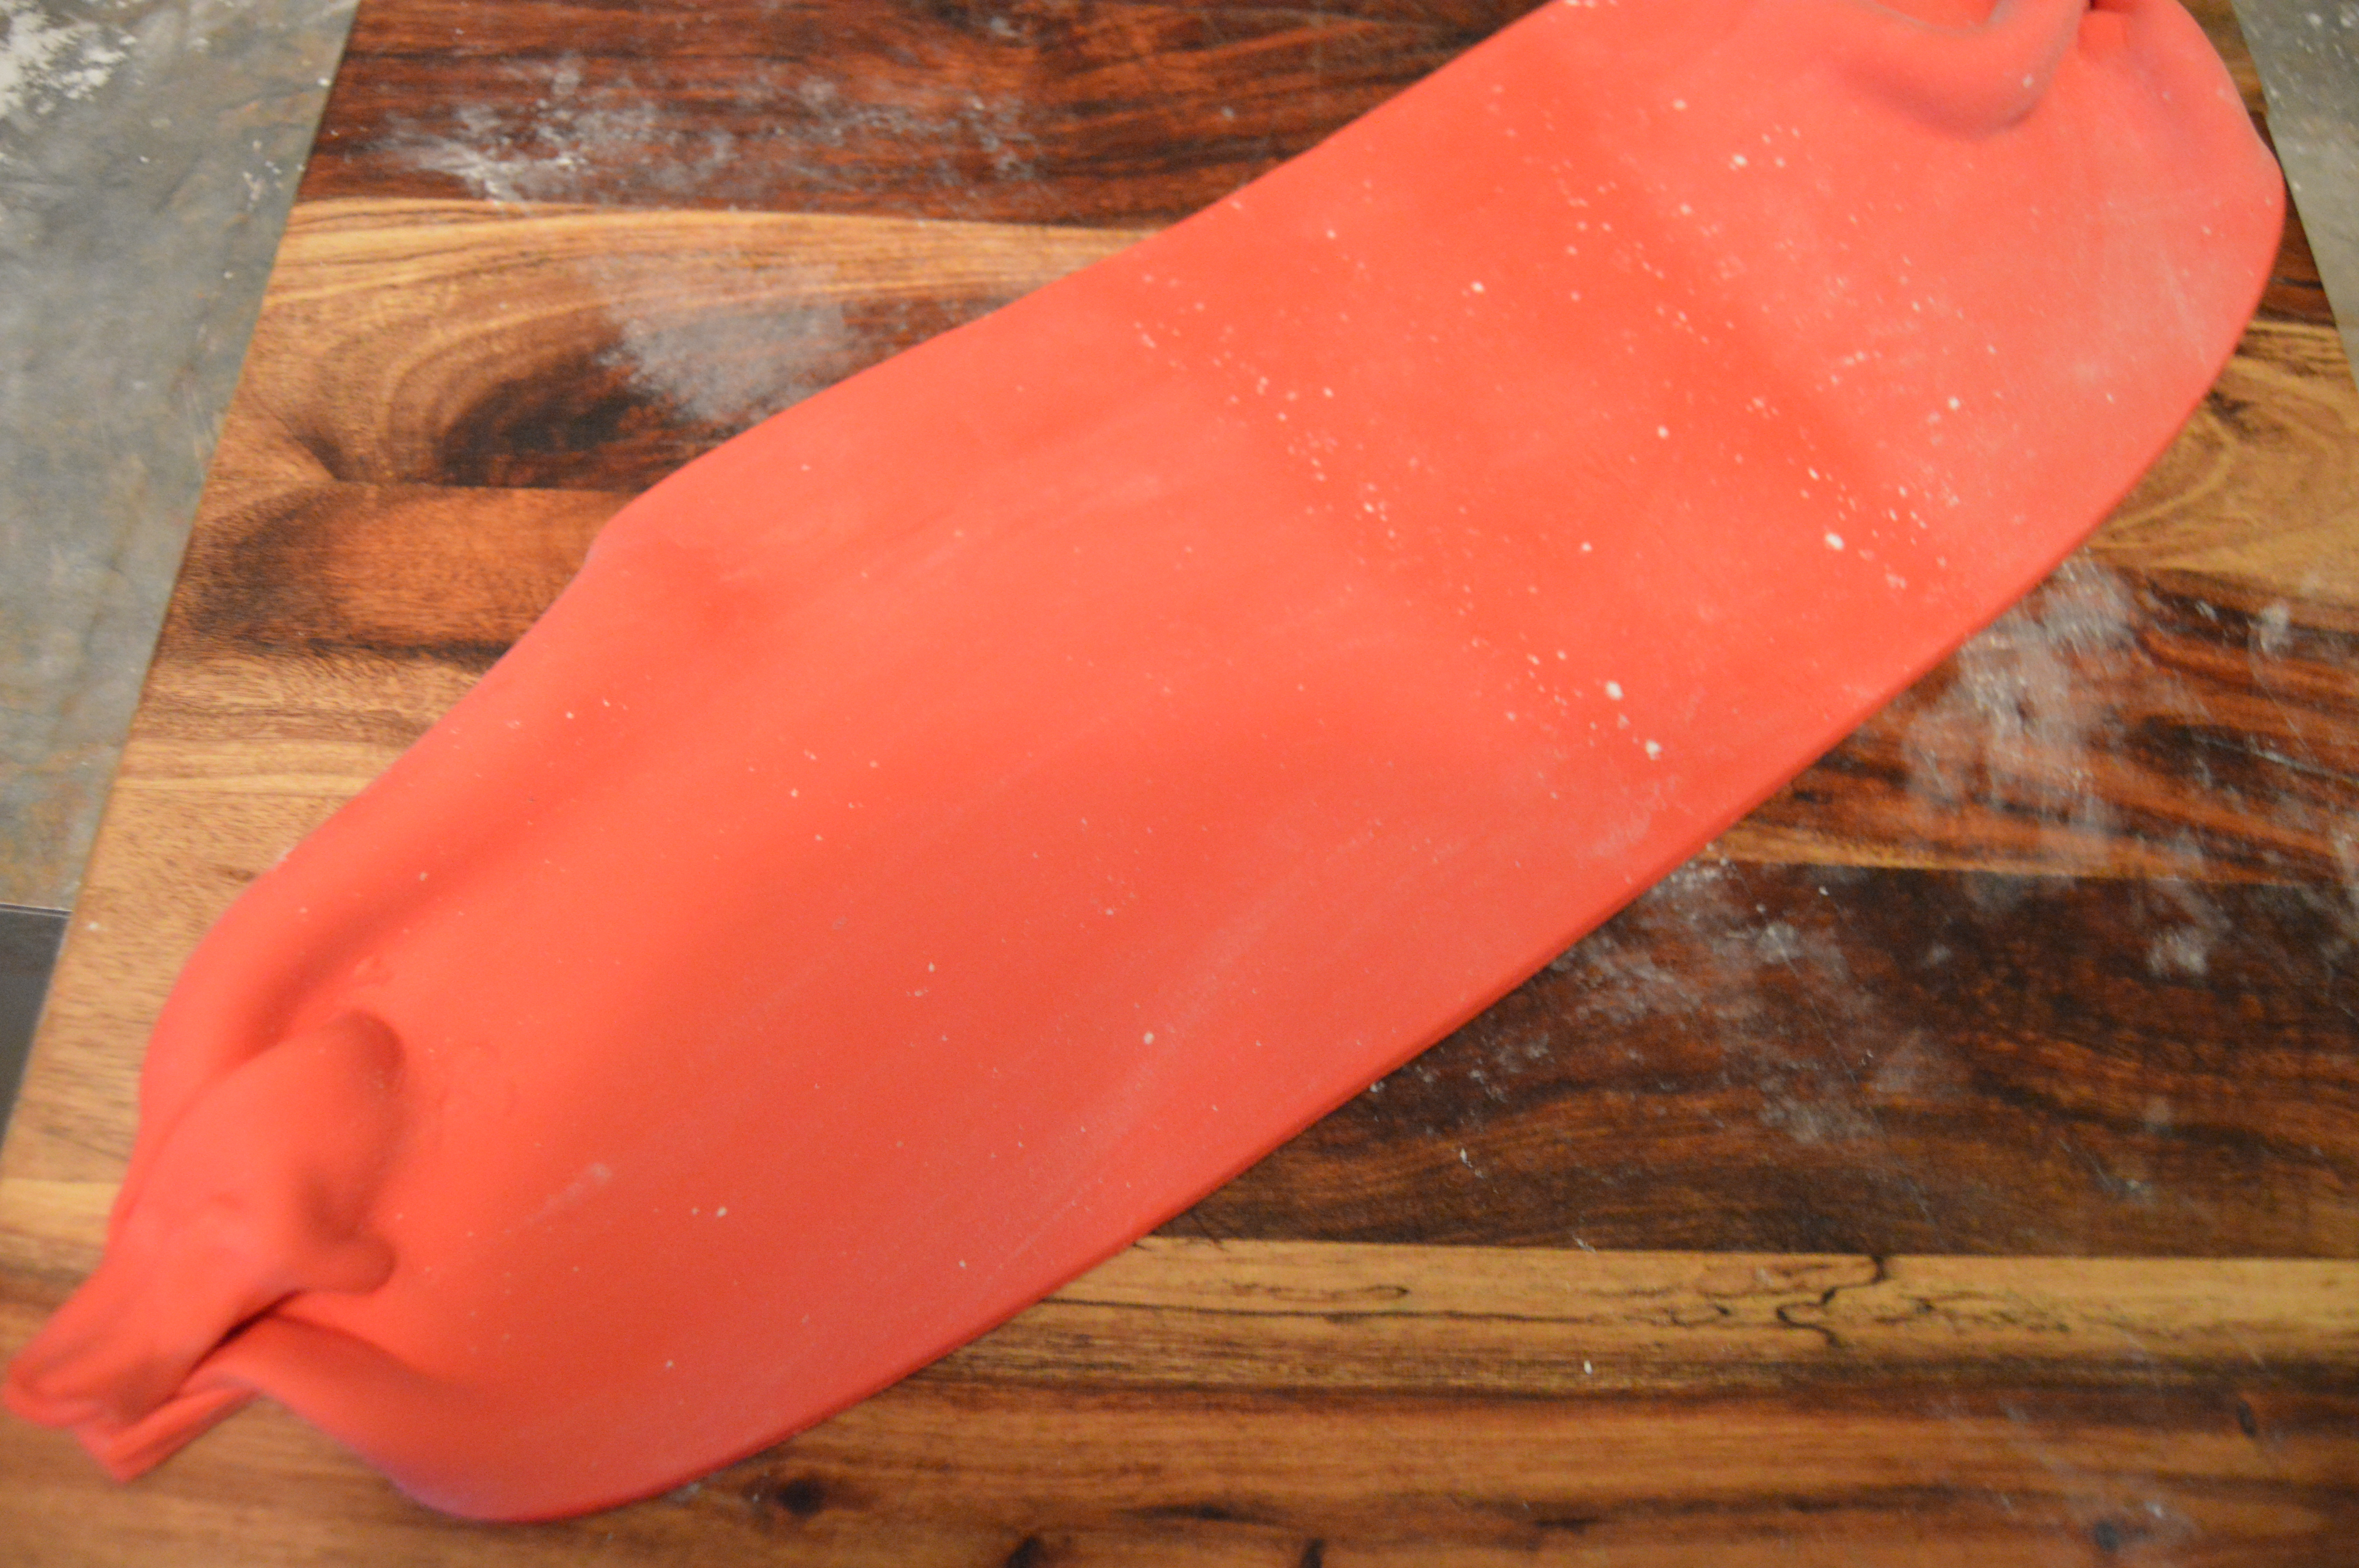
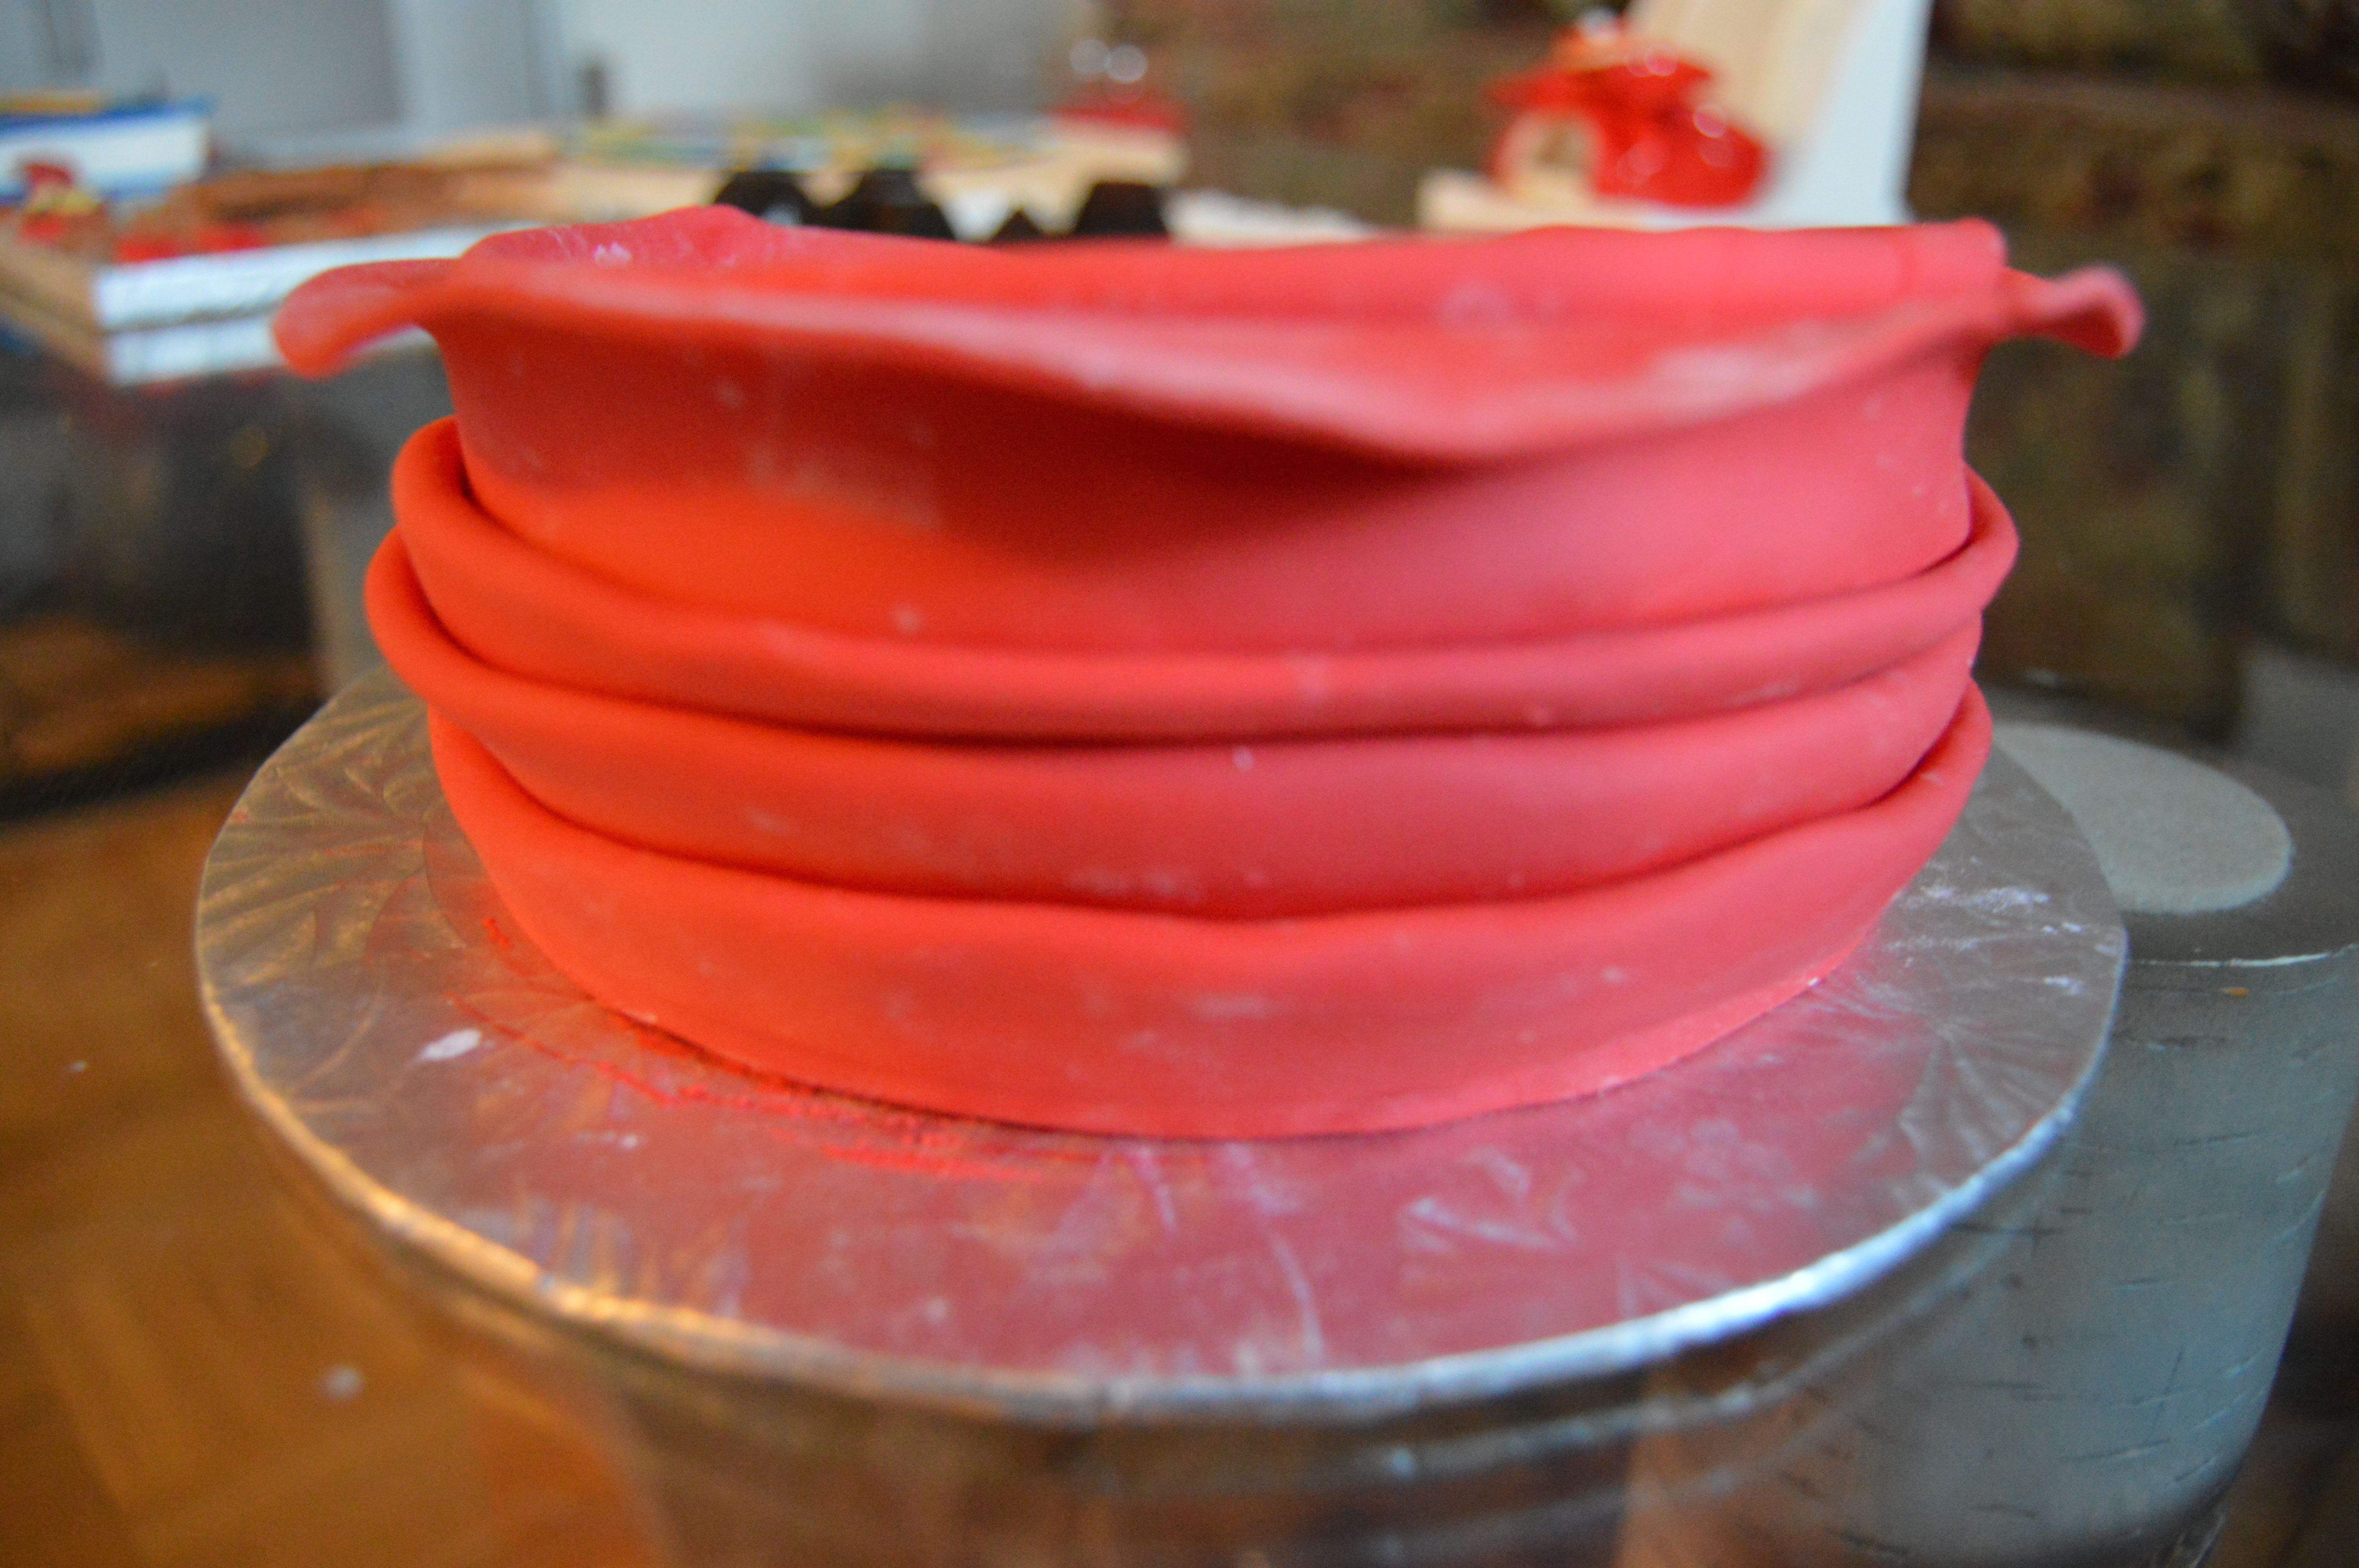
(2) Bring the ends of the fondant together and wrap it around your cylindrical object and stick the ends together at the back. As you wrap it, make folds on top and support these folds with objects as shown in the picture below. Leave it this way until the folds are dry enough to hold shape.
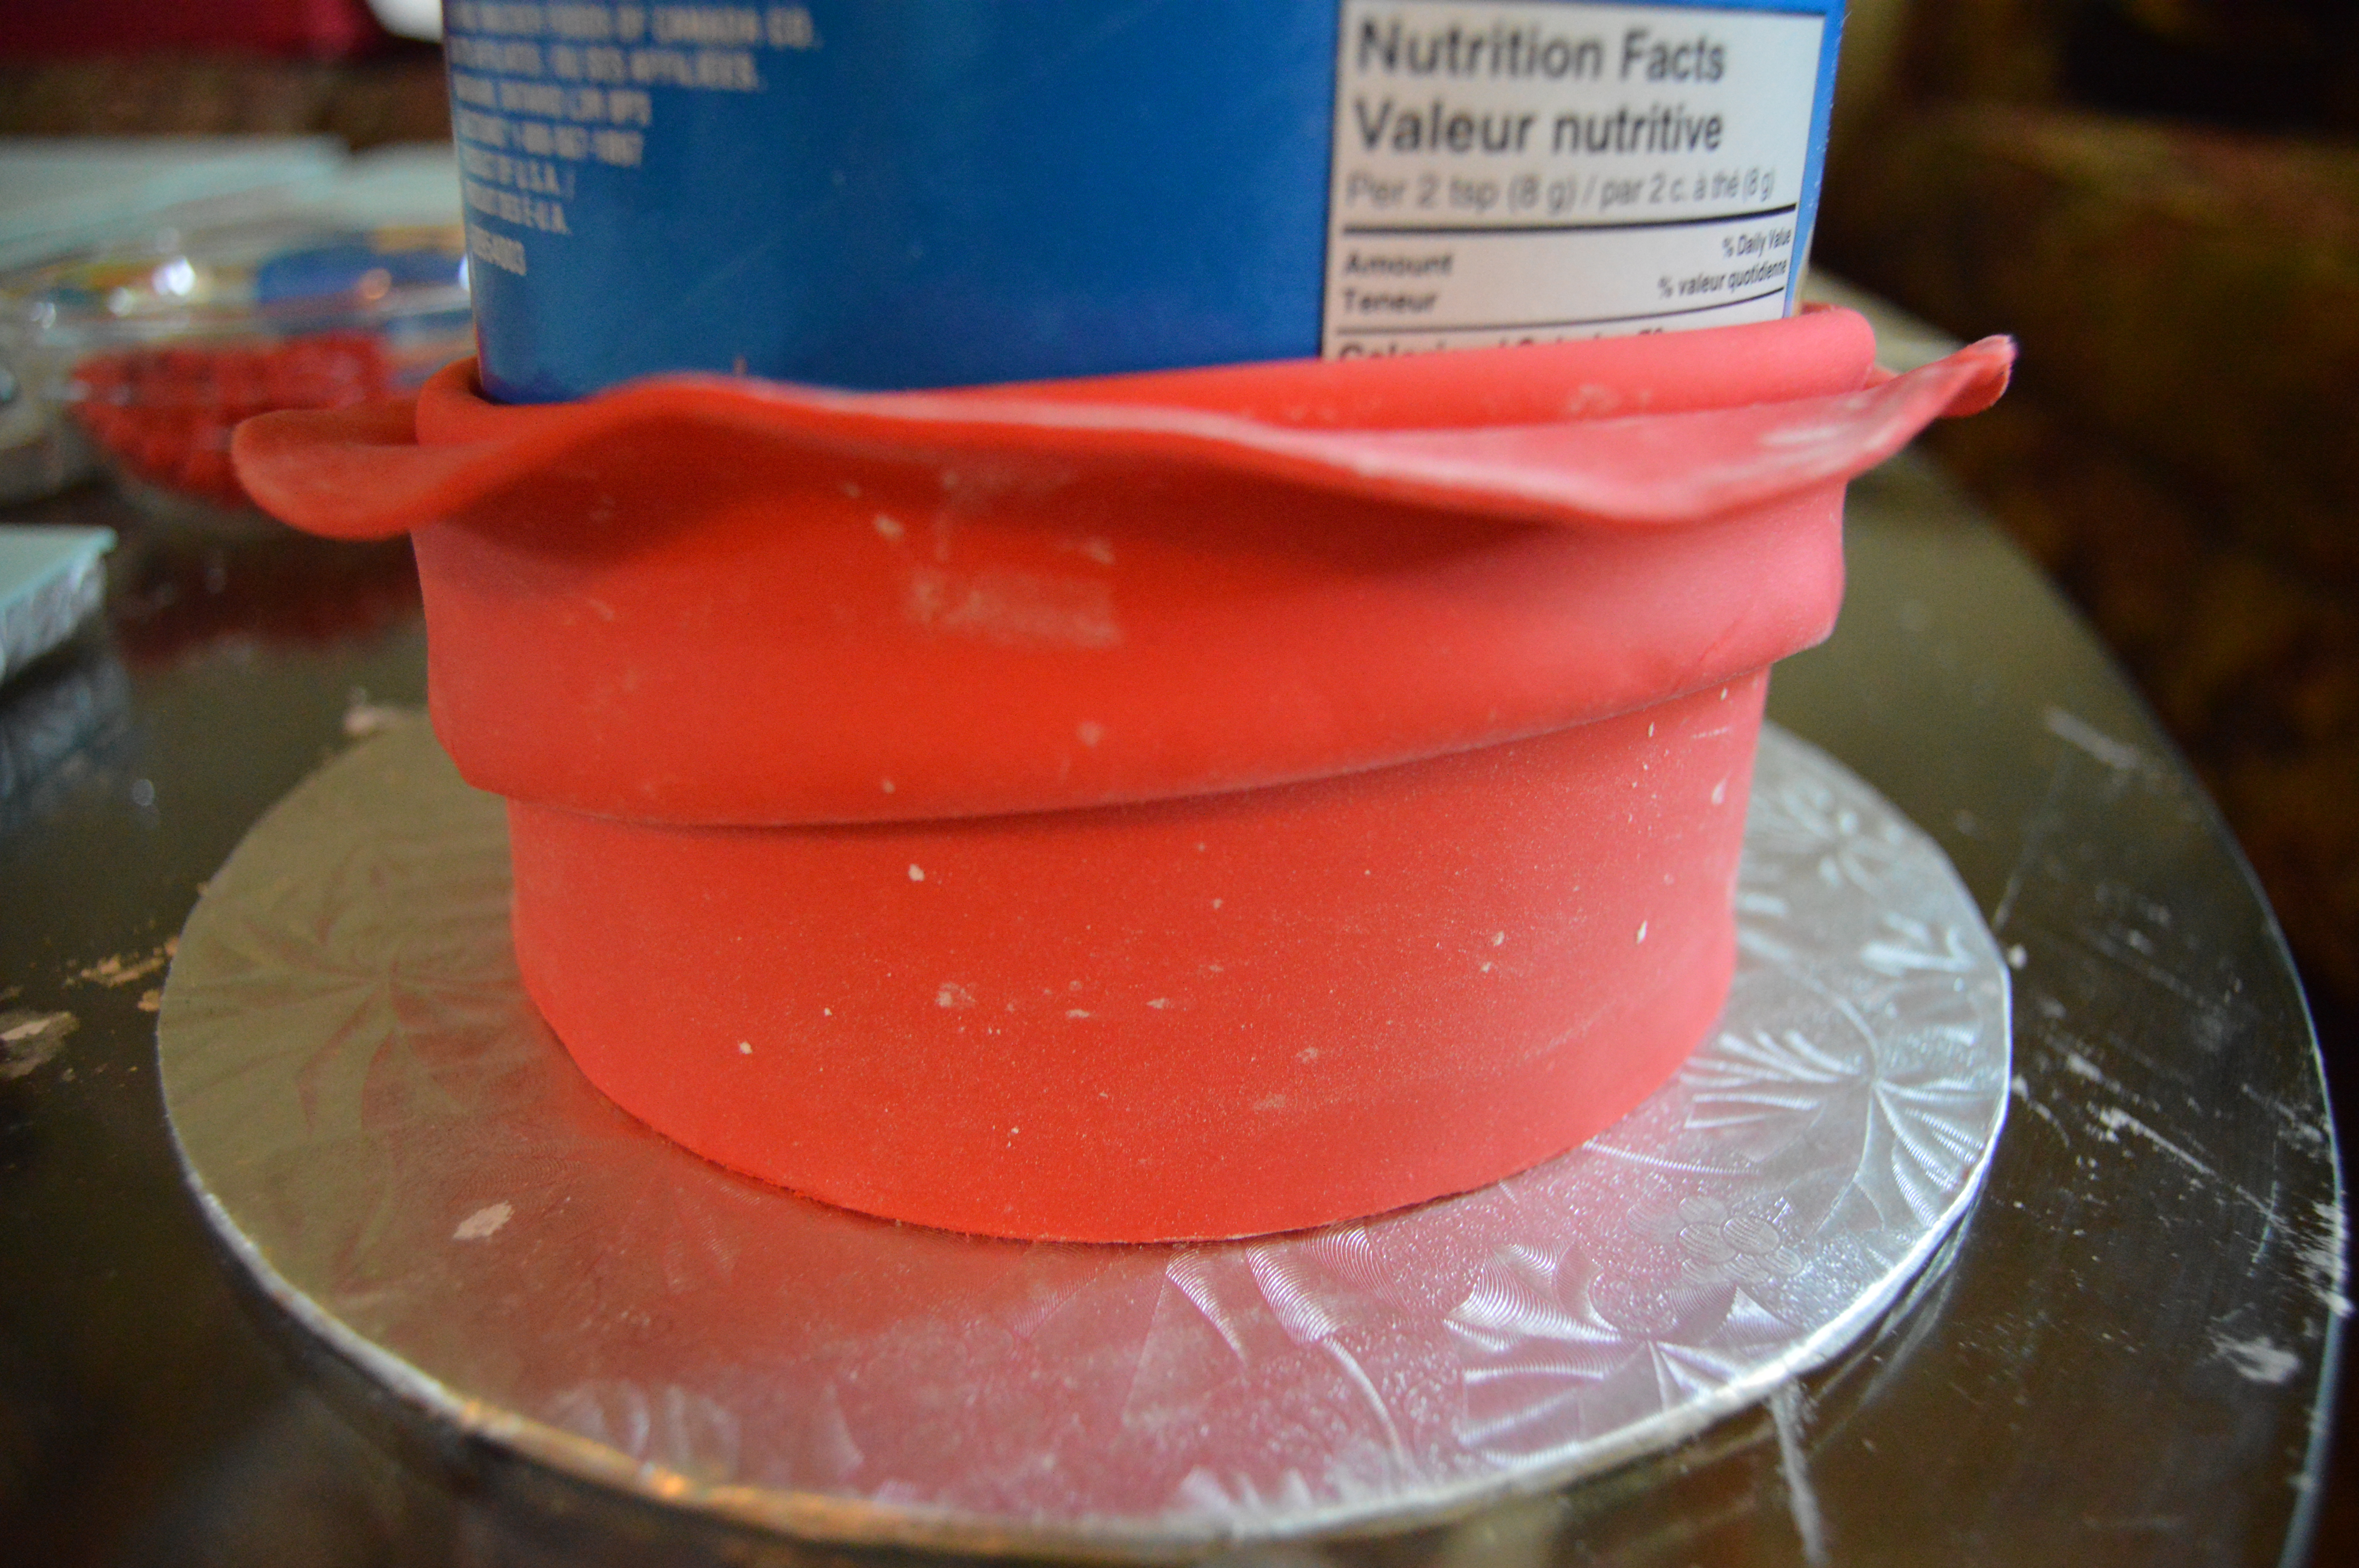
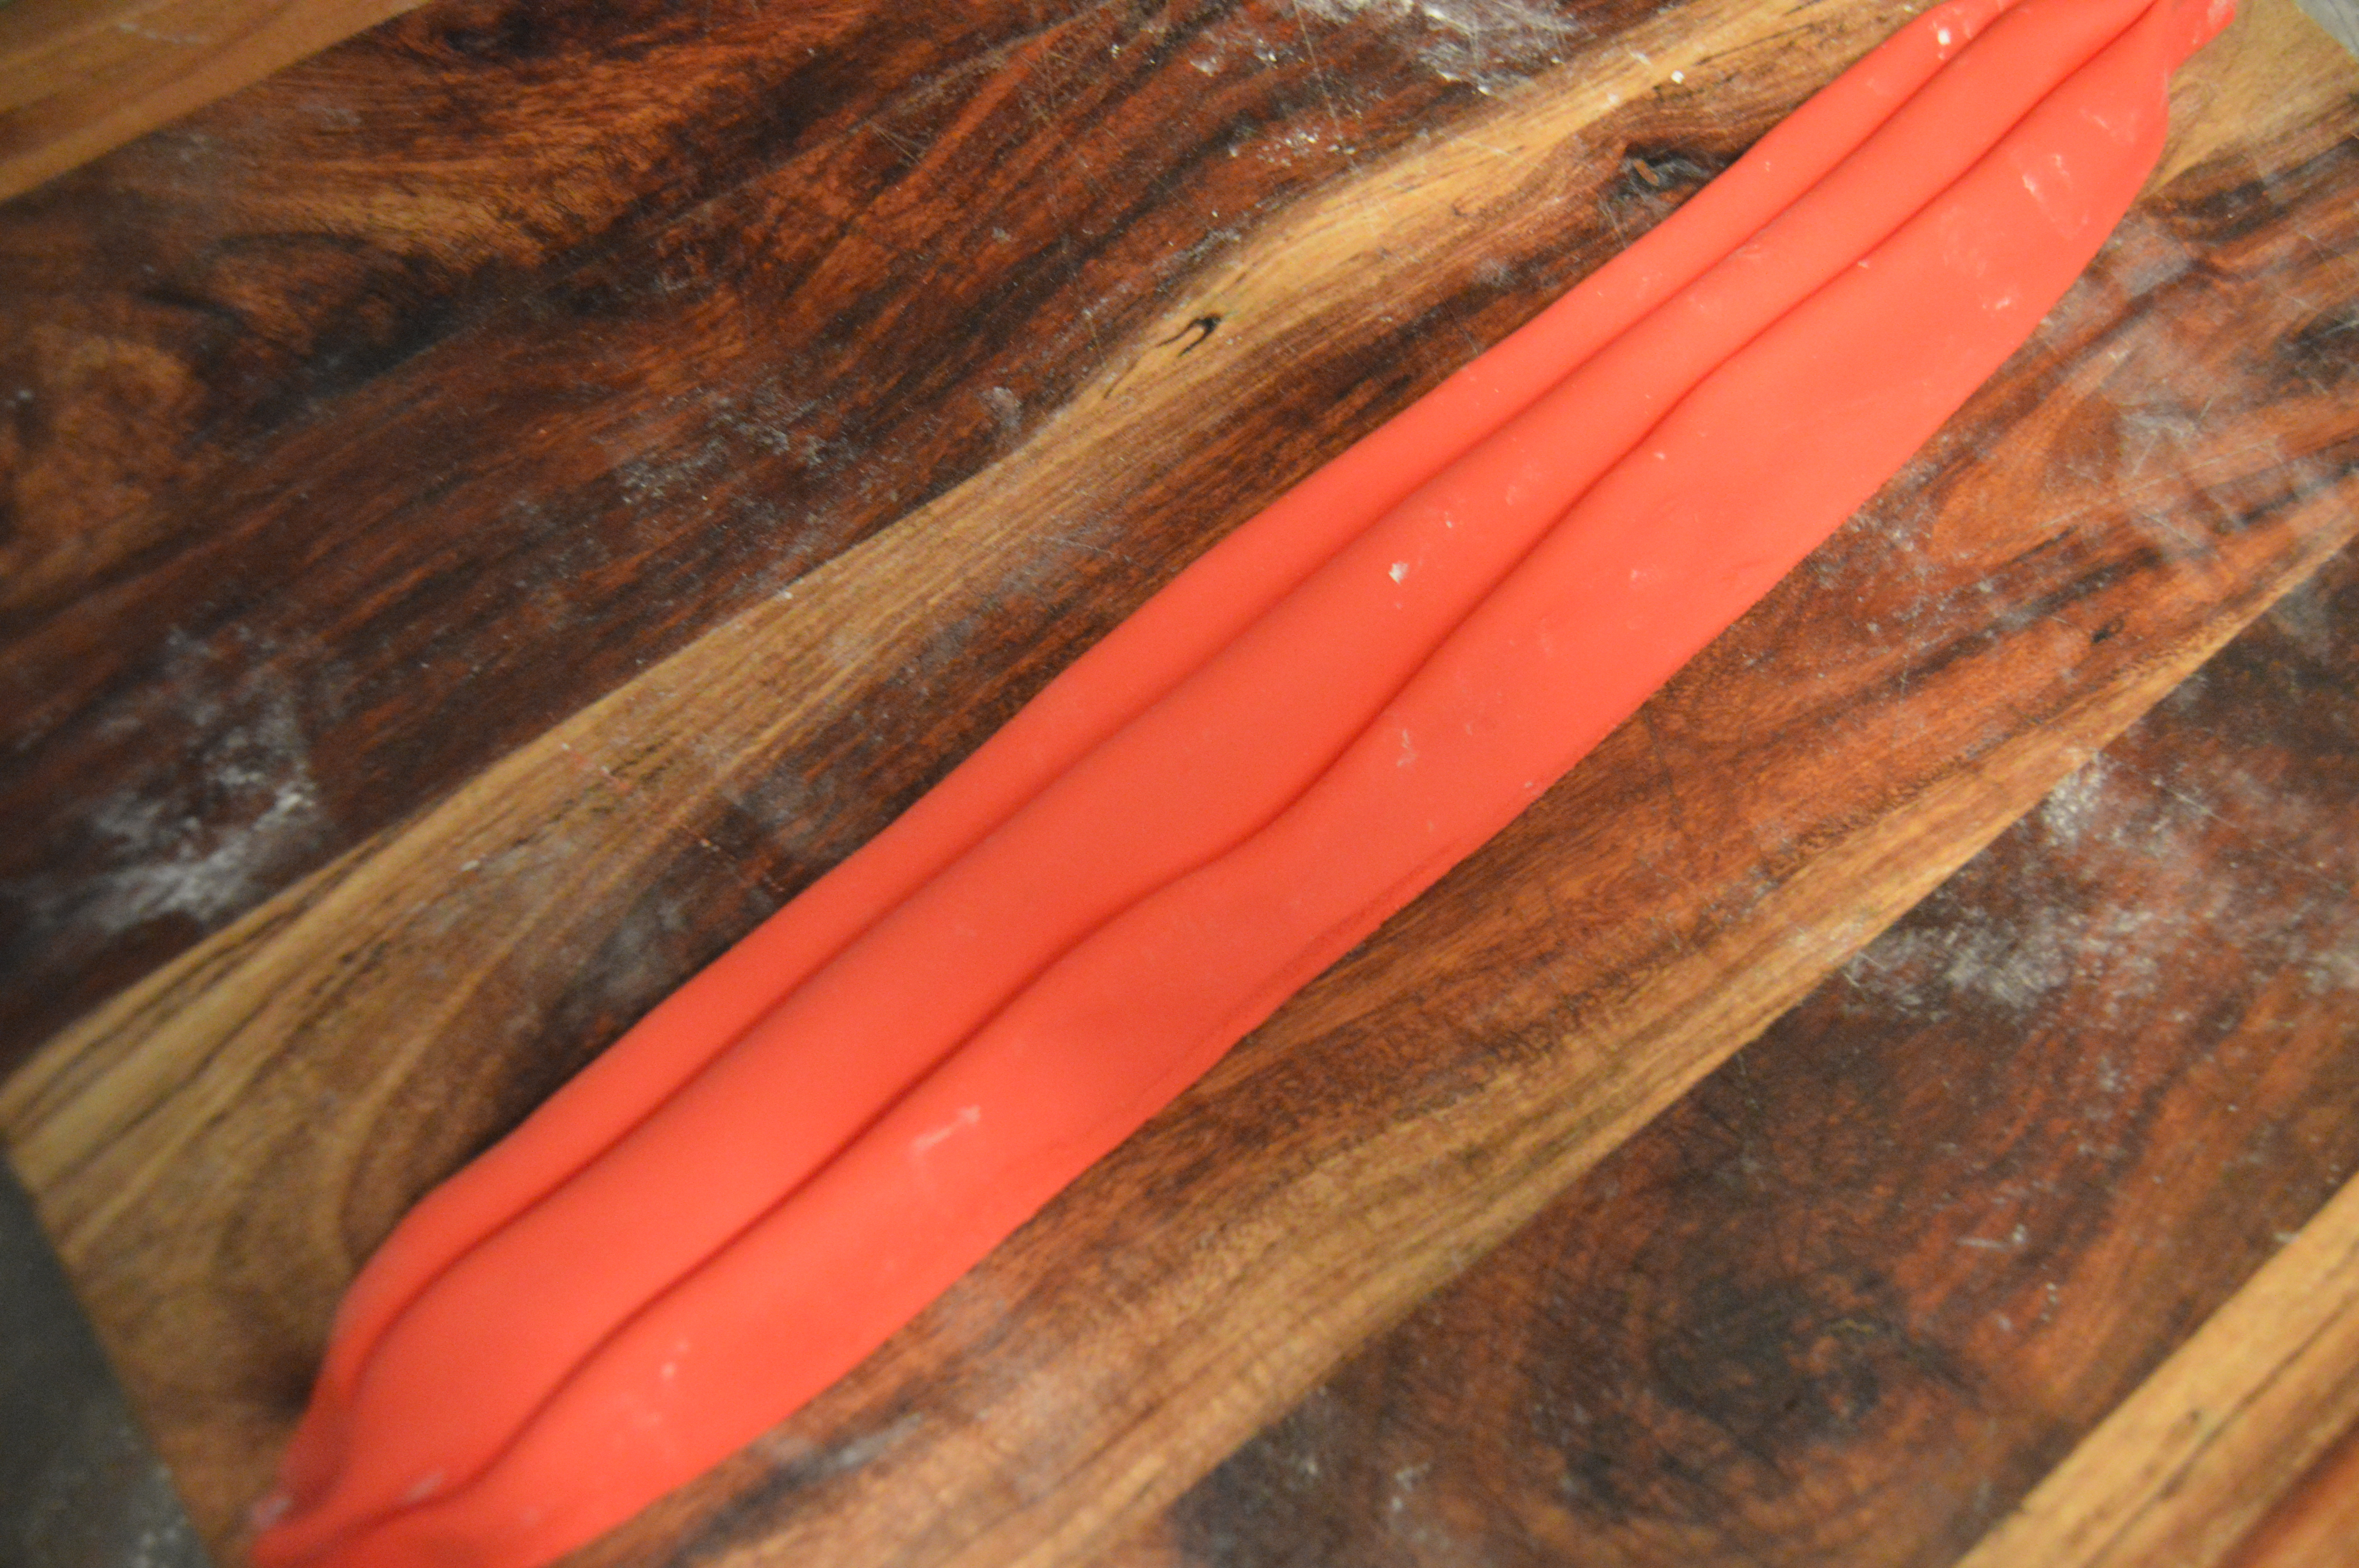
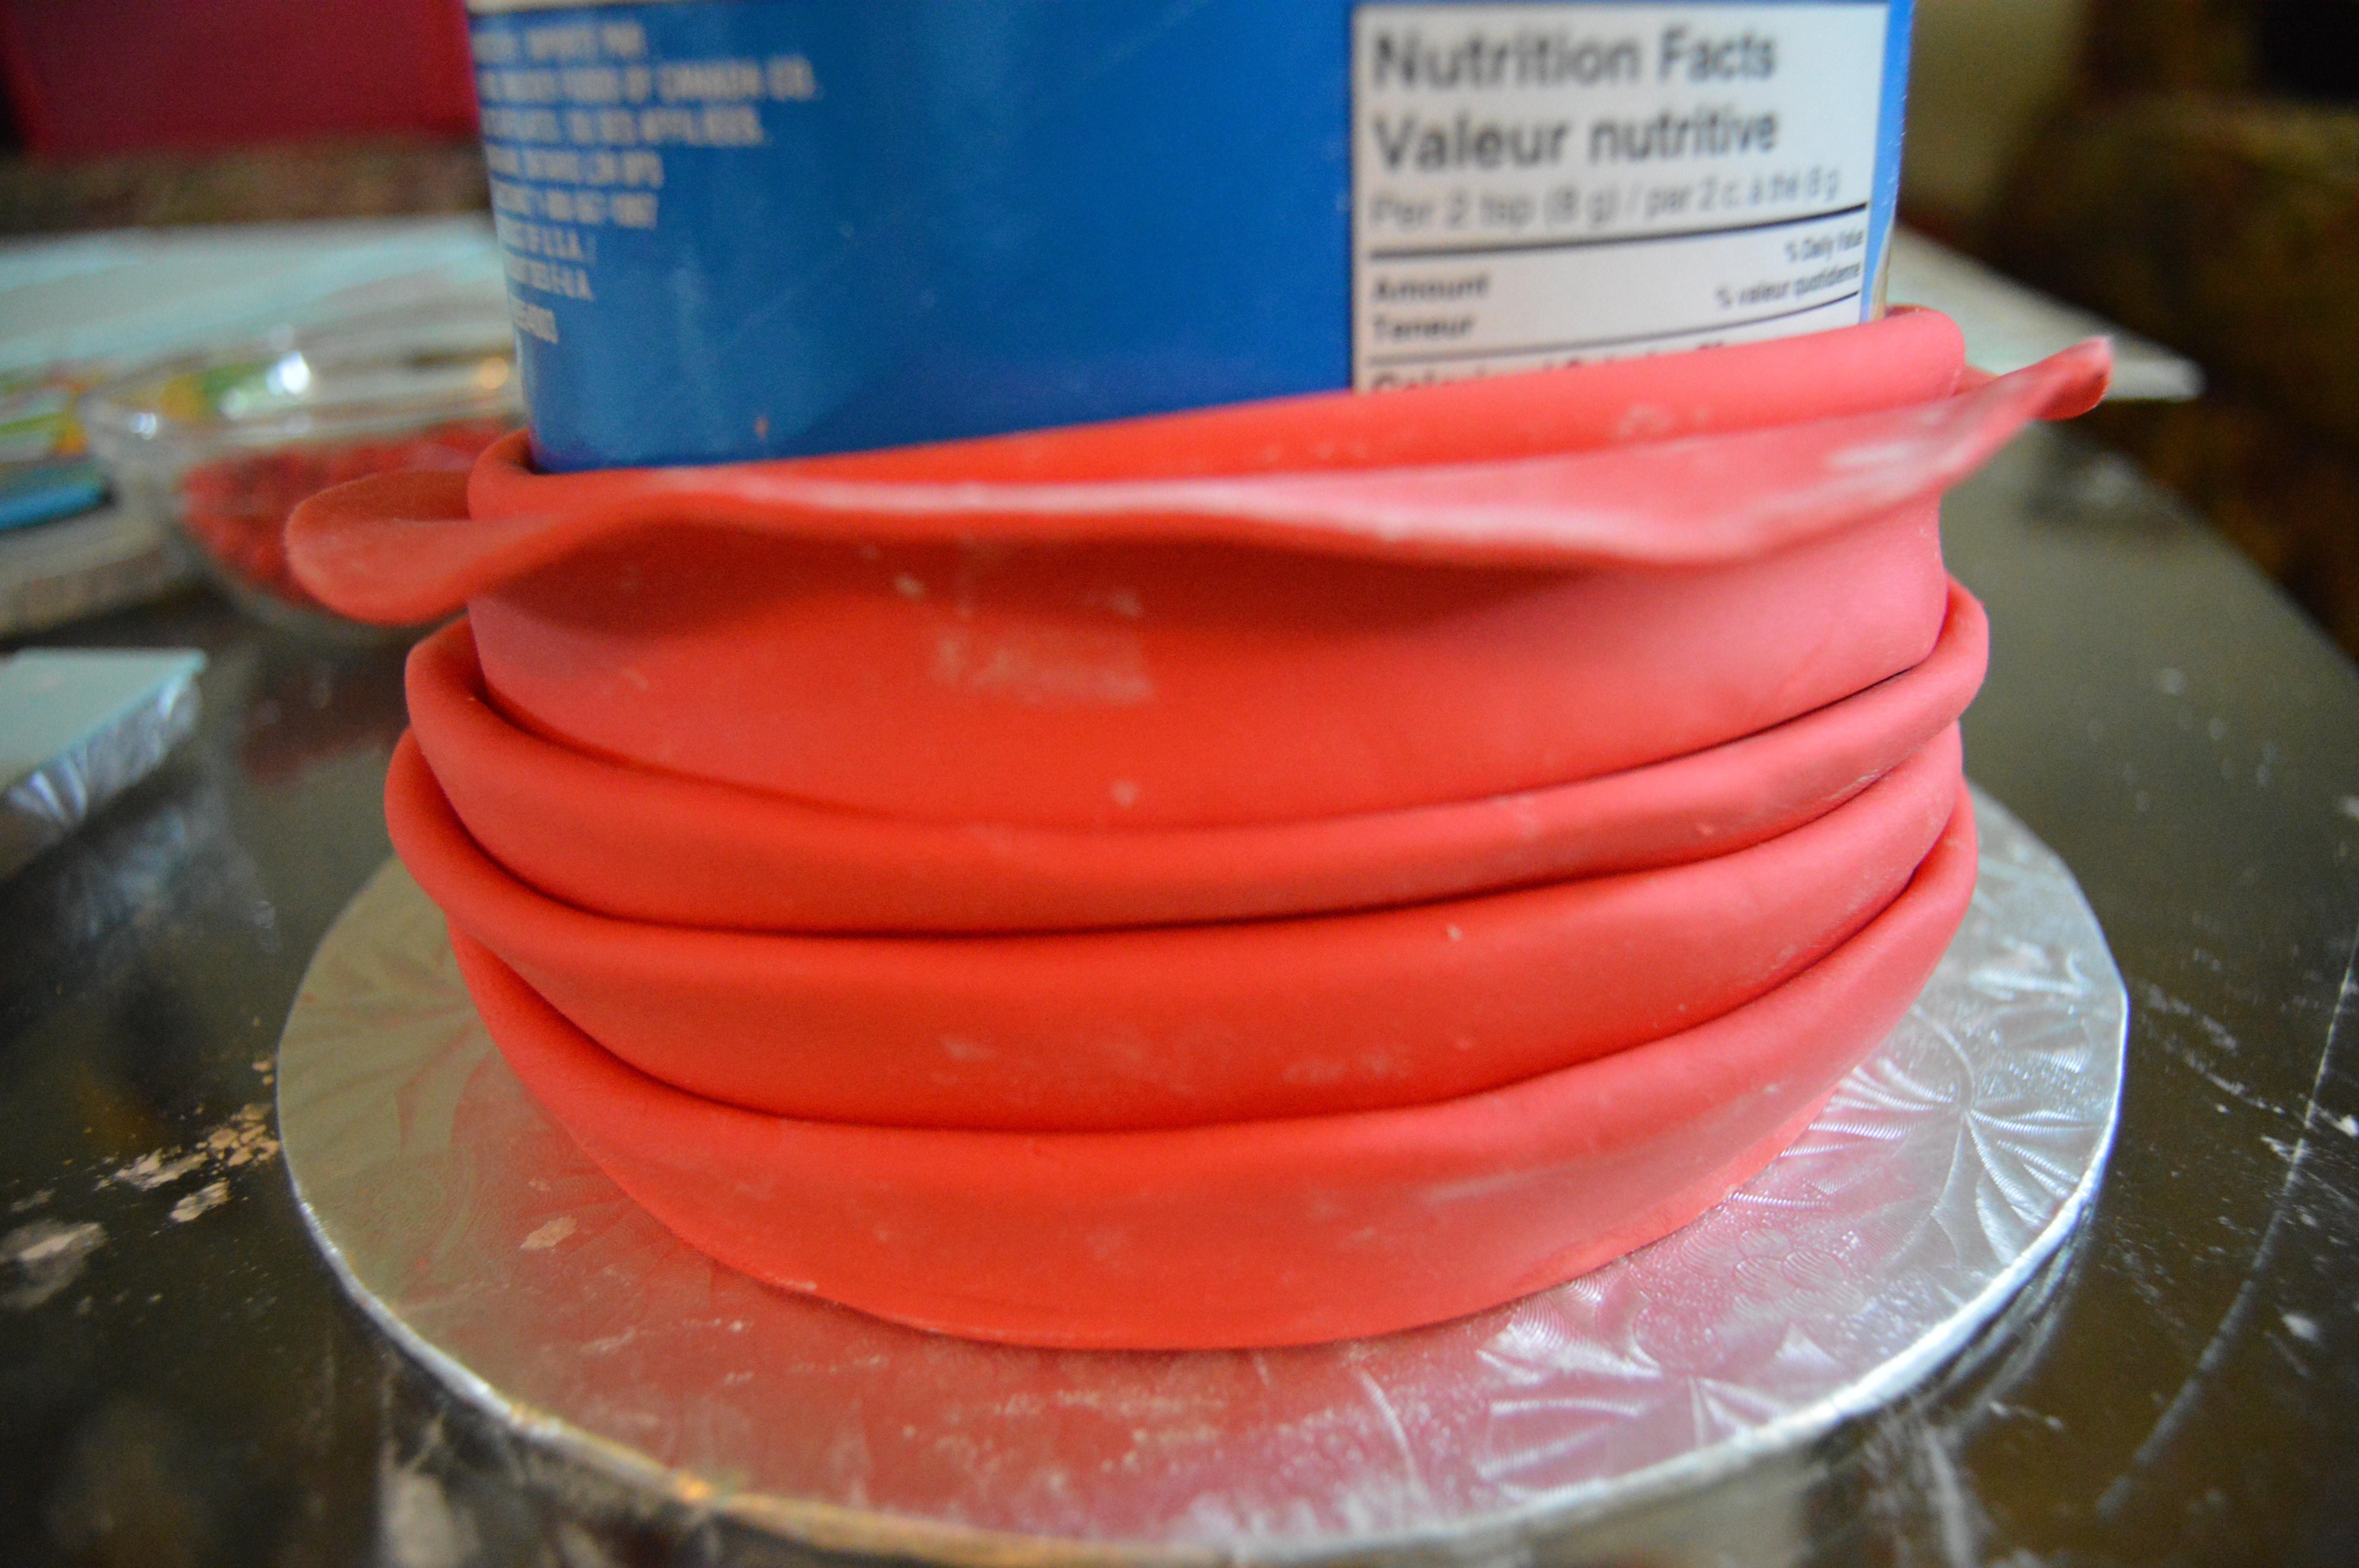
(3) Next, when the folds are dry, roll out another sheet of fondant and fold it to create horizontal pleats. Wrap this around the gele structure. Leave the gele this way to dry. When it is dry enough to stand on its own, take out the cylindrical object in the middle for the next layers of fondant are going to go inside the circle.
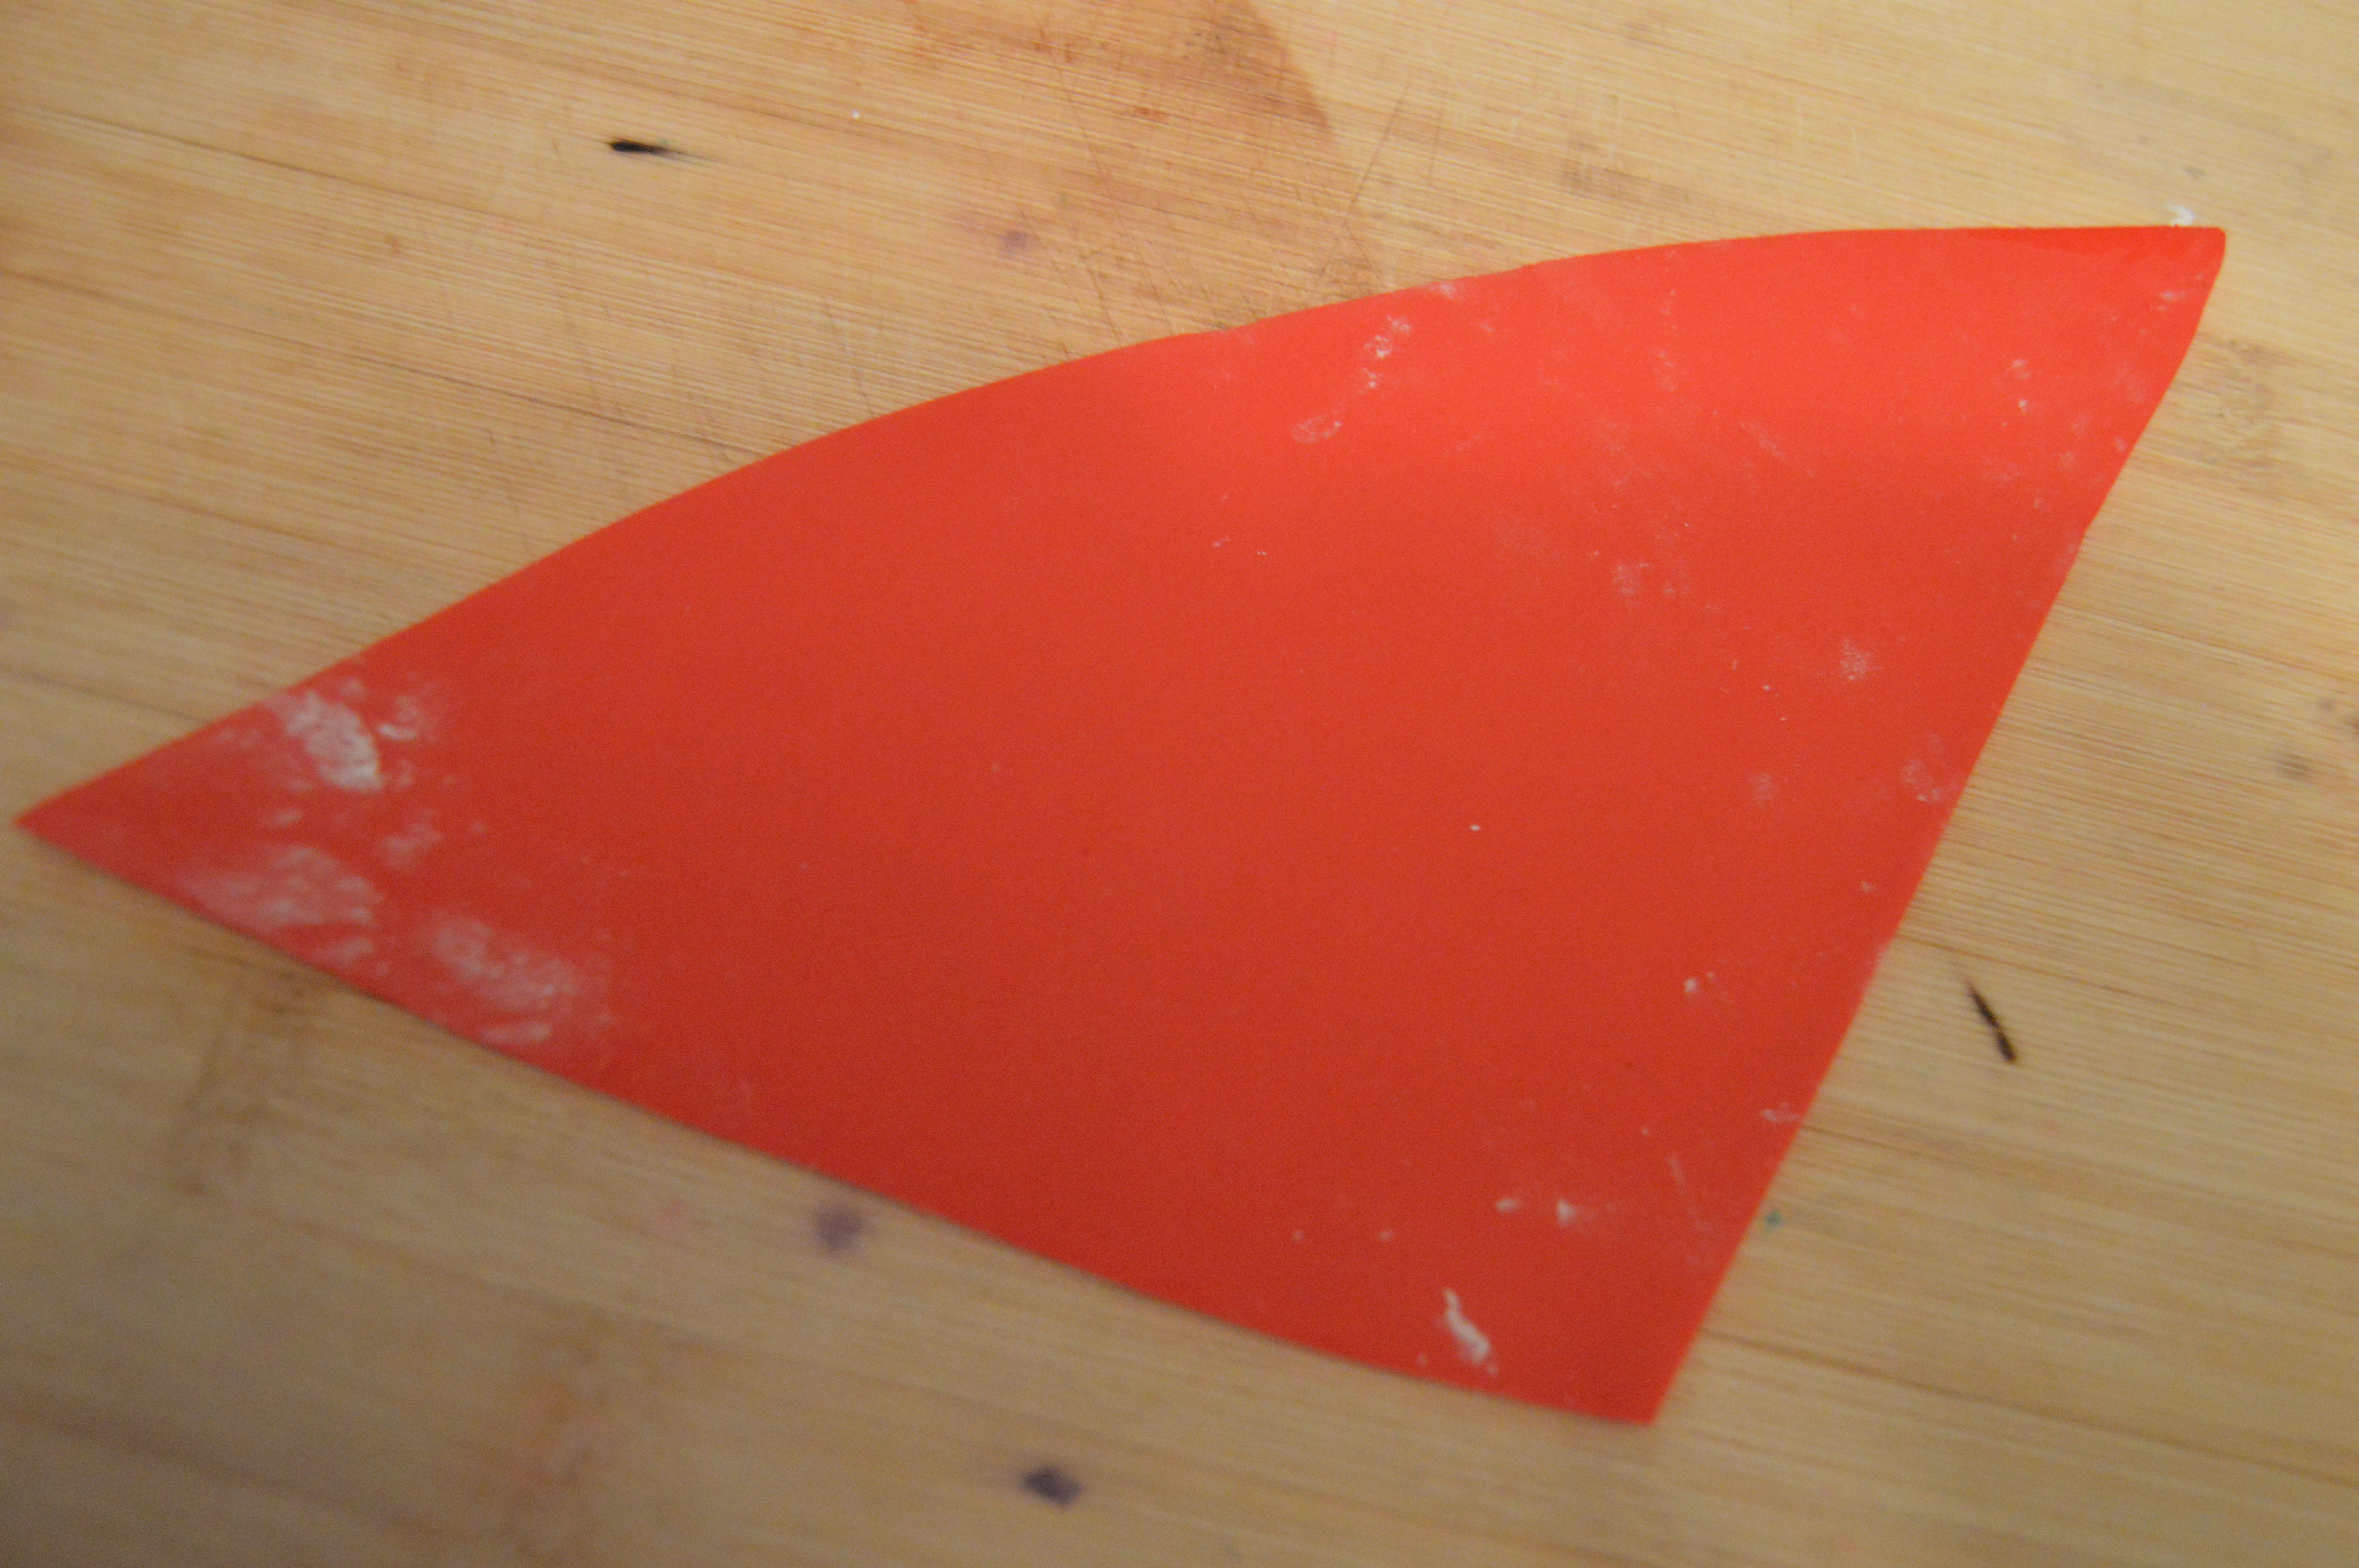
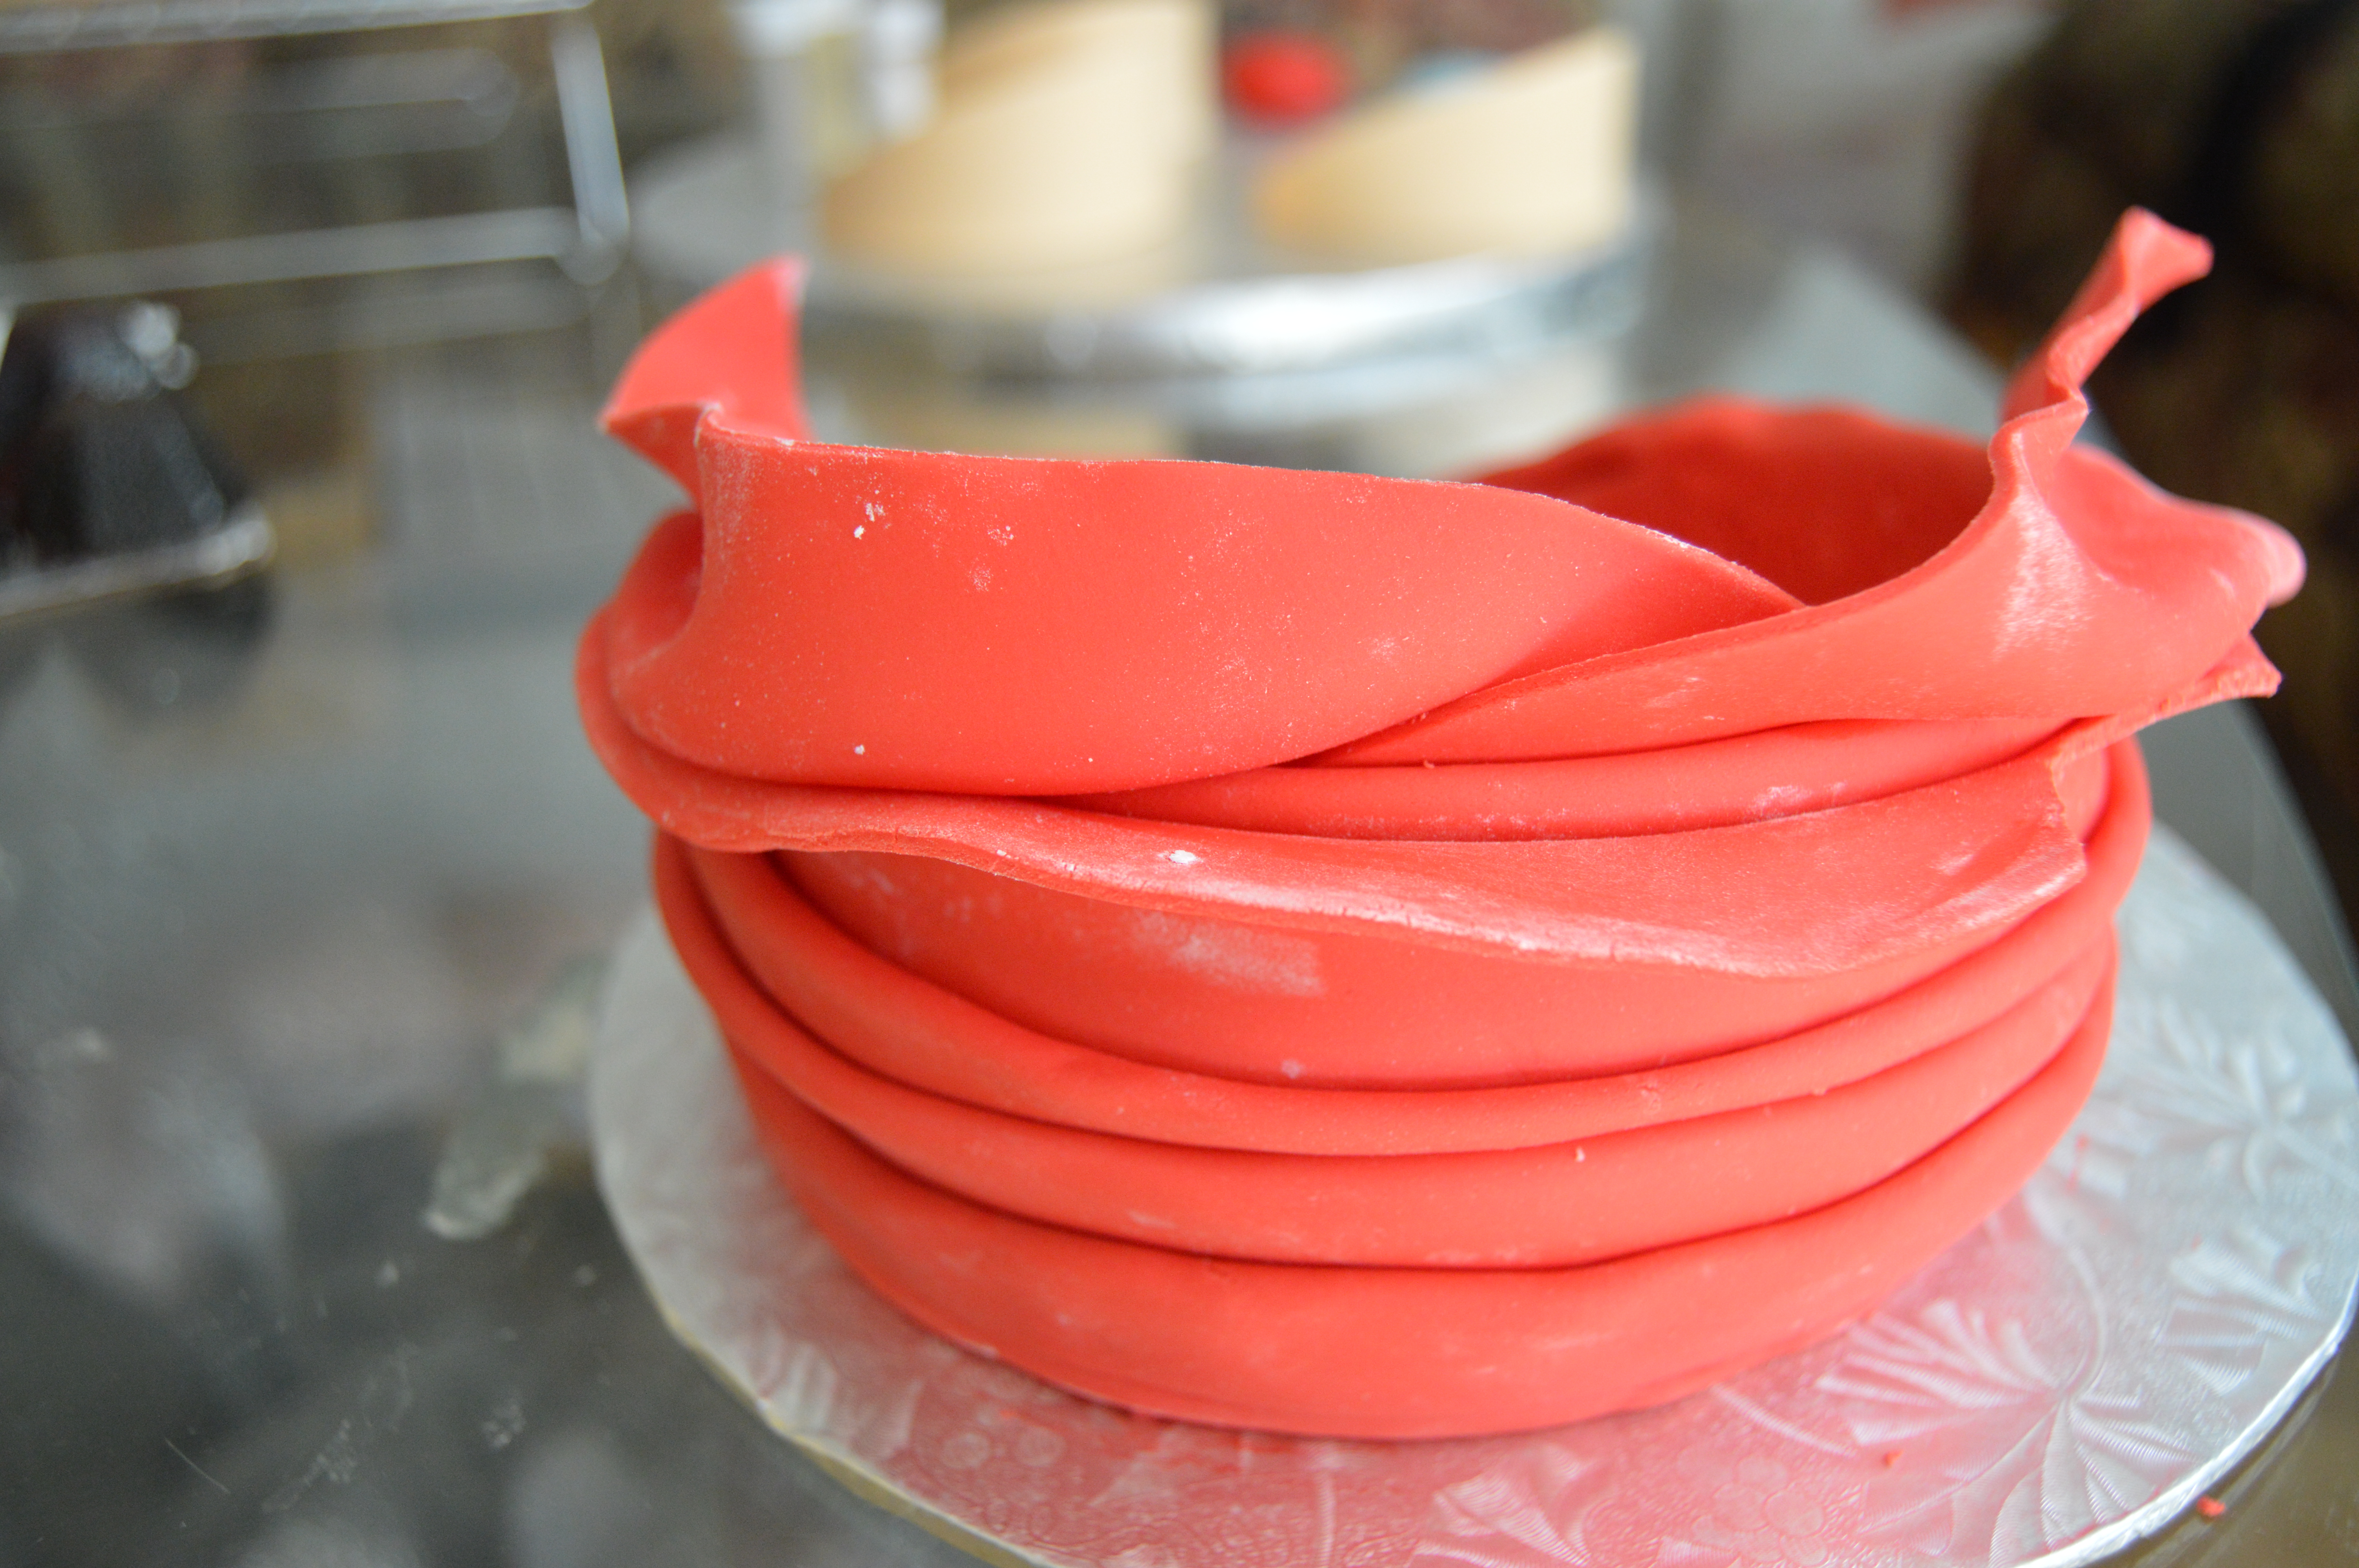
(4) Next, roll out fondant and cut them into rough triangles. Brush inside the gele with some water and stick these triangles inside, shaping them as you stick them. Use your knowledge of gele to create various folded patterns with the fondant and leave this to dry.
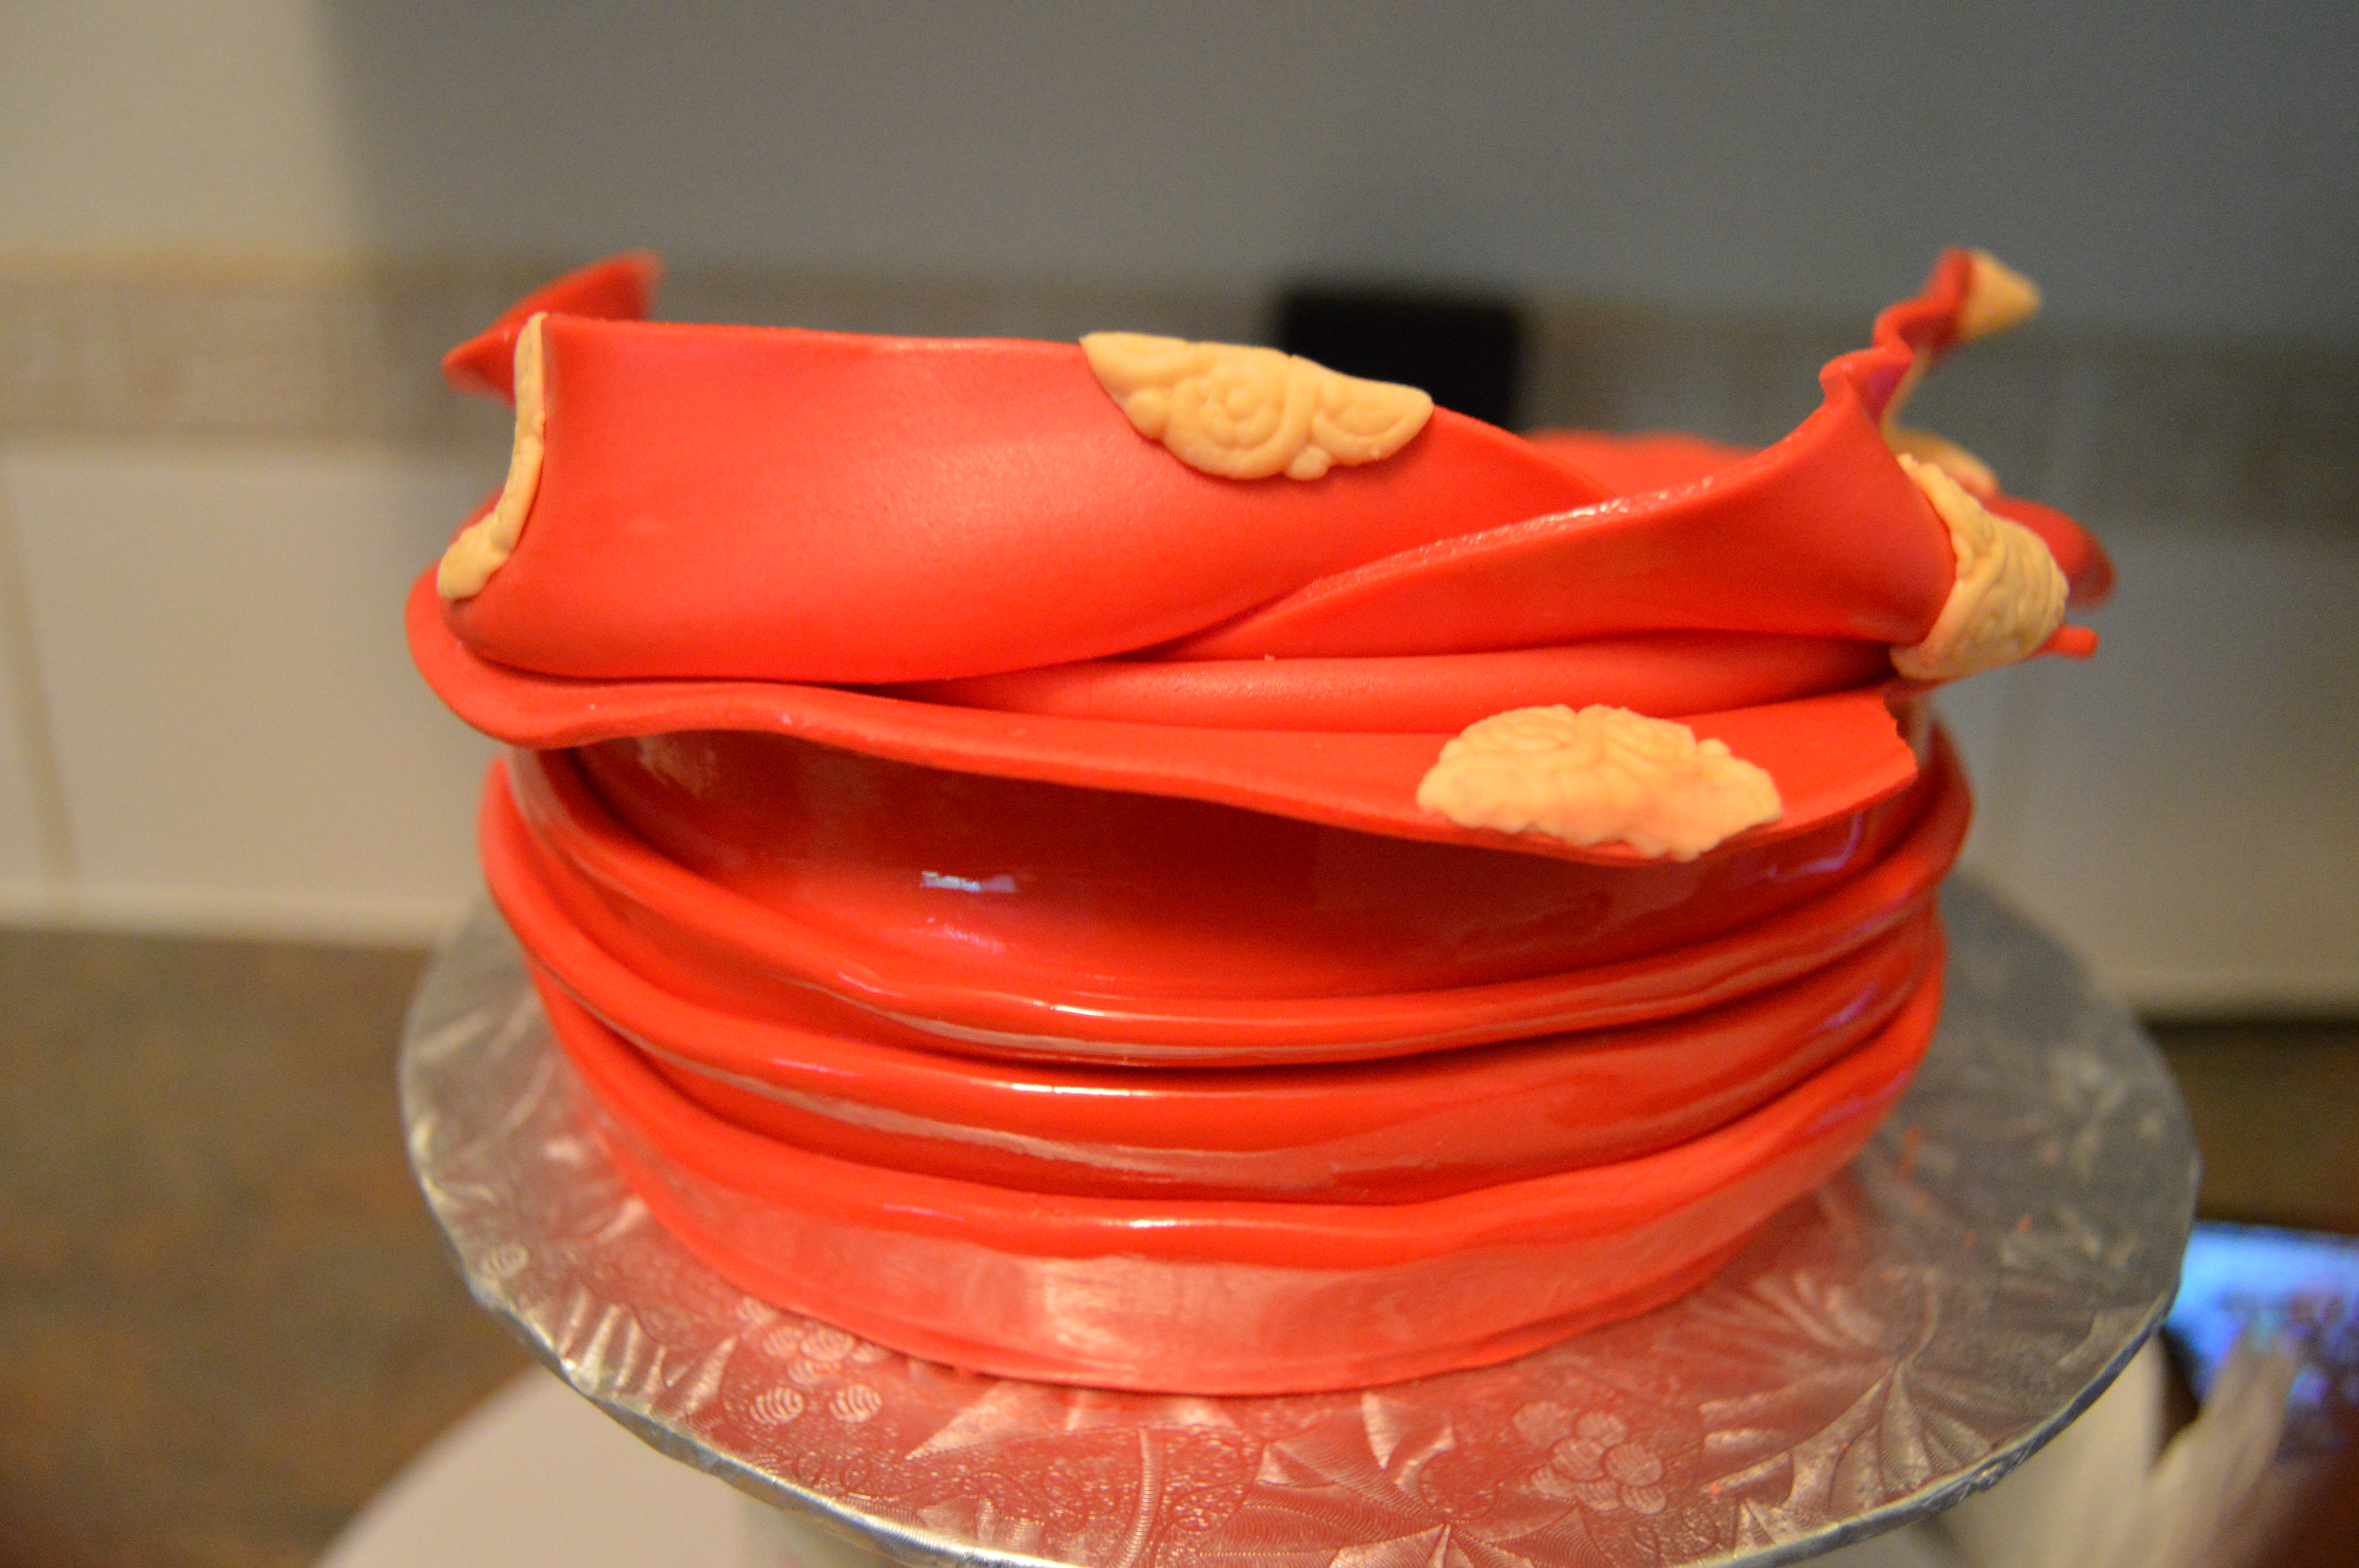
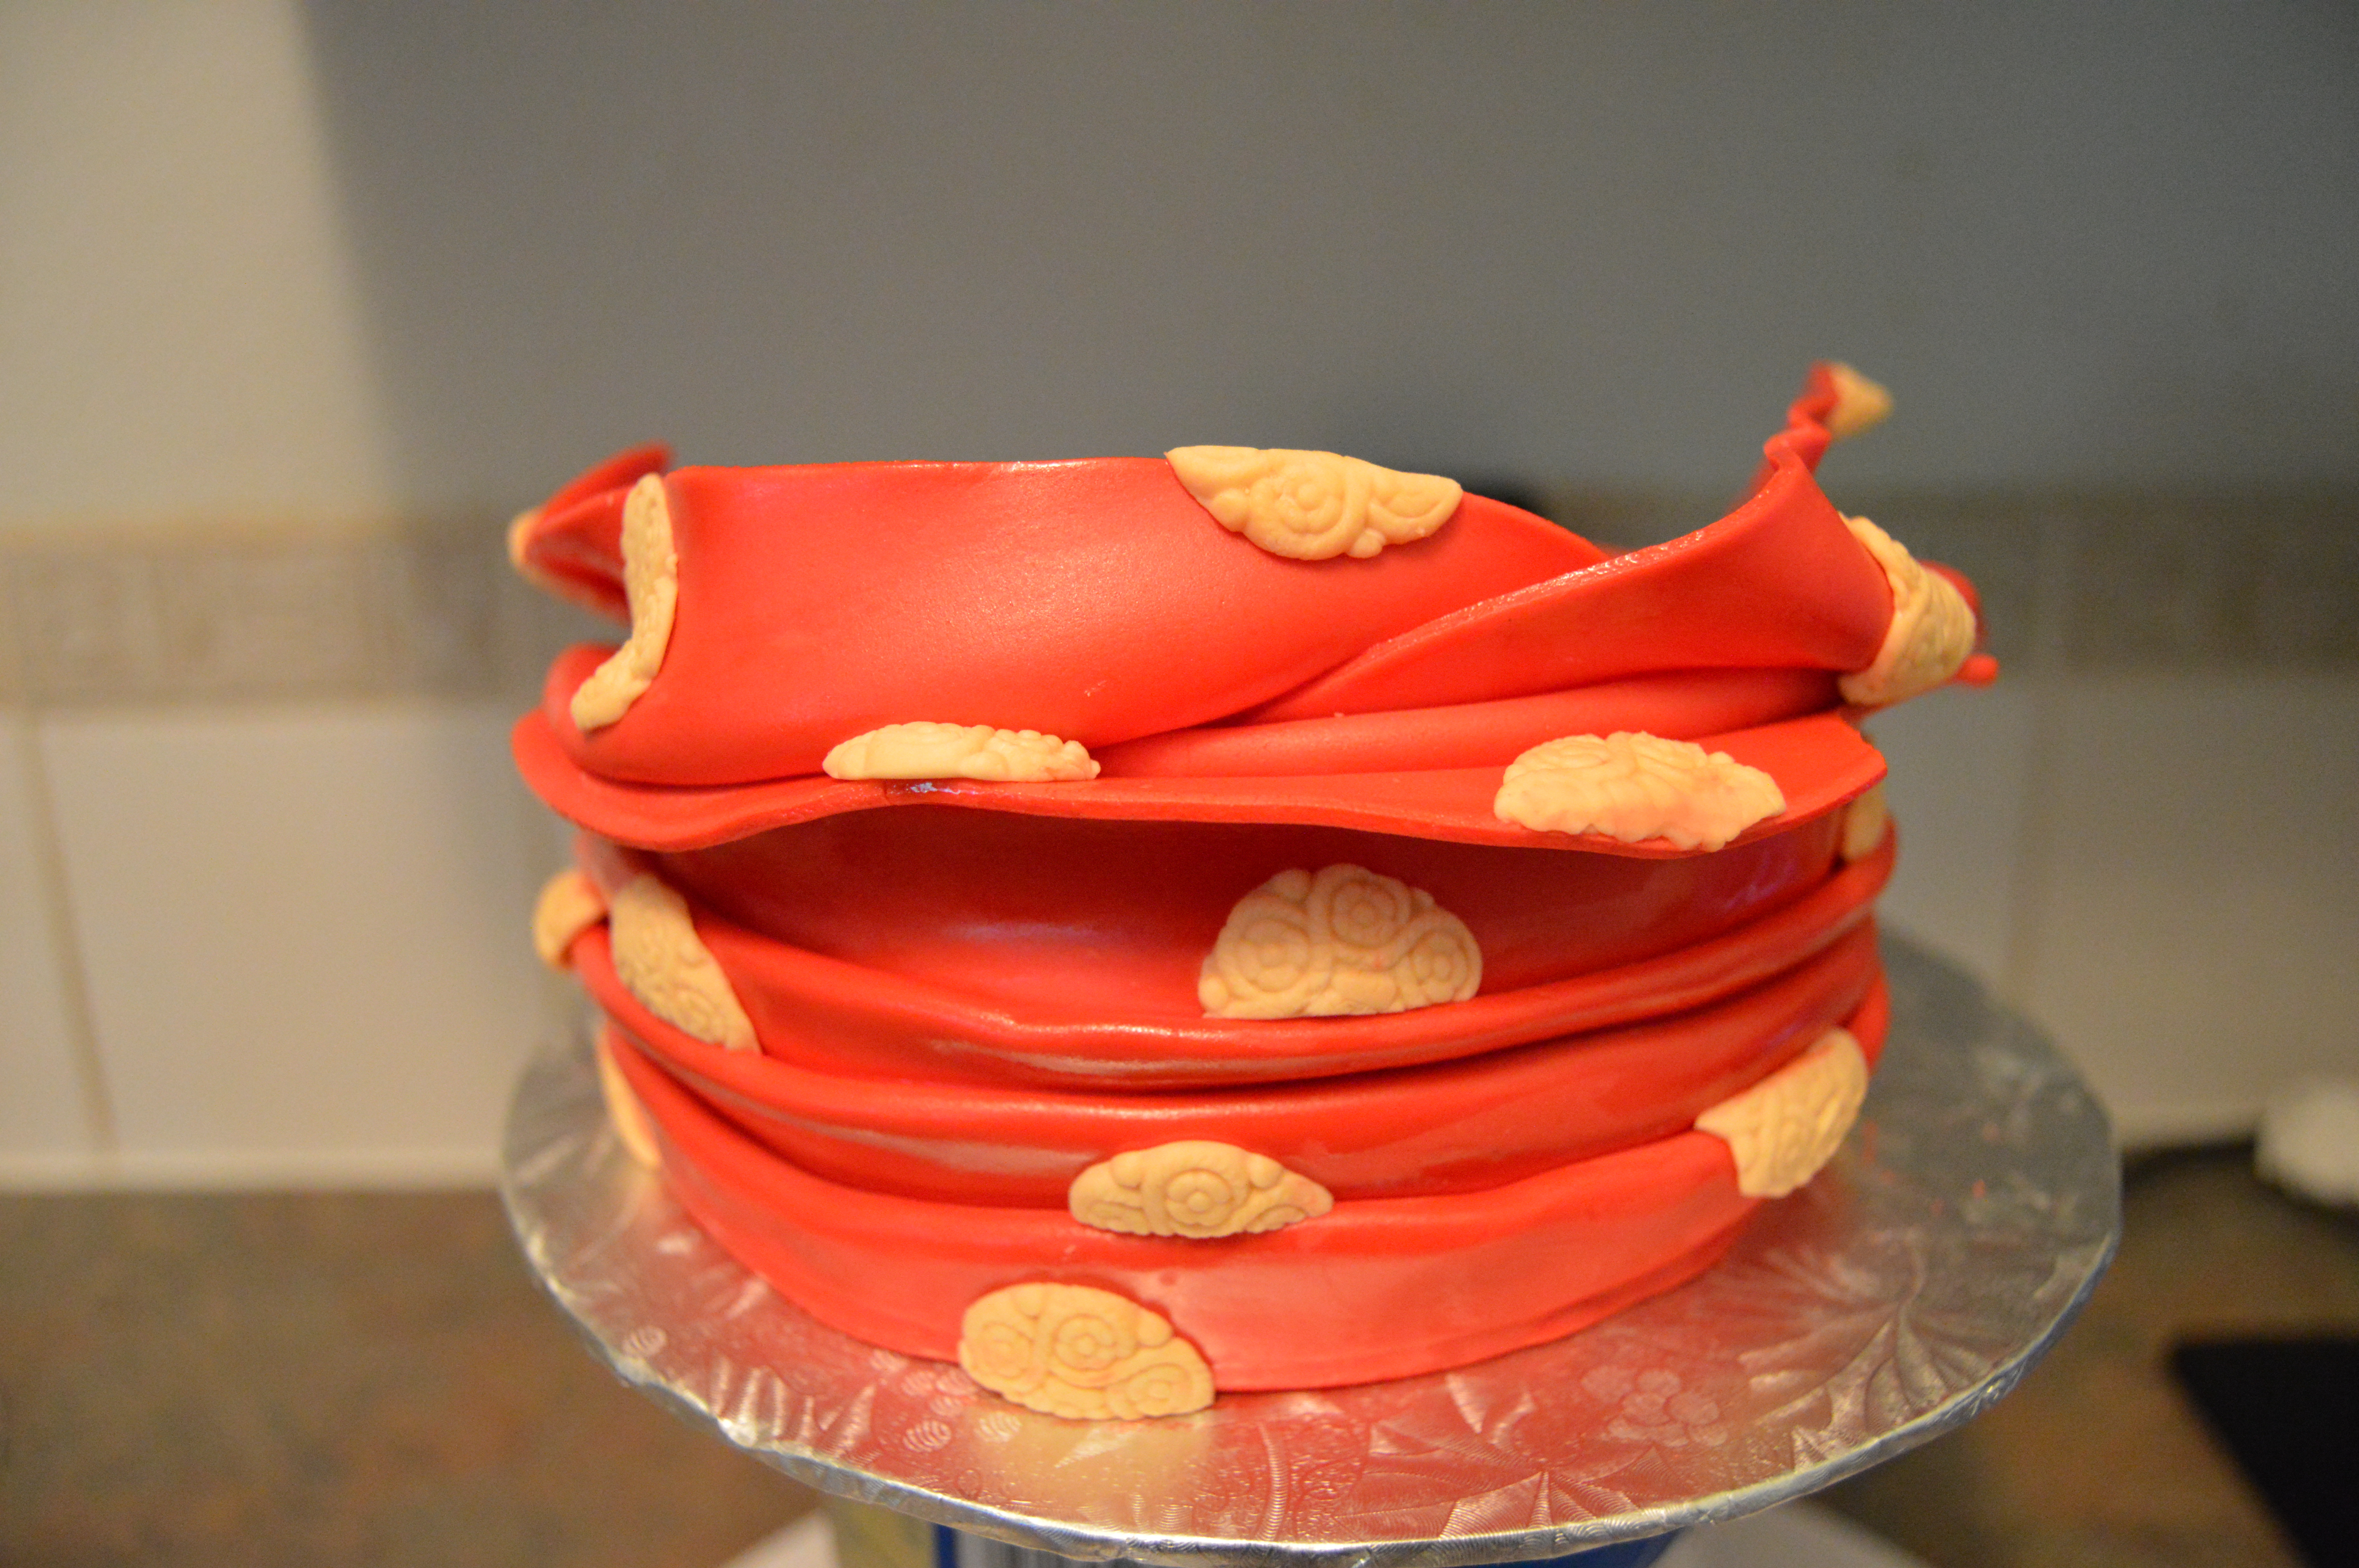
(5) When the gele has dried, its time to add the designs to it. I created buttons using a button mold and stuck these to the gele. The buttons were made with ivory fondant. They were later colored gold using gold luster dust mixed with vodka.
That’s all there is to it. Place it on your cake when it is dry. Happy caking!
Terry Adido is passionate about showing people how easy it is to recreate restaurant quality meals in the comfort of their kitchens. With a style of cooking he refers to as Afro-European Fusion, his meals are influenced greatly by French and Italian Cuisine with a West African twist. If you love good food, you are in for the ride of your life.
Thank you very very much for this tutorial. I’m making my brother’s traditional wedding cake for Sunday the 6th of September 2015 and the humidity here in Port Harcourt refused to let my figurines dry. I contemplated making headgears but I couldn’t fathom how to go about it. I was soooooo pleased to see this tutorial in my inbox.
I’m also making the white wedding cake and guess the design I chose for him, 3 tiers of your igbo woman blouse (floral lace overlay). I searched for tutorials on the internet for this design to no avail. Looking at the pictures on the internet, I guessed how it could be done but seeing your tutorial is such a blessing.
Terry Adido, thank you very much. I appreciate your generosity. I know I cannot pay you for these tutorials so I try to pass on the kindness by assisting other cake decorators whenever they call me asking for help, complete strangers or friends alike.
Thank you and God bless you, your family and your business.
Thanks a lot for your message. I appreciate it. All the best with the wedding cake.
when i saw this notification in my inbox i was so happy. thanks Terry. i was going to ask if this same technique will work on a model. cant wait for your tutorials on modelling people. i really appreciate you.
I’m not sure. I don’t model pple. Maybe some day.
God bless you Terry. U have always been good. Thanks for always sharing
My pleasure Lara.
You are blessed,one good thing I like about ur personality is you response to every comment,God would attend to every of your needs in Jesus name.
Thanks Suzzy. Glad to have you around.
Thanks Terry, your tutorials are always helpful.
I will try this soon.
You are welcome. All the best with trying it out.
Where is my own comment now?
Terry, you are really uncovering some mysteries in cake making, thereby helping people to be self-reliant.
Thank you.
My pleasure Chinyere.
Thanks so much for this tutorial, God.bless u. Terry, pls how did u achieve the ankara effect under d gele. God bless u real good.
Hi. I’m not sure I get you. There is no ankara effect on the gele.
thanks xo much terry GOD bless u
My pleasure Abigail.
Love ur work….xoxo
Thanks Limah.
Terry correct guy, thanks
Thanks Joy.
God bless Terry
Thanks Jummy.
pls i need tutorial on a gele,but i dont know how to up load it in dis comment
Hi. I only make tutorials for cakes I have made. If you cant find a tutorial on my website, it only means I am yet to execute such a design.
Thanks for sharing Terry!
Great instructions and pictures to go along with each step! I will send you my version of your creation soon.
Cheers!
You are welcome Esther. I will look out for it.
Nice job.. God bless you..
Thanks Monalisa.
This my first time seeing your post,tank u so much for this,God will give u more knowledge to carry on d gud work.lukn forward to see more,u r bless sir
Thanks Biola. Glad to have you here.
This is lovely.Thank you for sharing
You are welcome Yudie.
Thanks, this is great, more grace to the work of your hand.
You are welcome Ada.
Thanks for the good work,God bless you,please how will i make fondant agbada,fila(cap) and blouse.
Thanks. Hopefully I might have tutorials on those in future.
Wow Wow Wow!Am So Glad Dat I Found This Web,tnks Mr Terry
You are welcome Olaide.
Thanks so much Terry, God bless you for this wonderful tutorial.
You are welcome Vivian.
God will bless u real good. I will sure make this cake someday
I look forward to seeing your creation.